Fuel door SUZUKI KIZASHI 2010 1.G Owners Manual
[x] Cancel search | Manufacturer: SUZUKI, Model Year: 2010, Model line: KIZASHI, Model: SUZUKI KIZASHI 2010 1.GPages: 388, PDF Size: 4.94 MB
Page 8 of 388
57L20-03E
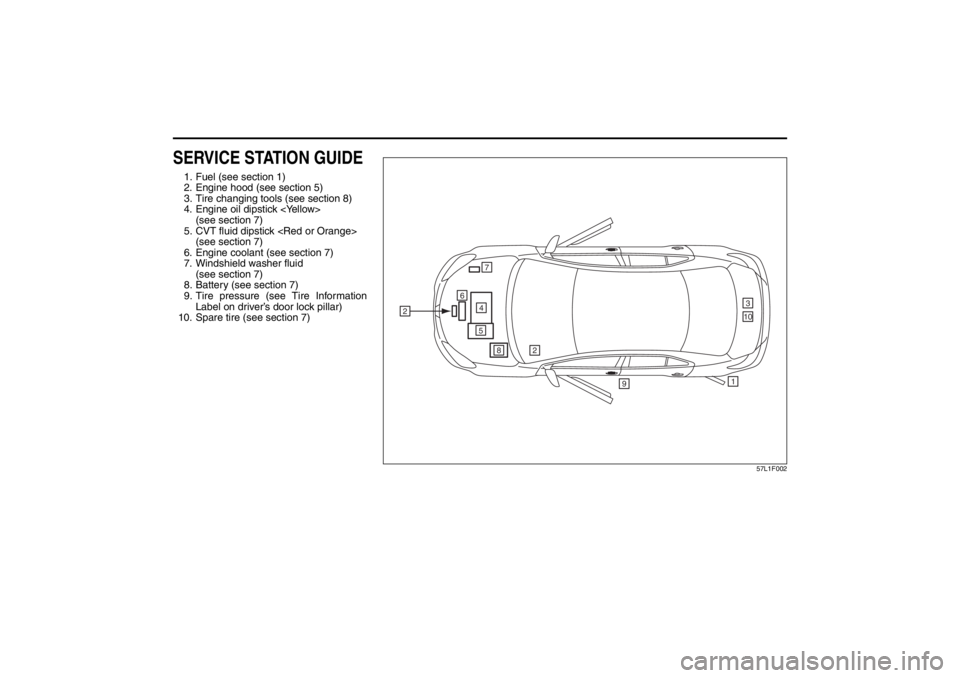
SERVICE STATION GUIDE1. Fuel (see section 1)
2. Engine hood (see section 5)
3. Tire changing tools (see section 8)
4. Engine oil dipstick
(see section 7)
5. CVT fluid dipstick
(see section 7)
6. Engine coolant (see section 7)
7. Windshield washer fluid
(see section 7)
8. Battery (see section 7)
9. Tire pressure (see Tire Information
Label on driver’s door lock pillar)
10. Spare tire (see section 7)
57L1F002
2
2
7
1
9
310
8
4
6
5
Page 10 of 388
ILLUSTRATED TABLE OF CONTENTS
57L20-03E
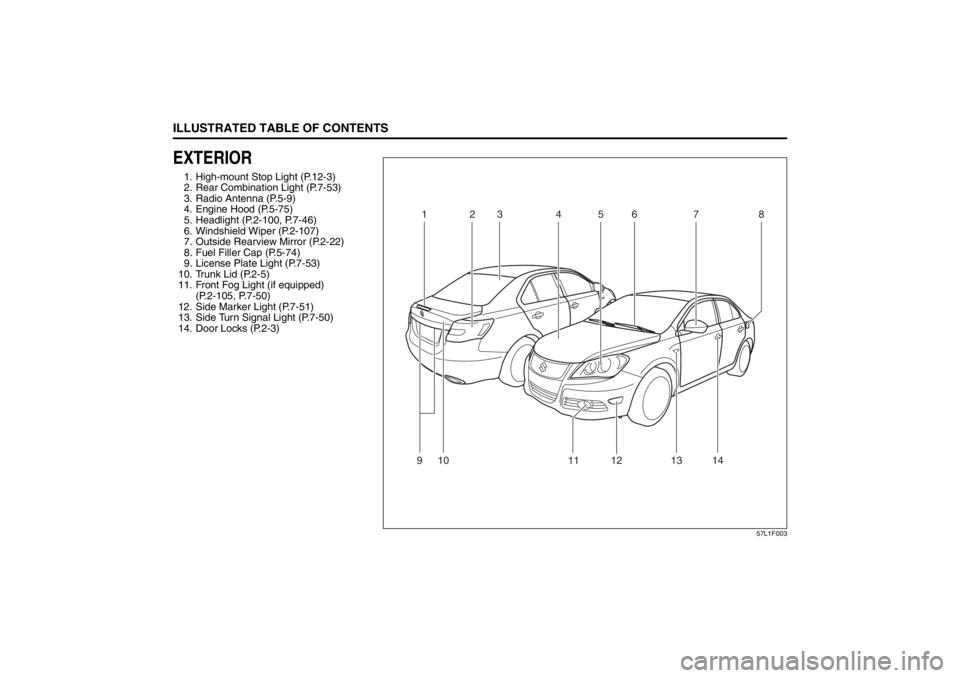
EXTERIOR1. High-mount Stop Light (P.12-3)
2. Rear Combination Light (P.7-53)
3. Radio Antenna (P.5-9)
4. Engine Hood (P.5-75)
5. Headlight (P.2-100, P.7-46)
6. Windshield Wiper (P.2-107)
7. Outside Rearview Mirror (P.2-22)
8. Fuel Filler Cap (P.5-74)
9. License Plate Light (P.7-53)
10. Trunk Lid (P.2-5)
11. Front Fog Light (if equipped)
(P.2-105, P.7-50)
12. Side Marker Light (P.7-51)
13. Side Turn Signal Light (P.7-50)
14. Door Locks (P.2-3)
57L1F003
1
5
7
2
3
4
6
8
10
9 11
14
13
12
Page 19 of 388
BEFORE DRIVING
2
57L20-03E
60G404
BEFORE DRIVINGKeys .................................................................................... 2-1
Immobilizer System .......................................................... 2-2
Door Locks ........................................................................ 2-3
Keyless Start System Remote Controller ....................... 2-6
Theft Deterrent Alarm System ......................................... 2-14
Windows ............................................................................ 2-17
Mirrors ................................................................................ 2-20
Front Seats ........................................................................ 2-23
Front Seat Heater (if equipped) ........................................ 2-28
Rear Seats .......................................................................... 2-29
Seat Belts and Child Restraint Systems ......................... 2-34
Supplemental Restraint System (air bags) ..................... 2-55
Instrument Cluster ............................................................ 2-68
Warning and Indicator Lights .......................................... 2-69
Speedometer ..................................................................... 2-78
Tachometer ........................................................................ 2-78
Fuel Gauge ......................................................................... 2-78
Temperature Gauge .......................................................... 2-79
Brightness Control ............................................................ 2-79
Information Display ........................................................... 2-80
Lighting Control Lever ...................................................... 2-100
Front Fog Light Switch (if equipped) .............................. 2-105
Turn Signal Control Lever ................................................ 2-105
Hazard Warning Switch .................................................... 2-106
Rain-sensing Wipers and Washer Lever ......................... 2-107
Tilt/Telescoping/Steering Lock Lever (if equipped) ....... 2-110
Horn .................................................................................... 2-111
Heated Rear Window and Heated Outside
Rearview Mirrors (if equipped) Switch ............................ 2-111
Page 98 of 388
2-79BEFORE DRIVING
57L20-03E
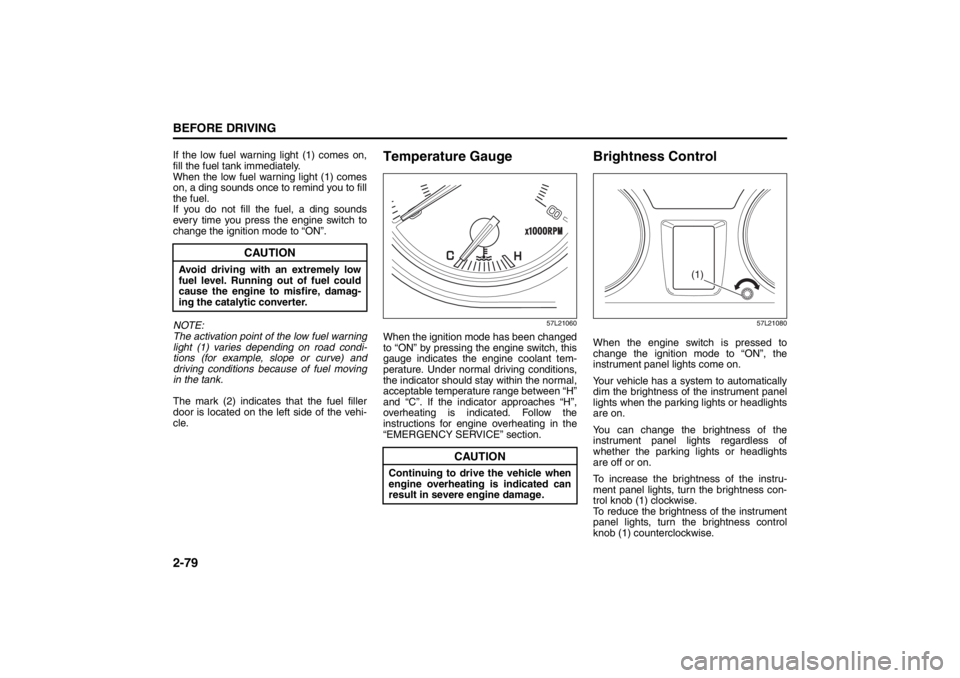
If the low fuel warning light (1) comes on,
fill the fuel tank immediately.
When the low fuel warning light (1) comes
on, a ding sounds once to remind you to fill
the fuel.
If you do not fill the fuel, a ding sounds
every time you press the engine switch to
change the ignition mode to “ON”.
NOTE:
The activation point of the low fuel warning
light (1) varies depending on road condi-
tions (for example, slope or curve) and
driving conditions because of fuel moving
in the tank.
The mark (2) indicates that the fuel filler
door is located on the left side of the vehi-
cle.
Temperature Gauge
57L21060
When the ignition mode has been changed
to “ON” by pressing the engine switch, this
gauge indicates the engine coolant tem-
perature. Under normal driving conditions,
the indicator should stay within the normal,
acceptable temperature range between “H”
and “C”. If the indicator approaches “H”,
overheating is indicated. Follow the
instructions for engine overheating in the
“EMERGENCY SERVICE” section.
Brightness Control
57L21080
When the engine switch is pressed to
change the ignition mode to “ON”, the
instrument panel lights come on.
Your vehicle has a system to automatically
dim the brightness of the instrument panel
lights when the parking lights or headlights
are on.
You can change the brightness of the
instrument panel lights regardless of
whether the parking lights or headlights
are off or on.
To increase the brightness of the instru-
ment panel lights, turn the brightness con-
trol knob (1) clockwise.
To reduce the brightness of the instrument
panel lights, turn the brightness control
knob (1) counterclockwise.
CAUTION
Avoid driving with an extremely low
fuel level. Running out of fuel could
cause the engine to misfire, damag-
ing the catalytic converter.
CAUTION
Continuing to drive the vehicle when
engine overheating is indicated can
result in severe engine damage.
(1)
Page 104 of 388
2-85BEFORE DRIVING
57L20-03E
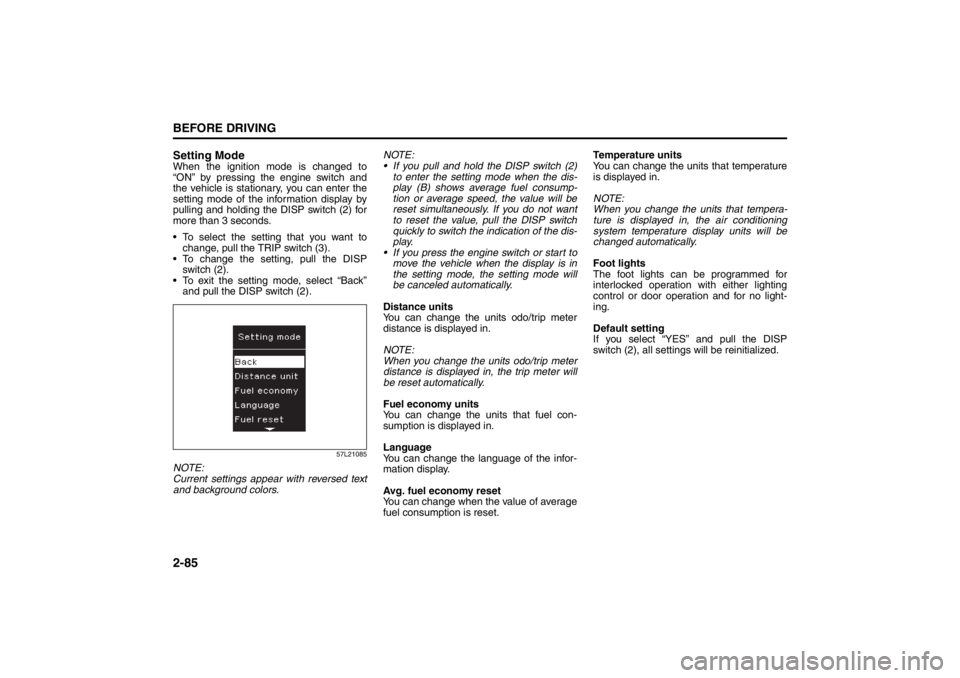
Setting ModeWhen the ignition mode is changed to
“ON” by pressing the engine switch and
the vehicle is stationary, you can enter the
setting mode of the information display by
pulling and holding the DISP switch (2) for
more than 3 seconds.
To select the setting that you want to
change, pull the TRIP switch (3).
To change the setting, pull the DISP
switch (2).
To exit the setting mode, select “Back”
and pull the DISP switch (2).
57L21085
NOTE:
Current settings appear with reversed text
and background colors.NOTE:
If you pull and hold the DISP switch (2)
to enter the setting mode when the dis-
play (B) shows average fuel consump-
tion or average speed, the value will be
reset simultaneously. If you do not want
to reset the value, pull the DISP switch
quickly to switch the indication of the dis-
play.
If you press the engine switch or start to
move the vehicle when the display is in
the setting mode, the setting mode will
be canceled automatically.
Distance units
You can change the units odo/trip meter
distance is displayed in.
NOTE:
When you change the units odo/trip meter
distance is displayed in, the trip meter will
be reset automatically.
Fuel economy units
You can change the units that fuel con-
sumption is displayed in.
Language
You can change the language of the infor-
mation display.
Avg. fuel economy reset
You can change when the value of average
fuel consumption is reset.Temperature units
You can change the units that temperature
is displayed in.
NOTE:
When you change the units that tempera-
ture is displayed in, the air conditioning
system temperature display units will be
changed automatically.
Foot lights
The foot lights can be programmed for
interlocked operation with either lighting
control or door operation and for no light-
ing.
Default setting
If you select “YES” and pull the DISP
switch (2), all settings will be reinitialized.
Page 133 of 388
3-2
OPERATING YOUR VEHICLE
57L20-03E
12)Check all gauges.
13)Make sure that the BRAKE light turnsoff when the parking brake is released.
Once a week, or each time you fill your fuel
tank, perform the following under-hood
checks:
1) Engine oil level
2) Coolant level
3) Brake fluid level
4) Windshield washer fluid level
5) Hood latch operation Pull the hood release handle inside the
vehicle. Make sure that you cannot
open the hood all the way without
releasing the secondary latch. Be sure
to close the hood securely after check-
ing for proper latch operation. See the
item “All latches, hinges and locks” of
“CHASSIS AND BODY” in the “Periodic
Maintenance Schedule” section in the
“INSPECTION AND MAINTENANCE”
section for lubrication schedule. Once a month, or each time you fill your
fuel tank, check the tire pressure using a
tire pressure gauge. Also check the tire
pressure of the spare tire.
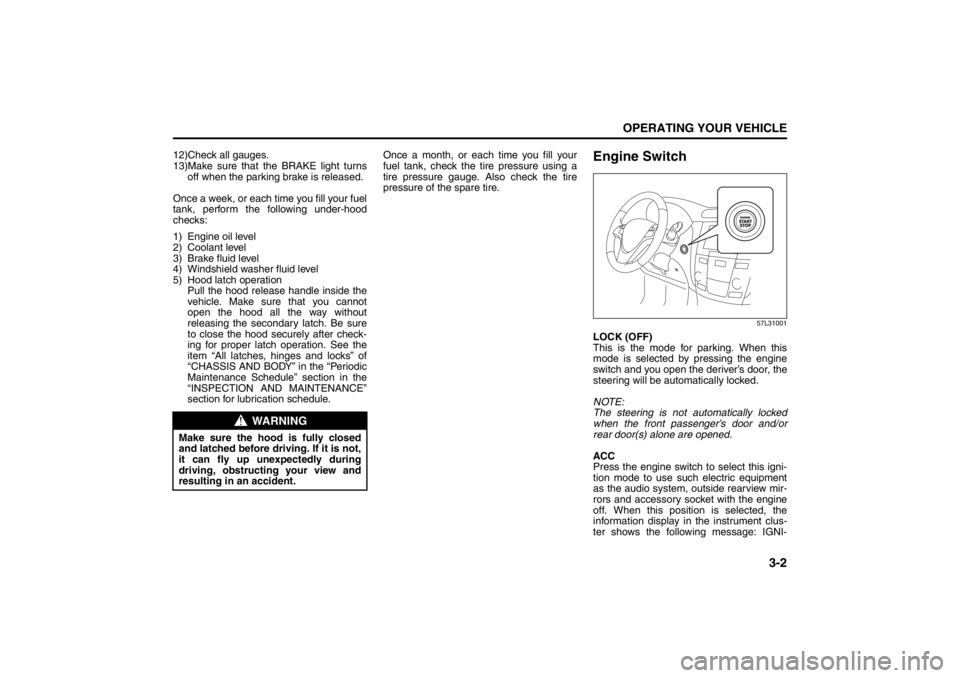
Engine Switch
57L31001
LOCK (OFF)
This is the mode for parking. When this
mode is selected by pressing the engine
switch and you open the deriver’s door, the
steering will be automatically locked.
NOTE:
The steering is not automatically locked
when the front passenger’s door and/or
rear door(s) alone are opened.
ACC
Press the engine switch to select this igni-
tion mode to use such electric equipment
as the audio system, outside rearview mir-
rors and accessory socket with the engine
off. When this position is selected, the
information display in the instrument clus-
ter shows the following message: IGNI-
WARNING
Make sure the hood is fully closed
and latched before driving. If it is not,
it can fly up unexpectedly during
driving, obstructing your view and
resulting in an accident.
Ignition Switch: 8
Page 174 of 388
4-3DRIVING TIPS
57L20-03E
60A183S
Keep the air cleaner clean
If the air cleaner is clogged with dust, there
will be greater intake resistance, resulting
in decreased power output and increased
fuel consumption.
Keep weight to a minimum
The heavier the load, the more fuel the
vehicle consumes. Take out any luggage
or cargo when it is not necessary.
Keep tire pressure correct
Underinflation of the tires can waste fuel
due to increased running resistance of the
tires. Keep your tires inflated to the correct
pressure shown on the label located below
the driver’s side door latch striker.
Highway DrivingWhen driving at highway speeds, pay
attention to the following:
Stopping distance progressively
increases with vehicle speed. Apply the
brakes far enough ahead of the stopping
point to allow for the extra stopping dis-
tance.
On rainy days, “Hydroplaning” can occur.
“Hydroplaning” is the loss of direct con-
tact between the road surface and the
vehicle’s tires due to a water film forming
between them. Steering or braking the
vehicle while “Hydroplaning” can be very
difficult, and loss of control can occur.
Keep speed down when the road surface
is wet.
At high speeds, the vehicle may be
affected by side winds. Therefore,
reduce speed and be prepared for unex-
pected buffeting, which can occur at the
exits of tunnels, when passing by a cut of
a hill, or when being overtaken by large
vehicles, etc.
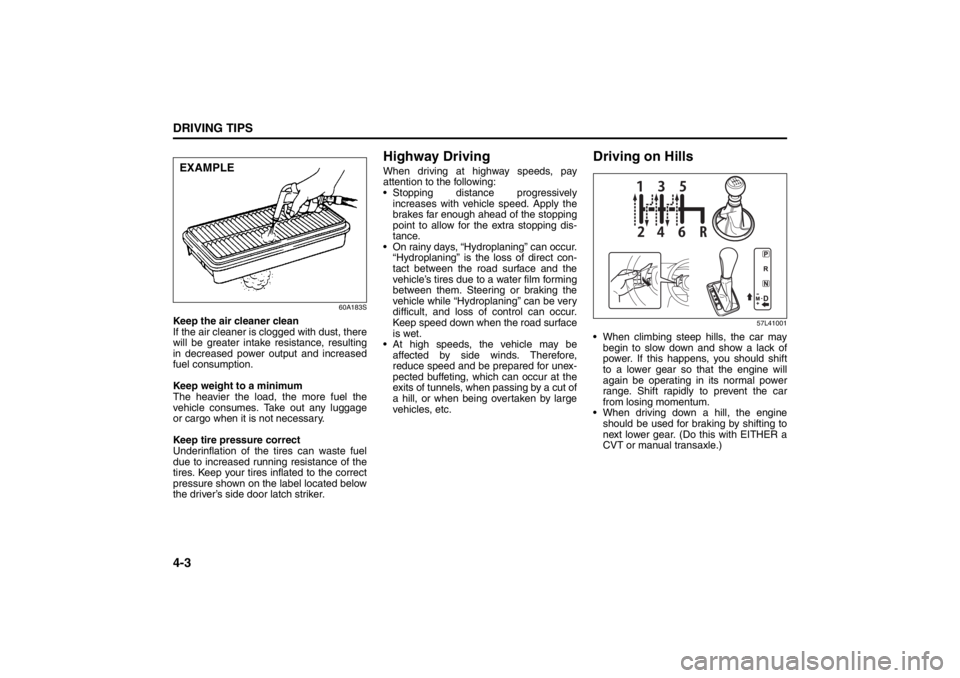
Driving on Hills
57L41001
When climbing steep hills, the car may
begin to slow down and show a lack of
power. If this happens, you should shift
to a lower gear so that the engine will
again be operating in its normal power
range. Shift rapidly to prevent the car
from losing momentum.
When driving down a hill, the engine
should be used for braking by shifting to
next lower gear. (Do this with EITHER a
CVT or manual transaxle.)
EXAMPLE
Warning and Indicator Lights: 8
Page 179 of 388
OTHER CONTROLS AND EQUIPMENT
5
57L20-03E
60G407
OTHER CONTROLS AND EQUIPMENTAutomatic Heating and Air Conditioning System
(Climate Control) ................................................................. 5-1
Radio Antenna ..................................................................... 5-9
Audio Systems .................................................................... 5-10
Fuel Filler Door .................................................................... 5-73
Fuel Filler Cap ..................................................................... 5-74
Engine Hood ........................................................................ 5-75
Sun Visor ............................................................................. 5-77
Interior Light Switch ........................................................... 5-78
Courtesy Lights ................................................................... 5-79
Footwell Lights .................................................................... 5-79
Trunk Light .......................................................................... 5-79
Spot Light ............................................................................ 5-80
Accessory Socket ............................................................... 5-80
Assist Grips ......................................................................... 5-82
Coat Hooks .......................................................................... 5-83
Sunroof (if equipped) .......................................................... 5-83
Glove Box ............................................................................ 5-85
Overhead Console .............................................................. 5-86
Lidded Instrument Panel Box ............................................ 5-87
Cup Holder and Storage Area (if equipped) ..................... 5-87
Front Seat Back Pocket (if equipped) ............................... 5-89
Footrest ................................................................................ 5-89
Center Console Box ............................................................ 5-89
Armrest ................................................................................ 5-90
Floor Mats (if equipped) ..................................................... 5-91
Luggage Under-box ............................................................ 5-92
Net/Rope Hooks .................................................................. 5-92
Roof Rack Anchors (if equipped) ...................................... 5-92
HomeLink
® (if equipped) .................................................... 5-93
Frame Hooks ....................................................................... 5-96
Page 252 of 388
5-73OTHER CONTROLS AND EQUIPMENT
57L20-03E
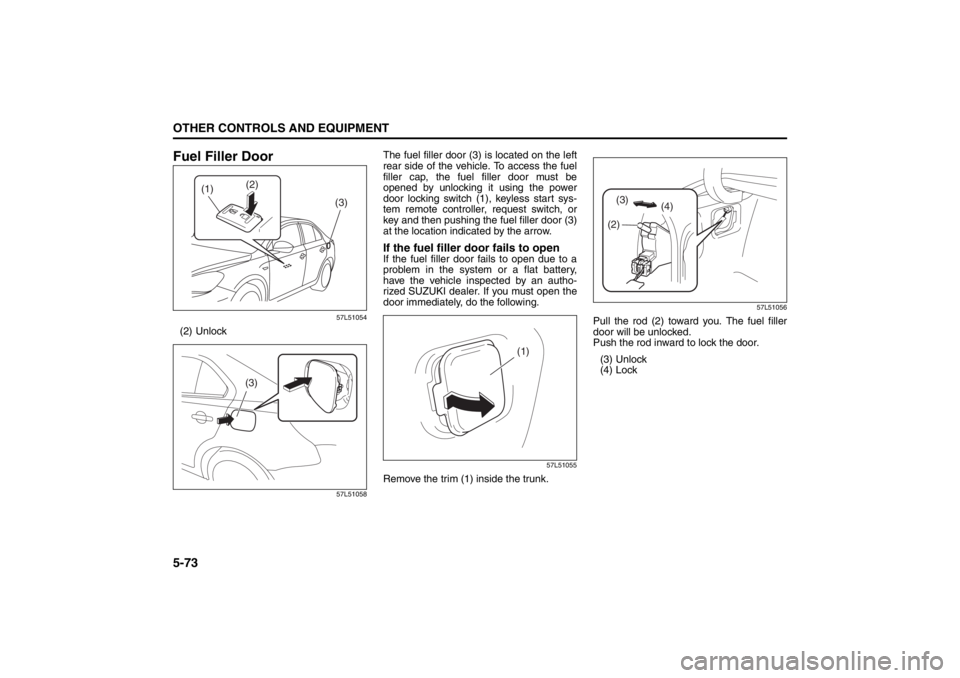
Fuel Filler Door
57L51054
(2) Unlock
57L51058
The fuel filler door (3) is located on the left
rear side of the vehicle. To access the fuel
filler cap, the fuel filler door must be
opened by unlocking it using the power
door locking switch (1), keyless start sys-
tem remote controller, request switch, or
key and then pushing the fuel filler door (3)
at the location indicated by the arrow.If the fuel filler door fails to openIf the fuel filler door fails to open due to a
problem in the system or a flat battery,
have the vehicle inspected by an autho-
rized SUZUKI dealer. If you must open the
door immediately, do the following.
57L51055
Remove the trim (1) inside the trunk.
57L51056
Pull the rod (2) toward you. The fuel filler
door will be unlocked.
Push the rod inward to lock the door.
(3) Unlock
(4) Lock
(1)
(3) (2)
(3)
(1)
(2)(3)
(4)
Page 253 of 388
5-74
OTHER CONTROLS AND EQUIPMENT
57L20-03E
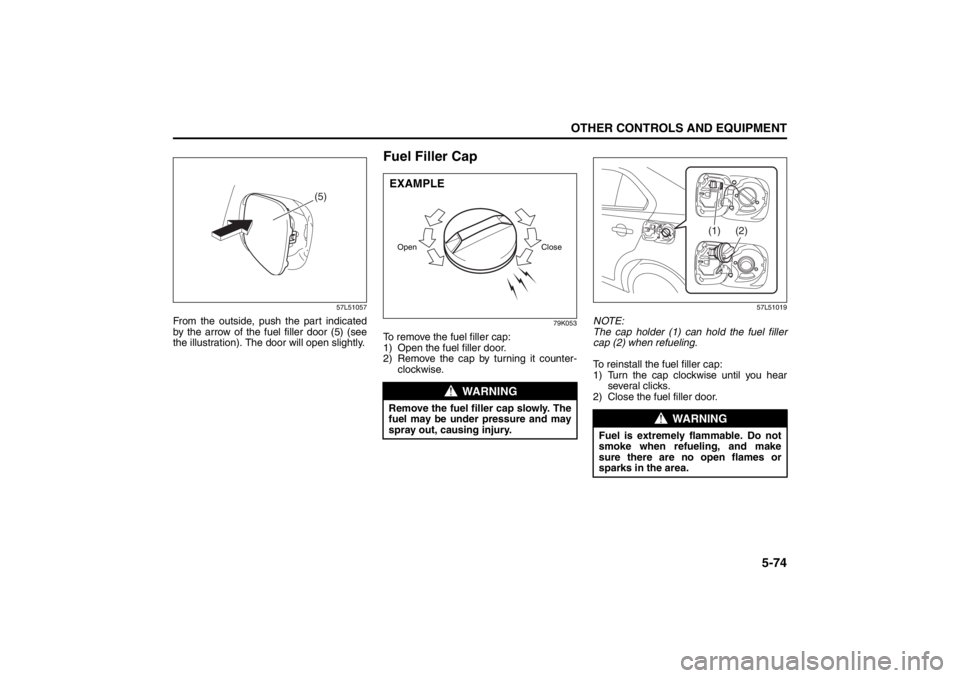
57L51057
From the outside, push the part indicated
by the arrow of the fuel filler door (5) (see
the illustration). The door will open slightly.
Fuel Filler Cap
79K053
To remove the fuel filler cap:
1) Open the fuel filler door.
2) Remove the cap by turning it counter-
clockwise.
57L51019
NOTE:
The cap holder (1) can hold the fuel filler
cap (2) when refueling.
To reinstall the fuel filler cap:
1) Turn the cap clockwise until you hear
several clicks.
2) Close the fuel filler door.
(5)
WARNING
Remove the fuel filler cap slowly. The
fuel may be under pressure and may
spray out, causing injury.Open CloseEXAMPLE
WARNING
Fuel is extremely flammable. Do not
smoke when refueling, and make
sure there are no open flames or
sparks in the area.
(1) (2)