radio SUZUKI RENO 2008 1.G Owners Manual
[x] Cancel search | Manufacturer: SUZUKI, Model Year: 2008, Model line: RENO, Model: SUZUKI RENO 2008 1.GPages: 226, PDF Size: 4.98 MB
Page 9 of 226
0-2
85Z14-03E
IMPORTANT
WARNING/CAUTION/NOTE
Please read this manual and follow its
instructions carefully. To emphasize spe-
cial information, the symbol and the
words WARNING, CAUTION and NOTE
have special meanings. Pay special atten-
tion to the messages highlighted by these
signal words:
NOTE:
Indicates special infor mation to make
maintenance easier or instructions clearer.
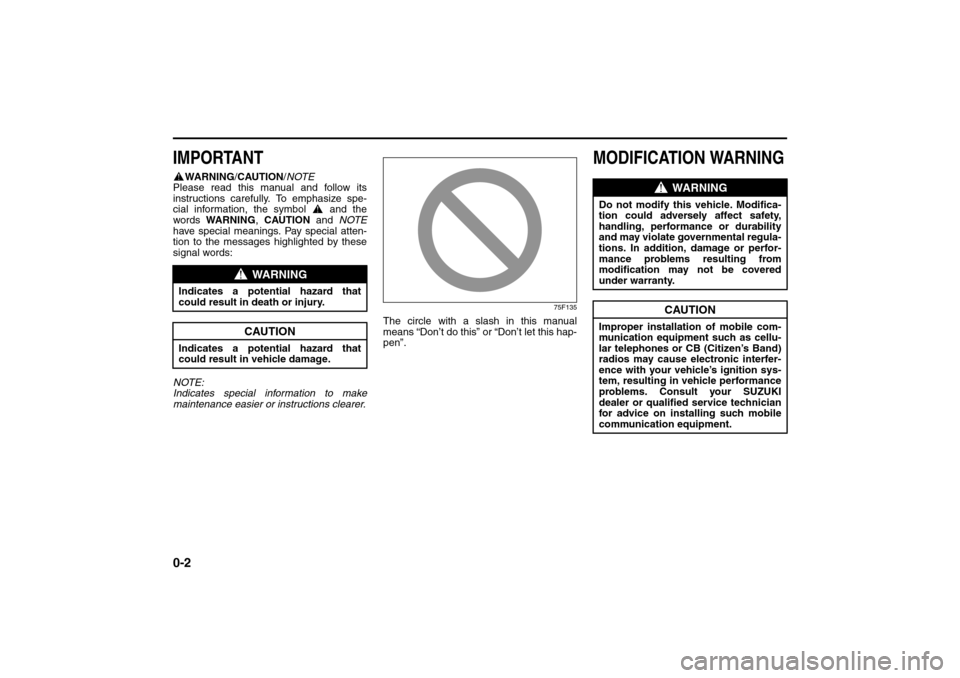
75F135
The circle with a slash in this manual
means “Don’t do this” or “Don’t let this hap-
pen”.
MODIFICATION WARNING
WARNING
Indicates a potential hazard that
could result in death or injury.
CAUTION
Indicates a potential hazard that
could result in vehicle damage.
WARNING
Do not modify this vehicle. Modifica-
tion could adversely affect safety,
handling, performance or durability
and may violate governmental regula-
tions. In addition, damage or perfor-
mance problems resulting from
modification may not be covered
under warranty.
CAUTION
Improper installation of mobile com-
munication equipment such as cellu-
lar telephones or CB (Citizen’s Band)
radios may cause electronic interfer-
ence with your vehicle’s ignition sys-
tem, resulting in vehicle performance
problems. Consult your SUZUKI
dealer or qualified service technician
for advice on installing such mobile
communication equipment.
Page 49 of 226
2-1FEATURES AND CONTROLS
85Z14-03E
Keys
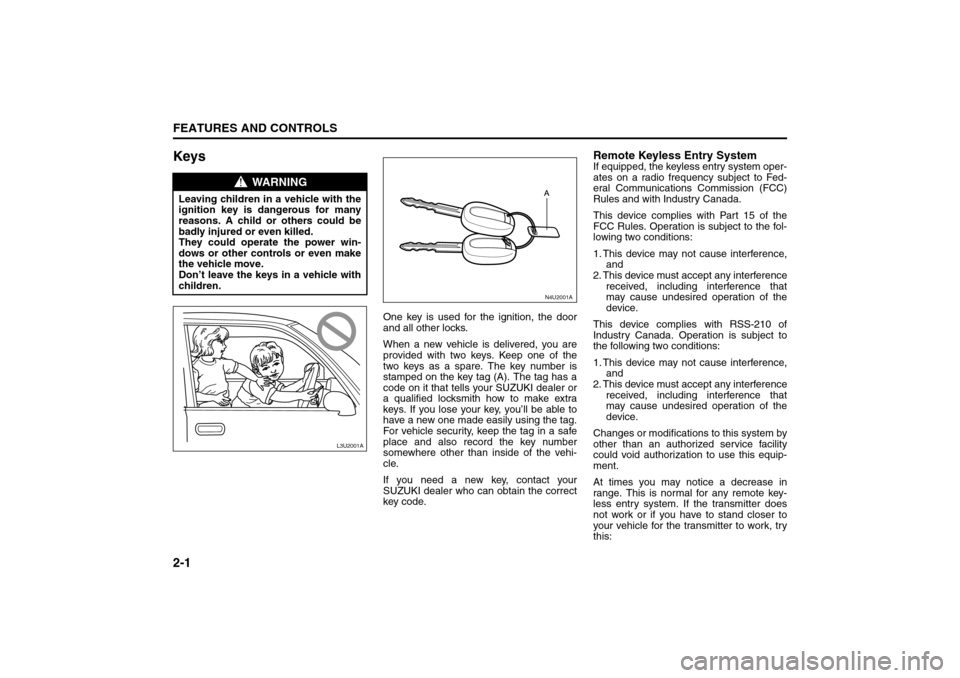
One key is used for the ignition, the door
and all other locks.
When a new vehicle is delivered, you are
provided with two keys. Keep one of the
two keys as a spare. The key number is
stamped on the key tag (A). The tag has a
code on it that tells your SUZUKI dealer or
a qualified locksmith how to make extra
keys. If you lose your key, you’ll be able to
have a new one made easily using the tag.
For vehicle security, keep the tag in a safe
place and also record the key number
somewhere other than inside of the vehi-
cle.
If you need a new key, contact your
SUZUKI dealer who can obtain the correct
key code.
Remote Keyless Entry SystemIf equipped, the keyless entry system oper-
ates on a radio frequency subject to Fed-
eral Communications Commission (FCC)
Rules and with Industry Canada.
This device complies with Part 15 of the
FCC Rules. Operation is subject to the fol-
lowing two conditions:
1. This device may not cause interference,
and
2. This device must accept any interference
received, including interference that
may cause undesired operation of the
device.
This device complies with RSS-210 of
Industry Canada. Operation is subject to
the following two conditions:
1. This device may not cause interference,
and
2. This device must accept any interference
received, including interference that
may cause undesired operation of the
device.
Changes or modifications to this system by
other than an authorized service facility
could void authorization to use this equip-
ment.
At times you may notice a decrease in
range. This is normal for any remote key-
less entry system. If the transmitter does
not work or if you have to stand closer to
your vehicle for the transmitter to work, try
this:
WARNING
Leaving children in a vehicle with the
ignition key is dangerous for many
reasons. A child or others could be
badly injured or even killed.
They could operate the power win-
dows or other controls or even make
the vehicle move.
Don’t leave the keys in a vehicle with
children.
L3U2001A
N4U2001A
Keys:
Page 59 of 226
2-11FEATURES AND CONTROLS
85Z14-03E
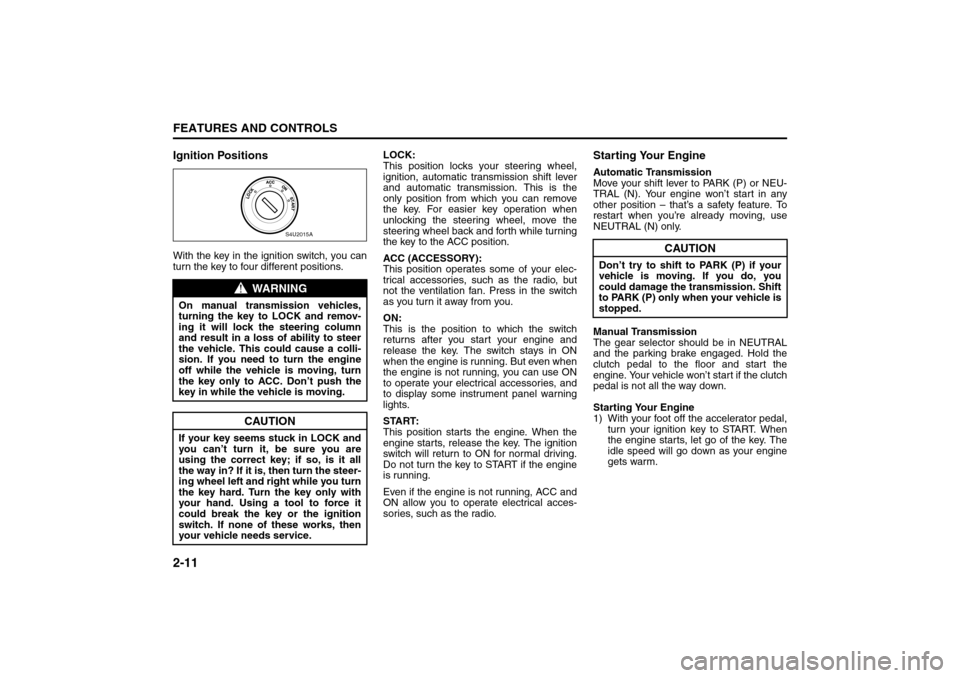
Ignition PositionsWith the key in the ignition switch, you can
turn the key to four different positions.LOCK:
This position locks your steering wheel,
ignition, automatic transmission shift lever
and automatic transmission. This is the
only position from which you can remove
the key. For easier key operation when
unlocking the steering wheel, move the
steering wheel back and forth while turning
the key to the ACC position.
ACC (ACCESSORY):
This position operates some of your elec-
trical accessories, such as the radio, but
not the ventilation fan. Press in the switch
as you turn it away from you.
ON:
This is the position to which the switch
returns after you start your engine and
release the key. The switch stays in ON
when the engine is running. But even when
the engine is not running, you can use ON
to operate your electrical accessories, and
to display some instrument panel warning
lights.
START:
This position starts the engine. When the
engine starts, release the key. The ignition
switch will return to ON for normal driving.
Do not turn the key to START if the engine
is running.
Even if the engine is not running, ACC and
ON allow you to operate electrical acces-
sories, such as the radio.
Starting Your EngineAutomatic Transmission
Move your shift lever to PARK (P) or NEU-
TRAL (N). Your engine won’t start in any
other position – that’s a safety feature. To
restart when you’re already moving, use
NEUTRAL (N) only.
Manual Transmission
The gear selector should be in NEUTRAL
and the parking brake engaged. Hold the
clutch pedal to the floor and start the
engine. Your vehicle won’t start if the clutch
pedal is not all the way down.
Starting Your Engine
1) With your foot off the accelerator pedal,
turn your ignition key to START. When
the engine starts, let go of the key. The
idle speed will go down as your engine
gets warm.
WARNING
On manual transmission vehicles,
turning the key to LOCK and remov-
ing it will lock the steering column
and result in a loss of ability to steer
the vehicle. This could cause a colli-
sion. If you need to turn the engine
off while the vehicle is moving, turn
the key only to ACC. Don’t push the
key in while the vehicle is moving.
CAUTION
If your key seems stuck in LOCK and
you can’t turn it, be sure you are
using the correct key; if so, is it all
the way in? If it is, then turn the steer-
ing wheel left and right while you turn
the key hard. Turn the key only with
your hand. Using a tool to force it
could break the key or the ignition
switch. If none of these works, then
your vehicle needs service.
S4U2015A
CAUTION
Don’t try to shift to PARK (P) if your
vehicle is moving. If you do, you
could damage the transmission. Shift
to PARK (P) only when your vehicle is
stopped.
Starting and Operating Your Vehicle:
Page 71 of 226
2-23FEATURES AND CONTROLS
85Z14-03E
Rear Seat ArmrestYour vehicle’s rear seat armrest may con-
tain two cupholders. To access the cup-
holders, pull the armrest down from the
rear seatback.AntennaThe antenna is located in the windshield
glass. Be sure that the inside surface of the
windshield glass is not scratched and that
the lines on the glass are not damaged. If
the inside surface is damaged, it could
interfere with radio reception.
Because this antenna is built into your
windshield glass, there is a reduced risk of
damage caused by car washes and van-
dals.If you choose to add a cellular telephone to
your vehicle, and the antenna needs to be
attached to the glass, be sure that you do
not damage the grid lines for the antenna.
There is enough space between the lines
to attach a cellular telephone antenna with-
out interfering with radio reception.
Do not apply aftermarket glass tinting to
the back glass. The metallic film in some
tinting materials will interfere with or distort
the incoming radio reception. Care must
be taken when cleaning the rear window or
windshield glass to avoid causing breaks in
the resistive material heating element
which can adversely affect radio and
defogger performance. See your SUZUKI
dealer for details.
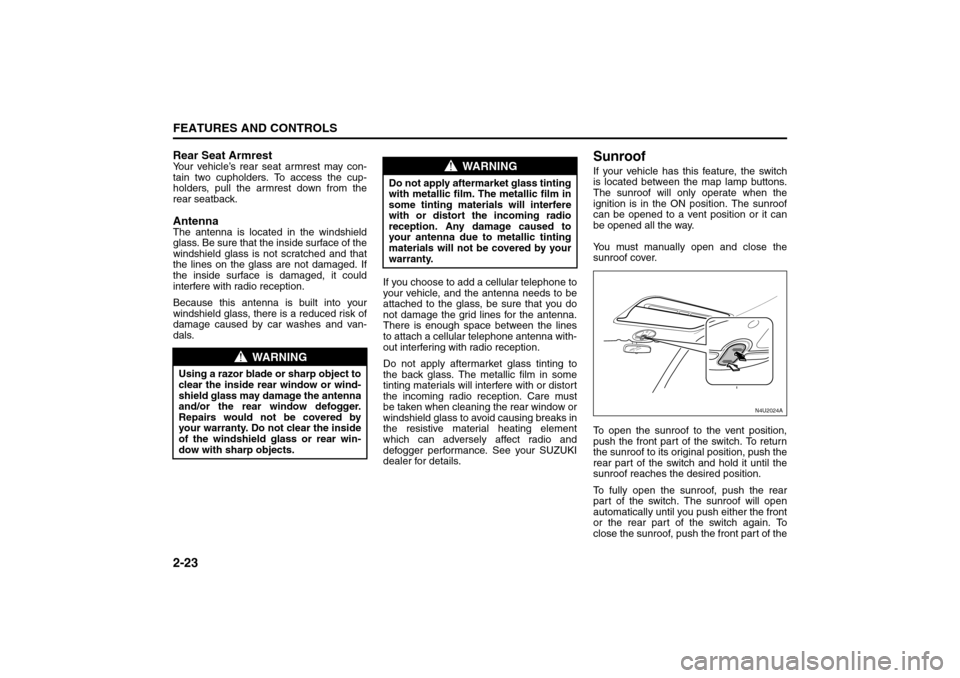
SunroofIf your vehicle has this feature, the switch
is located between the map lamp buttons.
The sunroof will only operate when the
ignition is in the ON position. The sunroof
can be opened to a vent position or it can
be opened all the way.
You must manually open and close the
sunroof cover.
To open the sunroof to the vent position,
push the front part of the switch. To return
the sunroof to its original position, push the
rear part of the switch and hold it until the
sunroof reaches the desired position.
To fully open the sunroof, push the rear
part of the switch. The sunroof will open
automatically until you push either the front
or the rear part of the switch again. To
close the sunroof, push the front part of the
WARNING
Using a razor blade or sharp object to
clear the inside rear window or wind-
shield glass may damage the antenna
and/or the rear window defogger.
Repairs would not be covered by
your warranty. Do not clear the inside
of the windshield glass or rear win-
dow with sharp objects.
WARNING
Do not apply aftermarket glass tinting
with metallic film. The metallic film in
some tinting materials will interfere
with or distort the incoming radio
reception. Any damage caused to
your antenna due to metallic tinting
materials will not be covered by your
warranty.
N4U2024A
Storage Areas:
Sunroof:
Page 84 of 226
3-10
INSTRUMENT PANEL
85Z14-03E
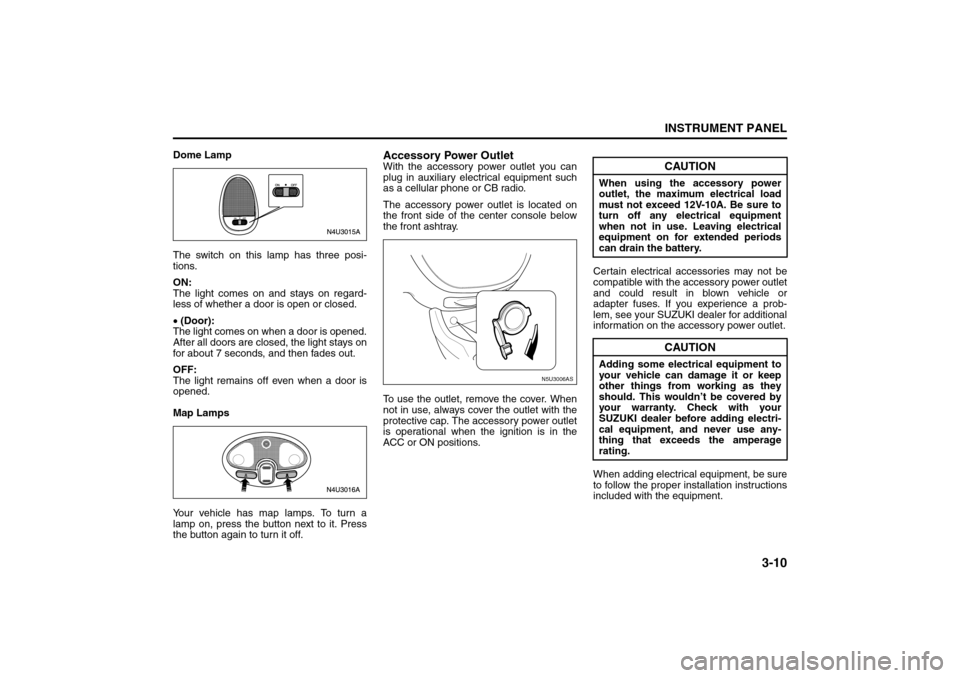
Dome Lamp
The switch on this lamp has three posi-
tions.
ON:
The light comes on and stays on regard-
less of whether a door is open or closed.
• (Door):
The light comes on when a door is opened.
After all doors are closed, the light stays on
for about 7 seconds, and then fades out.
OFF:
The light remains off even when a door is
opened.
Map Lamps
Your vehicle has map lamps. To turn a
lamp on, press the button next to it. Press
the button again to turn it off.
Accessory Power OutletWith the accessory power outlet you can
plug in auxiliary electrical equipment such
as a cellular phone or CB radio.
The accessory power outlet is located on
the front side of the center console below
the front ashtray.
To use the outlet, remove the cover. When
not in use, always cover the outlet with the
protective cap. The accessory power outlet
is operational when the ignition is in the
ACC or ON positions.Certain electrical accessories may not be
compatible with the accessory power outlet
and could result in blown vehicle or
adapter fuses. If you experience a prob-
lem, see your SUZUKI dealer for additional
information on the accessory power outlet.
When adding electrical equipment, be sure
to follow the proper installation instructions
included with the equipment.
N5U3006AS
CAUTION
When using the accessory power
outlet, the maximum electrical load
must not exceed 12V-10A. Be sure to
turn off any electrical equipment
when not in use. Leaving electrical
equipment on for extended periods
can drain the battery.
CAUTION
Adding some electrical equipment to
your vehicle can damage it or keep
other things from working as they
should. This wouldn’t be covered by
your warranty. Check with your
SUZUKI dealer before adding electri-
cal equipment, and never use any-
thing that exceeds the amperage
rating.
Instrument Panel Overview:
Page 94 of 226
3-20
INSTRUMENT PANEL
85Z14-03E
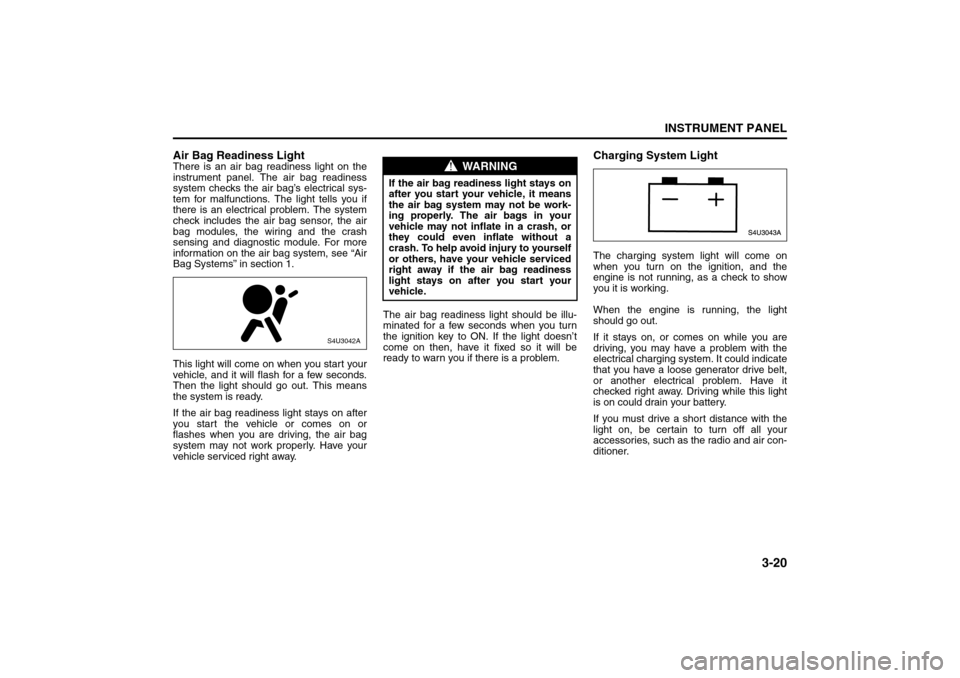
Air Bag Readiness LightThere is an air bag readiness light on the
instrument panel. The air bag readiness
system checks the air bag’s electrical sys-
tem for malfunctions. The light tells you if
there is an electrical problem. The system
check includes the air bag sensor, the air
bag modules, the wiring and the crash
sensing and diagnostic module. For more
information on the air bag system, see “Air
Bag Systems” in section 1.
This light will come on when you start your
vehicle, and it will flash for a few seconds.
Then the light should go out. This means
the system is ready.
If the air bag readiness light stays on after
you start the vehicle or comes on or
flashes when you are driving, the air bag
system may not work properly. Have your
vehicle serviced right away.The air bag readiness light should be illu-
minated for a few seconds when you turn
the ignition key to ON. If the light doesn’t
come on then, have it fixed so it will be
ready to warn you if there is a problem.
Charging System LightThe charging system light will come on
when you turn on the ignition, and the
engine is not running, as a check to show
you it is working.
When the engine is running, the light
should go out.
If it stays on, or comes on while you are
driving, you may have a problem with the
electrical charging system. It could indicate
that you have a loose generator drive belt,
or another electrical problem. Have it
checked right away. Driving while this light
is on could drain your battery.
If you must drive a short distance with the
light on, be certain to turn off all your
accessories, such as the radio and air con-
ditioner.
S4U3042A
WARNING
If the air bag readiness light stays on
after you start your vehicle, it means
the air bag system may not be work-
ing properly. The air bags in your
vehicle may not inflate in a crash, or
they could even inflate without a
crash. To help avoid injury to yourself
or others, have your vehicle serviced
right away if the air bag readiness
light stays on after you start your
vehicle.
Warning Lights, Gauges and Indicators:
Page 105 of 226
3-31INSTRUMENT PANEL
85Z14-03E
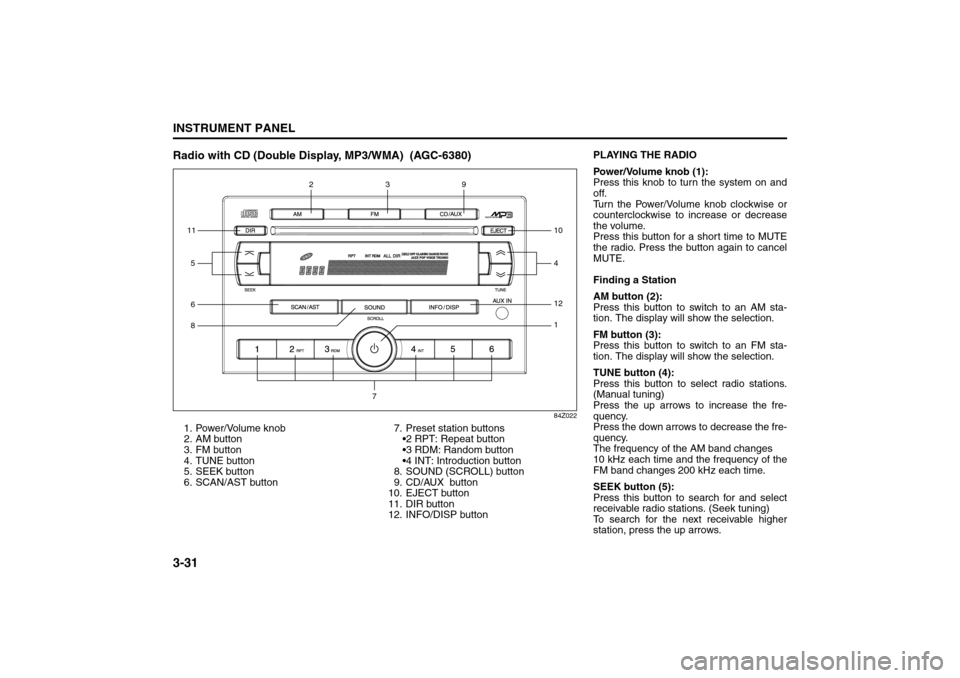
Radio with CD (Double Display, MP3/WMA) (AGC-6380)
84Z022
1. Power/Volume knob
2. AM button
3. FM button
4. TUNE button
5. SEEK button
6. SCAN/AST button7. Preset station buttons
2 RPT: Repeat button
3 RDM: Random button
4 INT: Introduction button
8. SOUND (SCROLL) button
9. CD/AUX button
10. EJECT button
11. DIR button
12. INFO/DISP button611812
1
59
410
3
2
7
PLAYING THE RADIO
Power/Volume knob (1):
Press this knob to turn the system on and
off.
Turn the Power/Volume knob clockwise or
counterclockwise to increase or decrease
the volume.
Press this button for a short time to MUTE
the radio. Press the button again to cancel
MUTE.
Finding a Station
AM button (2):
Press this button to switch to an AM sta-
tion. The display will show the selection.
FM button (3):
Press this button to switch to an FM sta-
tion. The display will show the selection.
TUNE button (4):
Press this button to select radio stations.
(Manual tuning)
Press the up arrows to increase the fre-
quency.
Press the down arrows to decrease the fre-
quency.
The frequency of the AM band changes
10 kHz each time and the frequency of the
FM band changes 200 kHz each time.
SEEK button (5):
Press this button to search for and select
receivable radio stations. (Seek tuning)
To search for the next receivable higher
station, press the up arrows.
Audio System:
Page 106 of 226
3-32
INSTRUMENT PANEL
85Z14-03E
To search for the previous receivable lower
station, press the down arrows.
SCAN/AST button (6):
Press this button to scan radio stations.
(Scan tuning)
Scan
The radio will go to a station, play for a few
seconds, and then go on to the next sta-
tion. Press this button again to stop scan-
ning.
The radio will only scan stations with a
strong signal that are in the selected band.
Automatic Store
Press and hold this button to use Auto
Store.
FM1’s 6 preset stations with the strongest
signal in the region can be automatically
stored. The display will show “AUTO
SCANNING”, and “SCANNING” will flash
on display.
Stored stations will flash for a short time on
display in sequence. Once the stations are
stored, the radio will switch to FM-A and
the first preset station will begin to play.
FM-A will appear on the display when lis-
tening to the automatically stored stations.
Press the AM or FM button to stop auto-
matic store.Preset station buttons (7):
Setting Preset Stations
Up to 36 stations (six FM1, six FM2, six
FM-A and six AM1, six AM2, six AM-A),
can be programmed on the six numbered
preset buttons, by performing the following
steps:
1) Turn the radio on.
2) Press the AM or FM button to select
FM1, FM2, FM-A, AM1, AM2 or AM-A.
3) Tune in the desired station.
4) Press and hold one of the six numbered
preset buttons.
The preset button number (Display:
CH#1 ~ CH#6) will flash on the display
when the station has been set. When-
ever that numbered preset button is
pressed, the memorized station will
return.
5) Repeat the previous four steps for each
preset button.
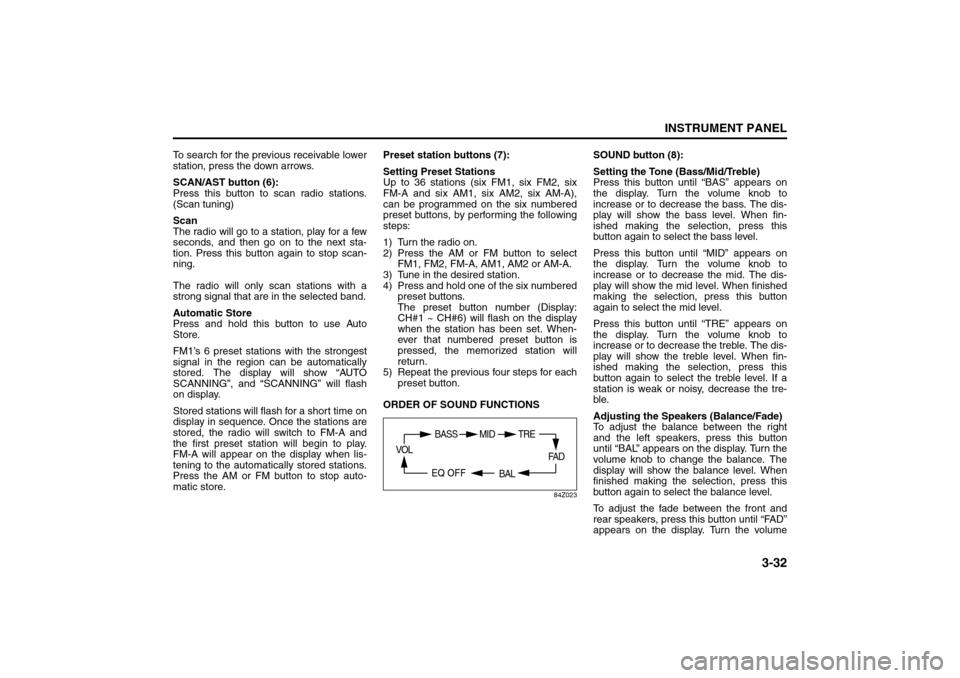
ORDER OF SOUND FUNCTIONS
84Z023
SOUND button (8):
Setting the Tone (Bass/Mid/Treble)
Press this button until “BAS” appears on
the display. Turn the volume knob to
increase or to decrease the bass. The dis-
play will show the bass level. When fin-
ished making the selection, press this
button again to select the bass level.
Press this button until “MID” appears on
the display. Turn the volume knob to
increase or to decrease the mid. The dis-
play will show the mid level. When finished
making the selection, press this button
again to select the mid level.
Press this button until “TRE” appears on
the display. Turn the volume knob to
increase or to decrease the treble. The dis-
play will show the treble level. When fin-
ished making the selection, press this
button again to select the treble level. If a
station is weak or noisy, decrease the tre-
ble.
Adjusting the Speakers (Balance/Fade)
To adjust the balance between the right
and the left speakers, press this button
until “BAL” appears on the display. Turn the
volume knob to change the balance. The
display will show the balance level. When
finished making the selection, press this
button again to select the balance level.
To adjust the fade between the front and
rear speakers, press this button until “FAD”
appears on the display. Turn the volume
FA D
BAL
BASS MID
EQ OFF VOL
TRE
Audio System:
Page 107 of 226
3-33INSTRUMENT PANEL
85Z14-03E
knob to change the fade between the front
and the rear speakers. The display will
show the fade level. When finished making
the selection, press this button again to
select the fade level.
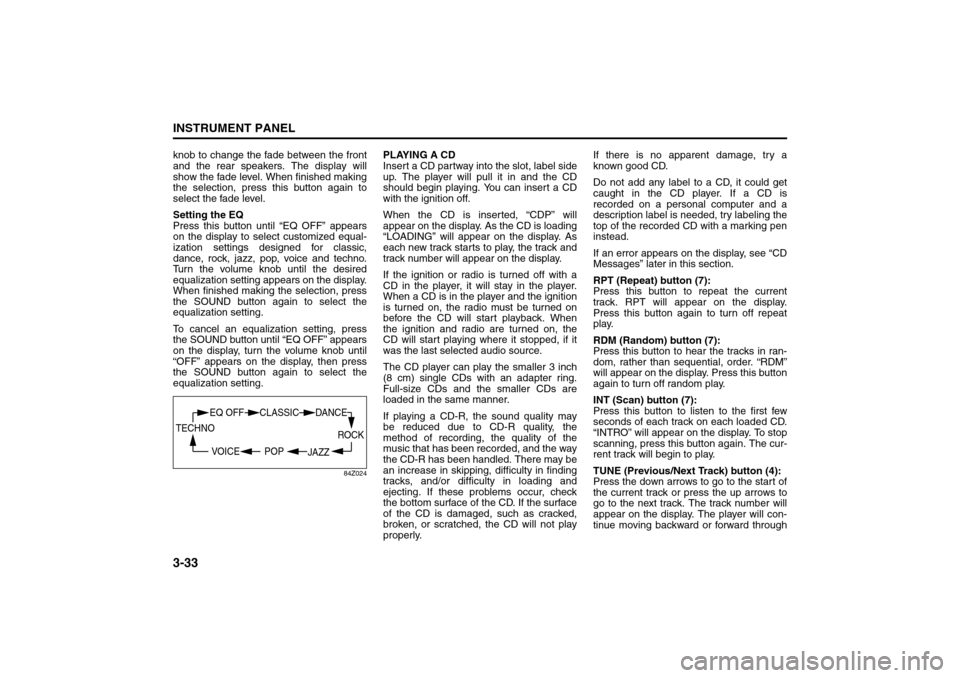
Setting the EQ
Press this button until “EQ OFF” appears
on the display to select customized equal-
ization settings designed for classic,
dance, rock, jazz, pop, voice and techno.
Turn the volume knob until the desired
equalization setting appears on the display.
When finished making the selection, press
the SOUND button again to select the
equalization setting.
To cancel an equalization setting, press
the SOUND button until “EQ OFF” appears
on the display, turn the volume knob until
“OFF” appears on the display, then press
the SOUND button again to select the
equalization setting.
84Z024
PLAYING A CD
Insert a CD partway into the slot, label side
up. The player will pull it in and the CD
should begin playing. You can insert a CD
with the ignition off.
When the CD is inserted, “CDP” will
appear on the display. As the CD is loading
“LOADING” will appear on the display. As
each new track starts to play, the track and
track number will appear on the display.
If the ignition or radio is turned off with a
CD in the player, it will stay in the player.
When a CD is in the player and the ignition
is turned on, the radio must be turned on
before the CD will start playback. When
the ignition and radio are turned on, the
CD will start playing where it stopped, if it
was the last selected audio source.
The CD player can play the smaller 3 inch
(8 cm) single CDs with an adapter ring.
Full-size CDs and the smaller CDs are
loaded in the same manner.
If playing a CD-R, the sound quality may
be reduced due to CD-R quality, the
method of recording, the quality of the
music that has been recorded, and the way
the CD-R has been handled. There may be
an increase in skipping, difficulty in finding
tracks, and/or difficulty in loading and
ejecting. If these problems occur, check
the bottom surface of the CD. If the surface
of the CD is damaged, such as cracked,
broken, or scratched, the CD will not play
properly.If there is no apparent damage, try a
known good CD.
Do not add any label to a CD, it could get
caught in the CD player. If a CD is
recorded on a personal computer and a
description label is needed, try labeling the
top of the recorded CD with a marking pen
instead.
If an error appears on the display, see “CD
Messages” later in this section.
RPT (Repeat) button (7):
Press this button to repeat the current
track. RPT will appear on the display.
Press this button again to turn off repeat
play.
RDM (Random) button (7):
Press this button to hear the tracks in ran-
dom, rather than sequential, order. “RDM”
will appear on the display. Press this button
again to turn off random play.
INT (Scan) button (7):
Press this button to listen to the first few
seconds of each track on each loaded CD.
“INTRO” will appear on the display. To stop
scanning, press this button again. The cur-
rent track will begin to play.
TUNE (Previous/Next Track) button (4):
Press the down arrows to go to the start of
the current track or press the up arrows to
go to the next track. The track number will
appear on the display. The player will con-
tinue moving backward or forward through
ROCK
JAZZ
EQ OFF CLASSIC
POP VOICE TECHNO
DANCE
Audio System:
Page 108 of 226
3-34
INSTRUMENT PANEL
85Z14-03E
the CD with each press of the up or down
arrows.
AM button (2):
Press this button to listen to the radio when
a CD is playing. The inactive CD will
remain safely inside the radio for future lis-
tening.
FM button (3):
Press this button to listen to the radio when
a CD is playing. The inactive CD will
remain safely inside the radio for future lis-
tening.
CD/AUX button (9):
Press this button to play a CD when listen-
ing to the radio. “CDP” will appear on the
display when the CD player has been
selected. The CD symbol will appear on
the display when a CD is loaded.
Press this button while a CD is playing to
pause the CD. “PAUSE” will flash on the
display. Press this button again to resume
playing the CD.
Press this button to play a CD when listen-
ing to the audio contents from other device
(AUX mode). “CDP” will appear on the dis-
play when the CD player has been
selected. The CD symbol will appear on
the display when a CD is loaded.
EJECT button (10):
Press this button to eject a CD. The only
way a CD can be ejected from the player is
by pressing the eject button. The CD willnot eject when the ignition or the radio is
turned off.
Using an MP3/WMA CD
MP3/WMA Format
If you burn your own MP3/WMA disc on a
personal computer:
Make sure the MP3/WMA files are
recorded on a CD-R disc.
Make sure to finalize the disc when burn-
ing an MP3/WMA disc, using multiple
sessions. It is usually better to burn the
disc all at once.
Files can be recorded with a variety of
fixed or variable bit rates. Song title, art-
ist name, and album will be available for
display by the radio when recorded using
ID3 tags version 1 and 2.
Do not mix standard audio and MP3/
WMA files on one disc.
Make sure each MP3/WMA file has a
“.mp3” or “.wma” extension, other file
extensions may not work.
The player will be able to read and play a
maximum of 50 folders, 5 sessions, and
999 files. Long file names and folder
names may use more disc memory space
than necessary. To conserve space on the
disc, minimize the length of the file, and
folder names. You can also play an MP3/
WMA CD that was recorded using no file
folders. The system can support up to 8
folders in depth, but, keep the depth of the
folders to a minimum in order to keep downthe complexity and confusion in trying to
locate a particular folder during playback. If
a CD contains more than the maximum of
50 folders, 5 sessions, and 999 files the
player will let you access and navigate up
to the maximum, but all items over the
maximum will be ignored.
Root Directory
The root directory will be treated as a
folder. If the root directory has compressed
audio files, the directory will be displayed
as “ROOT”. All files contained directly
under the root directory will be accessed
prior to any other directory.
Empty Directory or Folder
If a root directory or a folder exists some-
where in the file structure that contains
only folders/subfolders and no compressed
files directly beneath them, the player will
advance to the next folder in the file struc-
ture that contains compressed audio files
and the empty folder will not be displayed
or numbered.
No Folder
When the CD contains only compressed
files, the files will be located under the root
folder. The next and previous folder func-
tions will have no function on a CD that
was recorded without folders or playlists.
When displaying the name of the folder the
radio will display “ROOT”.
When the CD contains only compressed
audio files, but no folders, all files will be
located under the root folder. When the
Audio System: