traction control SUZUKI RENO 2008 1.G Owners Manual
[x] Cancel search | Manufacturer: SUZUKI, Model Year: 2008, Model line: RENO, Model: SUZUKI RENO 2008 1.GPages: 226, PDF Size: 4.98 MB
Page 10 of 226
0-3
85Z14-03E
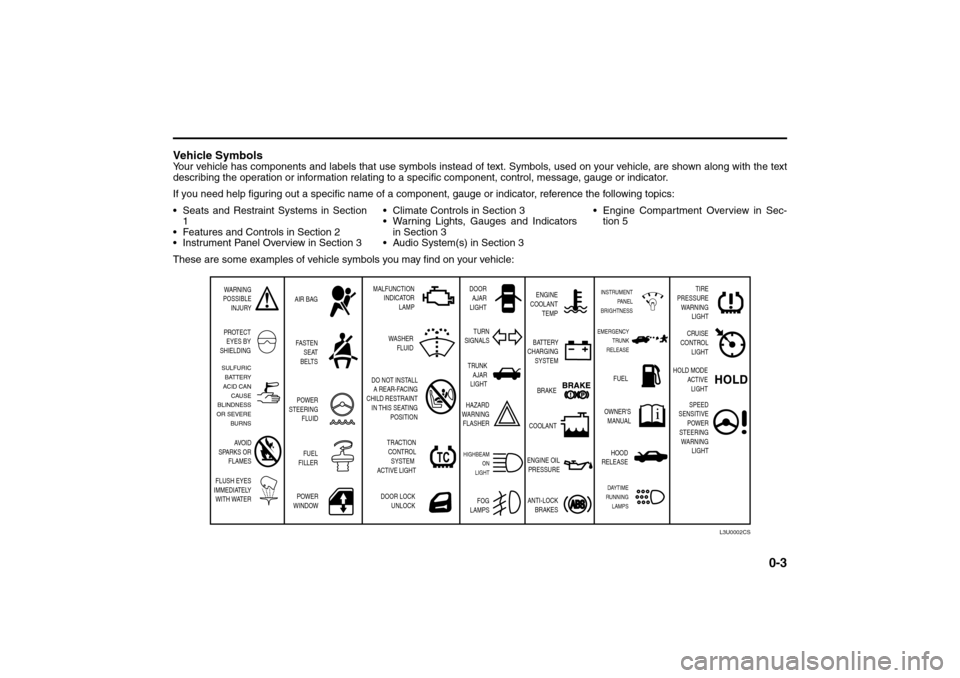
Vehicle SymbolsYour vehicle has components and labels that use symbols instead of text. Symbols, used on your vehicle, are shown along with the text
describing the operation or information relating to a specific component, control, message, gauge or indicator.
If you need help figuring out a specific name of a component, gauge or indicator, reference the following topics:
Seats and Restraint Systems in Section
1
Features and Controls in Section 2
Instrument Panel Overview in Section 3 Climate Controls in Section 3
Warning Lights, Gauges and Indicators
in Section 3
Audio System(s) in Section 3 Engine Compartment Overview in Sec-
tion 5
These are some examples of vehicle symbols you may find on your vehicle:
WARNING
POSSIBLE
INJURY
PROTECT
EYES BY
SHIELDINGFASTEN
SEAT
BELTS
POWER
WINDOWDOOR LOCK
UNLOCK DO NOT INSTALL
A REAR-FACING
CHILD RESTRAINT
IN THIS SEATING
POSITION AIR BAGMALFUNCTION
INDICATOR
LAMPENGINE
COOLANT
TEMP
FUEL
OWNER'S
MANUAL BATTERY
CHARGING
SYSTEM
BRAKE
COOLANT
ENGINE OIL
PRESSURE
ANTI-LOCK
BRAKES TURN
SIGNALS
HAZARD
WARNING
FLASHER
HIGHBEAM
ON
LIGHT
FOG
LAMPS
SULFURIC
BATTERY
ACID CAN
CAUSE
BLINDNESS
OR SEVERE
BURNS
AVOID
SPARKS OR
FLAMES
FLUSH EYES
IMMEDIATELY
WITH WATER
L3U0002CS
DOOR
AJAR
LIGHT
POWER
STEERING
FLUID
FUEL
FILLER
EMERGENCY
TRUNK
RELEASEINSTRUMENT
PANEL
BRIGHTNESS
TRUNK
AJAR
LIGHT
HOOD
RELEASEDAYTIME
RUNNING
LAMPS
TRACTION
CONTROL
SYSTEM
ACTIVE LIGHTWASHER
FLUID
TIRE
PRESSURE
WARNING
LIGHT
CRUISE
CONTROL
LIGHT
HOLD MODE
ACTIVE
LIGHT
SPEED
SENSITIVE
POWER
STEERING
WARNING
LIGHT
Page 80 of 226
3-6
INSTRUMENT PANEL
85Z14-03E
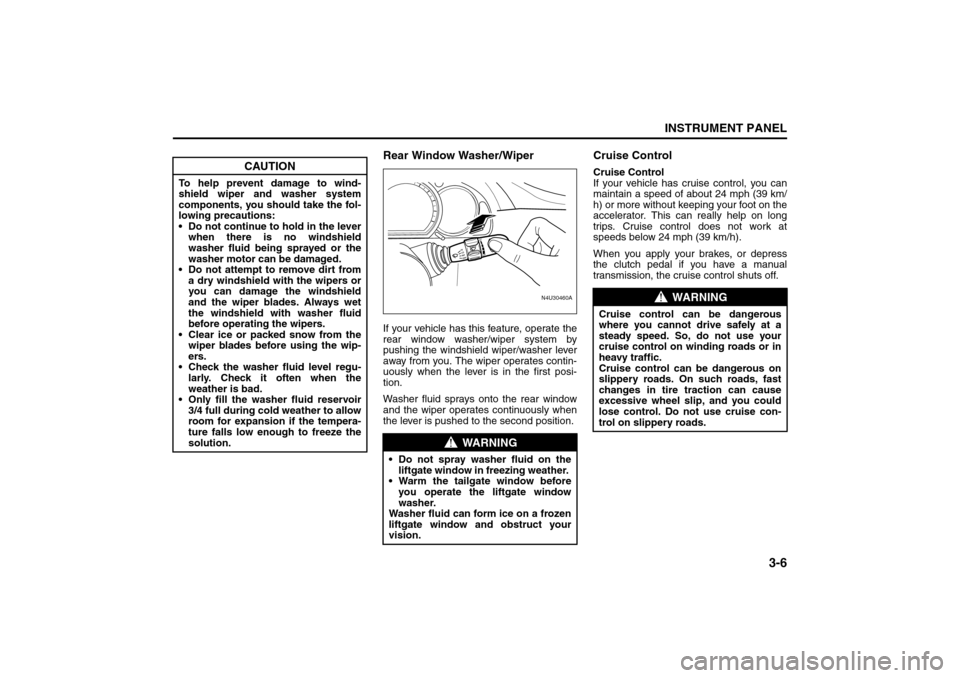
Rear Window Washer/WiperIf your vehicle has this feature, operate the
rear window washer/wiper system by
pushing the windshield wiper/washer lever
away from you. The wiper operates contin-
uously when the lever is in the first posi-
tion.
Washer fluid sprays onto the rear window
and the wiper operates continuously when
the lever is pushed to the second position.
Cruise ControlCruise Control
If your vehicle has cruise control, you can
maintain a speed of about 24 mph (39 km/
h) or more without keeping your foot on the
accelerator. This can really help on long
trips. Cruise control does not work at
speeds below 24 mph (39 km/h).
When you apply your brakes, or depress
the clutch pedal if you have a manual
transmission, the cruise control shuts off.
CAUTION
To help prevent damage to wind-
shield wiper and washer system
components, you should take the fol-
lowing precautions:
Do not continue to hold in the lever
when there is no windshield
washer fluid being sprayed or the
washer motor can be damaged.
Do not attempt to remove dirt from
a dry windshield with the wipers or
you can damage the windshield
and the wiper blades. Always wet
the windshield with washer fluid
before operating the wipers.
Clear ice or packed snow from the
wiper blades before using the wip-
ers.
Check the washer fluid level regu-
larly. Check it often when the
weather is bad.
Only fill the washer fluid reservoir
3/4 full during cold weather to allow
room for expansion if the tempera-
ture falls low enough to freeze the
solution.
WARNING
Do not spray washer fluid on the
liftgate window in freezing weather.
Warm the tailgate window before
you operate the liftgate window
washer.
Washer fluid can form ice on a frozen
liftgate window and obstruct your
vision.
N4U30460A
FASTSLOW
WARNING
Cruise control can be dangerous
where you cannot drive safely at a
steady speed. So, do not use your
cruise control on winding roads or in
heavy traffic.
Cruise control can be dangerous on
slippery roads. On such roads, fast
changes in tire traction can cause
excessive wheel slip, and you could
lose control. Do not use cruise con-
trol on slippery roads.
Instrument Panel Overview:
Page 110 of 226
3-36
INSTRUMENT PANEL
85Z14-03E
tion such as: Song Title, Album Title, Artist,
and Bit rate may appear.
When information is not available, “No Info”
will appear on the display.
Press and hold this button to change the
display mode.
Scroll:
Press and hold the sound button [in MP3/
WMA mode]
The song title or other information of a
song will scroll on/off. The default mode is
scroll on.
Scroll mode can be changed only when
you press and hold the sound button.
CD Messages
CHECK CD:
If this message appears on the display
and/or the CD comes out, it could be for
one of the following reasons:
It is very hot. When the temperature
returns to normal, the CD will play.
You are driving on a very rough road.
When the road becomes smoother, the
CD will play.
The CD is dirty, scratched, wet, or
upside down.
The air is very humid. If so, wait about an
hour and try again.
The format of the CD may not be com-
patible. See “MP3/WMA Format” earlier
in this section. There may have been a problem while
burning the CD.
The label may be caught in the CD
player.
If the CD is not playing correctly, for any
other reason, try a known good CD.
If any error occurs repeatedly or if an error
cannot be corrected, contact your SUZUKI
dealer. If the radio displays an error mes-
sage, write it down and provide it to your
SUZUKI dealer when reporting the prob-
lem.
AUX Mod e
Press this button to listen to the audio con-
tents from other devices; Walkman, Porta-
ble CD Player, Portable MP3 Player, i-pod,
XM receiver, etc.
1) Connect the output port of the device to
the aux jack of the head unit with an
aux connector.
2) Turn the device on.
3) Press this button.
If you want to control the volume level, use
the volume buttons of the head unit or the
device.
Using the Auxiliary Input Jack
Your radio system has an auxiliary input
jack located on the lower right side of the
faceplate. This is not an audio output; do
not plug a headphone set into the front
auxiliary input jack. You can however, con-
nect an external audio device such as aniPod, laptop computer, MP3 player, CD
changer, or cassette tape player, etc. to the
auxiliary input jack for use as another
source for audio listening.
The auxiliary input jack will also accept cell
phone connectors. Plug the cell phone
connector into the auxiliary input jack to
hear the other side of a cell phone’s con-
versation through the vehicle sound sys-
tem.
Drivers are encouraged to set up their por-
table audio player while the vehicle is
parked. See Defensive Driving for more
information on driver distraction.
To use a portable audio player, connect a
3.5 mm (1/8 inch) cable to the radio’s front
auxiliary input jack. When a device is con-
nected, press the radio CD/AUX button as
needed to begin playing audio from the
device over the car speakers.
CD/AUX (CD/Auxiliary) button (9):
Press this button once to play a CD while a
portable audio device is playing. Press this
button a second time and the system will
begin playing audio from the connected
portable audio player. Once in this mode,
“Auxinput” will appear on the display. If the
auxiliary jack does not detect the presence
of an output jack, the aux mode will be pre-
vented from coming up.
Power/Volume knob (1):
Turn this knob clockwise or counterclock-
wise to increase or decrease the volume of
Page 117 of 226
3-43INSTRUMENT PANEL
85Z14-03E
tion such as: Song Title, Album Title, Artist,
and Bit rate may appear.
When information is not available, “No Info”
will appear on the display.
Press and hold this button to change the
display mode.
Scroll:
Press and hold the sound button [in MP3/
WMA mode]
The song title or other information of a
song will scroll on/off. The default mode is
scroll on.
Scroll mode can be changed only when
you press and hold the sound button.
CD Messages
CHECK CD:
If this message appears on the display
and/or the CD comes out, it could be for
one of the following reasons:
It is very hot. When the temperature
returns to normal, the CD will play.
You are driving on a very rough road.
When the road becomes smoother, the
CD will play.
The CD is dirty, scratched, wet, or
upside down.
The air is very humid. If so, wait about an
hour and try again.
The format of the CD may not be com-
patible. See “MP3/WMA Format” earlier
in this section. There may have been a problem while
burning the CD.
The label may be caught in the CD
player.
If the CD is not playing correctly, for any
other reason, try a known good CD.
If any error occurs repeatedly or if an error
cannot be corrected, contact your SUZUKI
dealer. If the radio displays an error mes-
sage, write it down and provide it to your
SUZUKI dealer when reporting the prob-
lem.
AUX Mod e
Press this button to listen to the audio con-
tents from other devices; Walkman, Porta-
ble CD Player, Portable MP3 Player, i-pod,
XM receiver, etc.
1) Connect the output port of the device to
the aux jack of the head unit with an
aux connector.
2) Turn the device on.
3) Press this button.
If you want to control the volume level, use
the volume buttons of the head unit or the
device.
Using the Auxiliary Input Jack
Your radio system has an auxiliary input
jack located on the lower right side of the
faceplate. This is not an audio output; do
not plug a headphone set into the front
auxiliary input jack. You can however, con-
nect an external audio device such as aniPod, laptop computer, MP3 player, CD
changer, or cassette tape player, etc. to the
auxiliary input jack for use as another
source for audio listening.
The auxiliary input jack will also accept cell
phone connectors. Plug the cell phone
connector into the auxiliary input jack to
hear the other side of a cell phone’s con-
versation through the vehicle sound sys-
tem.
Drivers are encouraged to set up their por-
table audio player while the vehicle is
parked. See Defensive Driving for more
information on driver distraction.
To use a portable audio player, connect a
3.5 mm (1/8 inch) cable to the radio’s front
auxiliary input jack. When a device is con-
nected, press the radio CD/AUX button as
needed to begin playing audio from the
device over the car speakers.
CD/AUX (CD/Auxiliary) button (9):
Press this button once to play a CD while a
portable audio device is playing. Press this
button a second time and the system will
begin playing audio from the connected
portable audio player. Once in this mode,
“Auxinput” will appear on the display. If the
auxiliary jack does not detect the presence
of an output jack, the aux mode will be pre-
vented from coming up.
Power/Volume knob (1):
Turn this knob clockwise or counterclock-
wise to increase or decrease the volume of
Page 129 of 226
4-5DRIVING YOUR VEHICLE
85Z14-03E
SteeringPower Steering
If you lose power steering assist because
the engine stops or the system is not func-
tioning, you can steer but it will take much
more effort.
Speed Sensitive Power Steering
System
This system continuously adjusts the effort
you feel when steering at all vehicle
speeds. It provides ease when parking, yet
a firm, solid feel at highway speeds.
If your vehicle has this system, it varies the
amount of effort required to steer the vehi-
cle in relation to the speed of the vehicle.
The amount of steering effort required is
less at slower speeds to make the vehicle
more maneuverable and easier to park. At
faster speeds, the steering effort increases
to provide a sport-like feel to the steering.
This provides maximum control and stabil-
ity.
This warning light will stay on, or come on
while you are driving, if there’s a problem
with the SSPS system.When this warning light is on, your vehicle
will seem harder to steer than normal
when parking or driving slowly. You will still
have power steering, but steering will be
stiffer than normal at slow speeds. See
your SUZUKI dealer for service.
Steering Tips
Driving on Curves
It’s important to take curves at a reason-
able speed.
A lot of the “driver lost control” accidents
mentioned on the news happen on curves.
Here’s why:
Experienced driver or beginner, each of us
is subject to the same laws of physics
when driving on curves. The traction of the
tires against the road surface makes it pos-
sible for the vehicle to change its path
when you turn the front wheels. If there’s
no traction, inertia will keep the vehicle
going in the same direction. If you’ve ever
tried to steer a vehicle on wet ice, you’ll
understand this.
The traction you can get in a curve
depends on the condition of your tires and
the road surface, the angle at which the
curve is banked, and your speed. While
you’re in a curve, speed is the one factor
you can control.
Suppose you’re steering through a sharp
curve. Then you suddenly apply the
brakes. Both control systems – steeringand braking – have to do their work where
the tires meet the road. Unless you have
four-wheel anti-lock brakes, adding the
hard braking can demand too much of
those places. You can lose control.
The same thing can happen if you’re steer-
ing through a sharp curve and you sud-
denly accelerate. Those two control
systems – steering and acceleration – can
overwhelm those places where the tires
meet the road and make you lose control.
What should you do if this ever happens?
Ease up on the brake or accelerator pedal,
steer the vehicle the way you want it to go,
and slow down.
Speed limit signs near curves warn that
you should adjust your speed. Of course,
the posted speeds are based on good
weather and road conditions. Under less
favorable conditions you’ll want to go
slower.
If you need to reduce your speed as you
approach a curve, do it before you enter
the curve, while your front wheels are
straight ahead.
Try to adjust your speed so you can “drive”
through the curve. Maintain a reasonable,
steady speed. Wait to accelerate until you
are out of the curve, and then accelerate
gently into the straightaway.
L5U3004A
Your Driving, the Road, and Your Vehicle:
Page 132 of 226
4-8
DRIVING YOUR VEHICLE
85Z14-03E
steer the way you want the vehicle to go. If
you start steering quickly enough, your
vehicle may straighten out. Always be
ready for a second skid if it occurs.
Of course, traction is reduced when water,
snow, ice, gravel or other material is on the
road. For safety, you’ll want to slow down
and adjust your driving to these conditions.
It is important to slow down on slippery
surfaces because stopping distance will be
longer and vehicle control more limited.
While driving on a surface with reduced
traction, try your best to avoid sudden
steering, acceleration or braking (including
engine braking by shifting to a lower gear).
Any sudden changes could cause the tires
to slide. You may not realize the surface is
slippery until your vehicle is skidding.
Learn to recognize warning clues – such
as enough water, ice or packed snow on
the road to make a “mirrored surface” –
and slow down when you have any doubt.
If you have the anti-lock braking system,
remember: It helps avoid only the braking
skid. If you do not have anti-lock, then in a
braking skid (where the wheels are no
longer rolling), release enough pressure
on the brakes to get the wheels rolling
again. This restores steering control. Push
the brake pedal down steadily when you
have to stop suddenly. As long as the
wheels are rolling, you will have steering
control.
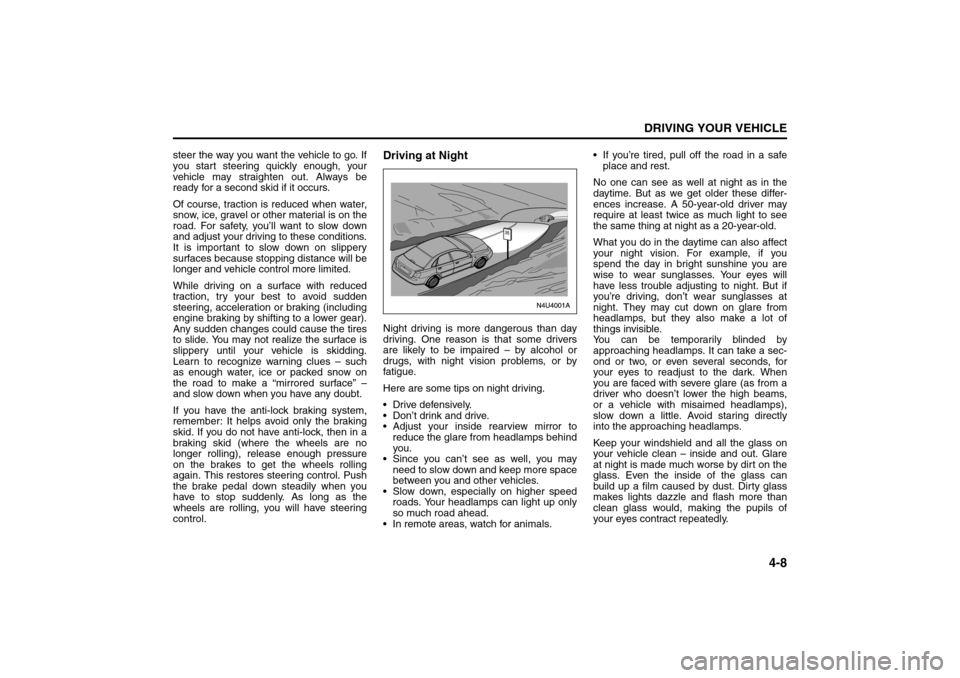
Driving at NightNight driving is more dangerous than day
driving. One reason is that some drivers
are likely to be impaired – by alcohol or
drugs, with night vision problems, or by
fatigue.
Here are some tips on night driving.
Drive defensively.
Don’t drink and drive.
Adjust your inside rearview mirror to
reduce the glare from headlamps behind
you.
Since you can’t see as well, you may
need to slow down and keep more space
between you and other vehicles.
Slow down, especially on higher speed
roads. Your headlamps can light up only
so much road ahead.
In remote areas, watch for animals. If you’re tired, pull off the road in a safe
place and rest.
No one can see as well at night as in the
daytime. But as we get older these differ-
ences increase. A 50-year-old driver may
require at least twice as much light to see
the same thing at night as a 20-year-old.
What you do in the daytime can also affect
your night vision. For example, if you
spend the day in bright sunshine you are
wise to wear sunglasses. Your eyes will
have less trouble adjusting to night. But if
you’re driving, don’t wear sunglasses at
night. They may cut down on glare from
headlamps, but they also make a lot of
things invisible.
You can be temporarily blinded by
approaching headlamps. It can take a sec-
ond or two, or even several seconds, for
your eyes to readjust to the dark. When
you are faced with severe glare (as from a
driver who doesn’t lower the high beams,
or a vehicle with misaimed headlamps),
slow down a little. Avoid staring directly
into the approaching headlamps.
Keep your windshield and all the glass on
your vehicle clean – inside and out. Glare
at night is made much worse by dirt on the
glass. Even the inside of the glass can
build up a film caused by dust. Dirty glass
makes lights dazzle and flash more than
clean glass would, making the pupils of
your eyes contract repeatedly.
Your Driving, the Road, and Your Vehicle:
Page 133 of 226
4-9DRIVING YOUR VEHICLE
85Z14-03E
Remember that your headlamps light up
far less of a roadway when you are in a
turn or curve. Keep your eyes moving; that
way, it’s easier to pick out dimly lighted
objects. Just as your headlamps should be
checked regularly for proper aim, so
should your eyes be examined regularly.
Some drivers suffer from night blindness –
the inability to see in dim light – and aren’t
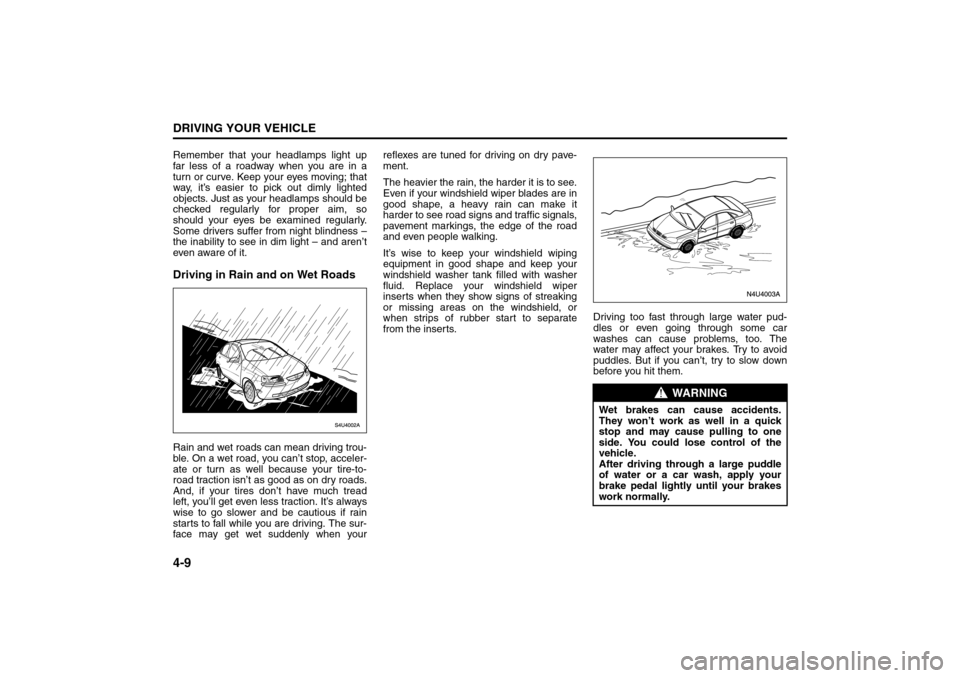
even aware of it.Driving in Rain and on Wet RoadsRain and wet roads can mean driving trou-
ble. On a wet road, you can’t stop, acceler-
ate or turn as well because your tire-to-
road traction isn’t as good as on dry roads.
And, if your tires don’t have much tread
left, you’ll get even less traction. It’s always
wise to go slower and be cautious if rain
starts to fall while you are driving. The sur-
face may get wet suddenly when yourreflexes are tuned for driving on dry pave-
ment.
The heavier the rain, the harder it is to see.
Even if your windshield wiper blades are in
good shape, a heavy rain can make it
harder to see road signs and traffic signals,
pavement markings, the edge of the road
and even people walking.
It’s wise to keep your windshield wiping
equipment in good shape and keep your
windshield washer tank filled with washer
fluid. Replace your windshield wiper
inserts when they show signs of streaking
or missing areas on the windshield, or
when strips of rubber start to separate
from the inserts.Driving too fast through large water pud-
dles or even going through some car
washes can cause problems, too. The
water may affect your brakes. Try to avoid
puddles. But if you can’t, try to slow down
before you hit them.
WARNING
Wet brakes can cause accidents.
They won’t work as well in a quick
stop and may cause pulling to one
side. You could lose control of the
vehicle.
After driving through a large puddle
of water or a car wash, apply your
brake pedal lightly until your brakes
work normally.
Your Driving, the Road, and Your Vehicle:
Page 181 of 226
5-37SERVICE AND APPEARANCE CARE
85Z14-03E
Uniform Tire Quality GradingQuality grades can be found where appli-
cable on the tire sidewall between the
tread shoulder and the maximum section
width. For example:
Treadwear 200 Traction AA Temperature
A
The following information relates to the
system developed by the United States
National Highway Traffic Safety Adminis-
tration, which grades tires by treadwear,
traction and temperature performance.
(This applies only to vehicles sold in the
United States.) The grades are molded on
the sidewalls of most passenger car tires.
The Uniform Tire Quality Grading system
does not apply to deep tread, winter-type
snow tires, space-saver or temporary use
spare tires, tires with nominal rim diame-
ters of 10 to 12 inches (25 to 30 cm), or to
some limited-production tires.
While the tires available on SUZUKI vehi-
cles may vary with respect to these grades,they all conform to federal safety require-
ments.
Treadwear
The treadwear grade is a comparative rat-
ing based on the wear rate of the tire when
tested under controlled conditions on a
specified government test course. For
example, a tire graded 150 would wear one
and a half (1.5) times as well on the gov-
ernment course as a tire graded 100. The
relative performance of tires depends upon
the actual conditions of their use, however,
and may depart significantly from the norm
due to variations in driving habits, service
practices and differences in road charac-
teristics and climate.
Traction – AA, A, B, C
The traction grades, from highest to low-
est, are AA, A, B, and C. Those grades
represent the tire’s ability to stop on wet
pavement as measured under controlled
conditions on specified government test
surfaces of asphalt and concrete. A tire
marked C may have poor traction perfor-
mance.Temperature – A, B, C
The temperature grades are A (the high-
est), B, and C, representing the tire’s resis-
tance to the generation of heat and its
ability to dissipate heat when tested under
controlled conditions on a specified indoor
laboratory test wheel. Sustained high tem-
perature can cause the material of the tire
to degenerate and reduce tire life, and
excessive temperature can lead to sudden
tire failure. The grade C corresponds to a
level of performance which all passenger
car tires must meet under the Federal
Motor Vehicle Safety Standard No.109.
Grades B and A represent higher levels of
performance on the laboratory test wheel
than the minimum required by law.
Wheel Alignment and Tire BalanceThe wheels on your vehicle were aligned
and balanced carefully at the factory to
give you the longest tire life and best over-
all performance.
Scheduled wheel alignment and wheel bal-
ancing are not needed. However, if you
notice unusual tire wear or your vehicle
CAUTION
Replacing the original tires with tires
of a different size may result in false
speedometer or odometer readings.
Check with your SUZUKI dealer
before purchasing replacement tires
that differ in size from the original
tires.
WARNING
The traction grade assigned to this
tire is based on straight-ahead brak-
ing traction tests, and does not
include acceleration, cornering,
hydroplaning, or peak traction char-
acteristics.
WARNING
The temperature grade for this tire is
established for a tire that is properly
inflated and not overloaded. Exces-
sive speed, underinflation, or exces-
sive loading, either separately or in
combination, can cause heat buildup
and possible tire failure.
Tires: