Start SUZUKI SWIFT 2017 5.G User Guide
[x] Cancel search | Manufacturer: SUZUKI, Model Year: 2017, Model line: SWIFT, Model: SUZUKI SWIFT 2017 5.GPages: 336, PDF Size: 6.24 MB
Page 31 of 336
2-12
BEFORE DRIVING
74LH0-74E
• If the interior light switch is in the
“DOOR” position, the interior light will
turn on for about 15 seconds and then
fade out. If you insert the key into the
ignition switch during this time, the light
will start to fade out immediately.
Be sure the doors are locked after you
operate the “LOCK” button (1). If no door is
opened within about 30 seconds after the
“UNLOCK” button (2) is operated, the
doors will automatically lock again.NOTE:
• The maximum operating distance of the
keyless entry system transmitter is about
5 m (16 ft.), but this can vary depending
on the surroundings, especially near
other transmitting devices such as radio
towers or CB (Citizen’s Band) radios.
• The door locks cannot be operated with
the transmitter, if the ignition key is
inserted in the ignition switch.
• If any door is open, you cannot lock the
door by operating the transmitter, how-
ever unlock the door.
• If you lose one of the transmitters, ask
your MARUTI SUZUKI dealer as soon
as possible for a replacement. Be sure
to have your dealer program the new
transmitter code in your vehicle’s mem-
ory so that the old code is erased.Security System (Vehicle with
Keyless entry system)
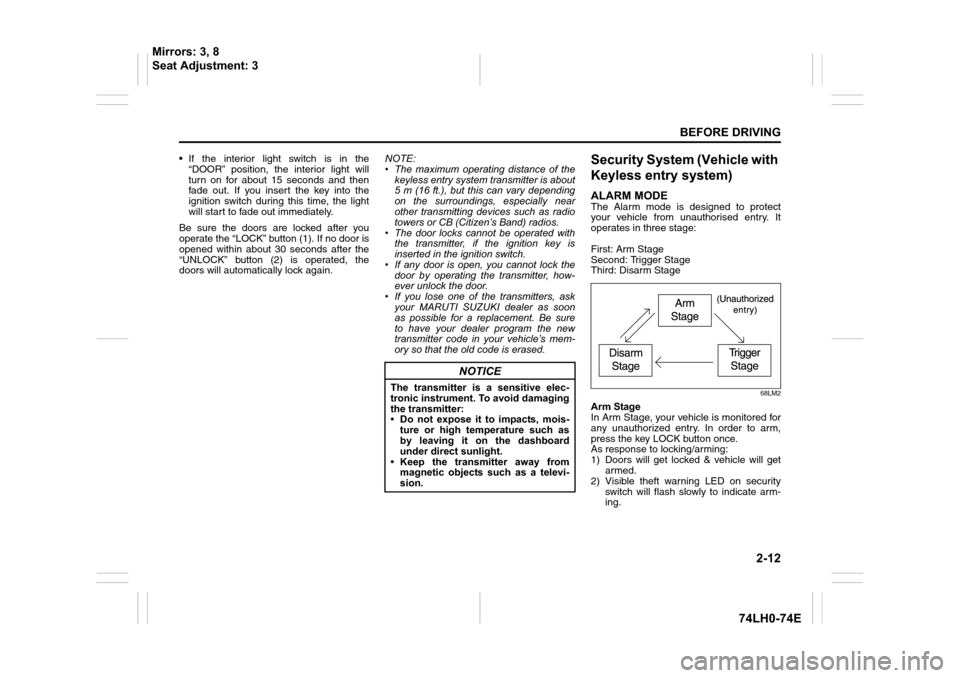
ALARM MODEThe Alarm mode is designed to protect
your vehicle from unauthorised entry. It
operates in three stage:
First: Arm Stage
Second: Trigger Stage
Third: Disarm Stage
68LM2
Arm Stage
In Arm Stage, your vehicle is monitored for
any unauthorized entry. In order to arm,
press the key LOCK button once.
As response to locking/arming:
1) Doors will get locked & vehicle will get
armed.
2) Visible theft warning LED on security
switch will flash slowly to indicate arm-
ing.
NOTICE
The transmitter is a sensitive elec-
tronic instrument. To avoid damaging
the transmitter:
• Do not expose it to impacts, mois-
ture or high temperature such as
by leaving it on the dashboard
under direct sunlight.
• Keep the transmitter away from
magnetic objects such as a televi-
sion.
Mirrors: 3, 8
Seat Adjustment: 3
Page 39 of 336
2-20
BEFORE DRIVING
74LH0-74E
Security System (Vehicle with Key-
less push start system)
The security system is armed after you
lock all doors (including engine hood and
trunk/tailgate) by using the keyless push
start system remote controller or request
switch.
Once the system is armed, any attempt to
open a door by using any other means (*)
than the keyless push start system remote
controller or open the engine hood, will
cause the alarm to be triggered.
* These means include the following:
–The key
– The lock knob on a door
– The central door locking switch
– The tailgate unlatch button (if
equipped)
– The trunk lid unlatch button (if
equipped)
Also, in case that you have set the shock
sensor to enabled state and set sensitivity
of the pre-warning function and full blast
warning function to a level other than 0, the
warning will be triggered in case of any
attempt to tamper with the vehicle. The
shock sensor can be selected enabled or
disabled state, and sensitivity of each
warning can be adjusted as desired. To set
the shock sensor, ask your MARUTI
SUZUKI dealer or use the setting mode of
the information display.NOTE:
• The default setting of the shock sensor
is in the disabled state. Set to the
enabled state and adjust sensitivity of
each warning according to your prefer-
ence. For details on how to use the infor-
mation display, refer to “Information
Display” in this section.
• Your dealer may have already set the
shock sensor of the vehicle to the
enabled state before you purchase it.
Consult your dealer for further informa-
tion.
NOTE:
• The security system generates alarms
when any of the predetermined condi-
tions is met. However, the system does
not have any function of blocking unau-
thorized entry into the vehicle.
• Always use the keyless push start system
remote controller to unlock the doors when
the security system has been armed.
Using a key instead will trigger the alarm.
• If a person who does not know the secu-
rity system is going to drive the vehicle,
we recommend you explain the system
and its operation to the person. Mistak-
enly triggering the alarm may cause a
nuisance to others.
• Even if the security system is armed,
you should still be careful to guard
against theft. Do not leave money or
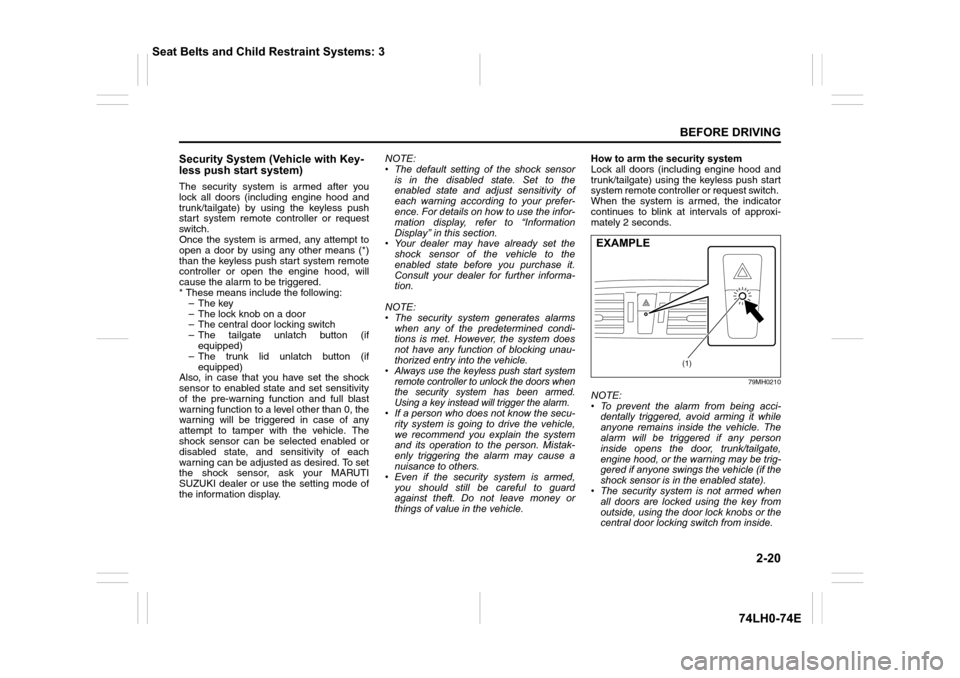
things of value in the vehicle.How to arm the security system
Lock all doors (including engine hood and
trunk/tailgate) using the keyless push start
system remote controller or request switch.
When the system is armed, the indicator
continues to blink at intervals of approxi-
mately 2 seconds.
79MH0210
NOTE:
• To prevent the alarm from being acci-
dentally triggered, avoid arming it while
anyone remains inside the vehicle. The
alarm will be triggered if any person
inside opens the door, trunk/tailgate,
engine hood, or the warning may be trig-
gered if anyone swings the vehicle (if the
shock sensor is in the enabled state).
• The security system is not armed when
all doors are locked using the key from
outside, using the door lock knobs or the
central door locking switch from inside.
(1)
EXAMPLE
Seat Belts and Child Restraint Systems: 3
Page 40 of 336
2-21
BEFORE DRIVING
74LH0-74E
• If any door is not operated within approx-
imately 30 seconds after the doors have
been unlocked using the keyless push
start system remote controller, the doors
are automatically locked again. When
the doors are locked, the security sys-
tem will be armed.
• If the security system indicator (1) blinks
when the ignition mode is “ON”, there
may be something wrong with the secu-
rity system. Ask your MARUTI SUZUKI
dealer to inspect the system.
How to disarm the security system
Simply unlock the doors using the keyless
push start system remote controller. The
security system indicator will go out, indi-
cating that the security system is dis-
armed.
How to stop the alarm
Should the alarm be triggered accidentally,
unlock the doors using the keyless push
start system remote controller or request
switch, or in case of emergency, press the
engine switch to change the ignition mode
to “ON”.
NOTE:
• Even after the alarm has stopped, if you
lock the doors using the keyless push
start system remote controller, the secu-
rity system will be rearmed.
• If you disconnect the battery while the
security system is in the armed condition
or the alarm is actually in operation, thealarm will be re-triggered when the bat-
tery is then reconnected.
• Even after the alarm has stopped at the
end of the predetermined operation time,
it will be triggered again if any of the
doors, trunk/tailgate or engine hood is
opened, or the warning may be triggered
if the vehicle feels a shock (if the shock
sensor is in the enabled state), without
disarming the security system.
Checking whether the alarm has been
triggered during parking
If the alarm was triggered and you then
turn the ignition mode is “ON”, the security
system indicator will blink rapidly for about
8 seconds and a buzzer will beep 4 times
during this period. If this happens, check
whether the vehicle has been broken into
while you were away from it.
Security system indication
• If any of the doors or trunk/tailgate are
opened without unlocking by the keyless
push start system remote controller, all
turn signal lights start to blink and the
interior buzzer beeps intermittently. After
5 seconds, the siren will sound for about
27.5 seconds. The security system indi-
cator continues to blink during this time.
• If the engine hood is opened, all turn sig-
nal lights blink, and the siren sounds for
about 27.5 seconds. The security sys-
tem indicator continues to blink during
this time.• If the shock sensor is in the enabled
state and the vehicle feels a shock
higher than the pre-warning sensitivity,
the siren sounds for about 2 seconds
(pre-warning). If the vehicle feel a shock
higher than the full blast warning sensi-
tivity, siren will sound for about 4.5 sec-
onds (full blast warning). The security
system indicator continues to blink
during this time.
NOTE:
If you set the full blast warning sensitivity
higher than the pre-warning sensitivity in
the setting mode of the information display,
or the vehicle feels such shock as to be
able to trigger the full blast warning, the full
blast warning will be triggered preferen-
tially. In this case, the pre-warning will not
be triggered.
Seat Belts and Child Restraint Systems: 3
Page 43 of 336
2-24
BEFORE DRIVING
74LH0-74E
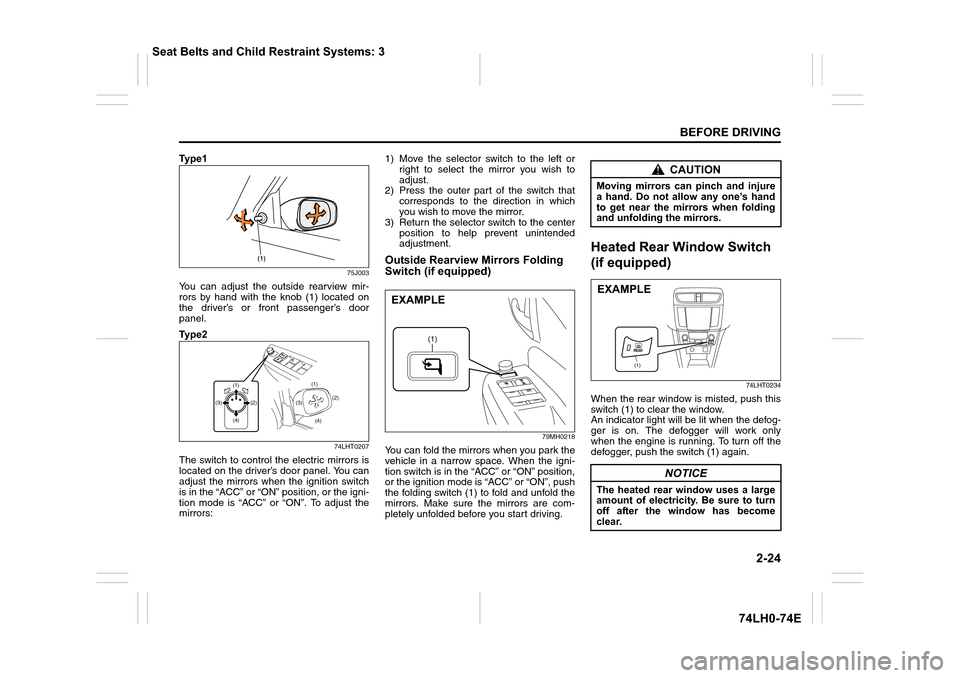
Ty p e 1
75J003
You can adjust the outside rearview mir-
rors by hand with the knob (1) located on
the driver’s or front passenger’s door
panel.
Ty p e 2
74LHT0207
The switch to control the electric mirrors is
located on the driver’s door panel. You can
adjust the mirrors when the ignition switch
is in the “ACC” or “ON” position, or the igni-
tion mode is “ACC” or “ON”. To adjust the
mirrors:1) Move the selector switch to the left or
right to select the mirror you wish to
adjust.
2) Press the outer part of the switch that
corresponds to the direction in which
you wish to move the mirror.
3) Return the selector switch to the center
position to help prevent unintended
adjustment.
Outside Rearview Mirrors Folding
Switch (if equipped)
79MH0218
You can fold the mirrors when you park the
vehicle in a narrow space. When the igni-
tion switch is in the “ACC” or “ON” position,
or the ignition mode is “ACC” or “ON”, push
the folding switch (1) to fold and unfold the
mirrors. Make sure the mirrors are com-
pletely unfolded before you start driving.
Heated Rear Window Switch
(if equipped)
74LHT0234
When the rear window is misted, push this
switch (1) to clear the window.
An indicator light will be lit when the defog-
ger is on. The defogger will work only
when the engine is running. To turn off the
defogger, push the switch (1) again.
(1)(1)
(4) (4)(2)(2)
(3)(3)
(1)
EXAMPLE
CAUTION
Moving mirrors can pinch and injure
a hand. Do not allow any one’s hand
to get near the mirrors when folding
and unfolding the mirrors.
NOTICE
The heated rear window uses a large
amount of electricity. Be sure to turn
off after the window has become
clear.
(1)
EXAMPLE
Seat Belts and Child Restraint Systems: 3
Page 44 of 336
2-25
BEFORE DRIVING
74LH0-74E
NOTE:
• The defogger will work only when the
engine is running.
• The defogger will automatically turn off
after the defogger remains on for 15 min-
utes to prevent discharging of the bat-
tery.
Front Seats
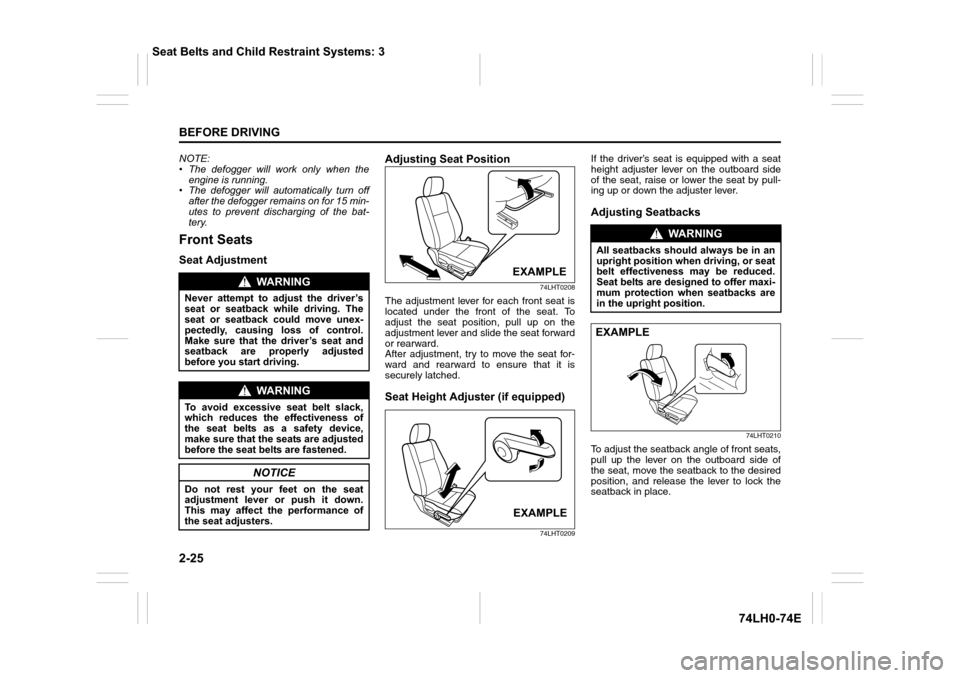
Seat AdjustmentAdjusting Seat Position
74LHT0208
The adjustment lever for each front seat is
located under the front of the seat. To
adjust the seat position, pull up on the
adjustment lever and slide the seat forward
or rearward.
After adjustment, try to move the seat for-
ward and rearward to ensure that it is
securely latched.
Seat Height Adjuster (if equipped)
74LHT0209
If the driver’s seat is equipped with a seat
height adjuster lever on the outboard side
of the seat, raise or lower the seat by pull-
ing up or down the adjuster lever.
Adjusting Seatbacks
74LHT0210
To adjust the seatback angle of front seats,
pull up the lever on the outboard side of
the seat, move the seatback to the desired
position, and release the lever to lock the
seatback in place.
WA R N I N G
Never attempt to adjust the driver’s
seat or seatback while driving. The
seat or seatback could move unex-
pectedly, causing loss of control.
Make sure that the driver’s seat and
seatback are properly adjusted
before you start driving.
WA R N I N G
To avoid excessive seat belt slack,
which reduces the effectiveness of
the seat belts as a safety device,
make sure that the seats are adjusted
before the seat belts are fastened.
NOTICE
Do not rest your feet on the seat
adjustment lever or push it down.
This may affect the performance of
the seat adjusters.
EXAMPLE
EXAMPLE
WA R N I N G
All seatbacks should always be in an
upright position when driving, or seat
belt effectiveness may be reduced.
Seat belts are designed to offer maxi-
mum protection when seatbacks are
in the upright position.
EXAMPLE
Seat Belts and Child Restraint Systems: 3
Page 51 of 336
2-32
BEFORE DRIVING
74LH0-74E
NOTE:
The word “CENTER” is molded on the
buckle and latch plate of the center lap
belt. The buckles are designed so a latch
plate can not be inserted into the wrong
buckle.
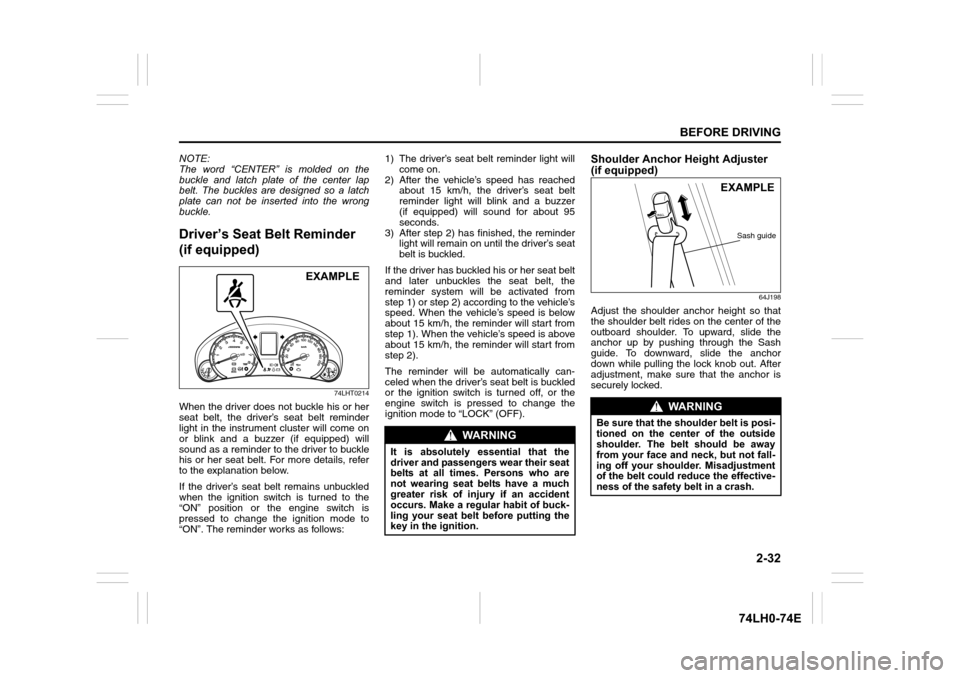
Driver’s Seat Belt Reminder
(if equipped)
74LHT0214
When the driver does not buckle his or her
seat belt, the driver’s seat belt reminder
light in the instrument cluster will come on
or blink and a buzzer (if equipped) will
sound as a reminder to the driver to buckle
his or her seat belt. For more details, refer
to the explanation below.
If the driver’s seat belt remains unbuckled
when the ignition switch is turned to the
“ON” position or the engine switch is
pressed to change the ignition mode to
“ON”. The reminder works as follows:1) The driver’s seat belt reminder light will
come on.
2) After the vehicle’s speed has reached
about 15 km/h, the driver’s seat belt
reminder light will blink and a buzzer
(if equipped) will sound for about 95
seconds.
3) After step 2) has finished, the reminder
light will remain on until the driver’s seat
belt is buckled.
If the driver has buckled his or her seat belt
and later unbuckles the seat belt, the
reminder system will be activated from
step 1) or step 2) according to the vehicle’s
speed. When the vehicle’s speed is below
about 15 km/h, the reminder will start from
step 1). When the vehicle’s speed is above
about 15 km/h, the reminder will start from
step 2).
The reminder will be automatically can-
celed when the driver’s seat belt is buckled
or the ignition switch is turned off, or the
engine switch is pressed to change the
ignition mode to “LOCK” (OFF).
Shoulder Anchor Height Adjuster
(if equipped)
64J198
Adjust the shoulder anchor height so that
the shoulder belt rides on the center of the
outboard shoulder. To upward, slide the
anchor up by pushing through the Sash
guide. To downward, slide the anchor
down while pulling the lock knob out. After
adjustment, make sure that the anchor is
securely locked.
EXAMPLE
WA R N I N G
It is absolutely essential that the
driver and passengers wear their seat
belts at all times. Persons who are
not wearing seat belts have a much
greater risk of injury if an accident
occurs. Make a regular habit of buck-
ling your seat belt before putting the
key in the ignition.
WA R N I N G
Be sure that the shoulder belt is posi-
tioned on the center of the outside
shoulder. The belt should be away
from your face and neck, but not fall-
ing off your shoulder. Misadjustment
of the belt could reduce the effective-
ness of the safety belt in a crash.
EXAMPLE
Sash guide
Page 65 of 336
2-46
BEFORE DRIVING
74LH0-74E
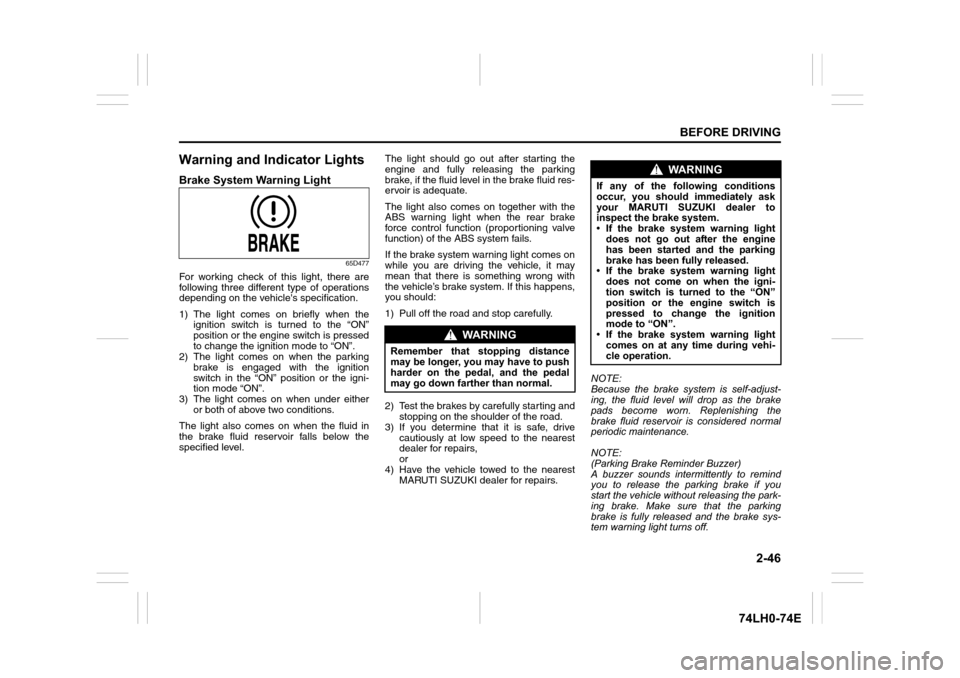
Warning and Indicator Lights
Brake System Warning Light
65D477
For working check of this light, there are
following three different type of operations
depending on the vehicle's specification.
1) The light comes on briefly when the
ignition switch is turned to the “ON”
position or the engine switch is pressed
to change the ignition mode to “ON”.
2) The light comes on when the parking
brake is engaged with the ignition
switch in the “ON” position or the igni-
tion mode “ON”.
3) The light comes on when under either
or both of above two conditions.
The light also comes on when the fluid in
the brake fluid reservoir falls below the
specified level.The light should go out after starting the
engine and fully releasing the parking
brake, if the fluid level in the brake fluid res-
ervoir is adequate.
The light also comes on together with the
ABS warning light when the rear brake
force control function (proportioning valve
function) of the ABS system fails.
If the brake system warning light comes on
while you are driving the vehicle, it may
mean that there is something wrong with
the vehicle’s brake system. If this happens,
you should:
1) Pull off the road and stop carefully.
2) Test the brakes by carefully starting and
stopping on the shoulder of the road.
3) If you determine that it is safe, drive
cautiously at low speed to the nearest
dealer for repairs,
or
4) Have the vehicle towed to the nearest
MARUTI SUZUKI dealer for repairs.NOTE:
Because the brake system is self-adjust-
ing, the fluid level will drop as the brake
pads become worn. Replenishing the
brake fluid reservoir is considered normal
periodic maintenance.
NOTE:
(Parking Brake Reminder Buzzer)
A buzzer sounds intermittently to remind
you to release the parking brake if you
start the vehicle without releasing the park-
ing brake. Make sure that the parking
brake is fully released and the brake sys-
tem warning light turns off.
WA R N I N G
Remember that stopping distance
may be longer, you may have to push
harder on the pedal, and the pedal
may go down farther than normal.
WA R N I N G
If any of the following conditions
occur, you should immediately ask
your MARUTI SUZUKI dealer to
inspect the brake system.
• If the brake system warning light
does not go out after the engine
has been started and the parking
brake has been fully released.
• If the brake system warning light
does not come on when the igni-
tion switch is turned to the “ON”
position or the engine switch is
pressed to change the ignition
mode to “ON”.
• If the brake system warning light
comes on at any time during vehi-
cle operation.
Page 66 of 336
2-47
BEFORE DRIVING
74LH0-74E
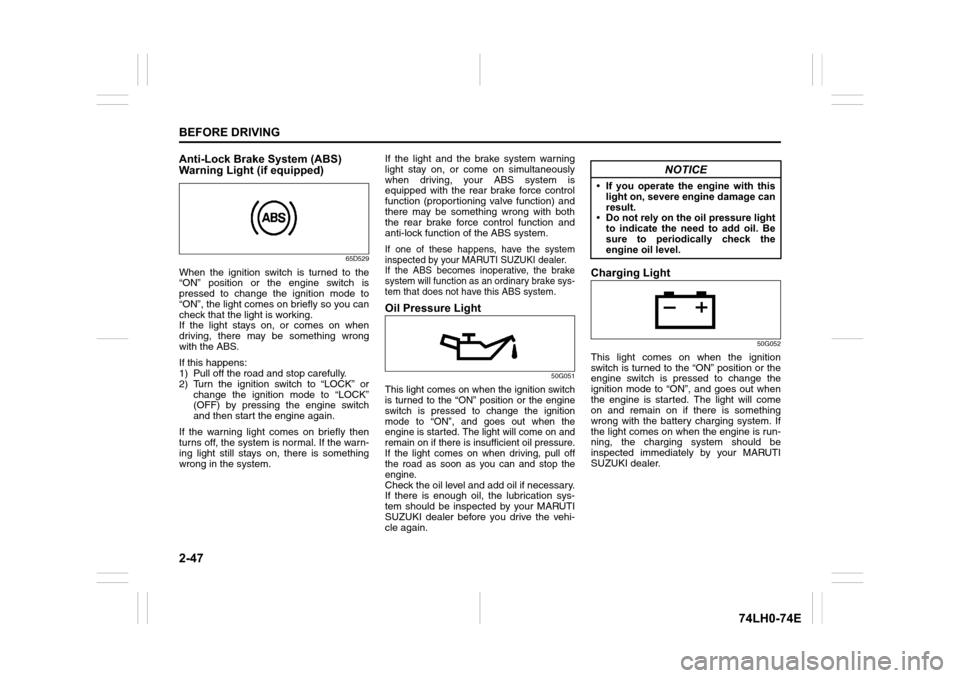
Anti-Lock Brake System (ABS)
Warning Light (if equipped)
65D529
When the ignition switch is turned to the
“ON” position or the engine switch is
pressed to change the ignition mode to
“ON”, the light comes on briefly so you can
check that the light is working.
If the light stays on, or comes on when
driving, there may be something wrong
with the ABS.
If this happens:
1) Pull off the road and stop carefully.
2) Turn the ignition switch to “LOCK” or
change the ignition mode to “LOCK”
(OFF) by pressing the engine switch
and then start the engine again.
If the warning light comes on briefly then
turns off, the system is normal. If the warn-
ing light still stays on, there is something
wrong in the system.If the light and the brake system warning
light stay on, or come on simultaneously
when driving, your ABS system is
equipped with the rear brake force control
function (proportioning valve function) and
there may be something wrong with both
the rear brake force control function and
anti-lock function of the ABS system.
If one of these happens, have the system
inspected by your MARUTI SUZUKI dealer.
If the ABS becomes inoperative, the brake
system will function as an ordinary brake sys-
tem that does not have this ABS system.
Oil Pressure Light
50G051
This light comes on when the ignition switch
is turned to the “ON” position or the engine
switch is pressed to change the ignition
mode to “ON”, and goes out when the
engine is started. The light will come on and
remain on if there is insufficient oil pressure.
If the light comes on when driving, pull off
the road as soon as you can and stop the
engine.
Check the oil level and add oil if necessary.
If there is enough oil, the lubrication sys-
tem should be inspected by your MARUTI
SUZUKI dealer before you drive the vehi-
cle again.
Charging Light
50G052
This light comes on when the ignition
switch is turned to the “ON” position or the
engine switch is pressed to change the
ignition mode to “ON”, and goes out when
the engine is started. The light will come
on and remain on if there is something
wrong with the battery charging system. If
the light comes on when the engine is run-
ning, the charging system should be
inspected immediately by your MARUTI
SUZUKI dealer.
NOTICE
• If you operate the engine with this
light on, severe engine damage can
result.
• Do not rely on the oil pressure light
to indicate the need to add oil. Be
sure to periodically check the
engine oil level.
Page 67 of 336
2-48
BEFORE DRIVING
74LH0-74E
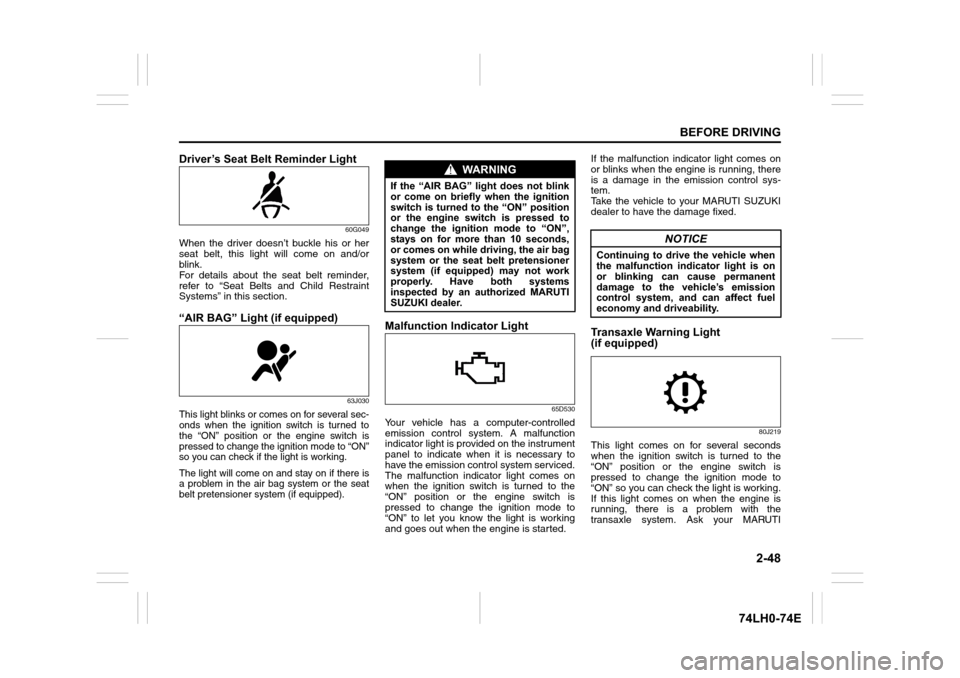
Driver’s Seat Belt Reminder Light
60G049
When the driver doesn’t buckle his or her
seat belt, this light will come on and/or
blink.
For details about the seat belt reminder,
refer to “Seat Belts and Child Restraint
Systems” in this section.
“AIR BAG” Light (if equipped)
63J030
This light blinks or comes on for several sec-
onds when the ignition switch is turned to
the “ON” position or the engine switch is
pressed to change the ignition mode to “ON”
so you can check if the light is working.
The light will come on and stay on if there is
a problem in the air bag system or the seat
belt pretensioner system (if equipped).
Malfunction Indicator Light
65D530
Your vehicle has a computer-controlled
emission control system. A malfunction
indicator light is provided on the instrument
panel to indicate when it is necessary to
have the emission control system serviced.
The malfunction indicator light comes on
when the ignition switch is turned to the
“ON” position or the engine switch is
pressed to change the ignition mode to
“ON” to let you know the light is working
and goes out when the engine is started. If the malfunction indicator light comes on
or blinks when the engine is running, there
is a damage in the emission control sys-
tem.
Take the vehicle to your MARUTI SUZUKI
dealer to have the damage fixed.
Transaxle Warning Light
(if equipped)
80J219
This light comes on for several seconds
when the ignition switch is turned to the
“ON” position or the engine switch is
pressed to change the ignition mode to
“ON” so you can check the light is working.
If this light comes on when the engine is
running, there is a problem with the
transaxle system. Ask your MARUTI
WA R N I N G
If the “AIR BAG” light does not blink
or come on briefly when the ignition
switch is turned to the “ON” position
or the engine switch is pressed to
change the ignition mode to “ON”,
stays on for more than 10 seconds,
or comes on while driving, the air bag
system or the seat belt pretensioner
system (if equipped) may not work
properly. Have both systems
inspected by an authorized MARUTI
SUZUKI dealer.
NOTICE
Continuing to drive the vehicle when
the malfunction indicator light is on
or blinking can cause permanent
damage to the vehicle’s emission
control system, and can affect fuel
economy and driveability.
Page 68 of 336
2-49
BEFORE DRIVING
74LH0-74E
SUZUKI dealer to have the system
inspected.
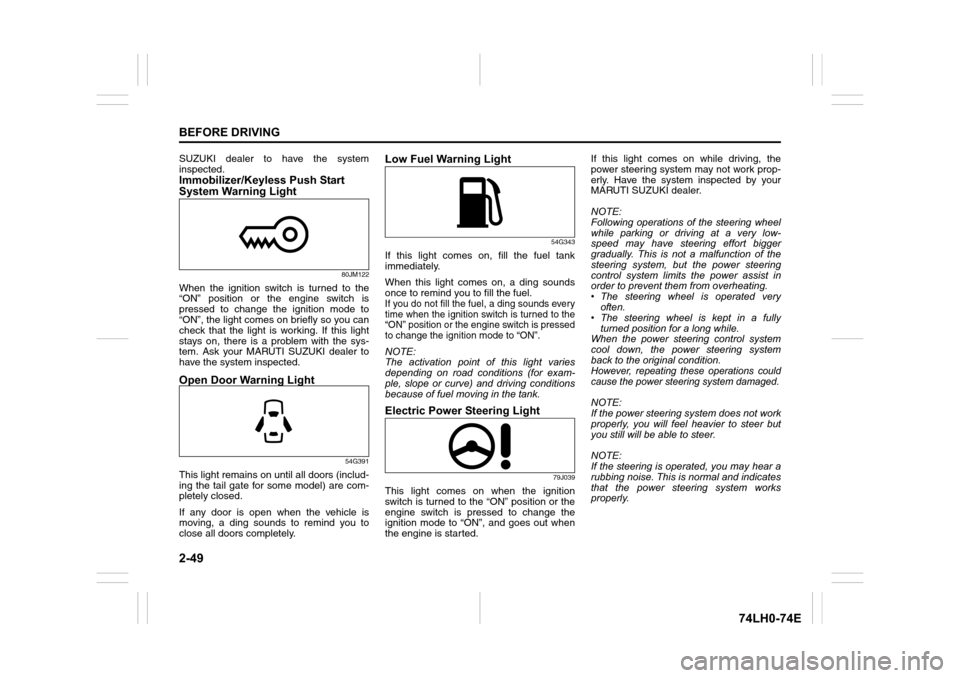
Immobilizer/Keyless Push Start
System Warning Light
80JM122
When the ignition switch is turned to the
“ON” position or the engine switch is
pressed to change the ignition mode to
“ON”, the light comes on briefly so you can
check that the light is working. If this light
stays on, there is a problem with the sys-
tem. Ask your MARUTI SUZUKI dealer to
have the system inspected.
Open Door Warning Light
54G391
This light remains on until all doors (includ-
ing the tail gate for some model) are com-
pletely closed.
If any door is open when the vehicle is
moving, a ding sounds to remind you to
close all doors completely.
Low Fuel Warning Light
54G343
If this light comes on, fill the fuel tank
immediately.
When this light comes on, a ding sounds
once to remind you to fill the fuel.
If you do not fill the fuel, a ding sounds every
time when the ignition switch is turned to the
“ON” position or the engine switch is pressed
to change the ignition mode to “ON”.
NOTE:
The activation point of this light varies
depending on road conditions (for exam-
ple, slope or curve) and driving conditions
because of fuel moving in the tank.
Electric Power Steering Light
79J039
This light comes on when the ignition
switch is turned to the “ON” position or the
engine switch is pressed to change the
ignition mode to “ON”, and goes out when
the engine is started.If this light comes on while driving, the
power steering system may not work prop-
erly. Have the system inspected by your
MARUTI SUZUKI dealer.
NOTE:
Following operations of the steering wheel
while parking or driving at a very low-
speed may have steering effort bigger
gradually. This is not a malfunction of the
steering system, but the power steering
control system limits the power assist in
order to prevent them from overheating.
• The steering wheel is operated very
often.
• The steering wheel is kept in a fully
turned position for a long while.
When the power steering control system
cool down, the power steering system
back to the original condition.
However, repeating these operations could
cause the power steering system damaged.
NOTE:
If the power steering system does not work
properly, you will feel heavier to steer but
you still will be able to steer.
NOTE:
If the steering is operated, you may hear a
rubbing noise. This is normal and indicates
that the power steering system works
properly.