Section 7 SUZUKI SWIFT 2017 5.G Owners Manual
[x] Cancel search | Manufacturer: SUZUKI, Model Year: 2017, Model line: SWIFT, Model: SUZUKI SWIFT 2017 5.GPages: 336, PDF Size: 6.24 MB
Page 9 of 336
0-1
FOREWORDThis manual is an essential part of your
vehicle and should remain with the vehicle
when resold or otherwise transferred to a
new owner or operator. Please read this
manual carefully before operating your
new MARUTI SUZUKI and review the
manual from time to time. It contains
important information on safety, operation
and maintenance. You are invited to avail
the three Free Inspection Services as
described in the manual. Three free
inspection coupons are attached to this
manual. Please show this manual to your
dealer while you take your MARUTI
SUZUKI for any Service.
To prolong the life of your vehicle and
reduce maintenance cost, the periodic
maintenance must be carried out accord-
ing to “PERIODIC MAINTENANCE
SCHEDULE” described in “INSPECTION
AND MAINTENANCE” section of this man-
ual. It is essential for preventing trouble
and accidents to ensure your satisfaction
and safety.
Daily inspection and care as per “DAILY
INSPECTION CHECKLIST” described in
the “INSPECTION AND MAINTENANCE”
section of this manual is essential for pro-
longing the life of the vehicle and for safe
driving. MARUTI SUZUKI INDIA LIMITED believes
in conservation and protection of Earth’s
natural resources.
To that end, we encourage every vehicle
owner to recycle, trade-in or properly dis-
pose of, as appropriate, used Engine Oil,
coolant and other fluids, batteries and
tyres etc.
MARUTI SUZUKI INDIA LIMITED
All information in
this manual is based
on the latest product information avail-
able at the time of publication. Due to
improvements or other changes, there
may be discrepancies between informa-
tion in this manual and your vehicle.
MARUTI SUZUKI INDIA LIMITED
reserves the right to make production
changes at any time, without notice and
without incurring any obligation to
make the same or similar changes to
vehicles previously built or sold.
This vehicle may not co mply with stan-
dards or regulations of other countries.
Before attempting to register this vehi-
cle in any other country, check all appli-
cable regulations and make any neces-
sary modifications.
Page 20 of 336
2-1
BEFORE DRIVING
74LH0-74E
Keys
54G489
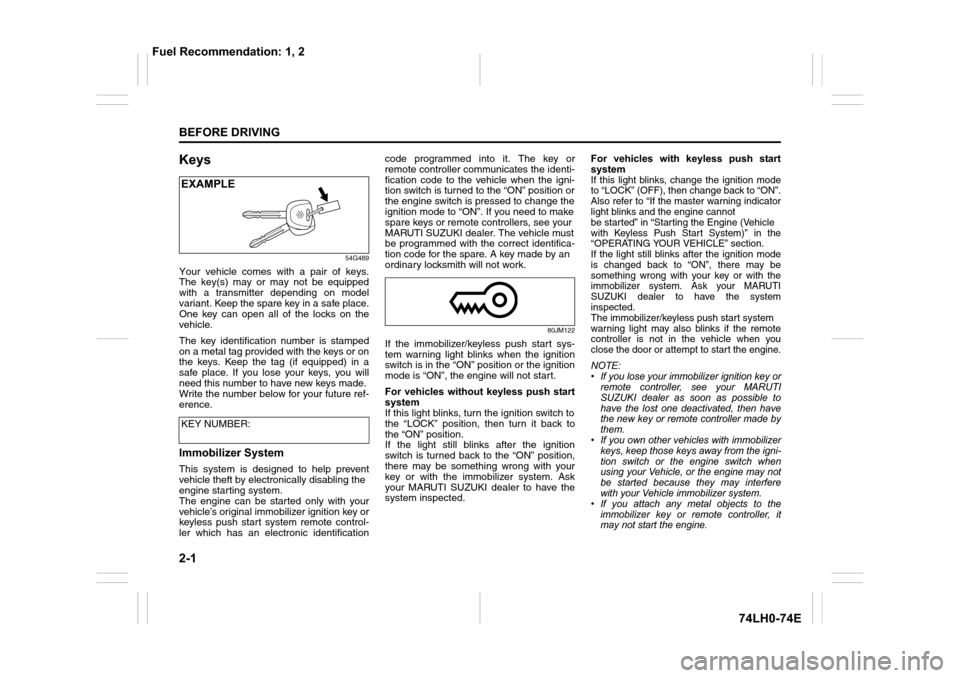
Your vehicle comes with a pair of keys.
The key(s) may or may not be equipped
with a transmitter depending on model
variant. Keep the spare key in a safe place.
One key can open all of the locks on the
vehicle.
The key identification number is stamped
on a metal tag provided with the keys or on
the keys. Keep the tag (if equipped) in a
safe place. If you lose your keys, you will
need this number to have new keys made.
Write the number below for your future ref-
erence.
Immobilizer System
This system is designed to help prevent
vehicle theft by electronically disabling the
engine starting system.
The engine can be started only with your
vehicle’s original immobilizer ignition key or
keyless push start system remote control-
ler which has an electronic identificationcode programmed into it. The key or
remote controller communicates the identi-
fication code to the vehicle when the igni-
tion switch is turned to the “ON” position or
the engine switch is pressed to change the
ignition mode to “ON”. If you need to make
spare keys or remote controllers, see your
MARUTI SUZUKI dealer. The vehicle must
be programmed with the correct identifica-
tion code for the spare. A key made by an
ordinary locksmith will not work.
80JM122
If the immobilizer/keyless push start sys-
tem warning light blinks when the ignition
switch is in the “ON” position or the ignition
mode is “ON”, the engine will not start.
For vehicles without keyless push start
system
If this light blinks, turn the ignition switch to
the “LOCK” position, then turn it back to
the “ON” position.
If the light still blinks after the ignition
switch is turned back to the “ON” position,
there may be something wrong with your
key or with the immobilizer system. Ask
your MARUTI SUZUKI dealer to have the
system inspected.For vehicles with keyless push start
system
If this light blinks, change the ignition mode
to “LOCK” (OFF), then change back to “ON”.
Also refer to “If the master warning indicator
light blinks and the engine cannot
be started” in “Starting the Engine (Vehicle
with Keyless Push Start System)” in the
“OPERATING YOUR VEHICLE” section.
If the light still blinks after the ignition mode
is changed back to “ON”, there may be
something wrong with your key or with the
immobilizer system. Ask your MARUTI
SUZUKI dealer to have the system
inspected.
The immobilizer/keyless push start system
warning light may also blinks if the remote
controller is not in the vehicle when you
close the door or attempt to start the engine.
NOTE:
• If you lose your immobilizer ignition key or
remote controller, see your MARUTI
SUZUKI dealer as soon as possible to
have the lost one deactivated, then have
the new key or remote controller made by
them.
• If you own other vehicles with immobilizer
keys, keep those keys away from the igni-
tion switch or the engine switch when
using your Vehicle, or the engine may not
be started because they may interfere
with your Vehicle immobilizer system.
• If you attach any metal objects to the
immobilizer key or remote controller, it
may not start the engine.
KEY NUMBER:
EXAMPLE
Fuel Recommendation: 1, 2
Page 22 of 336
2-3
BEFORE DRIVING
74LH0-74E
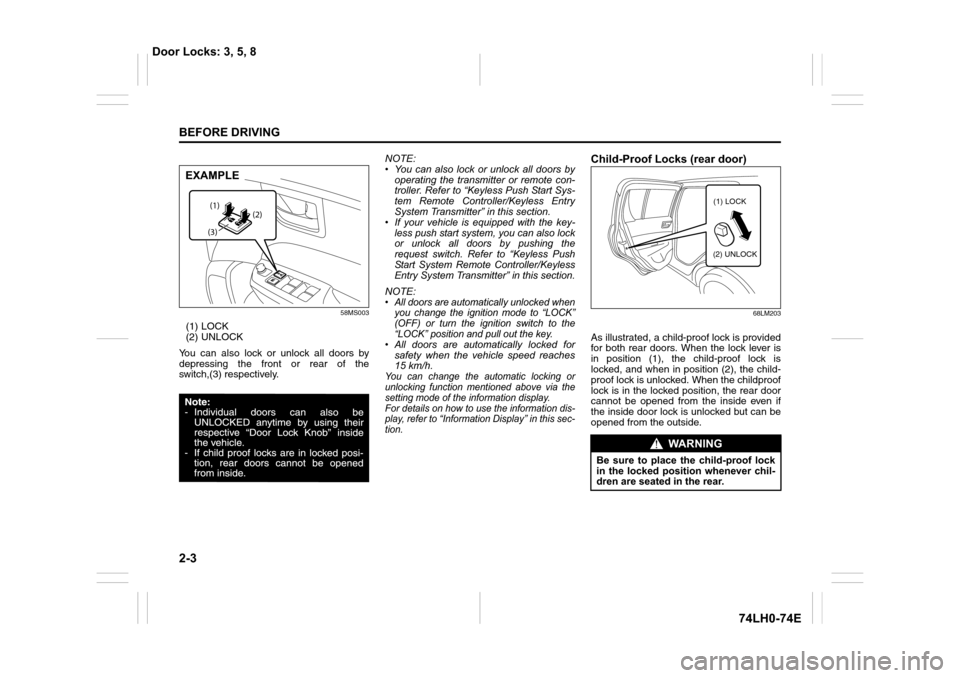
58MS003
(1) LOCK
(2) UNLOCK
You can also lock or unlock all doors by
depressing the front or rear of the
switch,(3) respectively.NOTE:
• You can also lock or unlock all doors by
operating the transmitter or remote con-
troller. Refer to “Keyless Push Start Sys-
tem Remote Controller/Keyless Entry
System Transmitter” in this section.
• If your vehicle is equipped with the key-
less push start system, you can also lock
or unlock all doors by pushing the
request switch. Refer to “Keyless Push
Start System Remote Controller/Keyless
Entry System Transmitter” in this section.
NOTE:• All doors are automatically unlocked when
you change the ignition mode to “LOCK”
(OFF) or turn the ignition switch to the
“LOCK” position and pull out the key.
• All doors are automatically locked for
safety when the vehicle speed reaches
15 km/h.
You can change the automatic locking or
unlocking function mentioned above via the
setting mode of the information display.
For details on how to use the information dis-
play, refer to “Information Display” in this sec-
tion.
Child-Proof Locks (rear door)
68LM203
As illustrated, a child-proof lock is provided
for both rear doors. When the lock lever is
in position (1), the child-proof lock is
locked, and when in position (2), the child-
proof lock is unlocked. When the childproof
lock is in the locked position, the rear door
cannot be opened from the inside even if
the inside door lock is unlocked but can be
opened from the outside.
(2) (1)
(3)
EXAMPLE
WA R N I N G
Be sure to place the child-proof lock
in the locked position whenever chil-
dren are seated in the rear.
(1) LOCK
(2) UNLOCK
Door Locks: 3, 5, 8
Page 23 of 336
2-4
BEFORE DRIVING
74LH0-74E
Ta i l g a t e
Ty p e 1
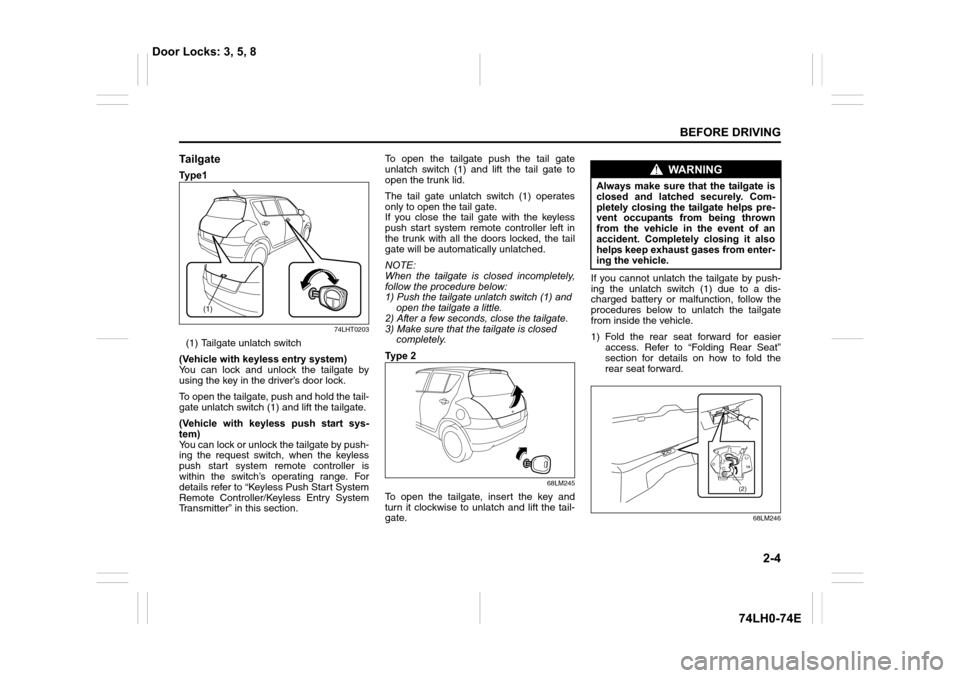
74LHT0203
(1) Tailgate unlatch switch
(Vehicle with keyless entry system)
You can lock and unlock the tailgate by
using the key in the driver’s door lock.
To open the tailgate, push and hold the tail-
gate unlatch switch (1) and lift the tailgate.
(Vehicle with keyless push start sys-
tem)
You can lock or unlock the tailgate by push-
ing the request switch, when the keyless
push start system remote controller is
within the switch’s operating range. For
details refer to “Keyless Push Start System
Remote Controller/Keyless Entry System
Transmitter” in this section.To open the tailgate push the tail gate
unlatch switch (1) and lift the tail gate to
open the trunk lid.
The tail gate unlatch switch (1) operates
only to open the tail gate.
If you close the tail gate with the keyless
push start system remote controller left in
the trunk with all the doors locked, the tail
gate will be automatically unlatched.
NOTE:
When the tailgate is closed incompletely,
follow the procedure below:
1) Push the tailgate unlatch switch (1) and
open the tailgate a little.
2) After a few seconds, close the tailgate.
3) Make sure that the tailgate is closed
completely.
Ty p e 2
68LM245
To open the tailgate, insert the key and
turn it clockwise to unlatch and lift the tail-
gate.If you cannot unlatch the tailgate by push-
ing the unlatch switch (1) due to a dis-
charged battery or malfunction, follow the
procedures below to unlatch the tailgate
from inside the vehicle.
1) Fold the rear seat forward for easier
access. Refer to “Folding Rear Seat”
section for details on how to fold the
rear seat forward.
68LM246
(1)
WA R N I N G
Always make sure that the tailgate is
closed and latched securely. Com-
pletely closing the tailgate helps pre-
vent occupants from being thrown
from the vehicle in the event of an
accident. Completely closing it also
helps keep exhaust gases from enter-
ing the vehicle.
(2)
Door Locks: 3, 5, 8
Page 25 of 336
2-6
BEFORE DRIVING
74LH0-74E
Keyless Push Start System
Remote Controller/Keyless
Entry System Transmitter
79MH0205
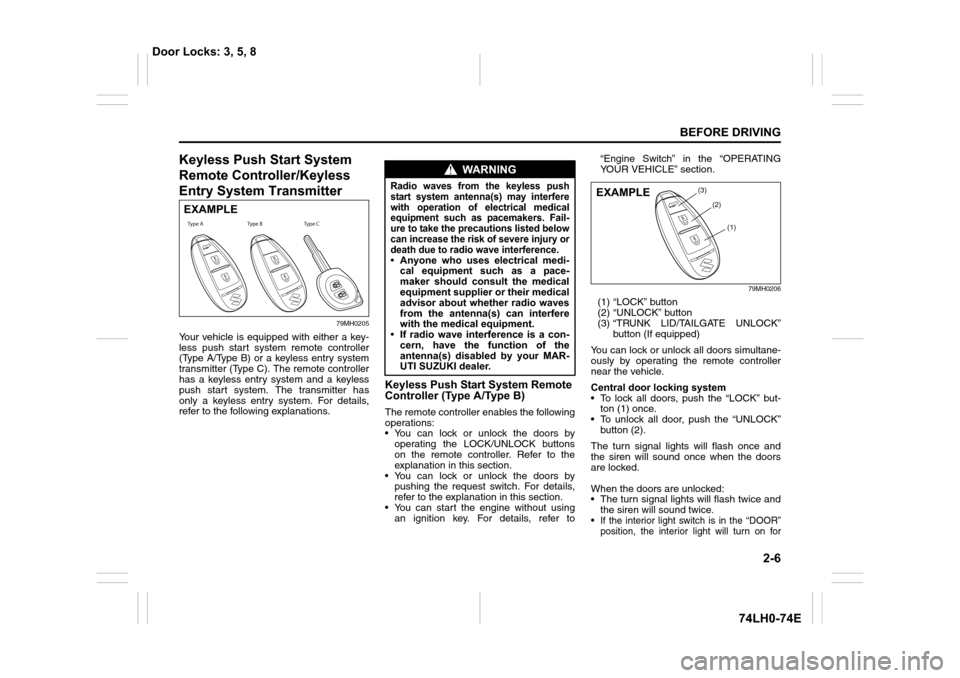
Your vehicle is equipped with either a key-
less push start system remote controller
(Type A/Type B) or a keyless entry system
transmitter (Type C). The remote controller
has a keyless entry system and a keyless
push start system. The transmitter has
only a keyless entry system. For details,
refer to the following explanations.
Keyless Push Start System Remote
Controller (Type A/Type B)
The remote controller enables the following
operations:
• You can lock or unlock the doors by
operating the LOCK/UNLOCK buttons
on the remote controller. Refer to the
explanation in this section.
• You can lock or unlock the doors by
pushing the request switch. For details,
refer to the explanation in this section.
• You can start the engine without using
an ignition key. For details, refer to“Engine Switch” in the “OPERATING
YOUR VEHICLE” section.
79MH0206
(1) “LOCK” button
(2) “UNLOCK” button
(3) “TRUNK LID/TAILGATE UNLOCK”
button (If equipped)
You can lock or unlock all doors simultane-
ously by operating the remote controller
near the vehicle.
Central door locking system
• To lock all doors, push the “LOCK” but-
ton (1) once.
• To unlock all door, push the “UNLOCK”
button (2).
The turn signal lights will flash once and
the siren will sound once when the doors
are locked.
When the doors are unlocked:
• The turn signal lights will flash twice and
the siren will sound twice.
• If the interior light switch is in the “DOOR”
position, the interior light will turn on for
EXAMPLE
Type B Type CType A
WA R N I N G
Radio waves from the keyless push
start system antenna(s) may interfere
with operation of electrical medical
equipment such as pacemakers. Fail-
ure to take the precautions listed below
can increase the risk of severe injury or
death due to radio wave interference.
• Anyone who uses electrical medi-
cal equipment such as a pace-
maker should consult the medical
equipment supplier or their medical
advisor about whether radio waves
from the antenna(s) can interfere
with the medical equipment.
• If radio wave interference is a con-
cern, have the function of the
antenna(s) disabled by your MAR-
UTI SUZUKI dealer.
EXAMPLE
(1)
(2)
(3)
Door Locks: 3, 5, 8
Page 26 of 336
2-7
BEFORE DRIVING
74LH0-74E
about 15 seconds and then fade out. If you
press the engine switch during this time,
the light will start to fade out immediately.
Be sure the doors are locked after you oper-
ate the “LOCK” button (1).
If no door is opened within about 30 seconds
after the “UNLOCK” button (2) is operated,
the doors will automatically lock again.
Car locator functionCar locator function helps in locating the
vehicle.
Push both of the “LOCK” button (1) and
“UNLOCK” button (2) for more than 3 sec-
onds.
The turn signal lights will blink for about
27.5 seconds. Also, the siren will sound for
about 27.5 seconds at the same time.
To cancel the car locator funciton, press any
button (LOCK or UNLOCK). You can also
press the engine switch to change the igni-
tion mode to “ON” to cancel the car locator
function.
NOTE:
The car locator function will not activate
when the ignition mode is “ACC” or “ON” or
pre warning / full blast warning by shock
sensor or alarm is in activated condition.
• If you lock the doors using the remote con-
troller when the tail gate or engine hood
are open, the siren will sound 3 times to
remind you.
• If the security system was triggered due
to an unauthorized entry into the vehicle
and then you unlock the doors using theremote controller, the siren will sound 4
times to remind you. If this happens,
check whether your vehicle has been
broken into while you were away from it.
• Once you push both of the “LOCK” button
(1) and “UNLOCK” button (2), then you
push one of the buttons within 5 seconds,
the siren will not sound. However, If you
push one of the buttons twice within 5 sec-
onds, or push one of the buttons 5 sec-
onds later, the siren will sound.
• You can set whether the siren sounds
when locking or unlocking the door(s) via
the setting mode of the information display.
For details on how to use the information
display, refer to “Information Display” in
this section.
NOTE:
• The maximum operating distance of the
remote controller is about 5 m (16 ft.),
but this can vary depending on the sur-
roundings, especially near other trans-
mitting devices such as radio towers or
CB (Citizen’s Band) radios.
• The door locks cannot be operated with
the remote controller if the ignition mode
is other than the “LOCK” (OFF).
• If any door is open, you cannot lock the
door by operating the remote controller,
however unlock the door.
• If you lose one of the remote controllers,
ask your MARUTI SUZUKI dealer as soon
as possible for a replacement. Be sure to
have your dealer program the new remotecontroller code in your vehicle’s memory
so that the old code is erased.
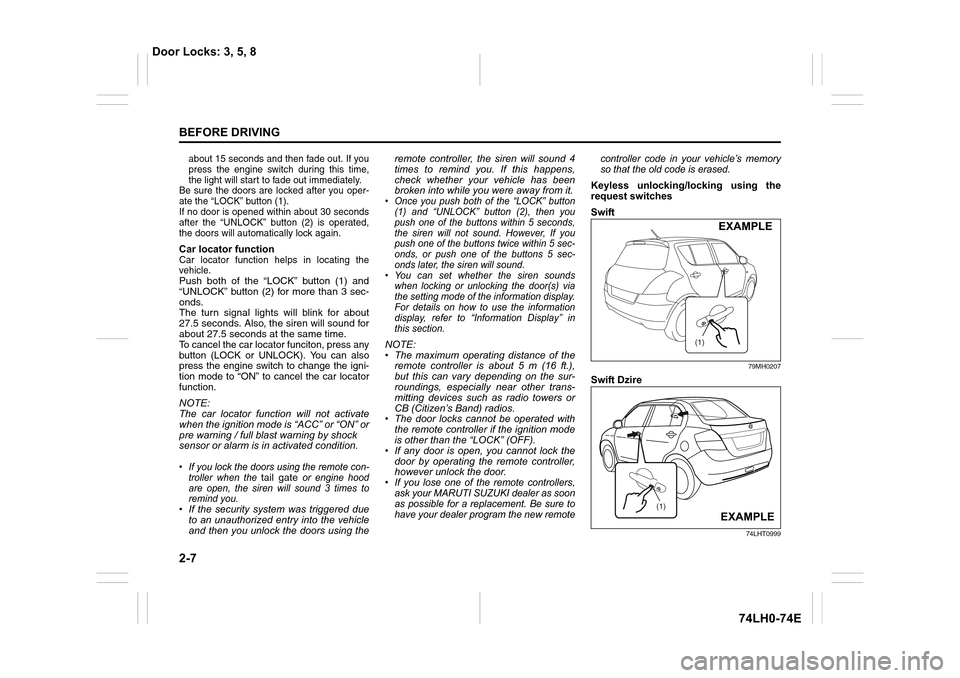
Keyless unlocking/locking using the
request switches
Swift
79MH0207
Swift Dzire
74LHT0999
(1)
EXAMPLE
(1)
EXAMPLE
Door Locks: 3, 5, 8
Page 27 of 336
2-8
BEFORE DRIVING
74LH0-74E
When the remote controller is within the
operating range described in this section,
you can lock or unlock the doors by pushing
the request switch (1) on the driver’s door
handle, front passenger’s door handle or
tailgate.
To lock all doors when all doors are
unlocked:
• push one of the request switches once.
The turn signal lights will flash once and
the exterior siren will sound once when the
doors are locked.
To unlock doors:
• Push one of the request switches to
unlock all door.When the doors are unlocked:
• The turn signal lights will flash twice and
the exterior siren will sound twice.
• If the interior light switch is in the
“DOOR” position, the interior light will
turn on for about 15 seconds and then
fade out. If you press the engine switch
during this time, the light will start to fade
out immediately.
Be sure the doors are locked after you
operate the request switch to lock the
doors.
NOTE:
• The door locks cannot be operated by
the request switch under the following
conditions:
– If any door is open or is not completely
closed.
– If the ignition mode is other than
“LOCK” (OFF).
• If no doors are opened within about 30
seconds after unlocking the doors by
pushing the request switch, the doors
will be locked again automatically.Swift
79MH0208
Swift Dzire
74LHT2002
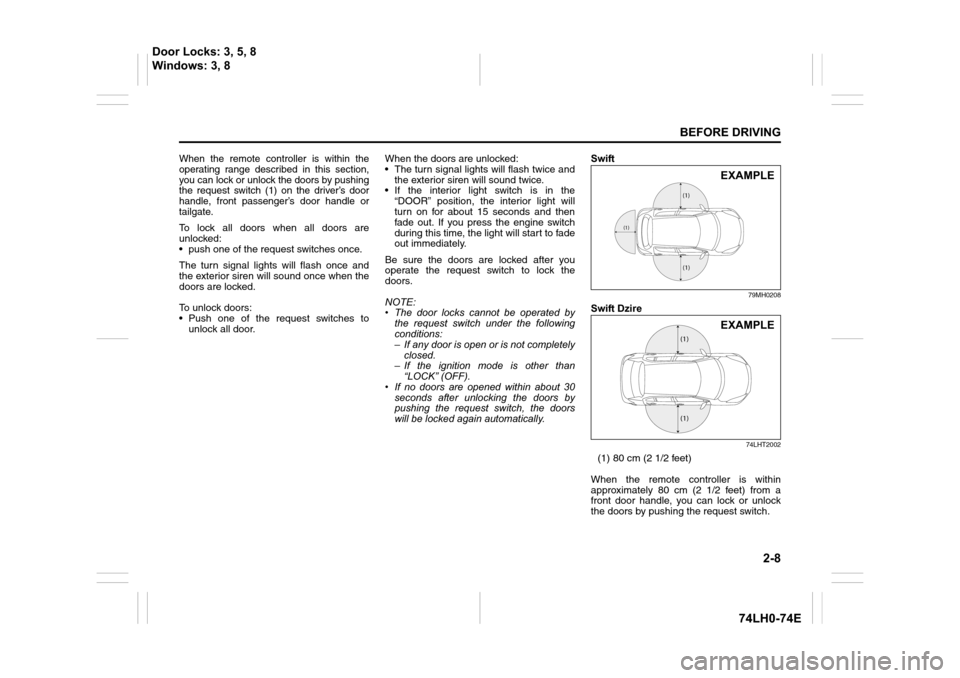
(1) 80 cm (2 1/2 feet)
When the remote controller is within
approximately 80 cm (2 1/2 feet) from a
front door handle, you can lock or unlock
the doors by pushing the request switch.
(1)
(1)
(1)
EXAMPLE
(1)
(1)
EXAMPLE
Door Locks: 3, 5, 8
Windows: 3, 8
Page 32 of 336
2-13
BEFORE DRIVING
74LH0-74E
NOTE:
1) Three siren chirps and one light flash of
all indicator lights will indicate that
engine hood is open. However, locking
of all doors take place but security sys-
tem will not be armed.
68LM2
2) Be sure to close all doors (including the
engine hood and trunk/tailgate) and
windows before locking/arming the
vehicle.
3) System will not Lock/Arm in following
conditions.
a) If any of door is open.
b) If key is in key cylinder.Tri gg er Stag e
In the event of any unauthorized entry
(without unlocking/disarming) into the vehi-
cle, the alarm triggers and all indicator
lights flash. The triggering of the alarm is in
two stages. First acting as a warning to the
intruder and then alarm drawing the sur-
rounding attention. However, alarm will be
activated without any warning if intrusion
happens through engine hood.
68LM2
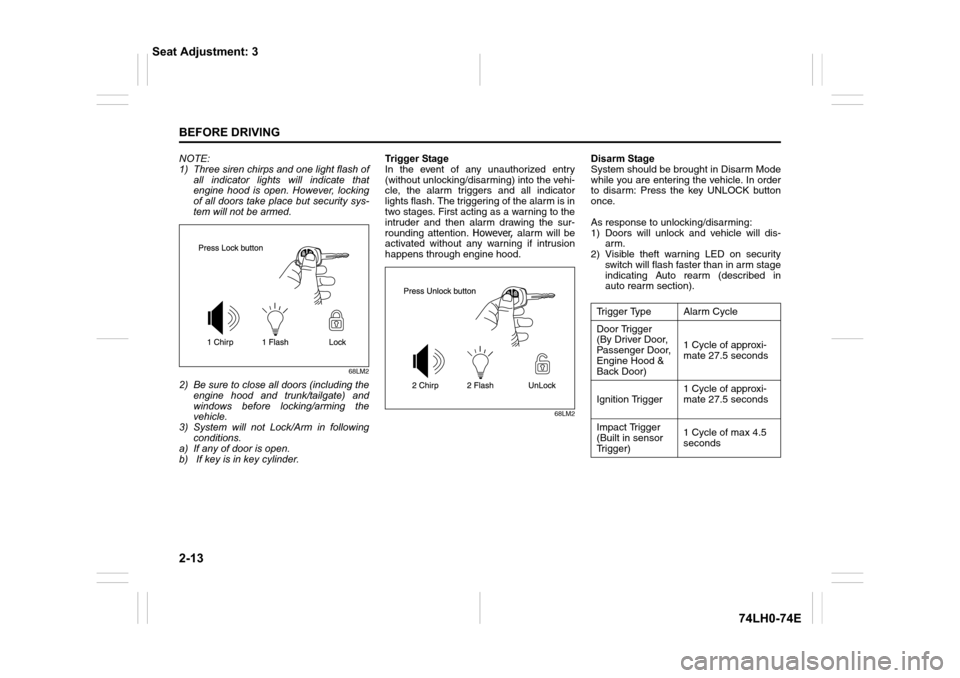
Disarm Stage
System should be brought in Disarm Mode
while you are entering the vehicle. In order
to disarm: Press the key UNLOCK button
once.
As response to unlocking/disarming:
1) Doors will unlock and vehicle will dis-
arm.
2) Visible theft warning LED on security
switch will flash faster than in arm stage
indicating Auto rearm (described in
auto rearm section).
Trigger Type Alarm Cycle
Door Trigger
(By Driver Door,
Passenger Door,
Engine Hood &
Back Door)1 Cycle of approxi-
mate 27.5 seconds
Ignition Trigger 1 Cycle of approxi-
mate 27.5 seconds
Impact Trigger
(Built in sensor
Trigger)1 Cycle of max 4.5
seconds
Seat Adjustment: 3
Page 39 of 336
2-20
BEFORE DRIVING
74LH0-74E
Security System (Vehicle with Key-
less push start system)
The security system is armed after you
lock all doors (including engine hood and
trunk/tailgate) by using the keyless push
start system remote controller or request
switch.
Once the system is armed, any attempt to
open a door by using any other means (*)
than the keyless push start system remote
controller or open the engine hood, will
cause the alarm to be triggered.
* These means include the following:
–The key
– The lock knob on a door
– The central door locking switch
– The tailgate unlatch button (if
equipped)
– The trunk lid unlatch button (if
equipped)
Also, in case that you have set the shock
sensor to enabled state and set sensitivity
of the pre-warning function and full blast
warning function to a level other than 0, the
warning will be triggered in case of any
attempt to tamper with the vehicle. The
shock sensor can be selected enabled or
disabled state, and sensitivity of each
warning can be adjusted as desired. To set
the shock sensor, ask your MARUTI
SUZUKI dealer or use the setting mode of
the information display.NOTE:
• The default setting of the shock sensor
is in the disabled state. Set to the
enabled state and adjust sensitivity of
each warning according to your prefer-
ence. For details on how to use the infor-
mation display, refer to “Information
Display” in this section.
• Your dealer may have already set the
shock sensor of the vehicle to the
enabled state before you purchase it.
Consult your dealer for further informa-
tion.
NOTE:
• The security system generates alarms
when any of the predetermined condi-
tions is met. However, the system does
not have any function of blocking unau-
thorized entry into the vehicle.
• Always use the keyless push start system
remote controller to unlock the doors when
the security system has been armed.
Using a key instead will trigger the alarm.
• If a person who does not know the secu-
rity system is going to drive the vehicle,
we recommend you explain the system
and its operation to the person. Mistak-
enly triggering the alarm may cause a
nuisance to others.
• Even if the security system is armed,
you should still be careful to guard
against theft. Do not leave money or
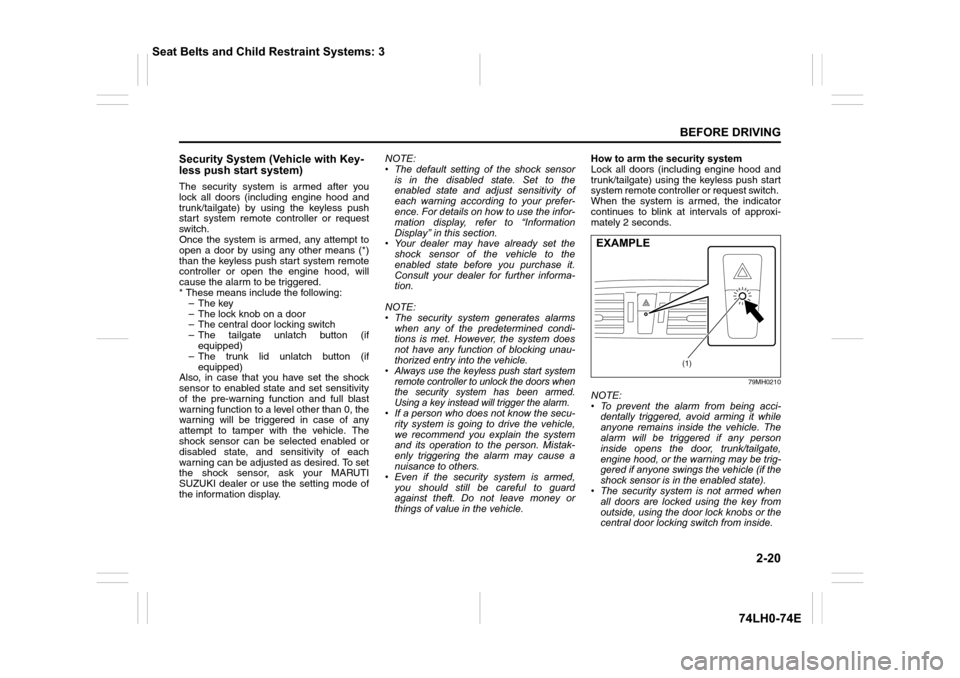
things of value in the vehicle.How to arm the security system
Lock all doors (including engine hood and
trunk/tailgate) using the keyless push start
system remote controller or request switch.
When the system is armed, the indicator
continues to blink at intervals of approxi-
mately 2 seconds.
79MH0210
NOTE:
• To prevent the alarm from being acci-
dentally triggered, avoid arming it while
anyone remains inside the vehicle. The
alarm will be triggered if any person
inside opens the door, trunk/tailgate,
engine hood, or the warning may be trig-
gered if anyone swings the vehicle (if the
shock sensor is in the enabled state).
• The security system is not armed when
all doors are locked using the key from
outside, using the door lock knobs or the
central door locking switch from inside.
(1)
EXAMPLE
Seat Belts and Child Restraint Systems: 3
Page 54 of 336
2-35
BEFORE DRIVING
74LH0-74E
65D609
Installation with Lap-Shoulder Seat
Belts
ELR type belt
65D233
Install your child restraint system accord-
ing to the instructions provided by the child
restraint system manufacturer.
Make sure that the seat belt is securely
latched.
Try to move the child restraint system in all
directions to make sure it is securely
installed.
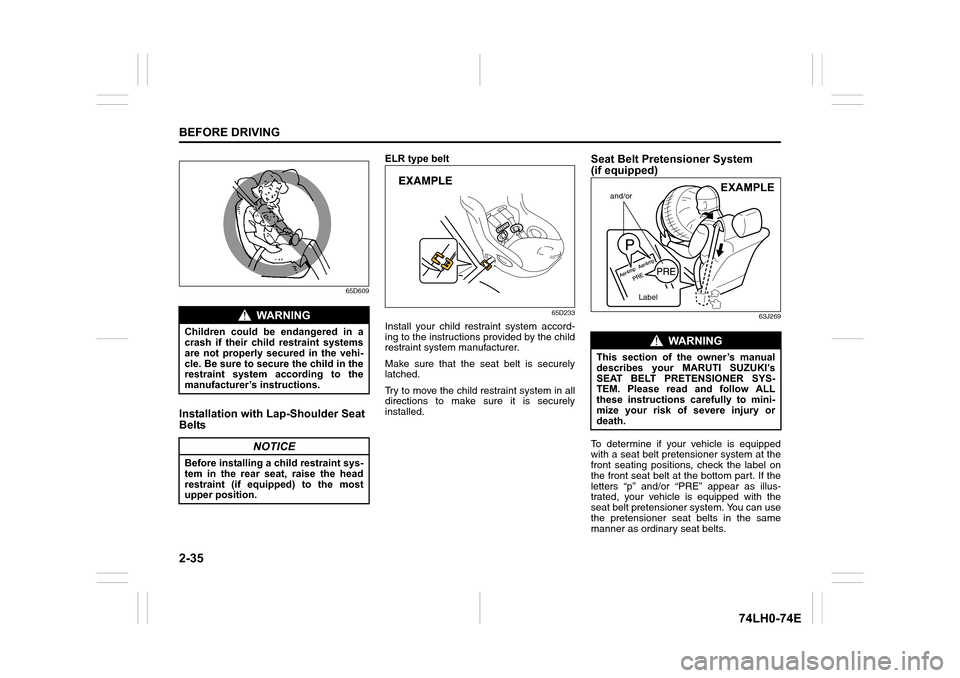
Seat Belt Pretensioner System
(if equipped)
63J269
To determine if your vehicle is equipped
with a seat belt pretensioner system at the
front seating positions, check the label on
the front seat belt at the bottom part. If the
letters “p” and/or “PRE” appear as illus-
trated, your vehicle is equipped with the
seat belt pretensioner system. You can use
the pretensioner seat belts in the same
manner as ordinary seat belts.
WA R N I N G
Children could be endangered in a
crash if their child restraint systems
are not properly secured in the vehi-
cle. Be sure to secure the child in the
restraint system according to the
manufacturer’s instructions.
NOTICE
Before installing a child restraint sys-
tem in the rear seat, raise the head
restraint (if equipped) to the most
upper position.
WA R N I N G
This section of the owner’s manual
describes your MARUTI SUZUKI’s
SEAT BELT PRETENSIONER SYS-
TEM. Please read and follow ALL
these instructions carefully to mini-
mize your risk of severe injury or
death.
and/or
Label
EXAMPLE