dashboard SUZUKI SWIFT 2017 5.G Owners Manual
[x] Cancel search | Manufacturer: SUZUKI, Model Year: 2017, Model line: SWIFT, Model: SUZUKI SWIFT 2017 5.GPages: 336, PDF Size: 6.24 MB
Page 21 of 336
2-2
BEFORE DRIVING
74LH0-74E
Ignition Key Reminder (if equipped)
A buzzer sounds intermittently to remind
you to remove the ignition key if it is in the
ignition switch when the driver’s door is
opened.
Door Locks
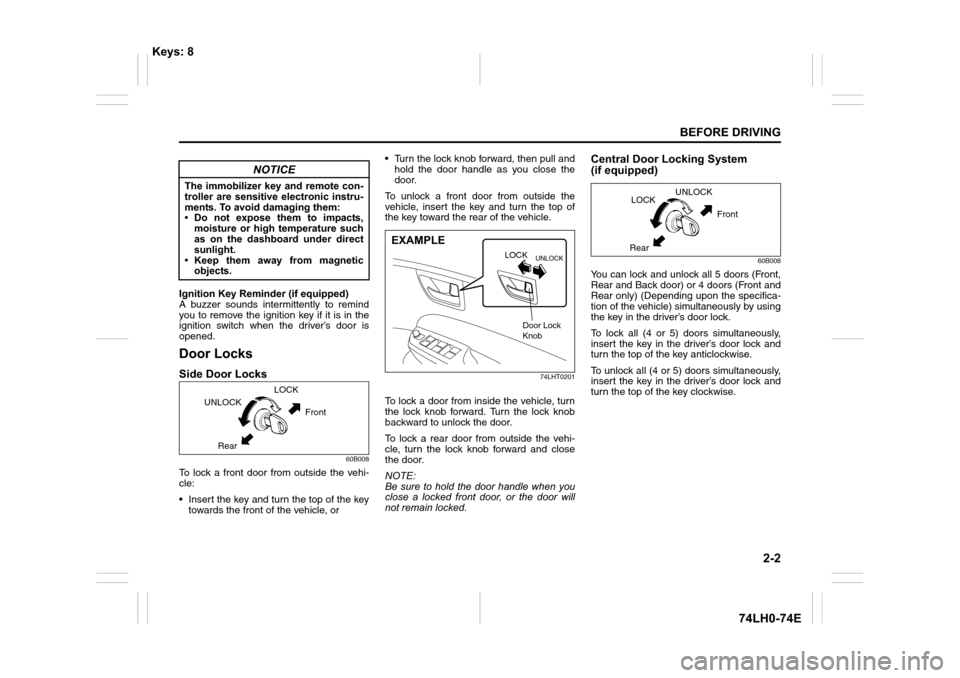
Side Door Locks
60B008
To lock a front door from outside the vehi-
cle:
• Insert the key and turn the top of the key
towards the front of the vehicle, or• Turn the lock knob forward, then pull and
hold the door handle as you close the
door.
To unlock a front door from outside the
vehicle, insert the key and turn the top of
the key toward the rear of the vehicle.
74LHT0201
To lock a door from inside the vehicle, turn
the lock knob forward. Turn the lock knob
backward to unlock the door.
To lock a rear door from outside the vehi-
cle, turn the lock knob forward and close
the door.
NOTE:
Be sure to hold the door handle when you
close a locked front door, or the door will
not remain locked.
Central Door Locking System
(if equipped)
60B008
You can lock and unlock all 5 doors (Front,
Rear and Back door) or 4 doors (Front and
Rear only) (Depending upon the specifica-
tion of the vehicle) simultaneously by using
the key in the driver’s door lock.
To lock all (4 or 5) doors simultaneously,
insert the key in the driver’s door lock and
turn the top of the key anticlockwise.
To unlock all (4 or 5) doors simultaneously,
insert the key in the driver’s door lock and
turn the top of the key clockwise.
NOTICE
The immobilizer key and remote con-
troller are sensitive electronic instru-
ments. To avoid damaging them:
• Do not expose them to impacts,
moisture or high temperature such
as on the dashboard under direct
sunlight.
• Keep them away from magnetic
objects.
UNLOCKLOCK
Front
Rear
UNLOCKLOCK
EXAMPLE
Door Lock
Knob
UNLOCK
LOCK
Front
Rear
Keys: 8
Page 28 of 336
2-9
BEFORE DRIVING
74LH0-74E
NOTE:
• If the remote controller is outside the
request switch operating range
described above, you will not be able to
operate the request switch.
• If the battery of the remote controller
runs down or there are strong radio
waves or noise, the request switch oper-
ating range may be reduced or the
remote controller may be inoperative.
• If the remote controller is too close to the
door glass, the request switches may not
operate.
• If a spare remote controller is in the vehi-
cle, the request switches may not oper-
ate normally.
• The remote controller will only operate a
request switch if it is within the switch’s
operating range. For example, if the
remote controller is within the operating
range of the driver’s door request switch
but not the front passenger’s door
request switch, the driver’s door switch
can be operated but the front passen-
ger’s door switch cannot be operated.
• Avoid operations of switch with sharp
objects or long nails.NOTE:
The keyless push start system may not
function correctly in certain environments
or under certain operating conditions such
as the following:
• When there are strong signals coming
from a television, power station or a cel-
lular phone.
• When the remote controller is in contact
with or covered by a metal object.
• When a radio wave type remote keyless
entry is used nearby.
• When the remote controller is placed
near an electronic device such as per-
sonal computer.
Some additional precautions you should
take and information you should be aware
of are:
• Make sure the key is stowed in the
remote controller. If the remote controller
becomes unreliable, you will not be able
to lock or unlock the doors.• Be sure that the driver always carries the
remote controller.
• If you lose one of the remote controllers,
ask your MARUTI SUZUKI dealer as
soon as possible for a replacement. Be
sure to have your dealer program the
new remote controller code in your vehi-
cle’s memory so that the old code is
erased.
• You can use up to four remote control-
lers and the keys for your vehicle. Ask
your MARUTI SUZUKI dealer for details.
• The battery life of the remote controller
is about two years, but it can vary
depending on usage conditions.
57L21016
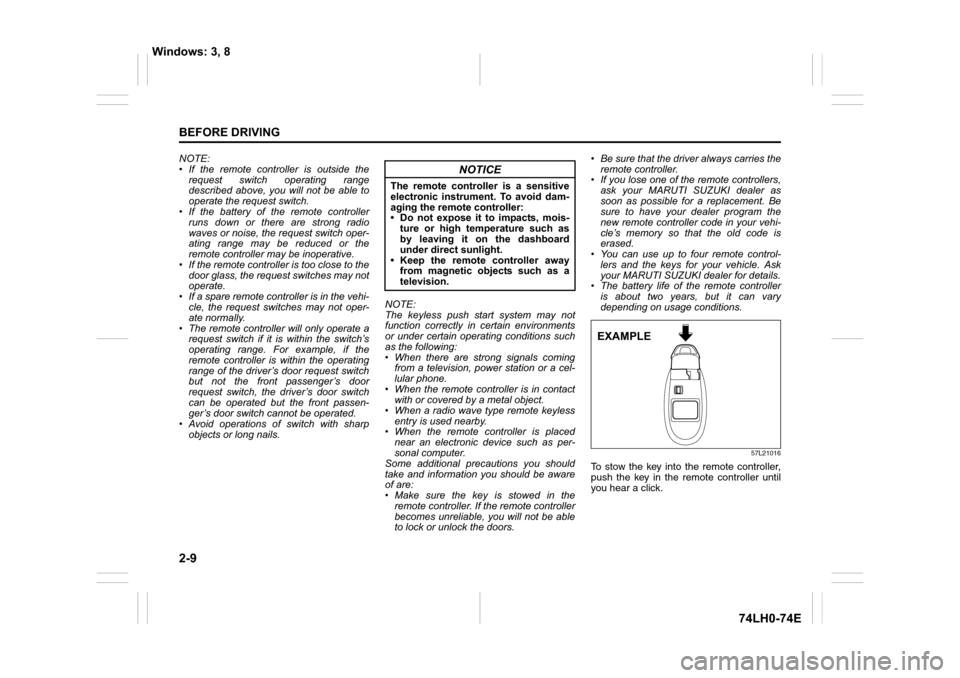
To stow the key into the remote controller,
push the key in the remote controller until
you hear a click.
NOTICE
The remote controller is a sensitive
electronic instrument. To avoid dam-
aging the remote controller:
• Do not expose it to impacts, mois-
ture or high temperature such as
by leaving it on the dashboard
under direct sunlight.
• Keep the remote controller away
from magnetic objects such as a
television.
EXAMPLE
Windows: 3, 8
Page 31 of 336
2-12
BEFORE DRIVING
74LH0-74E
• If the interior light switch is in the
“DOOR” position, the interior light will
turn on for about 15 seconds and then
fade out. If you insert the key into the
ignition switch during this time, the light
will start to fade out immediately.
Be sure the doors are locked after you
operate the “LOCK” button (1). If no door is
opened within about 30 seconds after the
“UNLOCK” button (2) is operated, the
doors will automatically lock again.NOTE:
• The maximum operating distance of the
keyless entry system transmitter is about
5 m (16 ft.), but this can vary depending
on the surroundings, especially near
other transmitting devices such as radio
towers or CB (Citizen’s Band) radios.
• The door locks cannot be operated with
the transmitter, if the ignition key is
inserted in the ignition switch.
• If any door is open, you cannot lock the
door by operating the transmitter, how-
ever unlock the door.
• If you lose one of the transmitters, ask
your MARUTI SUZUKI dealer as soon
as possible for a replacement. Be sure
to have your dealer program the new
transmitter code in your vehicle’s mem-
ory so that the old code is erased.Security System (Vehicle with
Keyless entry system)
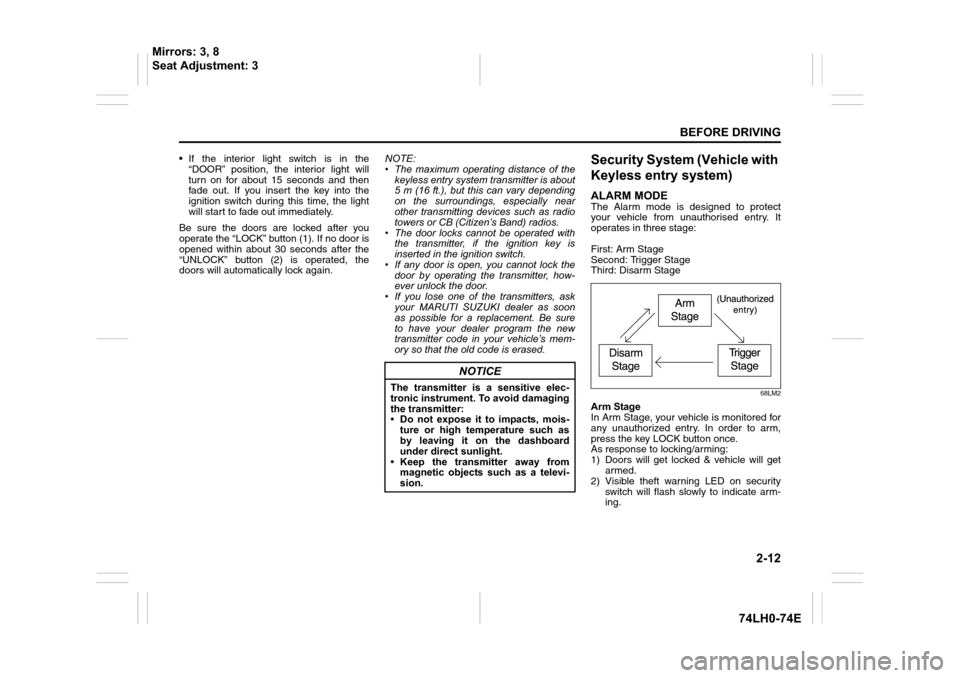
ALARM MODEThe Alarm mode is designed to protect
your vehicle from unauthorised entry. It
operates in three stage:
First: Arm Stage
Second: Trigger Stage
Third: Disarm Stage
68LM2
Arm Stage
In Arm Stage, your vehicle is monitored for
any unauthorized entry. In order to arm,
press the key LOCK button once.
As response to locking/arming:
1) Doors will get locked & vehicle will get
armed.
2) Visible theft warning LED on security
switch will flash slowly to indicate arm-
ing.
NOTICE
The transmitter is a sensitive elec-
tronic instrument. To avoid damaging
the transmitter:
• Do not expose it to impacts, mois-
ture or high temperature such as
by leaving it on the dashboard
under direct sunlight.
• Keep the transmitter away from
magnetic objects such as a televi-
sion.
Mirrors: 3, 8
Seat Adjustment: 3
Page 58 of 336
2-39
BEFORE DRIVING
74LH0-74E
“AIR BAG” light (If equipped)
63J030
If the “AIR BAG” light on the instrument
cluster does not blink or come on when the
ignition switch is first turned to the “ON”
position, or the ignition mode is first
changed to “ON” or the “AIR BAG” light
stays on, or comes on while driving, the air
bag system (or the seat belt pretensioner
system) may not work properly. Have the
air bag system inspected by an authorized
MARUTI SUZUKI dealer as soon as possi-
ble.
Front Air Bags
63J113
Front air bags are designed to inflate in
severe frontal collisions when the ignition
switch is in the “ON” position or the ignition
mode is “ON”.
Front air bags are not designed to inflate in
rear impacts, side impacts, rollovers or
minor frontal collisions, since they would
offer no protection in those types of acci-
dents. Remember, since an air bag
deploys only one time during an accident,
seat belts are needed to restrain occu-
pants from further movements during the
accident.
Therefore, an air bag is NOT a substitute
for seat belts. To maximize your protection,
ALWAYS WEAR YOUR SEAT BELTS. Be
aware that no system can prevent all pos-
sible injuries that may occur in an accident.
63J114
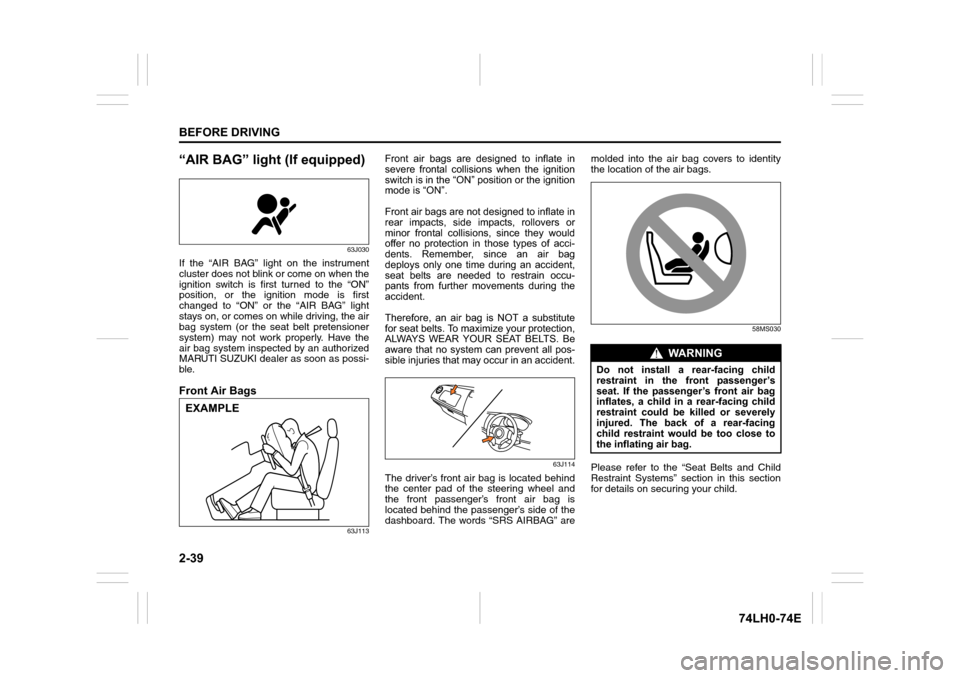
The driver’s front air bag is located behind
the center pad of the steering wheel and
the front passenger’s front air bag is
located behind the passenger’s side of the
dashboard. The words “SRS AIRBAG” aremolded into the air bag covers to identity
the location of the air bags.
58MS030
Please refer to the “Seat Belts and Child
Restraint Systems” section in this section
for details on securing your child.
EXAMPLE
WA R N I N G
Do not install a rear-facing child
restraint in the front passenger’s
seat. If the passenger’s front air bag
inflates, a child in a rear-facing child
restraint could be killed or severely
injured. The back of a rear-facing
child restraint would be too close to
the inflating air bag.
Page 61 of 336
2-42
BEFORE DRIVING
74LH0-74E
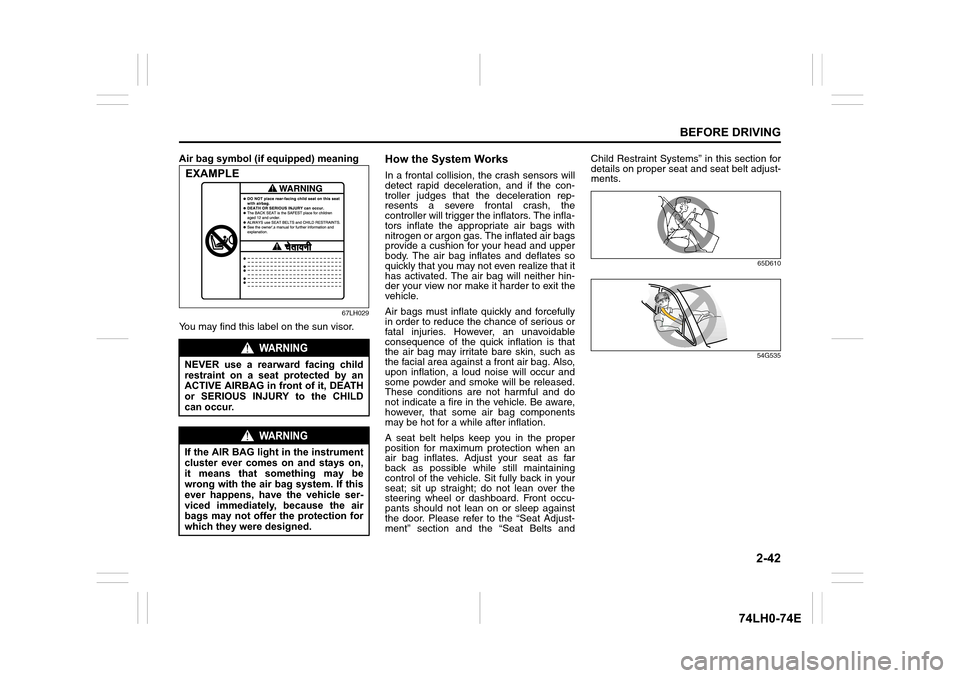
Air bag symbol (if equipped) meaning
67LH029
You may find this label on the sun visor.
How the System Works
In a frontal collision, the crash sensors will
detect rapid deceleration, and if the con-
troller judges that the deceleration rep-
resents a severe frontal crash, the
controller will trigger the inflators. The infla-
tors inflate the appropriate air bags with
nitrogen or argon gas. The inflated air bags
provide a cushion for your head and upper
body. The air bag inflates and deflates so
quickly that you may not even realize that it
has activated. The air bag will neither hin-
der your view nor make it harder to exit the
vehicle.
Air bags must inflate quickly and forcefully
in order to reduce the chance of serious or
fatal injuries. However, an unavoidable
consequence of the quick inflation is that
the air bag may irritate bare skin, such as
the facial area against a front air bag. Also,
upon inflation, a loud noise will occur and
some powder and smoke will be released.
These conditions are not harmful and do
not indicate a fire in the vehicle. Be aware,
however, that some air bag components
may be hot for a while after inflation.
A seat belt helps keep you in the proper
position for maximum protection when an
air bag inflates. Adjust your seat as far
back as possible while still maintaining
control of the vehicle. Sit fully back in your
seat; sit up straight; do not lean over the
steering wheel or dashboard. Front occu-
pants should not lean on or sleep against
the door. Please refer to the “Seat Adjust-
ment” section and the “Seat Belts andChild Restraint Systems” in this section for
details on proper seat and seat belt adjust-
ments.
65D610
54G535
WARNING
NEVER use a rearward facing child
restraint on a seat protected by an
ACTIVE AIRBAG in front of it, DEATH
or SERIOUS INJURY to the CHILD
can occur.
WARNING
If the AIR BAG light in the instrument
cluster ever comes on and stays on,
it means that something may be
wrong with the air bag system. If this
ever happens, have the vehicle ser-
viced immediately, because the air
bags may not offer the protection for
which they were designed.
EXAMPLE
Page 62 of 336
2-43
BEFORE DRIVING
74LH0-74E
Note that even though your vehicle may be
moderately damaged in a collision, the col-
lision may not have been severe enough to
trigger the air bags to inflate. If your vehicle
sustains ANY front-end or side damage,
have the air bag system inspected by an
authorized MARUTI SUZUKI dealer to
ensure it is in proper working order.
Your vehicle is equipped with a diagnostic
module which records information about
the air bag system if the air bags deploy in
a crash. The module records information
about overall system status, which sensors
activated the deployment.
Servicing the air bag systemIf the air bags inflate, have the air bags and
related components replaced by an autho-
rized MARUTI SUZUKI dealer as soon as
possible.
If your vehicle ever gets in deep water and
the driver’s floor is submerged, the air bag
controller could be damaged. If it does,
have the air bag system inspected by the
MARUTI SUZUKI dealer as soon as possi-
ble.
Special procedures are required for servic-
ing or replacing an air bag. For that reason,
only an authorized MARUTI SUZUKI
dealer should be allowed to service or
replace your air bags. Please remind any-
one who services your MARUTI SUZUKI
that it has air bags.Service on or around air bag components
or wiring must be performed only by an
authorized MARUTI SUZUKI dealer.
Improper service could result in unin-
tended air bag deployment or could render
the air bag inoperative. Either of these two
conditions may result in severe injury.
To prevent damage or unintended inflation
of the air bag system, be sure the battery
is disconnected and the ignition switch has
been in the “LOCK” position or the ignition
mode has been “LOCK” (OFF) for at least
90 seconds before performing any electri-
cal service work on your MARUTI SUZUKI.
Do not touch air bag system components
or wires. The wires are wrapped with yel-
low tape or yellow tubing, and the couplers
are yellow for easy identification.
Scrapping a vehicle that has an uninflated
air bag can be hazardous. Ask your dealer,
body repair shop or scrap yard for help
with disposal.
According to accident statistics, children
are safer when properly restrained on rear
seats than front passenger’s seat when-
ever possible, MARUTI SUZUKI recom-
mends that child restraint systems be
installed the rear seat.
WA R N I N G
• The driver should not lean over the
steering wheel. The front passenger
should not rest his or her body against
the dashboard, or otherwise get too
close to the dashboard. In these situa-
tions, the out-of-position occupant
would be too close to an inflating air
bag, and may suffer severe injury.
• Do not attach any objects to, or place
any objects over, the steering wheel or
dashboard. Do not place any objects
between the air bag and the driver or
front passenger. These objects may
interfere with air bag operation or may
be propelled by the air bag in the event
of a crash. Either of these conditions
may cause severe injury.
Page 135 of 336
5-8
OTHER CONTROLS AND EQUIPMENT
74LH0-74E
You can use the air conditioning switch (6)
to manually turn the air conditioner on or off
according to your preference. When you
turn the air conditioning switch off, the cli-
mate control system cannot lower the inside
temperature below outside temperature.
To turn the climate control system off, push
the “OFF” switch (7).
NOTE:
If the “AUTO” on the display blinks, there is
a problem in the heating system and/or air
conditioning system. You should have the
system inspected by an authorized MAR-
UTI SUZUKI dealer.
NOTE:
To find the temperature at which you are
most comfortable, start with the 25°C
(75°F) setting.
If you turn the temperature selector (1)
until “HI” or “LO” appears on the display,
the climate control system will operate at
maximum heating or cooling and the
blower will run at full speed.
To avoid blowing cold air in cold weather
or hot air in hot weather, the system will
delay turning on the blower until warmed
or chilled air is available.
If your vehicle has been left in the sun
with the windows closed, it will cool
faster if you open the windows briefly. Even under the automatic operation, you
can set individual selectors to the man-
ual mode. The manually selected func-
tions are maintained, and the other
functions remain under automatic opera-
tion.
To return the blower speed selector (2),
air intake selector (3), and air flow selec-
tor (4) to automatic operation, push the
“AUTO” switch (8).
74LHT0510
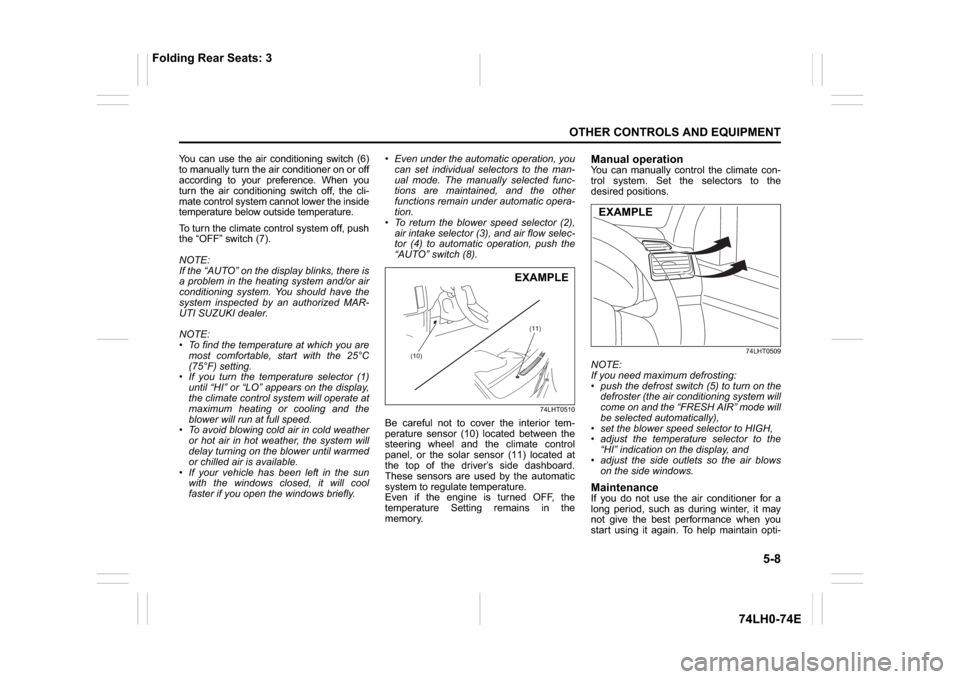
Be careful not to cover the interior tem-
perature sensor (10) located between the
steering wheel and the climate control
panel, or the solar sensor (11) located at
the top of the driver’s side dashboard.
These sensors are used by the automatic
system to regulate temperature.
Even if the engine is turned OFF, the
temperature Setting remains in the
memory.
Manual operationYou can manually control the climate con-
trol system. Set the selectors to the
desired positions.
74LHT0509
NOTE:
If you need maximum defrosting:
push the defrost switch (5) to turn on the
defroster (the air conditioning system will
come on and the “FRESH AIR” mode will
be selected automatically),
set the blower speed selector to HIGH,
adjust the temperature selector to the
“HI” indication on the display, and
adjust the side outlets so the air blows
on the side windows.MaintenanceIf you do not use the air conditioner for a
long period, such as during winter, it may
not give the best performance when you
start using it again. To help maintain opti-
(10)(11)
EXAMPLE
EXAMPLE
Folding Rear Seats: 3
Page 163 of 336
5-36
OTHER CONTROLS AND EQUIPMENT
74LH0-74E
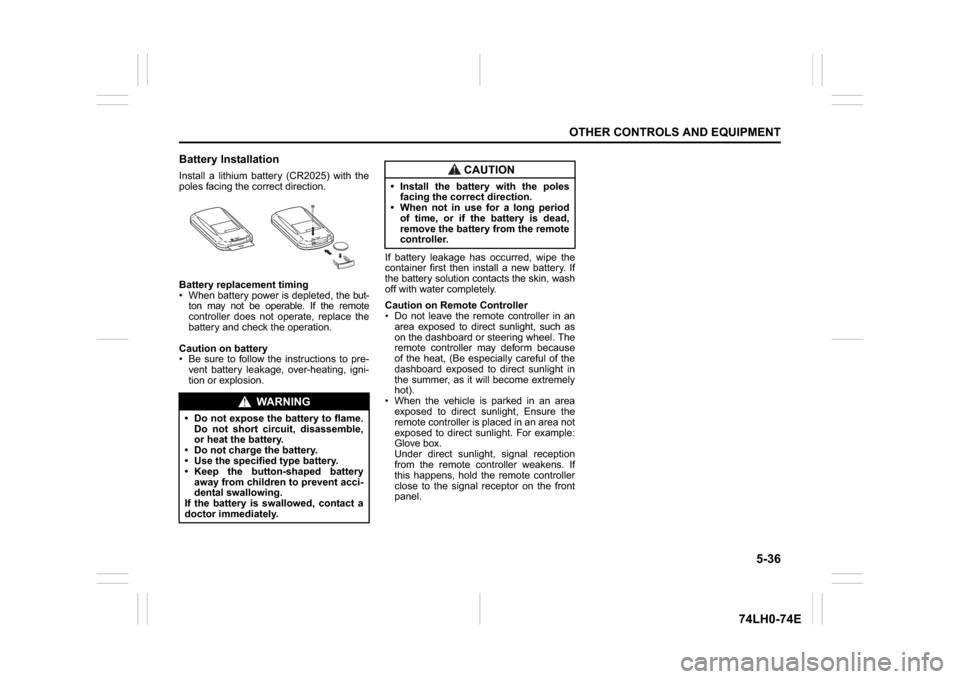
Battery InstallationInstall a lithium battery (CR2025) with the
poles facing the correct direction.
Battery replacement timing
When battery power is depleted, the but-
ton may not be operable. If the remote
controller does not operate, replace the
battery and check the operation.
Caution on battery
Be sure to follow the instructions to pre-
vent battery leakage, over-heating, igni-
tion or explosion.If battery leakage has occurred, wipe the
container first then install a new battery. If
the battery solution contacts the skin, wash
off with water completely.
Caution on Remote Controller
Do not leave the remote controller in an
area exposed to direct sunlight, such as
on the dashboard or steering wheel. The
remote controller may deform because
of the heat, (Be especially careful of the
dashboard exposed to direct sunlight in
the summer, as it will become extremely
hot).
When the vehicle is parked in an area
exposed to direct sunlight, Ensure the
remote controller is placed in an area not
exposed to direct sunlight. For example:
Glove box.
Under direct sunlight, signal reception
from the remote controller weakens. If
this happens, hold the remote controller
close to the signal receptor on the front
panel.
WA R N I N G
Do not expose the battery to flame.
Do not short circuit, disassemble,
or heat the battery.
Do not charge the battery.
Use the specified type battery.
Keep the button-shaped battery
away from children to prevent acci-
dental swallowing.
If the battery is swallowed, contact a
doctor immediately.
CAUTION
Install the battery with the poles
facing the correct direction.
When not in use for a long period
of time, or if the battery is dead,
remove the battery from the remote
controller.