window SUZUKI SWIFT 2017 5.G Owners Manual
[x] Cancel search | Manufacturer: SUZUKI, Model Year: 2017, Model line: SWIFT, Model: SUZUKI SWIFT 2017 5.GPages: 336, PDF Size: 6.24 MB
Page 19 of 336
BEFORE DRIVING
74LH0-74E
BEFORE DRIVINGKeys ......................................................................................... 2-1
Door Locks .............................................................................. 2-2
Central Door Locking System (if equipped) ........................ 2-2
Keyless Push Start System Remote Controller/Keyless
Entry System Transmitter ..................................................... 2-6
Security System (Vehicle With Keyless Entry System) ....... 2-12
Security System
(Vehicle With Keyless Push Start System) ........................... 2-20
Windows .................................................................................. 2-22
Mirrors ..................................................................................... 2-23
Heated Rear Window Switch (if equipped) .......................... 2-24
Front Seats .............................................................................. 2-25
Rear Seats ............................................................................... 2-26
Folding Rear Seat (if equipped) ............................................. 2-27
Seat Belts and Child Restraint Systems .............................. 2-28
Driver’s Seat Belt Reminder (if equipped) ........................... 2-32
Supplemental Restraint System (air bags)
(if equipped) ............................................................................ 2-38
Instrument Cluster ................................................................. 2-44
Warning and Indicator Lights ................................................ 2-46
Speedometer ........................................................................... 2-51
Tachometer (if equipped) ...................................................... 2-51
Fuel Gauge .............................................................................. 2-51
Temperature Gauge ............................................................... 2-52
Brightness Control ................................................................. 2-52
Information Display ................................................................ 2-53
Lighting Control Lever ........................................................... 2-60
Headlight Leveling Switch ..................................................... 2-61
Turn Signal Control Lever ..................................................... 2-61
Hazard Warning Switch ......................................................... 2-62
Windshield Wiper and Washer Lever ................................... 2-62
Tilt Steering Lock Lever ......................................................... 2-64
Horn ........................................................................................ 2-64
2
Page 27 of 336
2-8
BEFORE DRIVING
74LH0-74E
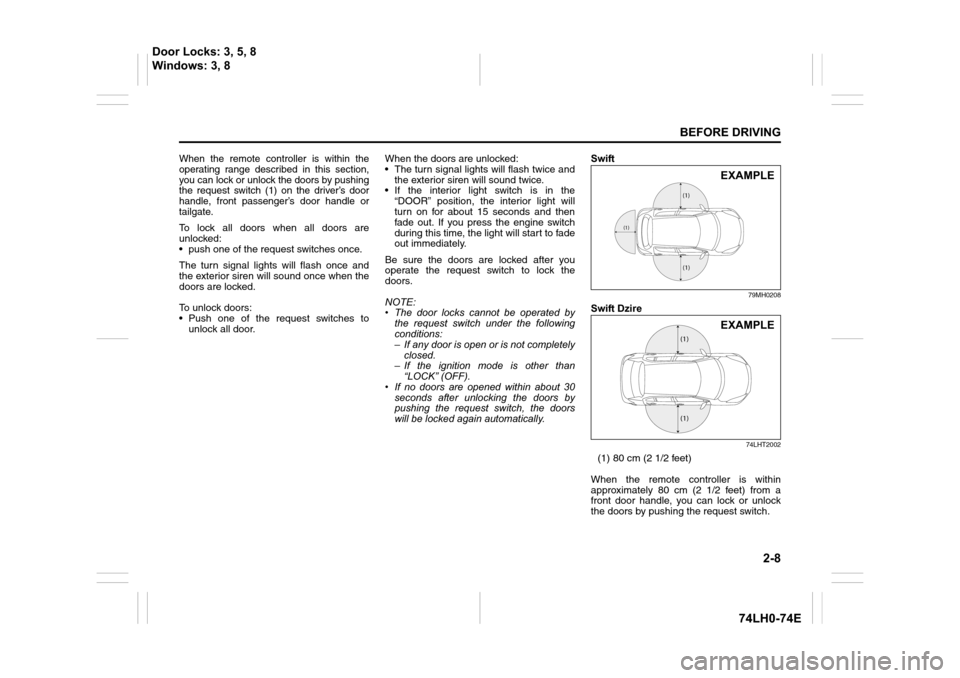
When the remote controller is within the
operating range described in this section,
you can lock or unlock the doors by pushing
the request switch (1) on the driver’s door
handle, front passenger’s door handle or
tailgate.
To lock all doors when all doors are
unlocked:
• push one of the request switches once.
The turn signal lights will flash once and
the exterior siren will sound once when the
doors are locked.
To unlock doors:
• Push one of the request switches to
unlock all door.When the doors are unlocked:
• The turn signal lights will flash twice and
the exterior siren will sound twice.
• If the interior light switch is in the
“DOOR” position, the interior light will
turn on for about 15 seconds and then
fade out. If you press the engine switch
during this time, the light will start to fade
out immediately.
Be sure the doors are locked after you
operate the request switch to lock the
doors.
NOTE:
• The door locks cannot be operated by
the request switch under the following
conditions:
– If any door is open or is not completely
closed.
– If the ignition mode is other than
“LOCK” (OFF).
• If no doors are opened within about 30
seconds after unlocking the doors by
pushing the request switch, the doors
will be locked again automatically.Swift
79MH0208
Swift Dzire
74LHT2002
(1) 80 cm (2 1/2 feet)
When the remote controller is within
approximately 80 cm (2 1/2 feet) from a
front door handle, you can lock or unlock
the doors by pushing the request switch.
(1)
(1)
(1)
EXAMPLE
(1)
(1)
EXAMPLE
Door Locks: 3, 5, 8
Windows: 3, 8
Page 28 of 336
2-9
BEFORE DRIVING
74LH0-74E
NOTE:
• If the remote controller is outside the
request switch operating range
described above, you will not be able to
operate the request switch.
• If the battery of the remote controller
runs down or there are strong radio
waves or noise, the request switch oper-
ating range may be reduced or the
remote controller may be inoperative.
• If the remote controller is too close to the
door glass, the request switches may not
operate.
• If a spare remote controller is in the vehi-
cle, the request switches may not oper-
ate normally.
• The remote controller will only operate a
request switch if it is within the switch’s
operating range. For example, if the
remote controller is within the operating
range of the driver’s door request switch
but not the front passenger’s door
request switch, the driver’s door switch
can be operated but the front passen-
ger’s door switch cannot be operated.
• Avoid operations of switch with sharp
objects or long nails.NOTE:
The keyless push start system may not
function correctly in certain environments
or under certain operating conditions such
as the following:
• When there are strong signals coming
from a television, power station or a cel-
lular phone.
• When the remote controller is in contact
with or covered by a metal object.
• When a radio wave type remote keyless
entry is used nearby.
• When the remote controller is placed
near an electronic device such as per-
sonal computer.
Some additional precautions you should
take and information you should be aware
of are:
• Make sure the key is stowed in the
remote controller. If the remote controller
becomes unreliable, you will not be able
to lock or unlock the doors.• Be sure that the driver always carries the
remote controller.
• If you lose one of the remote controllers,
ask your MARUTI SUZUKI dealer as
soon as possible for a replacement. Be
sure to have your dealer program the
new remote controller code in your vehi-
cle’s memory so that the old code is
erased.
• You can use up to four remote control-
lers and the keys for your vehicle. Ask
your MARUTI SUZUKI dealer for details.
• The battery life of the remote controller
is about two years, but it can vary
depending on usage conditions.
57L21016
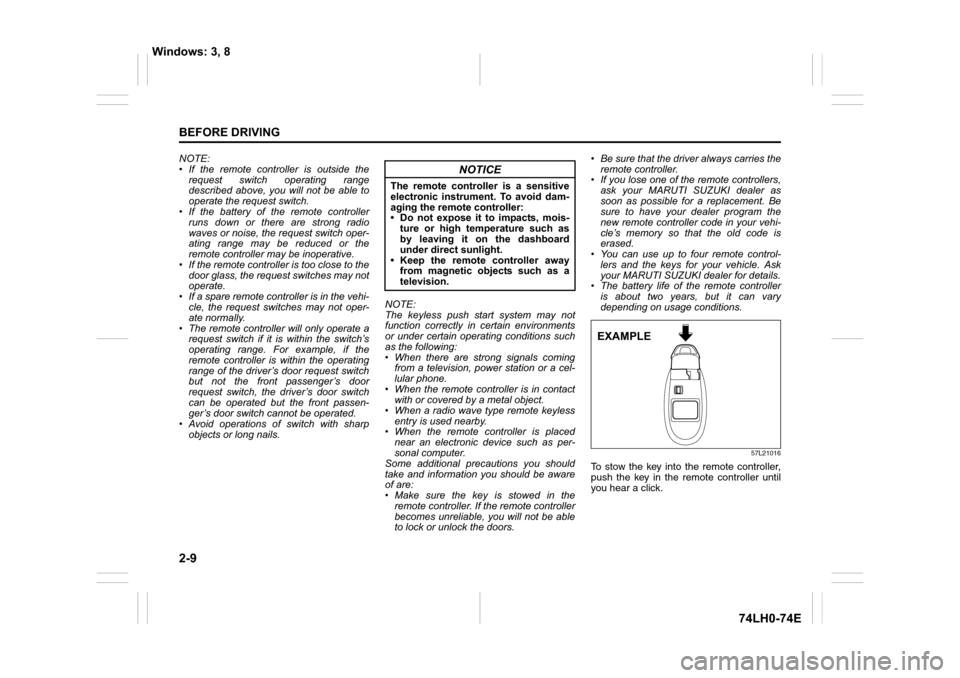
To stow the key into the remote controller,
push the key in the remote controller until
you hear a click.
NOTICE
The remote controller is a sensitive
electronic instrument. To avoid dam-
aging the remote controller:
• Do not expose it to impacts, mois-
ture or high temperature such as
by leaving it on the dashboard
under direct sunlight.
• Keep the remote controller away
from magnetic objects such as a
television.
EXAMPLE
Windows: 3, 8
Page 29 of 336
2-10
BEFORE DRIVING
74LH0-74E
68LM247
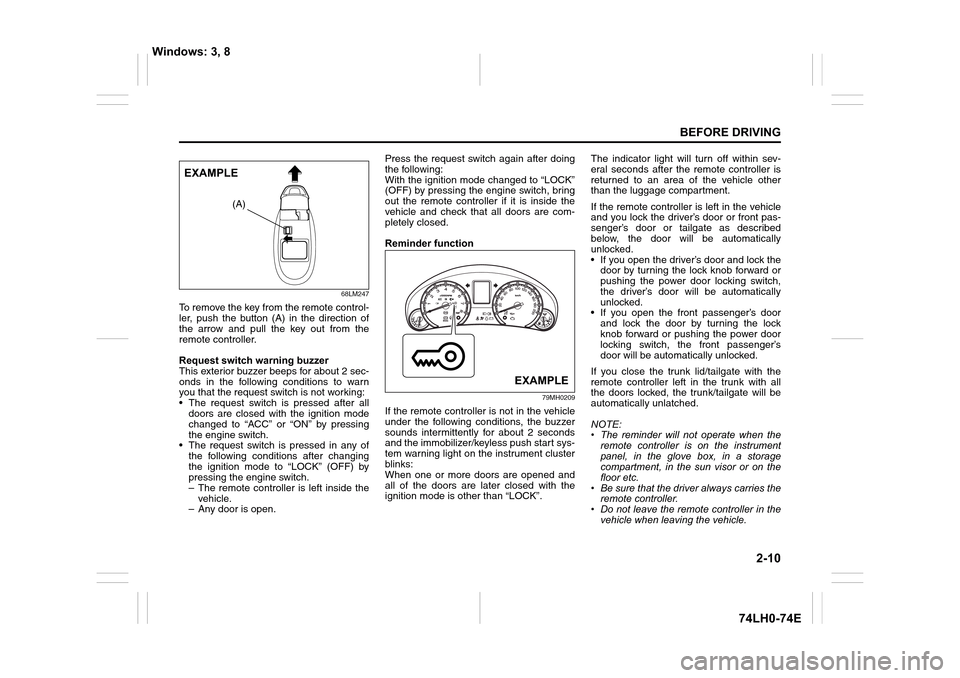
To remove the key from the remote control-
ler, push the button (A) in the direction of
the arrow and pull the key out from the
remote controller.
Request switch warning buzzer
This exterior buzzer beeps for about 2 sec-
onds in the following conditions to warn
you that the request switch is not working:
• The request switch is pressed after all
doors are closed with the ignition mode
changed to “ACC” or “ON” by pressing
the engine switch.
• The request switch is pressed in any of
the following conditions after changing
the ignition mode to “LOCK” (OFF) by
pressing the engine switch.
– The remote controller is left inside the
vehicle.
– Any door is open.Press the request switch again after doing
the following:
With the ignition mode changed to “LOCK”
(OFF) by pressing the engine switch, bring
out the remote controller if it is inside the
vehicle and check that all doors are com-
pletely closed.
Reminder function
79MH0209
If the remote controller is not in the vehicle
under the following conditions, the buzzer
sounds intermittently for about 2 seconds
and the immobilizer/keyless push start sys-
tem warning light on the instrument cluster
blinks:
When one or more doors are opened and
all of the doors are later closed with the
ignition mode is other than “LOCK”.The indicator light will turn off within sev-
eral seconds after the remote controller is
returned to an area of the vehicle other
than the luggage compartment.
If the remote controller is left in the vehicle
and you lock the driver’s door or front pas-
senger’s door or tailgate as described
below, the door will be automatically
unlocked.
• If you open the driver’s door and lock the
door by turning the lock knob forward or
pushing the power door locking switch,
the driver’s door will be automatically
unlocked.
• If you open the front passenger’s door
and lock the door by turning the lock
knob forward or pushing the power door
locking switch, the front passenger’s
door will be automatically unlocked.
If you close the trunk lid/tailgate with the
remote controller left in the trunk with all
the doors locked, the trunk/tailgate will be
automatically unlatched.
NOTE:
• The reminder will not operate when the
remote controller is on the instrument
panel, in the glove box, in a storage
compartment, in the sun visor or on the
floor etc.
• Be sure that the driver always carries the
remote controller.
• Do not leave the remote controller in the
vehicle when leaving the vehicle.
(A)
EXAMPLE
EXAMPLE
Windows: 3, 8
Page 32 of 336
2-13
BEFORE DRIVING
74LH0-74E
NOTE:
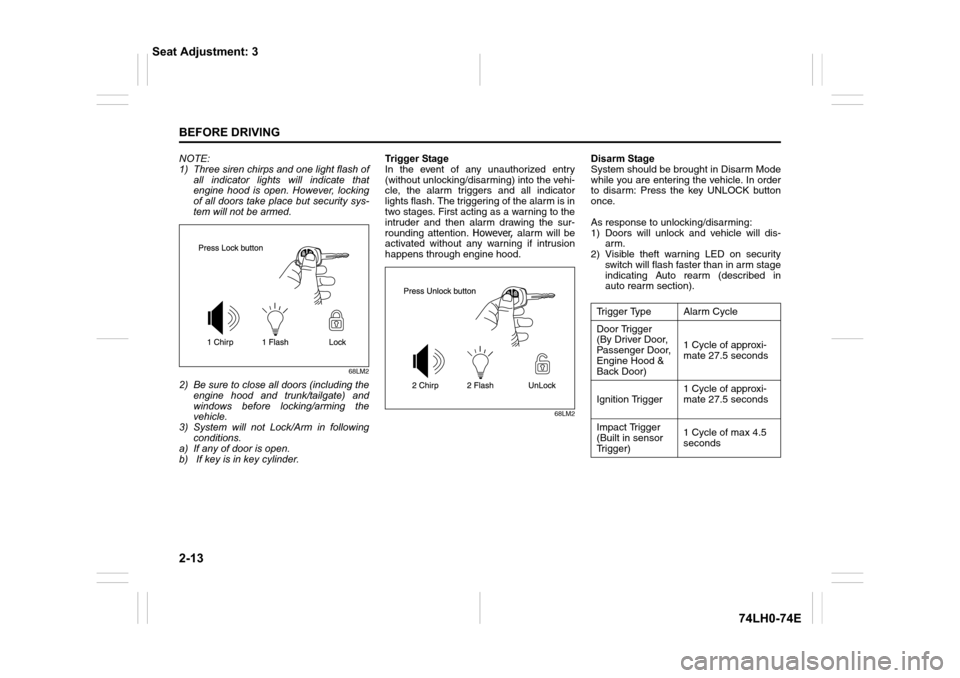
1) Three siren chirps and one light flash of
all indicator lights will indicate that
engine hood is open. However, locking
of all doors take place but security sys-
tem will not be armed.
68LM2
2) Be sure to close all doors (including the
engine hood and trunk/tailgate) and
windows before locking/arming the
vehicle.
3) System will not Lock/Arm in following
conditions.
a) If any of door is open.
b) If key is in key cylinder.Tri gg er Stag e
In the event of any unauthorized entry
(without unlocking/disarming) into the vehi-
cle, the alarm triggers and all indicator
lights flash. The triggering of the alarm is in
two stages. First acting as a warning to the
intruder and then alarm drawing the sur-
rounding attention. However, alarm will be
activated without any warning if intrusion
happens through engine hood.
68LM2
Disarm Stage
System should be brought in Disarm Mode
while you are entering the vehicle. In order
to disarm: Press the key UNLOCK button
once.
As response to unlocking/disarming:
1) Doors will unlock and vehicle will dis-
arm.
2) Visible theft warning LED on security
switch will flash faster than in arm stage
indicating Auto rearm (described in
auto rearm section).
Trigger Type Alarm Cycle
Door Trigger
(By Driver Door,
Passenger Door,
Engine Hood &
Back Door)1 Cycle of approxi-
mate 27.5 seconds
Ignition Trigger 1 Cycle of approxi-
mate 27.5 seconds
Impact Trigger
(Built in sensor
Trigger)1 Cycle of max 4.5
seconds
Seat Adjustment: 3
Page 41 of 336
2-22
BEFORE DRIVING
74LH0-74E
Windows
Manual Window Control
(if equipped)
60G010
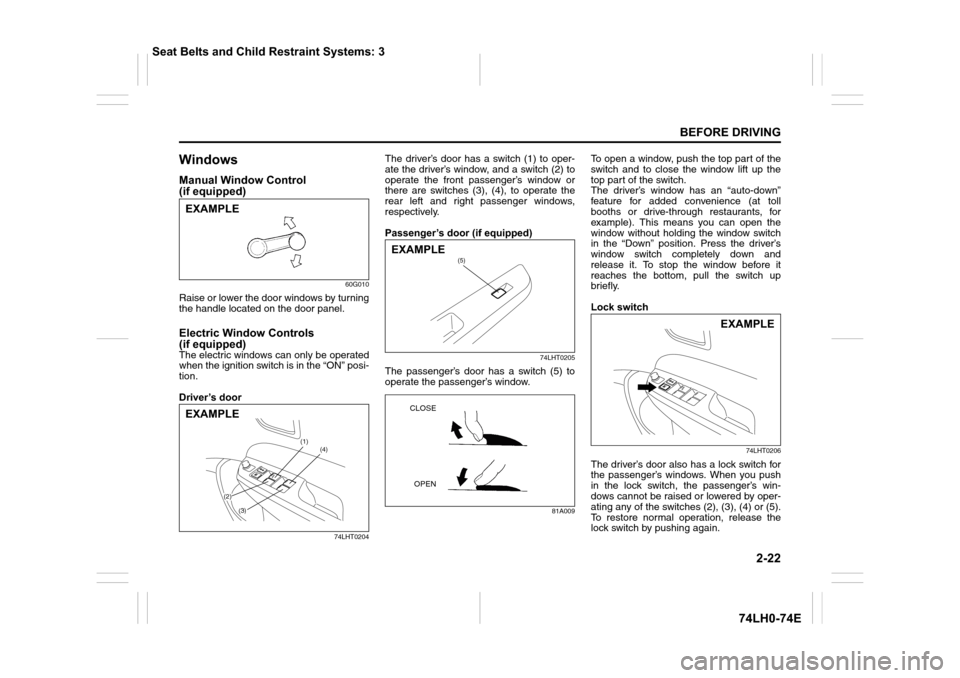
Raise or lower the door windows by turning
the handle located on the door panel.
Electric Window Controls
(if equipped)
The electric windows can only be operated
when the ignition switch is in the “ON” posi-
tion.
Driver’s door
74LHT0204
The driver’s door has a switch (1) to oper-
ate the driver’s window, and a switch (2) to
operate the front passenger’s window or
there are switches (3), (4), to operate the
rear left and right passenger windows,
respectively.
Passenger’s door (if equipped)
74LHT0205
The passenger’s door has a switch (5) to
operate the passenger’s window.
81A009
To open a window, push the top part of the
switch and to close the window lift up the
top part of the switch.
The driver’s window has an “auto-down”
feature for added convenience (at toll
booths or drive-through restaurants, for
example). This means you can open the
window without holding the window switch
in the “Down” position. Press the driver’s
window switch completely down and
release it. To stop the window before it
reaches the bottom, pull the switch up
briefly.
Lock switch
74LHT0206
The driver’s door also has a lock switch for
the passenger’s windows. When you push
in the lock switch, the passenger’s win-
dows cannot be raised or lowered by oper-
ating any of the switches (2), (3), (4) or (5).
To restore normal operation, release the
lock switch by pushing again.
EXAMPLE
(1)
(2)
(3)
(4)
EXAMPLE
(5)EXAMPLE
CLOSE
OPEN
EXAMPLE
Seat Belts and Child Restraint Systems: 3
Page 42 of 336
2-23
BEFORE DRIVING
74LH0-74E
NOTE:
If you drive with one of the rear windows
open, you may hear a loud sound caused
by air vibration. To reduce the sound, open
the driver’s or front passenger’s window, or
narrow the rear window opening.
Mirrors
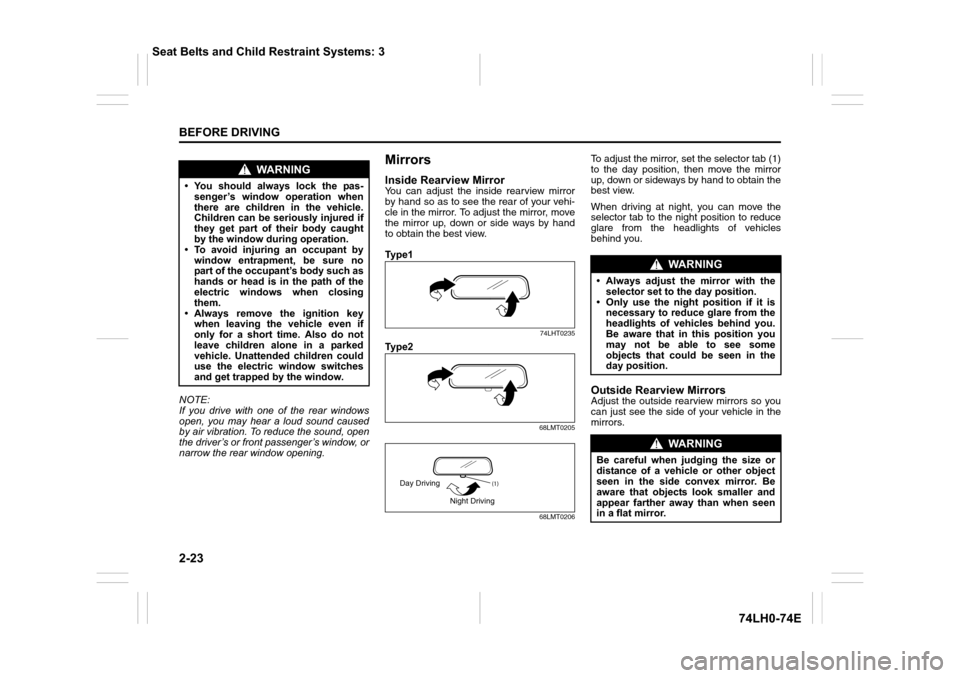
Inside Rearview MirrorYou can adjust the inside rearview mirror
by hand so as to see the rear of your vehi-
cle in the mirror. To adjust the mirror, move
the mirror up, down or side ways by hand
to obtain the best view.
Ty p e 1
74LHT0235
Ty p e 2
68LMT0205
68LMT0206
To adjust the mirror, set the selector tab (1)
to the day position, then move the mirror
up, down or sideways by hand to obtain the
best view.
When driving at night, you can move the
selector tab to the night position to reduce
glare from the headlights of vehicles
behind you.
Outside Rearview MirrorsAdjust the outside rearview mirrors so you
can just see the side of your vehicle in the
mirrors.
WA R N I N G
• You should always lock the pas-
senger’s window operation when
there are children in the vehicle.
Children can be seriously injured if
they get part of their body caught
by the window during operation.
• To avoid injuring an occupant by
window entrapment, be sure no
part of the occupant’s body such as
hands or head is in the path of the
electric windows when closing
them.
• Always remove the ignition key
when leaving the vehicle even if
only for a short time. Also do not
leave children alone in a parked
vehicle. Unattended children could
use the electric window switches
and get trapped by the window.
(1)Day Driving
Night Driving
WA R N I N G
• Always adjust the mirror with the
selector set to the day position.
• Only use the night position if it is
necessary to reduce glare from the
headlights of vehicles behind you.
Be aware that in this position you
may not be able to see some
objects that could be seen in the
day position.
WA R N I N G
Be careful when judging the size or
distance of a vehicle or other object
seen in the side convex mirror. Be
aware that objects look smaller and
appear farther away than when seen
in a flat mirror.
Seat Belts and Child Restraint Systems: 3
Page 43 of 336
2-24
BEFORE DRIVING
74LH0-74E
Ty p e 1
75J003
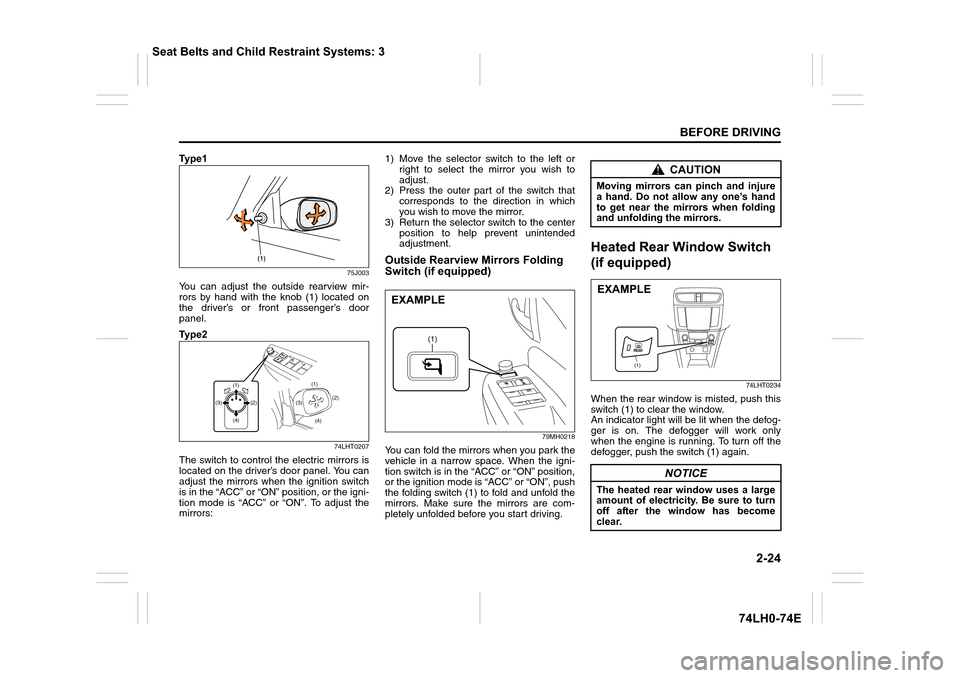
You can adjust the outside rearview mir-
rors by hand with the knob (1) located on
the driver’s or front passenger’s door
panel.
Ty p e 2
74LHT0207
The switch to control the electric mirrors is
located on the driver’s door panel. You can
adjust the mirrors when the ignition switch
is in the “ACC” or “ON” position, or the igni-
tion mode is “ACC” or “ON”. To adjust the
mirrors:1) Move the selector switch to the left or
right to select the mirror you wish to
adjust.
2) Press the outer part of the switch that
corresponds to the direction in which
you wish to move the mirror.
3) Return the selector switch to the center
position to help prevent unintended
adjustment.
Outside Rearview Mirrors Folding
Switch (if equipped)
79MH0218
You can fold the mirrors when you park the
vehicle in a narrow space. When the igni-
tion switch is in the “ACC” or “ON” position,
or the ignition mode is “ACC” or “ON”, push
the folding switch (1) to fold and unfold the
mirrors. Make sure the mirrors are com-
pletely unfolded before you start driving.
Heated Rear Window Switch
(if equipped)
74LHT0234
When the rear window is misted, push this
switch (1) to clear the window.
An indicator light will be lit when the defog-
ger is on. The defogger will work only
when the engine is running. To turn off the
defogger, push the switch (1) again.
(1)(1)
(4) (4)(2)(2)
(3)(3)
(1)
EXAMPLE
CAUTION
Moving mirrors can pinch and injure
a hand. Do not allow any one’s hand
to get near the mirrors when folding
and unfolding the mirrors.
NOTICE
The heated rear window uses a large
amount of electricity. Be sure to turn
off after the window has become
clear.
(1)
EXAMPLE
Seat Belts and Child Restraint Systems: 3
Page 82 of 336
2-63
BEFORE DRIVING
74LH0-74E
mist or light rain. In the “LO” position, the
wipers operate at a steady low speed. In
the “HI” position, the wipers operate at a
steady high speed. To turn off the wipers,
move the lever back to the “OFF” position.
Move the lever up and hold it to the “MIST”
position, the windshield wipers will turn on
continuously at low speed.
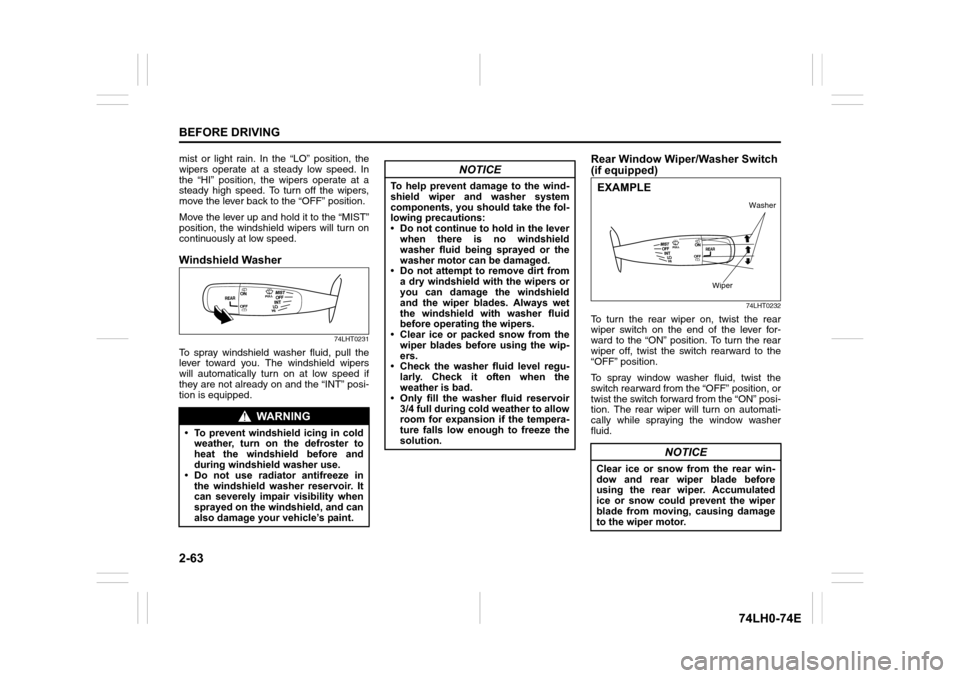
Windshield Washer
74LHT0231
To spray windshield washer fluid, pull the
lever toward you. The windshield wipers
will automatically turn on at low speed if
they are not already on and the “INT” posi-
tion is equipped.
Rear Window Wiper/Washer Switch
(if equipped)
74LHT0232
To turn the rear wiper on, twist the rear
wiper switch on the end of the lever for-
ward to the “ON” position. To turn the rear
wiper off, twist the switch rearward to the
“OFF” position.
To spray window washer fluid, twist the
switch rearward from the “OFF” position, or
twist the switch forward from the “ON” posi-
tion. The rear wiper will turn on automati-
cally while spraying the window washer
fluid.
WA R N I N G
• To prevent windshield icing in cold
weather, turn on the defroster to
heat the windshield before and
during windshield washer use.
• Do not use radiator antifreeze in
the windshield washer reservoir. It
can severely impair visibility when
sprayed on the windshield, and can
also damage your vehicle’s paint.
NOTICE
To help prevent damage to the wind-
shield wiper and washer system
components, you should take the fol-
lowing precautions:
• Do not continue to hold in the lever
when there is no windshield
washer fluid being sprayed or the
washer motor can be damaged.
• Do not attempt to remove dirt from
a dry windshield with the wipers or
you can damage the windshield
and the wiper blades. Always wet
the windshield with washer fluid
before operating the wipers.
• Clear ice or packed snow from the
wiper blades before using the wip-
ers.
• Check the washer fluid level regu-
larly. Check it often when the
weather is bad.
• Only fill the washer fluid reservoir
3/4 full during cold weather to allow
room for expansion if the tempera-
ture falls low enough to freeze the
solution.
NOTICE
Clear ice or snow from the rear win-
dow and rear wiper blade before
using the rear wiper. Accumulated
ice or snow could prevent the wiper
blade from moving, causing damage
to the wiper motor.
Washer
Wiper
EXAMPLE
Page 86 of 336
3-1OPERATING YOUR VEHICLE
74LH0-74E
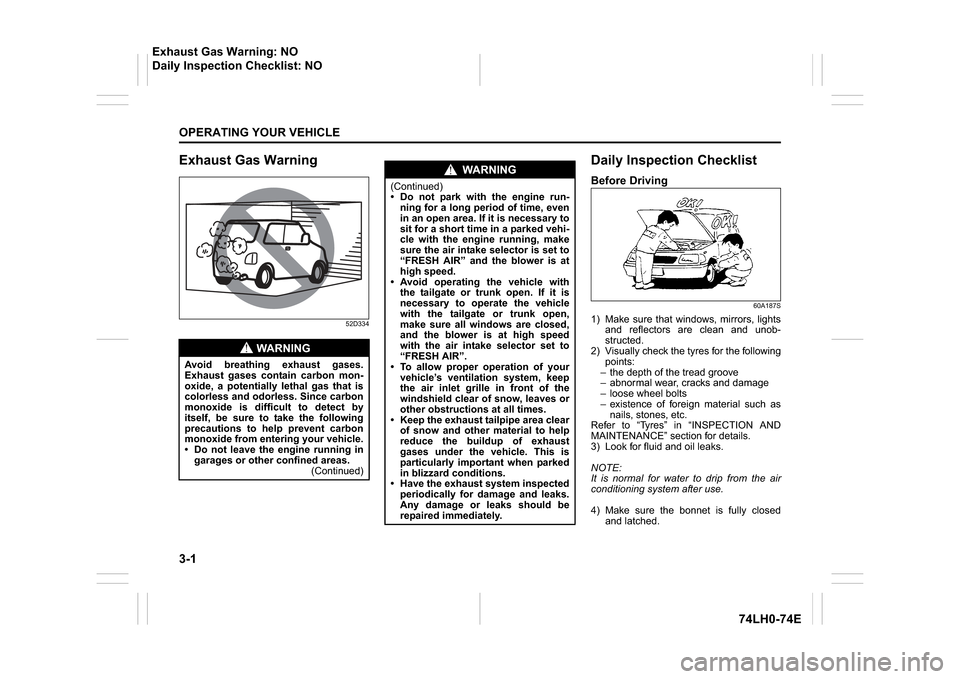
Exhaust Gas Warning
52D334
Daily Inspection ChecklistBefore Driving
60A187S
1) Make sure that windows, mirrors, lightsand reflectors are clean and unob-
structed.
2) Visually check the tyres for the following points:
– the depth of the tread groove
– abnormal wear, cracks and damage
– loose wheel bolts
– existence of foreign material such as nails, stones, etc.
Refer to “Tyres” in “INSPECTION AND
MAINTENANCE” section for details.
3) Look for fluid and oil leaks.
NOTE:
It is normal for water to drip from the air
conditioning system after use.
4) Make sure the bonnet is fully closed and latched.
WA R N I N G
Avoid breathing exhaust gases.
Exhaust gases contain carbon mon-
oxide, a potentially lethal gas that is
colorless and odorless. Since carbon
monoxide is difficult to detect by
itself, be sure to take the following
precautions to help prevent carbon
monoxide from entering your vehicle.
Do not leave the engine running in garages or other confined areas. (Continued)
WA R N I N G
(Continued)
Do not park with the engine run-ning for a long period of time, even
in an open area. If it is necessary to
sit for a short time in a parked vehi-
cle with the engine running, make
sure the air intake selector is set to
“FRESH AIR” and the blower is at
high speed.
Avoid operating the vehicle with the tailgate or trunk open. If it is
necessary to operate the vehicle
with the tailgate or trunk open,
make sure all windows are closed,
and the blower is at high speed
with the air intake selector set to
“FRESH AIR”.
To allow proper operation of your
vehicle’s ventilation system, keep
the air inlet grille in front of the
windshield clear of snow, leaves or
other obstructions at all times.
Keep the exhaust tailpipe area clear of snow and other material to help
reduce the buildup of exhaust
gases under the vehicle. This is
particularly important when parked
in blizzard conditions.
Have the exhaust system inspected periodically for damage and leaks.
Any damage or leaks should be
repaired immediately.
Exhaust Gas Warning: NO
Daily Inspection Checklist: NO