engine SUZUKI XL7 2007 2.G User Guide
[x] Cancel search | Manufacturer: SUZUKI, Model Year: 2007, Model line: XL7, Model: SUZUKI XL7 2007 2.GPages: 274, PDF Size: 6.12 MB
Page 69 of 274

2-13 FEATURES AND CONTROLS
78J00-03E
tion and park your vehicle, a chime will
sound, when you open the driver’s door.
Always remember to remove your key from
the ignition and take it with you. This will
lock your ignition and transaxle. Also,
always remember to lock the doors.
The battery could be drained if you leave
the key in the ignition while your vehicle is
parked. You may not be able to start your
vehicle after it has been parked for an
extended period of time.Retained Accessory Power (RAP)The vehicle has Retained Accessory
Power (RAP), which will allow your vehi-
cle’s radio and windows to work when the
ignition key is in RUN or ACC. Once the
key is turned from RUN to LOCK the radio
will continue to work 10 minutes or until the
driver’s door is opened. Also, the power
windows will continue to work for up to 10
minutes or until any door is opened.
Starting the EnginePlace the transaxle in the proper gear.
Move your shift lever to PARK (P) or NEU-
TRAL (N). Your engine will not start in any
other position -- this is a safety feature. To
restart when you are already moving, use
NEUTRAL (N) only.
Starting Procedure
1) With your foot off the accelerator pedal,
turn the ignition key to START. When
the engine starts, let go of the key. The
idle speed will go down as your engine
gets warm. Do not race the engine
immediately after starting it. Operate
the engine and transaxle gently to allow
the oil to warm up and lubricate all mov-
ing parts.
Your vehicle has a Computer-Con-
trolled Cranking System. This feature
assists in starting the engine and pro-
tects components. If the ignition key is
turned to the START position, and then
released when the engine begins
cranking, the engine will continue
cranking for a few seconds or until the
vehicle starts. If the engine does not
start and the key is held in START for
many seconds, cranking will be stoppedafter 15 seconds to prevent cranking
motor damage. To prevent gear dam-
age, this system also prevents cranking
if the engine is already running. Engine
cranking can be stopped by turning the
ignition switch to the ACC or LOCK
position.
2) If the engine does not start after 5-10
seconds, especially in very cold
weather (below 0°F –18°C), it could be
flooded with too much gasoline. Try
pushing the accelerator pedal all the
way to the floor and holding it there as
you hold the key in START for up to a
maximum of 15 seconds. Wait at least
15 seconds between each try, to allow
the cranking motor to cool down. When
the engine starts, let go of the key and
accelerator. If the vehicle starts briefly
but then stops again, do the same
thing. This clears the extra gasoline
from the engine. Do not race the engine
immediately after starting it. Operate
the engine and transaxle gently until
CAUTION
Shifting into PARK (P) with the vehi-
cle moving could damage the tran-
saxle. Shift into PARK (P) only when
your vehicle is stopped.
CAUTION
Cranking the engine for long periods
of time, by returning the key to the
START position immediately after
cranking has ended, can overheat
and damage the cranking motor, and
drain the battery. Wait at least 15 sec-
onds between each try, to allow the
cranking motor to cool down.
Page 70 of 274
2-14 FEATURES AND CONTROLS
78J00-03E
the oil warms up and lubricates all mov-
ing parts.
Engine Coolant HeaterIf your vehicle has this feature, in very cold
weather 0°F (–18°C) or colder, the engine
coolant heater can help. You will get easier
starting and better fuel economy during
engine warm-up. Usually, the coolant
heater should be plugged in a minimum of
four hours prior to starting your vehicle. At
temperatures above 32°F (0°C), use of the
coolant heater is not required. Your vehicle
may also have an internal thermostat in
the plug end of the cord. This will prevent
operation of the engine coolant heater
when the temperature is at or above 0°F (–
18°C) as noted on the cord.
To Use the Engine Coolant Heater
1) Turn off the engine.
2) Open the hood and unwrap the electri-
cal cord. The cord is located on thepassenger’s side of the engine com-
partment, near the radiator.
3) Plug it into a normal, grounded 110-volt
AC outlet.
4) Before starting the engine, be sure to
unplug and store the cord as it was
before to keep it away from moving
engine parts. If you do not, it could be
damaged.
How long should you keep the coolant
heater plugged in? The answer depends
on the outside temperature, the kind of oil
you have, and some other things. Instead
of trying to list everything here, we ask that
you contact your dealer in the area where
you will be parking your vehicle. The
dealer can give you the best advice for that
particular area.
Automatic Transaxle OperationThe shift lever for the automatic transaxle
is located on the console between the
seats.
Maximum engine speed is limited when
the vehicle is in PARK (P) or NEUTRAL
(N) to protect driveline components from
improper operation.
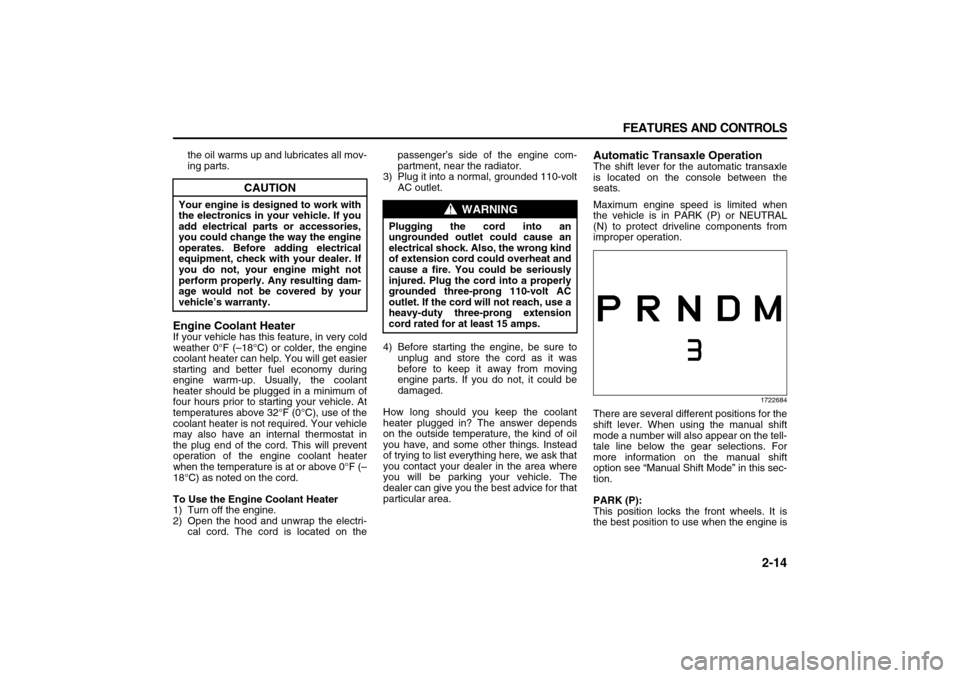
1722684
There are several different positions for the
shift lever. When using the manual shift
mode a number will also appear on the tell-
tale line below the gear selections. For
more information on the manual shift
option see “Manual Shift Mode” in this sec-
tion.
PARK (P):
This position locks the front wheels. It is
the best position to use when the engine is
CAUTION
Your engine is designed to work with
the electronics in your vehicle. If you
add electrical parts or accessories,
you could change the way the engine
operates. Before adding electrical
equipment, check with your dealer. If
you do not, your engine might not
perform properly. Any resulting dam-
age would not be covered by your
vehicle’s warranty.
WARNING
Plugging the cord into an
ungrounded outlet could cause an
electrical shock. Also, the wrong kind
of extension cord could overheat and
cause a fire. You could be seriously
injured. Plug the cord into a properly
grounded three-prong 110-volt AC
outlet. If the cord will not reach, use a
heavy-duty three-prong extension
cord rated for at least 15 amps.
Page 71 of 274
2-15 FEATURES AND CONTROLS
78J00-03E
started because the vehicle cannot move
easily.
Make sure the shift lever is fully in PARK
(P) before starting the engine. The vehicle
has an automatic transaxle shift lock con-
trol system. You must fully apply your reg-
ular brakes first and then press the shift
lever button, before you can shift from
PARK (P) when the ignition is in RUN. If
you cannot shift out of PARK (P), ease
pressure on the shift lever and push the
shift lever all way into PARK (P) as you
maintain brake application. Then press the
shift lever button and move the shift leverinto another gear. Refer to “Shifting Out of
Park (P)” in this section.
REVERSE (R):
Use this gear to back up.
To rock the vehicle back and forth to get
out of snow, ice, or sand without damaging
the transaxle, refer to “If Your Vehicle is
Stuck in Sand, Mud, Ice, or Snow” in “Your
Driving, the Road, and Your Vehicle” in the
“Driving Your Vehicle” section.
NEUTRAL (N):
In this position, the engine does not con-
nect with the wheels. To restart when the
vehicle is already moving, use NEUTRAL
(N) only. Also, use NEUTRAL (N) when the
vehicle is being towed.DRIVE (D):
This position is for normal driving. It pro-
vides the best fuel economy for your vehi-
cle. If the vehicle needs more power for
passing, and it is:
Going less than 35 mph (55 km/h), push
the accelerator pedal about halfway
down.
Going about 35 mph (55 km/h) or more,
push the accelerator pedal all the way
down. The vehicle will shift down to the
next gear and have more power.
WARNING
It is dangerous to get out of your
vehicle if the shift lever is not fully in
PARK (P) with the parking brake
firmly set. Your vehicle can roll.
Do not leave your vehicle when the
engine is running unless you have to.
If you have left the engine running,
the vehicle can move suddenly. You
or others could be injured. To be sure
your vehicle will not move, even
when you are on fairly level ground,
always set your parking brake and
move the shift lever to PARK (P).
Refer to “Shifting Into Park (P)” in
this section. If you are pulling a
trailer, refer to “Towing a Trailer” in
“Towing” in the “Driving Your Vehi-
cle” section.
CAUTION
Shifting to REVERSE (R) while your
vehicle is moving forward could dam-
age the transaxle. The repairs would
not be covered by your warranty.
Shift to REVERSE (R) only after your
vehicle is stopped.
WARNING
Shifting into a drive gear while your
engine is running at high speed is
dangerous. Unless your foot is firmly
on the brake pedal, your vehicle
could move very rapidly. You could
lose control and hit people or
objects. Do not shift into a drive gear
while your engine is running at high
speed.
CAUTION
Shifting out of PARK (P) or NEUTRAL
(N) while the engine is running at
high speed may damage the tran-
saxle. The repairs would not be cov-
ered by your warranty. Be sure the
engine is not running at high speeds
when shifting your vehicle.
Page 72 of 274
2-16 FEATURES AND CONTROLS
78J00-03E
Downshifting the transaxle in slippery road
conditions could result in skidding, refer to
“Loss of Control” in “Your Driving, the
Road, and Your Vehicle” in the “Driving
Your Vehicle” section.
MANUAL SHIFT MODE (M):
This position, available on the models with
the Manual Shift Mode (MSM), allows you
to change gears similar to a manual tran-
saxle. If your vehicle has this feature, see
“Manual Shift Mode (MSM)”.
Manual Shift Mode (MSM)
(Automatic Transaxle)
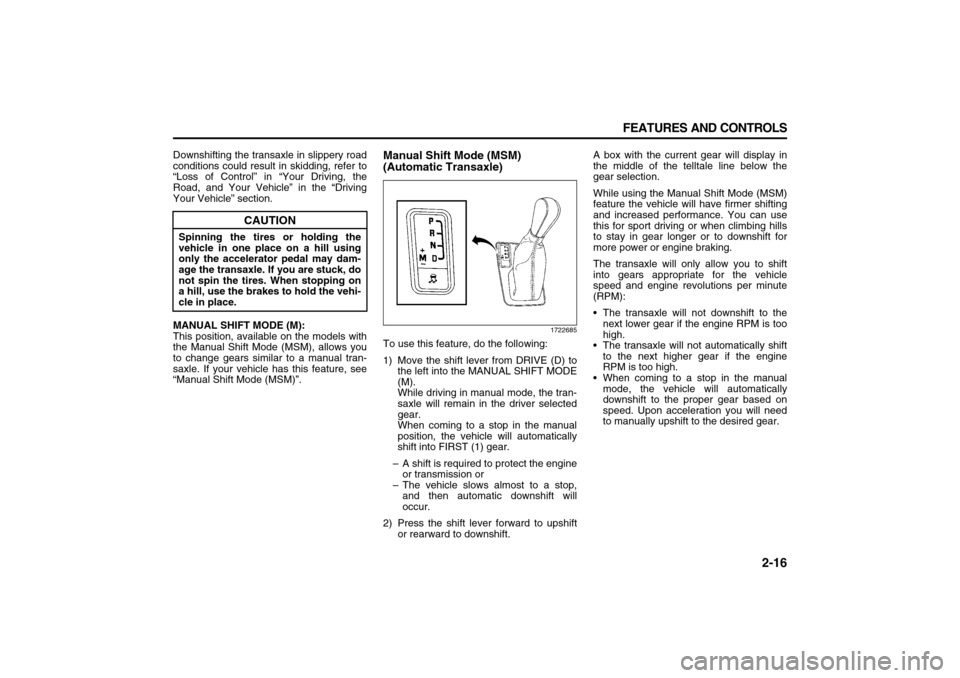
1722685
To use this feature, do the following:
1) Move the shift lever from DRIVE (D) to
the left into the MANUAL SHIFT MODE
(M).
While driving in manual mode, the tran-
saxle will remain in the driver selected
gear.
When coming to a stop in the manual
position, the vehicle will automatically
shift into FIRST (1) gear.
– A shift is required to protect the engine
or transmission or
– The vehicle slows almost to a stop,
and then automatic downshift will
occur.
2) Press the shift lever forward to upshift
or rearward to downshift.A box with the current gear will display in
the middle of the telltale line below the
gear selection.
While using the Manual Shift Mode (MSM)
feature the vehicle will have firmer shifting
and increased performance. You can use
this for sport driving or when climbing hills
to stay in gear longer or to downshift for
more power or engine braking.
The transaxle will only allow you to shift
into gears appropriate for the vehicle
speed and engine revolutions per minute
(RPM):
The transaxle will not downshift to the
next lower gear if the engine RPM is too
high.
The transaxle will not automatically shift
to the next higher gear if the engine
RPM is too high.
When coming to a stop in the manual
mode, the vehicle will automatically
downshift to the proper gear based on
speed. Upon acceleration you will need
to manually upshift to the desired gear.
CAUTION
Spinning the tires or holding the
vehicle in one place on a hill using
only the accelerator pedal may dam-
age the transaxle. If you are stuck, do
not spin the tires. When stopping on
a hill, use the brakes to hold the vehi-
cle in place.
Page 73 of 274
2-17 FEATURES AND CONTROLS
78J00-03E
SECOND (2) Gear Start Feature
When accelerating your vehicle from a
stop in snowy and icy conditions, you may
want to shift into SECOND (2). A higher
gear, and light application of the gas pedal,
may allow you to gain more traction on
slippery surfaces.
With the MANUAL SHIFT MODE, the vehi-
cle can accelerate from a stop in SECOND
(2).
1) Move the shift lever from DRIVE (D)
into the MANUAL SHIFT MODE (M)
position.
2) With the vehicle stopped, press the
plus (+) paddle forward to select SEC-
OND (2). The vehicle will start from a
stop position in SECOND (2).
3) Once the vehicle is moving select the
desired drive gear.
Parking Brake
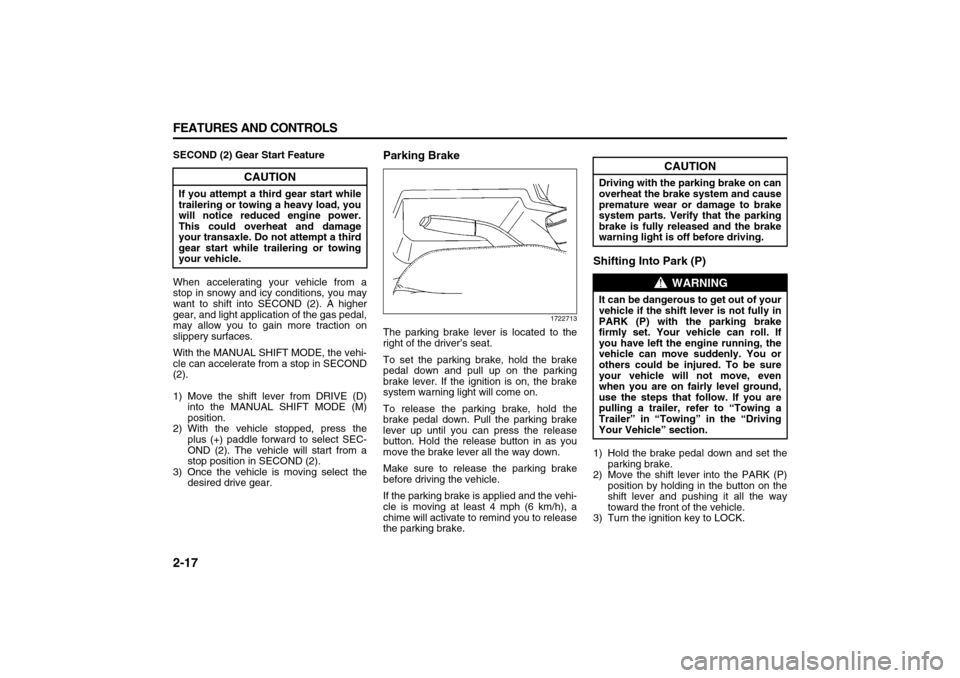
1722713
The parking brake lever is located to the
right of the driver’s seat.
To set the parking brake, hold the brake
pedal down and pull up on the parking
brake lever. If the ignition is on, the brake
system warning light will come on.
To release the parking brake, hold the
brake pedal down. Pull the parking brake
lever up until you can press the release
button. Hold the release button in as you
move the brake lever all the way down.
Make sure to release the parking brake
before driving the vehicle.
If the parking brake is applied and the vehi-
cle is moving at least 4 mph (6 km/h), a
chime will activate to remind you to release
the parking brake.
Shifting Into Park (P)1) Hold the brake pedal down and set the
parking brake.
2) Move the shift lever into the PARK (P)
position by holding in the button on the
shift lever and pushing it all the way
toward the front of the vehicle.
3) Turn the ignition key to LOCK.
CAUTION
If you attempt a third gear start while
trailering or towing a heavy load, you
will notice reduced engine power.
This could overheat and damage
your transaxle. Do not attempt a third
gear start while trailering or towing
your vehicle.
CAUTION
Driving with the parking brake on can
overheat the brake system and cause
premature wear or damage to brake
system parts. Verify that the parking
brake is fully released and the brake
warning light is off before driving.
WARNING
It can be dangerous to get out of your
vehicle if the shift lever is not fully in
PARK (P) with the parking brake
firmly set. Your vehicle can roll. If
you have left the engine running, the
vehicle can move suddenly. You or
others could be injured. To be sure
your vehicle will not move, even
when you are on fairly level ground,
use the steps that follow. If you are
pulling a trailer, refer to “Towing a
Trailer” in “Towing” in the “Driving
Your Vehicle” section.
Page 74 of 274
2-18 FEATURES AND CONTROLS
78J00-03E
4) Remove the key and take it with you. If
you can leave your vehicle with the igni-
tion key in your hand, your vehicle is in
PARK (P).
Leaving Your Vehicle With the Engine
Running
If you have to leave your vehicle with the
engine running, be sure your vehicle is in
PARK (P) and your parking brake is firmly
set before you leave it. After you have
moved the shift lever into PARK (P), hold
the regular brake pedal down. Then, see if
you can move the shift lever away from
PARK (P) without first pushing the button.
If you can, it means that the shift lever was
not fully locked into PARK (P).
Torque Lock
If you are parking on a hill and you do not
shift your transaxle into PARK (P) properly,
the weight of the vehicle may put too muchforce on the parking pawl in the transaxle.
You may find it difficult to pull the shift
lever out of PARK (P). This is called
“torque lock.” To prevent torque lock, set
the parking brake and then shift into PARK
(P) properly before you leave the driver’s
seat. To find out how, refer to “Shifting Into
Park (P)” in this section.
When you are ready to drive, move the
shift lever out of PARK (P) before you
release the parking brake.
If torque lock does occur, you may need to
have another vehicle push yours a little
uphill to take some of the pressure from
the parking pawl in the transaxle, so you
can pull the shift lever out of PARK (P).
Shifting Out of Park (P)Your vehicle has an automatic transaxle
shift lock control system. You have to fully
apply your regular brakes before you can
shift from PARK (P) when the ignition is in
RUN.
If you cannot shift out of PARK (P), ease
pressure on the shift lever – push the shift
lever all the way into PARK (P), as you
maintain brake application. Then, press
the button on the shift lever and move the
shift lever into the gear you wish.
If you ever hold the brake pedal down but
still cannot shift out of PARK (P), try this:
1) Turn the key to LOCK.2) Apply and hold the brake until the end
of Step 4.
3) Shift to NEUTRAL (N).
4) Start the vehicle and then shift to the
desired drive gear.
5) Have your vehicle fixed as soon as you
can.
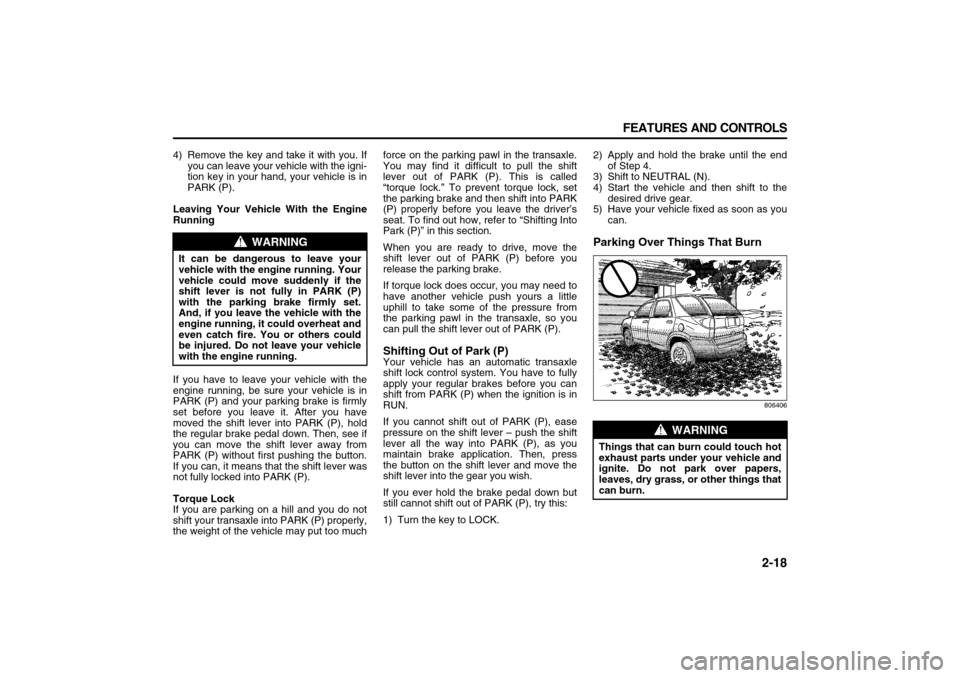
Parking Over Things That Burn
806406
WARNING
It can be dangerous to leave your
vehicle with the engine running. Your
vehicle could move suddenly if the
shift lever is not fully in PARK (P)
with the parking brake firmly set.
And, if you leave the vehicle with the
engine running, it could overheat and
even catch fire. You or others could
be injured. Do not leave your vehicle
with the engine running.
WARNING
Things that can burn could touch hot
exhaust parts under your vehicle and
ignite. Do not park over papers,
leaves, dry grass, or other things that
can burn.
Page 75 of 274
2-19 FEATURES AND CONTROLS
78J00-03E
Engine Exhaust Running the Engine While Parked
It is better not to park with the engine run-
ning. But if you ever have to, here are
some things to know.
Follow the proper steps to be sure your
vehicle will not move. Refer to “Shifting
Into Park (P)” in this section.
If you are parking on a hill and if you are
pulling a trailer, also refer to “Towing a
Trailer” in “Towing” in the “Driving Your
Vehicle” section.
WARNING
Engine exhaust can kill. It contains
the gas carbon monoxide (CO), which
you cannot see or smell. It can cause
unconsciousness and death.
You might have exhaust coming in if:
The exhaust system sounds
strange or different.
Your vehicle gets rusty under-
neath.
Your vehicle was damaged in a col-
lision.
Your vehicle was damaged when
driving over high points on the
road or over road debris.
Repairs were not done correctly.
Your vehicle or the exhaust system
has been modified improperly.
If you ever suspect exhaust is com-
ing into your vehicle:
Drive it only with all the windows
down to blow out any CO; and
Have your vehicle fixed immedi-
ately.
WARNING
Idling the engine with the climate
control system off could allow dan-
gerous exhaust into your vehicle.
Refer to the earlier caution under
“Engine Exhaust” in this section.
Also, idling in a closed-in place can
let deadly carbon monoxide (CO) into
your vehicle even if the climate con-
trol fan is at the highest setting. One
place this can happen is a garage.
Exhaust – with CO – can come in eas-
ily. NEVER park in a garage with the
engine running.
Another closed-in place can be a bliz-
zard. Refer to “Winter Driving” in
“Your Driving, the Road, and Your
Vehicle” in the “Driving Your Vehi-
cle” section.
WARNING
It can be dangerous to get out of your
vehicle if the shift lever is not fully in
PARK (P) with the parking brake
firmly set. Your vehicle can roll. Do
not leave your vehicle when the
engine is running unless you have to.
If you have left the engine running,
the vehicle can move suddenly. You
or others could be injured. To be sure
your vehicle will not move, even
when you are on fairly level ground,
always set your parking brake and
move the shift lever to PARK (P).
Page 89 of 274

3-7 INSTRUMENT PANEL
78J00-03E
the vehicle’s speed for approximately 60
seconds, cruise control will disengage.
Using Cruise Control on Hills
How well your cruise control will work on
hills depends upon your speed, load, and
the steepness of the hills. When going up
steep hills, you may have to step on the
accelerator pedal to maintain your vehi-
cle’s speed. When going downhill, you may
have to brake or shift to a lower gear to
limit the vehicle’s speed. Of course, apply-
ing the brakes ends cruise control. Many
drivers find this to be too much trouble and
do not use cruise control on steep hills.
Ending Cruise Control
There are three ways to end cruise control:
Step lightly on the brake pedal.
Press the cancel button on the steering
wheel.
Press the On/Off button on the steering
wheel.
Erasing Speed Memory
When the cruise control or the ignition is
turned off, the cruise control set speed
memory is erased.
HeadlampsThe exterior lamp control is located on the
turn signal/multifunction lever.
(Exterior Lamp Control):
Turn the control with this symbol on it to
operate the exterior lamps.
The exterior lamp control has the following
positions:
AUTO (Off/Automatic Headlamps):
Turn the control to this position to put the
headlamps in automatic mode. Automatic
mode will turn the exterior lamps on and off
depending upon how much light is avail-
able outside of the vehicle.
(Parking Lamps):
Turn the control to this position to turn on
the parking lamps together with the follow-
ing:
Sidemarker Lamps
Taillamps
License Plate Lamps
Instrument Panel Lights
(Headlamps):
Turning the control to this position turns on
the headlamps, together with the previ-
ously listed lamps and lights.
Headlamps on Reminder
If you open the driver’s door with the igni-
tion off and the lamps on, you will hear a
warning chime.Daytime Running Lamps (DRL)
Daytime Running Lamps (DRL) can make
it easier for others to see the front of your
vehicle during the day. DRL can be helpful
in many different driving conditions, but
they can be especially helpful in the short
periods after dawn and before sunset.
Fully functional daytime running lamps are
required on all vehicles first sold in Can-
ada.
A light sensor on top of the instrument
panel makes the DRL work, so be sure it is
not covered.
The DRL system’s automatic headlamp
control will make the low-beam headlamps
come on at a reduced brightness when the
following conditions are met:
The ignition is in RUN.
The exterior lamps control is in AUTO.
The engine is running.
When the DRL are on, only the low-beam
headlamps, at a reduced level of bright-
ness, will be on. The headlamps, taillamps,
sidemarker, and other lamps will not be on.
The instrument panel and cluster will also
not be lit.
When it is dark enough outside, the DRL
will turn off and the headlamps and parking
lamps will turn on. The other lamps that
come on with the headlamps will also
come on.
Page 91 of 274
3-9 INSTRUMENT PANEL
78J00-03E
your vehicle will come on when any door is
opened. In addition, the light will come on
when the remote keyless entry unlock but-
ton is pressed. It will stay on for 20 sec-
onds or until a door is opened. After the
door is opened the light will remain on and
stay on for 20 seconds after the doors are
closed, or until you put the key in the igni-
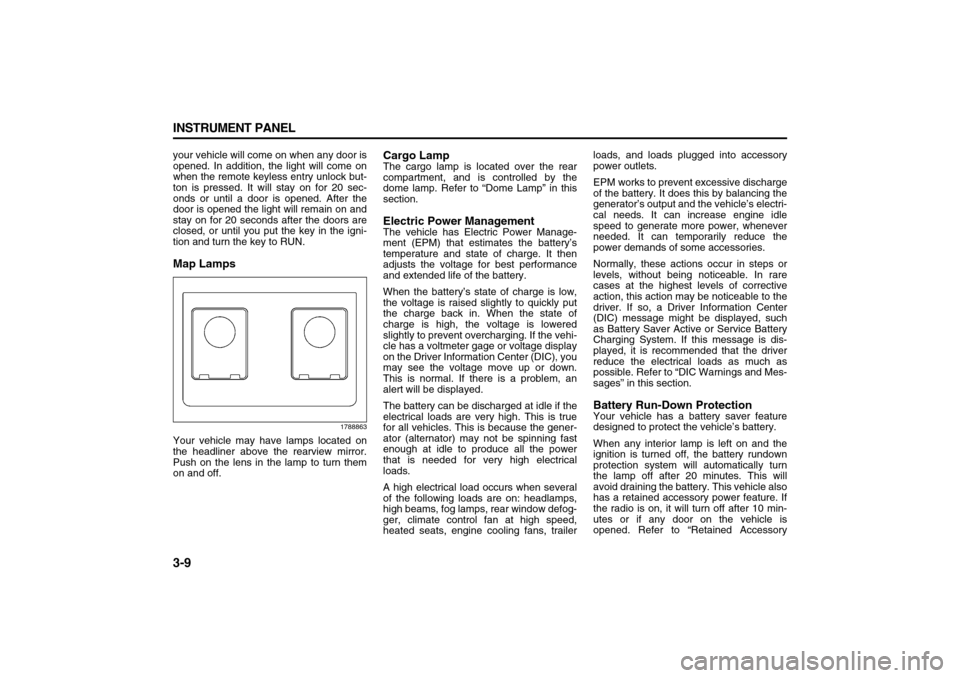
tion and turn the key to RUN.Map Lamps
1788863
Your vehicle may have lamps located on
the headliner above the rearview mirror.
Push on the lens in the lamp to turn them
on and off.
Cargo LampThe cargo lamp is located over the rear
compartment, and is controlled by the
dome lamp. Refer to “Dome Lamp” in this
section.Electric Power ManagementThe vehicle has Electric Power Manage-
ment (EPM) that estimates the battery’s
temperature and state of charge. It then
adjusts the voltage for best performance
and extended life of the battery.
When the battery’s state of charge is low,
the voltage is raised slightly to quickly put
the charge back in. When the state of
charge is high, the voltage is lowered
slightly to prevent overcharging. If the vehi-
cle has a voltmeter gage or voltage display
on the Driver Information Center (DIC), you
may see the voltage move up or down.
This is normal. If there is a problem, an
alert will be displayed.
The battery can be discharged at idle if the
electrical loads are very high. This is true
for all vehicles. This is because the gener-
ator (alternator) may not be spinning fast
enough at idle to produce all the power
that is needed for very high electrical
loads.
A high electrical load occurs when several
of the following loads are on: headlamps,
high beams, fog lamps, rear window defog-
ger, climate control fan at high speed,
heated seats, engine cooling fans, trailerloads, and loads plugged into accessory
power outlets.
EPM works to prevent excessive discharge
of the battery. It does this by balancing the
generator’s output and the vehicle’s electri-
cal needs. It can increase engine idle
speed to generate more power, whenever
needed. It can temporarily reduce the
power demands of some accessories.
Normally, these actions occur in steps or
levels, without being noticeable. In rare
cases at the highest levels of corrective
action, this action may be noticeable to the
driver. If so, a Driver Information Center
(DIC) message might be displayed, such
as Battery Saver Active or Service Battery
Charging System. If this message is dis-
played, it is recommended that the driver
reduce the electrical loads as much as
possible. Refer to “DIC Warnings and Mes-
sages” in this section.
Battery Run-Down ProtectionYour vehicle has a battery saver feature
designed to protect the vehicle’s battery.
When any interior lamp is left on and the
ignition is turned off, the battery rundown
protection system will automatically turn
the lamp off after 20 minutes. This will
avoid draining the battery. This vehicle also
has a retained accessory power feature. If
the radio is on, it will turn off after 10 min-
utes or if any door on the vehicle is
opened. Refer to “Retained Accessory
Page 94 of 274
3-12 INSTRUMENT PANEL
78J00-03E
The modes can also be selected by press-
ing the following buttons:
AUX (Auxiliary):
This button is on a vehicle that has the
Rear Climate Control System. Press it to
turn on the rear heating and air condition-
ing. Refer to “Rear Air Conditioning and
Heating System” in this section for more
information.
(Outside Air):
Press this button to turn on the outside air
mode. While this mode is on, outside air
circulates throughout the vehicle. An indi-
cator light in the button comes on when
this button is pressed. The outside air
mode can be used with all modes, but it
cannot be used with the recirculation
mode.
(Recirculation):
Press this button to recirculate cabin air
through the vehicle. It can be used to pre-
vent outside air and odors from entering
the vehicle or to help heat or cool the air
inside the vehicle more quickly. An indica-
tor light above the symbol comes on in this
mode. Operation in this mode during peri-
ods of high humidity and cool outside tem-
peratures can result in increased window
fogging. If window fogging is experienced,
select the defrost mode.
The recirculation mode cannot be used
with outside air, floor, defog, or defrost
modes.If your vehicle has a Rear Climate Control
System, use this button to switch between
outside air and recirculation.
(Air Conditioning):
Press this button to turn the air condition-
ing system on or off. When this button is
pressed, an indicator light on the button
comes on to let you know the air condition-
ing is activated.
On hot days, open the windows to let hot
inside air escape, then close them. This
helps to reduce the time it takes for the
vehicle to cool down. It also helps the sys-
tem to operate more efficiently.
The air conditioning system removes mois-
ture from the air, so you might notice a
small amount of water dripping underneath
the vehicle while idling or after turning off
the engine. This is normal.
(Heated Seats):
If your vehicle has heated seats, refer to
“Heated Seats” in the “Seats and Restraint
Systems” section for more information.
Defogging and Defrosting
Fog or frost on the inside of windows is a
result of high humidity (moisture) condens-
ing on the cool window glass. This can be
minimized if the climate control system is
used properly. To avoid fogging windows
on rainy and humid days at temperatures
above freezing, run the air conditioning
compressor. It is best to avoid the use of
the recirculation mode, except when maxi-mum A/C performance is needed or for
short times to avoid exterior odors.
Use the floor/defog mode to clear the win-
dows of fog or moisture and warm the pas-
sengers. Use the defrost mode to remove
fog or frost from the windshield more
quickly.
When either of these modes or the floor
mode is selected, the system runs the air
conditioning compressor and cancels recir-
culation mode to dry the air; however, the
recirculation light stays on. For best
results, clear all snow and ice from the
windshield before defrosting.
Turn the right knob to select the defog or
defrost mode.
(Floor/Defog):
This mode directs about half of the air to
the floor outlets and the remaining air to
the windshield and the side window out-
lets.
(Defrost):
This mode directs most of the air to the
windshield and the side window outlets.
Rear Window Defogger
The rear window defogger uses a warming
grid to remove fog from the rear window.
The rear window defogger only works
when the ignition is in RUN.