dead battery SUZUKI XL7 2007 2.G Owners Manual
[x] Cancel search | Manufacturer: SUZUKI, Model Year: 2007, Model line: XL7, Model: SUZUKI XL7 2007 2.GPages: 274, PDF Size: 6.12 MB
Page 173 of 274

4-15 DRIVING YOUR VEHICLE
78J00-03E
vehicle has a traction system, you will want
to slow down and adjust your driving to the
road conditions. Under certain conditions,
you may want to turn the traction system
off, such as when driving through deep
snow and loose gravel, to help maintain
vehicle motion at lower speeds. Refer to
“Traction Control System (TCS)” and
“Electronic Stability Control” in this section.
The Anti-Lock Brake System (ABS)
improves your vehicle’s stability when you
make a hard stop on a slippery road. Even
though you have ABS, you will want to
begin stopping sooner than you would on
dry pavement. Refer to “Anti-Lock Brake
System (ABS)” in this section.
Allow greater following distance on any
slippery road.
Watch for slippery spots. The road might
be fine until you hit a spot that is covered
with ice. On an otherwise clear road, ice
patches may appear in shaded areas
where the sun cannot reach, such as
around clumps of trees, behind build-
ings, or under bridges. Sometimes the
surface of a curve or an overpass may
remain icy when the surrounding roads
are clear. If you see a patch of ice ahead
of you, brake before you are on it. Try not
to brake while you are actually on the
ice, and avoid sudden steering maneu-
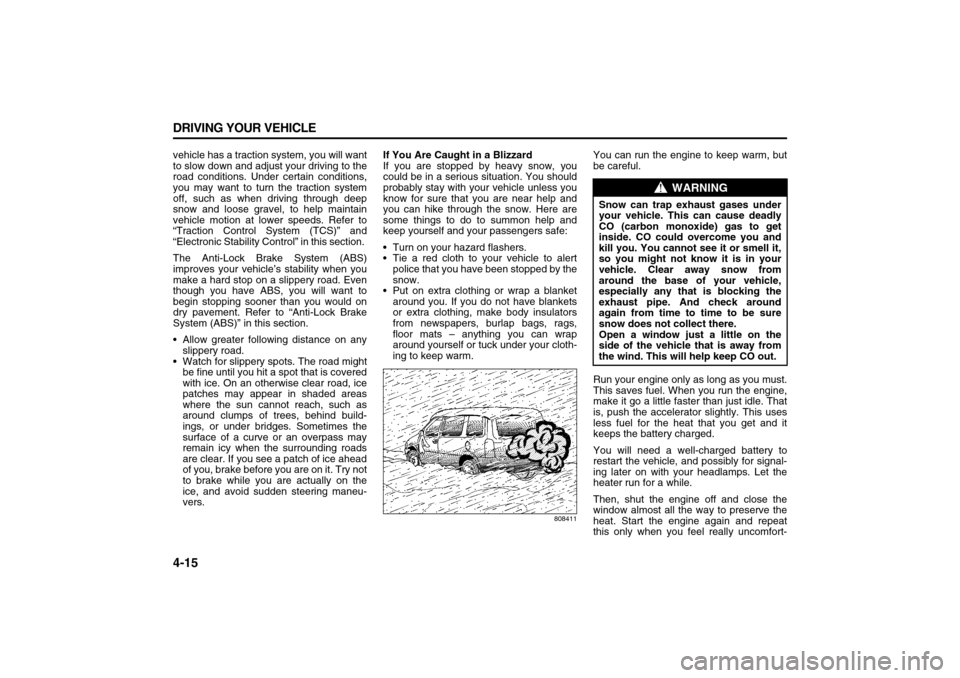
vers.If You Are Caught in a Blizzard
If you are stopped by heavy snow, you
could be in a serious situation. You should
probably stay with your vehicle unless you
know for sure that you are near help and
you can hike through the snow. Here are
some things to do to summon help and
keep yourself and your passengers safe:
Turn on your hazard flashers.
Tie a red cloth to your vehicle to alert
police that you have been stopped by the
snow.
Put on extra clothing or wrap a blanket
around you. If you do not have blankets
or extra clothing, make body insulators
from newspapers, burlap bags, rags,
floor mats – anything you can wrap
around yourself or tuck under your cloth-
ing to keep warm.
808411
You can run the engine to keep warm, but
be careful.
Run your engine only as long as you must.
This saves fuel. When you run the engine,
make it go a little faster than just idle. That
is, push the accelerator slightly. This uses
less fuel for the heat that you get and it
keeps the battery charged.
You will need a well-charged battery to
restart the vehicle, and possibly for signal-
ing later on with your headlamps. Let the
heater run for a while.
Then, shut the engine off and close the
window almost all the way to preserve the
heat. Start the engine again and repeat
this only when you feel really uncomfort-
WARNING
Snow can trap exhaust gases under
your vehicle. This can cause deadly
CO (carbon monoxide) gas to get
inside. CO could overcome you and
kill you. You cannot see it or smell it,
so you might not know it is in your
vehicle. Clear away snow from
around the base of your vehicle,
especially any that is blocking the
exhaust pipe. And check around
again from time to time to be sure
snow does not collect there.
Open a window just a little on the
side of the vehicle that is away from
the wind. This will help keep CO out.
Page 205 of 274

5-21 SERVICE AND APPEARANCE CARE
78J00-03E
Do not connect positive (+) to negative
(–), or you will get a short that would
damage the battery and maybe other
parts too. And do not connect the nega-
tive (–) cable to the negative (–) termi-
nal on the dead battery because this
can cause sparks.
871918
6) Connect the red positive (+) cable to
the positive (+) terminal location on the
vehicle with the dead battery. Use a
remote positive (+) terminal if the vehi-
cle has one.
7) Do not let the other end touch metal.
Connect it to the positive (+) terminal
location on the vehicle with the good
battery. Use a remote positive (+) termi-
nal if the vehicle has one.
8) Now connect the black negative (–)
cable to the negative (–) terminal loca-
tion on the vehicle with the good bat-
tery. Use a remote negative (–) terminalif the vehicle has one.
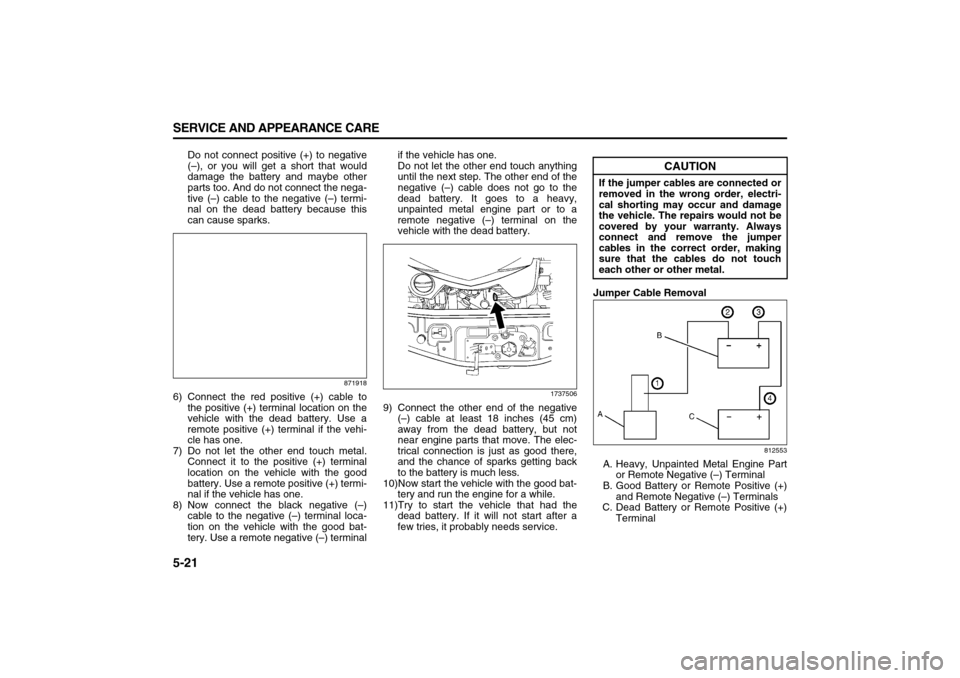
Do not let the other end touch anything
until the next step. The other end of the
negative (–) cable does not go to the
dead battery. It goes to a heavy,
unpainted metal engine part or to a
remote negative (–) terminal on the
vehicle with the dead battery.
1737506
9) Connect the other end of the negative
(–) cable at least 18 inches (45 cm)
away from the dead battery, but not
near engine parts that move. The elec-
trical connection is just as good there,
and the chance of sparks getting back
to the battery is much less.
10)Now start the vehicle with the good bat-
tery and run the engine for a while.
11)Try to start the vehicle that had the
dead battery. If it will not start after a
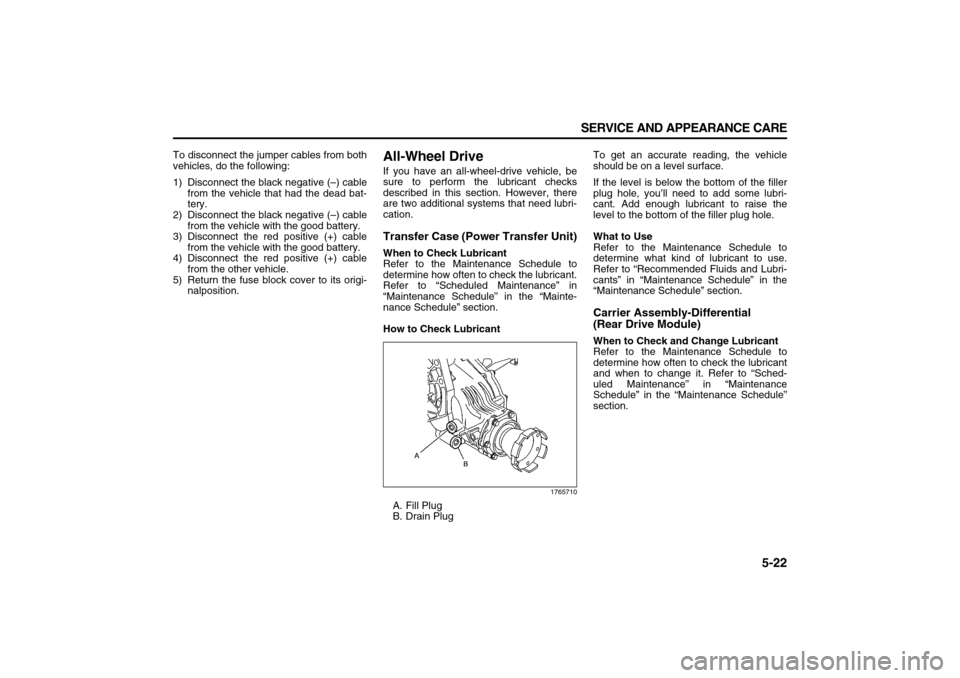
few tries, it probably needs service.Jumper Cable Removal
812553
A. Heavy, Unpainted Metal Engine Part
or Remote Negative (–) Terminal
B. Good Battery or Remote Positive (+)
and Remote Negative (–) Terminals
C. Dead Battery or Remote Positive (+)
Terminal
CAUTION
If the jumper cables are connected or
removed in the wrong order, electri-
cal shorting may occur and damage
the vehicle. The repairs would not be
covered by your warranty. Always
connect and remove the jumper
cables in the correct order, making
sure that the cables do not touch
each other or other metal.
Page 206 of 274

5-22 SERVICE AND APPEARANCE CARE
78J00-03E
To disconnect the jumper cables from both
vehicles, do the following:
1) Disconnect the black negative (–) cable
from the vehicle that had the dead bat-
tery.
2) Disconnect the black negative (–) cable
from the vehicle with the good battery.
3) Disconnect the red positive (+) cable
from the vehicle with the good battery.
4) Disconnect the red positive (+) cable
from the other vehicle.
5) Return the fuse block cover to its origi-
nalposition.
All-Wheel DriveIf you have an all-wheel-drive vehicle, be
sure to perform the lubricant checks
described in this section. However, there
are two additional systems that need lubri-
cation.Transfer Case (Power Transfer Unit)When to Check Lubricant
Refer to the Maintenance Schedule to
determine how often to check the lubricant.
Refer to “Scheduled Maintenance” in
“Maintenance Schedule” in the “Mainte-
nance Schedule” section.
How to Check Lubricant
1765710
A. Fill Plug
B. Drain PlugTo get an accurate reading, the vehicle
should be on a level surface.
If the level is below the bottom of the filler
plug hole, you’ll need to add some lubri-
cant. Add enough lubricant to raise the
level to the bottom of the filler plug hole.
What to Use
Refer to the Maintenance Schedule to
determine what kind of lubricant to use.
Refer to “Recommended Fluids and Lubri-
cants” in “Maintenance Schedule” in the
“Maintenance Schedule” section.
Carrier Assembly-Differential
(Rear Drive Module)When to Check and Change Lubricant
Refer to the Maintenance Schedule to
determine how often to check the lubricant
and when to change it. Refer to “Sched-
uled Maintenance” in “Maintenance
Schedule” in the “Maintenance Schedule”
section.