key TESLA MODEL 3 2020 s User Guide
[x] Cancel search | Manufacturer: TESLA, Model Year: 2020, Model line: MODEL 3, Model: TESLA MODEL 3 2020Pages: 220, PDF Size: 9.65 MB
Page 23 of 220
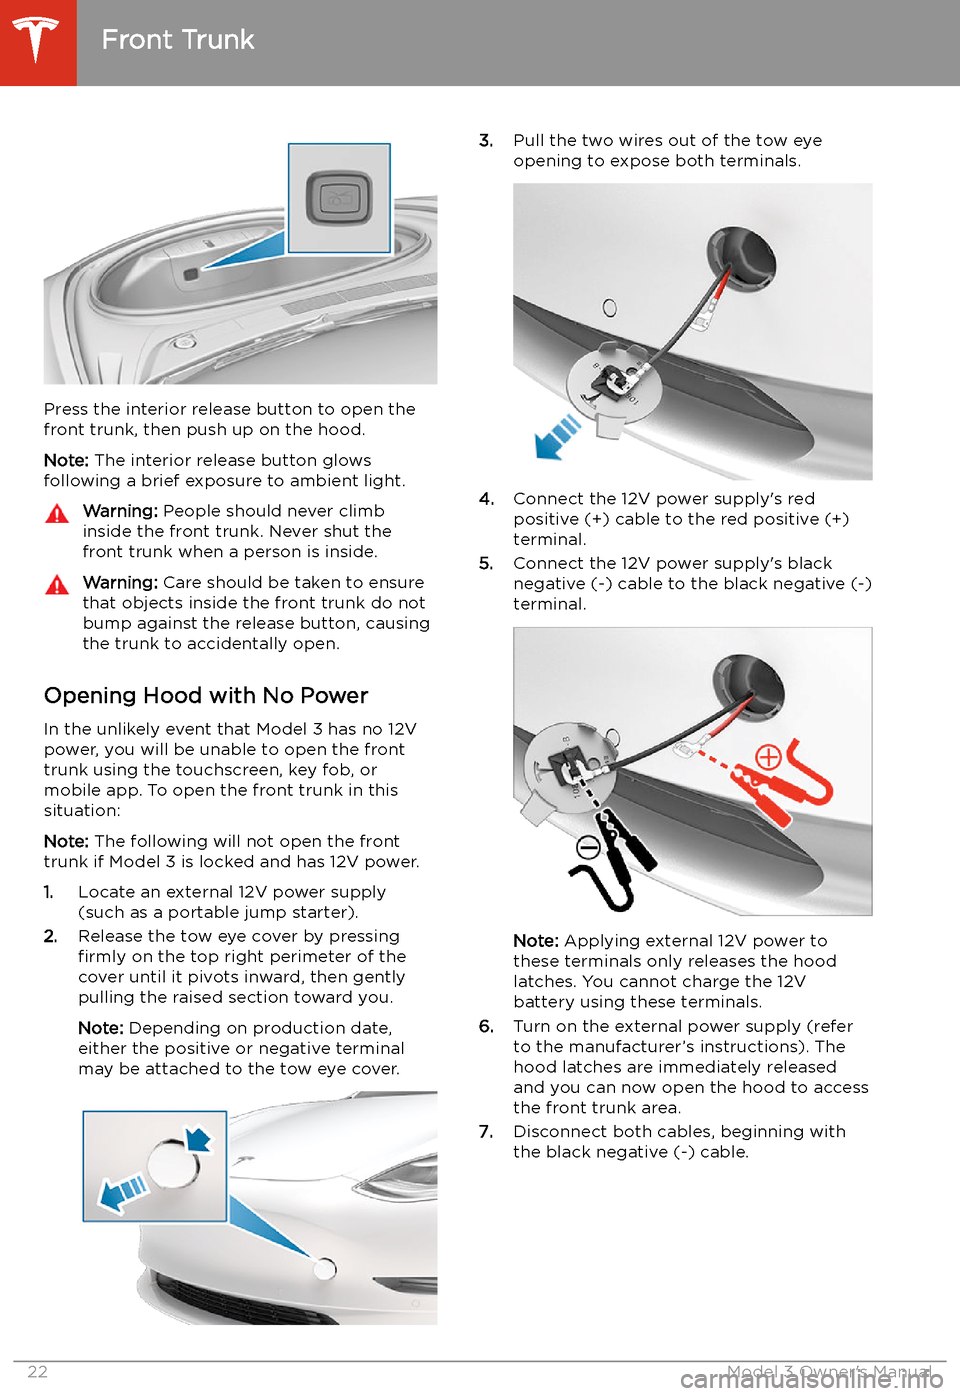
Press the interior release button to open the
front trunk, then push up on the hood.
Note: The interior release button glows
following a brief exposure to ambient light.
Warning: People should never climb
inside the front trunk. Never shut the
front trunk when a person is inside.Warning: Care should be taken to ensure
that objects inside the front trunk do not
bump against the release button, causing the trunk to accidentally open.
Opening Hood with No Power
In the unlikely event that Model 3 has no 12V power, you will be unable to open the front
trunk using the touchscreen, key fob, or
mobile app. To open the front trunk in this situation:
Note: The following will not open the front
trunk if Model 3 is locked and has 12V power.
1. Locate an external 12V power supply
(such as a portable jump starter).
2. Release the tow eye cover by pressing
firmly on the top right perimeter of the
cover until it pivots inward, then gently pulling the raised section toward you.
Note: Depending on production date,
either the positive or negative terminal
may be attached to the tow eye cover.
3. Pull the two wires out of the tow eye
opening to expose both terminals.
4. Connect the 12V power supply
Page 25 of 220
Interior Storage and Electronics
Glovebox
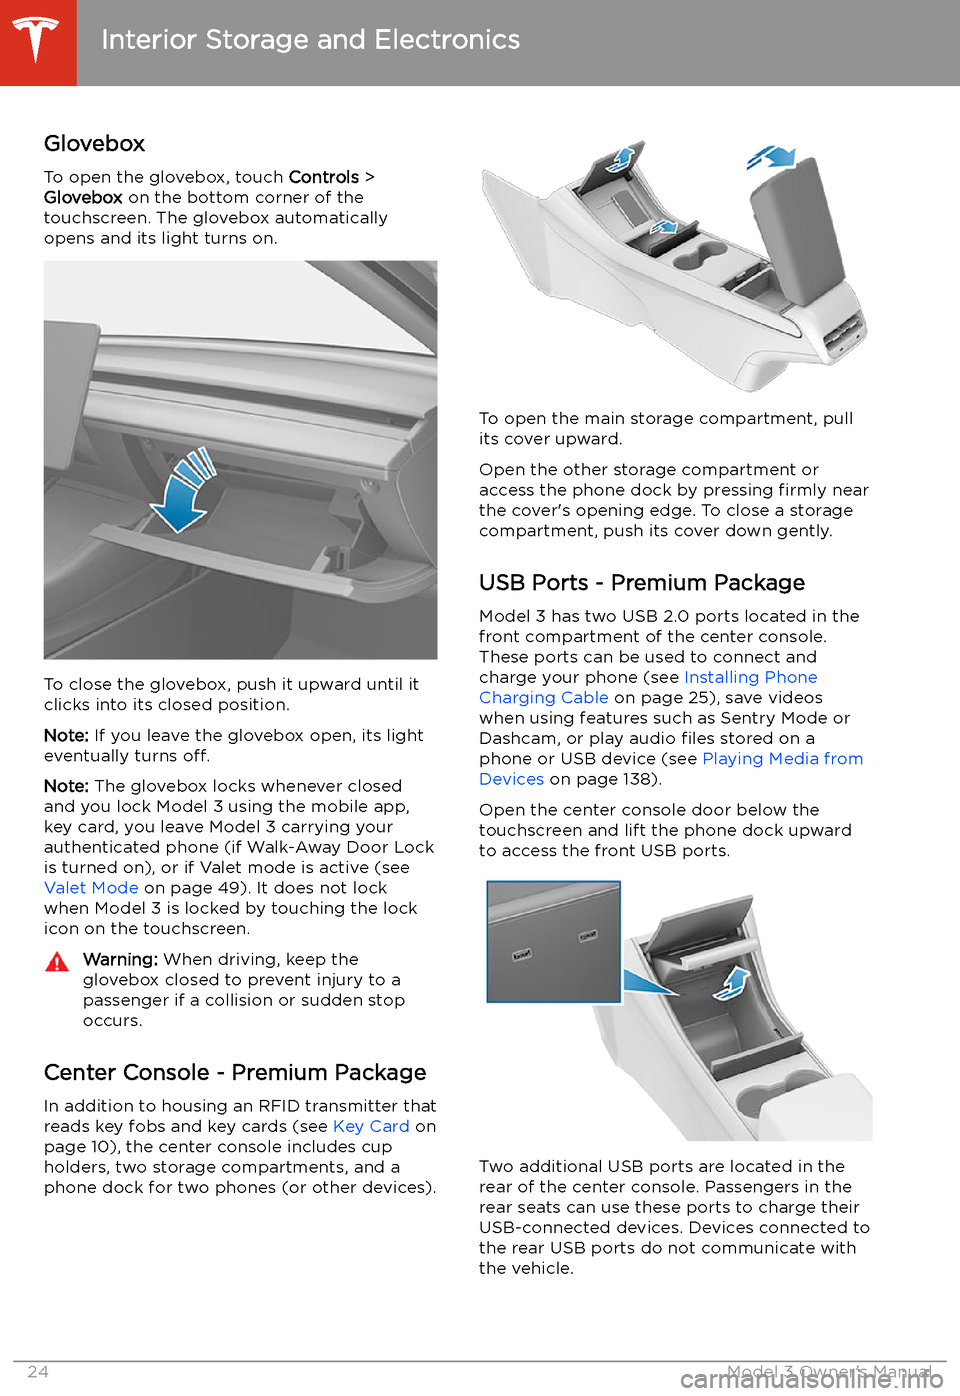
To open the glovebox, touch Controls >
Glovebox on the bottom corner of the
touchscreen. The glovebox automatically
opens and its light turns on.
To close the glovebox, push it upward until it
clicks into its closed position.
Note: If you leave the glovebox open, its light
eventually turns off.
Note: The glovebox locks whenever closed
and you lock Model 3 using the mobile app,
key card, you leave Model 3 carrying your authenticated phone (if Walk-Away Door Lock
is turned on), or if Valet mode is active (see Valet Mode on page 49). It does not lock
when Model 3 is locked by touching the lock
icon on the touchscreen.
Warning: When driving, keep the
glovebox closed to prevent injury to a
passenger if a collision or sudden stop occurs.
Center Console - Premium Package
In addition to housing an RFID transmitter that reads key fobs and key cards (see Key Card on
page 10), the center console includes cup
holders, two storage compartments, and a
phone dock for two phones (or other devices).
To open the main storage compartment, pull its cover upward.
Open the other storage compartment or
access the phone dock by pressing firmly near
the cover
Page 50 of 220
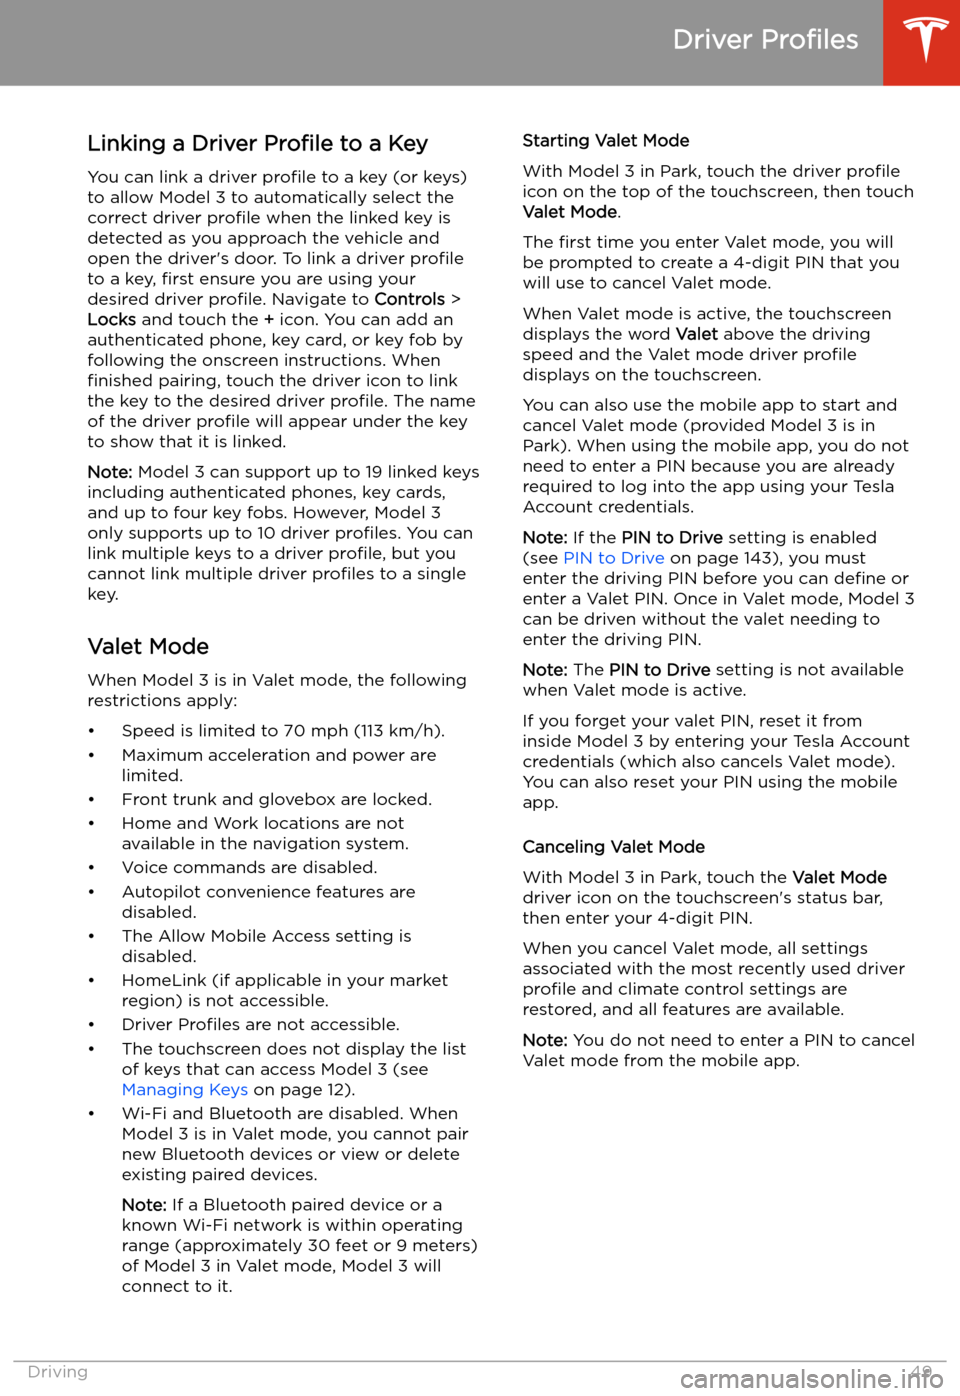
Linking a Driver Profile to a Key
You can link a driver profile to a key (or keys)
to allow Model 3 to automatically select the correct driver profile when the linked key is
detected as you approach the vehicle and
open the driver
Page 55 of 220
Starting and Powering
Off
Starting When you open a door, Model 3 powers on the
touchscreen and you can operate all controls.
To drive Model 3:
1. PRESS THE BRAKE PEDAL - Model 3
powers on and is ready to drive.
2. SELECT A GEAR - Move the gear lever all
the way down for Drive and all the way up
for Reverse. See Shifting Gears on page
56.
Note: If the PIN to Drive feature is enabled
(see PIN to Drive on page 143), you must also
enter a valid PIN on the touchscreen before
you can drive Model 3.
Note: If Passive Entry is off and you do not
press the brake pedal to start Model 3 within
approximately five minutes, a message
displays on the touchscreen and you must use
the key to lock then unlock Model 3 again before starting the vehicle.
Everything you need to know when driving
Model 3 displays on the touchscreen.
Drive Disabled - Requires Authentication
If Model 3 does not detect a key when you
press the brake (an authenticated phone is not
detected, or 30 seconds has passed since you
used the key card), the touchscreen displays a
message telling you that driving requires
authentication.
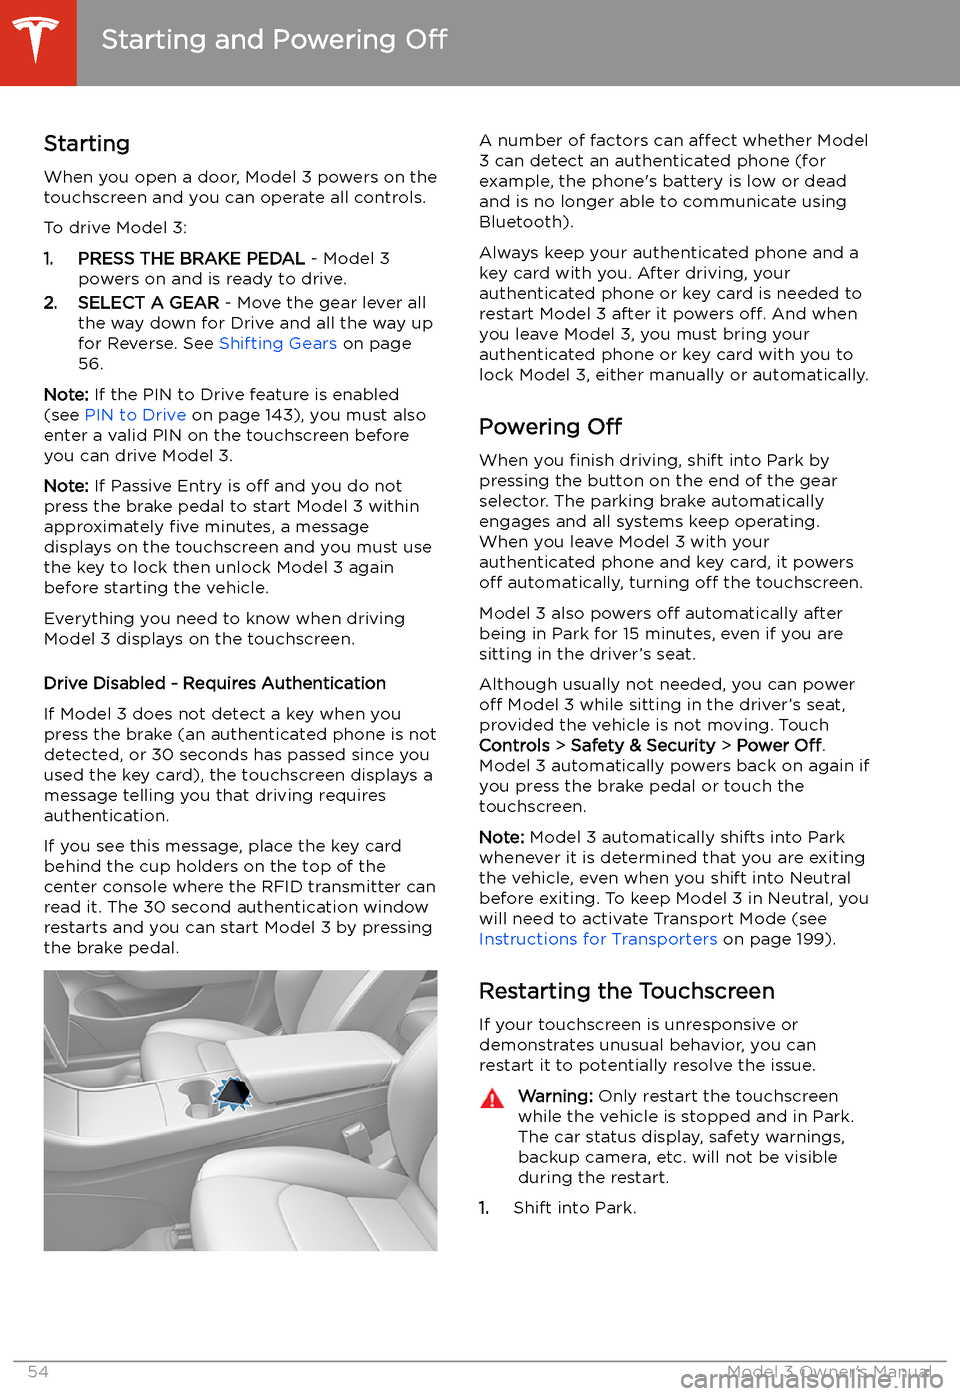
If you see this message, place the key card
behind the cup holders on the top of the center console where the RFID transmitter canread it. The 30 second authentication window
restarts and you can start Model 3 by pressing
the brake pedal.
A number of factors can affect whether Model
3 can detect an authenticated phone (for
example, the phone
Page 105 of 220
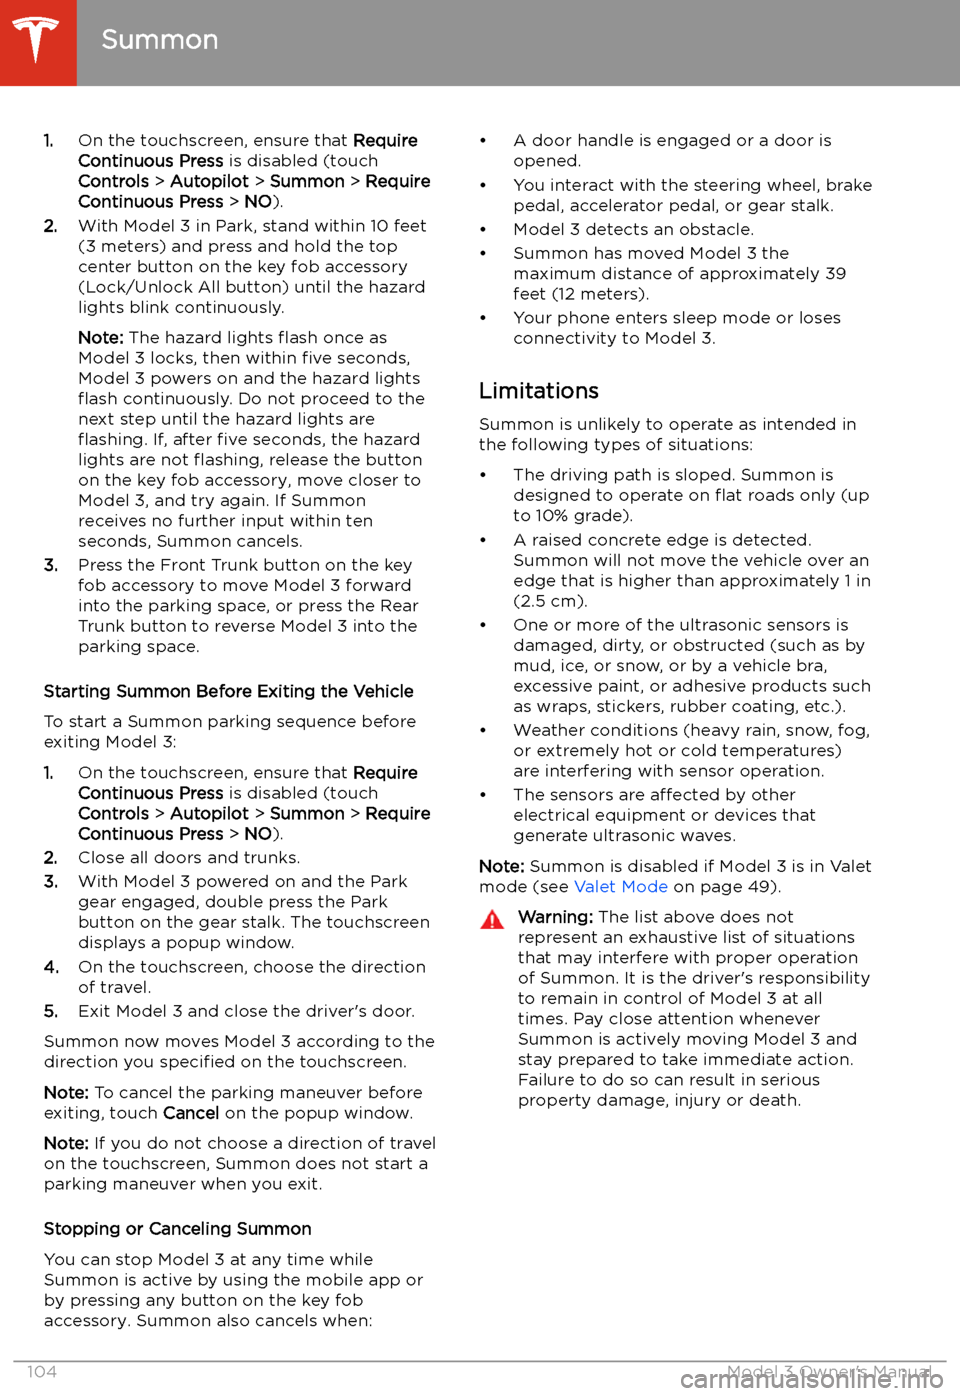
1.On the touchscreen, ensure that Require
Continuous Press is disabled (touch
Controls > Autopilot > Summon > Require
Continuous Press > NO ).
2. With Model 3 in Park, stand within 10 feet
(3 meters) and press and hold the top
center button on the key fob accessory
(Lock/Unlock All button) until the hazard
lights blink continuously.
Note: The hazard lights
Page 141 of 220
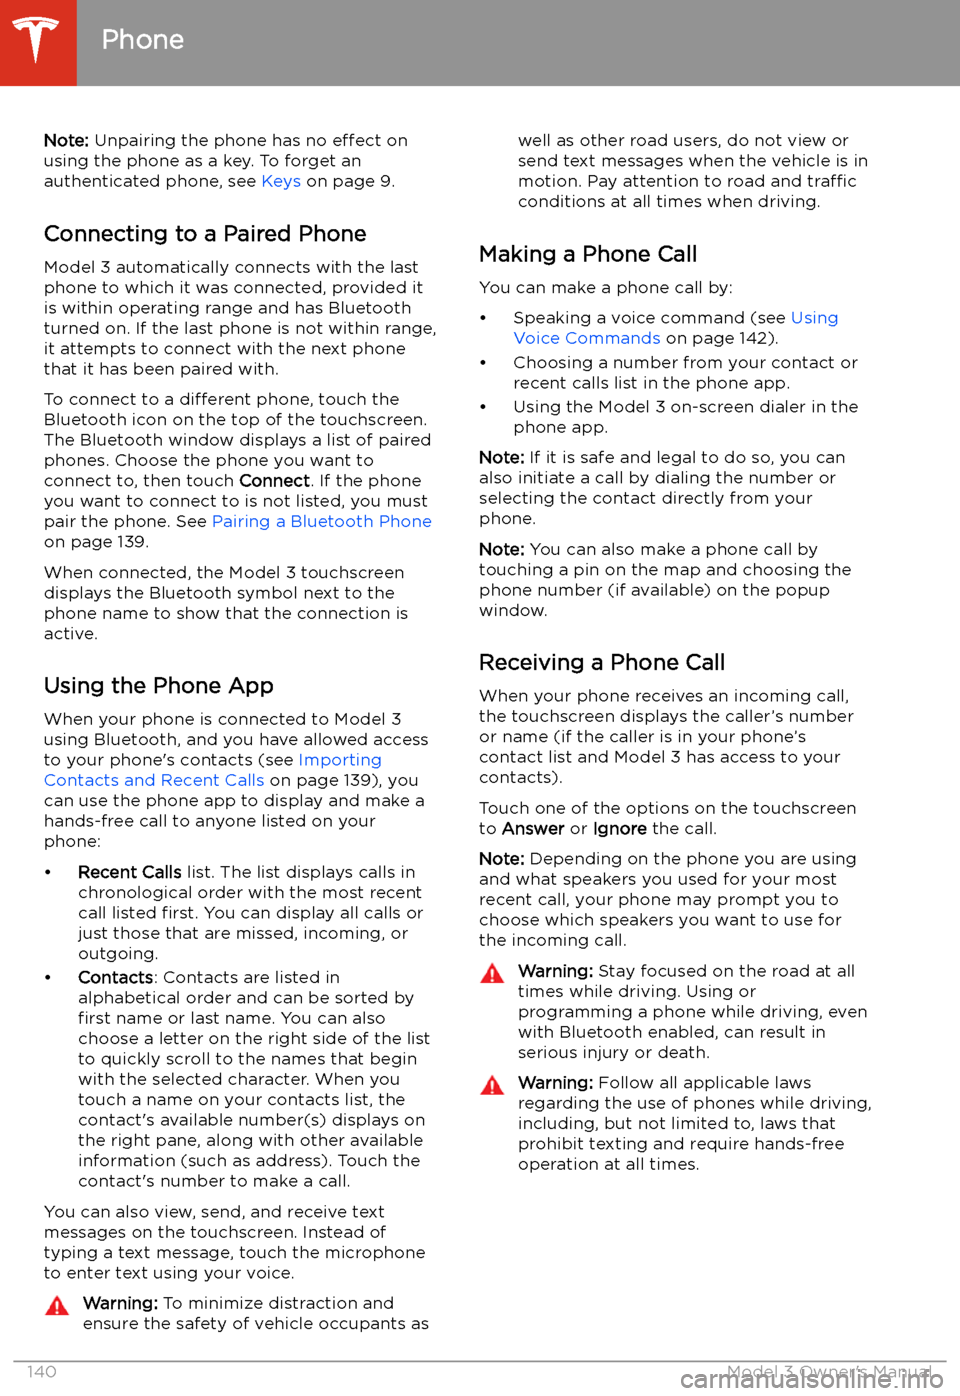
Note: Unpairing the phone has no effect on
using the phone as a key. To forget an
authenticated phone, see Keys on page 9.
Connecting to a Paired Phone
Model 3 automatically connects with the last
phone to which it was connected, provided it
is within operating range and has Bluetooth turned on. If the last phone is not within range,
it attempts to connect with the next phone
that it has been paired with.
To connect to a different phone, touch the
Bluetooth icon on the top of the touchscreen.
The Bluetooth window displays a list of paired
phones. Choose the phone you want to connect to, then touch Connect. If the phone
you want to connect to is not listed, you must
pair the phone. See Pairing a Bluetooth Phone
on page 139.
When connected, the Model 3 touchscreen displays the Bluetooth symbol next to thephone name to show that the connection is
active.
Using the Phone App
When your phone is connected to Model 3
using Bluetooth, and you have allowed access to your phone
Page 144 of 220
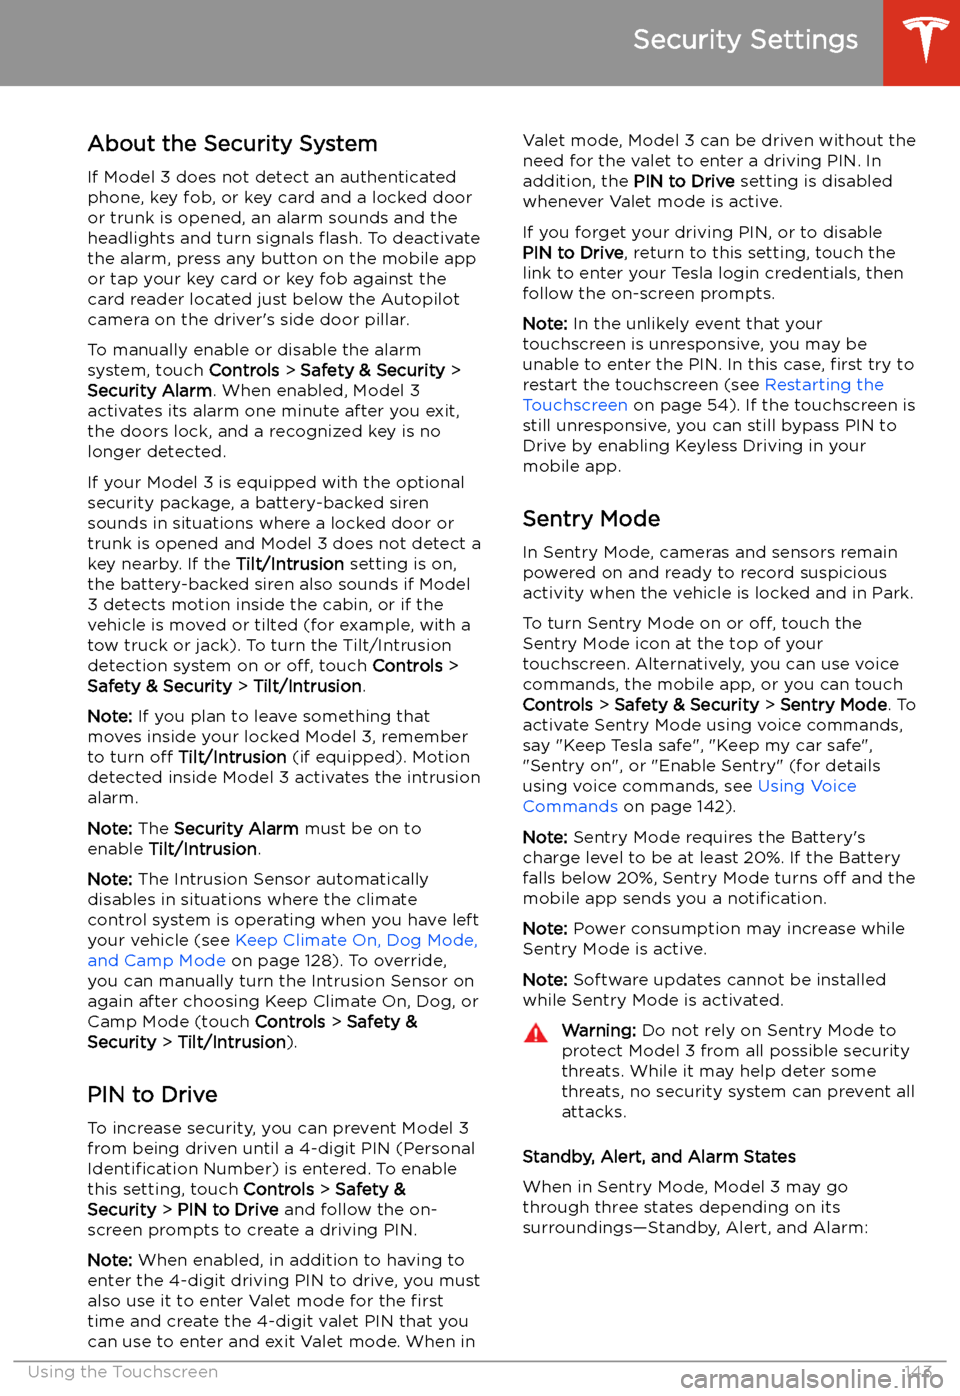
Security Settings
About the Security System
If Model 3 does not detect an authenticated
phone, key fob, or key card and a locked door
or trunk is opened, an alarm sounds and the
headlights and turn signals
Page 210 of 220
Declarations of Conformity
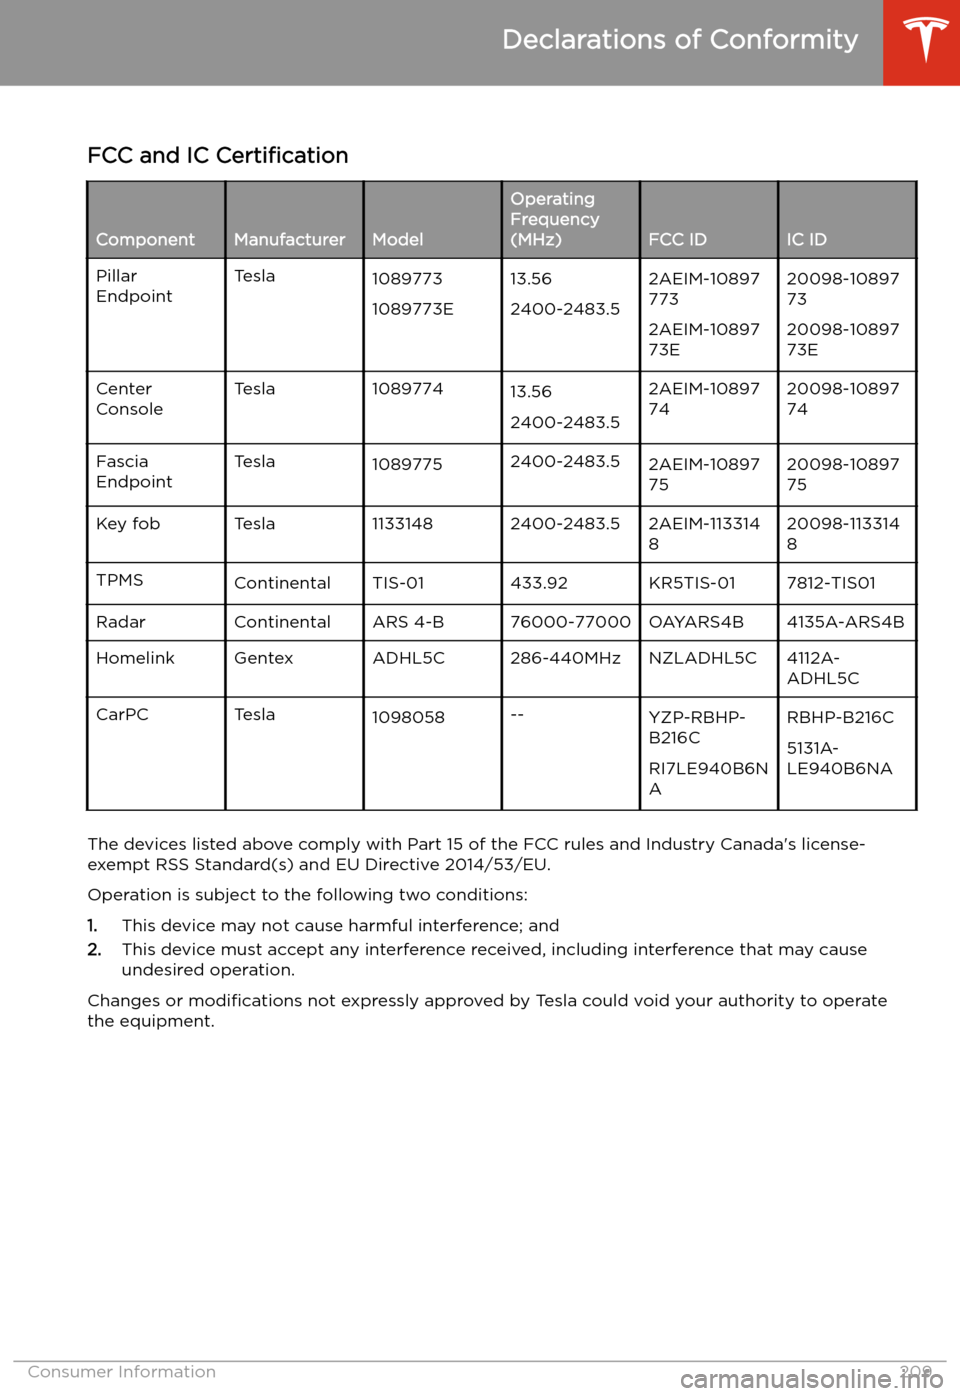
FCC and IC Certification
ComponentManufacturerModel
Operating
Frequency
(MHz)
FCC IDIC ID
Pillar
EndpointTesla1089773
1089773E13.56
2400-2483.52AEIM-10897
773
2AEIM-10897
73E20098-10897
73
20098-10897
73ECenter
ConsoleTesla108977413.56
2400-2483.52AEIM-10897
7420098-10897
74Fascia
EndpointTesla10897752400-2483.52AEIM-10897
7520098-10897
75Key fobTesla11331482400-2483.52AEIM-113314
820098-113314
8TPMSContinentalTIS-01433.92KR5TIS-017812-TIS01RadarContinentalARS 4-B76000-77000OAYARS4B4135A-ARS4BHomelinkGentexADHL5C286-440MHzNZLADHL5C4112A-
ADHL5CCarPCTesla1098058--YZP-RBHP-
B216C
RI7LE940B6N
ARBHP-B216C
5131A-
LE940B6NA
The devices listed above comply with Part 15 of the FCC rules and Industry Canada
Page 214 of 220
Index
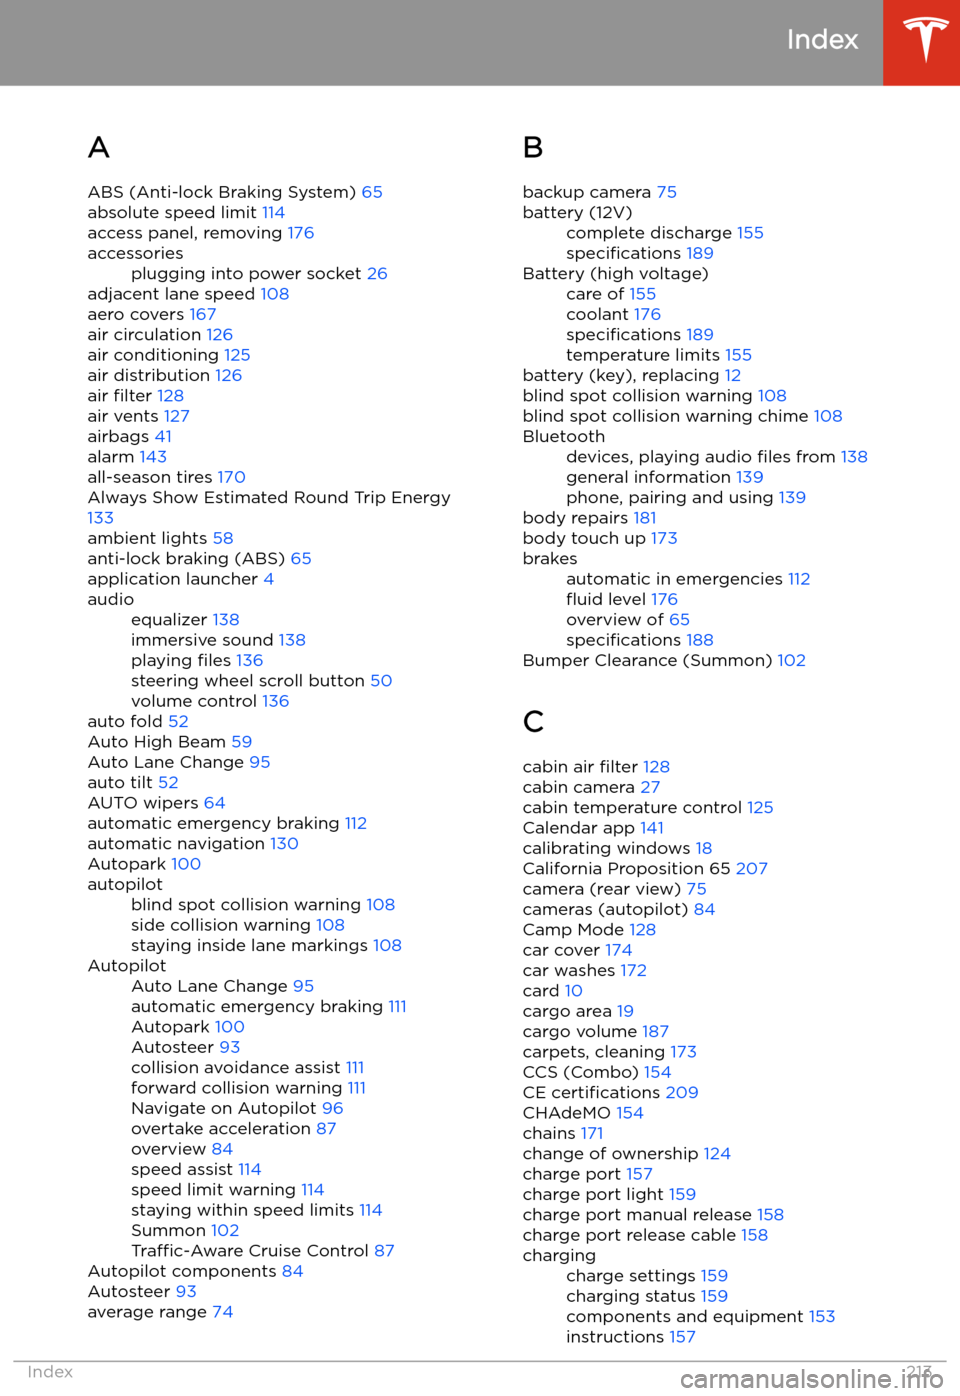
A ABS (Anti-lock Braking System) 65
absolute speed limit 114
access panel, removing 176
accessoriesplugging into power socket 26
adjacent lane speed 108
aero covers 167
air circulation 126
air conditioning 125
air distribution 126
air filter 128
air vents 127
airbags 41
alarm 143
all-season tires 170
Always Show Estimated Round Trip Energy
133
ambient lights 58
anti-lock braking (ABS) 65
application launcher 4
audioequalizer 138
immersive sound 138
playing files 136
steering wheel scroll button 50
volume control 136
auto fold
52
Auto High Beam 59
Auto Lane Change 95
auto tilt 52
AUTO wipers 64
automatic emergency braking 112
automatic navigation 130
Autopark 100
autopilotblind spot collision warning 108
side collision warning 108
staying inside lane markings 108AutopilotAuto Lane Change 95
automatic emergency braking 111
Autopark 100
Autosteer 93
collision avoidance assist 111
forward collision warning 111
Navigate on Autopilot 96
overtake acceleration 87
overview 84
speed assist 114
speed limit warning 114
staying within speed limits 114
Summon 102
Traffic-Aware Cruise Control 87
Autopilot components 84
Autosteer 93
average range 74
B
backup camera 75battery (12V)complete discharge 155
specifications 189Battery (high voltage)care of 155
coolant 176
specifications 189
temperature limits 155
battery (key), replacing 12
blind spot collision warning 108
blind spot collision warning chime 108
Bluetoothdevices, playing audio files from 138
general information 139
phone, pairing and using 139
body repairs 181
body touch up 173
brakesautomatic in emergencies 112
Page 215 of 220
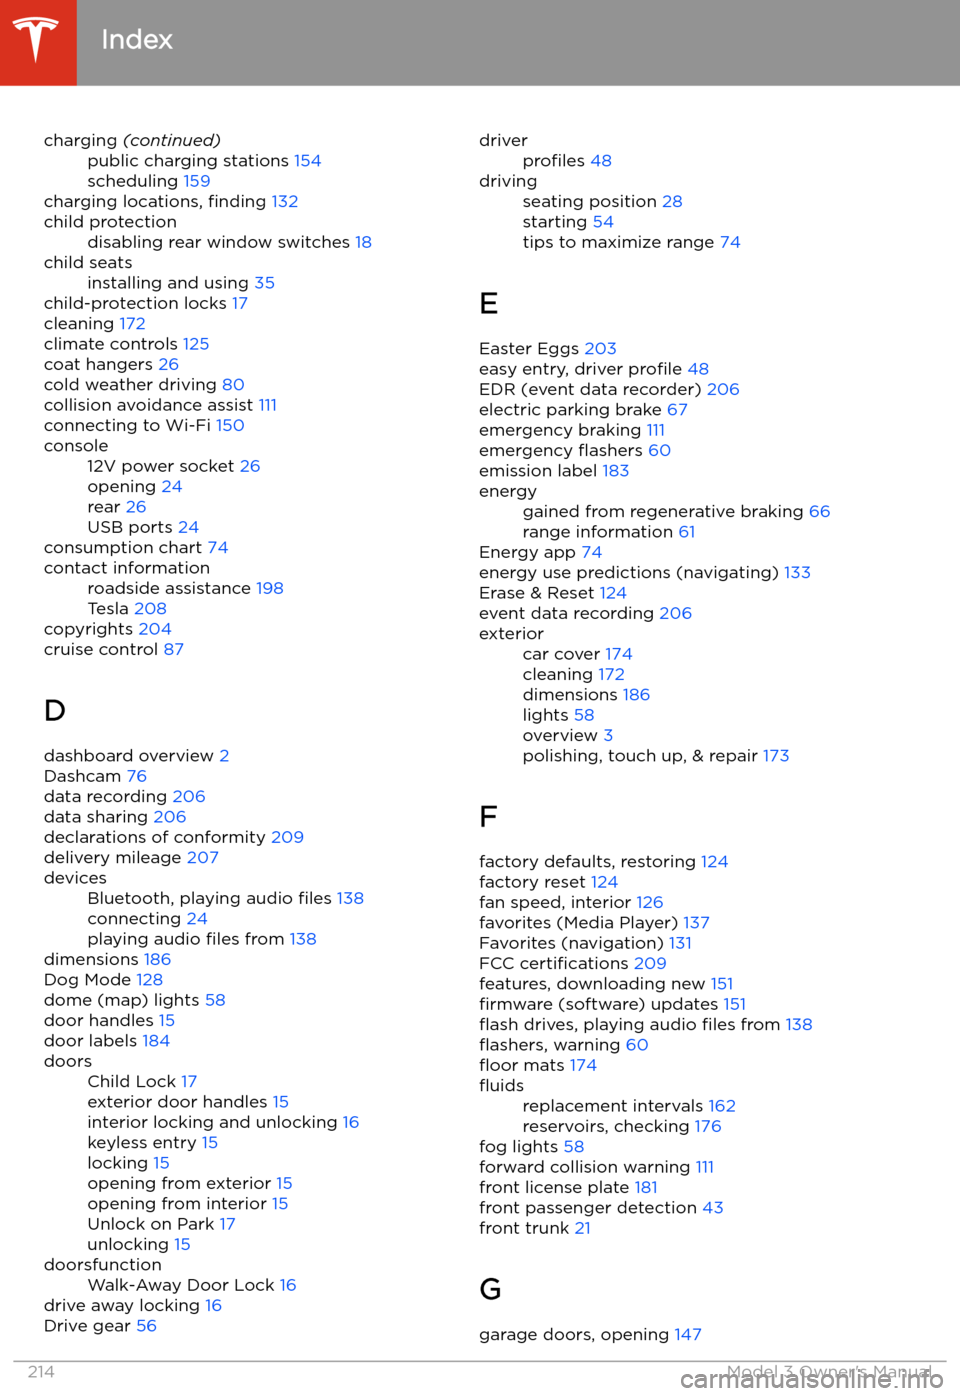
charging (continued)public charging stations 154
scheduling 159
charging locations, finding 132
child protectiondisabling rear window switches 18child seatsinstalling and using 35
child-protection locks 17
cleaning 172
climate controls 125
coat hangers 26
cold weather driving 80
collision avoidance assist 111
connecting to Wi-Fi 150
console12V power socket 26
opening 24
rear 26
USB ports 24
consumption chart 74
contact informationroadside assistance 198
Tesla 208
copyrights 204
cruise control 87
D dashboard overview 2
Dashcam 76
data recording 206
data sharing 206
declarations of conformity 209
delivery mileage 207
devicesBluetooth, playing audio files 138
connecting 24
playing audio files from 138
dimensions 186
Dog Mode 128
dome (map) lights 58
door handles 15
door labels 184
doorsChild Lock 17
exterior door handles 15
interior locking and unlocking 16
keyless entry 15
locking 15
opening from exterior 15
opening from interior 15
Unlock on Park 17
unlocking 15doorsfunctionWalk-Away Door Lock 16
drive away locking 16
Drive gear 56
driverprofiles 48drivingseating position 28
starting 54
tips to maximize range 74
E
Easter Eggs 203
easy entry, driver profile 48
EDR (event data recorder) 206
electric parking brake 67
emergency braking 111
emergency