trunk TESLA MODEL 3 2022 Owner´s Manual
[x] Cancel search | Manufacturer: TESLA, Model Year: 2022, Model line: MODEL 3, Model: TESLA MODEL 3 2022Pages: 248, PDF Size: 7.76 MB
Page 26 of 248
WARNING: Riding in a moving vehicle with the
seat back reclined can result in serious injuries in a
collision, as you could slide under the lap belt or
be propelled into the seat belt. Ensure your seat
back is reclined no more than 30 degrees when
the vehicle is moving.
Folding Rear Seats
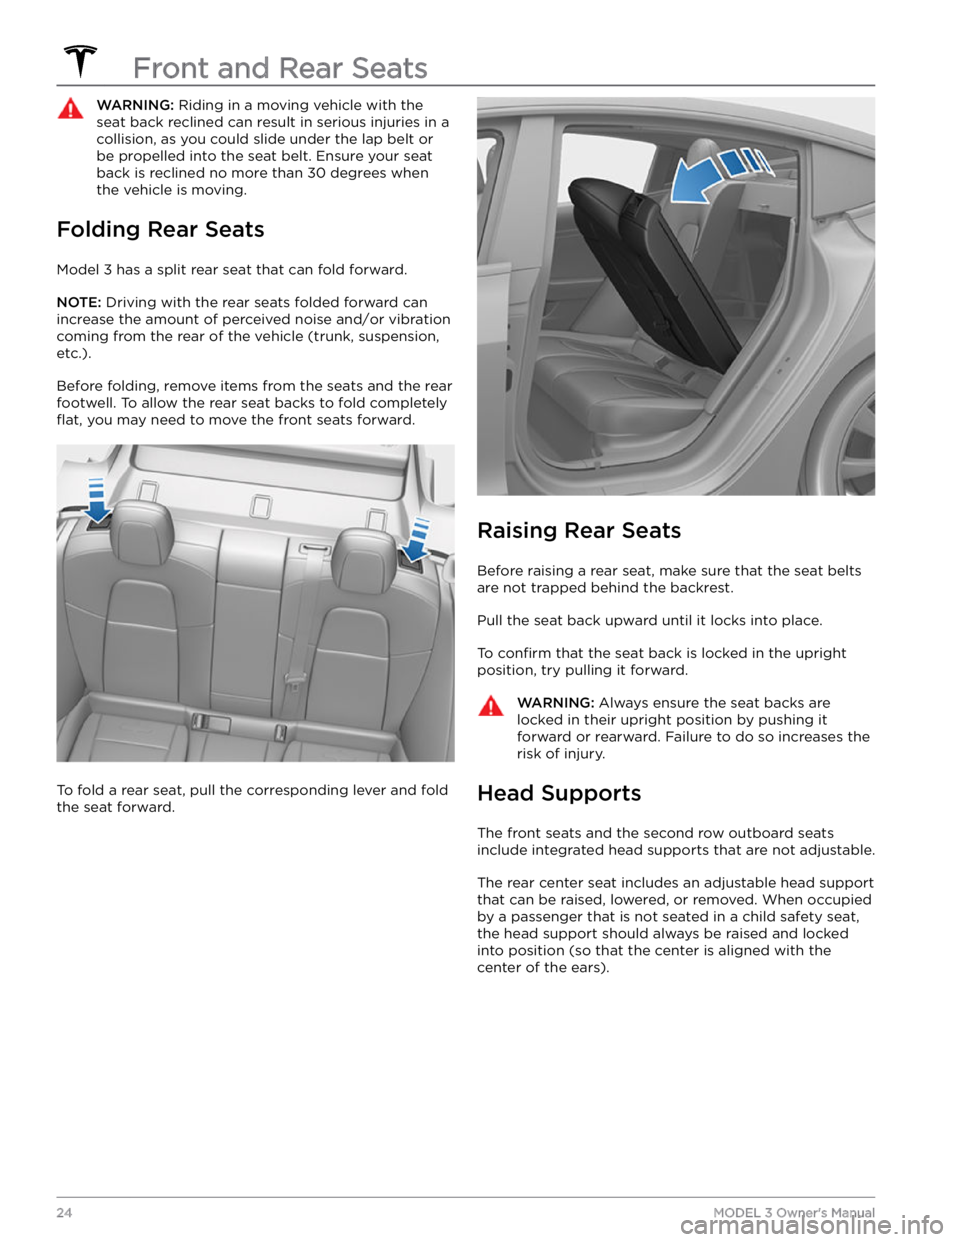
Model 3 has a split rear seat that can fold forward.
NOTE: Driving with the rear seats folded forward can
increase the amount of perceived noise and/or vibration
coming from the rear of the vehicle (trunk, suspension, etc.).
Before folding, remove items from the seats and the rear footwell. To allow the rear seat backs to fold completely
flat, you may need to move the front seats forward.
To fold a rear seat, pull the corresponding lever and fold the seat forward.
Raising Rear Seats
Before raising a rear seat, make sure that the seat belts are not trapped behind the backrest.
Pull the seat back upward until it locks into place.
To confirm that the seat back is locked in the upright
position, try pulling it forward.
WARNING: Always ensure the seat backs are
locked in their upright position by pushing it
forward or rearward. Failure to do so increases the
risk of injury.
Head Supports
The front seats and the second row outboard seats
include integrated head supports that are not adjustable.
The rear center seat includes an adjustable head support
that can be raised, lowered, or removed. When occupied
by a passenger that is not seated in a child safety seat, the head support should always be raised and locked into position (so that the center is aligned with the
center of the ears).
Front and Rear Seats
24MODEL 3 Owner
Page 57 of 248
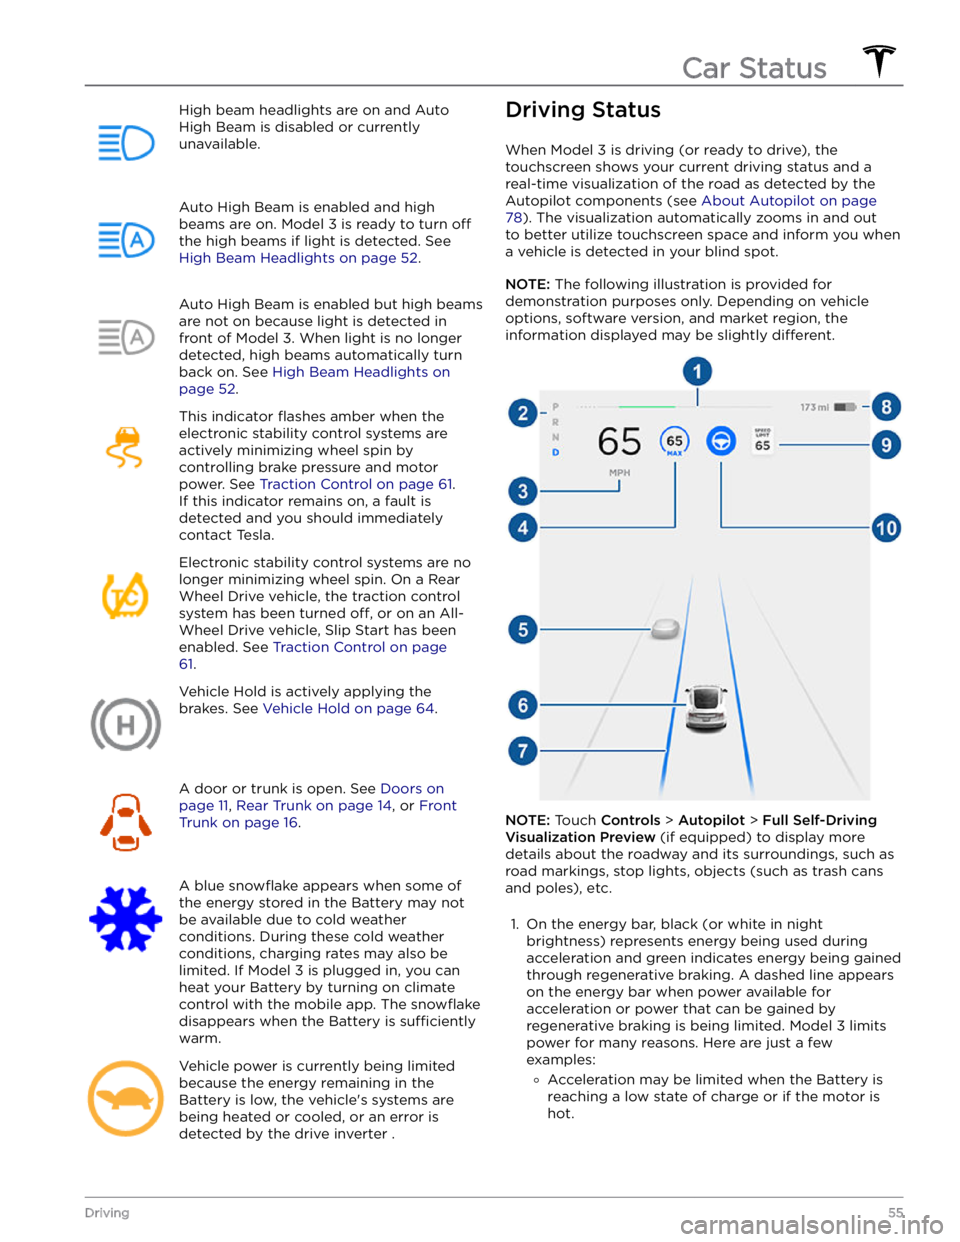
High beam headlights are on and Auto
High Beam is disabled or currently
unavailable.Auto High Beam is enabled and high
beams are on.
Model 3 is ready to turn off
the high beams if light is detected. See
High Beam Headlights on page 52.
Auto High Beam is enabled but high beams
are not on because light is detected in front of
Model 3. When light is no longer
detected, high beams automatically turn
back on. See
High Beam Headlights on
page 52.
This indicator flashes amber when the
electronic stability control systems are actively minimizing wheel spin by
controlling brake pressure and motor
power. See
Traction Control on page 61.
If this indicator remains on, a fault is detected and you should immediately contact Tesla.
Electronic stability control systems are no longer minimizing wheel spin. On a Rear Wheel Drive vehicle, the traction control system has been turned
off, or on an All-
Wheel Drive vehicle, Slip Start has been
enabled. See
Traction Control on page
61.
Vehicle Hold is actively applying the brakes. See
Vehicle Hold on page 64.
A door or trunk is open. See Doors on
page 11, Rear Trunk on page 14, or Front
Trunk on page 16.
A blue snowflake appears when some of
the energy stored in the Battery may not be available due to cold weather
conditions. During these cold weather
conditions, charging rates may also be limited. If
Model 3 is plugged in, you can
heat your Battery by turning on climate control with the mobile app. The
snowflake
disappears when the Battery is sufficiently
warm.
Vehicle power is currently being limited
because the energy remaining in the
Battery is low, the vehicle
Page 142 of 248
About the Security System
If Model 3 does not detect an authenticated phone, key
fob, or key card and a locked door or trunk is opened, an
alarm sounds and the headlights and turn signals
flash.
To deactivate the alarm, press any button on the mobile
app or tap your key card or key fob against the card reader located
just below the Autopilot camera on the
driver
Page 158 of 248
2. While holding the public charging handle in one hand and the adapter in the other hand, press and hold the
button on the public charging handle and pull both
outwards, removing the handle and adapter at the same time.
NOTE: If the charging station handle separates from
the adapter, leaving the adapter in
Model 3, use the
touchscreen to unlock the charge port (touch the charging icon on the overhead view of the vehicle).
3.
Press and hold the charging handle button again to release the adapter from the charging handle.
NOTE: The charge port automatically closes within
approximately 10 seconds of removing the connector from the charge port.
CAUTION: Tesla strongly recommends leaving
Model 3 plugged in when not in use. This maintains
the Battery at the optimum level of charge.
Manually Releasing Charge Cable
If the usual methods for releasing a charge cable from the charge port (using the charge handle release button,
touchscreen, or mobile app) do not work, carefully
follow these steps:
1.
Ensure that Model 3 is not actively charging by
displaying the charging screen on the touchscreen. If necessary, touch
Stop Charging.
2.
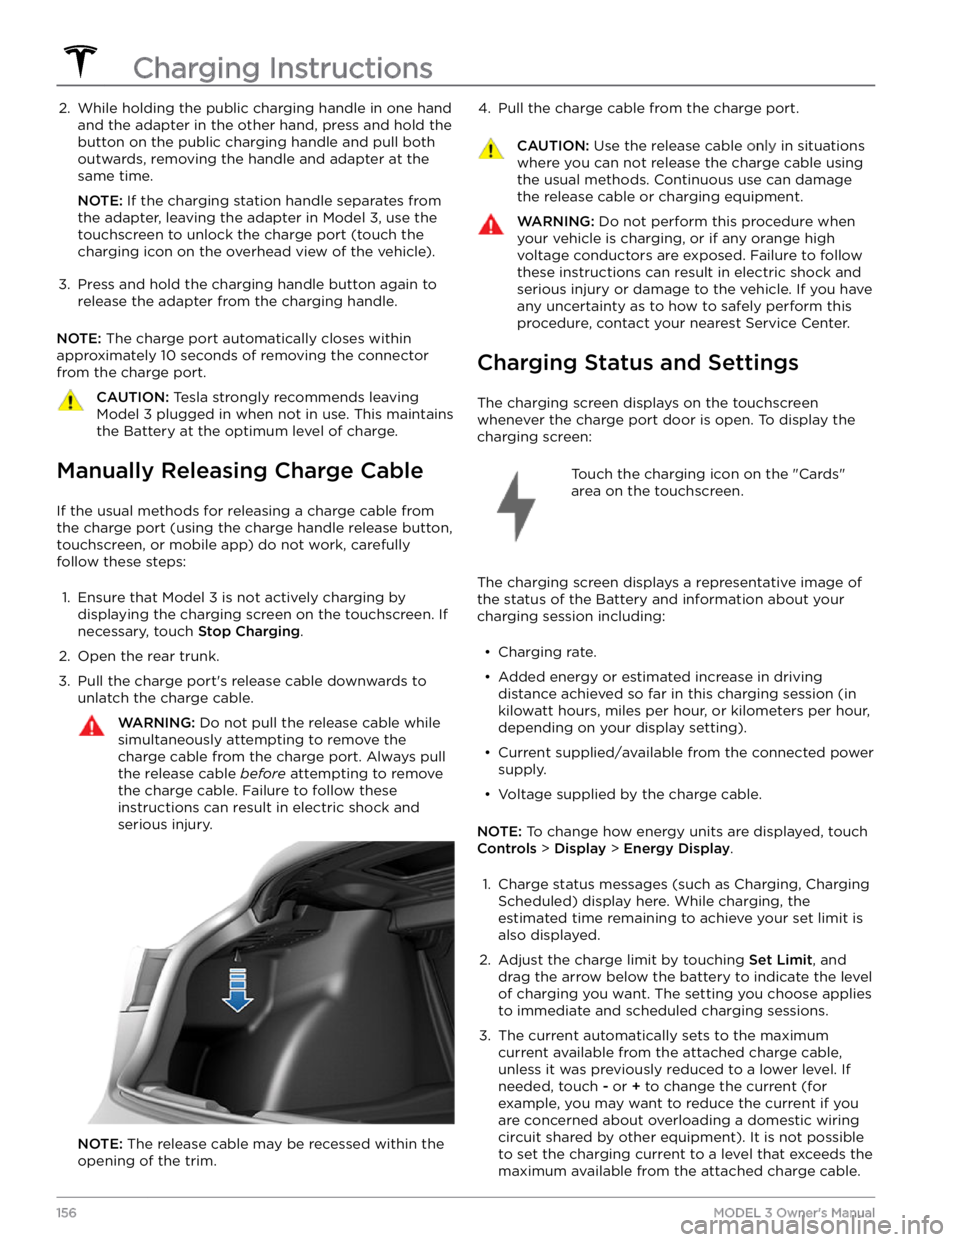
Open the rear trunk.
3.
Pull the charge port
Page 170 of 248
CAUTION: To avoid corrosive damage that may
not be covered by the warranty, rinse away any
road salt from the underside of the vehicle, wheel
wells, and brakes. After cleaning the vehicle, dry
the brakes by going on a short drive and applying
the brakes multiple times.
CAUTION: Avoid using tight-napped or rough
cloths, such as washing mitts. A high-quality
microfiber cleaning cloth is recommended.
CAUTION: If washing in an automatic car wash, use
touchless car washes only. These car washes have
no parts (brushes, etc.) that touch the surfaces of
Model 3. Some touchless car washes use caustic
solutions that, over time, can cause discoloration
of decorative exterior trim. Avoid exposure to
soaps and chemicals above pH 13. If unsure, check
the product label or ask the staff at the car wash.
Damage caused by improper washing is not
covered by the warranty.
CAUTION: If washing in an automatic car wash,
make sure the vehicle is locked. In addition, avoid
using controls on the touchscreen that can result
in accidentally opening doors or trunks while the
vehicle is being washed. Any damage caused is
not covered by the warranty.
CAUTION: Ensure the wipers are off before
washing Model 3 to avoid the risk of damaging the
wipers.
CAUTION: Do not use chemical based wheel
cleaners or pre-wash products. These can damage
the finish on the wheels.
WARNING: Never spray liquid at a high velocity
(for example, if using a pressure washer) towards
the charge port while Model 3 is charging. Failure
to follow these instructions can result in serious
injury or damage to the vehicle, charging
equipment, or property.
Cleaning the Interior
Frequently inspect and clean the interior to maintain its appearance and to prevent premature wear. If possible, immediately wipe up spills and remove marks. For
general cleaning, wipe interior surfaces using a soft cloth (such as
microfiber) dampened with a mixture of warm
water and mild non-detergent cleaner (test all cleaners on a concealed area before use). To avoid streaks, dry immediately with a soft lint-free cloth.
Interior Glass
Do not scrape, or use any abrasive cleaning fluid on
glass or mirrored surfaces. This can damage the
reflective surface of the mirror and the heating elements
in the rear window.
Airbags
Do not allow any substance to enter an airbag cover.
This could
affect correct operation.
Dashboard and Plastic Surfaces
Do not polish the upper surfaces of the dashboard. Polished surfaces are
reflective and could interfere with
your driving view.
Seats
Wipe spills as soon as possible using a soft cloth
moistened with warm water and non-detergent soap.
Wipe gently in a circular motion. Then wipe dry using a soft, lint-free cloth.
If equipped with polyurethane seats, be careful with dyes, such as from clothing or denim, that come into contact with the seats. Over time, dyes can
diffuse into
the seat material and cause staining.
Vacuum cloth seats as needed to remove any loose dirt.
CAUTION: Aftermarket, non-Tesla seat covers may
inhibit the sensitivity of a seat
Page 173 of 248
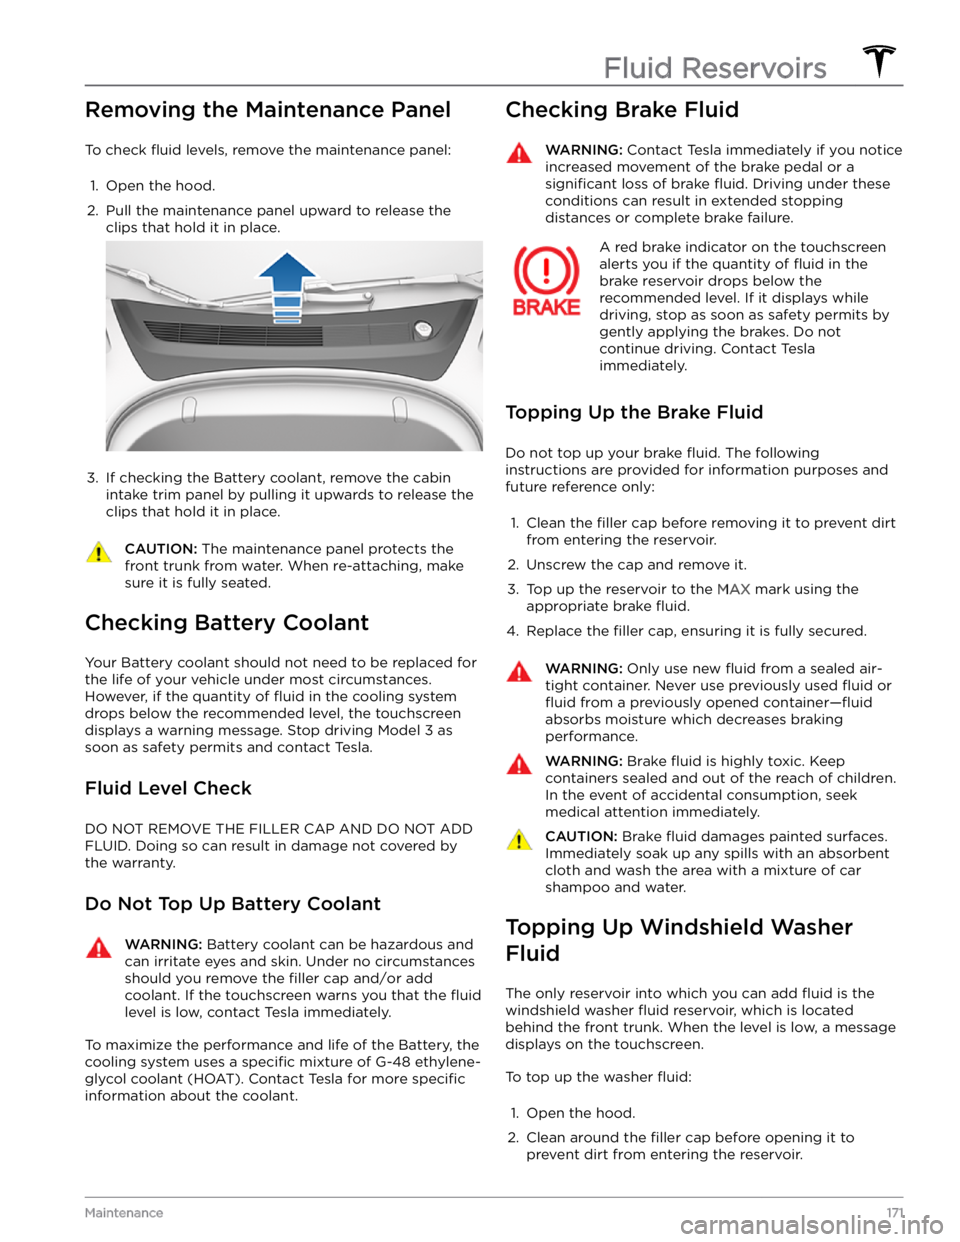
Removing the Maintenance Panel
To check fluid levels, remove the maintenance panel:
1.
Open the hood.
2.
Pull the maintenance panel upward to release the clips that hold it in place.
3.
If checking the Battery coolant, remove the cabin
intake trim panel by pulling it upwards to release the clips that hold it in place.
CAUTION: The maintenance panel protects the
front trunk from water. When re-attaching, make
sure it is fully seated.
Checking Battery Coolant
Your Battery coolant should not need to be replaced for
the life of your vehicle under most circumstances. However, if the quantity of
fluid in the cooling system
drops below the recommended level, the
touchscreen
displays a warning message. Stop driving Model 3 as
soon as safety permits and contact Tesla.
Fluid Level Check
DO NOT REMOVE THE FILLER CAP AND DO NOT ADD
FLUID. Doing so can result in damage not covered by
the warranty.
Do Not Top Up Battery Coolant
WARNING: Battery coolant can be hazardous and
can irritate eyes and skin. Under no circumstances
should you remove the filler cap and/or add
coolant. If the touchscreen warns you that the fluid
level is low, contact Tesla immediately.
To maximize the performance and life of the Battery, the
cooling system uses a
specific mixture of G-48 ethylene-
glycol coolant (HOAT). Contact Tesla for more
specific
information about the coolant.
Checking Brake FluidWARNING: Contact Tesla immediately if you notice
increased movement of the brake pedal or a
significant loss of brake fluid. Driving under these
conditions can result in extended stopping
distances or complete brake failure.
A red brake indicator on the touchscreen
alerts you if the quantity of fluid in the
brake reservoir drops below the
recommended level. If it displays while driving, stop as soon as safety permits by
gently applying the brakes. Do not
continue driving. Contact Tesla
immediately.
Topping Up the Brake Fluid
Do not top up your brake fluid. The following
instructions are provided for information purposes and future reference only:
1.
Clean the filler cap before removing it to prevent dirt
from entering the reservoir.
2.
Unscrew the cap and remove it.
3.
Top up the reservoir to the MAX mark using the
appropriate brake
fluid.
4.
Replace the filler cap, ensuring it is fully secured.
WARNING: Only use new fluid from a sealed air-
tight container. Never use previously used fluid or
fluid from a previously opened container
Page 185 of 248
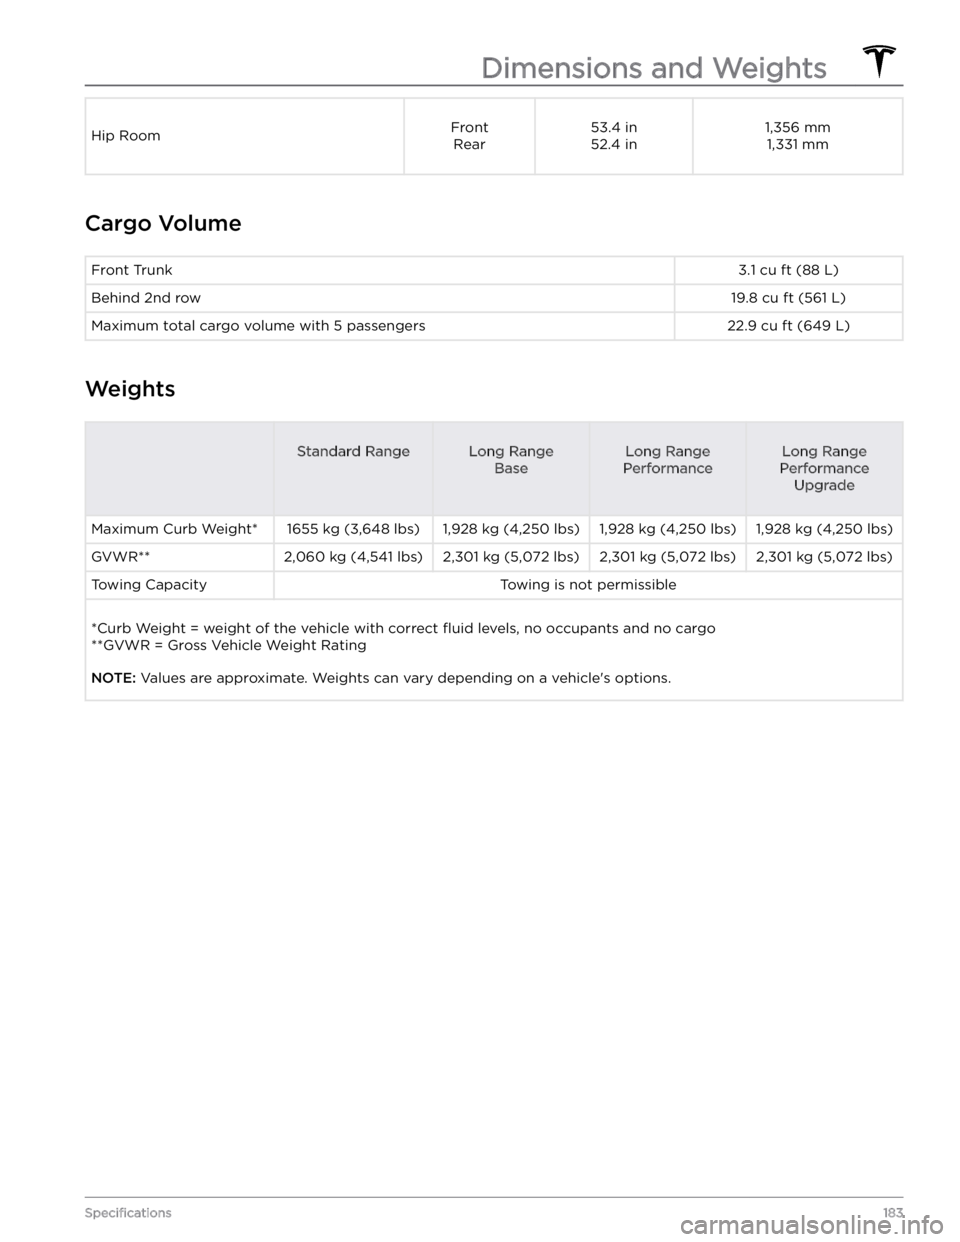
Hip RoomFrontRear53.4 in52.4 in1,356 mm 1,331 mm
Cargo Volume
Front Trunk3.1 cu ft (88 L)Behind 2nd row19.8 cu ft (561 L)Maximum total cargo volume with 5 passengers22.9 cu ft (649 L)
Weights
Standard RangeLong Range
BaseLong Range
PerformanceLong Range
Performance Upgrade
Maximum Curb Weight*1655 kg (3,648 lbs)1,928 kg (4,250 lbs)1,928 kg (4,250 lbs)1,928 kg (4,250 lbs)GVWR**2,060 kg (4,541 lbs)2,301 kg (5,072 lbs)2,301 kg (5,072 lbs)2,301 kg (5,072 lbs)Towing CapacityTowing is not permissible
*Curb Weight = weight of the vehicle with correct fluid levels, no occupants and no cargo
**GVWR = Gross Vehicle Weight Rating
NOTE: Values are approximate. Weights can vary depending on a vehicle
Page 243 of 248
F
factory defaults, restoring: 122
factory reset: 122
fan speed, interior: 123
favorites (Media Player): 134
Favorites (navigation): 129
FCC certifications: 203
features, downloading new: 148
firmware (software) updates: 148
flash drives, playing audio files from: 134
flashers, warning: 53
floor mats: 169
fluids: 159, 171
replacement intervals: 159
reservoirs, checking: 171
fog lights: 51
forward collision warning: 112
front license plate: 177
front passenger detection: 38
front trunk: 16
G
G-meter: 65
garage doors, opening: 144
gates, opening: 144
GAWR: 180
gears: 50
glovebox: 19
Glovebox PIN: 140
Gross Axle Weight Rating: 180
Gross Vehicle Weight Rating: 180
ground clearance: 182
GVWR: 180
H
Handling Balance (Track Mode): 65
hazard warning flashers: 53
head supports: 24
headlights: 51, 52
after exit: 52
controlling: 51
high beams: 52
heating: 123
high beam headlights: 52
high voltage: 151, 160, 186
Battery specifications: 186
components: 151
safety: 160
hills, stopping on: 64
hitches: 181
Home location: 131
HomeLink: 103, 144
programming and using: 144
when using Summon: 103
hood: 16
horn: 45
hub caps: 163
I
I
Page 246 of 248
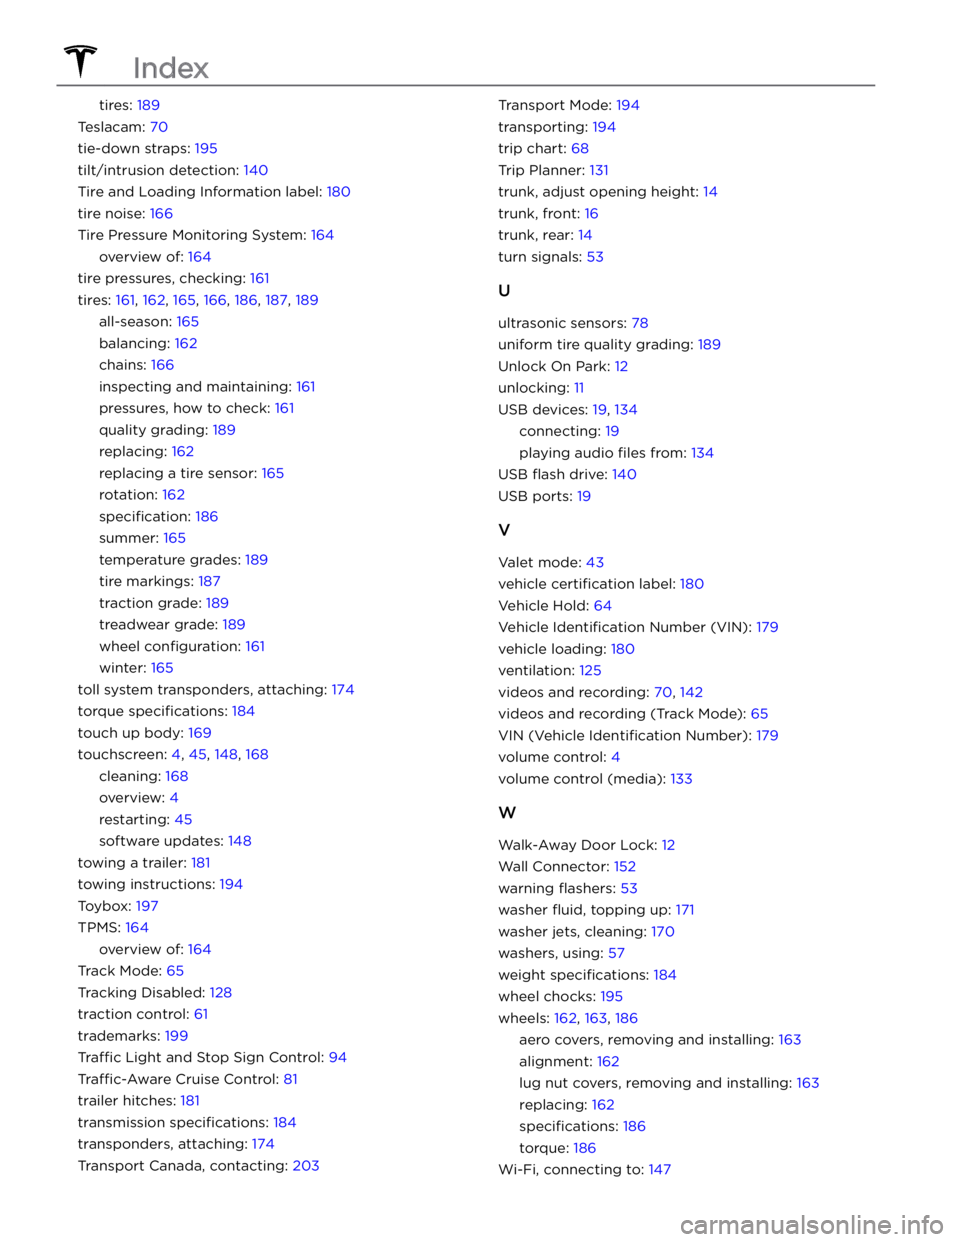
tires: 189
Teslacam: 70
tie-down straps: 195
tilt/intrusion detection: 140
Tire and Loading Information label: 180
tire noise: 166
Tire Pressure Monitoring System: 164
overview of: 164
tire pressures, checking: 161
tires: 161, 162, 165, 166, 186, 187, 189
all-season: 165
balancing: 162
chains: 166
inspecting and maintaining: 161
pressures, how to check: 161
quality grading: 189
replacing: 162
replacing a tire sensor: 165
rotation: 162
specification: 186
summer: 165
temperature grades: 189
tire markings: 187
traction grade: 189
treadwear grade: 189
wheel configuration: 161
winter: 165
toll system transponders, attaching: 174
torque specifications: 184
touch up body: 169
touchscreen: 4, 45, 148, 168
cleaning: 168
overview: 4
restarting: 45
software updates: 148
towing a trailer: 181
towing instructions: 194
Toybox: 197
TPMS: 164
overview of: 164
Track Mode: 65
Tracking Disabled: 128
traction control: 61
trademarks: 199
Traffic Light and Stop Sign Control: 94
Traffic-Aware Cruise Control: 81
trailer hitches: 181
transmission specifications: 184
transponders, attaching: 174
Transport Canada, contacting: 203
Transport Mode: 194
transporting: 194
trip chart: 68
Trip Planner: 131
trunk, adjust opening height: 14
trunk, front: 16
trunk, rear: 14
turn signals: 53
U
ultrasonic sensors: 78
uniform tire quality grading: 189
Unlock On Park: 12
unlocking: 11
USB devices: 19, 134
connecting: 19
playing audio files from: 134
USB flash drive: 140
USB ports: 19
V
Valet mode: 43
vehicle certification label: 180
Vehicle Hold: 64
Vehicle Identification Number (VIN): 179
vehicle loading: 180
ventilation: 125
videos and recording: 70, 142
videos and recording (Track Mode): 65
VIN (Vehicle Identification Number): 179
volume control: 4
volume control (media): 133
W
Walk-Away Door Lock: 12
Wall Connector: 152
warning flashers: 53
washer fluid, topping up: 171
washer jets, cleaning: 170
washers, using: 57
weight specifications: 184
wheel chocks: 195
wheels: 162, 163, 186
aero covers, removing and installing: 163
alignment: 162
lug nut covers, removing and installing: 163
replacing: 162
specifications: 186
torque: 186
Wi-Fi, connecting to: 147
Index