center console TESLA MODEL 3 2022 Owner´s Manual
[x] Cancel search | Manufacturer: TESLA, Model Year: 2022, Model line: MODEL 3, Model: TESLA MODEL 3 2022Pages: 248, PDF Size: 7.76 MB
Page 5 of 248
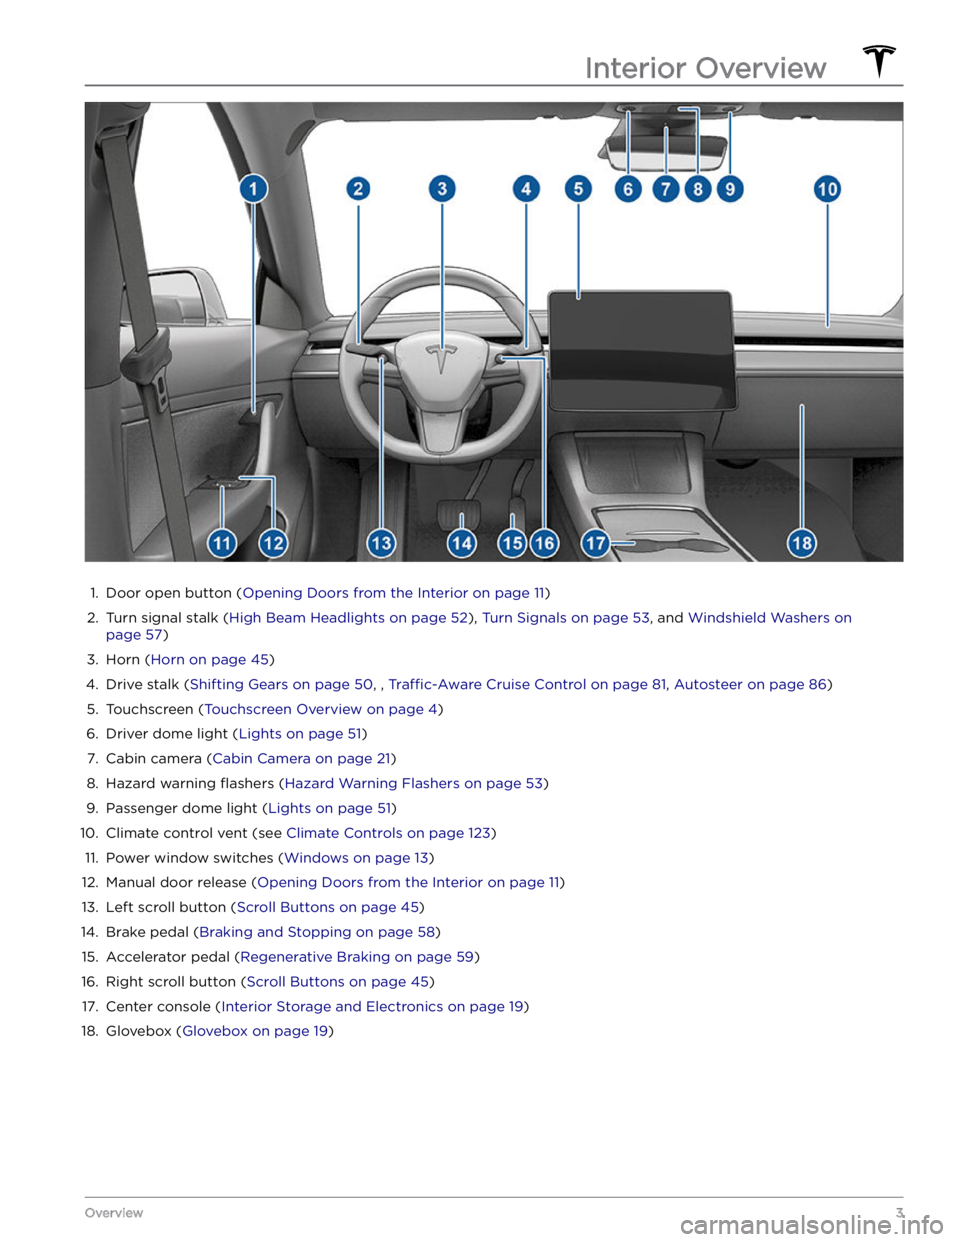
1.
Door open button (Opening Doors from the Interior on page 11)
2.
Turn signal stalk (High Beam Headlights on page 52), Turn Signals on page 53, and Windshield Washers on
page 57)
3.
Horn (Horn on page 45)
4.
Drive stalk (Shifting Gears on page 50, , Traffic-Aware Cruise Control on page 81, Autosteer on page 86)
5.
Touchscreen (Touchscreen Overview on page 4)
6.
Driver dome light (Lights on page 51)
7.
Cabin camera (Cabin Camera on page 21)
8.
Hazard warning flashers (Hazard Warning Flashers on page 53)
9.
Passenger dome light (Lights on page 51)
10.
Climate control vent (see Climate Controls on page 123)
11.
Power window switches (Windows on page 13)
12.
Manual door release (Opening Doors from the Interior on page 11)
13.
Left scroll button (Scroll Buttons on page 45)
14.
Brake pedal (Braking and Stopping on page 58)
15.
Accelerator pedal (Regenerative Braking on page 59)
16.
Right scroll button (Scroll Buttons on page 45)
17.
Center console (Interior Storage and Electronics on page 19)
18.
Glovebox (Glovebox on page 19)
Interior Overview
3Overview
Page 10 of 248
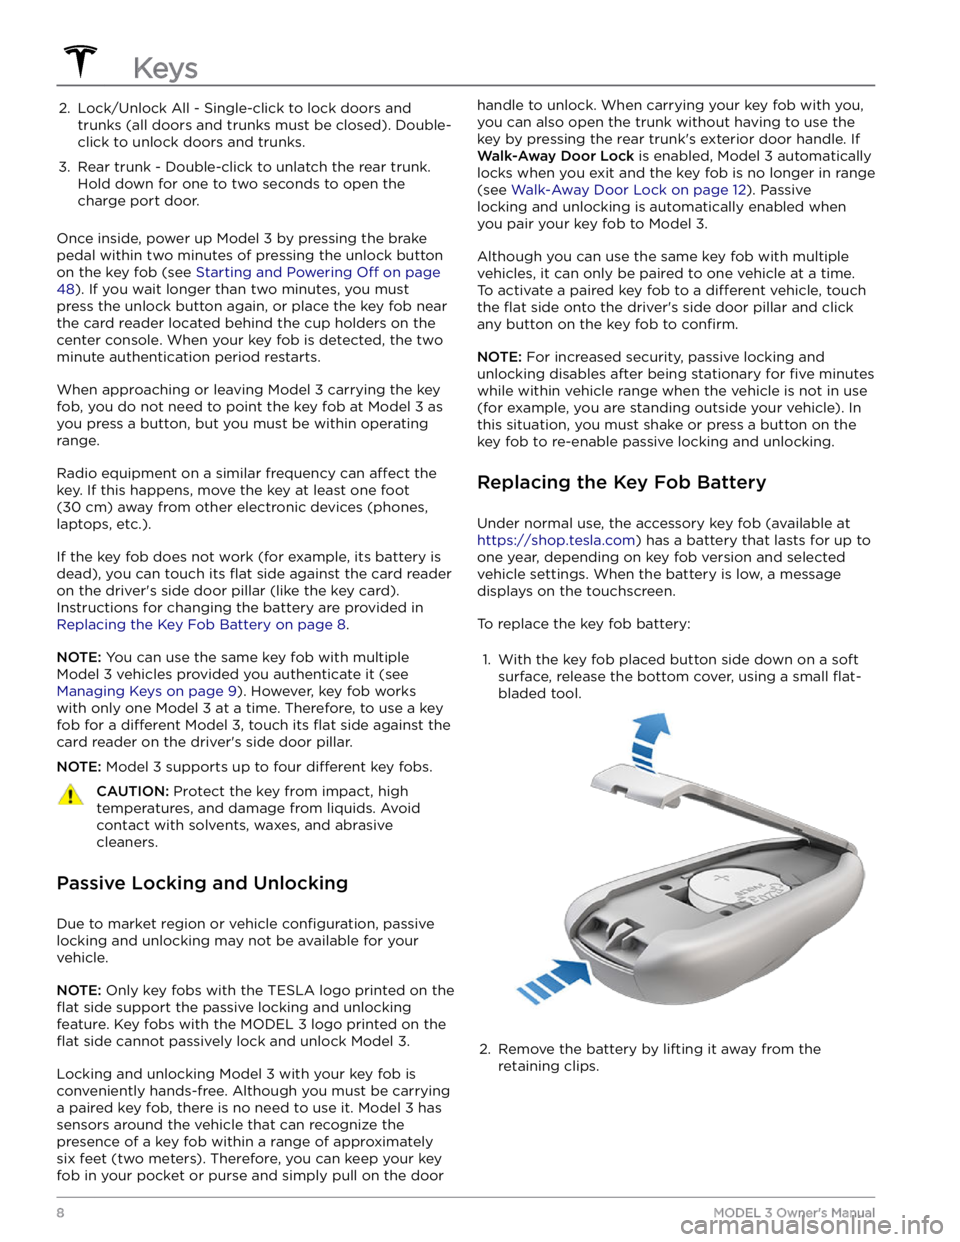
2. Lock/Unlock All - Single-click to lock doors and trunks (all doors and trunks must be closed). Double-
click to unlock doors and trunks.3.
Rear trunk - Double-click to unlatch the rear trunk. Hold down for one to two seconds to open the
charge port door.
Once inside, power up Model 3 by pressing the brake
pedal within two minutes of pressing the unlock button
on the key fob (see
Starting and Powering Off on page
48). If you wait longer than two minutes, you must
press the unlock button again, or place the key fob near
the card reader located
behind the cup holders on the
center console. When your key fob is detected, the two
minute authentication period restarts.
When approaching or leaving Model 3 carrying the key
fob, you do not need to point the key fob at
Model 3 as
you press a button, but you must be within operating range.
Radio equipment on a similar frequency can affect the
key. If this happens, move the key at least
one foot
(30 cm) away from other electronic devices (phones,
laptops, etc.).
If the key fob does not work (for example, its battery is dead), you can touch its
flat side against the card reader
on the driver
Page 21 of 248
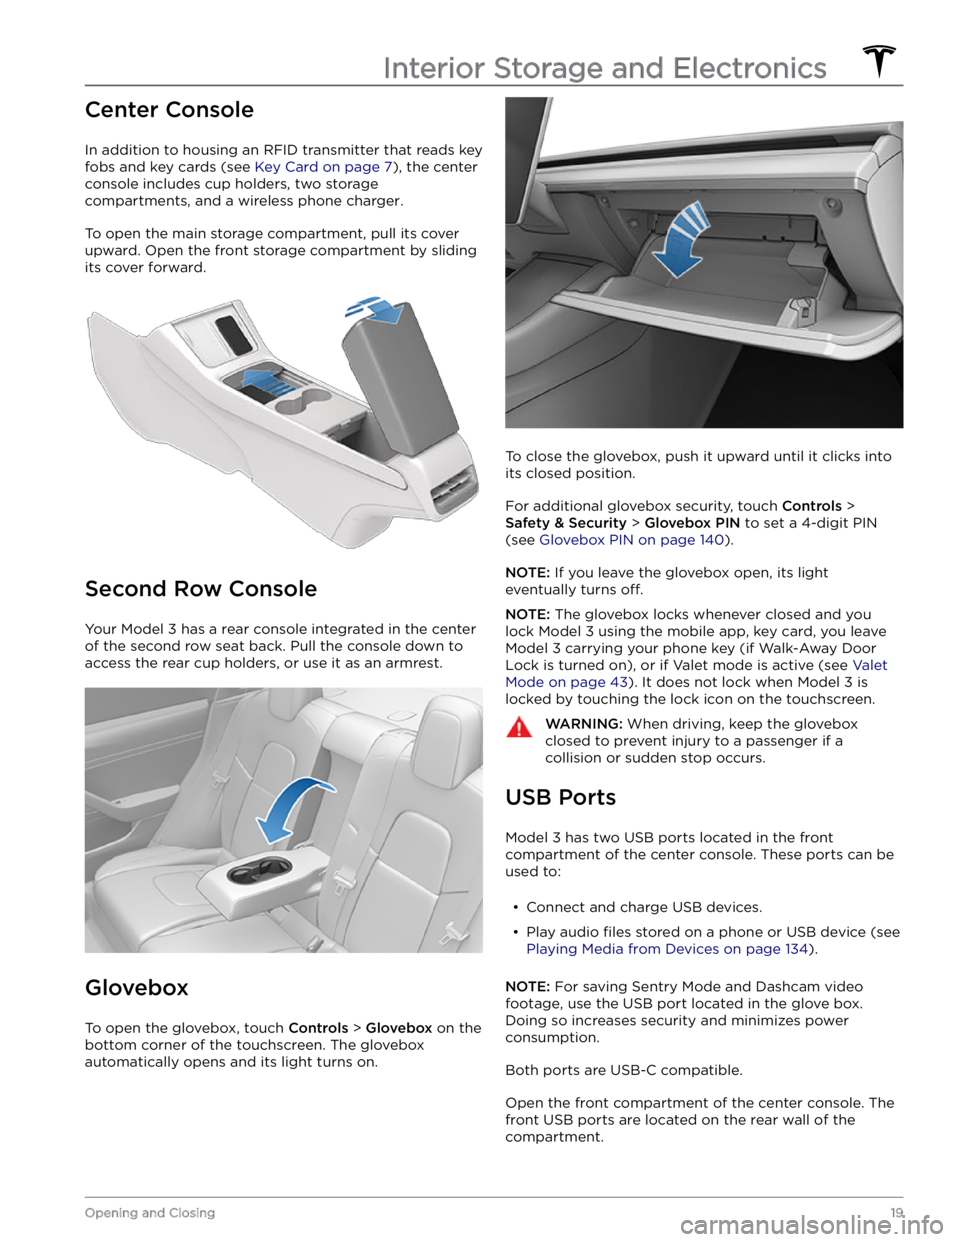
Center Console
In addition to housing an RFID transmitter that reads key fobs and key cards (see
Key Card on page 7), the center
console includes cup holders, two storage
compartments, and
a wireless phone charger.
To open the main storage compartment, pull its cover upward. Open the front storage compartment by sliding its cover forward.
Second Row Console
Your Model 3 has a rear console integrated in the center
of the second row seat back. Pull the console down to
access the rear cup holders, or use it as an armrest.
Glovebox
To open the glovebox, touch Controls > Glovebox on the
bottom corner of the touchscreen. The glovebox automatically opens and its light turns on.
To close the glovebox, push it upward until it clicks into its closed position.
For additional glovebox security, touch Controls >
Safety & Security > Glovebox PIN to set a 4-digit PIN
(see
Glovebox PIN on page 140).
NOTE: If you leave the glovebox open, its light
eventually turns
off.
NOTE: The glovebox locks whenever closed and you
lock
Model 3 using the mobile app, key card, you leave
Model 3 carrying your phone key (if Walk-Away Door
Lock is turned on), or if Valet mode is active (see
Valet
Mode on page 43). It does not lock when Model 3 is
locked by touching the lock icon on the touchscreen.
WARNING: When driving, keep the glovebox
closed to prevent injury to a passenger if a
collision or sudden stop occurs.
USB Ports
Model 3 has two USB ports located in the front
compartment of the center console. These ports can be used to:
Page 22 of 248
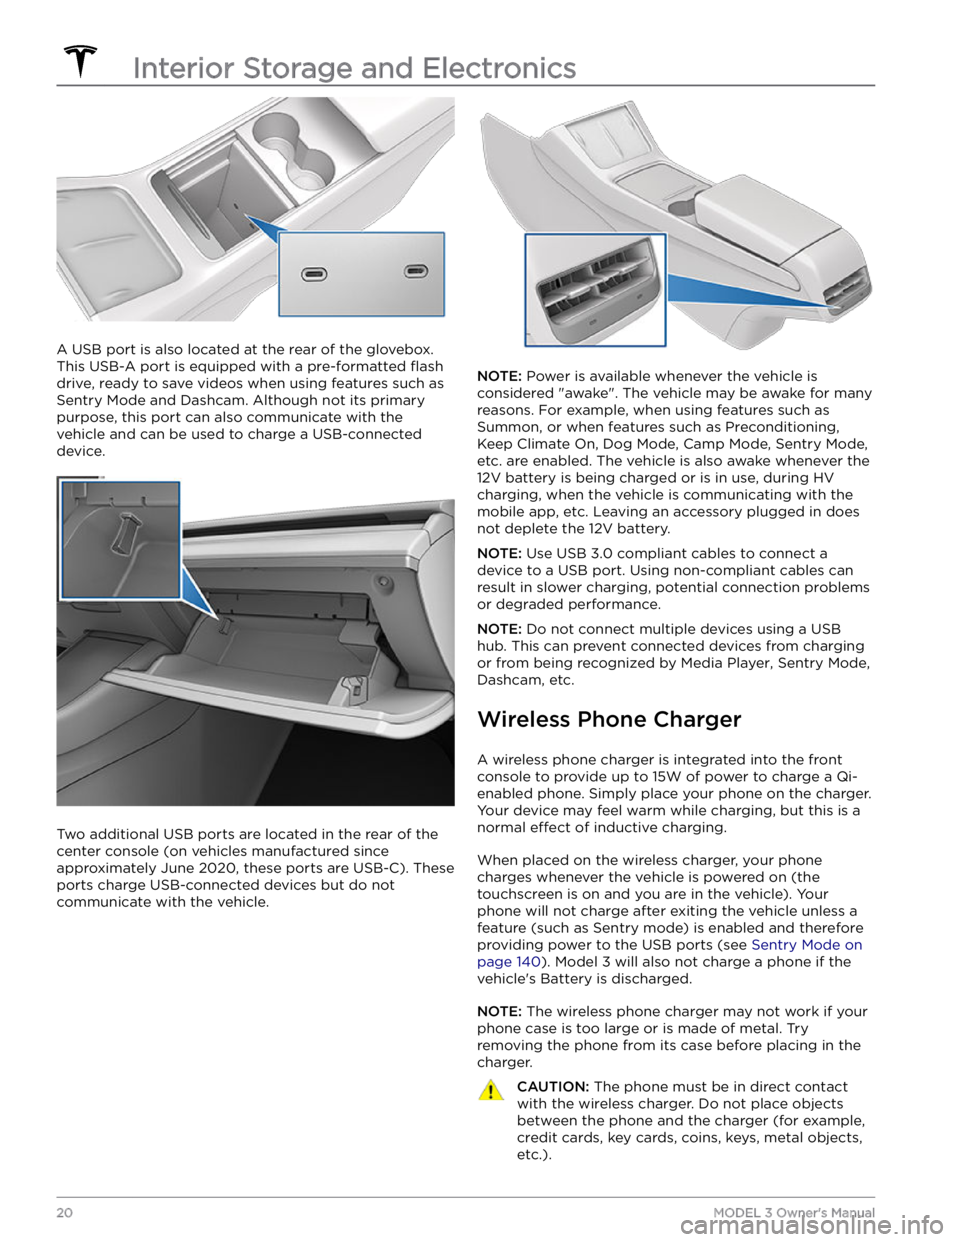
A USB port is also located at the rear of the glovebox.
This USB-A port is equipped with a pre-formatted
flash
drive, ready to save videos when using features such as
Sentry Mode and Dashcam. Although not its primary
purpose, this port can also communicate with the
vehicle and can be used to charge a USB-connected device.
Two additional USB ports are located in the rear of the center console (on vehicles manufactured since approximately June 2020, these ports are USB-C). These
ports charge USB-connected devices but do not communicate with the vehicle.
NOTE: Power is available whenever the vehicle is
considered "awake". The vehicle may be awake for many
reasons. For example, when using features such as
Summon, or when features such as Preconditioning,
Keep Climate On, Dog Mode, Camp Mode,
Sentry Mode,
etc. are enabled. The vehicle is also awake whenever the 12V battery is being charged or is in use, during HV charging, when the vehicle is communicating with the mobile app, etc. Leaving an accessory plugged in does not deplete the 12V battery.
NOTE: Use USB 3.0 compliant cables to connect a
device to a USB port. Using non-compliant cables can result in slower charging, potential connection problems or degraded performance.
NOTE: Do not connect multiple devices using a USB
hub. This can prevent connected devices from charging or from being recognized by Media Player
, Sentry Mode,
Dashcam, etc.
Wireless Phone Charger
A wireless phone charger is integrated into the front
console to provide up to 15W of power to charge a Qi- enabled phone. Simply place your phone on the charger. Your device may feel warm while charging, but this is a normal
effect of inductive charging.
When placed on the wireless charger, your phone
charges whenever the vehicle is powered on (the
touchscreen is on and you are in the vehicle). Your phone will not charge after exiting the vehicle
unless a
feature (such as Sentry mode) is enabled and therefore
providing power to the USB ports (see Sentry Mode on
page 140). Model 3 will also not charge a phone if the
vehicle
Page 23 of 248
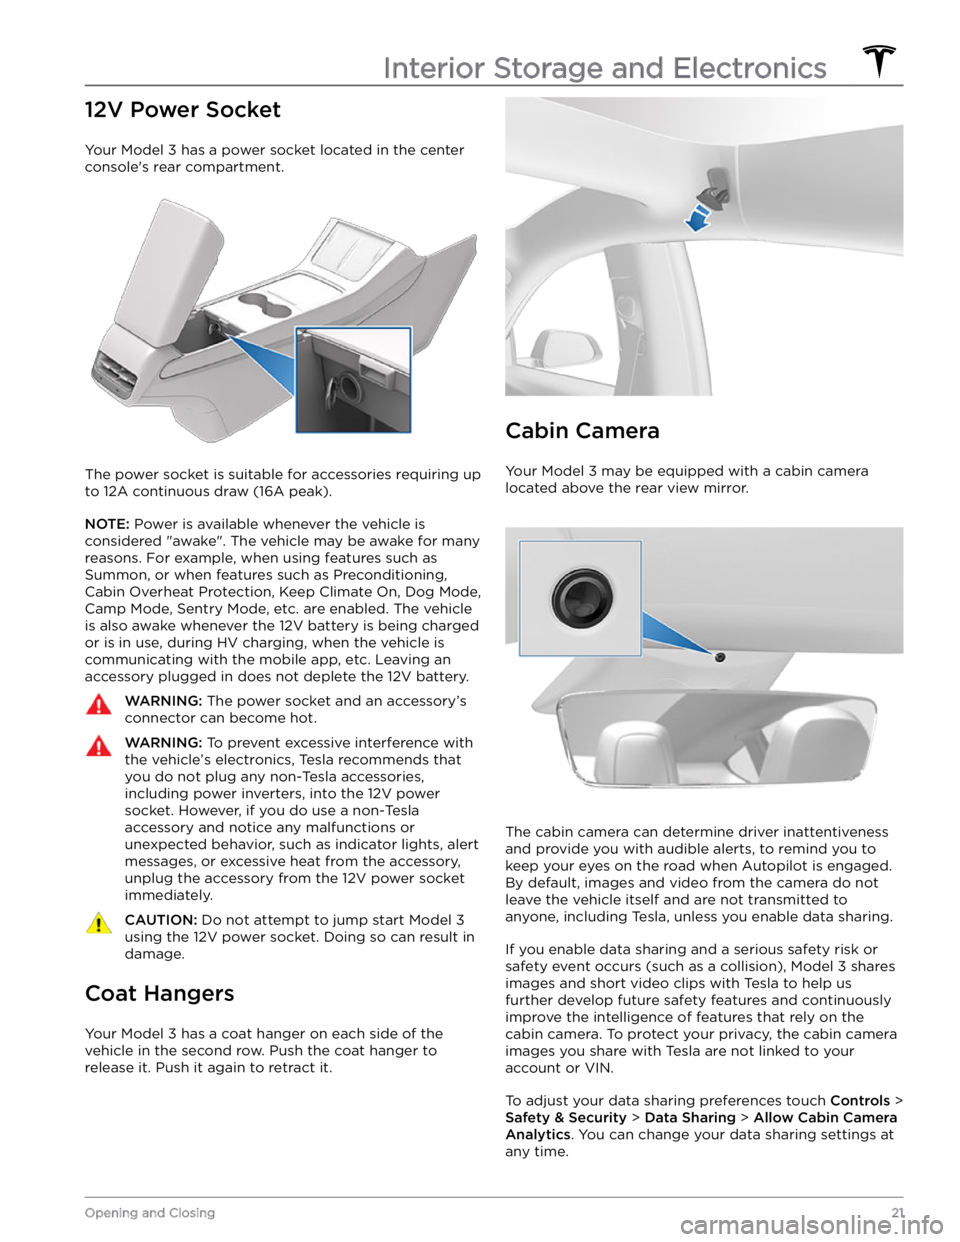
12V Power Socket
Your Model 3 has a power socket located in the center
console
Page 127 of 248
Operating Seat Heaters
To control the front seat heaters for the driver and passenger, touch the corresponding control on the main climate
control area at the bottom of the touchscreen.
To control the rear seat heaters (if equipped) or access duplicate
controls for the front seat heaters, touch the fan icon, then touch the seat heater icon followed by the seat for which
you want to adjust heating. Seat heaters operate at three setting levels from 3 (highest) to 1 (lowest). When
operating, the associated seat icon displays twisting lines that turn red to indicate the setting level. You can touch
All
Off to turn off all seat heaters simultaneously.
Adjusting the Front Vents
Model 3 has a unique horizontal face-level vent that
spans the width of the dashboard. Using the
touchscreen, you can pinpoint exactly where you want to direct the air
flowing from this vent when heating or
cooling the front cabin area.
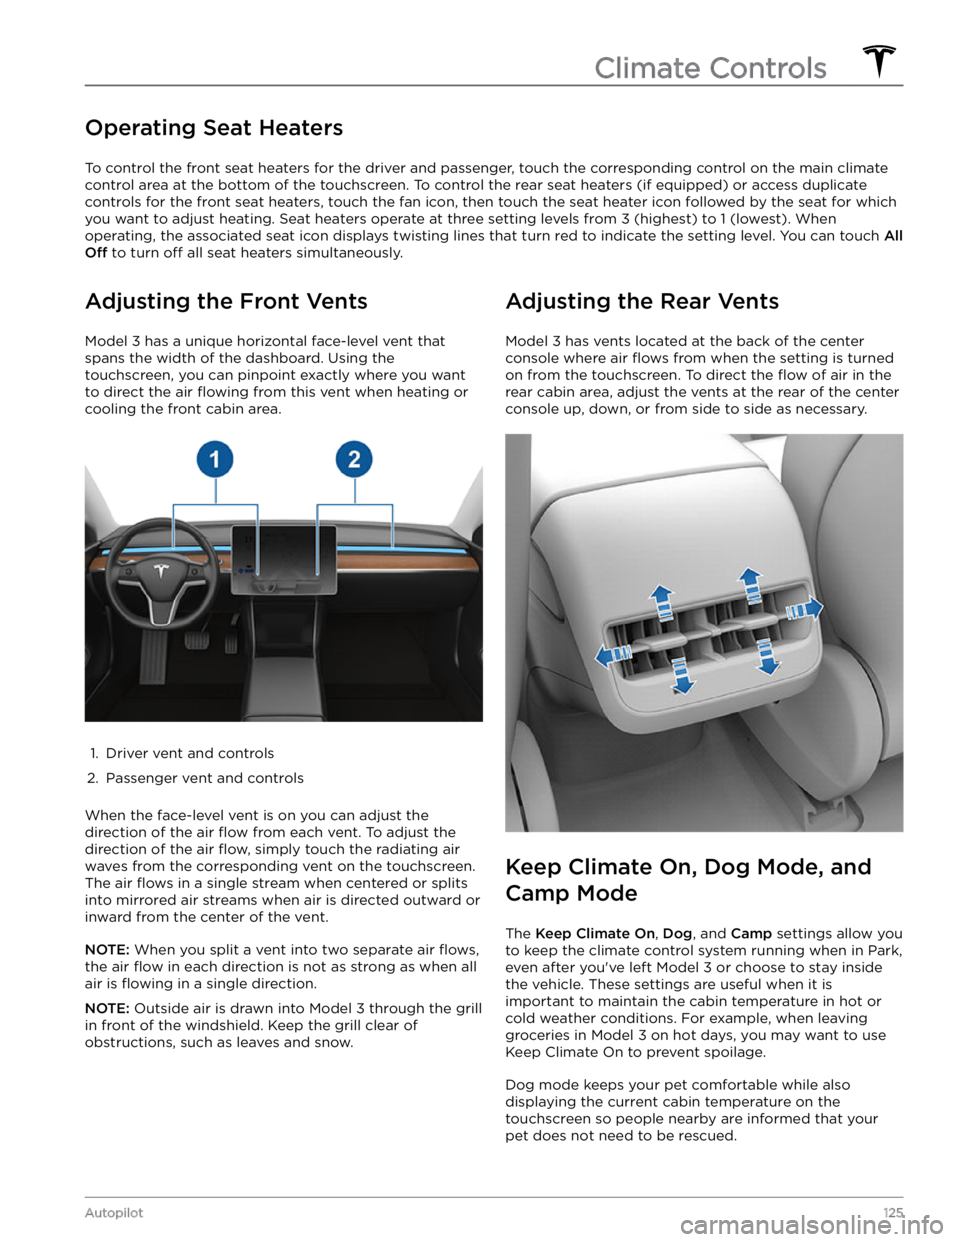
1.
Driver vent and controls
2.
Passenger vent and controls
When the face-level vent is on you can adjust the direction of the air
flow from each vent. To adjust the
direction of the air
flow, simply touch the radiating air
waves from the corresponding vent on the touchscreen.
The air
flows in a single stream when centered or splits
into mirrored air streams when air is directed outward or inward from the center of the vent.
NOTE: When you split a vent into two separate air flows,
the air flow in each direction is not as strong as when all
air is
flowing in a single direction.
NOTE: Outside air is drawn into Model 3 through the grill
in front of the windshield. Keep the grill clear of
obstructions, such as leaves and snow.
Adjusting the Rear Vents
Model 3 has vents located at the back of the center
console where air
flows from when the setting is turned
on from the touchscreen. To direct the
flow of air in the
rear cabin area, adjust the vents at the rear of the center console up, down, or from side to side as necessary.
Keep Climate On, Dog Mode, and
Camp Mode
The Keep Climate On, Dog, and Camp settings allow you
to keep the climate control system running when in Park,
even after you
Page 205 of 248
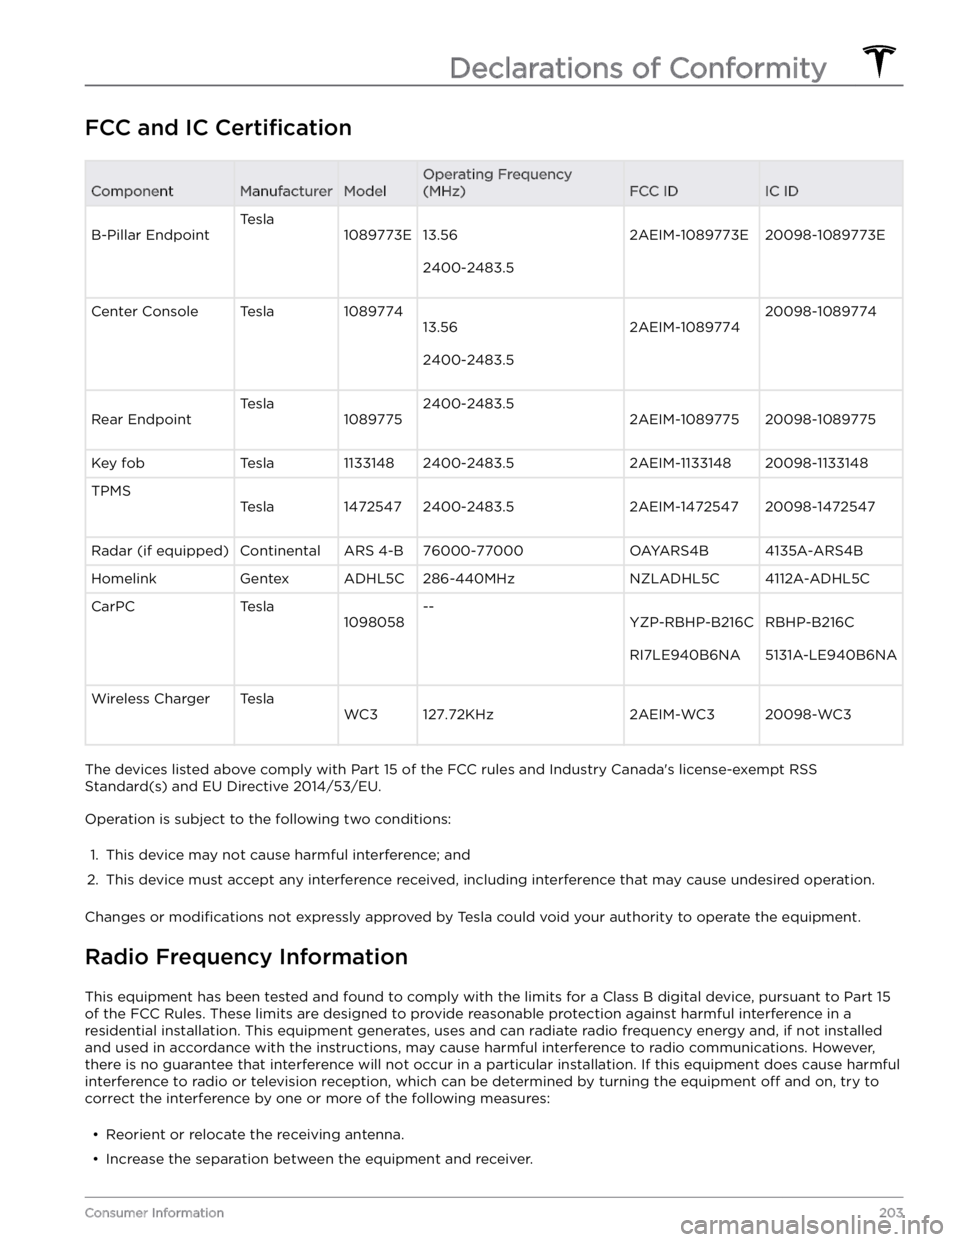
FCC and IC CertificationComponentManufacturerModel
Operating Frequency
(MHz)
FCC IDIC IDB-Pillar Endpoint
Tesla
1089773E13.56
2400-2483.5
2AEIM-1089773E20098-1089773E
Center ConsoleTesla1089774
13.56
2400-2483.5
2AEIM-1089774
20098-1089774
Rear Endpoint
Tesla
1089775
2400-2483.5
2AEIM-108977520098-1089775
Key fobTesla11331482400-2483.52AEIM-113314820098-1133148TPMS
Tesla14725472400-2483.52AEIM-147254720098-1472547
Radar (if equipped)ContinentalARS 4-B76000-77000OAYARS4B4135A-ARS4BHomelinkGentexADHL5C286-440MHzNZLADHL5C4112A-ADHL5CCarPCTesla
1098058
--
YZP-RBHP-B216C
RI7LE940B6NA
RBHP-B216C
5131A-LE940B6NA
Wireless ChargerTesla
WC3127.72KHz2AEIM-WC320098-WC3
The devices listed above comply with Part 15 of the FCC rules and Industry Canada