trailer TESLA MODEL X 2020 Owner's Manual
[x] Cancel search | Manufacturer: TESLA, Model Year: 2020, Model line: MODEL X, Model: TESLA MODEL X 2020Pages: 247, PDF Size: 6.48 MB
Page 73 of 247
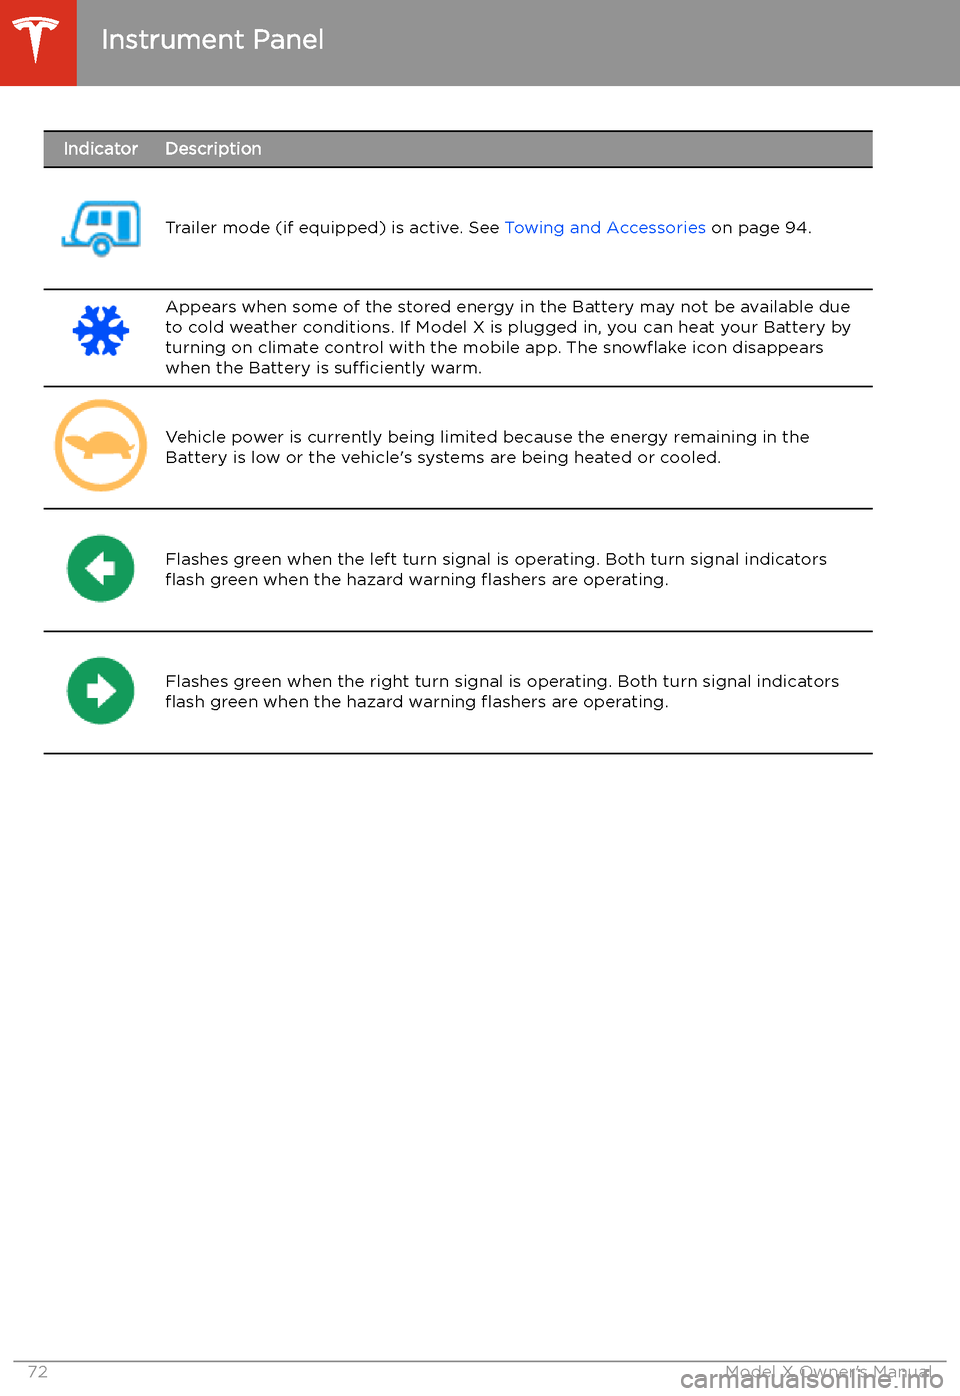
IndicatorDescription
Trailer mode (if equipped) is active. See Towing and Accessories on page 94.
Appears when some of the stored energy in the Battery may not be available due
to cold weather conditions. If Model X is plugged in, you can heat your Battery by
turning on climate control with the mobile app. The snow
Page 82 of 247
Park Assist
How Park Assist Works
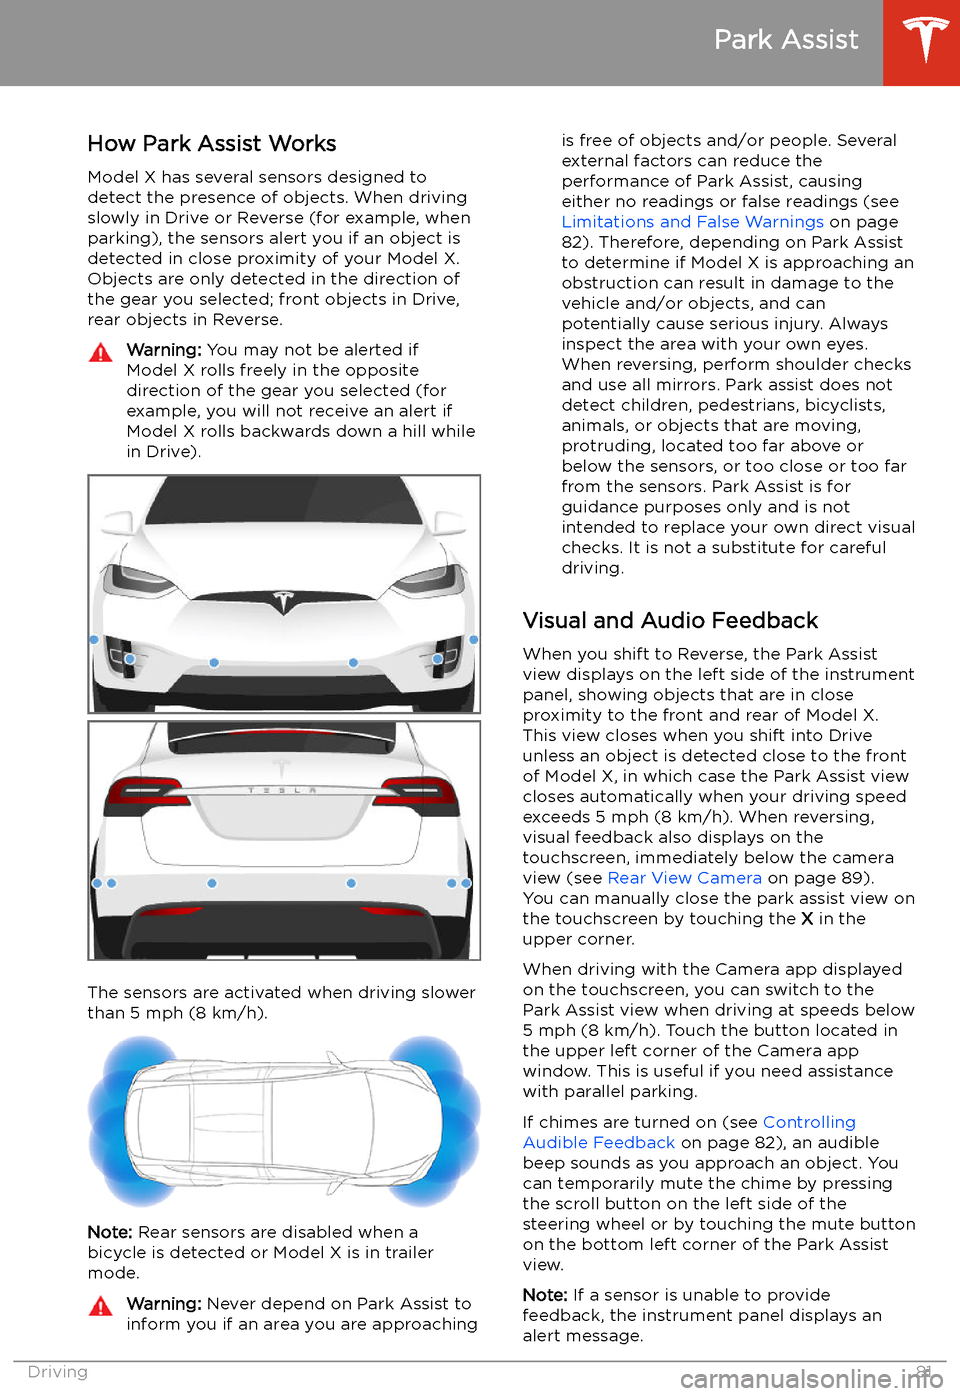
Model X has several sensors designed to
detect the presence of objects. When driving
slowly in Drive or Reverse (for example, when
parking), the sensors alert you if an object is
detected in close proximity of your Model X.
Objects are only detected in the direction of
the gear you selected; front objects in Drive,
rear objects in Reverse.
Warning: You may not be alerted if
Model X rolls freely in the opposite
direction of the gear you selected (for
example, you will not receive an alert if
Model X rolls backwards down a hill while
in Drive).
The sensors are activated when driving slower
than 5 mph (8 km/h).
Note: Rear sensors are disabled when a
bicycle is detected or Model X is in trailer
mode.
Warning: Never depend on Park Assist to
inform you if an area you are approachingis free of objects and/or people. Several
external factors can reduce the
performance of Park Assist, causing
either no readings or false readings (see
Limitations and False Warnings on page
82). Therefore, depending on Park Assist
to determine if Model X is approaching an
obstruction can result in damage to the vehicle and/or objects, and can
potentially cause serious injury. Always
inspect the area with your own eyes.
When reversing, perform shoulder checks and use all mirrors. Park assist does not
detect children, pedestrians, bicyclists,
animals, or objects that are moving, protruding, located too far above or
below the sensors, or too close or too far
from the sensors. Park Assist is for
guidance purposes only and is not intended to replace your own direct visual
checks. It is not a substitute for careful
driving.
Visual and Audio Feedback
When you shift to Reverse, the Park Assist
view displays on the left side of the instrument
panel, showing objects that are in close
proximity to the front and rear of Model X.
This view closes when you shift into Drive
unless an object is detected close to the front
of Model X, in which case the Park Assist view
closes automatically when your driving speed
exceeds 5 mph (8 km/h). When reversing,
visual feedback also displays on the touchscreen, immediately below the camera
view (see Rear View Camera on page 89).
You can manually close the park assist view on
the touchscreen by touching the X in the
upper corner.
When driving with the Camera app displayed
on the touchscreen, you can switch to the
Park Assist view when driving at speeds below
5 mph (8 km/h). Touch the button located in the upper left corner of the Camera app
window. This is useful if you need assistance
with parallel parking.
If chimes are turned on (see Controlling
Audible Feedback on page 82), an audible
beep sounds as you approach an object. You
can temporarily mute the chime by pressing
the scroll button on the left side of the
steering wheel or by touching the mute button on the bottom left corner of the Park Assist
view.
Note: If a sensor is unable to provide
feedback, the instrument panel displays an
alert message.
Park Assist
Driving81
Page 95 of 247
Towing and Accessories
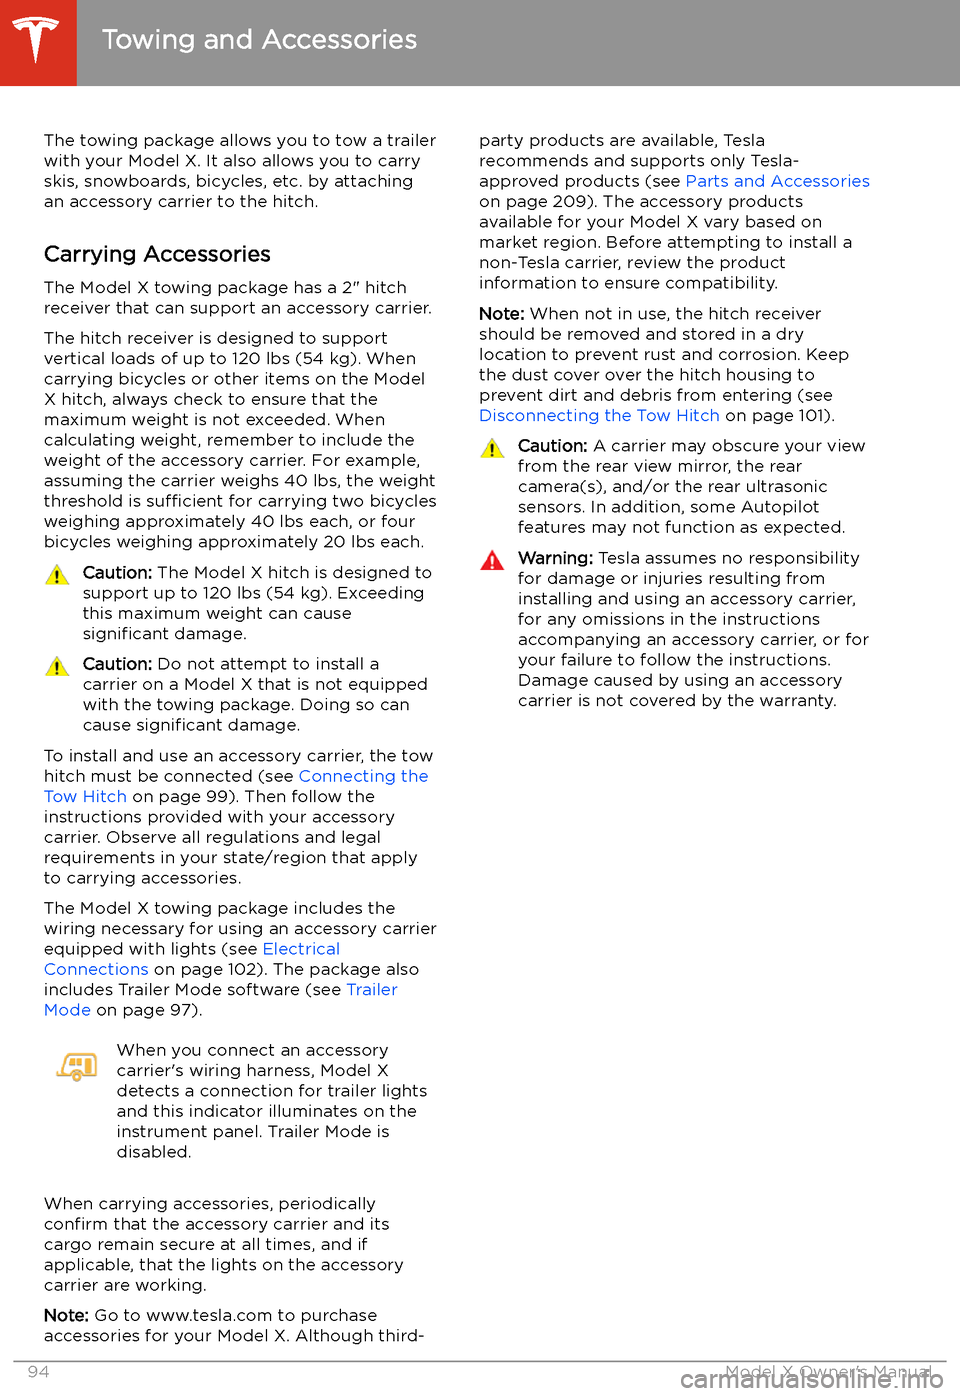
The towing package allows you to tow a trailer
with your Model X. It also allows you to carry skis, snowboards, bicycles, etc. by attaching
an accessory carrier to the hitch.
Carrying Accessories The Model X towing package has a 2" hitchreceiver that can support an accessory carrier.
The hitch receiver is designed to support vertical loads of up to 120 lbs (54 kg). When
carrying bicycles or other items on the Model
X hitch, always check to ensure that the
maximum weight is not exceeded. When
calculating weight, remember to include the weight of the accessory carrier. For example,
assuming the carrier weighs 40 lbs, the weight
threshold is sufficient for carrying two bicycles
weighing approximately 40 lbs each, or four bicycles weighing approximately 20 lbs each.
Caution: The Model X hitch is designed to
support up to 120 lbs (54 kg). Exceeding
this maximum weight can cause
significant damage.Caution: Do not attempt to install a
carrier on a Model X that is not equipped
with the towing package. Doing so can
cause significant damage.
To install and use an accessory carrier, the tow
hitch must be connected (see Connecting the
Tow Hitch on page 99). Then follow the
instructions provided with your accessory
carrier. Observe all regulations and legal requirements in your state/region that apply
to carrying accessories.
The Model X towing package includes the wiring necessary for using an accessory carrier
equipped with lights (see Electrical
Connections on page 102). The package also
includes Trailer Mode software (see Trailer
Mode on page 97).
When you connect an accessory
carrier
Page 96 of 247

Towing Capacity
The total trailer weight (including all cargo
and additional equipment), and the trailer
tongue weight, must never exceed the following:TiresMaximum Towing
Capacity*Maximum Tongue
Weight**245/45R19 110
V / YSAE Class III
Page 97 of 247
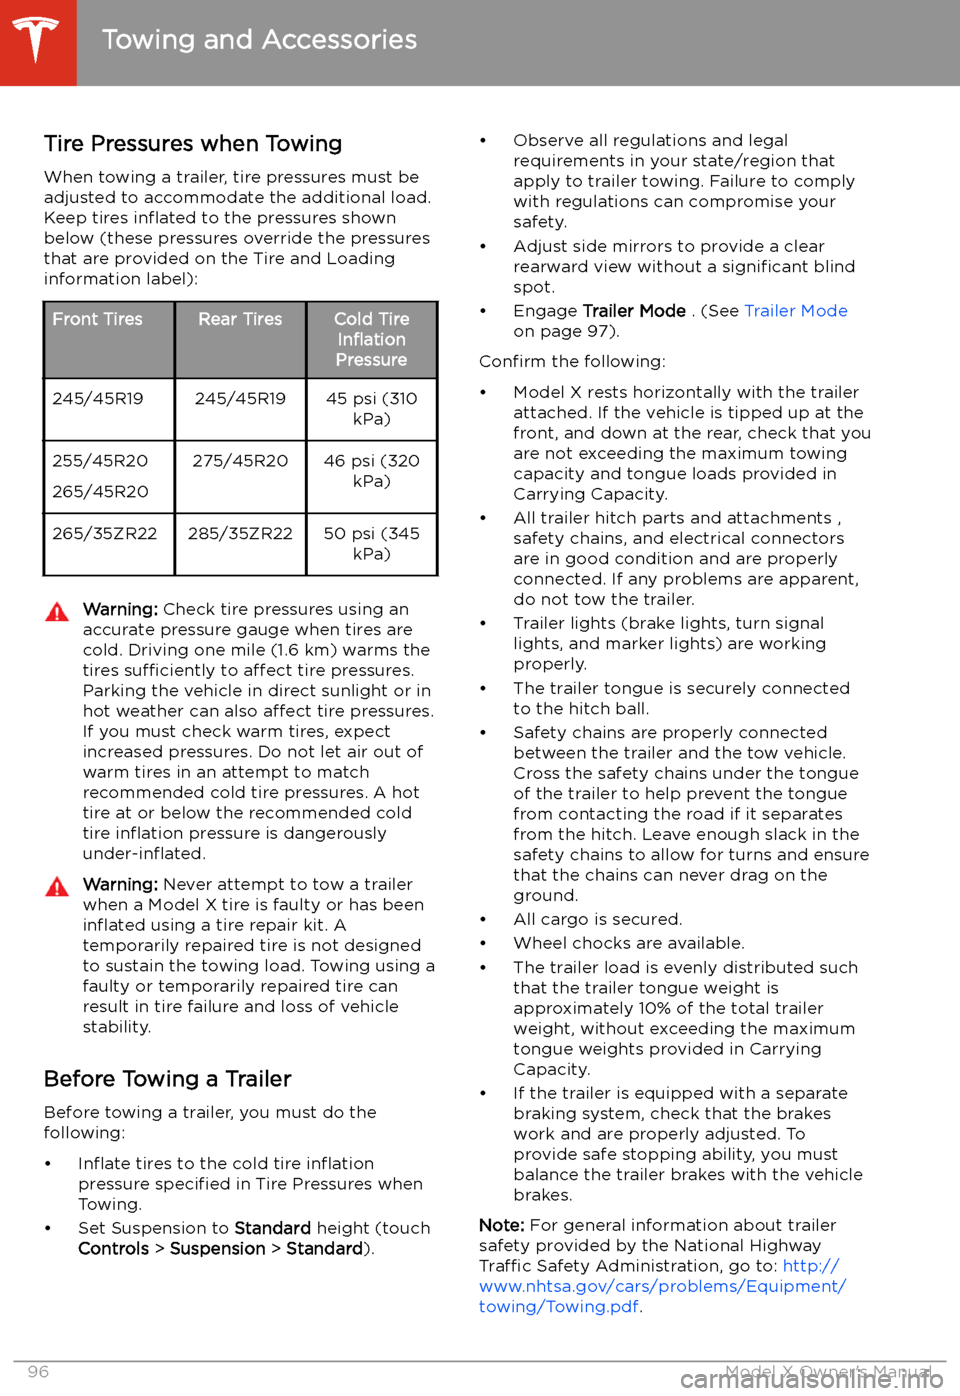
Tire Pressures when TowingWhen towing a trailer, tire pressures must be
adjusted to accommodate the additional load.
Keep tires in
Page 98 of 247
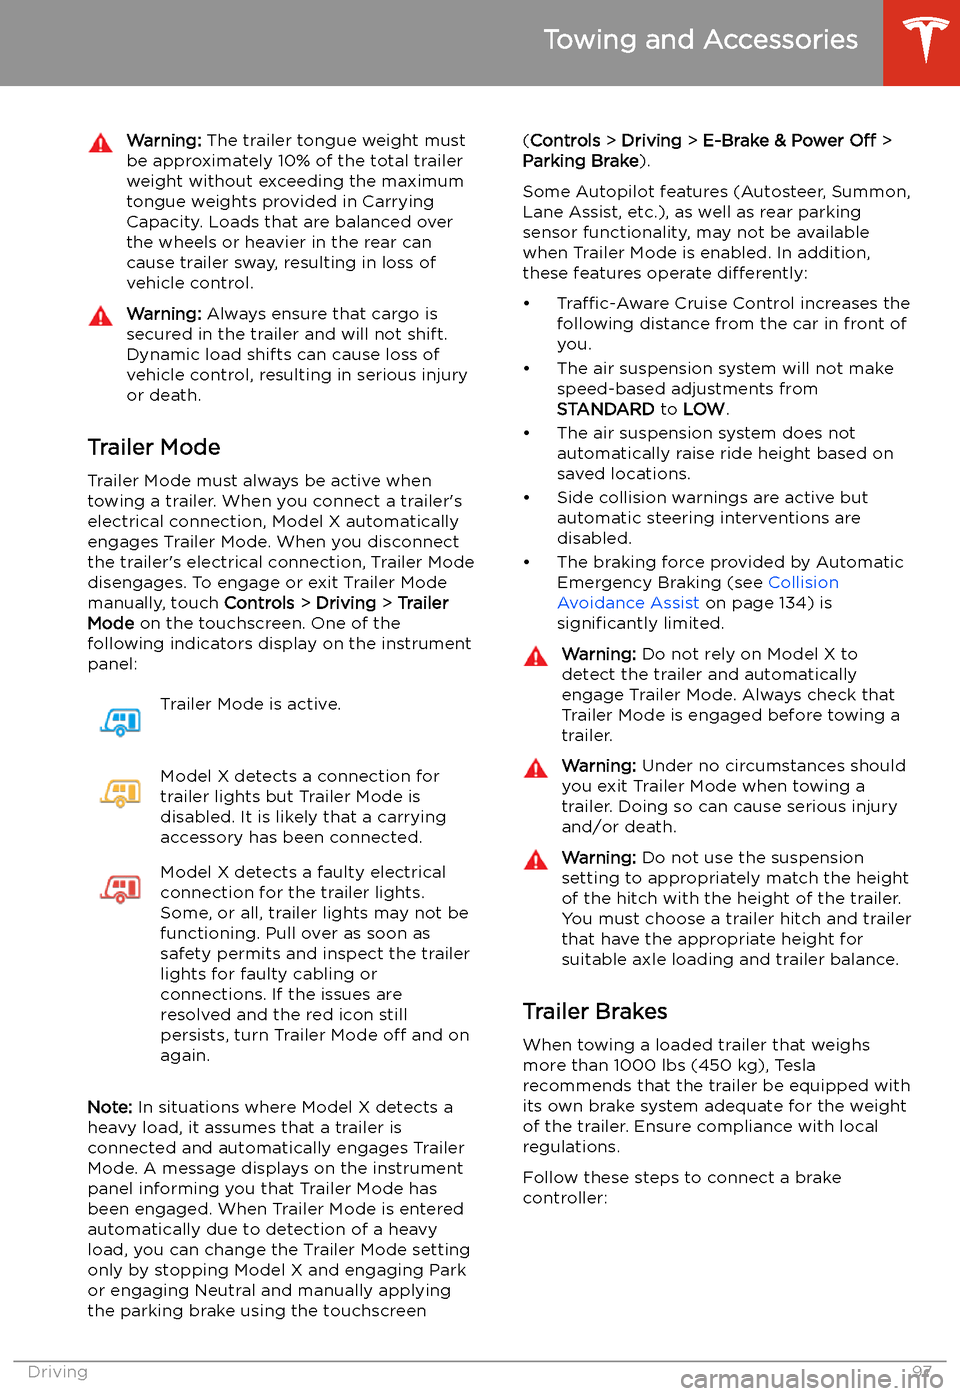
Warning: The trailer tongue weight must
be approximately 10% of the total trailer weight without exceeding the maximumtongue weights provided in Carrying
Capacity. Loads that are balanced over
the wheels or heavier in the rear can
cause trailer sway, resulting in loss of
vehicle control.Warning: Always ensure that cargo is
secured in the trailer and will not shift.
Dynamic load shifts can cause loss of
vehicle control, resulting in serious injury
or death.
Trailer Mode
Trailer Mode must always be active when
towing a trailer. When you connect a trailer
Page 99 of 247

1.Connect the wiring on the brake controller
to the appropriate locations on the 4-pin
pigtail connector included with your
Model X.
1 - Brake control output to trailer
2 - Ground
3 - Brake On Signal
4 - 12V Power (20A)
2. Remove the cover located under the
dashboard in the driver
Page 100 of 247

Towing Guidelines
Model X is designed primarily as a passenger-
carrying vehicle. Towing a trailer puts additional load on the motor(s), drive train,
brakes, tires, and suspension and significantly
decreases range. If you decide to tow a trailer,
proceed with caution and follow these general
guidelines:
Page 101 of 247
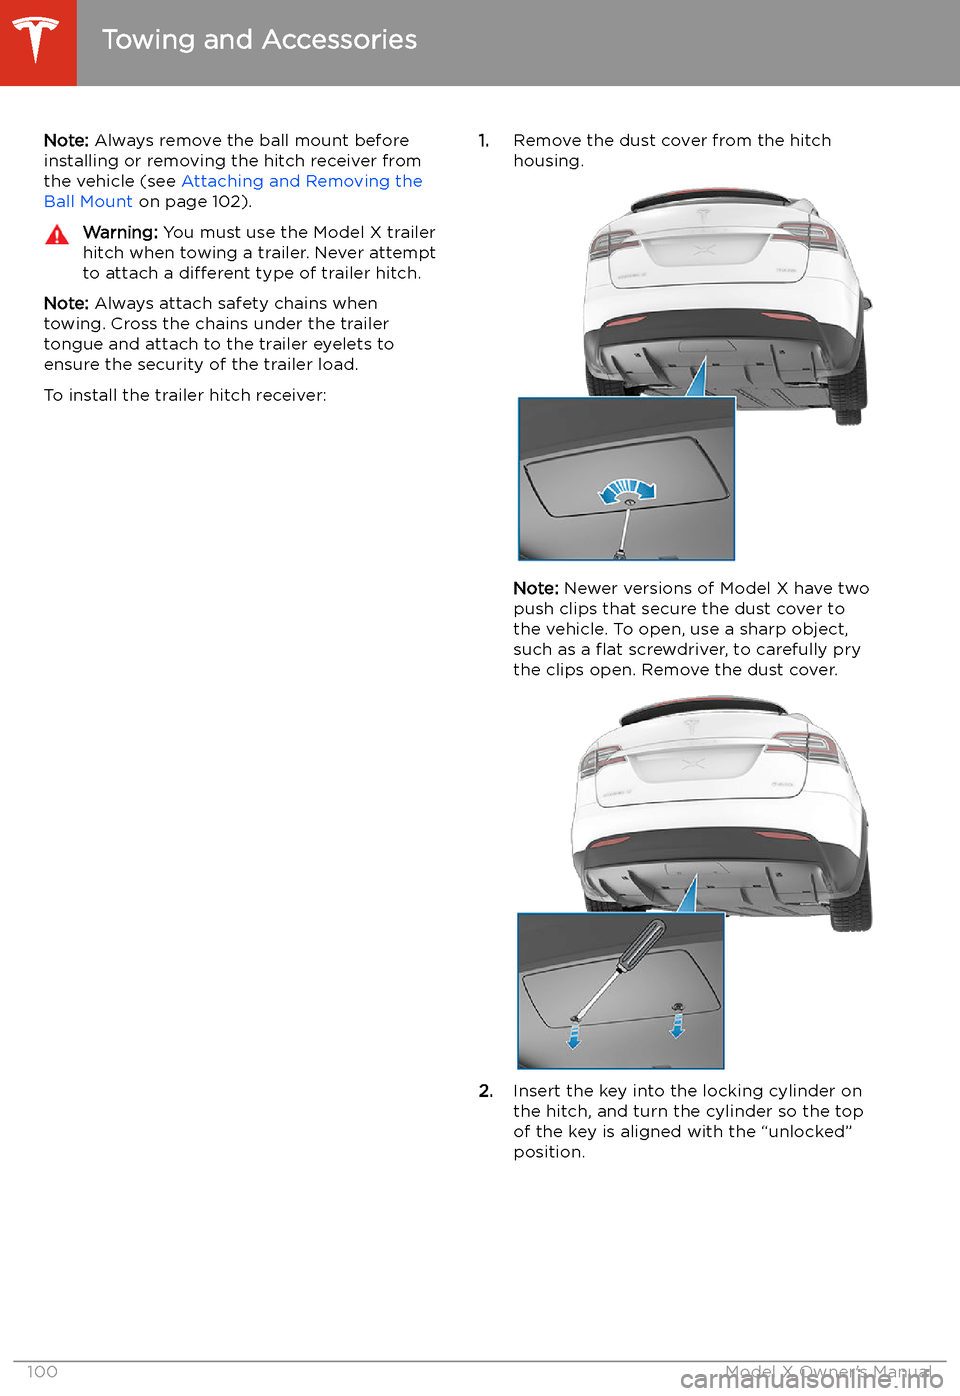
Note: Always remove the ball mount before
installing or removing the hitch receiver from
the vehicle (see Attaching and Removing the
Ball Mount on page 102).Warning: You must use the Model X trailer
hitch when towing a trailer. Never attempt
to attach a different type of trailer hitch.
Note: Always attach safety chains when
towing. Cross the chains under the trailer
tongue and attach to the trailer eyelets to
ensure the security of the trailer load.
To install the trailer hitch receiver:
1. Remove the dust cover from the hitch
housing.
Note: Newer versions of Model X have two
push clips that secure the dust cover to
the vehicle. To open, use a sharp object,
such as a
Page 103 of 247
Attaching and Removing the Ball
Mount
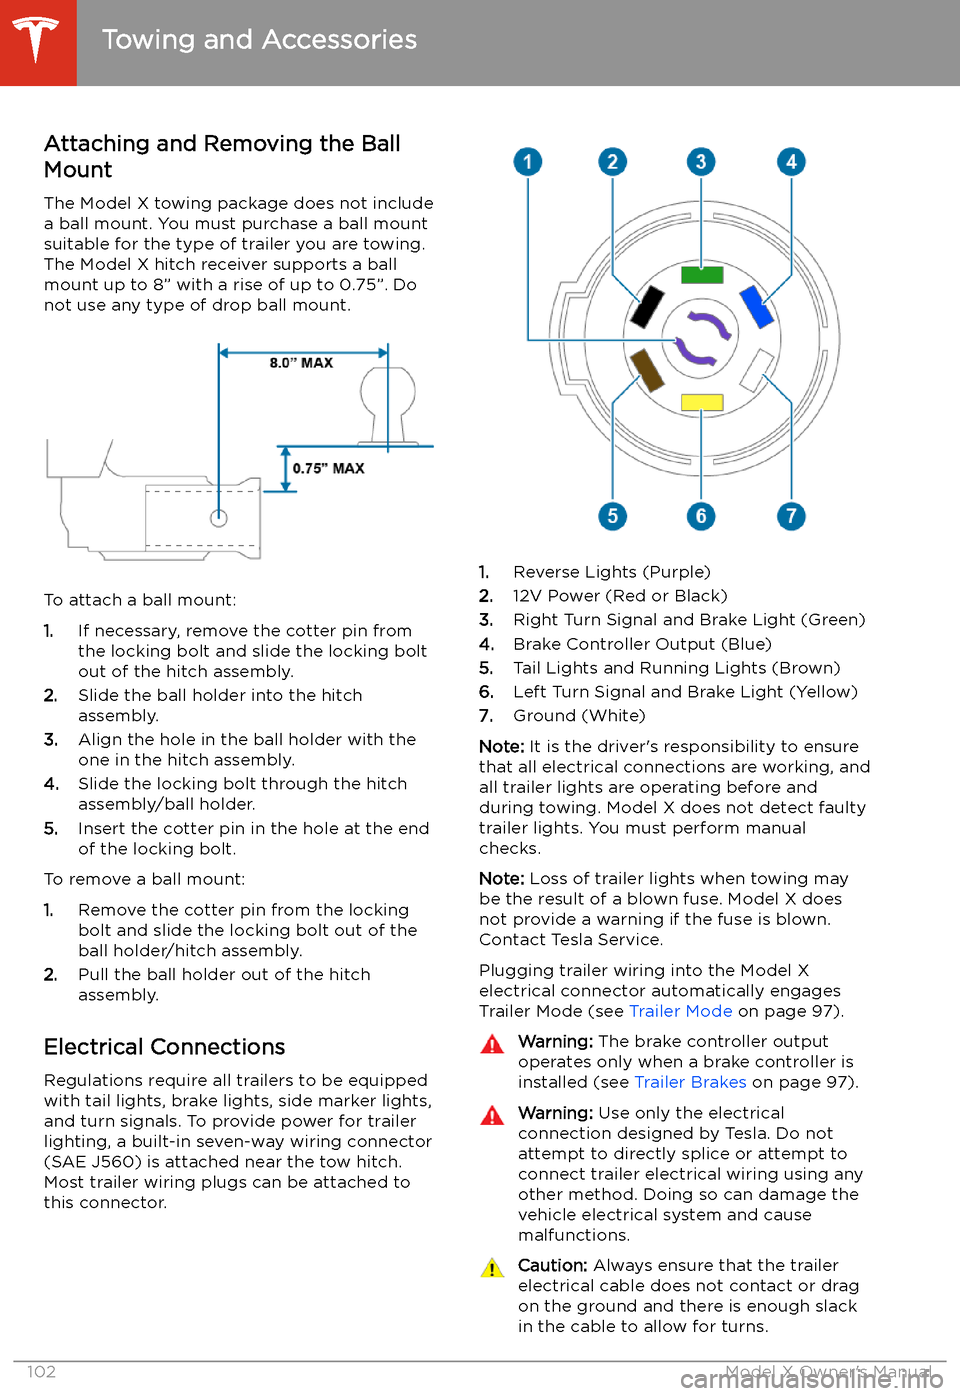
The Model X towing package does not include
a ball mount. You must purchase a ball mount
suitable for the type of trailer you are towing. The Model X hitch receiver supports a ballmount up to 8” with a rise of up to 0.75”. Do
not use any type of drop ball mount.
To attach a ball mount:
1. If necessary, remove the cotter pin from
the locking bolt and slide the locking bolt out of the hitch assembly.
2. Slide the ball holder into the hitch
assembly.
3. Align the hole in the ball holder with the
one in the hitch assembly.
4. Slide the locking bolt through the hitch
assembly/ball holder.
5. Insert the cotter pin in the hole at the end
of the locking bolt.
To remove a ball mount:
1. Remove the cotter pin from the locking
bolt and slide the locking bolt out of the
ball holder/hitch assembly.
2. Pull the ball holder out of the hitch
assembly.
Electrical Connections
Regulations require all trailers to be equipped
with tail lights, brake lights, side marker lights,
and turn signals. To provide power for trailer
lighting, a built-in seven-way wiring connector (SAE J560) is attached near the tow hitch.Most trailer wiring plugs can be attached tothis connector.
1. Reverse Lights (Purple)
2. 12V Power (Red or Black)
3. Right Turn Signal and Brake Light (Green)
4. Brake Controller Output (Blue)
5. Tail Lights and Running Lights (Brown)
6. Left Turn Signal and Brake Light (Yellow)
7. Ground (White)
Note: It is the driver