wheel TESLA MODEL X 2022 Owner´s Manual
[x] Cancel search | Manufacturer: TESLA, Model Year: 2022, Model line: MODEL X, Model: TESLA MODEL X 2022Pages: 212, PDF Size: 5.07 MB
Page 69 of 212
Caution: Keep sensors clean from dirt,
debris, snow, and ice. Avoid using a high
pressure power washer on the sensors
and do not clean a sensor with a sharp or abrasive object that can scratch or
damage its surface.Caution: Do not install accessories or
stickers on or near the parking sensors.
Controlling Audible Feedback
You can use Park Assist with or without
audible feedback. To turn chimes on or off,
touch Controls > Settings > Safety &
Security > Park Assist Chimes .
To mute the chimes temporarily, press the
scroll wheel on the left side of the steering wheel or touch the mute button in the bottom
left corner of the Park Assist view. The chimes
are muted until you shift into a different gear
or drive over 8 km/h.
Limitations and False Warnings
The parking sensors may not function
correctly in these situations:
Page 76 of 212
Rear View Camera
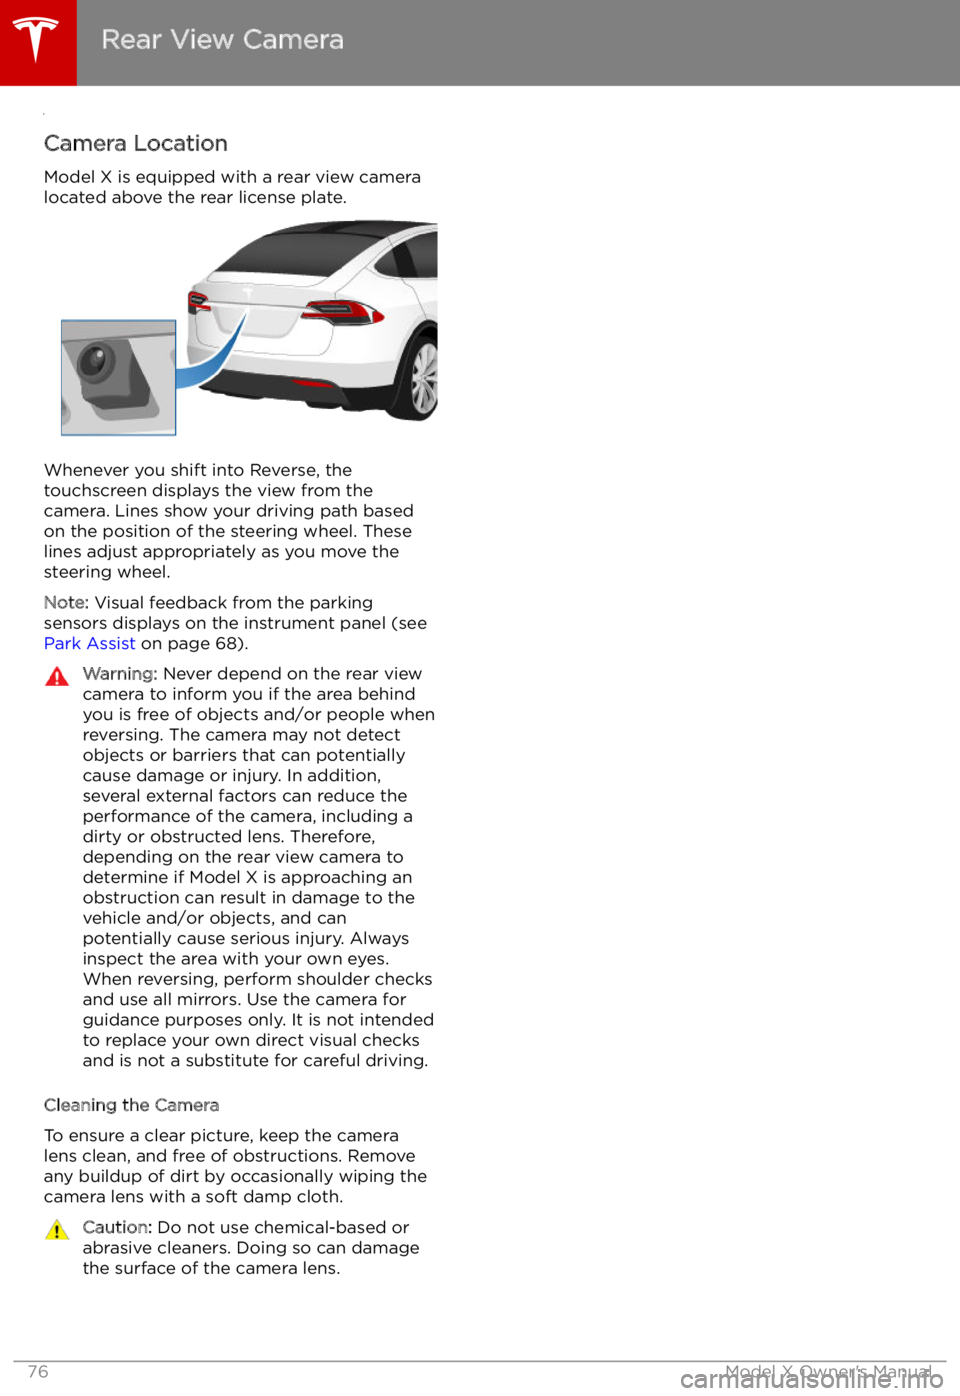
Camera Location
Model X is equipped with a rear view camera
located above the rear license plate.
Whenever you shift into Reverse, the
touchscreen displays the view from the
camera. Lines show your driving path based
on the position of the steering wheel. These
lines adjust appropriately as you move the
steering wheel.
Note: Visual feedback from the parking
sensors displays on the instrument panel (see
Park Assist on page 68).
Warning: Never depend on the rear view
camera to inform you if the area behind
you is free of objects and/or people when
reversing. The camera may not detect
objects or barriers that can potentially
cause damage or injury. In addition, several external factors can reduce the
performance of the camera, including a
dirty or obstructed lens. Therefore,
depending on the rear view camera to
determine if Model X is approaching an
obstruction can result in damage to the vehicle and/or objects, and can
potentially cause serious injury. Always
inspect the area with your own eyes.
When reversing, perform shoulder checks and use all mirrors. Use the camera forguidance purposes only. It is not intendedto replace your own direct visual checks
and is not a substitute for careful driving.
Cleaning the Camera
To ensure a clear picture, keep the camera
lens clean, and free of obstructions. Remove
any buildup of dirt by occasionally wiping the camera lens with a soft damp cloth.
Caution: Do not use chemical-based or
abrasive cleaners. Doing so can damage
the surface of the camera lens.
Rear View Camera
76Model X Owner
Page 99 of 212
Note: Auto Lane Change assists in moving
Model X one lane at a time. Moving into an
additional lane requires you to engage the
turn signal a second time after the first lane
change is complete.Warning: If Auto Lane Change aborts
during a lane change (for example, Auto
Lane Change cannot detect the outside
of the target lane midway through the
lane change), Model X returns to its
original driving lane.
When Auto Lane Change is active, it is
important to monitor its performance by
watching the driving path in front of you and
the surrounding area. Stay prepared to take
over steering at any time. As you are crossing
over into the adjacent lane, the instrument
panel displays the lane marking as a dashed
blue line. Once in your new lane, lane markings
are displayed as solid blue lines again.
In situations where Auto Lane Change is
unable to operate at optimal performance, or
cannot operate due to inadequate data, the
instrument panel displays a series of warnings.
Therefore, when using Auto Lane Change,
always pay attention to the instrument panel
and be prepared to manually steer Model X.
Warning: When Auto Lane Change is
actively assisting in steering Model X, the steering wheel moves accordingly.
Although you must have your hands on
the steering wheel, any significant
restriction of or force on the steering wheel
Page 101 of 212
To Cancel Parking
Autopark cancels the parking sequence when you manually move the steering wheel,change gears, or touch Cancel on the
touchscreen. Autopark also cancels parking
when:
Page 116 of 212
6.Climate controls (see Climate Controls on page 126).
7. Volume control
Touch the up and down arrows to increase or decrease the volume of the speakers. You can
also adjust the volume using the scroll wheel on the left side of the steering wheel.
8. Reverse the position of the two currently displayed apps.Warning: Paying attention to road and traffic conditions must always be the driver
Page 126 of 212
Climate Controls
Overview of Climate Controls
The climate controls are always available at the bottom of the touchscreen. By default, climate control is set to Auto, which maintains optimum comfort in all but the most severe weather conditions. When you adjust the temperature, the system automatically adjusts the heating, air
conditioning, air distribution, air circulation, and fan speed to maintain your selected temperature.
To override these settings, touch Auto (see Customizing Climate Control on page 128).
The fan, heating, and air conditioning systems are powered by the Battery. Therefore, prolonged
use decreases driving range.
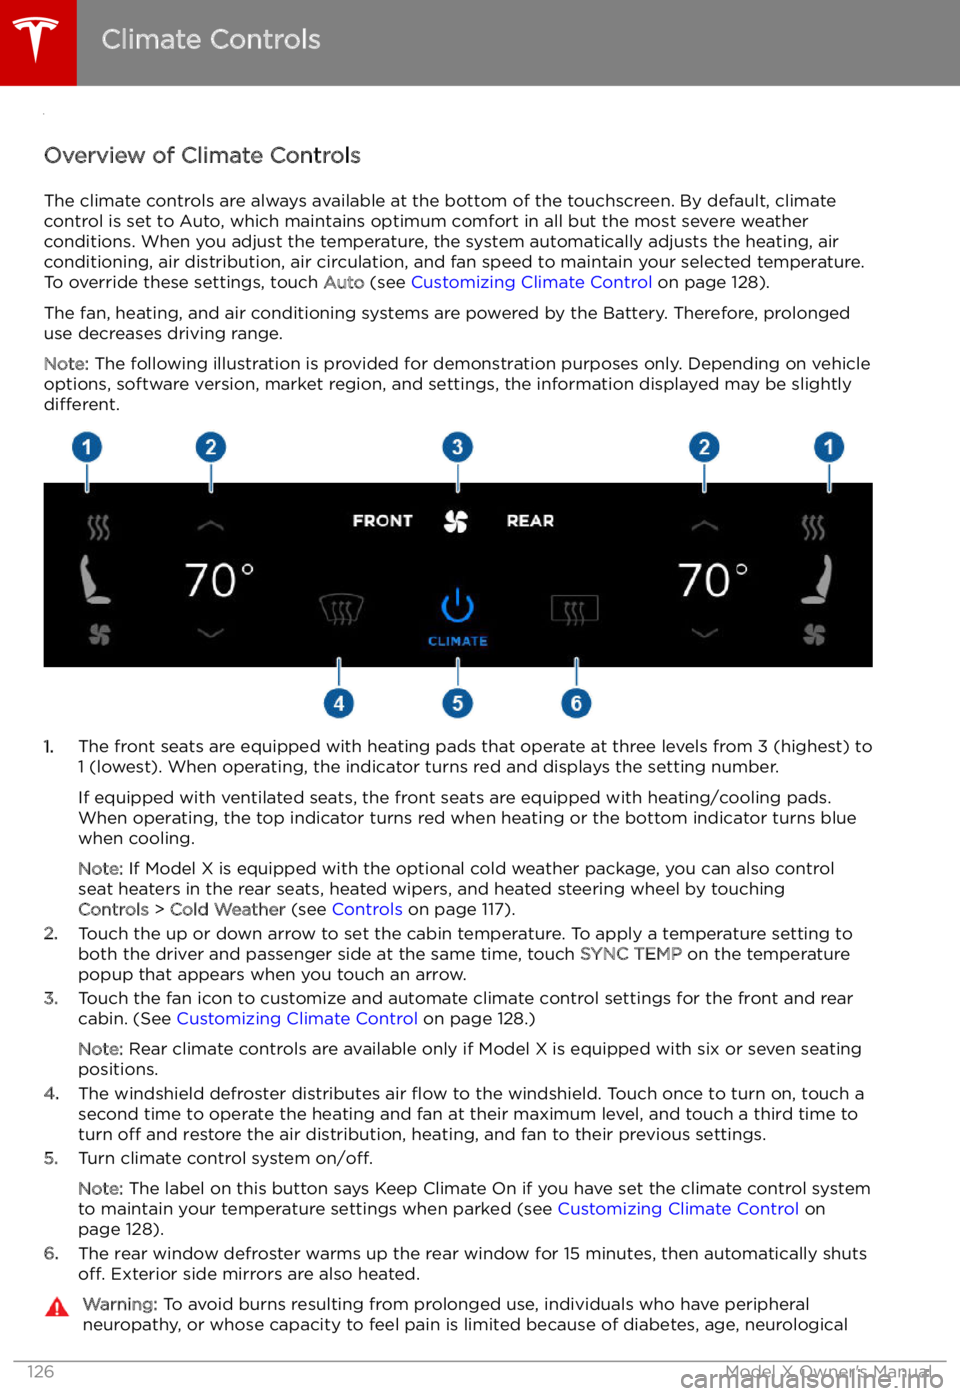
Note: The following illustration is provided for demonstration purposes only. Depending on vehicle
options, software version, market region, and settings, the information displayed may be slightly
different.
1. The front seats are equipped with heating pads that operate at three levels from 3 (highest) to
1 (lowest). When operating, the indicator turns red and displays the setting number.
If equipped with ventilated seats, the front seats are equipped with heating/cooling pads.
When operating, the top indicator turns red when heating or the bottom indicator turns blue
when cooling.
Note: If Model X is equipped with the optional cold weather package, you can also control
seat heaters in the rear seats, heated wipers, and heated steering wheel by touching Controls > Cold Weather (see Controls on page 117).
2. Touch the up or down arrow to set the cabin temperature. To apply a temperature setting to
both the driver and passenger side at the same time, touch SYNC TEMP on the temperature
popup that appears when you touch an arrow.
3. Touch the fan icon to customize and automate climate control settings for the front and rear
cabin. (See Customizing Climate Control on page 128.)
Note: Rear climate controls are available only if Model X is equipped with six or seven seating
positions.
4. The windshield defroster distributes air
Page 138 of 212
To play the next song in a selected playlist or
album, touch the previous or next arrows on
the Now Playing view, or use the buttons on
the left side of the steering wheel (see Using
Left Steering Wheel Buttons on page 46). You
can also shu
Page 144 of 212
Steering Wheel on page 46), touch a
location in the Recent or Favorites list, or
touch a pin on the map, and then touch Navigate from the popup.
Page 166 of 212
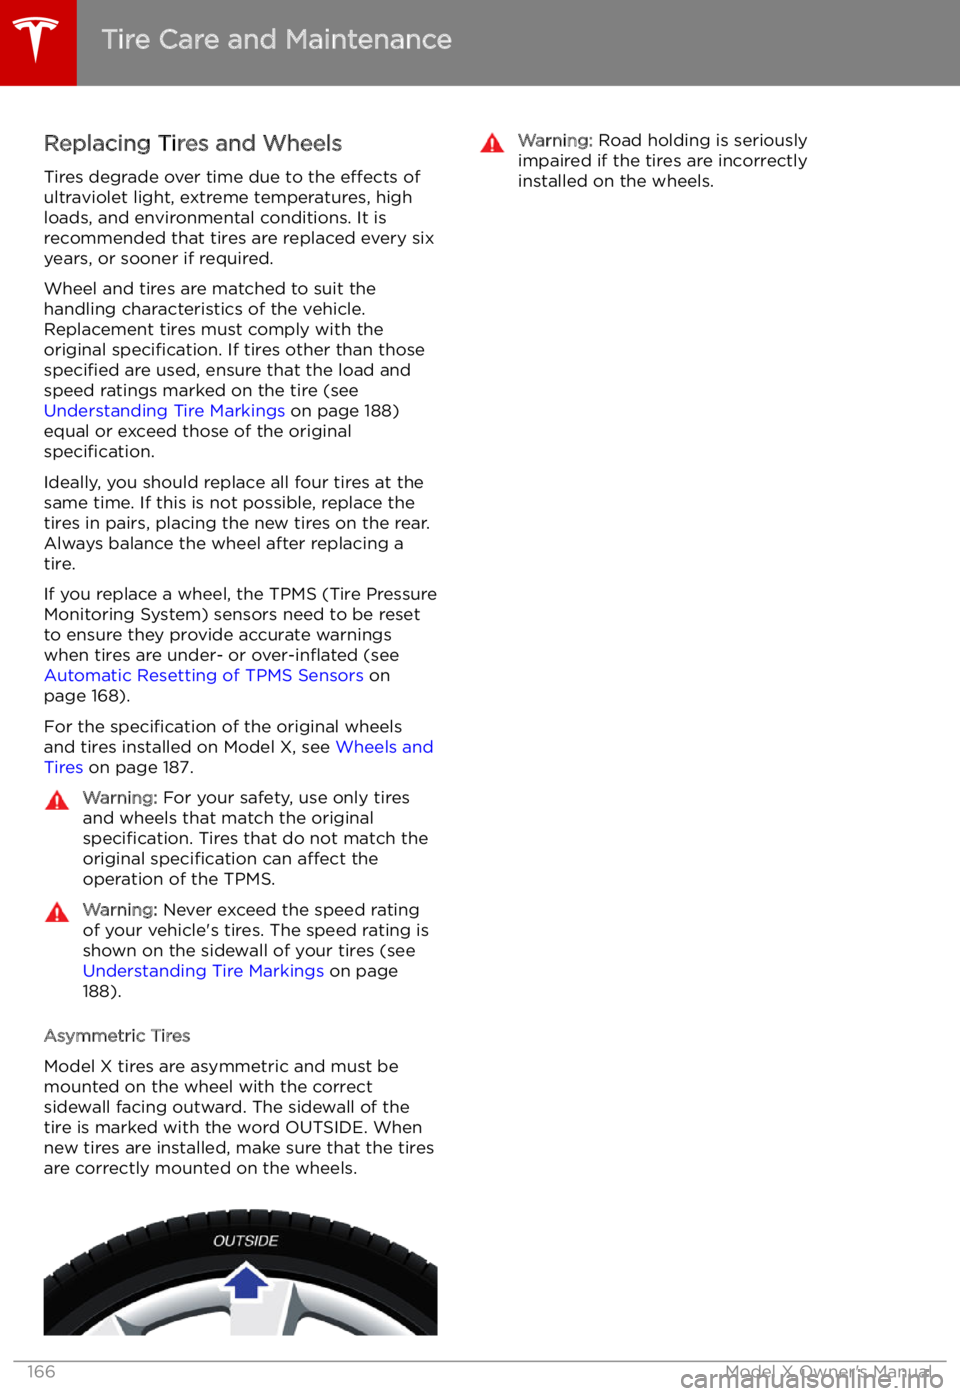
Replacing Tires and Wheels
Tires degrade over time due to the effects of
ultraviolet light, extreme temperatures, high
loads, and environmental conditions. It is
recommended that tires are replaced every six
years, or sooner if required.
Wheel and tires are matched to suit thehandling characteristics of the vehicle.
Replacement tires must comply with the
original specification. If tires other than those
specified are used, ensure that the load and
speed ratings marked on the tire (see Understanding Tire Markings on page 188)
equal or exceed those of the original
specification.
Ideally, you should replace all four tires at the same time. If this is not possible, replace the
tires in pairs, placing the new tires on the rear.
Always balance the wheel after replacing a
tire.
If you replace a wheel, the TPMS (Tire Pressure
Monitoring System) sensors need to be reset to ensure they provide accurate warnings
when tires are under- or over-in
Page 167 of 212
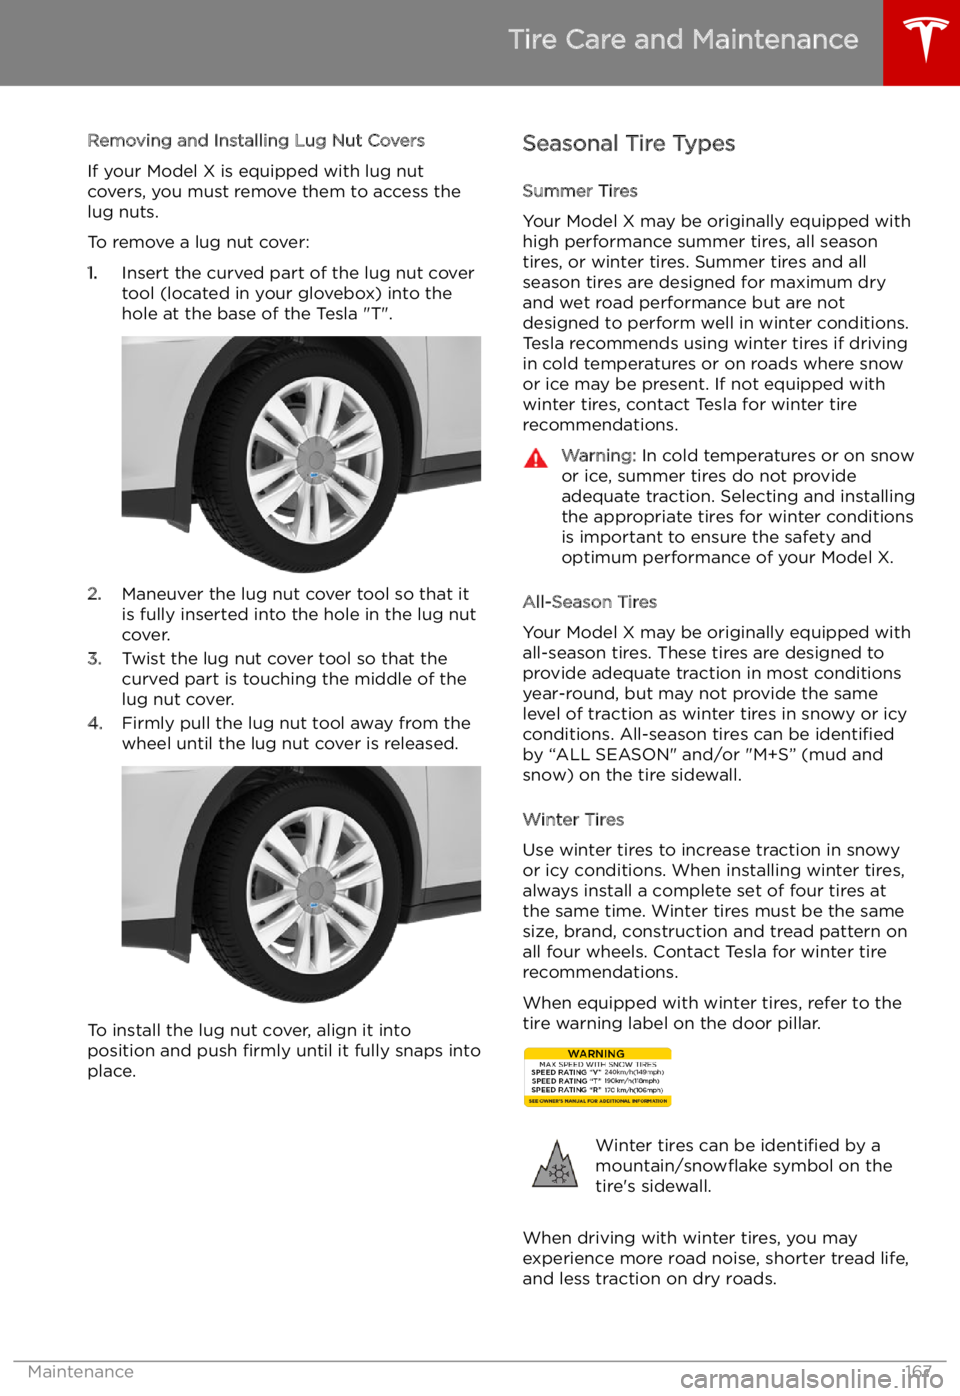
Removing and Installing Lug Nut Covers
If your Model X is equipped with lug nut
covers, you must remove them to access the
lug nuts.
To remove a lug nut cover:
1. Insert the curved part of the lug nut cover
tool (located in your glovebox) into the hole at the base of the Tesla "T".
2. Maneuver the lug nut cover tool so that it
is fully inserted into the hole in the lug nut
cover.
3. Twist the lug nut cover tool so that the
curved part is touching the middle of the
lug nut cover.
4. Firmly pull the lug nut tool away from the
wheel until the lug nut cover is released.
To install the lug nut cover, align it into
position and push firmly until it fully snaps into
place.
Seasonal Tire Types
Summer Tires
Your Model X may be originally equipped with high performance summer tires, all season
tires, or winter tires. Summer tires and all
season tires are designed for maximum dry
and wet road performance but are not
designed to perform well in winter conditions.
Tesla recommends using winter tires if driving
in cold temperatures or on roads where snow
or ice may be present. If not equipped with winter tires, contact Tesla for winter tire
recommendations.Warning: In cold temperatures or on snow
or ice, summer tires do not provide
adequate traction. Selecting and installing the appropriate tires for winter conditions
is important to ensure the safety and
optimum performance of your Model X.
All-Season Tires
Your Model X may be originally equipped with
all-season tires. These tires are designed to
provide adequate traction in most conditions
year-round, but may not provide the same level of traction as winter tires in snowy or icy
conditions. All-season tires can be identified
by “ALL SEASON" and/or "M+S” (mud and
snow) on the tire sidewall.
Winter Tires
Use winter tires to increase traction in snowy
or icy conditions. When installing winter tires,
always install a complete set of four tires at
the same time. Winter tires must be the same
size, brand, construction and tread pattern on all four wheels. Contact Tesla for winter tire
recommendations.
When equipped with winter tires, refer to the
tire warning label on the door pillar.
Winter tires can be identified by a
mountain/snow