lock TESLA MODEL X 2023 User Guide
[x] Cancel search | Manufacturer: TESLA, Model Year: 2023, Model line: MODEL X, Model: TESLA MODEL X 2023Pages: 296, PDF Size: 8.56 MB
Page 39 of 296
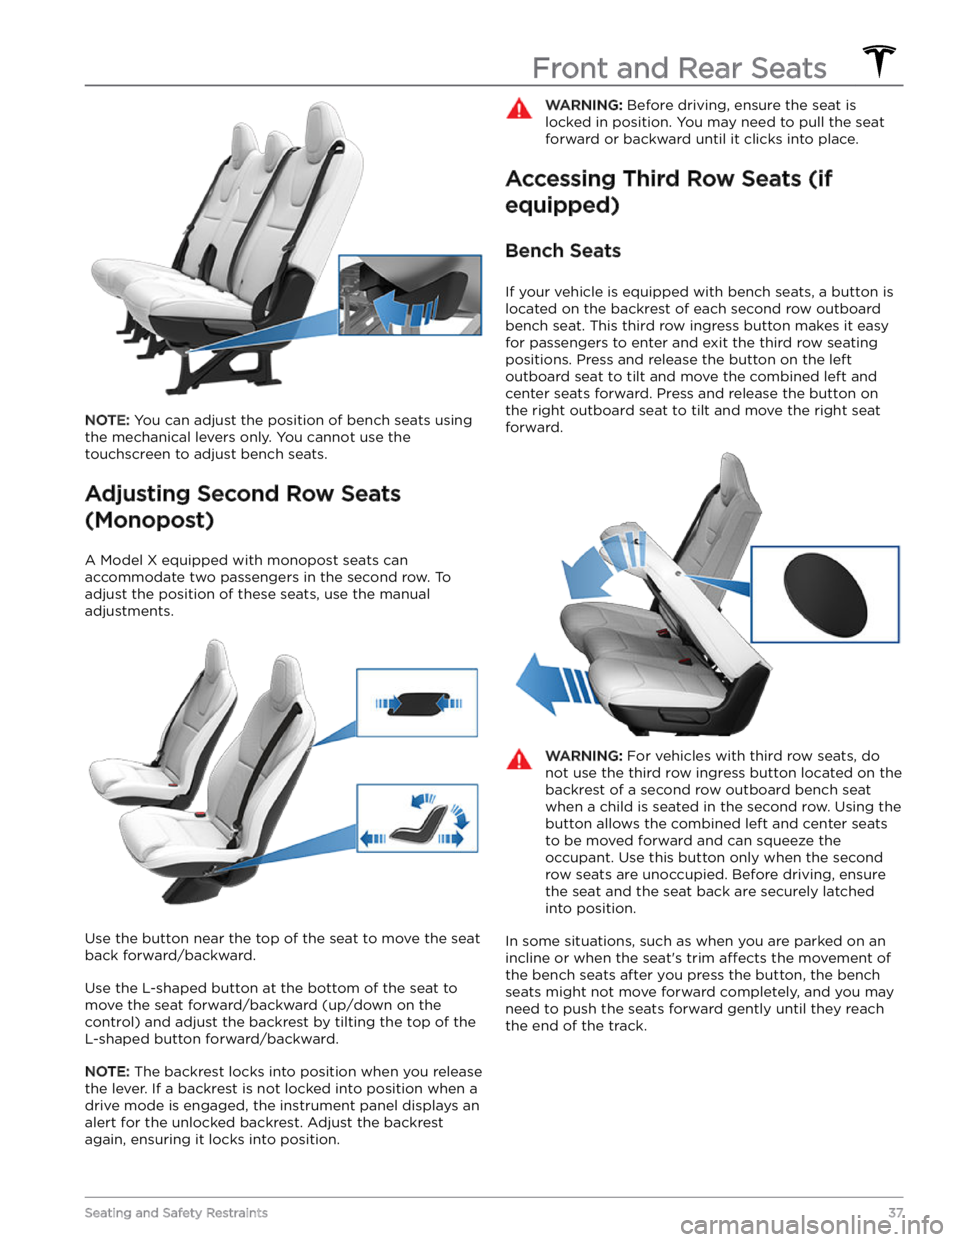
NOTE: You can adjust the position of bench seats using
the mechanical levers only. You cannot use the touchscreen to adjust bench seats.
Adjusting Second Row Seats
(Monopost)
A Model X equipped with monopost seats can
accommodate two passengers in the second row. To
adjust the position of these seats, use the manual
adjustments.
Use the button near the top of the seat to move the seat
back forward/backward.
Use the L-shaped button at the bottom of the seat to move the seat forward/backward (up/down on the control) and adjust the backrest by tilting the top of the
L-shaped button forward/backward.
NOTE: The backrest locks into position when you release
the lever. If a backrest is not locked into position when a
drive mode is engaged, the instrument panel displays an alert for the unlocked backrest. Adjust the backrest again, ensuring it locks into position.
WARNING: Before driving, ensure the seat is
locked in position. You may need to pull the seat
forward or backward until it clicks into place.
Accessing Third Row Seats (if
equipped)
Bench Seats
If your vehicle is equipped with bench seats, a button is
located on the backrest of each second row outboard bench seat. This third row ingress button makes it easy for passengers to enter and exit the third row seating
positions. Press and release the button on the left outboard seat to tilt and move the combined left and center seats forward. Press and release the button on the right outboard seat to tilt and move the right seat
forward.
WARNING: For vehicles with third row seats, do
not use the third row ingress button located on the
backrest of a second row outboard bench seat
when a child is seated in the second row. Using the
button allows the combined left and center seats
to be moved forward and can squeeze the
occupant. Use this button only when the second
row seats are unoccupied. Before driving, ensure
the seat and the seat back are securely latched
into position.
In some situations, such as when you are parked on an
incline or when the seat
Page 41 of 296
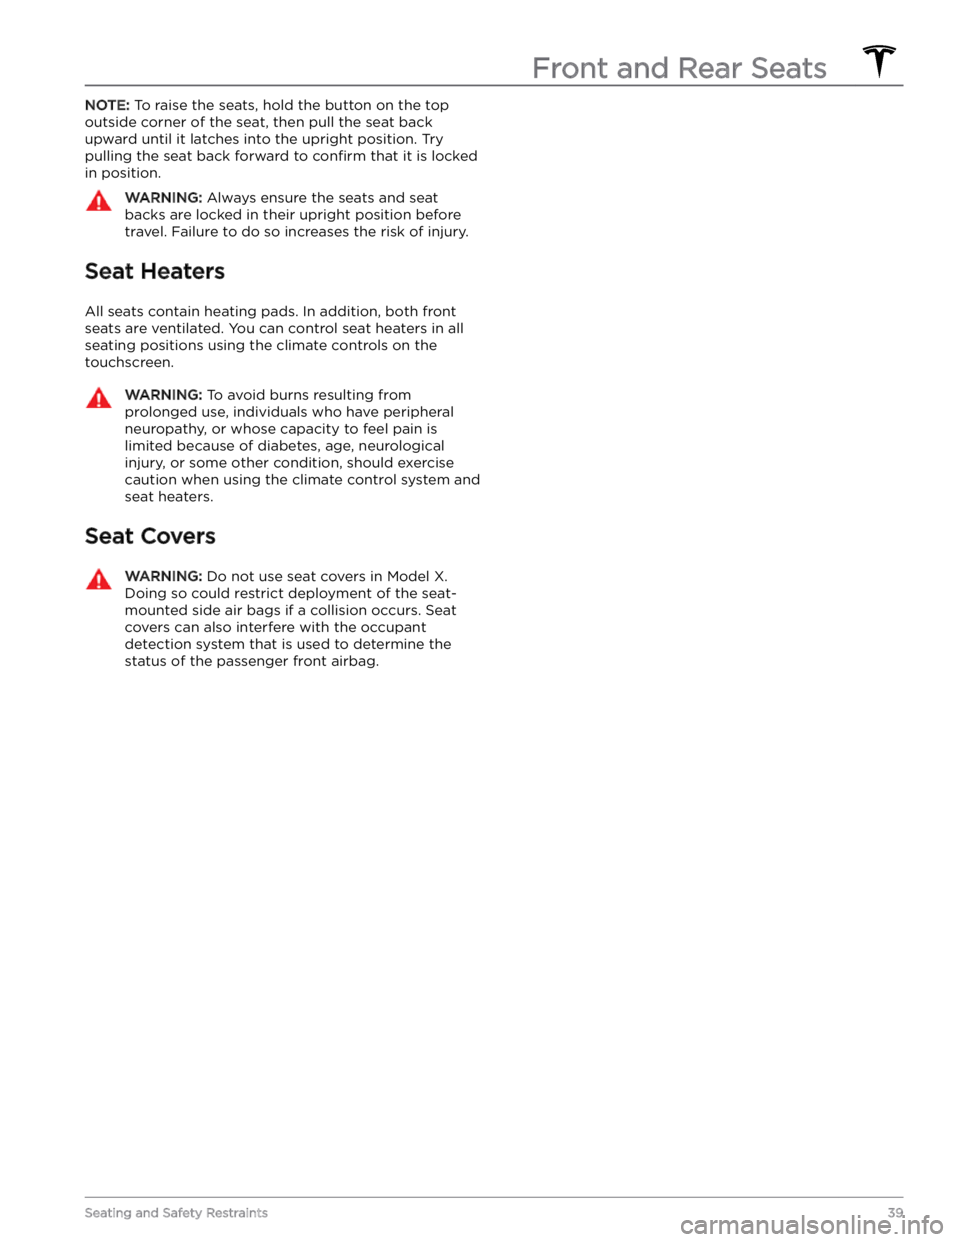
NOTE: To raise the seats, hold the button on the top
outside corner of the seat, then pull the seat back
upward until it latches into the upright position. Try pulling the seat back forward to
confirm that it is locked
in position.
WARNING: Always ensure the seats and seat
backs are locked in their upright position before
travel. Failure to do so increases the risk of injury.
Seat Heaters
All seats contain heating pads. In addition, both front seats are ventilated.
You can control seat heaters in all
seating positions using the climate controls on the
touchscreen.
WARNING: To avoid burns resulting from
prolonged use, individuals who have peripheral
neuropathy, or whose capacity to feel pain is
limited because of diabetes, age, neurological
injury, or some other condition, should exercise
caution when using the climate control system and
seat heaters.
Seat Covers
WARNING: Do not use seat covers in Model X.
Doing so could restrict deployment of the seat-
mounted side air bags if a collision occurs. Seat
covers can also interfere with the occupant
detection system that is used to determine the
status of the passenger front airbag.
Front and Rear Seats
39Seating and Safety Restraints
Page 42 of 296
Wearing Seat Belts
Using seat belts and child safety seats is the most
effective way to protect occupants if a collision occurs.
Therefore, wearing a seat belt is required by law in most jurisdictions.
Both the driver and passenger seats are equipped with three-point inertia reel seat belts. Inertia reel belts are automatically tensioned to allow occupants to move
comfortably during normal driving conditions.
To
securely hold child safety seats, all passenger seating
positions are equipped with an automatic locking
retractor (ALR) feature that, by fully extracting the seat
belt (beyond the length needed for a typical adult
occupant), locks the belt into place until the seat belt is
unbuckled.
The seat belt reel automatically locks to prevent
movement of occupants if
Model X experiences a force
associated with hard acceleration, braking, cornering, or
an impact in a collision.
Seat Belt Reminders
The seat belt reminder on the instrument
panel alerts you if a seat belt for an
occupied driver or passenger seat is unbuckled. If all occupants are buckled up and the reminder stays on, re-buckle seat
belts to ensure they are correctly latched.
Also remove any heavy objects (such as a briefcase) from an unoccupied seat. If the reminder light continues to stay on,
contact Tesla.
You can temporarily disable a seat belt reminder
associated with a rear seating position. This is useful when you are carrying an object in a rear seat that triggers the seat belt reminder alert. To disable the
reminder, touch the associated seat on the seat belt reminder popup message that displays on the touchscreen when a seat belt reminder is active. When a
reminder is disabled, the seat belt reminder icon is
replaced by a seat icon, for the current drive only. Touch the seat again to re-enable the reminder.
WARNING: Seat belts must be worn by passengers
in all seating positions. Do not disable a seat belt
reminder when the seating position is occupied by
a passenger.
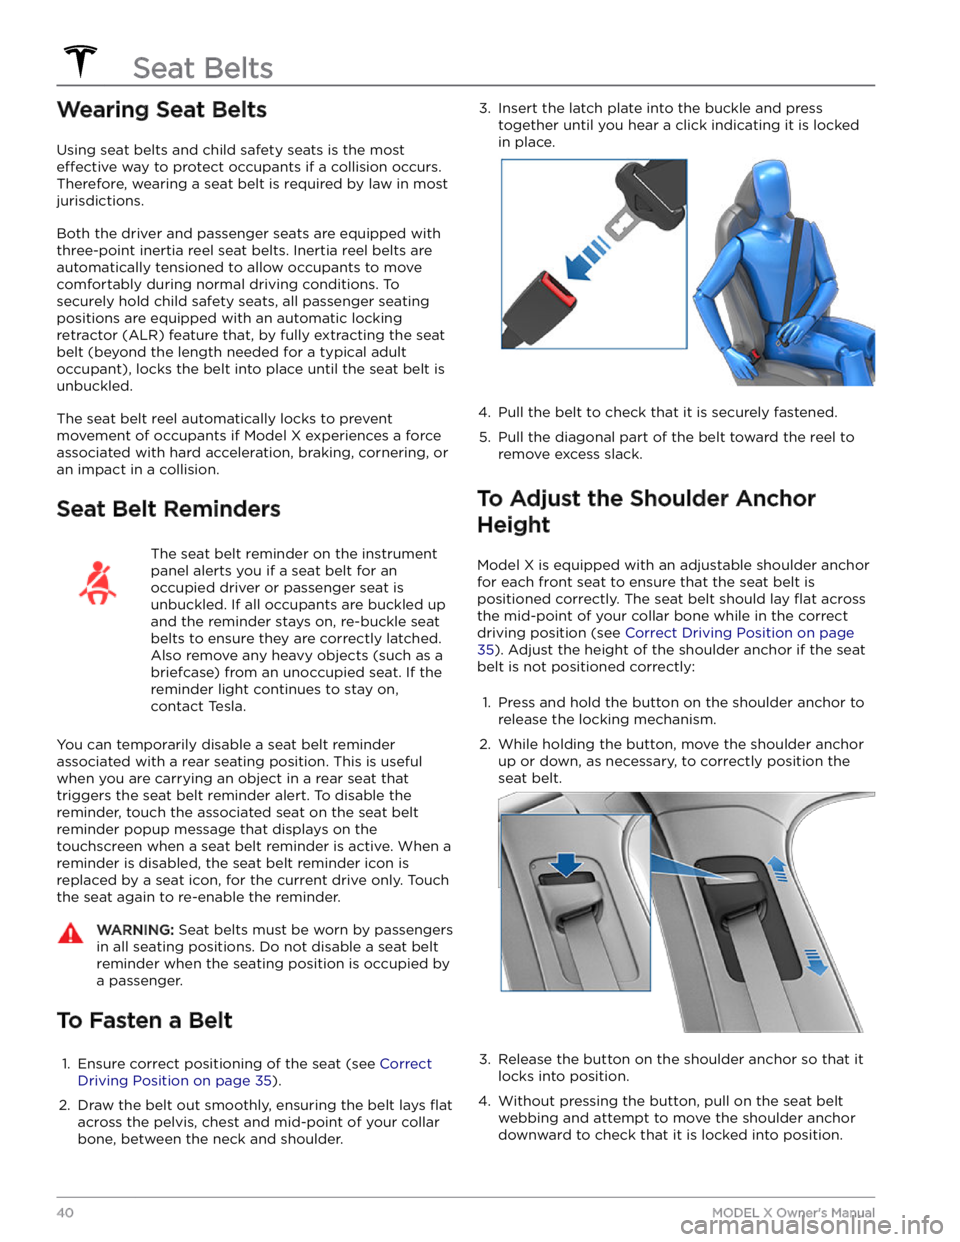
To Fasten a Belt
1.
Ensure correct positioning of the seat (see Correct
Driving Position on page 35).
2.
Draw the belt out smoothly, ensuring the belt lays flat
across the pelvis, chest and mid-point of your collar
bone, between the neck and shoulder.
3. Insert the latch plate into the buckle and press
together until you hear a click indicating it is locked
in place.4.
Pull the belt to check that it is securely fastened.
5.
Pull the diagonal part of the belt toward the reel to
remove excess slack.
To Adjust the Shoulder Anchor
Height
Model X is equipped with an adjustable shoulder anchor
for each front seat to ensure that the seat belt is positioned correctly. The seat belt should lay
flat across
the mid-point of your collar bone while in the correct driving position
(see Correct Driving Position on page
35). Adjust the height of the shoulder anchor if the seat
belt is not positioned correctly:
1.
Press and hold the button on the shoulder anchor to release the locking mechanism.
2.
While holding the button, move the shoulder anchor up or down, as necessary, to correctly position the seat belt.
3.
Release the button on the shoulder anchor so that it
locks into position.
4.
Without pressing the button, pull on the seat belt webbing and attempt to move the shoulder anchor
downward to check that it is locked into position.
Seat Belts
40MODEL X Owner
Page 43 of 296

WARNING: Ensure that the seat belt is positioned
correctly and that the shoulder anchor is locked
into position before driving. Riding in a moving
vehicle with the seat belt positioned incorrectly or
with the shoulder anchor not locked into position
can reduce the effectiveness of the seat belt in a
collision.
To Release a Belt
Hold the belt near the buckle to prevent the belt from
retracting too quickly, then press the button on the
buckle. The belt retracts automatically. Ensure there is
no obstruction that prevents the belt from fully
retracting. The belt should not hang loose. If a seat belt
does not fully retract, contact Tesla.
Wearing Seat Belts When Pregnant
Do not put the lap or shoulder sections of the seat belt over the abdominal area. Wear the lap section of the
belt as low as possible across the hips, not the waist. Position the shoulder portion of the belt between the
breasts and to the side of the abdomen. Consult your doctor for
specific guidance.
WARNING: Never place anything between you and
the seat belt to cushion the impact in the event of
a collision.
Seat Belt Pre-tensioners
The front seat belts are equipped with pre
Page 44 of 296

2. With the belt unfastened, unreel the webbing to its limit. Check that unreeling is free from snags, and
visually check the webbing for wear. Allow the webbing to retract, checking that retraction is
smooth and complete.3.
With the webbing half unreeled, hold the tongue plate and pull forward quickly. The mechanism should lock automatically and prevent further unreeling.
If a seat belt fails any of these tests, contact Tesla immediately.
For information about cleaning seat belts, see Seat Belts
on page 198.
Seat Belt Warnings
WARNING: Seat belts should be worn by all
occupants at all times, even if driving for a very
short distance. Failure to do so increases the risk
of injury or death if a collision occurs.
WARNING: Secure small children in a suitable child
safety seat as described in the Child Safety Seat
topic. Always follow the child safety seat
manufacturer
Page 47 of 296

To securely hold child safety seats, all passenger seating positions are equipped with an automatic locking
retractor (ALR) feature that, by fully extracting the seat belt (beyond the length needed for a typical adult
occupant), locks the belt into place until the seat belt is unbuckled and the webbing is fully retracted. The ALR
mechanism operates as a ratchet, winding in slack and preventing the seat belt from extending any further until it has been completely rewound. When installing a child safety seat with integrated restraints, engage the belt
Page 48 of 296
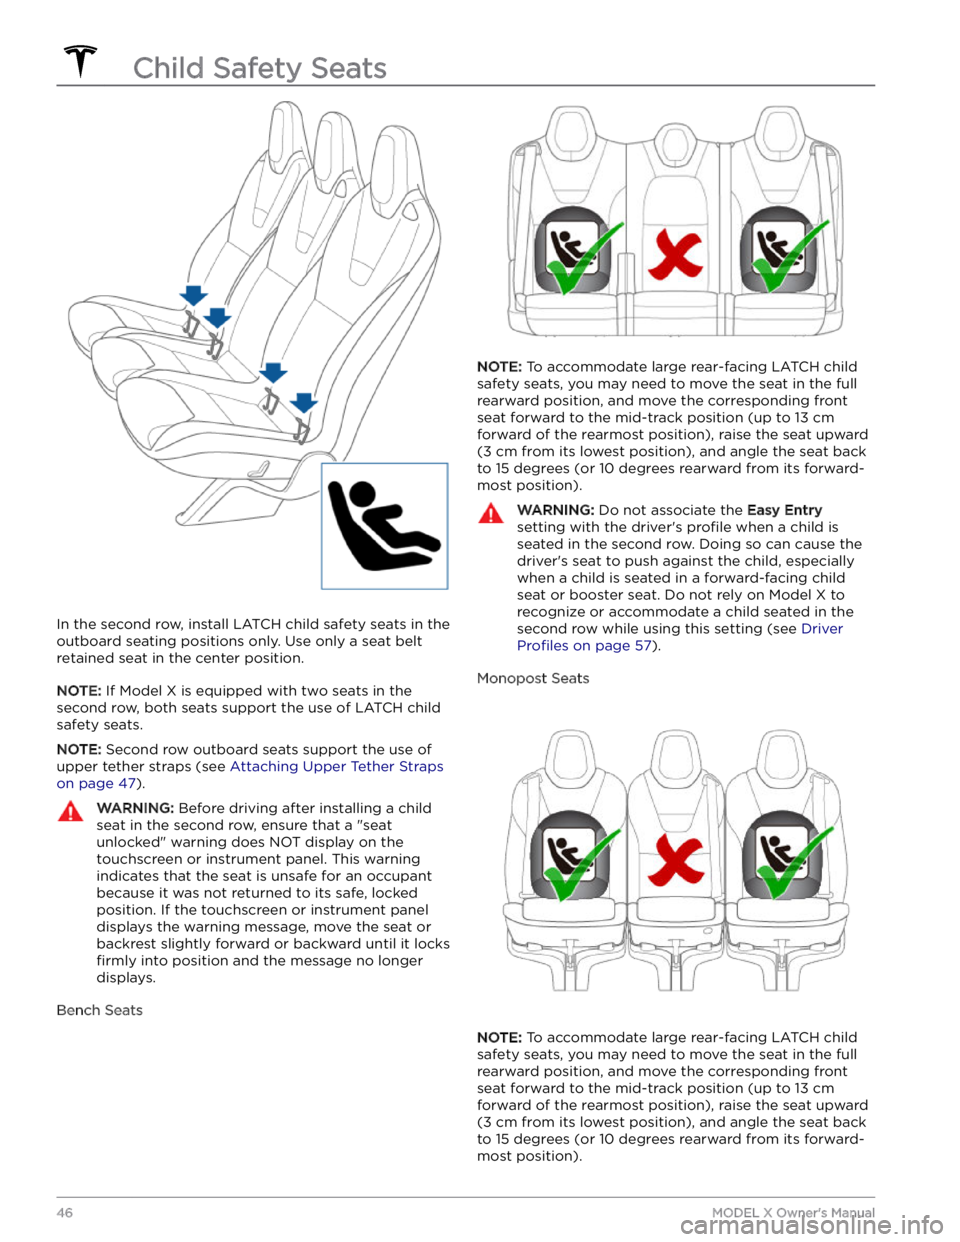
In the second row, install LATCH child safety seats in the
outboard seating positions only. Use only a seat belt
retained seat in the center position.
NOTE: If Model X is equipped with two seats in the
second row, both seats support the use of
LATCH child
safety seats.
NOTE: Second row outboard seats support the use of
upper tether straps (see
Attaching Upper Tether Straps
on page 47).
WARNING: Before driving after installing a child
seat in the second row, ensure that a "seat
unlocked" warning does NOT display on the
touchscreen or instrument panel. This warning
indicates that the seat is unsafe for an occupant
because it was not returned to its safe, locked
position. If the touchscreen or instrument panel
displays the warning message, move the seat or
backrest slightly forward or backward until it locks
firmly into position and the message no longer
displays.
Bench Seats
NOTE: To accommodate large rear-facing LATCH child
safety seats, you may need to move the seat in the full rearward position, and move the corresponding front seat forward to the mid-track position (up to 13 cm forward of the rearmost position), raise the seat upward
(3 cm from its lowest position), and angle the seat back
to 15 degrees (or 10 degrees rearward from its forward- most position).
WARNING: Do not associate the Easy Entry
setting with the driver
Page 70 of 296
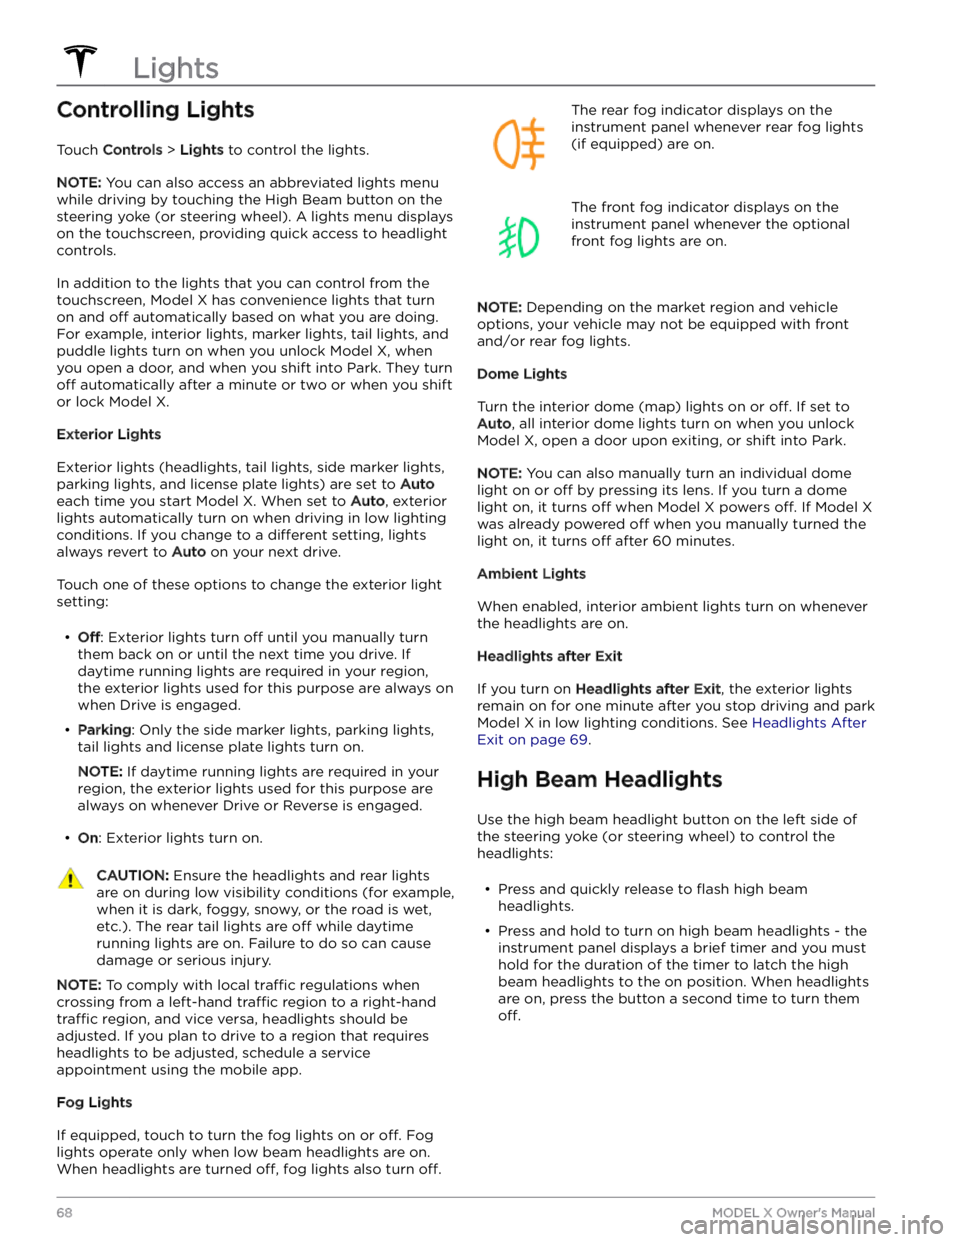
Controlling Lights
Touch Controls > Lights to control the lights.
NOTE: You can also access an abbreviated lights menu
while driving by touching the High Beam button on the
steering yoke (or steering wheel). A lights menu displays
on the touchscreen, providing quick access to headlight controls.
In addition to the lights that you can control from the
touchscreen,
Model X has convenience lights that turn
on and
off automatically based on what you are doing.
For example, interior lights, marker lights, tail lights, and
puddle lights turn on when you unlock
Model X, when
you open a door, and when you shift into Park. They turn
off automatically after a minute or two or when you shift
or lock
Model X.
Exterior Lights
Exterior lights (headlights, tail lights, side marker lights,
parking lights, and license plate lights) are set to
Auto
each time you start Model X. When set to Auto, exterior
lights automatically turn on when driving in low lighting
conditions. If you change to a
different setting, lights
always revert to
Auto on your next drive.
Touch one of these options to change the exterior light setting:
Page 75 of 296
10. The power meter displays real-time power usage. During acceleration, the bar fills to the right with a gray color
(or white if the display is dark) to represent power being used. During deceleration (when
Model X is moving and
you release your foot from the accelerator pedal), the bar
fills to the left with a green color to represent power
being fed back to the Battery by regenerative braking (see
Regenerative Braking on page 77).
11.
When Autosteer is active and detects the driving lane, it is highlighted in blue (see Autosteer on page 105).
Depending on the current driving scenario, you may see neighboring lanes.
NOTE: In situations where Autosteer is unable to detect lane markings, the driving lane is determined based on
the vehicle you are following.
NOTE: If Navigate on Autopilot is active, the driving lane displays as a single blue line in front of Model X (see
Navigate on Autopilot on page 110).
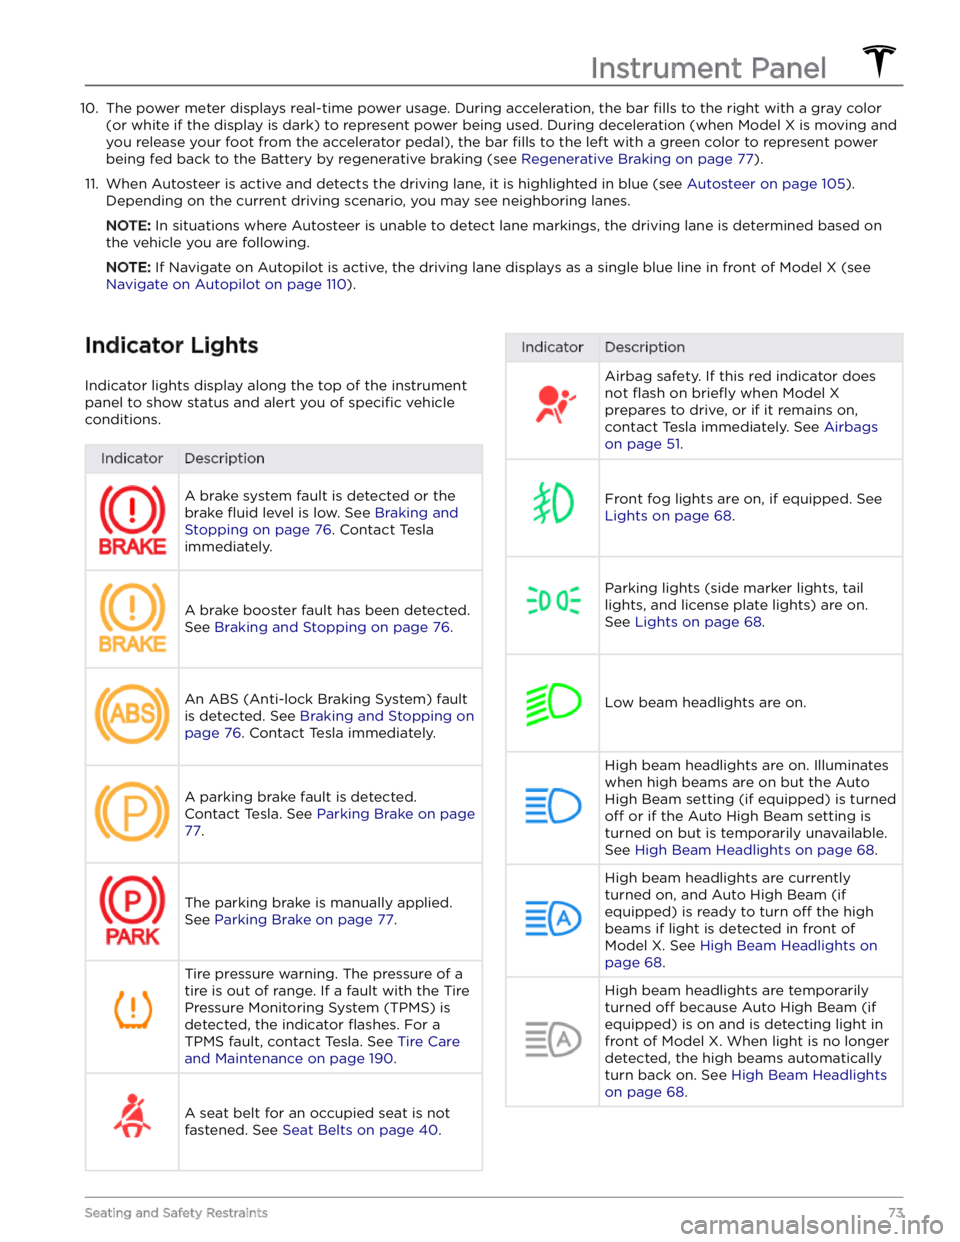
Indicator Lights
Indicator lights display along the top of the instrument panel to show status and alert you of
specific vehicle
conditions.
IndicatorDescriptionA brake system fault is detected or the brake
fluid level is low. See Braking and
Stopping on page 76. Contact Tesla
immediately.
A brake booster fault has been detected. See
Braking and Stopping on page 76.
An ABS (Anti-lock Braking System) fault is detected. See
Braking and Stopping on
page 76. Contact Tesla immediately.
A parking brake fault is detected. Contact Tesla. See
Parking Brake on page
77.
The parking brake is manually applied.
See
Parking Brake on page 77.
Tire pressure warning. The pressure of a tire is out of range. If a fault with the Tire Pressure Monitoring System (TPMS) is
detected, the indicator
flashes. For a
TPMS fault, contact Tesla. See
Tire Care
and Maintenance on page 190.
A seat belt for an occupied seat is not
fastened. See
Seat Belts on page 40.
IndicatorDescriptionAirbag safety. If this red indicator does not
flash on briefly when Model X
prepares to drive, or if it remains on, contact Tesla immediately. See
Airbags
on page 51.
Front fog lights are on, if equipped. See
Lights on page 68.
Parking lights (side marker lights, tail
lights, and license plate lights) are on. See
Lights on page 68.
Low beam headlights are on.
High beam headlights are on. Illuminates when high beams are on but the Auto High Beam setting (if equipped) is turned
off or if the Auto High Beam setting is
turned on but is temporarily unavailable.
See
High Beam Headlights on page 68.
High beam headlights are currently
turned on, and Auto High Beam (if equipped) is ready to turn
off the high
beams if light is detected in front of
Model X. See High Beam Headlights on
page 68.
High beam headlights are temporarily
turned
off because Auto High Beam (if
equipped) is on and is detecting light in
front of
Model X. When light is no longer
detected, the high beams automatically turn back on. See
High Beam Headlights
on page 68.
Instrument Panel
73Seating and Safety Restraints
Page 78 of 296
Braking SystemsWARNING: Properly functioning braking systems
are critical to ensure safety. If you experience a
problem with the brake pedal, brake calipers, or
any component of a Model X braking system,
contact Tesla immediately.
Model X has an anti-lock braking system (ABS) that
prevents the wheels from locking when you apply
maximum brake pressure. This improves steering control
during heavy braking in most road conditions.
During emergency braking conditions, the ABS
constantly monitors the speed of each wheel and varies
the brake pressure according to the grip available.
The alteration of brake pressure can be felt as a pulsing sensation through the brake pedal. This demonstrates that the ABS is operating and is not a cause for concern. Keep
firm and steady pressure on the brake pedal while
experiencing the pulsing.
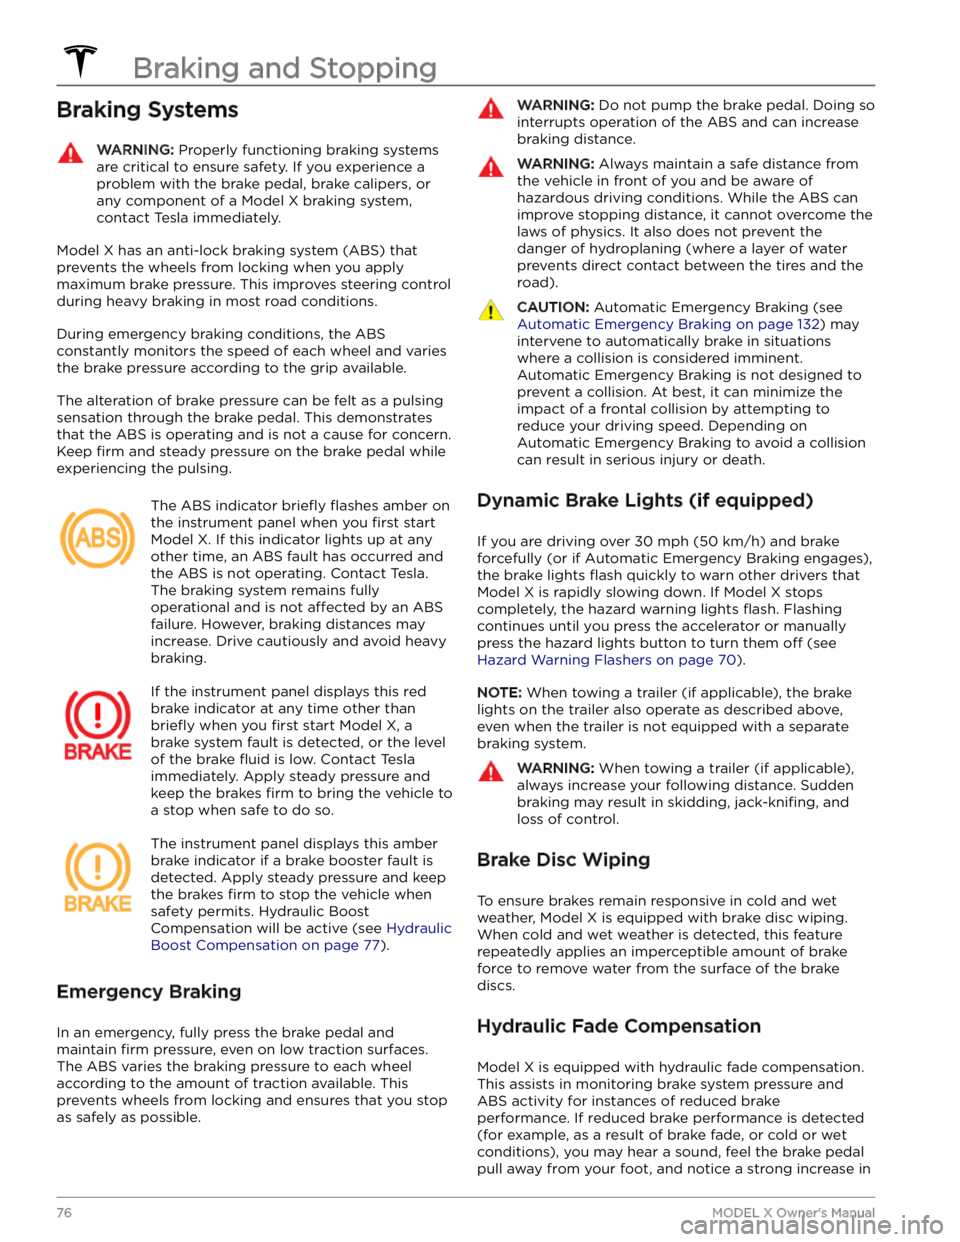
The ABS indicator briefly flashes amber on
the
instrument panel when you first start
Model X. If this indicator lights up at any
other time, an ABS fault has occurred and the ABS is not operating. Contact Tesla.
The braking system remains fully
operational and is not
affected by an ABS
failure. However, braking distances may increase. Drive cautiously and avoid heavy braking.
If the instrument panel displays this red
brake indicator at any time other than
briefly when you first start Model X, a
brake system fault is detected, or the level
of the brake
fluid is low. Contact Tesla
immediately. Apply steady pressure and keep the brakes
firm to bring the vehicle to
a stop when safe to do so.
The instrument panel displays this amber
brake indicator if a brake booster fault is detected. Apply steady pressure and keep the brakes
firm to stop the vehicle when
safety permits. Hydraulic Boost Compensation will be active (see
Hydraulic
Boost Compensation on page 77).
Emergency Braking
In an emergency, fully press the brake pedal and
maintain
firm pressure, even on low traction surfaces.
The ABS varies the braking pressure to each wheel
according to the amount of traction available. This prevents wheels from locking and ensures that you stop as safely as possible.
WARNING: Do not pump the brake pedal. Doing so
interrupts operation of the ABS and can increase
braking distance.
WARNING: Always maintain a safe distance from
the vehicle in front of you and be aware of
hazardous driving conditions. While the ABS can
improve stopping distance, it cannot overcome the
laws of physics. It also does not prevent the
danger of hydroplaning (where a layer of water
prevents direct contact between the tires and the
road).
CAUTION: Automatic Emergency Braking (see
Automatic Emergency Braking on page 132) may
intervene to automatically brake in situations
where a collision is considered imminent.
Automatic Emergency Braking is not designed to
prevent a collision. At best, it can minimize the
impact of a frontal collision by attempting to
reduce your driving speed. Depending on
Automatic Emergency Braking to avoid a collision
can result in serious injury or death.
Dynamic Brake Lights (if equipped)
If you are driving over 30 mph (50 km/h) and brake
forcefully
(or if Automatic Emergency Braking engages),
the brake lights
flash quickly to warn other drivers that
Model X is rapidly slowing down. If Model X stops
completely, the hazard warning lights
flash. Flashing
continues until you press the accelerator or manually press the hazard lights button to turn them
off (see
Hazard Warning Flashers on page 70).
NOTE: When towing a trailer (if applicable), the brake
lights on the trailer also operate as described above,
even when the trailer is not equipped with a separate
braking system.
WARNING: When towing a trailer (if applicable),
always increase your following distance. Sudden
braking may result in skidding, jack-knifing, and
loss of control.
Brake Disc Wiping
To ensure brakes remain responsive in cold and wet
weather,
Model X is equipped with brake disc wiping.
When cold and wet weather is detected, this feature
repeatedly applies an imperceptible amount of brake
force to remove water from the surface of the brake
discs.
Hydraulic Fade Compensation
Model X is equipped with hydraulic fade compensation.
This assists in monitoring brake system pressure and ABS activity for instances of reduced brake
performance. If reduced brake performance is detected (for example, as a result of brake fade, or cold or wet
conditions), you may hear a sound, feel the brake pedal pull away from your foot, and notice a strong increase in
Braking and Stopping
76MODEL X Owner