turn TESLA MODEL X 2023 Owners Manual
[x] Cancel search | Manufacturer: TESLA, Model Year: 2023, Model line: MODEL X, Model: TESLA MODEL X 2023Pages: 296, PDF Size: 8.56 MB
Page 10 of 296
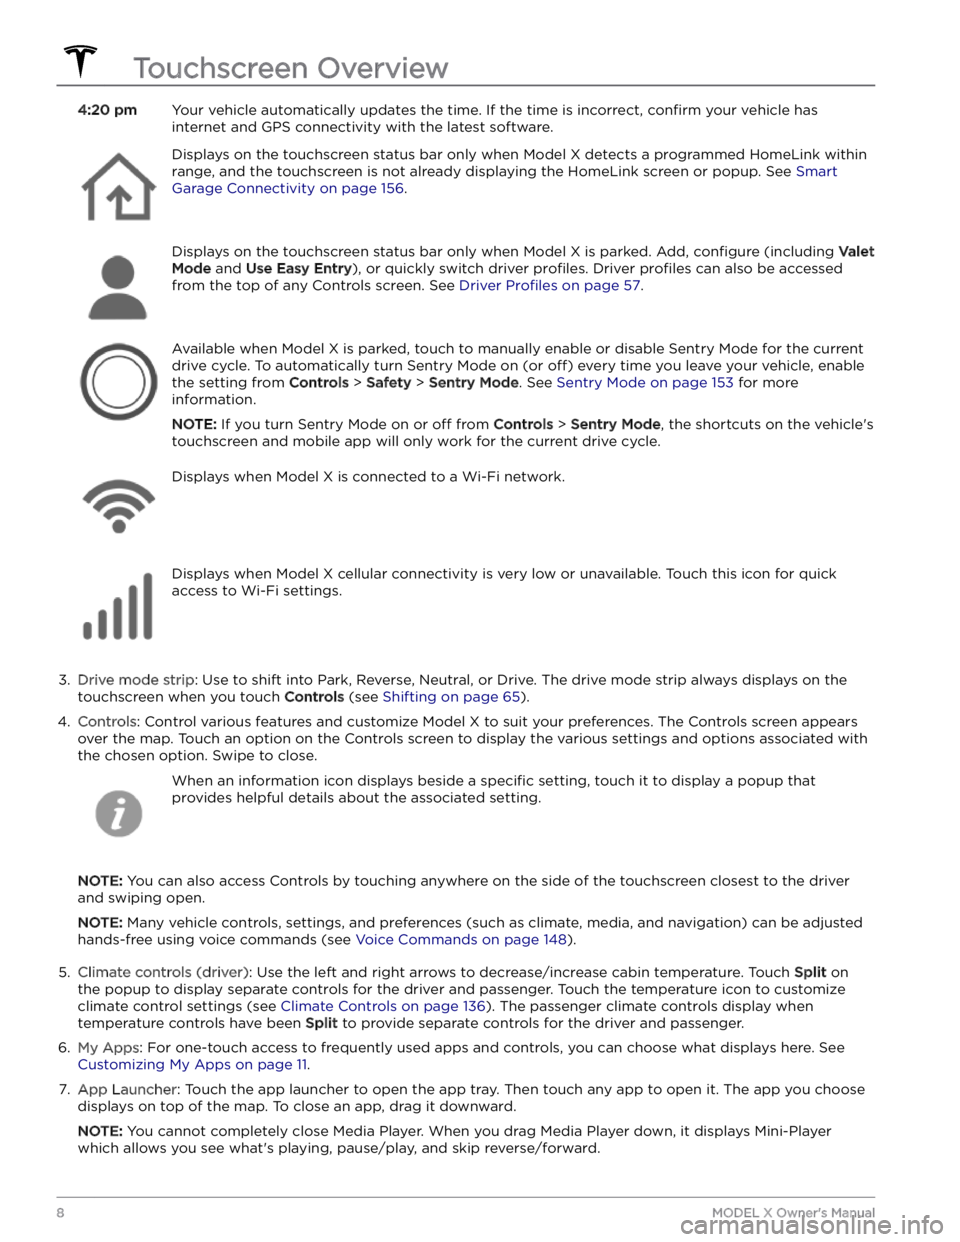
4:20 pmYour vehicle automatically updates the time. If the time is incorrect, confirm your vehicle has
internet and GPS connectivity with the latest software.Displays on the touchscreen status bar only when Model X detects a programmed HomeLink within
range, and the touchscreen is not already displaying the HomeLink screen or popup. See
Smart
Garage Connectivity on page 156.
Displays on the touchscreen status bar only when Model X is parked. Add, configure (including Valet
Mode and Use Easy Entry), or quickly switch driver profiles. Driver profiles can also be accessed
from the top of any Controls screen. See
Driver Profiles on page 57.
Available when Model X is parked, touch to manually enable or disable Sentry Mode for the current
drive cycle. To automatically turn Sentry Mode on (or
off) every time you leave your vehicle, enable
the setting from
Controls > Safety > Sentry Mode. See Sentry Mode on page 153 for more
information.
NOTE: If you turn Sentry Mode on or off from Controls > Sentry Mode, the shortcuts on the vehicle
Page 12 of 296
3.
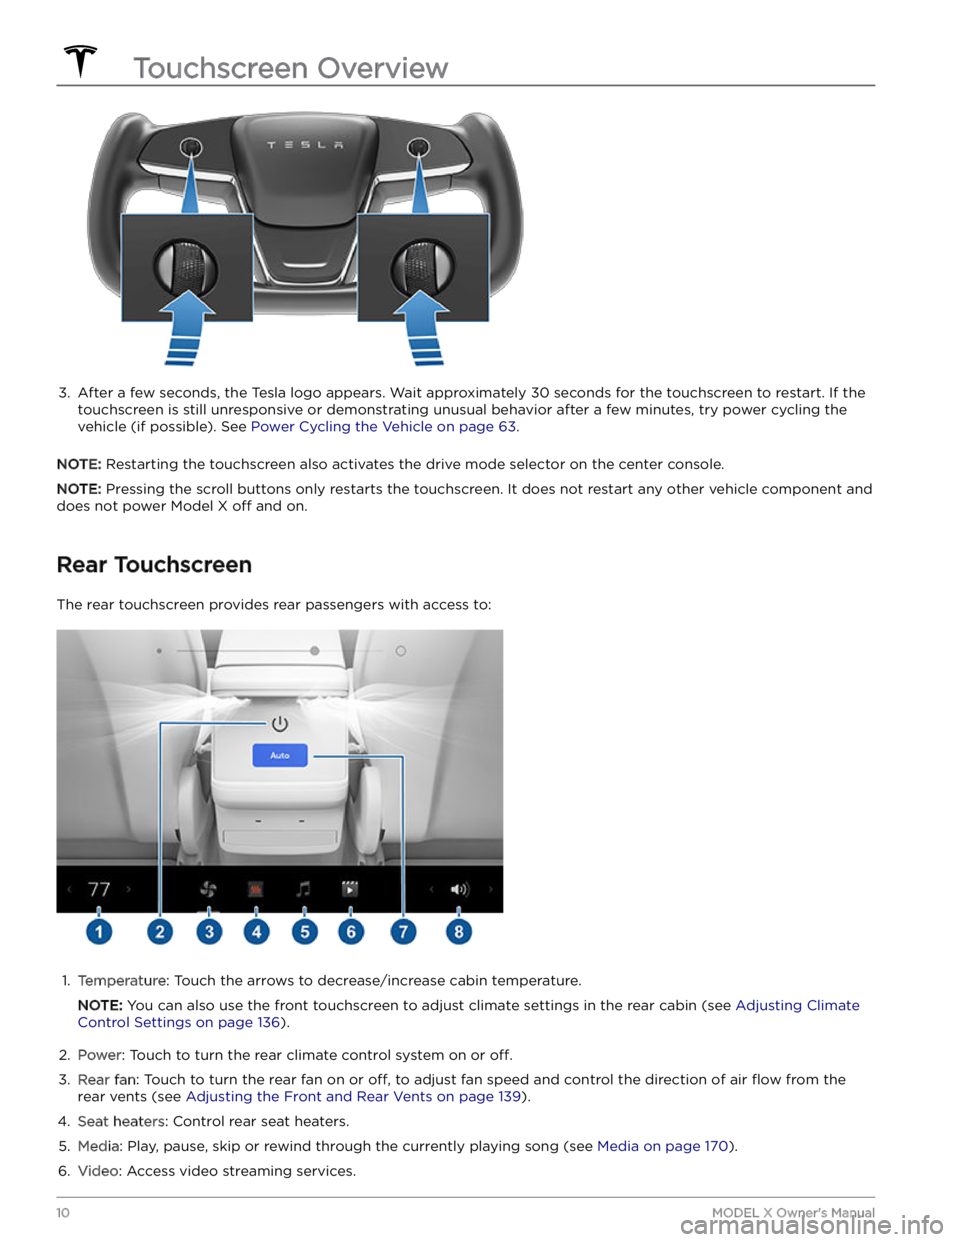
After a few seconds, the Tesla logo appears. Wait approximately 30 seconds for the touchscreen to restart. If the
touchscreen is still unresponsive or demonstrating unusual behavior after a few minutes, try power cycling the
vehicle (if possible). See
Power Cycling the Vehicle on page 63.
NOTE: Restarting the touchscreen also activates the drive mode selector on the center console.
NOTE: Pressing the scroll buttons only restarts the touchscreen. It does not restart any other vehicle component and
does not power
Model X off and on.
Rear Touchscreen
The rear touchscreen provides rear passengers with access to:
1.
Temperature: Touch the arrows to decrease/increase cabin temperature.
NOTE: You can also use the front touchscreen to adjust climate settings in the rear cabin (see Adjusting Climate
Control Settings on page 136).
2.
Power: Touch to turn the rear climate control system on or off.
3.
Rear fan: Touch to turn the rear fan on or off, to adjust fan speed and control the direction of air flow from the
rear vents (see
Adjusting the Front and Rear Vents on page 139).
4.
Seat heaters: Control rear seat heaters.
5.
Media: Play, pause, skip or rewind through the currently playing song (see Media on page 170).
6.
Video: Access video streaming services.
Touchscreen Overview
10MODEL X Owner
Page 24 of 296
Front Door Reset
Since your Model X does not have traditional door
handles that you can pull from the outside, it is
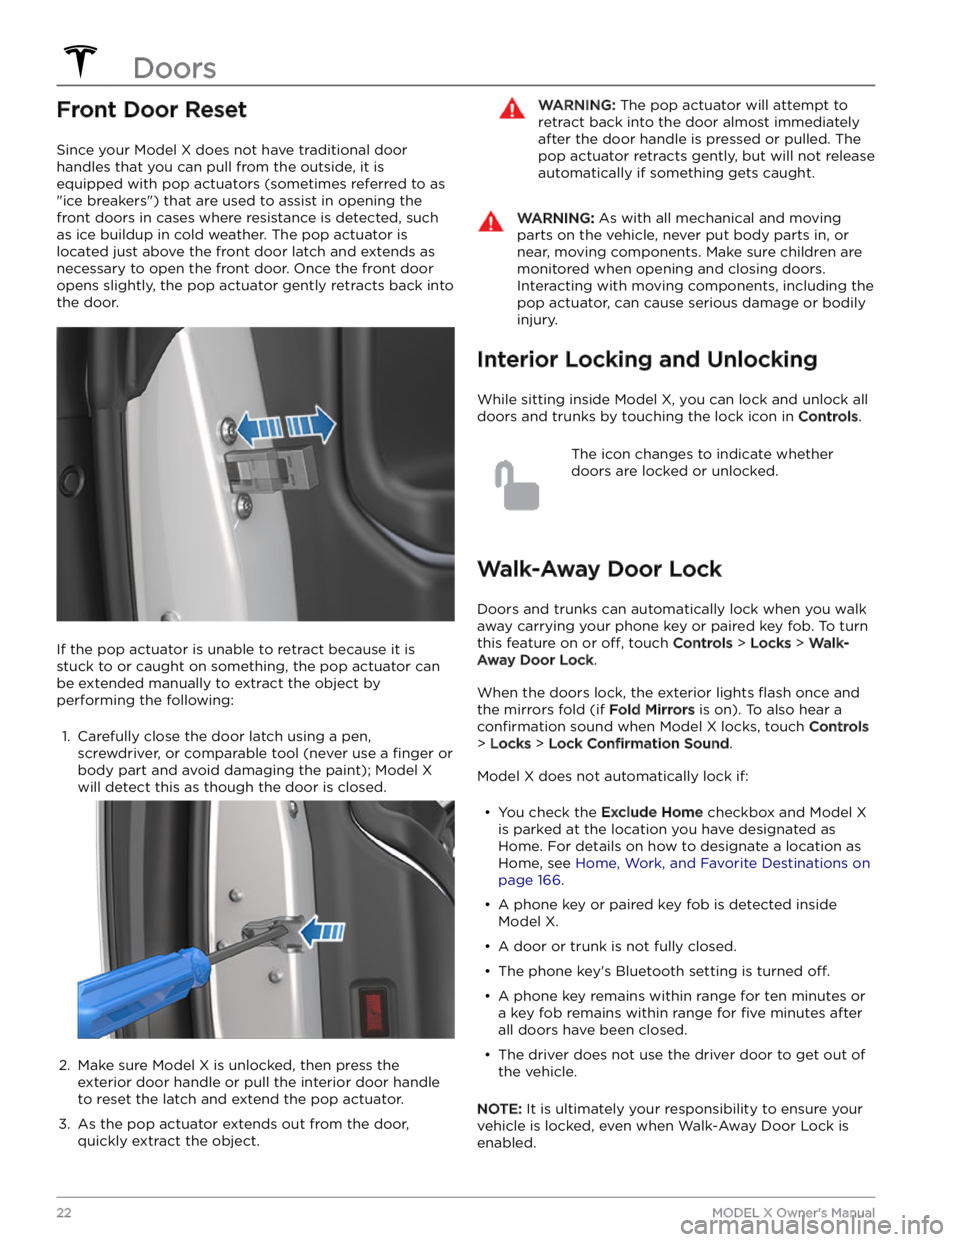
equipped with pop actuators (sometimes referred to as "ice breakers") that are used to assist in opening the front doors in cases where resistance is detected, such as ice buildup in cold weather. The pop actuator is located just above the front door latch and extends as necessary to open the front door. Once the front door opens slightly, the pop actuator gently retracts back into
the door.
If the pop actuator is unable to retract because it is
stuck to or caught on something, the pop actuator can be extended manually to extract the object by
performing the following:
1.
Carefully close the door latch using a pen, screwdriver, or comparable tool (never use a
finger or
body part and avoid damaging the paint);
Model X
will detect this as though the door is closed.
2.
Make sure Model X is unlocked, then press the
exterior door handle or pull the interior door handle
to reset the latch and extend the pop actuator.
3.
As the pop actuator extends out from the door, quickly extract the object.
WARNING: The pop actuator will attempt to
retract back into the door almost immediately
after the door handle is pressed or pulled. The
pop actuator retracts gently, but will not release
automatically if something gets caught.
WARNING: As with all mechanical and moving
parts on the vehicle, never put body parts in, or
near, moving components. Make sure children are
monitored when opening and closing doors.
Interacting with moving components, including the
pop actuator, can cause serious damage or bodily
injury.
Interior Locking and Unlocking
While sitting inside Model X, you can lock and unlock all
doors and trunks by touching the lock icon
in Controls.
The icon changes to indicate whether
doors are locked or unlocked.
Walk-Away Door Lock
Doors and trunks can automatically lock when you walk away carrying your phone key or paired key fob. To turn
this feature on or
off, touch Controls > Locks > Walk-
Away Door Lock.
When the doors lock, the exterior lights flash once and
the mirrors fold (if
Fold Mirrors is on). To also hear a
confirmation sound when Model X locks, touch Controls
> Locks > Lock Confirmation Sound.
Model X does not automatically lock if:
Page 25 of 296

Drive Away Locking
Model X automatically locks all doors (including the
trunks) when your driving speed exceeds
5 mph
(8 km/h)8 km/h.
Driver Door Unlock Mode
Enabling Controls > Locks > Driver Door Unlock Mode
only unlocks the driver door when you first unlock
Model X. The driver door unlocks only if a key is present
on the driver side of the vehicle and not the passenger side. To unlock the remaining doors, use the touchscreen, mobile app or press the key fob a second
time.
Car Left Open Notifications
To receive a mobile notification if a door, trunk and/or
window is left open or if
Model X is left unlocked
unexpectedly, touch
Controls > Locks > Car Left Open
Notifications.
Child Locks
Model X has child locks on the rear doors to prevent
them from being opened using the interior release buttons. On the touchscreen,
touch Controls > Locks >
Child Lock. You can choose Both to engage the child
lock on both rear doors, or you can choose
Left or Right
to engage it on just a specific door.
WARNING: It is recommended that you turn on
child locks when children are seated in the rear
seats.
Unlock on Park
When you stop Model X and engage Park, you can
choose to unlock all doors. To turn this feature on or
off,
touch Controls > Locks > Unlock on Park.
Doors
23Opening and Closing
Page 31 of 296

6. Turn on the external power supply (refer to the manufacturer
Page 32 of 296
Center Console
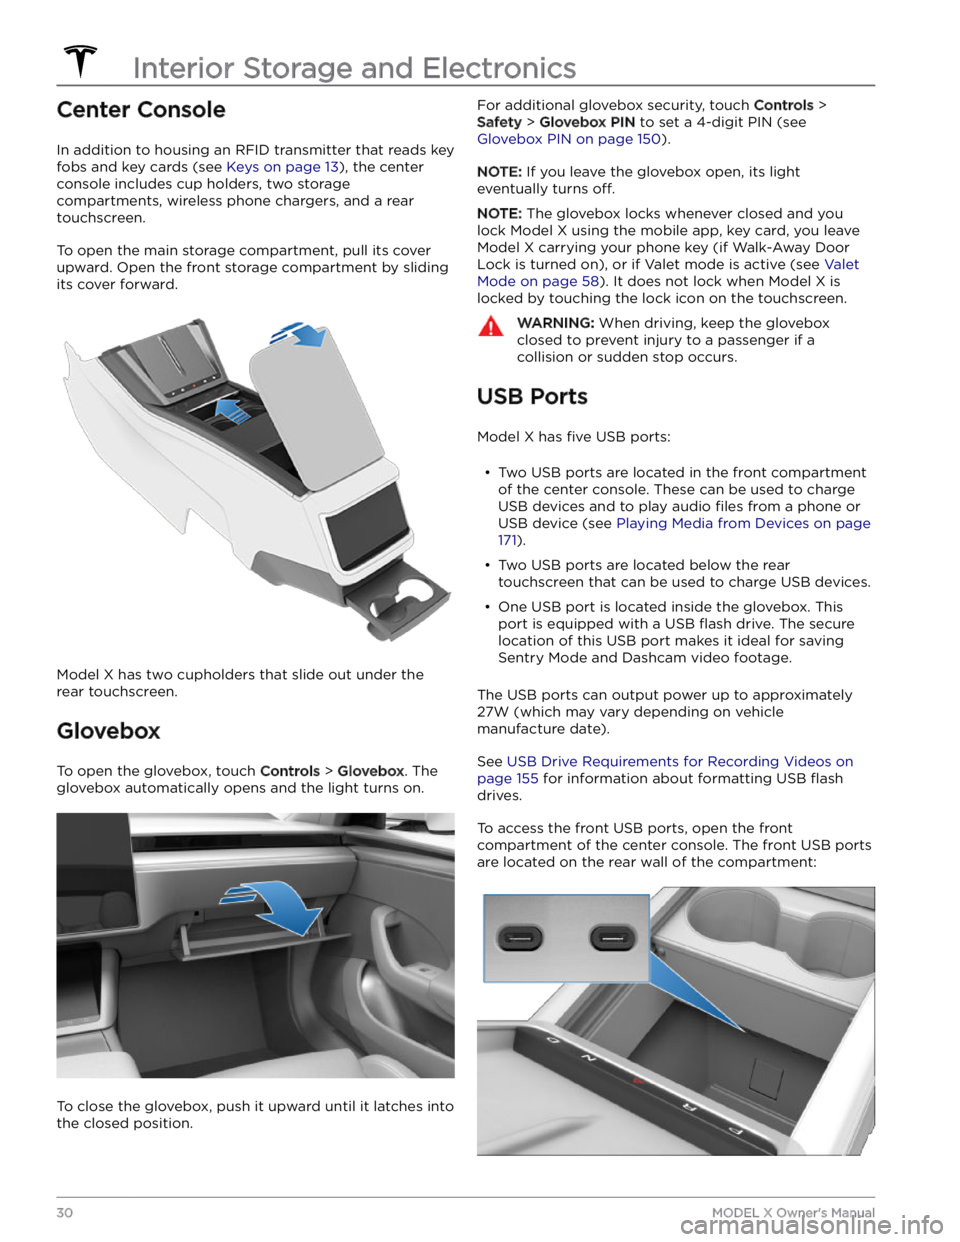
In addition to housing an RFID transmitter that reads key fobs and key cards (see
Keys on page 13), the center
console includes cup holders, two storage
compartments, wireless phone chargers, and a rear
touchscreen.
To open the main storage compartment, pull its cover upward. Open the front storage compartment by sliding its cover forward.
Model X has two cupholders that slide out under the
rear touchscreen.
Glovebox
To open the glovebox, touch Controls > Glovebox. The
glovebox automatically opens and the light turns on.
To close the glovebox, push it upward until it latches into the closed position.
For additional glovebox security, touch Controls >
Safety > Glovebox PIN to set a 4-digit PIN (see
Glovebox PIN on page 150).
NOTE: If you leave the glovebox open, its light
eventually turns
off.
NOTE: The glovebox locks whenever closed and you
lock
Model X using the mobile app, key card, you leave
Model X carrying your phone key (if Walk-Away Door
Lock is turned on), or if Valet mode is active (see
Valet
Mode on page 58). It does not lock when Model X is
locked by touching the lock icon on the touchscreen.
WARNING: When driving, keep the glovebox
closed to prevent injury to a passenger if a
collision or sudden stop occurs.
USB Ports
Model X has five USB ports:
Page 38 of 296
WARNING: Riding in a moving vehicle with the
seat back reclined can result in serious injuries in a
collision, as you could slide under the lap belt or
be propelled into the seat belt. Ensure your seat
back is reclined no more than 30 degrees when
the vehicle is moving.
Calibrating Seats
(If equipped) You can calibrate the driver seat. This is useful if you
find your seat range limited or your driver
profile does not automatically adjust the seat for you.
Navigate to
Controls > Service > Driver Seat, Steering &
Mirrors Calibration and follow the instructions on the
touchscreen.
WARNING: Ensure nothing is behind or
underneath the driver seat during calibration.
Failure to do so may cause serious injury.
Adjusting Second Row Seats
(Bench)
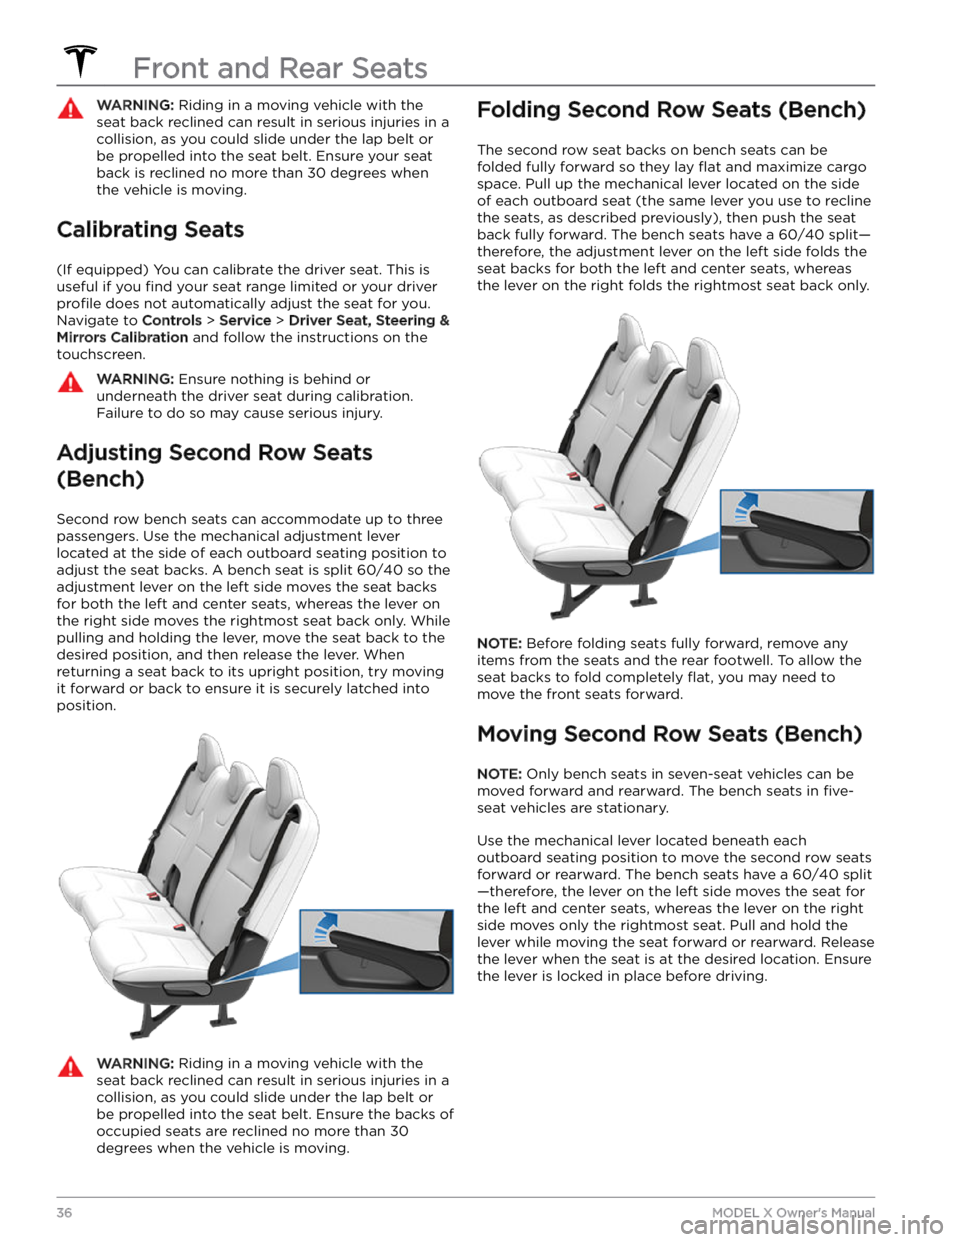
Second row bench seats can accommodate up to three passengers. Use the mechanical adjustment lever
located at the side of each outboard seating position to adjust the seat backs. A bench seat is split 60/40 so the adjustment lever on the left side moves the seat backs
for both the left and center seats, whereas the lever on the right side moves the rightmost seat back only. While pulling and holding the lever, move the seat back to the desired position, and then release the lever. When
returning a seat back to its upright position, try moving
it forward or back to ensure it is securely latched into
position.
WARNING: Riding in a moving vehicle with the
seat back reclined can result in serious injuries in a
collision, as you could slide under the lap belt or
be propelled into the seat belt. Ensure the backs of
occupied seats are reclined no more than 30
degrees when the vehicle is moving.
Folding Second Row Seats (Bench)
The second row seat backs on bench seats can be
folded fully forward so they lay
flat and maximize cargo
space. Pull up the mechanical lever located on the side of each outboard seat (the same lever you use to recline
the seats, as described previously), then push the seat
back fully forward. The bench seats have a 60/40 split
Page 48 of 296
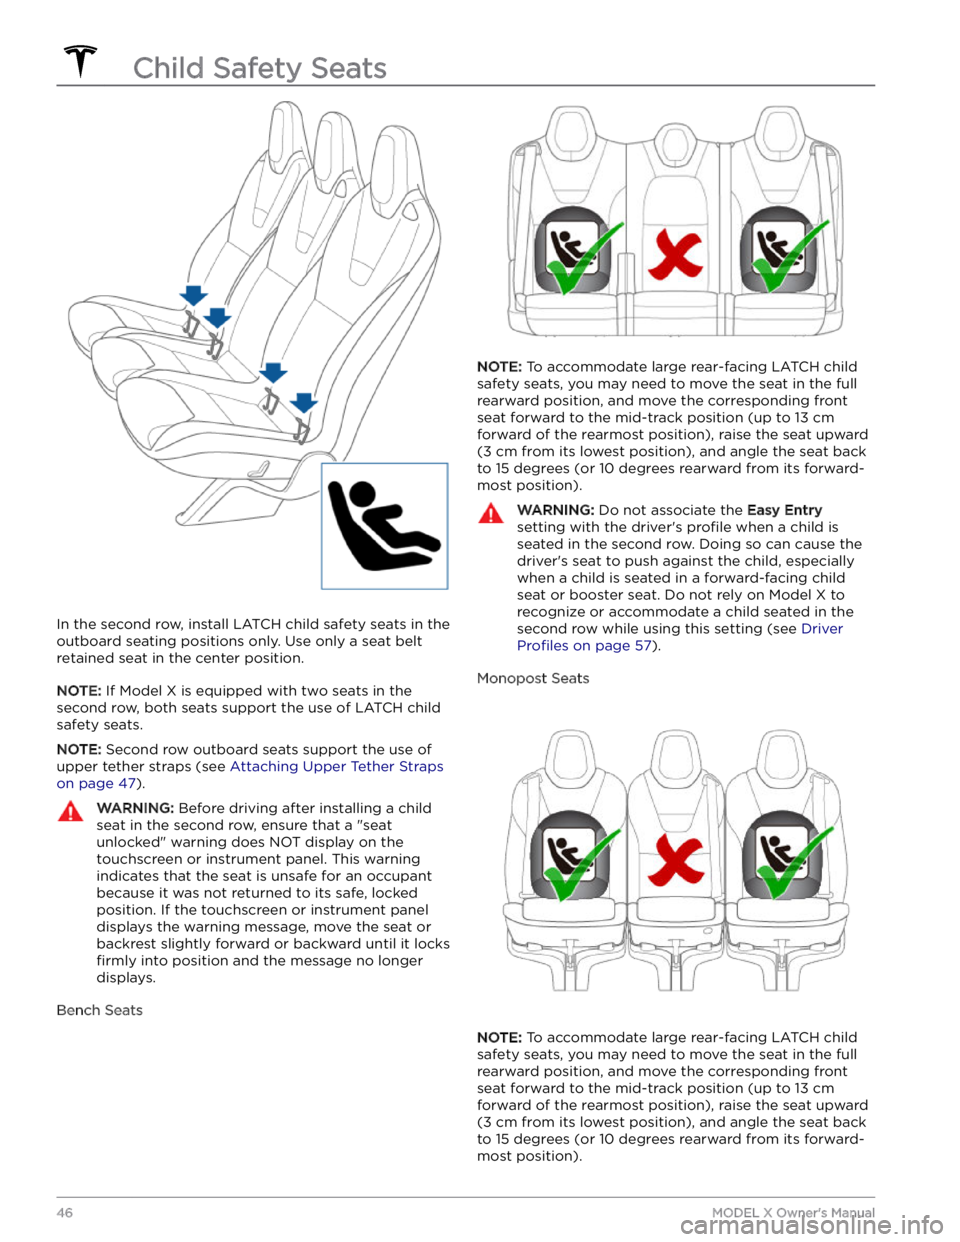
In the second row, install LATCH child safety seats in the
outboard seating positions only. Use only a seat belt
retained seat in the center position.
NOTE: If Model X is equipped with two seats in the
second row, both seats support the use of
LATCH child
safety seats.
NOTE: Second row outboard seats support the use of
upper tether straps (see
Attaching Upper Tether Straps
on page 47).
WARNING: Before driving after installing a child
seat in the second row, ensure that a "seat
unlocked" warning does NOT display on the
touchscreen or instrument panel. This warning
indicates that the seat is unsafe for an occupant
because it was not returned to its safe, locked
position. If the touchscreen or instrument panel
displays the warning message, move the seat or
backrest slightly forward or backward until it locks
firmly into position and the message no longer
displays.
Bench Seats
NOTE: To accommodate large rear-facing LATCH child
safety seats, you may need to move the seat in the full rearward position, and move the corresponding front seat forward to the mid-track position (up to 13 cm forward of the rearmost position), raise the seat upward
(3 cm from its lowest position), and angle the seat back
to 15 degrees (or 10 degrees rearward from its forward- most position).
WARNING: Do not associate the Easy Entry
setting with the driver
Page 70 of 296
Controlling Lights
Touch Controls > Lights to control the lights.
NOTE: You can also access an abbreviated lights menu
while driving by touching the High Beam button on the
steering yoke (or steering wheel). A lights menu displays
on the touchscreen, providing quick access to headlight controls.
In addition to the lights that you can control from the
touchscreen,
Model X has convenience lights that turn
on and
off automatically based on what you are doing.
For example, interior lights, marker lights, tail lights, and
puddle lights turn on when you unlock
Model X, when
you open a door, and when you shift into Park. They turn
off automatically after a minute or two or when you shift
or lock
Model X.
Exterior Lights
Exterior lights (headlights, tail lights, side marker lights,
parking lights, and license plate lights) are set to
Auto
each time you start Model X. When set to Auto, exterior
lights automatically turn on when driving in low lighting
conditions. If you change to a
different setting, lights
always revert to
Auto on your next drive.
Touch one of these options to change the exterior light setting:
Page 71 of 296
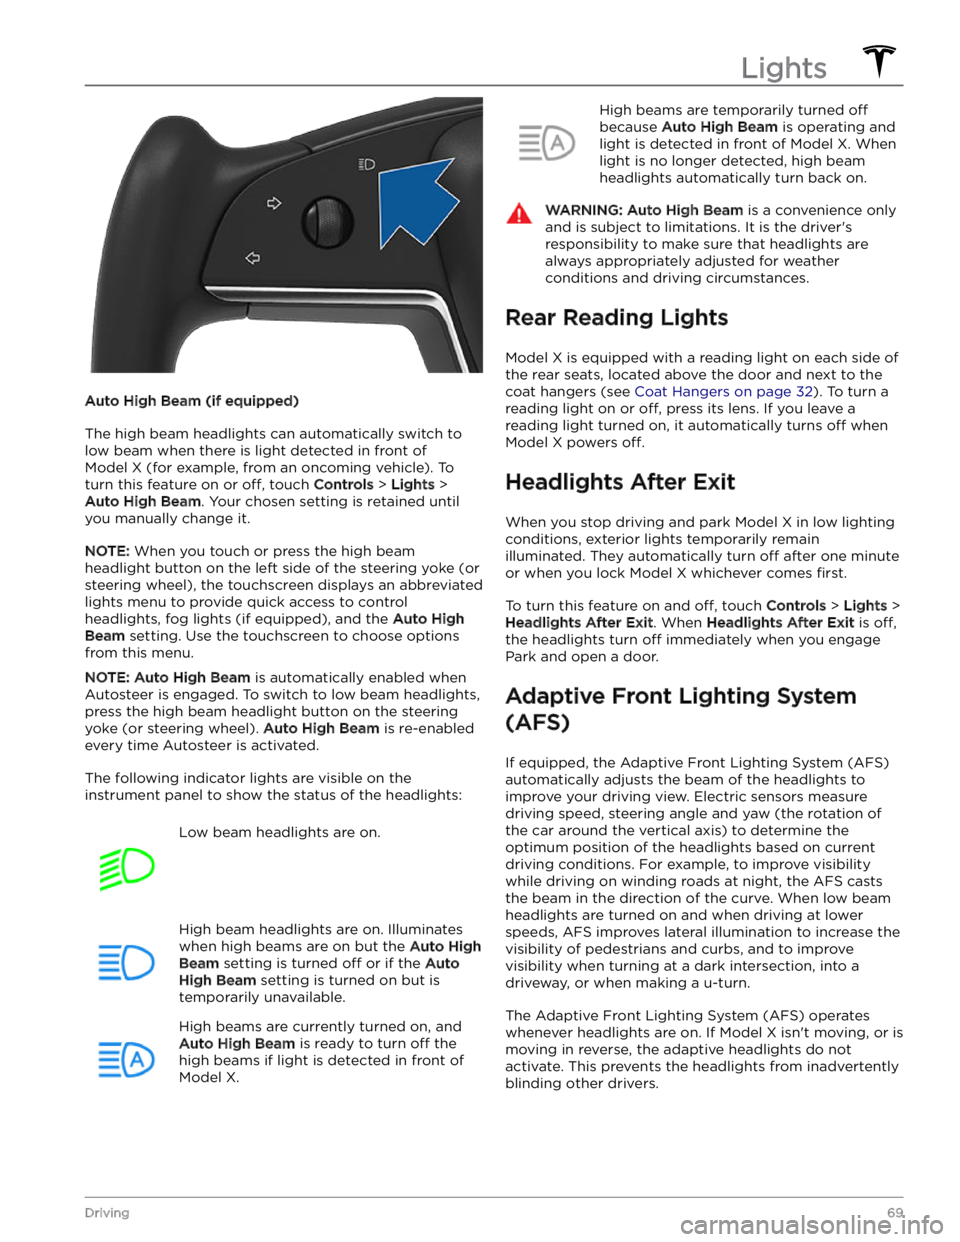
Auto High Beam (if equipped)
The high beam headlights can automatically switch to low beam when there is light detected in front of
Model X (for example, from an oncoming vehicle). To
turn this feature on or
off, touch Controls > Lights >
Auto High Beam. Your chosen setting is retained until
you manually change it.
NOTE: When you touch or press the high beam
headlight button on the left side of the
steering yoke (or
steering wheel), the touchscreen displays an abbreviated
lights menu to provide quick access to control headlights, fog lights (if equipped), and the
Auto High
Beam setting. Use the touchscreen to choose options
from this menu.
NOTE: Auto High Beam is automatically enabled when
Autosteer is engaged. To switch to low beam headlights, press the high beam headlight button on the
steering
yoke (or steering wheel). Auto High Beam is re-enabled
every time Autosteer is activated.
The following indicator lights are visible on the instrument panel to show the status of the headlights:
Low beam headlights are on.High beam headlights are on. Illuminates
when high beams are on but the Auto High
Beam setting is turned off or if the Auto
High Beam setting is turned on but is
temporarily unavailable.
High beams are currently turned on, and
Auto High Beam is ready to turn off the
high beams if light is detected in front of
Model X.
High beams are temporarily turned off
because Auto High Beam is operating and
light is detected in front of
Model X. When
light is no longer detected, high beam headlights automatically turn back on.
WARNING: Auto High Beam is a convenience only
and is subject to limitations. It is the driver