window TESLA ROADSTER 2008 Owners Manual
[x] Cancel search | Manufacturer: TESLA, Model Year: 2008, Model line: ROADSTER, Model: TESLA ROADSTER 2008Pages: 115, PDF Size: 46.35 MB
Page 4 of 115
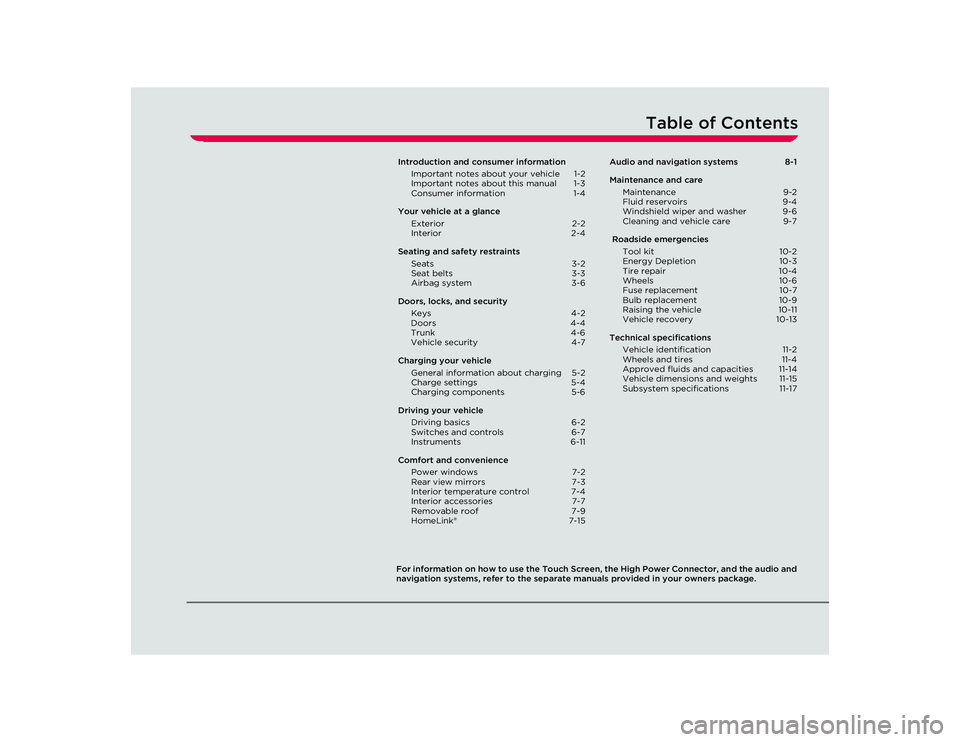
Table of Contents
For information on how to use the Touch Screen, the High Power Connector, and the audio and
navigation systems, refer to the separate manuals provided in your owners package.Introduction and consumer information
Important notes about your vehicle 1-2
Important notes about this manual 1-3
Consumer information 1-4
Your vehicle at a glance Exterior 2-2
Interior 2-4
Seating an d safety restraints
Seats 3-2
Seat belts 3-3
Airbag system 3-6
Doors, locks, and s ecurity
Keys 4-2
Do ors
4-4
Trunk 4-6
Vehicle security 4-7
Charging your vehicle General information about charging 5-2
Charge settings 5-4
Charging components 5-6
Driving your vehicle Driving basics 6-2
Switches and controls 6-7
Instruments 6-11
Comfort and convenience Power windows 7-2
Rear view mirrors 7-3
Interior temperature control 7-4
Interior accessories 7-7
Removable roof 7-9
HomeLink® 7-15Audio and navigation systems
8-1
Maintenance and care Maintenance 9-2
Fluid reservoirs 9-4
Windshield wiper and washer 9-6
Cleaning and vehicle care 9-7
Roadside emergencies Tool kit 10-2
Energy Depletion 10-3
Tire repair 10-4
Wheels 10-6
Fuse replacement 10-7
Bulb replacement 10-9
Raising the vehicle 10-11
Vehicle recovery 10-13
Technical specifications Vehicle identification 11-2
Wheels and tires 11-4
Approved fluids and capacities 11-14
Vehicle dimensions and weights 11-15
Subsystem specifications 11-17
Roadster OHB.book Page 1 Thursday, October 2, 2008 8:59 AM
Page 13 of 115
Interior
2-5
Your vehicle at a glance
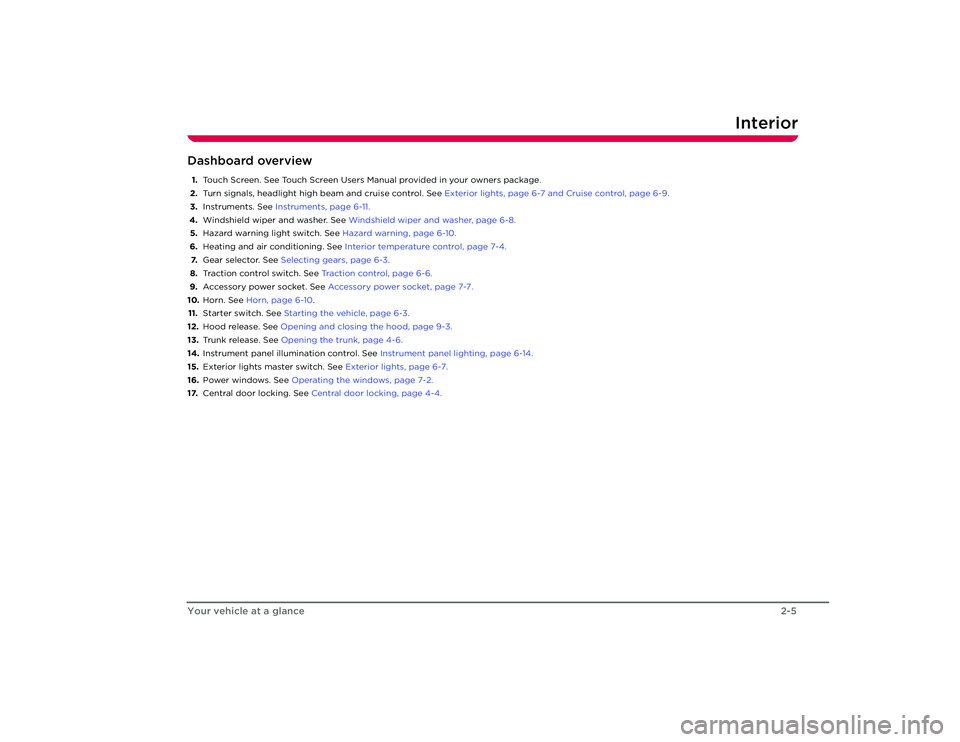
Dashboard overview1. Touch Screen. See Touch Scr een Users Manual provided in your owners package .
2. Turn signals, headlight high beam and cruise control. See Exterior lights, page 6-7 and Cruise control, page 6-9.
3. Instruments. See Instruments, page 6-11.
4. Windshield wiper and washer. See Windshield wiper and washer, page 6-8.
5. Hazard warning light switch. See Hazard warning, page 6-10.
6. Heating and air conditioning. See Interior temperature control, page 7-4.
7. Gear selector. See Selecting gears, page 6-3.
8. Traction control switch. See Traction control, page 6-6.
9. Accessory power socket. See Accessory power socket, page 7-7.
10. Horn. See Horn, page 6-10 .
11. Starter switch. See Starting the vehicle, page 6-3.
12. Hood release. See Opening and closing the hood, page 9-3.
13. Trunk release. See Opening the trunk, page 4-6.
14. Instrument panel illumination control. See Instrument panel lighting, page 6-14.
15. Exterior lights master switch. See Exterior lights, page 6-7.
16. Power windows. See Operating the windows, page 7-2.
17. Central door locking. See Central door locking, page 4-4.
Roadster OHB.book Page 5 Th ursday, October 2, 2008 8:59 AM
Page 42 of 115
Driving basics6-4
Driving your vehicle
•Drive with the top on and the windows up
to minimize aerodynamic drag.
• Keep tires at the recommended inflation
pressures.
• Remove unnecessary belongings from
the trunk.
• Minimize the use of resources such as
heating and air conditioning. Using seat
heaters to keep warm is more efficient
than heating the cabin.
In addition to driv ing habits, energy
consumption is also increased based on
environmental conditions, such as cold
weather and hilly roads.
The Touch Screen’s Energy screen displays
precise real-time feedback on the amount of
energy you’re using. Energy feedback is also
displayed on the LCD display on the
instrument panel. Deep waterDo not drive through flooded areas, water of
unknown depth, or deep puddles. When
driving through even a relatively shallow
puddle, drive slowly to prevent water from
entering the vehicle. Carrying items in cabin areaThe trunk is the preferred place to carry
objects. In an accident, during hard braking,
or sudden maneuvers, loose items carried in
the vehicle’s cabin area can be thrown
around, and cause injury to occupants unless
securely fastened.Roadster OHB.book Page 4 Th ursday, October 2, 2008 8:59 AM
Page 53 of 115
7-1
Comfort and convenience
Power windowsDriver’s door window controls 7-2
Operating the windows 7-2
Rear view mirrors Exterior rear view mirrors 7-3
Interior rear view mirror 7-3
Interior temperature control General information 7-4
Control panel 7-4
Operating the system 7-4
Ventilation 7-5
Windshield defrosting 7-5
Seat heaters 7-6
Interior accessories Interior light 7-7
Sun visors 7-7
Accessory power socket 7-7
USB Port 7-7
Cup holder 7-8
Removable roof Hard-top and soft-top 7-9
Installing the soft-top 7-10
Removing the soft-top 7-11
Installing the hard-top 7-13
Removing the hard-top 7-14
HomeLink® HomeLink® Universal Transceiver 7-15 7-16
Roadster OHB.book Page 1 Thursday, October 2, 2008 8:59 AM
Page 54 of 115
Power windows7-2
Comfort and convenience
Comfort and convenience
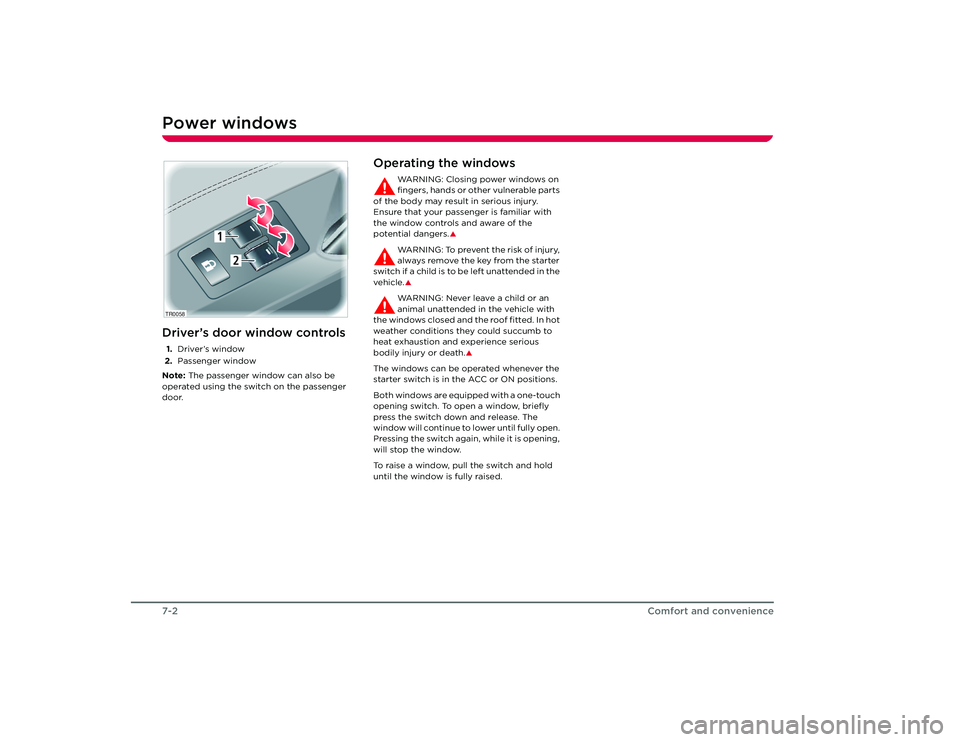
Power windowsDriver’s door window controls1.Driver’s window
2. Passenger window
Note: The passenger window can also be
operated using the switch on the passenger
door.
Operating the windows
WARNING: Closing power windows on
fingers, hands or other vulnerable parts
of the body may result in serious injury.
Ensure that your passenger is familiar with
the window controls and aware of the
potential dangers.
�S
WARNING: To prevent the risk of injury,
always remove the key from the starter
switch if a child is to be left unattended in the
vehicle.�SWARNING: Never leave a child or an
animal unattended in the vehicle with
the windows closed and the roof fitted. In hot
weather conditions they could succumb to
heat exhaustion and experience serious
bodily injury or death.
�S
The windows can be operated whenever the
starter switch is in the ACC or ON positions.
Both windows are equipped with a one-touch
opening switch. To open a window, briefly
press the switch down and release. The
window will continue to lower until fully open.
Pressing the switch again, while it is opening,
will stop the window.
To raise a window, pull the switch and hold
until the window is fully raised.
TR0058
1
2
Roadster OHB.book Page 2 Th ursday, October 2, 2008 8:59 AM
Page 57 of 115
Interior temperature control
7-5
Comfort and convenience
Rotate the temperature control to achieve
the desired air temperature.
Note: In high ambient temperatures, cooling
may be temporarily diverted away from the
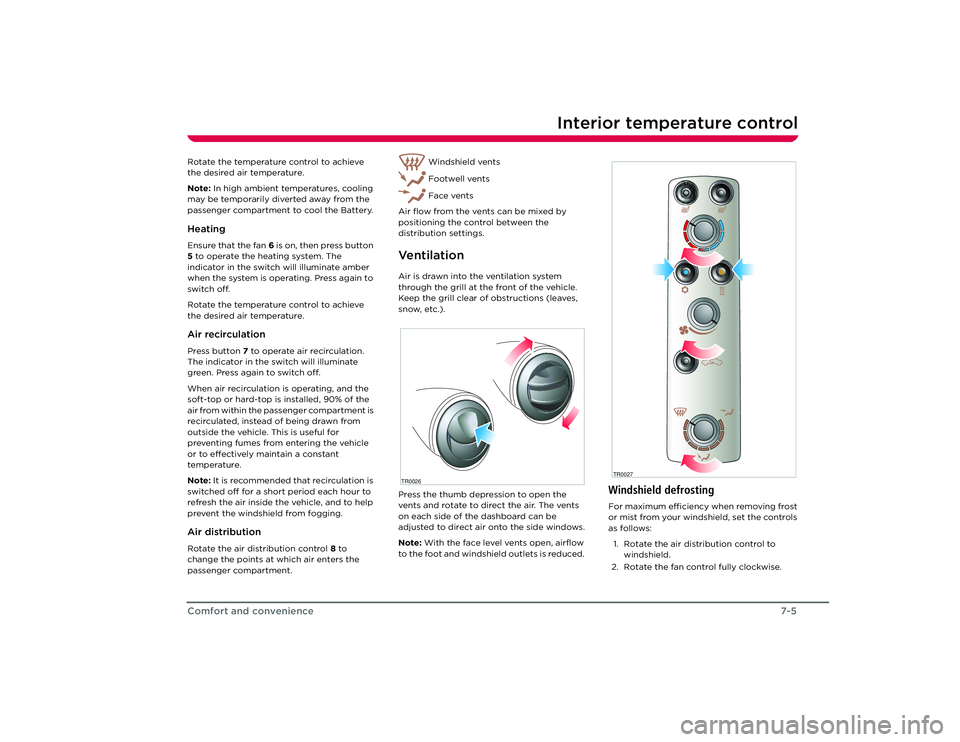
passenger compartment to cool the Battery.HeatingEnsure that the fan 6 is on, then press button
5 to operate the heating system. The
indicator in the switch will illuminate amber
when the system is operating. Press again to
switch off.
Rotate the temperature control to achieve
the desired air temperature.Air recirculationPress button 7 to operate air recirculation.
The indicator in the switch will illuminate
green. Press again to switch off.
When air recirculation is operating, and the
soft-top or hard-top is installed, 90% of the
air from within the passenger compartment is
recirculated, instead of being drawn from
outside the vehicle. This is useful for
preventing fumes from entering the vehicle
or to effectively maintain a constant
temperature.
Note: It is recommended that recirculation is
switched off for a short period each hour to
refresh the air inside the vehicle, and to help
prevent the windshield from fogging.Air distributionRotate the air distribution control 8 to
change the points at which air enters the
passenger compartment. Windshield vents
Footwell vents
Face vents
Air flow from the vents can be mixed by
positioning the control between the
distribution settings.
Ve n t i l a t i o nAir is drawn into the ventilation system
through the grill at the front of the vehicle.
Keep the grill clear of obstructions (leaves,
snow, etc.).
Press the thumb depression to open the
vents and rotate to direct the air. The vents
on each side of the dashboard can be
adjusted to direct air onto the side windows.
Note: With the face level vents open, airflow
to the foot and windshield outlets is reduced. TR0026
Windshield defrostingFor maximum efficiency when removing frost
or mist from your windshield, set the controls
as follows:
1. Rotate the air distribution control to windshield.
2. Rotate the fan control fully clockwise.TR0027
Roadster OHB.book Page 5 Th ursday, October 2, 2008 8:59 AM
Page 62 of 115
Removable roof7-10Comfort and convenienceInstalling the soft-top
WARNING: Never attempt to install the
soft-top while the vehicle is moving.
This could cause an accident in which you or
others may be seriously injured or killed.
�S
Open both doors. Remove the soft-top and
support stays from the bag.
Note: The support stays and the side rails of
the soft-top assembly have arrows on them
which should point to the front of the vehicle
when installing.
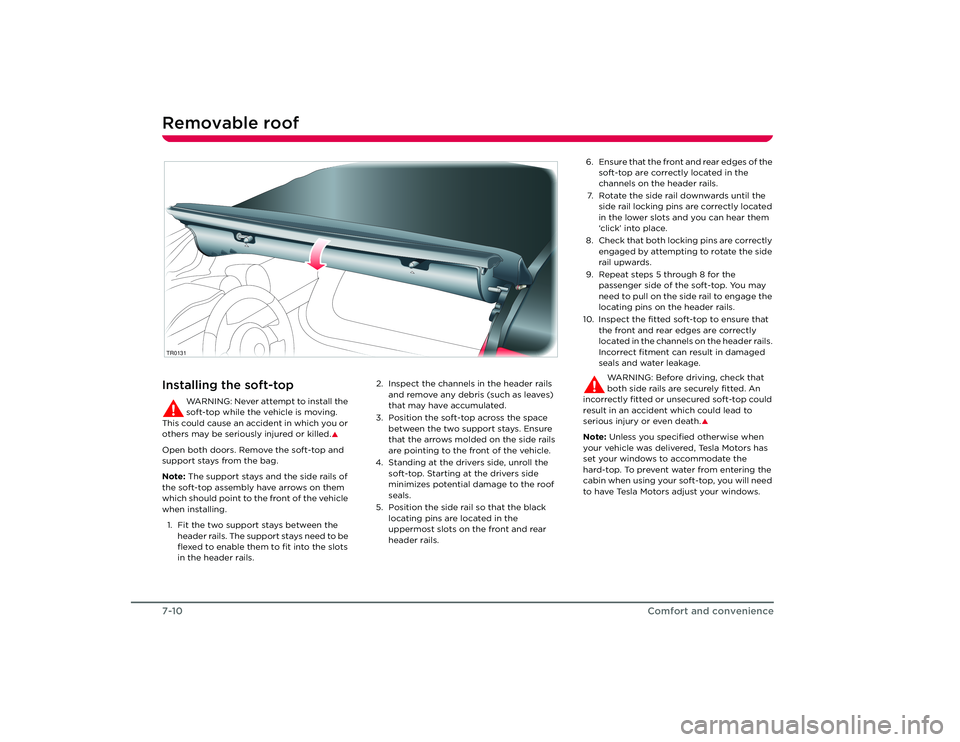
1. Fit the two support stays between the header rails. The support stays need to be
flexed to enable them to fit into the slots
in the header rails. 2. Inspect the channels in the header rails
and remove any debris (such as leaves)
that may have accumulated.
3. Position the soft-top across the space between the two support stays. Ensure
that the arrows molded on the side rails
are pointing to the front of the vehicle.
4. Standing at the drivers side, unroll the soft-top. Starting at the drivers side
minimizes potential damage to the roof
seals.
5. Position the side rail so that the black locating pins are located in the
uppermost slots on the front and rear
header rails.TR0131
6. Ensure that the front and rear edges of the soft-top are correctly located in the
channels on the header rails.
7. Rotate the side rail downwards until the side rail locking pins are correctly located
in the lower slots and you can hear them
‘click’ into place.
8. Check that both locking pins are correctly engaged by attempting to rotate the side
rail upwards.
9. Repeat steps 5 through 8 for the passenger side of the soft-top. You may
need to pull on the side rail to engage the
locating pins on the header rails.
10. Inspect the fitted soft-top to ensure that the front and rear edges are correctly
located in the channels on the header rails.
Incorrect fitment can result in damaged
seals and water leakage.
WARNING: Before driving, check that
both side rails are securely fitted. An
incorrectly fitted or unsecured soft-top could
result in an accident which could lead to
serious injury or even death.
�S
Note: Unless you specified otherwise when
your vehicle was delivered, Tesla Motors has
set your windows to accommodate the
hard-top. To prevent water from entering the
cabin when using your soft-top, you will need
to have Tesla Motors adjust your windows.
Roadster OHB.book Page 10 Thursday, October 2, 2008 8:59 AM
Page 66 of 115
Removable roof7-14
Comfort and convenience
5. Push the hard-top into position on the front header rail and then lower the
hard-top’s rear edge.
6. Engage the hook on the rear mounting brackets with the fixings on the rear
header rail.
7. Use the Torx
® tool supplied in the toolkit
to tighten the bolts just enough to keep
the rear brackets engaged. Do not fully
tighten.
8. Ensure the hard-top is correctly aligned on the vehicle.
9. Holding the rear mounting brackets to prevent them from twisting, tighten the
bolts to secure the hard-top in place. Do
not overtighten.
10. Check and tighten th e bolts securing the
front locating pins to the hard-top.
WARNING: Make sure that the
hard-top is securely fitted by trying
to lift each corner in turn. If any
movement is evident, check and tighten
the hard-top fixings. Driving with a loose
or incorrectly secured hard-top could
result in an accident which could lead to
serious injury and even death.
�S
11. Check that both doors shut correctly with the windows in the fully raised position.
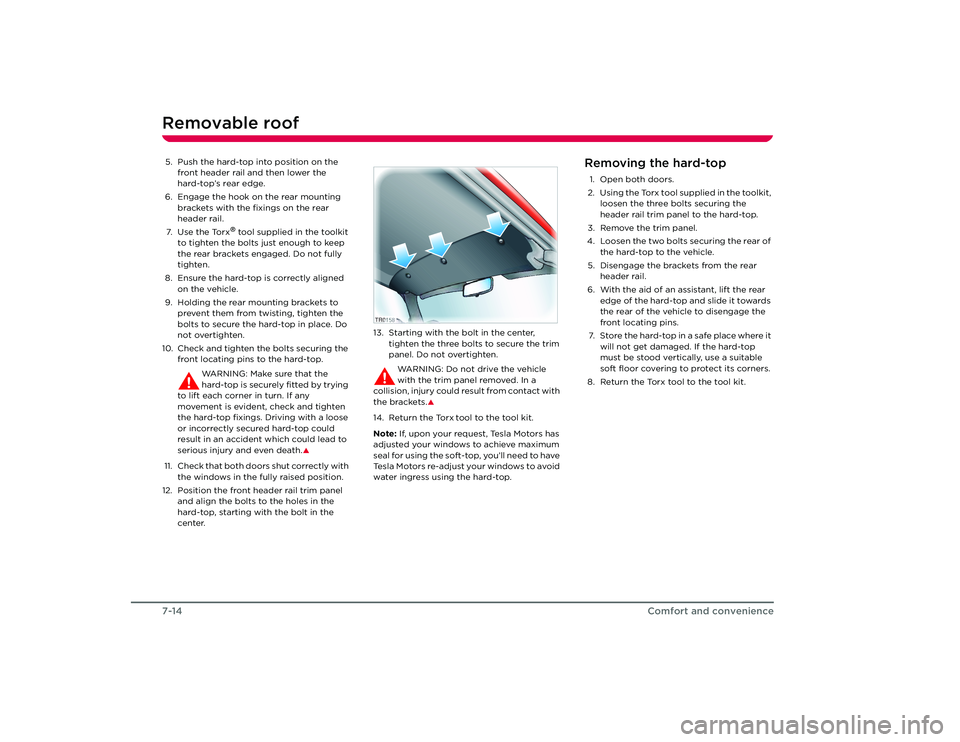
12. Position the front header rail trim panel and align the bolts to the holes in the
hard-top, starting with the bolt in the
center. 13. Starting with the bolt in the center,
tighten the three bolts to secure the trim
panel. Do not overtighten.
WARNING: Do not drive the vehicle
with the trim panel removed. In a
collision, injury could result from contact with
the brackets.
�S
14. Return the Torx
tool to the tool kit.
Note: If, upon your request, Tesla Motors has
adjusted your windows to achieve maximum
seal for using the soft-top, you’ll need to have
Tesla Motors re-adjust your windows to avoid
water ingress using the hard-top.
Removing the hard-top1. Open both doors.
2. Using the Torx tool supplied in the toolkit, loosen the three bolts securing the
header rail trim panel to the hard-top.
3. Remove the trim panel.
4. Loosen the two bolts securing the rear of the hard-top to the vehicle.
5. Disengage the brackets from the rear header rail.
6. With the aid of an assistant, lift the rear edge of the hard-top and slide it towards
the rear of the vehicle to disengage the
front locating pins.
7. Store the hard-top in a safe place where it will not get damaged. If the hard-top
must be stood vertically, use a suitable
soft floor covering to protect its corners.
8. Return the Torx tool to the tool kit.
TR0158
Roadster OHB.book Page 14 Thursday, October 2, 2008 8:59 AM
Page 76 of 115
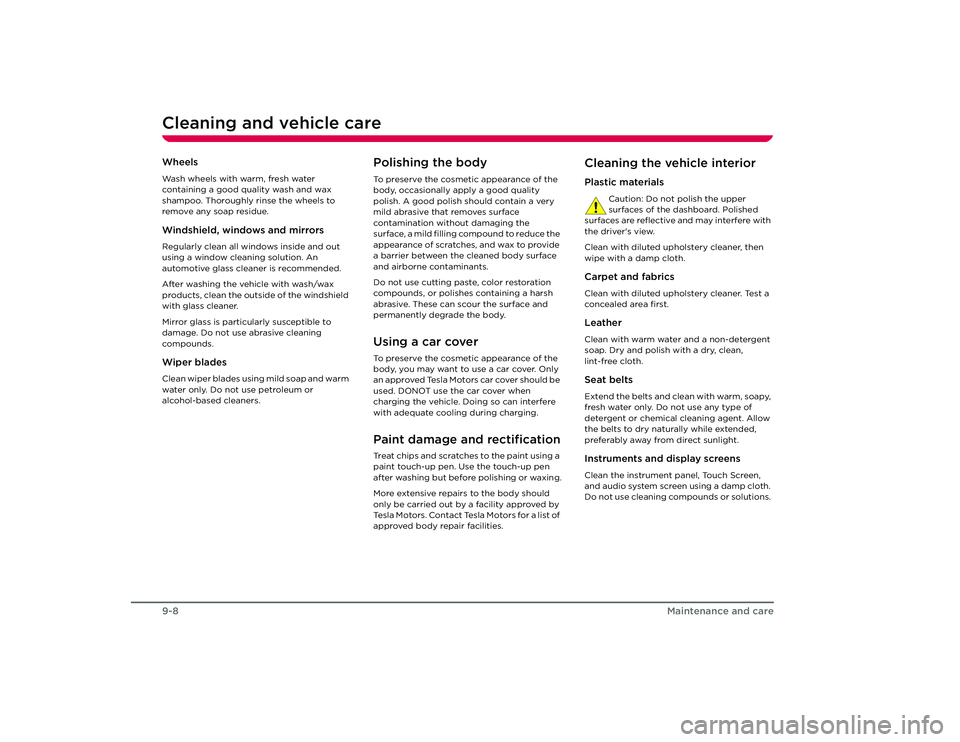
Cleaning and vehicle care9-8
Maintenance and care
WheelsWash wheels with warm, fresh water
containing a good quality wash and wax
shampoo. Thoroughly rinse the wheels to
remove any soap residue.Windshield, windows and mirrorsRegularly clean all windows inside and out
using a window cleaning solution. An
automotive glass cleaner is recommended.
After washing the vehicle with wash/wax
products, clean the outside of the windshield
with glass cleaner.
Mirror glass is particularly susceptible to
damage. Do not use abrasive cleaning
compounds.Wiper bladesClean wiper blades using mild soap and warm
water only. Do not use petroleum or
alcohol-based cleaners.
Polishing the bodyTo preserve the cosmetic appearance of the
body, occasionally apply a good quality
polish. A good polish should contain a very
mild abrasive that removes surface
contamination without damaging the
surface, a mild filling compound to reduce the
appearance of scratches, and wax to provide
a barrier between the cleaned body surface
and airborne contaminants.
Do not use cutting paste, color restoration
compounds, or polishes containing a harsh
abrasive. These can scour the surface and
permanently degrade the body.Using a car coverTo preserve the cosmetic appearance of the
body, you may want to use a car cover. Only
an approved Tesla Motors car cover should be
used. DONOT use the car cover when
charging the vehicle. Doing so can interfere
with adequate cooling during charging.Paint damage and rectificationTreat chips and scratches to the paint using a
paint touch-up pen. Use the touch-up pen
after washing but before polishing or waxing.
More extensive repairs to the body should
only be carried out by a facility approved by
Tesla Motors. Contact Tesla Motors for a list of
approved body repair facilities.
Cleaning the vehicle interiorPlastic materials
Caution: Do not polish the upper
surfaces of the dashboard. Polished
surfaces are reflective and may interfere with
the driver's view.
Clean with diluted upholstery cleaner, then
wipe with a damp cloth.
Carpet and fabricsClean with diluted upholstery cleaner. Test a
concealed area first.LeatherClean with warm water and a non-detergent
soap. Dry and polish with a dry, clean,
lint-free cloth.Seat beltsExtend the belts and clean with warm, soapy,
fresh water only. Do not use any type of
detergent or chemical cleaning agent. Allow
the belts to dry naturally while extended,
preferably away from direct sunlight.Instruments and display screensClean the instrument panel, Touch Screen,
and audio system screen using a damp cloth.
Do not use cleaning co mpounds or solutions.
Roadster OHB.book Page 8 Th ursday, October 2, 2008 8:59 AM
Page 84 of 115
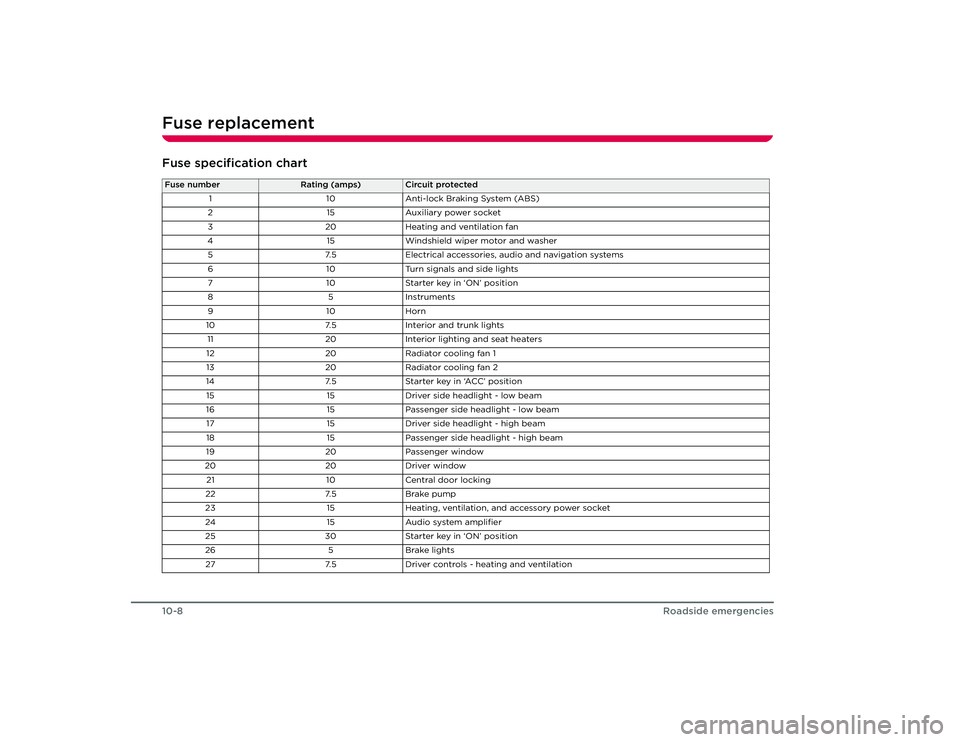
Fuse replacement10-8
Roadside emergencies
Fuse specification chartFuse number
Rating (amps)
Circuit protected
1 10Anti-lock Braking System (ABS)
2 15Auxiliary power socket
3 20Heating and ventilation fan
4 15Windshield wiper motor and washer
5 7.5Electrical accessories, audio and navigation systems
6 10Turn signals and side lights
7 10Starter key in ‘ON’ position
85 In stru m en ts
91 0Horn
10 7.5Interior and trunk lights
11 20Interior lighting and seat heaters
12 20Radiator cooling fan 1
13 20Radiator cooling fan 2
14 7.5Starter key in ‘ACC’ position
15 15Driver side headlight - low beam
16 15Passenger side headlight - low beam
17 15Driver side headlight - high beam
18 15Passenger side headlight - high beam
19 20Passenger window
20 20Driver window
21 10Central door locking
22 7.5Brake pump
23 15Heating, ventilation, and accessory power socket
24 15Audio system amplifier
25 30Starter key in ‘ON’ position
26 5Brake lights
27 7.5Driver controls - heating and ventilation
Roadster OHB.book Page 8 Th ursday, October 2, 2008 8:59 AM