change time TOYOTA 4RUNNER 2007 N210 / 4.G Quick Reference Guide
[x] Cancel search | Manufacturer: TOYOTA, Model Year: 2007, Model line: 4RUNNER, Model: TOYOTA 4RUNNER 2007 N210 / 4.GPages: 16, PDF Size: 0.96 MB
Page 2 of 16

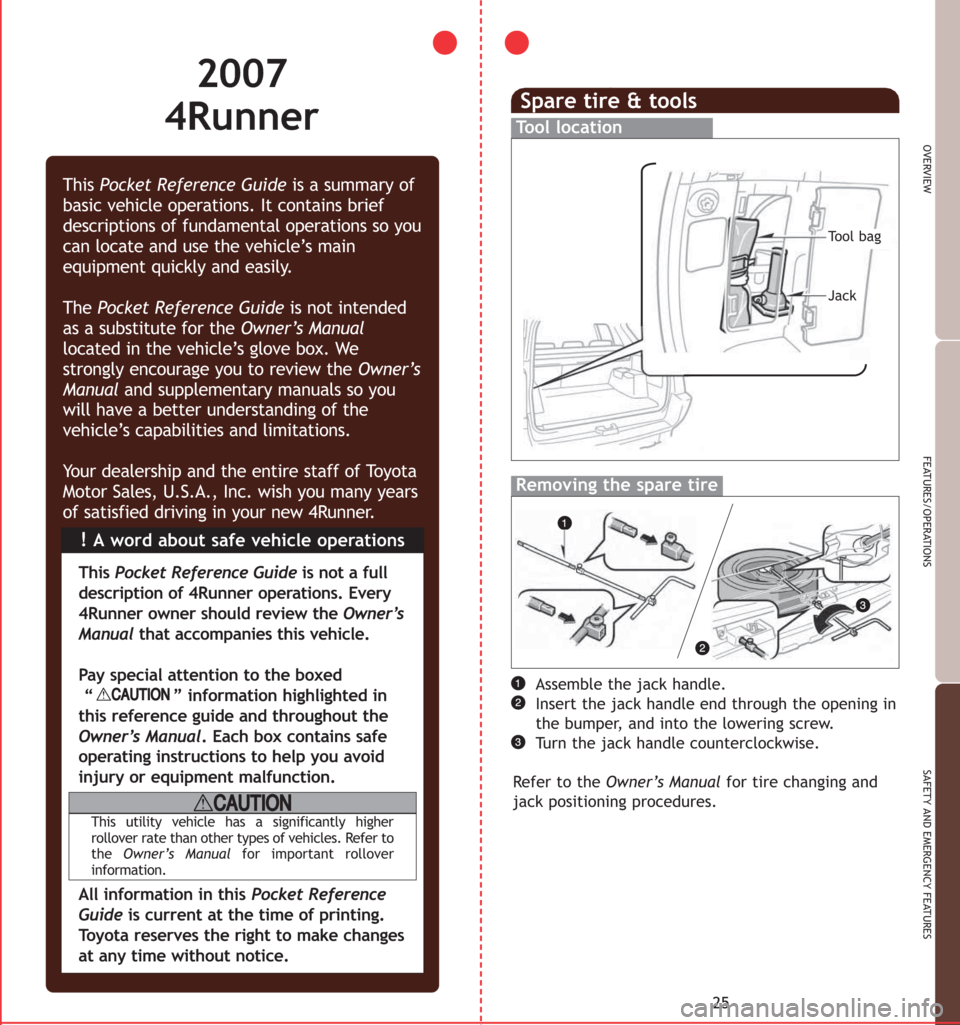
Spare tire & tools
Tool location
Removing the spare tire
25
OVERVIEW
FEATURES/OPERATIONS
SAFETY AND EMERGENCY FEATURES
Assemble the jack handle.
Insert the jack handle end through the opening in
the bumper, and into the lowering screw.
Turn the jack handle counterclockwise.
Refer to the Owner’s Manualfor tire changing and
jack positioning procedures.
!A word about safe vehicle operations This Pocket Reference Guideis a summary of
basic vehicle operations. It contains brief
descriptions of fundamental operations so you
can locate and use the vehicle’s main
equipment quickly and easily.
The Pocket Reference Guideis not intended
as a substitute for theOwner’s Manual
located in the vehicle’s glove box. We
strongly encourage you to review theOwner’s
Manual and supplementary manuals so you
will have a better understanding of the
vehicle’s capabilities and limitations.
Your dealership and the entire staff of Toyota
Motor Sales, U.S.A., Inc. wish you many years
of satisfied driving in your new 4Runner.
This Pocket Reference Guideis not a full
description of 4Runner operations. Every
4Runner owner should review the Owner’s
Manualthat accompanies this vehicle.
Pay special attention to the boxed
“ ” information highlighted in
this reference guide and throughout the
Owner’s Manual. Each box contains safe
operating instructions to help you avoid
injury or equipment malfunction.
All information in this Pocket Reference
Guideis current at the time of printing.
Toyota reserves the right to make changes
at any time without notice.
This utility vehicle has a significantly higher
rollover rate than other types of vehicles. Refer to
the Owner’s Manualfor important rollover
information.
2007
4Runner
Tool bag
Jack
Page 10 of 16

15
OVERVIEW
FEATURES/OPERATIONS
SAFETY AND EMERGENCY FEATURES
14
FEATURES/OPERATIONS
Operating from inside
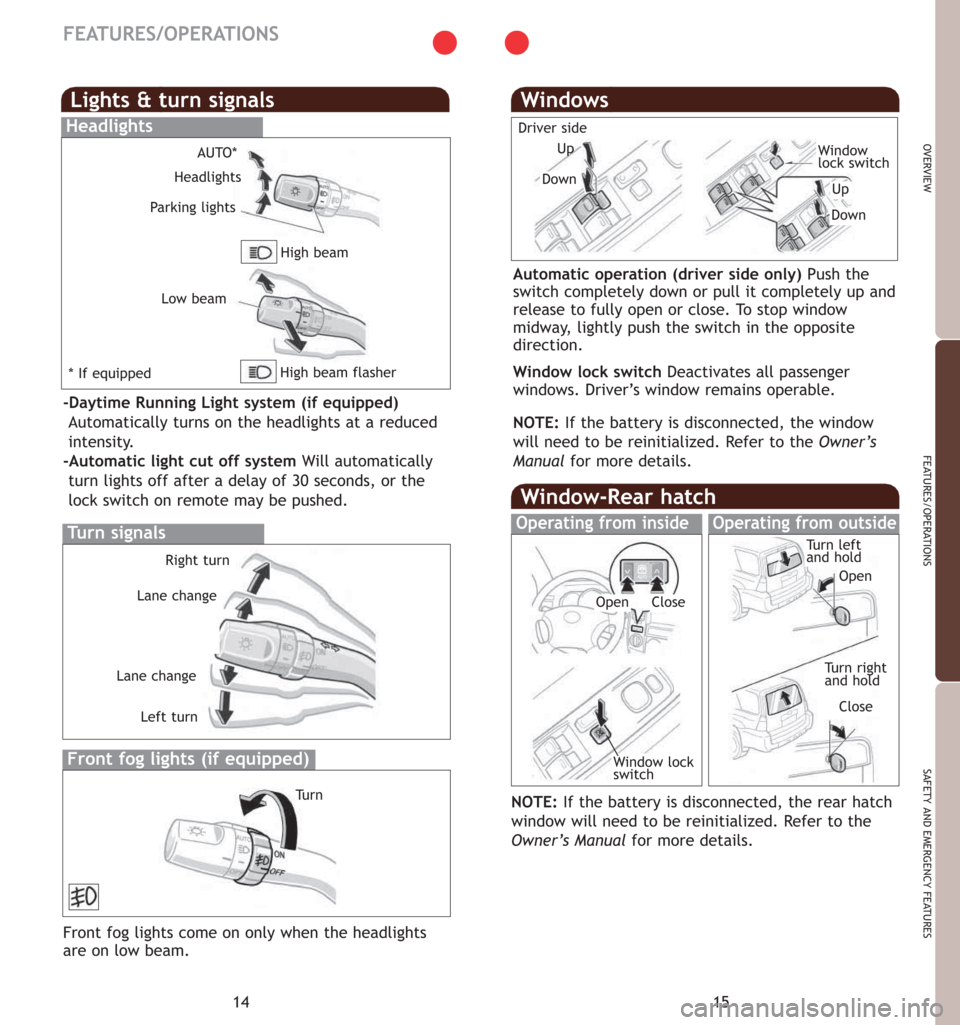
Windows
Driver side
Automatic operation (driver side only) Push the
switch completely down or pull it completely up and
release to fully open or close. To stop window
midway, lightly push the switch in the opposite
direction.
Window lock switch Deactivates all passenger
windows. Driver’s window remains operable.
NOTE: If the battery is disconnected, the window
will need to be reinitialized. Refer to the
Owner’s
Manualfor more details.
Window-Rear hatch
Operating from outside
Up
Down
Window
lock switch
Window lock
switch
Tu r n left
and hold
Up
Down
Open
Open
Tu r n right
and hold
Close
Close
Lights & turn signals
Turn signals
Headlights
AUTO*
High beam flasher
*If equippedLow beam
Front fog lights (if equipped)
Headlights
-Daytime Running Light system (if equipped)
Automatically turns on the headlights at a reduced
intensity.
-Automatic light cut off system Will automatically
turn lights off after a delay of 30 seconds, or the
lock switch on remote may be pushed.
Front fog lights come on only when the headlights
are on low beam.
Parking lights
High beam
Right turn
Tu r n Lane change
Lane change
Left turn
NOTE: If the battery is disconnected, the rear hatch
window will need to be reinitialized. Refer to the
Owner’s Manualfor more details.