TOYOTA 4RUNNER 2013 N280 / 5.G Owners Manual
Manufacturer: TOYOTA, Model Year: 2013, Model line: 4RUNNER, Model: TOYOTA 4RUNNER 2013 N280 / 5.GPages: 704, PDF Size: 11.56 MB
Page 491 of 704
491
3-7. Other interior features
3
Interior features
4RUNNER_U
NOTICE
■
To prevent damage to the cargo net hooks
Avoid hanging things other than a cargo net on them.
■ Slide deck weight capacity (if equipped)
Do not load anything heavier than 440 lb. (200 kg) on the sliding deck.
■ Grocery bag hook weight capacity
Do not hang any object heavier than 8.8 lb. (4 kg) on the grocery bag hooks.
■ When using the slide deck (if equipped)
● Do not close the back door while the slide deck is sliding out. Doing so
may cause the back door or slide deck to break.
● If operating the slide deck when the vehicle is stopped on an incline, the
slide deck may move faster. Be careful as luggage may become damaged
or fly out and damage the cabin.
Page 492 of 704
492
3-7. Other interior features
4RUNNER_U
Garage door opener
The garage door opener (HomeLink Universal Transceiver) is manufac-
tured under license from HomeLink.
Programming HomeLink (for U.S. owners)
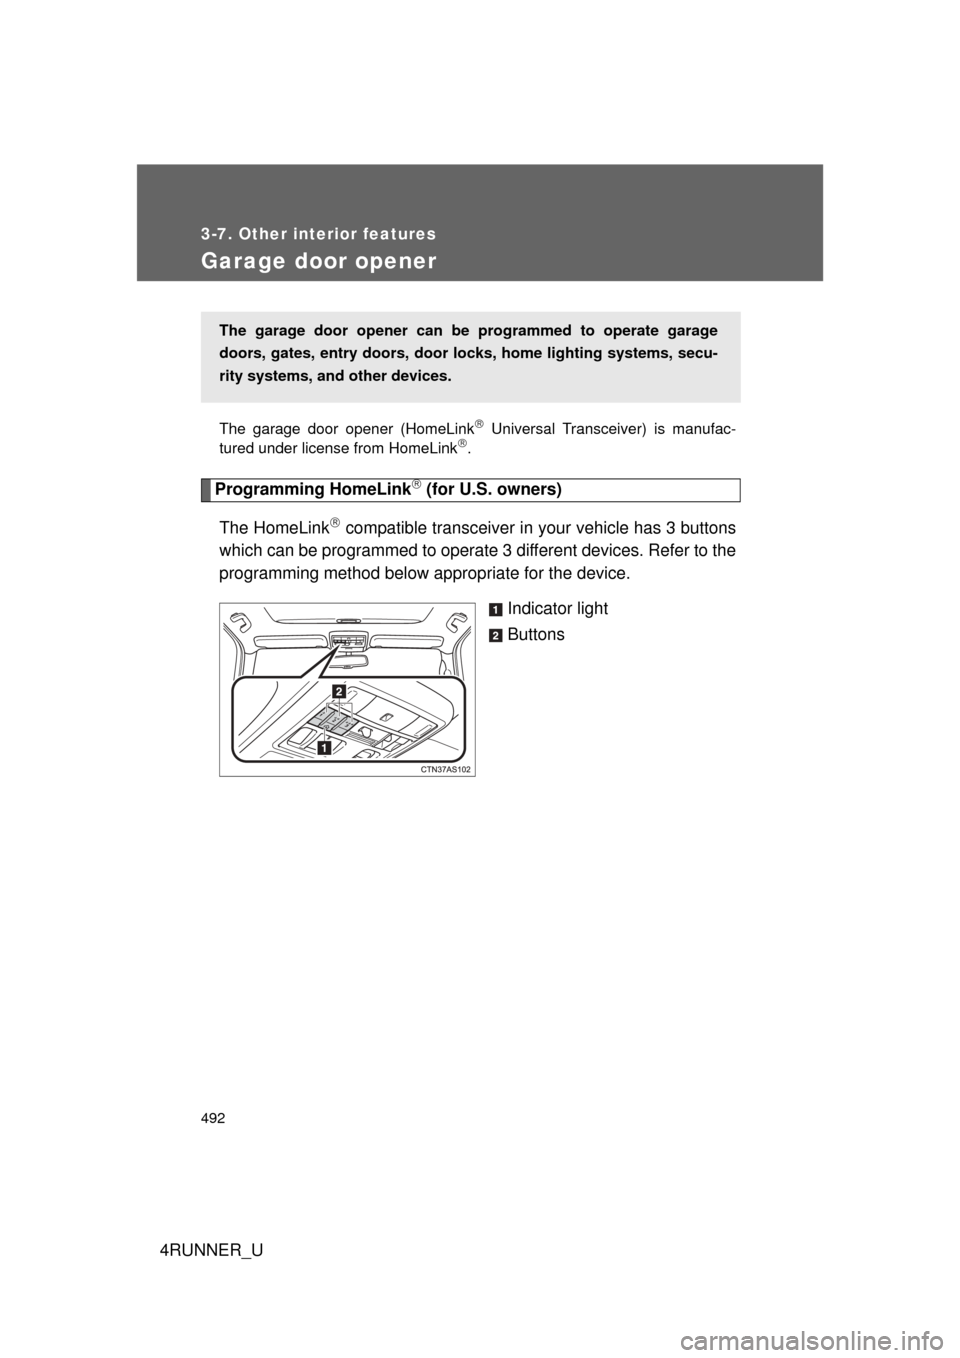
The HomeLink
compatible transceiver in your vehicle has 3 buttons
which can be programmed to operate 3 different devices. Refer to the
programming method below appropriate for the device.
Indicator light
Buttons
The garage door opener can be programmed to operate garage
doors, gates, entry doors, door locks, hom e lighting systems, secu-
rity systems, and other devices.
Page 493 of 704
493
3-7. Other interior features
3
Interior features
4RUNNER_U
■
Programming HomeLink
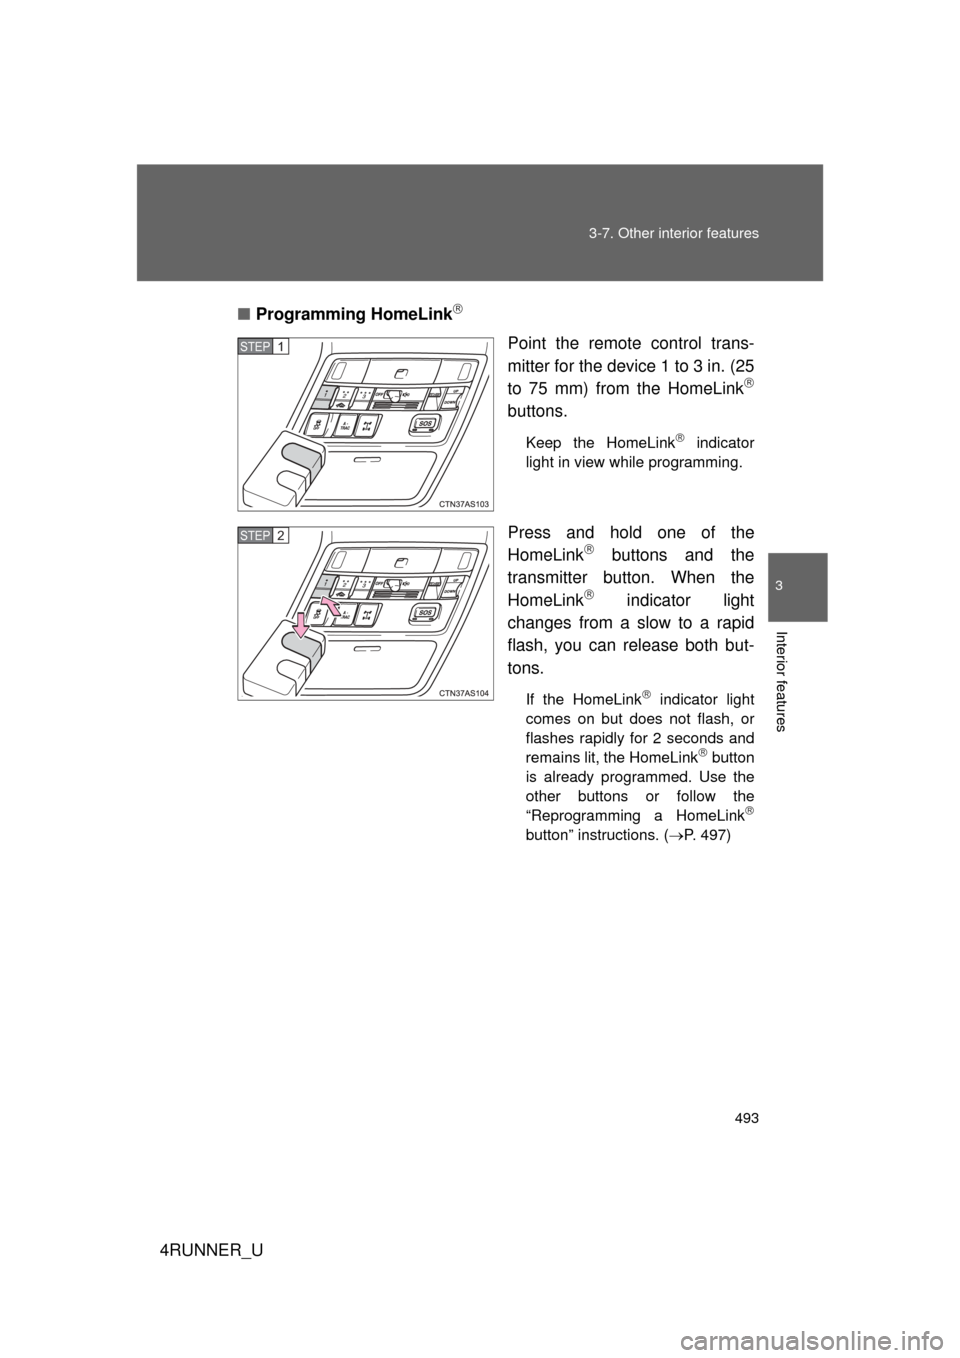
Point the remote control trans-
mitter for the device 1 to 3 in. (25
to 75 mm) from the HomeLink
buttons.
Keep the HomeLink indicator
light in view while programming.
Press and hold one of the
HomeLink buttons and the
transmitter button. When the
HomeLink
indicator light
changes from a slow to a rapid
flash, you can release both but-
tons.
If the HomeLink indicator light
comes on but does not flash, or
flashes rapidly for 2 seconds and
remains lit, the HomeLink
button
is already programmed. Use the
other buttons or follow the
“Reprogramming a HomeLink
button” instructions. ( P. 497)
STEP 1
STEP 2
Page 494 of 704
494 3-7. Other interior features
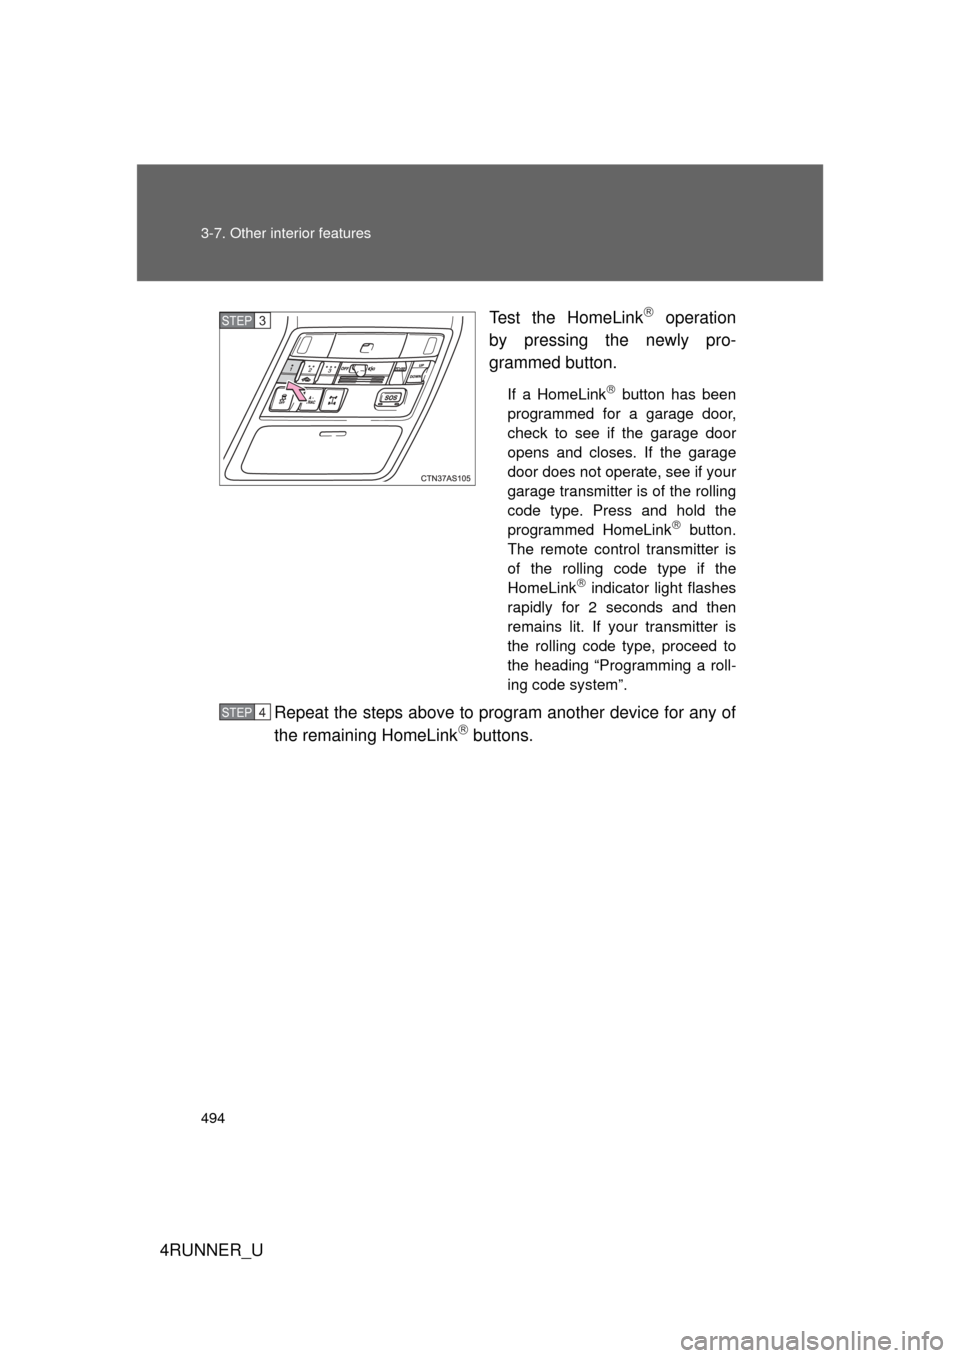
4RUNNER_UTest the HomeLink
operation
by pressing the newly pro-
grammed button.
If a HomeLink button has been
programmed for a garage door,
check to see if the garage door
opens and closes. If the garage
door does not operate, see if your
garage transmitter is of the rolling
code type. Press and hold the
programmed HomeLink
button.
The remote control transmitter is
of the rolling code type if the
HomeLink
indicator light flashes
rapidly for 2 seconds and then
remains lit. If your transmitter is
the rolling code type, proceed to
the heading “Programming a roll-
ing code system”.
Repeat the steps above to program another device for any of
the remaining HomeLink buttons.
STEP 3
STEP 4
Page 495 of 704
495
3-7. Other interior features
3
Interior features
4RUNNER_U
■
Programming a rolling code system (for U.S. owners)
If your device is rolling code e quipped, follow the steps under the
heading “Programming HomeLink
” before proceeding with the
steps listed below.
Locate the training button* on the ceiling mounted garage
door opener motor. The exact location and color of the button
may vary by brand of garage door opener.
Refer to the operation manual supplied with the garage door opener
for the location of the training button*.
Press the training button*.
Following this step, you have 30 seconds in which to initiate step 3
below.
Press and hold the vehicle’s programmed HomeLink button
for 2 seconds and release it. Repeat this step once again. The
garage door may open.
If the garage door opens, the programming process is complete. If
the door does not open, press and release the button a third time.
This third press and release will complete the programming process
by opening the garage door.
The ceiling mounted garage door opener motor should now recog-
nize the HomeLink
signal and operate the garage door.
Repeat the steps above to prog ram another rolling code sys-
tem for any of the remaining HomeLink buttons.
*: Names such as “learn”, “smart” or others vary according to manu- facturer.
STEP 1
STEP 2
STEP 3
STEP 4
Page 496 of 704
496 3-7. Other interior features
4RUNNER_U■
Programming an entry gate (for U.S. owners)/Programming a
device in the Canadian market
Place the remote control transmitter 1 to 3 in. (25 to 75 mm)
away from the HomeLink
buttons.
Keep the HomeLink indicator light in view while programming.
Press and hold the selected HomeLink button.
Repeatedly press and release (cycle) the remote control
transmitter for 2 seconds each until step 4 is completed.
When the HomeLink
indicator light starts to flash rapidly,
release the buttons.
Test the HomeLink
operation by pressing the newly pro-
grammed button. Check to see if the gate/device operates
correctly.
Repeat the steps above to program another device for any of
the remaining HomeLink
buttons.
■ Programming other devices
To program other devices such as home security systems, home
door locks and lighting, contact your Toyota dealer for assistance.
■ Reprogramming a button
The individual HomeLink
buttons cannot be erased but can be
reprogrammed. To reprogram a button, follow the “Reprogramming
a HomeLink
button” instructions.
STEP 1
STEP 2
STEP 3
STEP 4
STEP 5
STEP 6
Page 497 of 704
497
3-7. Other interior features
3
Interior features
4RUNNER_U
Operating HomeLink
Press the appropriate HomeLink button. The HomeLink indicator
light should come on.
The HomeLink compatible transceiver in your vehicle continues to send
a signal for up to 20 seconds as long as the button is pressed.
Reprogramming a HomeLink button
Press and hold the desired HomeLink
button. After 20 seconds, the
HomeLink indicator light will start flas hing slowly. Keep pressing the
HomeLink button and press and hold the transmitter button until the
HomeLink indicator light changes from a slow to a rapid flash.
Release the buttons.
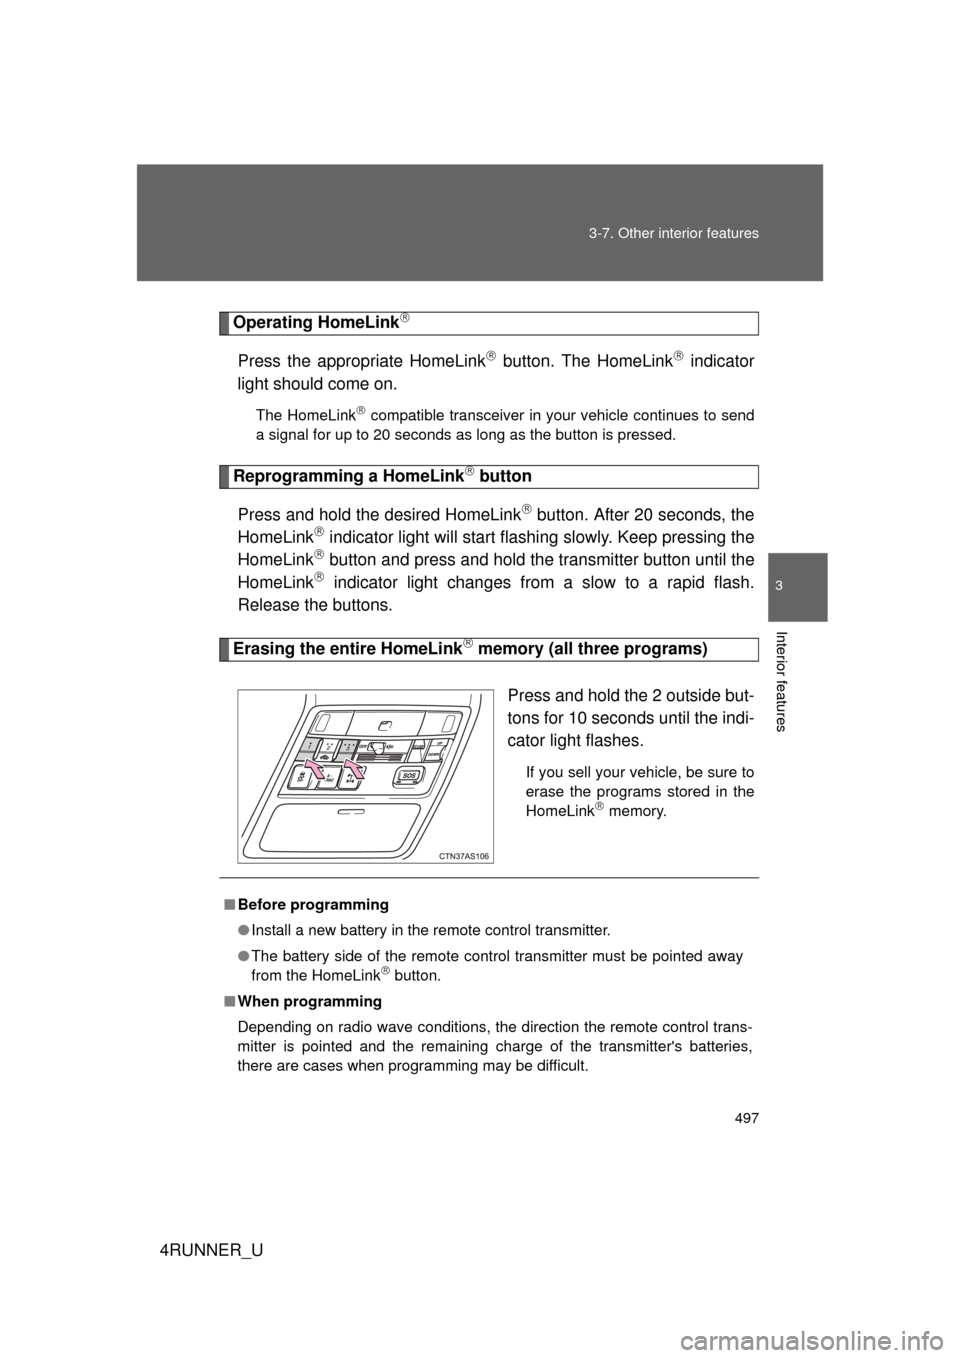
Erasing the entire HomeLink memory (all three programs)
Press and hold the 2 outside but-
tons for 10 seconds until the indi-
cator light flashes.
If you sell your vehicle, be sure to
erase the programs stored in the
HomeLink
memory.
■Before programming
● Install a new battery in the remote control transmitter.
● The battery side of the remote control transmitter must be pointed away
from the HomeLink
button.
■ When programming
Depending on radio wave conditions, the direction the remote control trans-
mitter is pointed and the remaining charge of the transmitter's batteries,
there are cases when programming may be difficult.
Page 498 of 704

498 3-7. Other interior features
4RUNNER_U
■Certification for the garage door opener
For vehicles sold in the U.S.A.
FCC ID: CB2610HL4
NOTE:
This device complies with Part 15 of the FCC Rules. Operation is subject to
the following two conditions: (1) this device may not cause harmful interfer-
ence, and (2) this device must accept any interference received, including
interference that may cause undesired operation.
FCC WARNING:
Changes or modifications not expressly approved by the party responsible
for compliance could void the user's authority to operate the equipment.
For vehicles sold in Canada
NOTE:
Operation is subject to the following two conditions: (1) this device may not
cause interference, and (2) this device must accept any interference, includ-
ing interference that may cause undesired operation of the device.
■ When support is necessary
Visit on the web at www.homelink.com
or call 1-800-355-3515.
CAUTION
■When programming a garage door or other remote control devices
The garage door or other devices may operate, so ensure people and
objects are out of danger to prevent potential harm.
■ Conforming to federal safety standards
Do not use the HomeLink
compatible transceiver with any garage door
opener or device that lacks safety stop and reverse features as required by
federal safety standards.
This includes any garage door that cannot detect an interfering object. A
door or device without these features increases the risk of death or serious
injury.
Page 499 of 704
499
3-7. Other interior features
3
Interior features
4RUNNER_U
Safety Connect
Safety Connect is a subscription-based telematics service that uses
Global Positioning System (GPS) data and embedded cellular tech-
nology to provide safety and security features to subscribers. Safety
Connect is supported by Toyota ’s designated response center,
which operates 24 hours per day, 7 days per week.
Safety Connect service is available by subscription on select,
telematics hardware-equipped vehicles.
By using the Safety Connect servi ce, you are agreeing to be bound
by the Telematics Subscription Serv ice Agreement and its Terms and
Conditions, as in effect and amende d from time to time, a current
copy of which is available at Toyota.com. All use of the Safety Con-
nect service is subject to such then-applicable Terms and Condi-
tions.
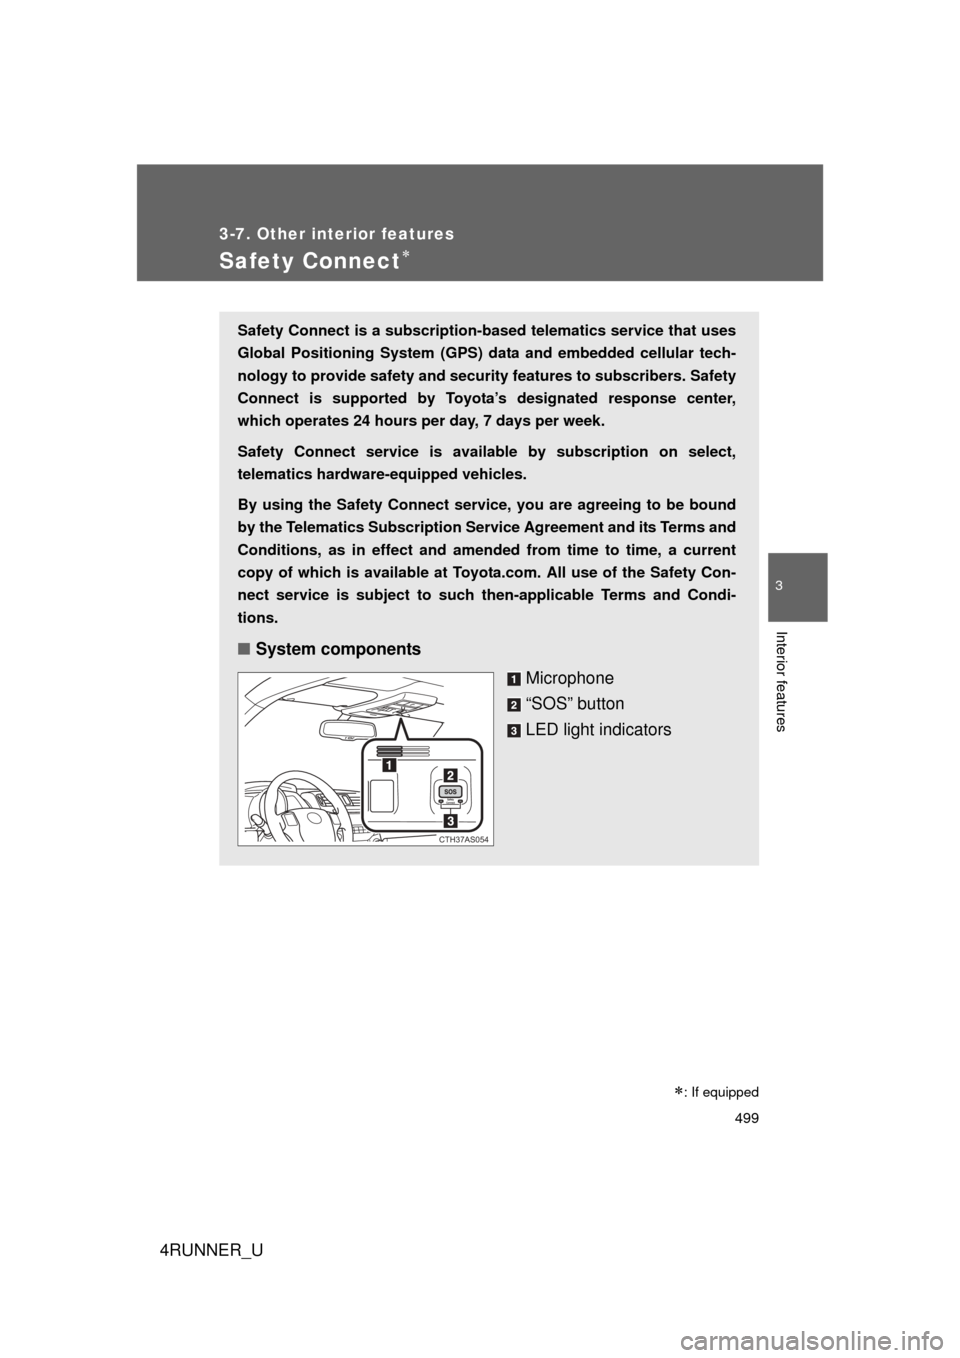
■ System components
Microphone
“SOS” button
LED light indicators
CTH37AS054
�
: If equipped
Page 500 of 704
500 3-7. Other interior features
4RUNNER_U
■Services
Subscribers have the following Sa fety Connect services avail-
able:
● Automatic Collision Notification
*
Helps drivers receive necessary response from emergency
service providers. ( P. 502)
*: U.S. Patent No. 7,508,298 B2
● Stolen Vehicle Location
Helps drivers in the event of vehicle theft. ( P. 503)
● Emergency Assistance Button (“SOS”)
Connects drivers to response-center support. ( P. 503)
● Enhanced Roadside Assistance
Provides drivers various on-road assistance. ( P. 503)
■ Subscription
After you have signed the Telema tics Subscription Service
Agreement and are enrolled, you can begin receiving services.
A variety of subscription terms is available for purchase. Contact
your Toyota dealer, call 1-800-331-4331, or push the “SOS” but-
ton in your vehicle for further subscription details.