door lock TOYOTA 86 2023 Owners Manual
[x] Cancel search | Manufacturer: TOYOTA, Model Year: 2023, Model line: 86, Model: TOYOTA 86 2023Pages: 449, PDF Size: 8.5 MB
Page 2 of 449
2TABLE OF CONTENTS
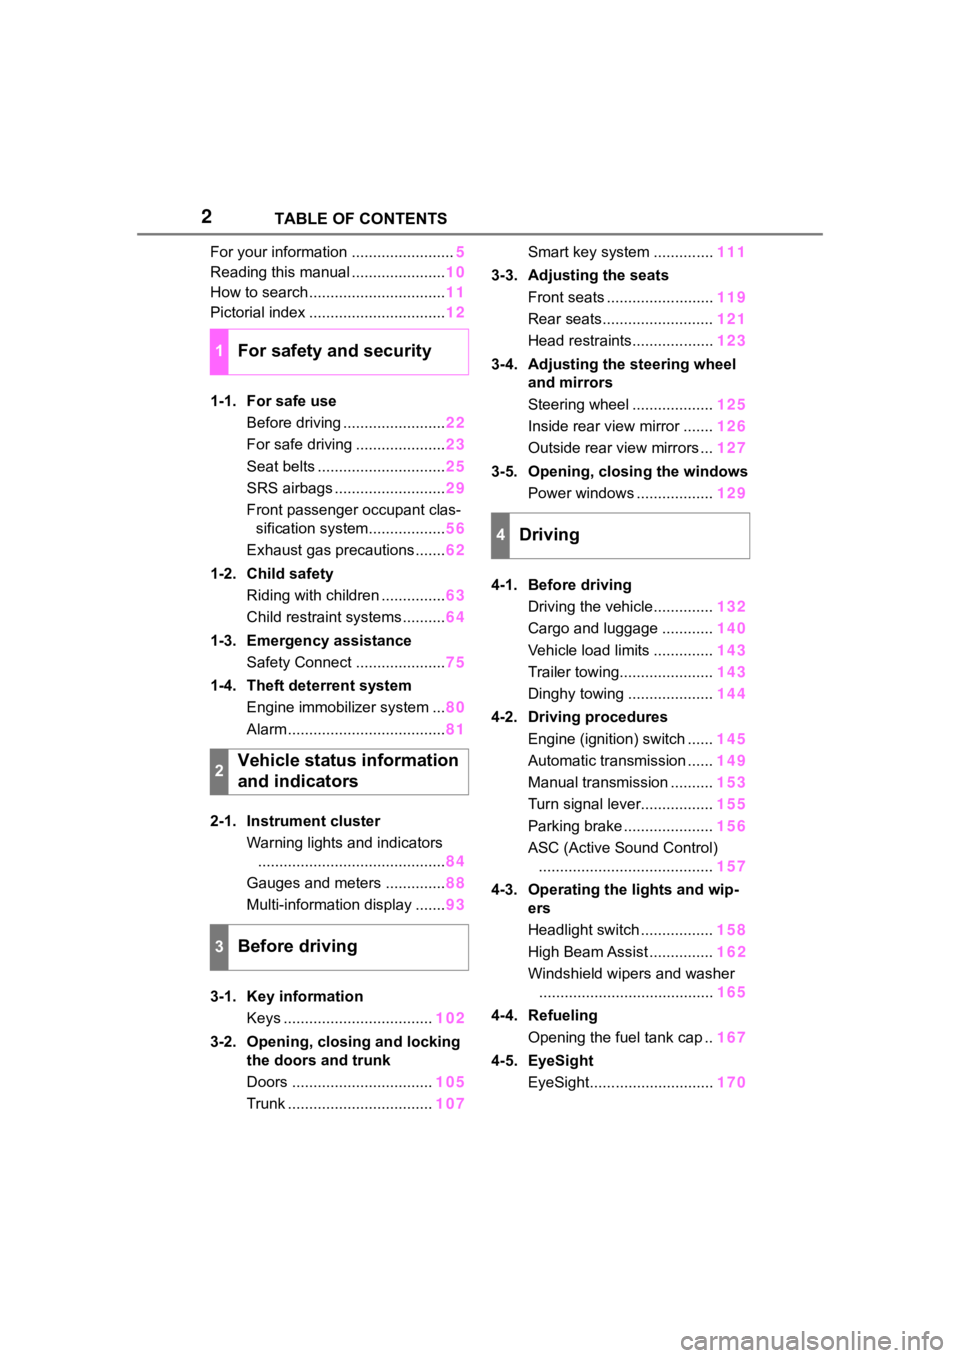
For your information ........................5
Reading this manual ...................... 10
How to search ................................ 11
Pictorial index ................................ 12
1-1. For safe use Before driving ........................ 22
For safe driving ..................... 23
Seat belts .............................. 25
SRS airbags .......................... 29
Front passenger occupant clas- sification system.................. 56
Exhaust gas precautions....... 62
1-2. Child safety Riding with children ............... 63
Child restraint systems .......... 64
1-3. Emergency assistance Safety Connect ..................... 75
1-4. Theft deterrent system Engine immobilizer system ... 80
Alarm ..................................... 81
2-1. Instrument cluster Warning lights and indicators............................................ 84
Gauges and meters .............. 88
Multi-information display ....... 93
3-1. Key information Keys ................................... 102
3-2. Opening, closing and locking the doors and trunk
Doors ................................. 105
Trunk .................................. 107Smart key system ..............
111
3-3. Adjusting the seats Front seats ......................... 119
Rear seats.......................... 121
Head restraints................... 123
3-4. Adjusting the steering wheel and mirrors
Steering wheel ................... 125
Inside rear view mirror ....... 126
Outside rear view mirrors ... 127
3-5. Opening, closing the windows Power windows .................. 129
4-1. Before driving Driving the vehicle.............. 132
Cargo and luggage ............ 140
Vehicle load limits .............. 143
Trailer towing...................... 143
Dinghy towing .................... 144
4-2. Driving procedures Engine (ignition) switch ...... 145
Automatic transmission ...... 149
Manual transmission .......... 153
Turn signal lever................. 155
Parking brake ..................... 156
ASC (Active Sound Control) ......................................... 157
4-3. Operating the lights and wip- ers
Headlight switch ................. 158
High Beam Assist ............... 16
2
Windshield wipers an
d washer
......................................... 165
4-4. Refueling Opening the fuel tank cap .. 167
4-5. EyeSight EyeSight............................. 170
1For safety and security
2Vehicle status information
and indicators
3Before driving
4Driving
Page 12 of 449
12Pictorial index
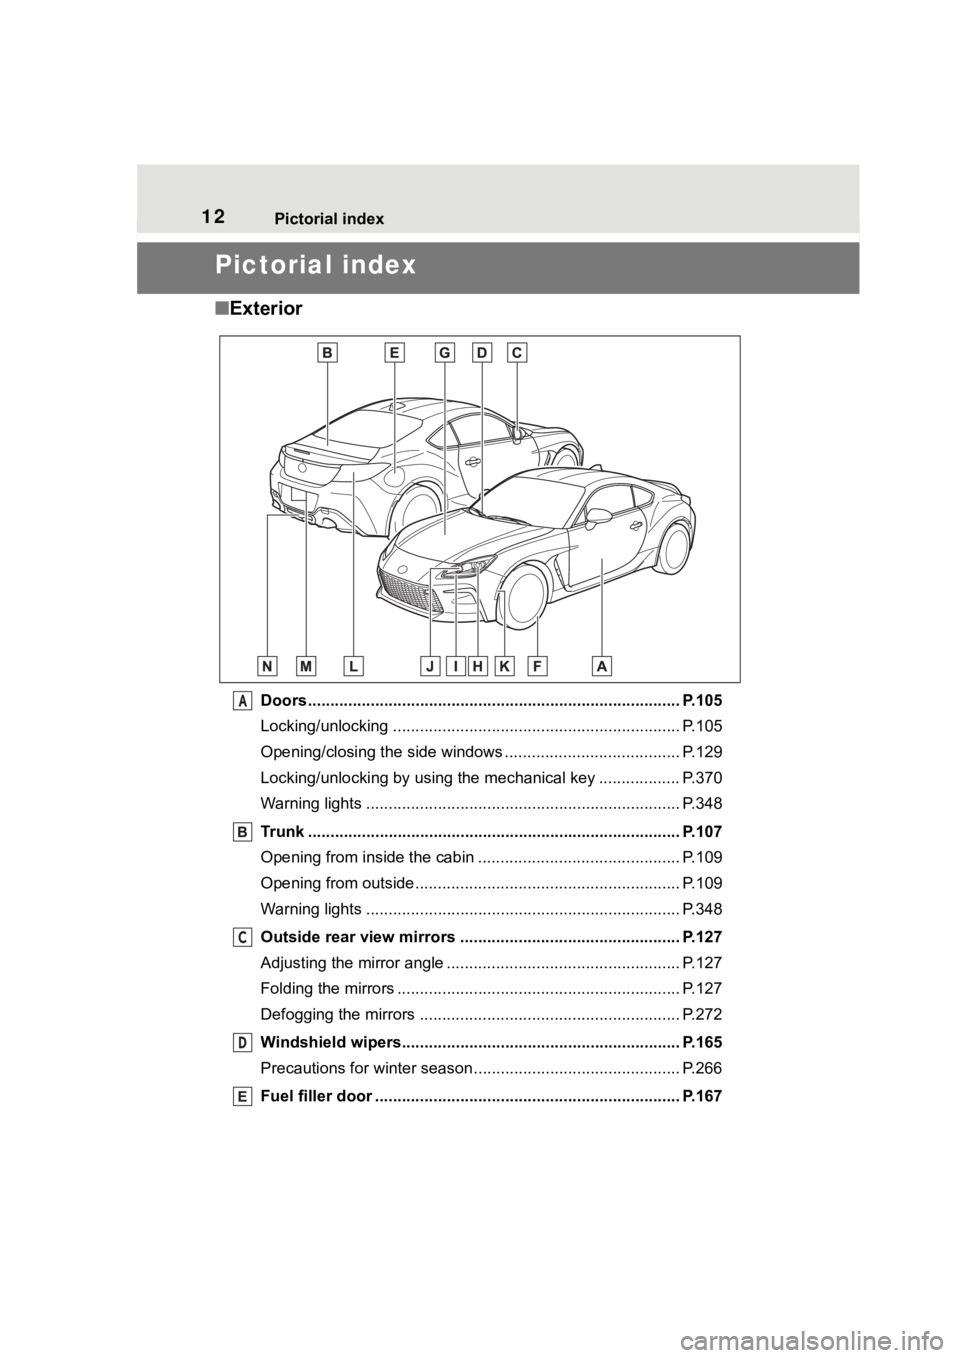
Pictorial index
■Exterior
Doors.......................................................... ......................... P.105
Locking/unlocking .............................................. .................. P.105
Opening/closing the side windows ............................... ........ P.129
Locking/unlocking by using the mechanical key .................. P. 3 7 0
Warning lights ................................................. ..................... P.348
Trunk ................................................................................... P.107
Opening from inside the cabin .................................. ........... P.109
Opening from outside........................................... ................ P.109
Warning lights ................................................. ..................... P.348
Outside rear view mirrors ................................................. P.127
Adjusting the mirror angle ..................................... ............... P.127
Folding the mirrors ............................................ ................... P.127
Defogging the mirrors .......................................... ................ P.272
Windshield wipers.............................................. ................ P.165
Precautions for winter seas on.............................................. P.266
Fuel filler door ............................................... ..................... P.167A
C
D
Page 16 of 449
16Pictorial index
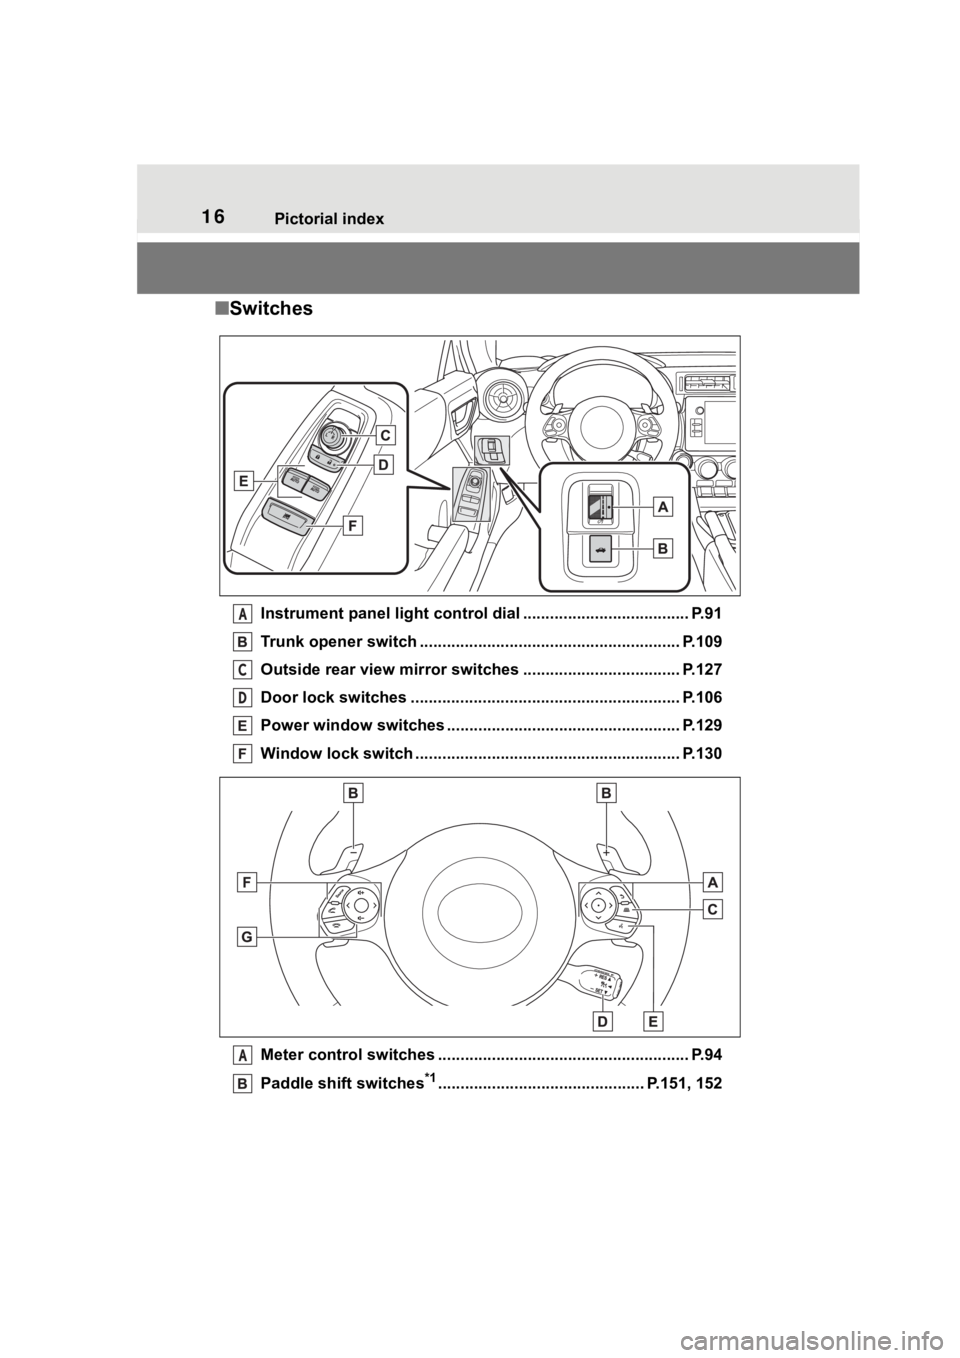
■Switches
Instrument panel light cont rol dial ..................................... P.91
Trunk opener switch ............................................ .............. P.109
Outside rear view mirror swi tches ................................... P.127
Door lock switches ............................................................ P.106
Power window switches ....... ............................................. P.129
Window lock switch ............................................. .............. P.130
Meter control switches .. ...................................................... P.94
Paddle shift switches
*1.............................................. P.151, 152
A
C
D
A
Page 26 of 449
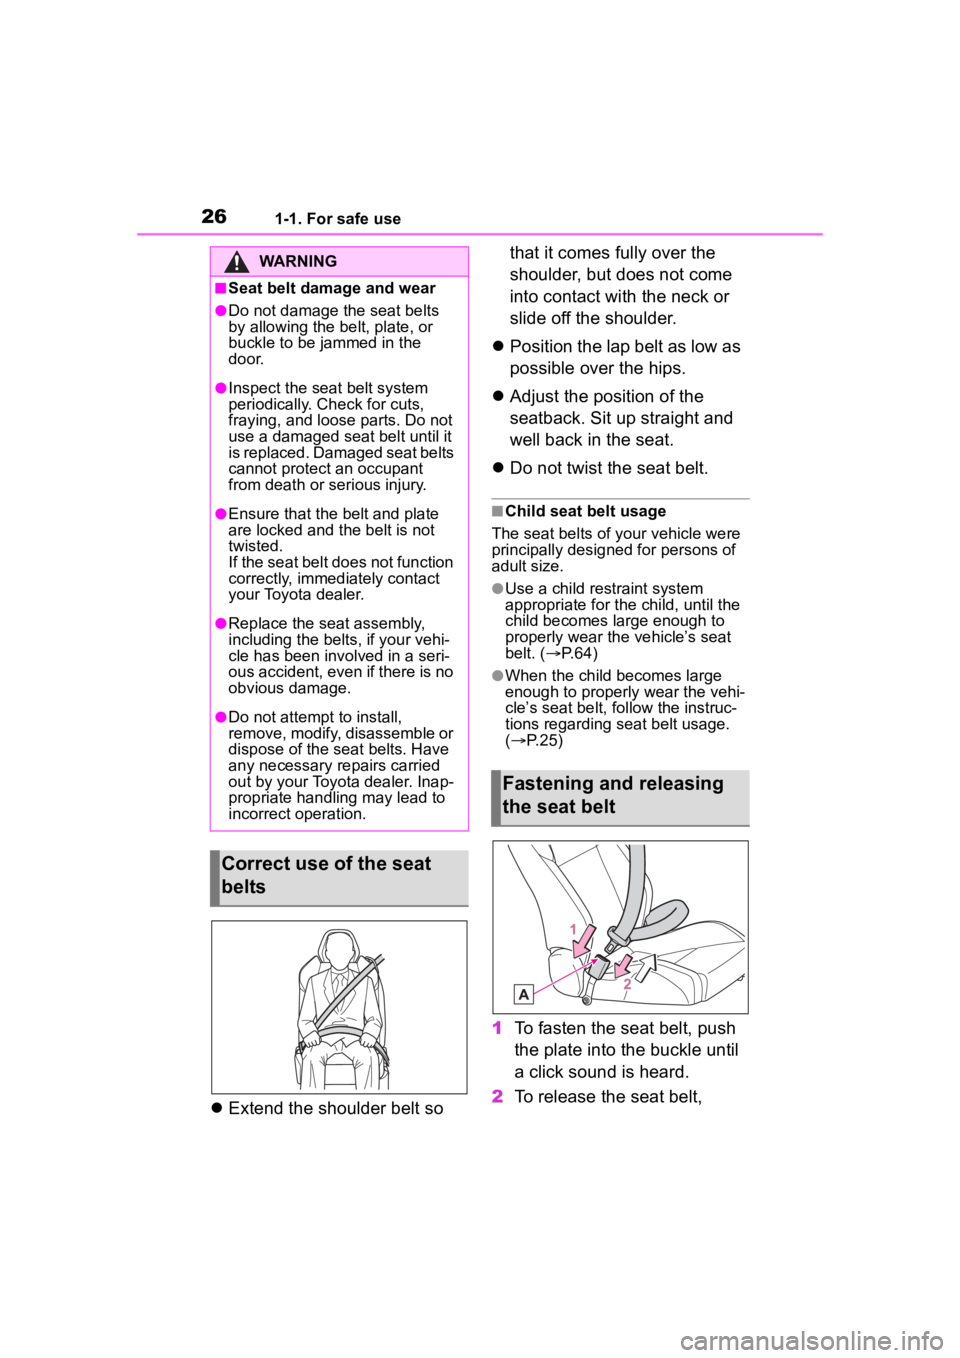
261-1. For safe use
Extend the shoulder belt so that it comes fully over the
shoulder, but does not come
into contact with the neck or
slide off the shoulder.
Position the lap belt as low as
possible over the hips.
Adjust the position of the
seatback. Sit up straight and
well back in the seat.
Do not twist the seat belt.
■Child seat belt usage
The seat belts of your vehicle were
principally designed for persons of
adult size.
●Use a child restraint system
appropriate for the child, until the
child becomes large enough to
properly wear the vehicle’s seat
belt. ( P. 6 4 )
●When the child becomes large
enough to properl y wear the vehi-
cle’s seat belt, follow the instruc-
tions regarding seat belt usage.
( P. 2 5 )
1 To fasten the seat belt, push
the plate into the buckle until
a click sound is heard.
2 To release the seat belt,
WARNING
■Seat belt damage and wear
●Do not damage the seat belts
by allowing the belt, plate, or
buckle to be jammed in the
door.
●Inspect the seat belt system
periodically. Check for cuts,
fraying, and loose parts. Do not
use a damaged sea t belt until it
is replaced. Damaged seat belts
cannot protect an occupant
from death or serious injury.
●Ensure that the belt and plate
are locked and the belt is not
twisted.
If the seat belt does not function
correctly, immediately contact
your Toyota dealer.
●Replace the seat assembly,
including the belts, if your vehi-
cle has been involved in a seri-
ous accident, even if there is no
obvious damage.
●Do not attempt to install,
remove, modify, disassemble or
dispose of the seat belts. Have
any necessary repairs carried
out by your Toyota dealer. Inap-
propriate handling may lead to
incorrect operation.
Correct use of the seat
belts
Fastening and releasing
the seat belt
Page 48 of 449
481-1. For safe use
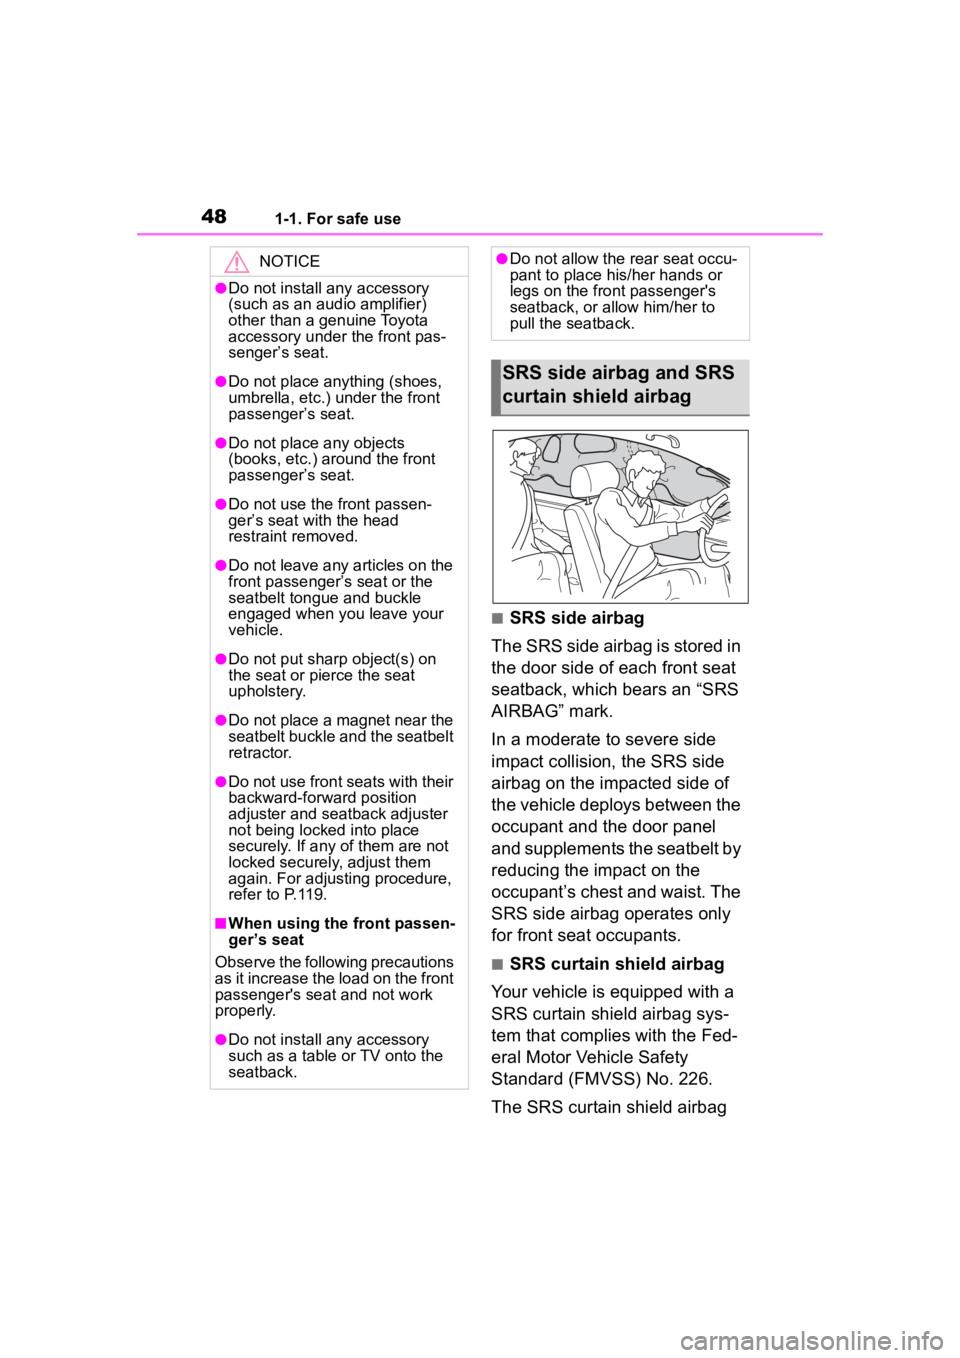
■SRS side airbag
The SRS side airbag is stored in
the door side of each front seat
seatback, which bears an “SRS
AIRBAG” mark.
In a moderate to severe side
impact collision, the SRS side
airbag on the impacted side of
the vehicle deploys between the
occupant and the door panel
and supplements the seatbelt by
reducing the impact on the
occupant’s chest and waist. The
SRS side airbag operates only
for front seat occupants.
■SRS curtain shield airbag
Your vehicle is equipped with a
SRS curtain shield airbag sys-
tem that complies with the Fed-
eral Motor Vehicle Safety
Standard (FMVSS) No. 226.
The SRS curtain shield airbag
NOTICE
●Do not install any accessory
(such as an audio amplifier)
other than a genuine Toyota
accessory under the front pas-
senger’s seat.
●Do not place anything (shoes,
umbrella, etc.) under the front
passenger’s seat.
●Do not place any objects
(books, etc.) around the front
passenger’s seat.
●Do not use the front passen-
ger’s seat with the head
restraint removed.
●Do not leave any articles on the
front passenger’ s seat or the
seatbelt tongue and buckle
engaged when you leave your
vehicle.
●Do not put sharp object(s) on
the seat or pierce the seat
upholstery.
●Do not place a magnet near the
seatbelt buckle and the seatbelt
retractor.
●Do not use front seats with their
backward-forward position
adjuster and seatback adjuster
not being locked into place
securely. If any of them are not
locked securely, adjust them
again. For adjusting procedure,
refer to P.119.
■When using the front passen-
ger’s seat
Observe the following precautions
as it increase the load on the front
passenger's seat and not work
properly.
●Do not install any accessory
such as a table or TV onto the
seatback.
●Do not allow the rear seat occu-
pant to place his/her hands or
legs on the front passenger's
seatback, or allow him/her to
pull the seatback.
SRS side airbag and SRS
curtain shield airbag
Page 67 of 449
671-2. Child safety
1
For safety and security
A child restraint system for a
small child or baby must itself be
properly restrained on the seat
with the lap portion of the
lap/shoulder belt.
■Installing child restraint
system using a seat belt
(child restraint lock func-
tion belt)
Install the child restraint system
in accordance to the operation
manual enclosed with the child
restraint system.
WARNING
■When installing a child
restraint system
Observe the following precau-
tions.
Failure to do so m ay result in
death or serious injury.
●Never use a child restraint sys-
tem on the front passenger
seat.
The force of the rapid inflation of
the front passenger airbag can
cause death or serious injury to
children in the event of an acci-
dent.
●Do not allow the child to lean
his/her head or any part of
his/her body against the door or
the area of the seat, front pillars
or roof side rails from which the
SRS side airbags or SRS cur-
tain shield airbags deploy even
if the child is seated in the child
restraint system. It is dangerous
if the SRS side and curtain
shield airbags inflate, and the
impact could cause death or
serious injury to the child.
●When a booster seat is
installed, always ensure that the
shoulder belt is positioned
across the center of the child’s
shoulder. The belt should be
kept away from the child’s neck,
but not so that it could fall off the
child’s shoulder.
●Use child restraint system suit-
able to the age and size of the
child and install it to the rear
seat.
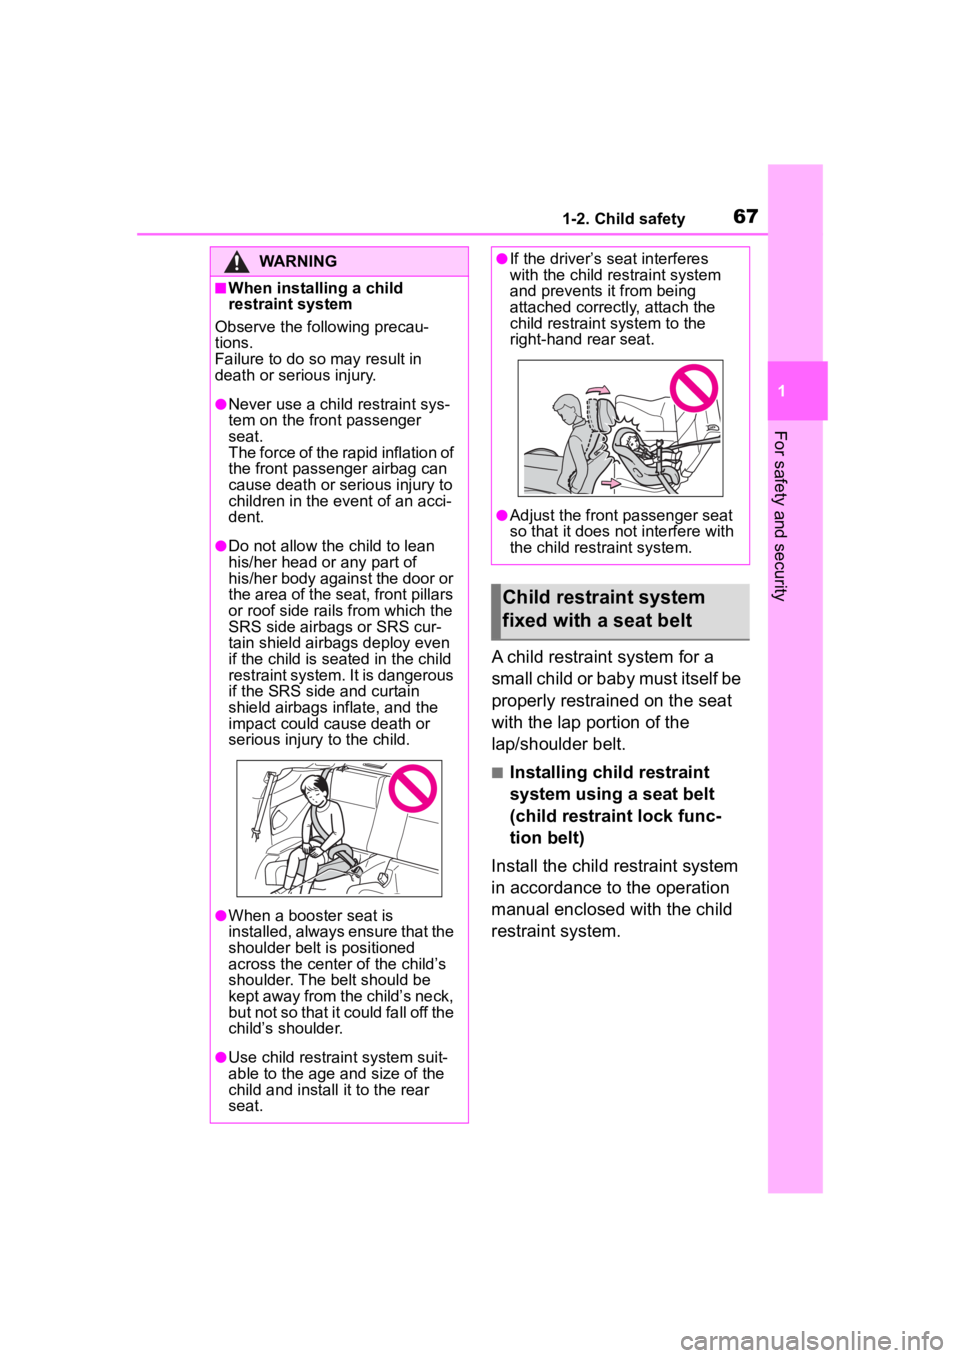
●If the driver’s seat interferes
with the child restraint system
and prevents it from being
attached correct ly, attach the
child restraint system to the
right-hand rear seat.
●Adjust the front passenger seat
so that it does not interfere with
the child restraint system.
Child restraint system
fixed with a seat belt
Page 81 of 449
811-4. Theft deterrent system
1
For safety and security
■Items to check before lock-
ing the vehicle
To prevent unexpected trigger-
ing of the alarm and vehicle
theft, make sure of the following:
Nobody is in the vehicle.
The windows are closed
before the alarm is set.
No valuables or other per-
sonal items are left in the
vehicle.
■Setting
Close the doors, trunk and hood, and lock both side doors
using the entry function or wire-
less remote control. The system
will set automatically after 30
seconds.
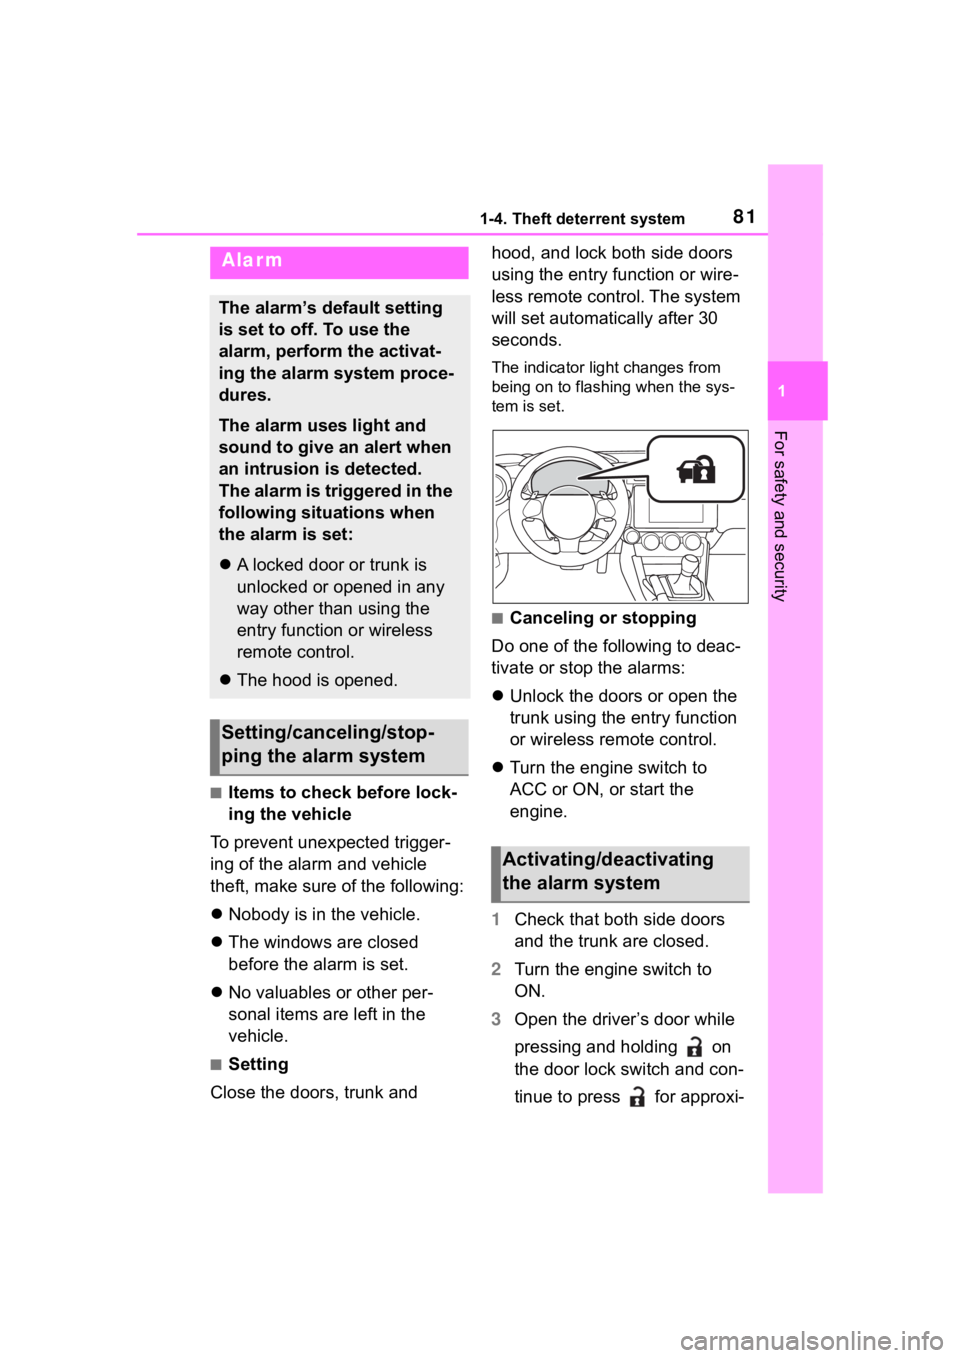
The indicator light changes from
being on to flashing when the sys-
tem is set.
■Canceling or stopping
Do one of the following to deac-
tivate or stop the alarms:
Unlock the doors or open the
trunk using the entry function
or wireless remote control.
Turn the engine switch to
ACC or ON, or start the
engine.
1 Check that both side doors
and the trunk are closed.
2 Turn the engine switch to
ON.
3 Open the driver’s door while
pressing and holding on
the door lock switch and con-
tinue to press for approxi-
Alarm
The alarm’s default setting
is set to off. To use the
alarm, perform the activat-
ing the alarm system proce-
dures.
The alarm uses light and
sound to give an alert when
an intrusion is detected.
The alarm is triggered in the
following situations when
the alarm is set:
A locked door or trunk is
unlocked or opened in any
way other than using the
entry function or wireless
remote control.
The hood is opened.
Setting/canceling/stop-
ping the alarm system
Activating/deactivating
the alarm system
Page 82 of 449
821-4. Theft deterrent system
mately 10 seconds after the
driver’s door has opened.
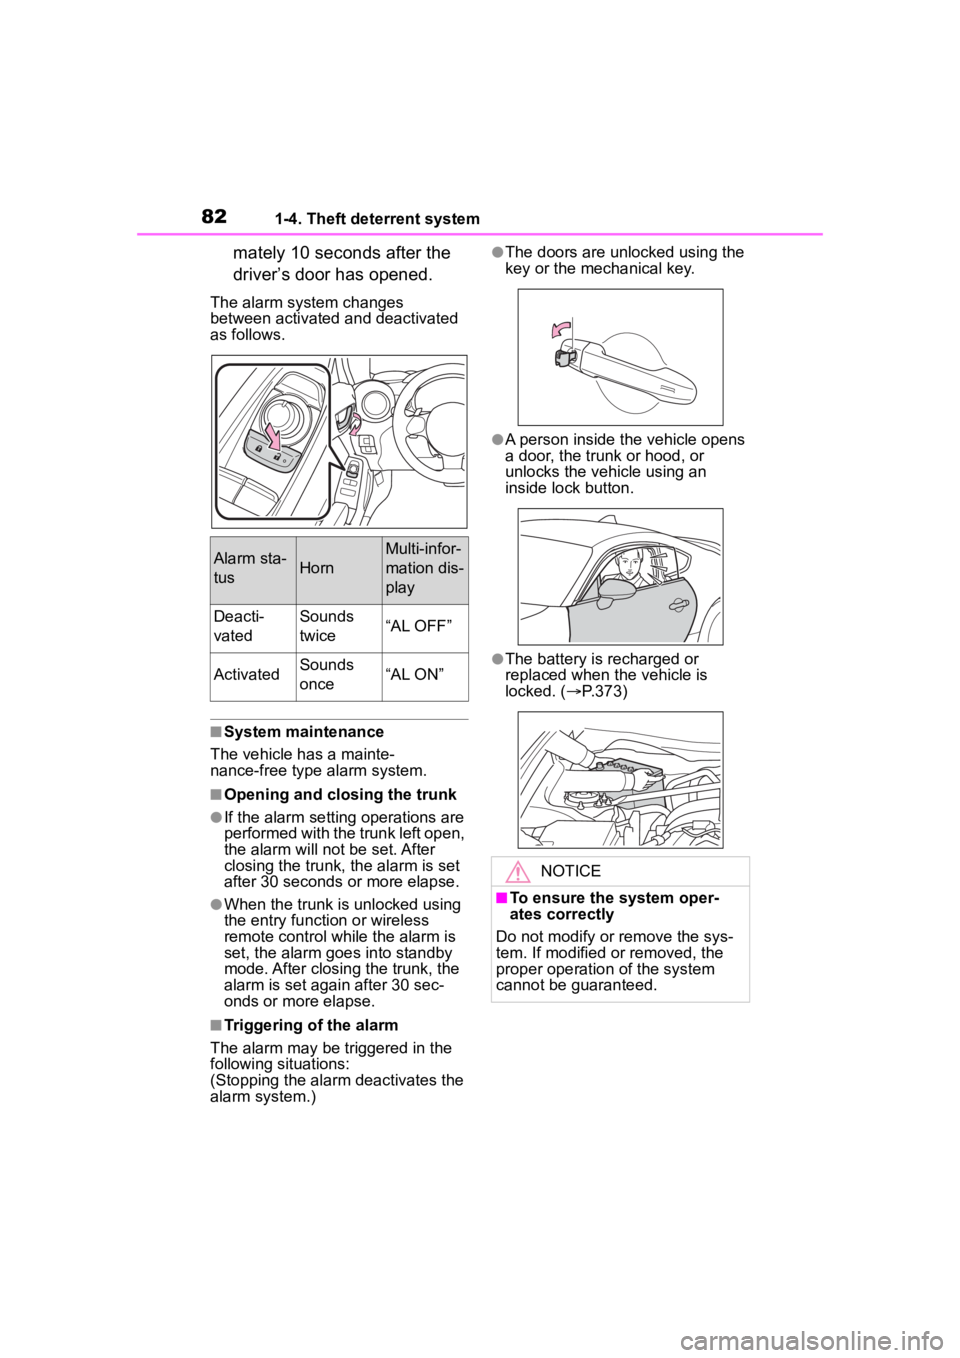
The alarm system changes
between activated and deactivated
as follows.
■System maintenance
The vehicle has a mainte-
nance-free type alarm system.
■Opening and closing the trunk
●If the alarm setting operations are
performed with the trunk left open,
the alarm will not be set. After
closing the trunk, the alarm is set
after 30 seconds or more elapse.
●When the trunk is unlocked using
the entry function or wireless
remote control while the alarm is
set, the alarm goes into standby
mode. After closing the trunk, the
alarm is set again after 30 sec-
onds or more elapse.
■Triggering of the alarm
The alarm may be triggered in the
following situations:
(Stopping the alarm deactivates the
alarm system.)
●The doors are unlocked using the
key or the mechanical key.
●A person inside the vehicle opens
a door, the trunk or hood, or
unlocks the vehicle using an
inside lock button.
●The battery is recharged or
replaced when the vehicle is
locked. ( P.373)
Alarm sta-
tusHorn
Multi-infor-
mation dis-
play
Deacti-
vatedSounds
twice“AL OFF”
ActivatedSounds
once“AL ON”
NOTICE
■To ensure the system oper-
ates correctly
Do not modify or remove the sys-
tem. If modified or removed, the
proper operation of the system
cannot be guaranteed.
Page 101 of 449
101
3
3
Before driving
Before driving
.3-1. Key informationKeys ............................ 102
3-2. Opening, closing and locking the doors and
trunk
Doors .......................... 105
Trunk ........................... 107
Smart key system ....... 111
3-3. Adjusting the seats Front seats .................. 119
Rear seats................... 121
Head restraints............ 123
3-4. Adjusting the steering wheel and mirrors
Steering wheel ............ 125
Inside rear view mirror .................................. 126
Outside rear view mirrors .................................. 127
3-5. Opening, closing the win- dows
Power windows ........... 129
Page 103 of 449
1033-1. Key information
3
Before driving
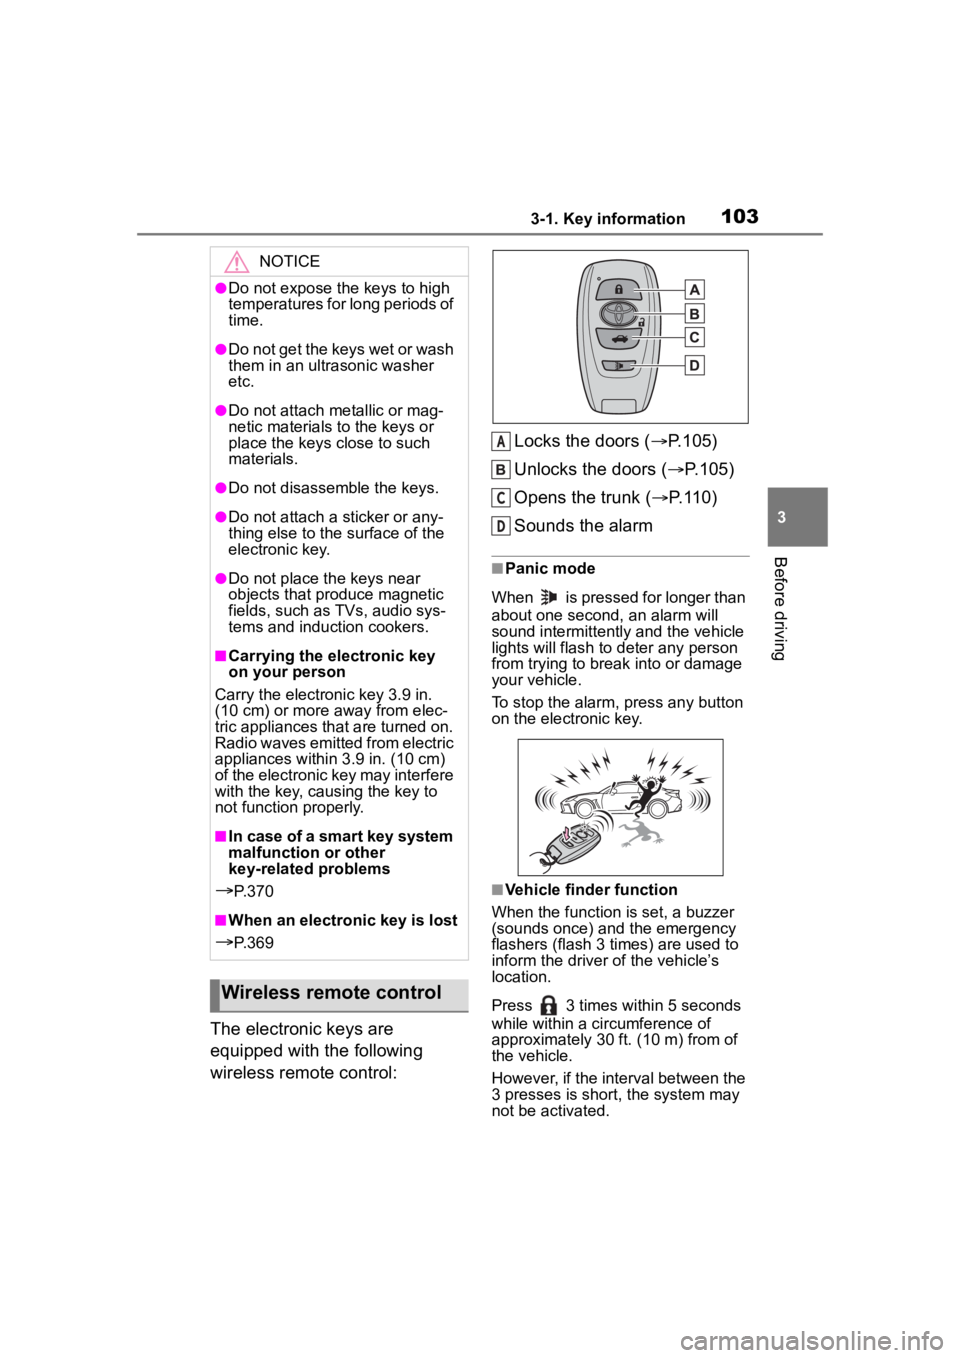
The electronic keys are
equipped with the following
wireless remote control:Locks the doors (
P.105)
Unlocks the doors ( P.105)
Opens the trunk ( P.110)
Sounds the alarm
■Panic mode
When is pressed for longer than
about one second, an alarm will
sound intermittently and the vehicle
lights will flash to deter any person
from trying to break into or damage
your vehicle.
To stop the alarm, press any button
on the electronic key.
■Vehicle finder function
When the function is set, a buzzer
(sounds once) and the emergency
flashers (flash 3 times) are used to
inform the driver of the vehicle’s
location.
Press 3 times within 5 seconds
while within a ci rcumference of
approximately 30 ft. (10 m) from of
the vehicle.
However, if the interval between the
3 presses is short, the system may
not be activated.
NOTICE
●Do not expose the keys to high
temperatures for long periods of
time.
●Do not get the keys wet or wash
them in an ultrasonic washer
etc.
●Do not attach metallic or mag-
netic materials to the keys or
place the keys close to such
materials.
●Do not disassemble the keys.
●Do not attach a sticker or any-
thing else to the surface of the
electronic key.
●Do not place th e keys near
objects that produce magnetic
fields, such as TVs, audio sys-
tems and induction cookers.
■Carrying the electronic key
on your person
Carry the electronic key 3.9 in.
(10 cm) or more away from elec-
tric appliances that are turned on.
Radio waves emitted from electric
appliances within 3.9 in. (10 cm)
of the electronic key may interfere
with the key, causing the key to
not function properly.
■In case of a smart key system
malfunction or other
key-related problems
P. 3 7 0
■When an electronic key is lost
P. 3 6 9
Wireless remote control
A
C
D