TOYOTA AVALON 2008 XX30 / 3.G Navigation Manual
Manufacturer: TOYOTA, Model Year: 2008, Model line: AVALON, Model: TOYOTA AVALON 2008 XX30 / 3.GPages: 146, PDF Size: 4.46 MB
Page 11 of 146
BASIC FUNCTIONS
25
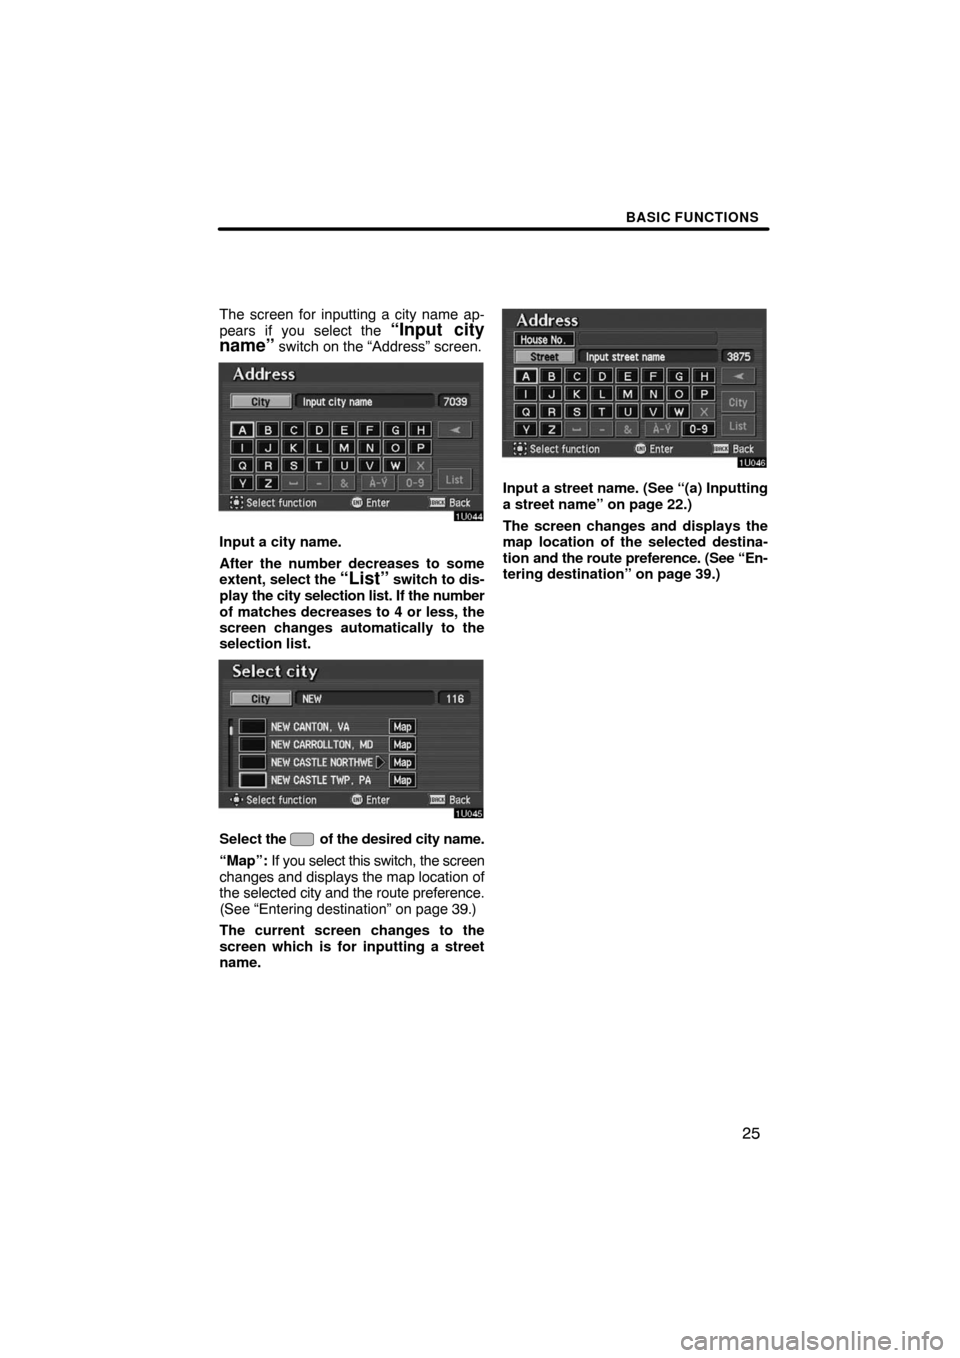
The screen for inputting a city name ap-
pears if you select the “Input city
name” switch on the “Address” screen.
Input a city name.
After the number decreases to some
extent, select the
“List” switch to dis-
play the city selection list. If the number
of matches decreases to 4 or less, the
screen changes automatically to the
selection list.
Select the of the desired city name.
“Map”: If you select this switch, the screen
changes and displays the map location of
the selected city and the route preference.
(See “Entering destination” on page 39.)
The current screen changes to the
screen which is for inputting a street
name.
Input a street name. (See “(a) Inputting
a street name” on page 22.)
The screen changes and displays the
map location of the selected destina-
tion and the route preference. (See “En-
tering destination” on page 39.)
Page 12 of 146
BASIC FUNCTIONS
26
There are 3 ways to select a point of in-
terest (POI) location.
(a) Input the name of the point of inter-
est directly.
(b) Inputting a city name first.
(c) Selecting from the points of inter-
est categories.
It will not take a long time for you to find
your destination if you use a combina-
tion of the searching ways of (a), (b) and
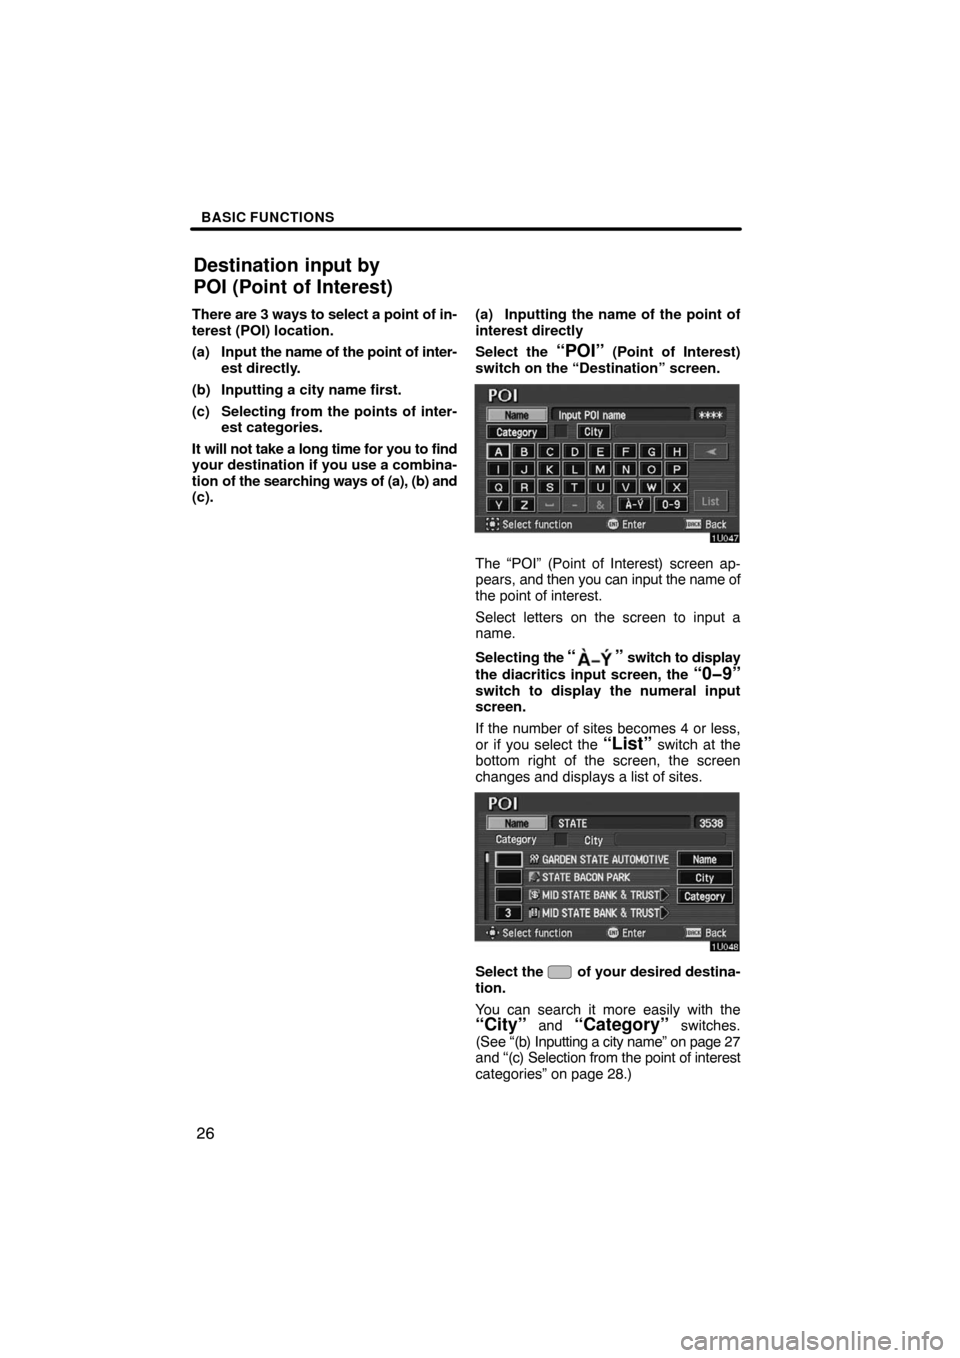
(c).(a) Inputting the name of the point of
interest directly
Select the
“POI” (Point of Interest)
switch on the “Destination” screen.
The “POI” (Point of Interest) screen ap-
pears, and then you can input the name of
the point of interest.
Select letters on the screen to input a
name.
Selecting the
“” switch to display
the diacritics input screen, the
“0�9”switch to display the numeral input
screen.
If the number of sites becomes 4 or less,
or if you select the
“List” switch at the
bottom right of the screen, the screen
changes and displays a list of sites.
Select the of your desired destina-
tion.
You can search it more easily with the
“City” and “Category” switches.
(See “(b) Inputting a city name” on page 27
and “(c) Selection from the point of interest
categories” on page 28.)
Destination input by
POI (Point of Interest)
Page 13 of 146
BASIC FUNCTIONS
27
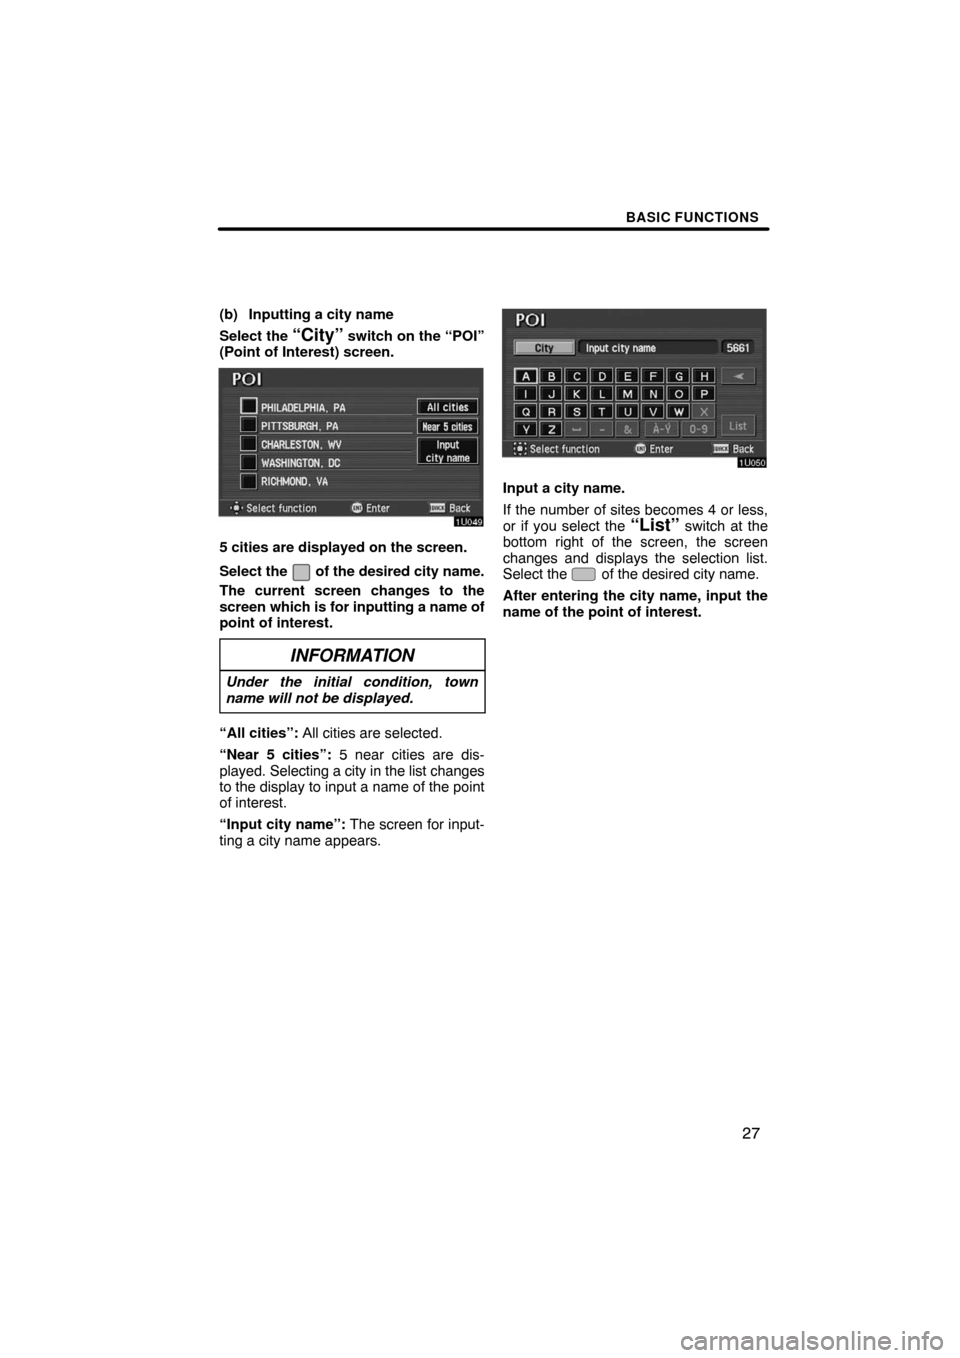
(b) Inputting a city name
Select the
“City” switch on the “POI”
(Point of Interest) screen.
5 cities are displayed on the screen.
Select the
of the desired city name.
The current screen changes to the
screen which is for inputting a name of
point of interest.
INFORMATION
Under the initial condition, town
name will not be displayed.
“All cities”: All cities are selected.
“Near 5 cities”: 5 near cities are dis-
played. Selecting a city in the list changes
to the display to input a name of the point
of interest.
“Input city name”: The screen for input-
ting a city name appears.
Input a city name.
If the number of sites becomes 4 or less,
or if you select the
“List” switch at the
bottom right of the screen, the screen
changes and displays the selection list.
Select the
of the desired city name.
After entering the city name, input the
name of the point of interest.
Page 14 of 146
BASIC FUNCTIONS
28
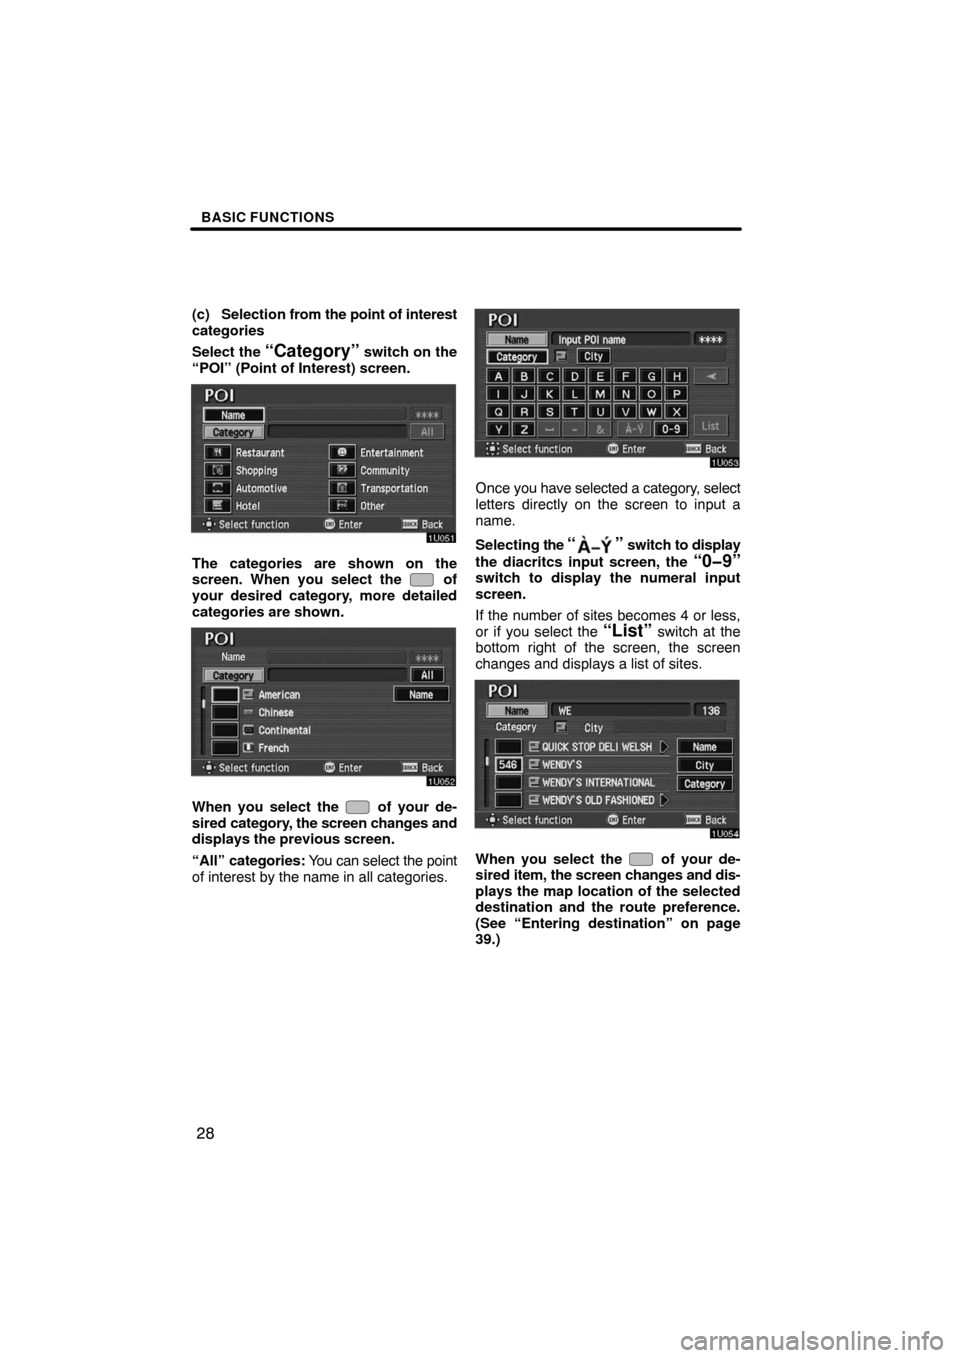
(c) Selection from the point of interest
categories
Select the
“Category” switch on the
“POI” (Point of Interest) screen.
The categories are shown on the
screen. When you select the of
your desired category, more detailed
categories are shown.
When you select the of your de-
sired category, the screen changes and
displays the previous screen.
“All” categories: You can select the point
of interest by the name in all categories.
Once you have selected a category, select
letters directly on the screen to input a
name.
Selecting the
“” switch to display
the diacritcs input screen, the
“0�9”switch to display the numeral input
screen.
If the number of sites becomes 4 or less,
or if you select the
“List” switch at the
bottom right of the screen, the screen
changes and displays a list of sites.
When you select the of your de-
sired item, the screen changes and dis-
plays the map location of the selected
destination and the route preference.
(See “Entering destination” on page
39.)
Page 15 of 146
BASIC FUNCTIONS
29
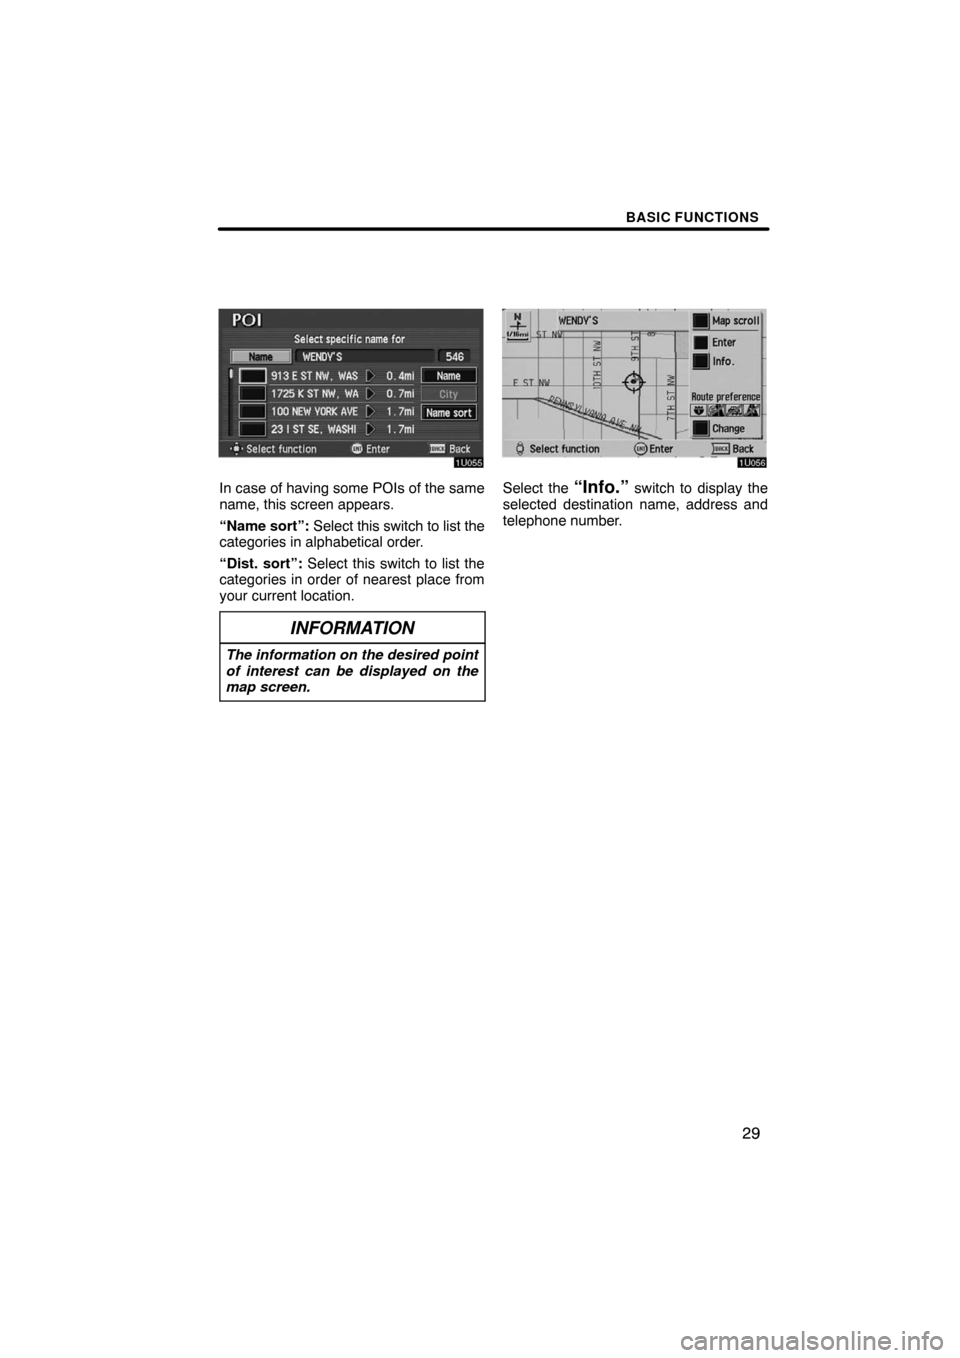
In case of having some POIs of the same
name, this screen appears.
“Name sort”: Select this switch to list the
categories in alphabetical order.
“Dist. sort”: Select this switch to list the
categories in order of nearest place from
your current location.
INFORMATION
The information on the desired point
of interest can be displayed on the
map screen.
Select the “Info.” switch to display the
selected destination name, address and
telephone number.
Page 16 of 146
BASIC FUNCTIONS
30
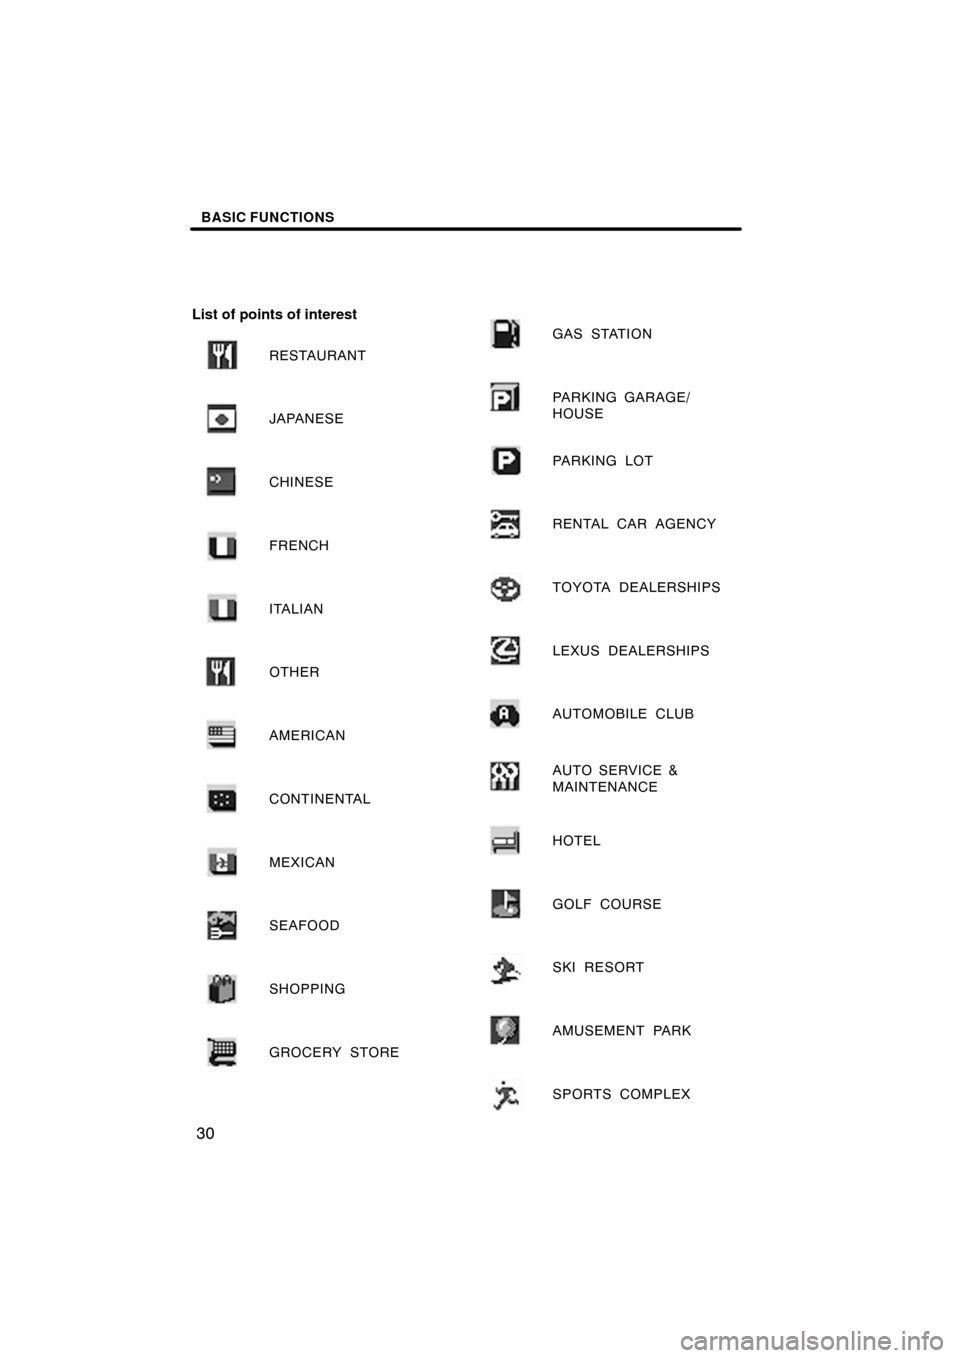
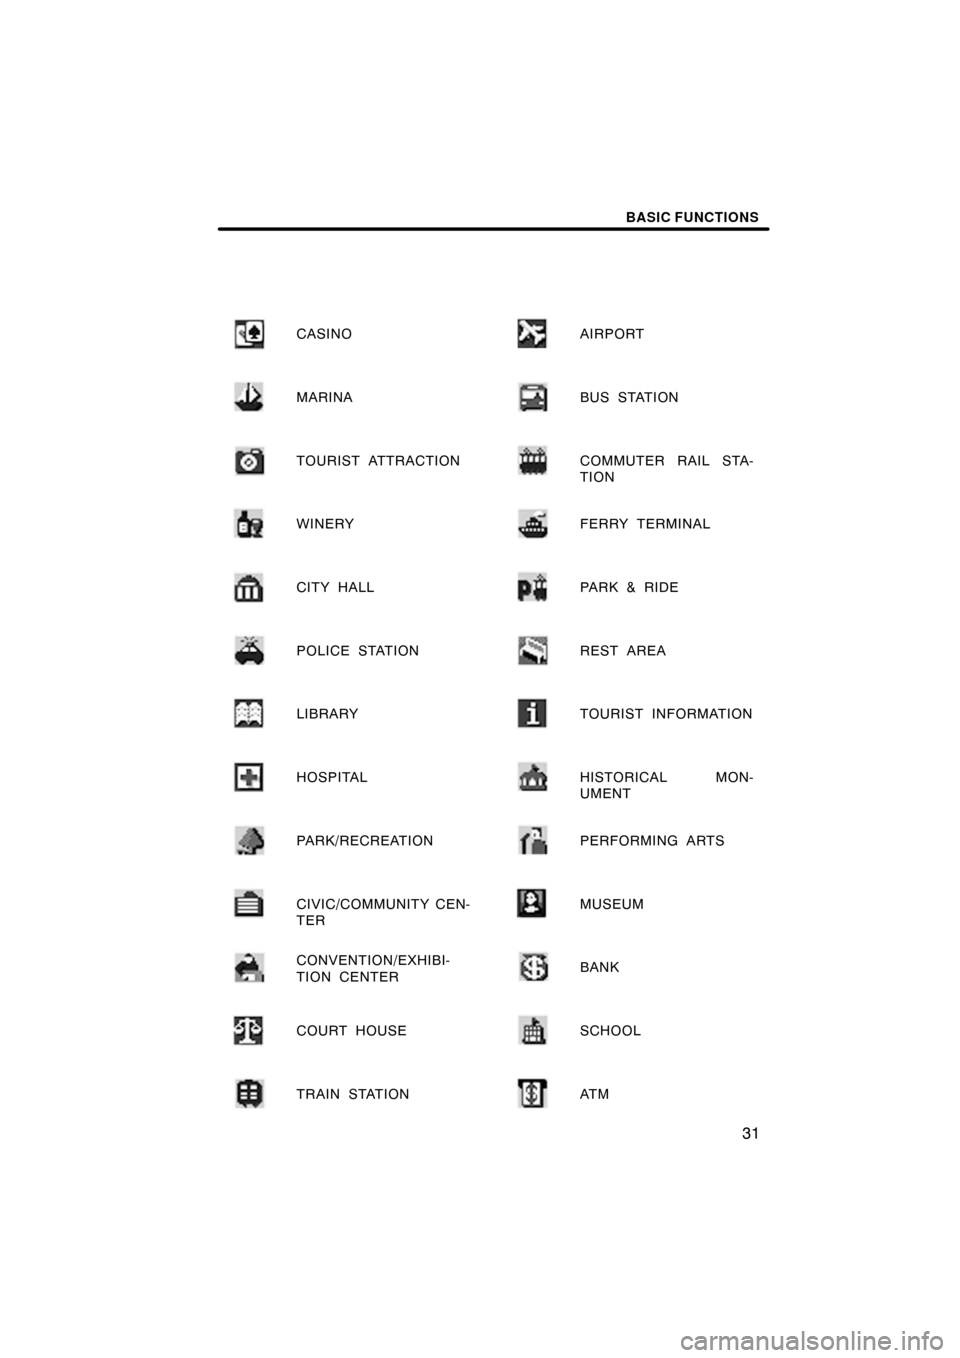
List of points of interest
RESTAURANT
JAPANESE
CHINESE
FRENCH
ITALIAN
OTHER
AMERICAN
CONTINENTAL
MEXICAN
SEAFOOD
SHOPPING
GROCERY STORE
GAS STATION
PARKING GARAGE/
HOUSE
PA R K I N G L O T
RENTAL CAR AGENCY
TOYOTA DEALERSHIPS
LEXUS DEALERSHIPS
AUTOMOBILE CLUB
AUTO SERVICE &
MAINTENANCE
HOTEL
GOLF COURSE
SKI RESORT
AMUSEMENT PARK
SPORTS COMPLEX
Page 17 of 146
BASIC FUNCTIONS
31
CASINO
MARINA
TOURIST ATTRACTION
WINERY
CITY HALL
POLICE STATION
LIBRARY
HOSPITAL
PARK/RECREATION
CIVIC/COMMUNITY CEN-
TER
CONVENTION/EXHIBI-
TION CENTER
COURT HOUSE
TRAIN STATION
AIRPORT
BUS STATION
COMMUTER RAIL STA-
TION
FERRY TERMINAL
PARK & RIDE
REST AREA
TOURIST INFORMATION
HISTORICAL MON-
UMENT
PERFORMING ARTS
MUSEUM
BANK
SCHOOL
AT M
Page 18 of 146
BASIC FUNCTIONS
32
HIGHER EDUCATION
BUSINESS FACILITY
CITY CENTER/NAMED
PLACE
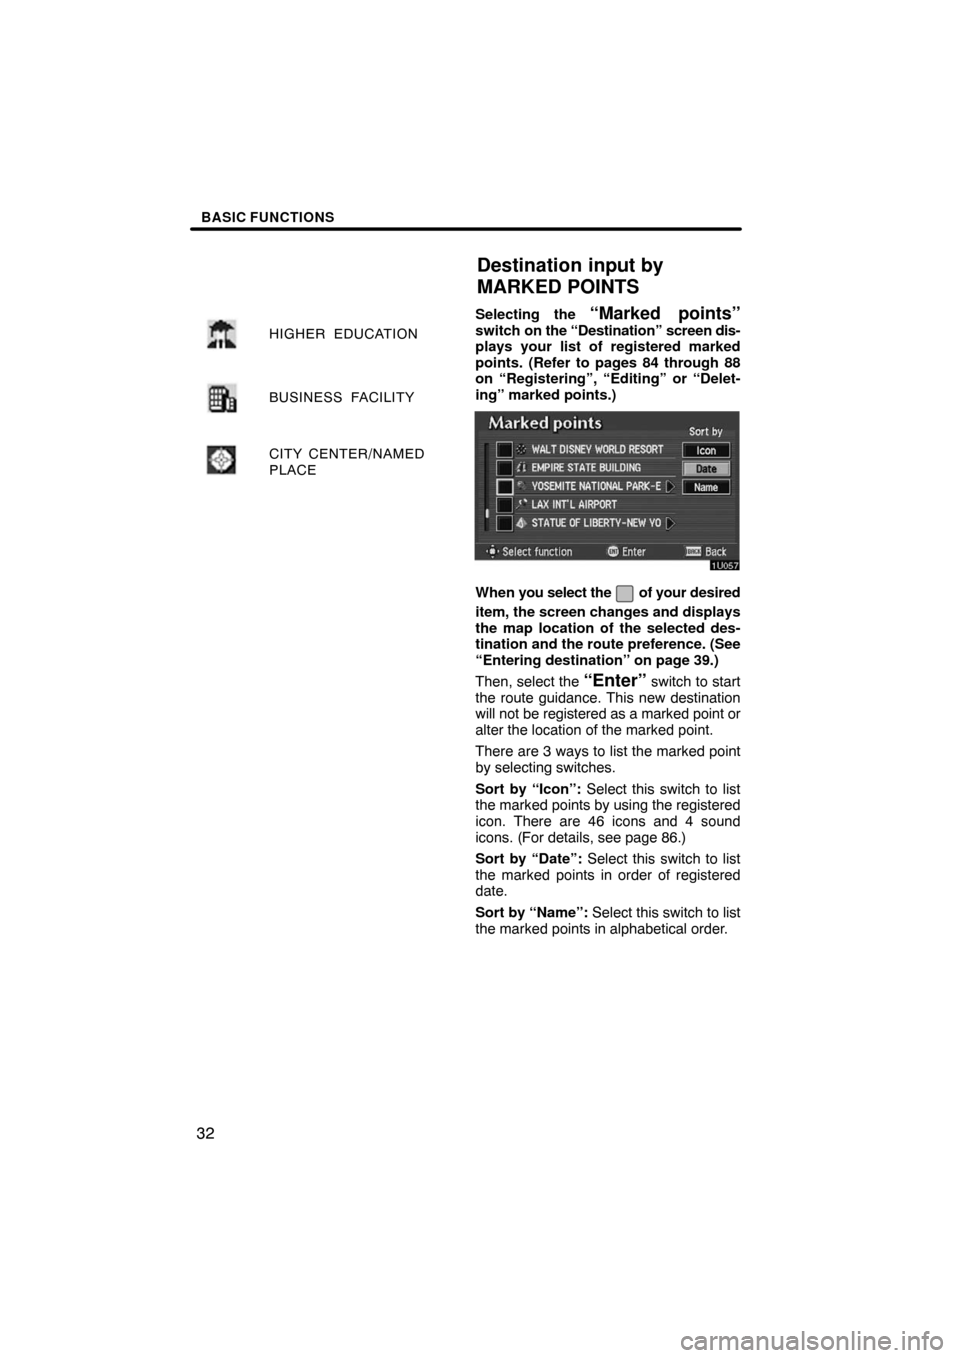
Selecting the “Marked points”switch on the “Destination” screen dis-
plays your list of registered marked
points. (Refer to pages 84 through 88
on “Registering”, “Editing” or “Delet-
ing” marked points.)
When you select the of your desired
item, the screen changes and displays
the map location of the selected des-
tination and the route preference. (See
“Entering destination” on page 39.)
Then, select the
“Enter” switch to start
the route guidance. This new destination
will not be registered as a marked point or
alter the location of the marked point.
There are 3 ways to list the marked point
by selecting switches.
Sort by “Icon”: Select this switch to list
the marked points by using the registered
icon. There are 46 icons and 4 sound
icons. (For details, see page 86.)
Sort by “Date”: Select this switch to list
the marked points in order of registered
date.
Sort by “Name”: Select this switch to list
the marked points in alphabetical order.
Destination input by
MARKED POINTS
Page 19 of 146
BASIC FUNCTIONS
33
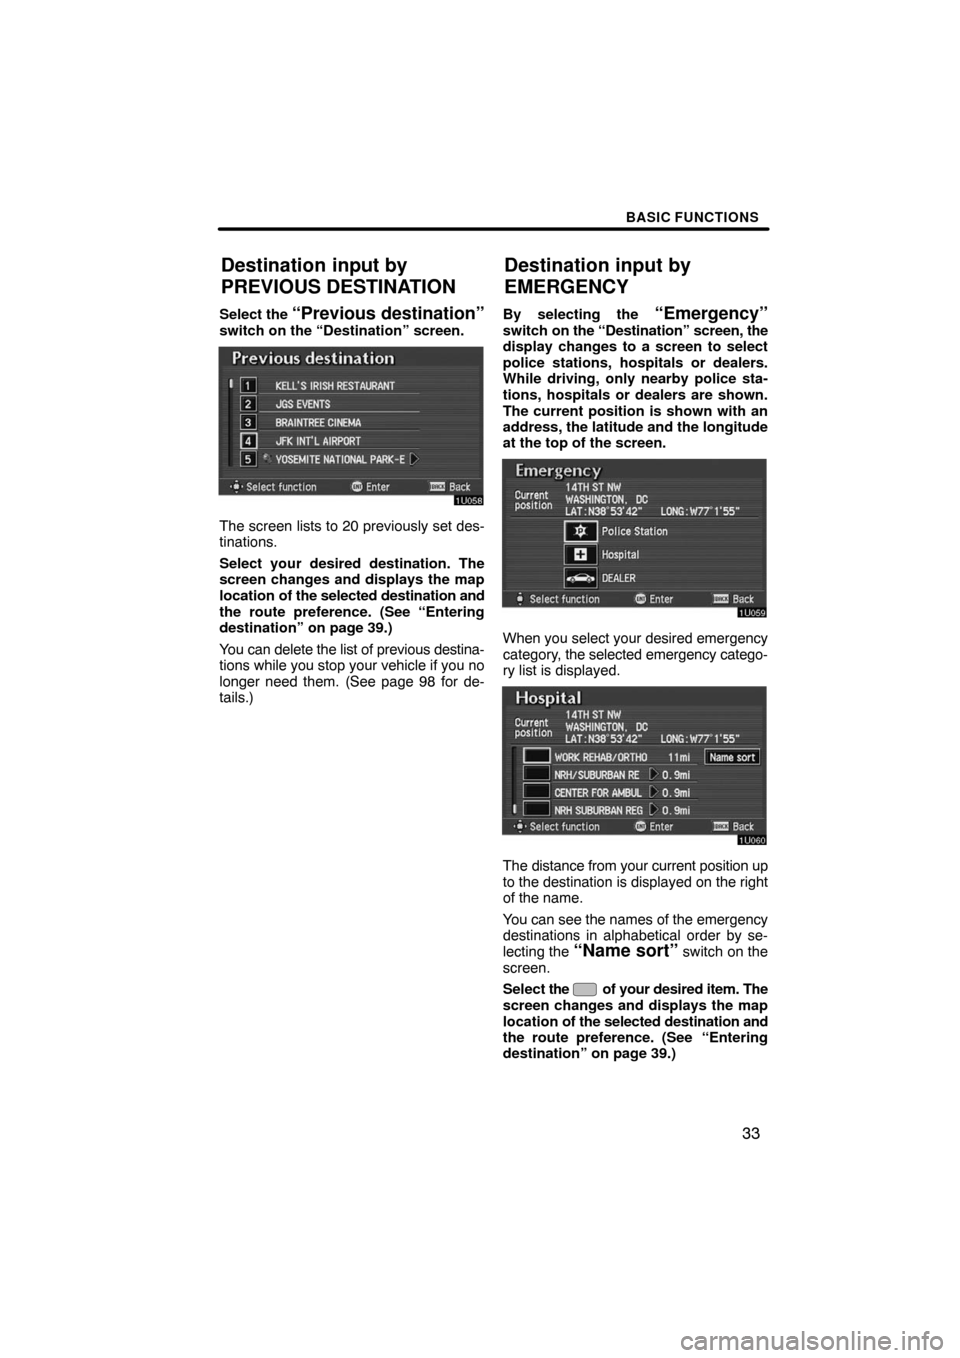
Select the “Previous destination”switch on the “Destination” screen.
The screen lists to 20 previously set des-
tinations.
Select your desired destination. The
screen changes and displays the map
location of the selected destination and
the route preference. (See “Entering
destination” on page 39.)
You can delete the list of previous destina-
tions while you stop your vehicle if you no
longer need them. (See page 98 for de-
tails.)By selecting the
“Emergency”switch on the “Destination” screen, the
display changes to a screen to select
police stations, hospitals or dealers.
While driving, only nearby police sta-
tions, hospitals or dealers are shown.
The current position is shown with an
address, the latitude and the longitude
at the top of the screen.
When you select your desired emergency
category, the selected emergency catego-
ry list is displayed.
The distance from your current position up
to the destination is displayed on the right
of the name.
You can see the names of the emergency
destinations in alphabetical order by se-
lecting the
“Name sort” switch on the
screen.
Select the
of your desired item. The
screen changes and displays the map
location of the selected destination and
the route preference. (See
“Entering
destination” on page 39.)
Destination input by
PREVIOUS DESTINATION
Destination input by
EMERGENCY
Page 20 of 146
BASIC FUNCTIONS
34
Select the “INFO” switch to display the
selected emergency destination name,
address and telephone number.
INFORMATION
In an area which has not been regis-
tered for route guidance, the naviga-
tion does not guide. (See pages 60
and 61.)
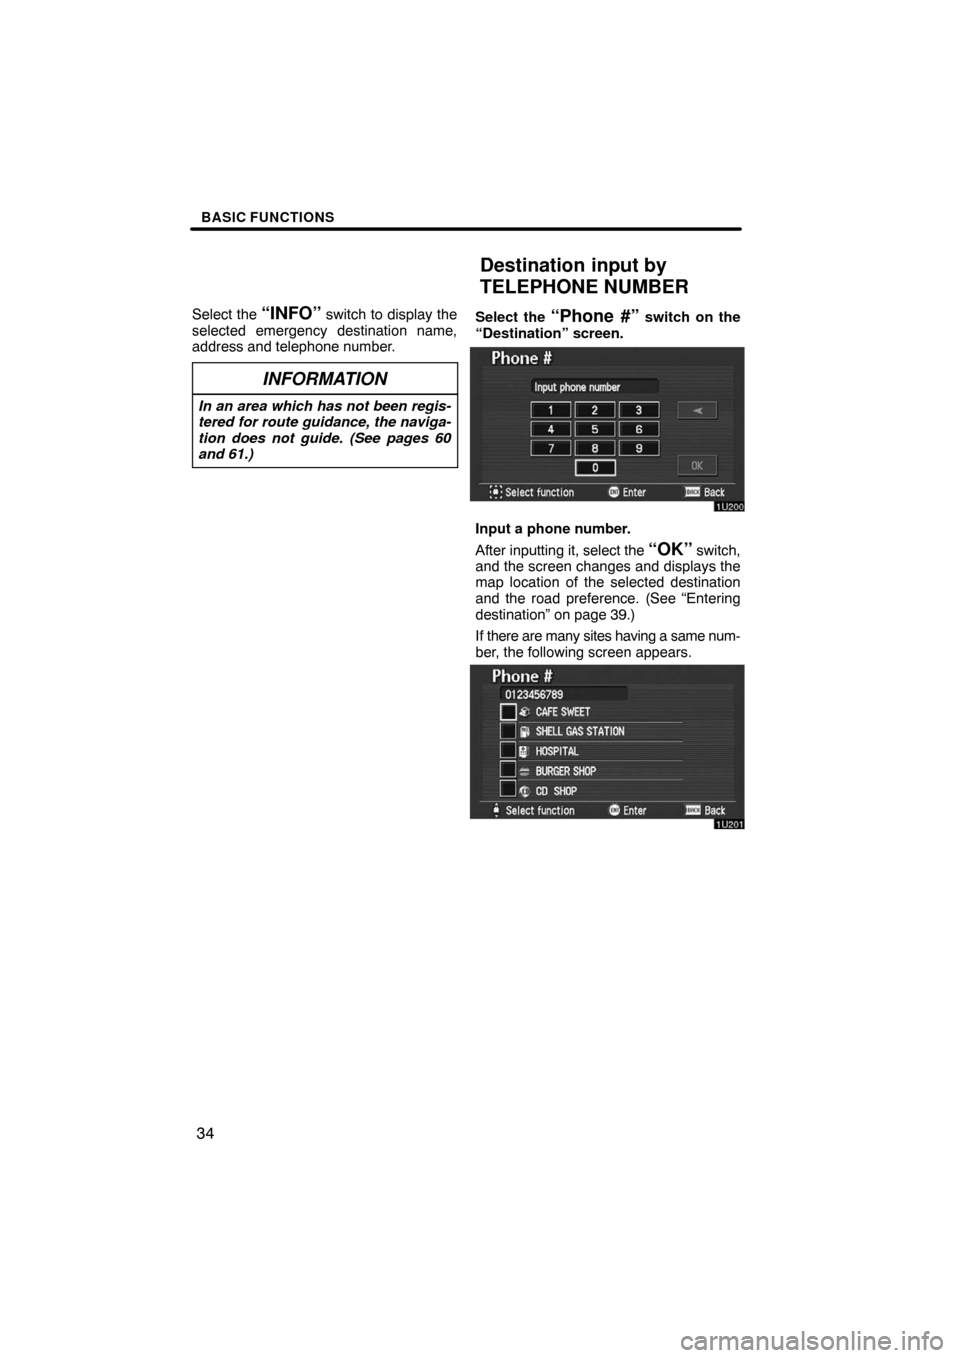
Select the “Phone #” switch on the
“Destination” screen.
Input a phone number.
After inputting it, select the
“OK” switch,
and the screen changes and displays the
map location of the selected destination
and the road preference. (See “Entering
destination” on page 39.)
If there are many sites having a same num-
ber, the following screen appears.
Destination input by
TELEPHONE NUMBER