interior TOYOTA AVALON 2008 XX30 / 3.G Owner's Manual
[x] Cancel search | Manufacturer: TOYOTA, Model Year: 2008, Model line: AVALON, Model: TOYOTA AVALON 2008 XX30 / 3.GPages: 452, PDF Size: 7.59 MB
Page 189 of 452
189
3-2. Using the audio system
3
Interior features
AVALON_U_(L/O_0802)
■
Using cellular phones
Interference may be heard through the audio system’s speakers if a cellular
phone is being used inside or close to the vehicle while the audio syste\
m is
operating.
CAUTION
■For vehicles sold in the U.S.A. and Canada
● Part 15 of the FCC Rules
FCC Warning:
Any unauthorized changes or modifications to this equipment will void the
user’s authority to operate this device.
● Laser products
• Do not take this unit apart or attempt to make any changes yourself.
This is an intricate unit that uses a laser pickup to retrieve information
from the surface of compact discs. The laser is carefully shielded so
that its rays remain inside the cabinet. Therefore, never try to disas-
semble the player or alter any of its parts since you may be exposed to
laser rays and dangerous voltages.
• This product utilizes a laser.
Use of controls or adjustments or performance of procedures other
than those specified herein may result in hazardous radiation expo-
sure.
NOTICE
■ To prevent battery discharge
Do not leave the audio system on longer than necessary with the engine o\
ff.
■ To avoid damaging the audio system
Take care not to spill drinks or other fluids over the audio system.
Page 191 of 452
191
3-2. Using the audio system
3
Interior features
AVALON_U_(L/O_0802)
Using the radio
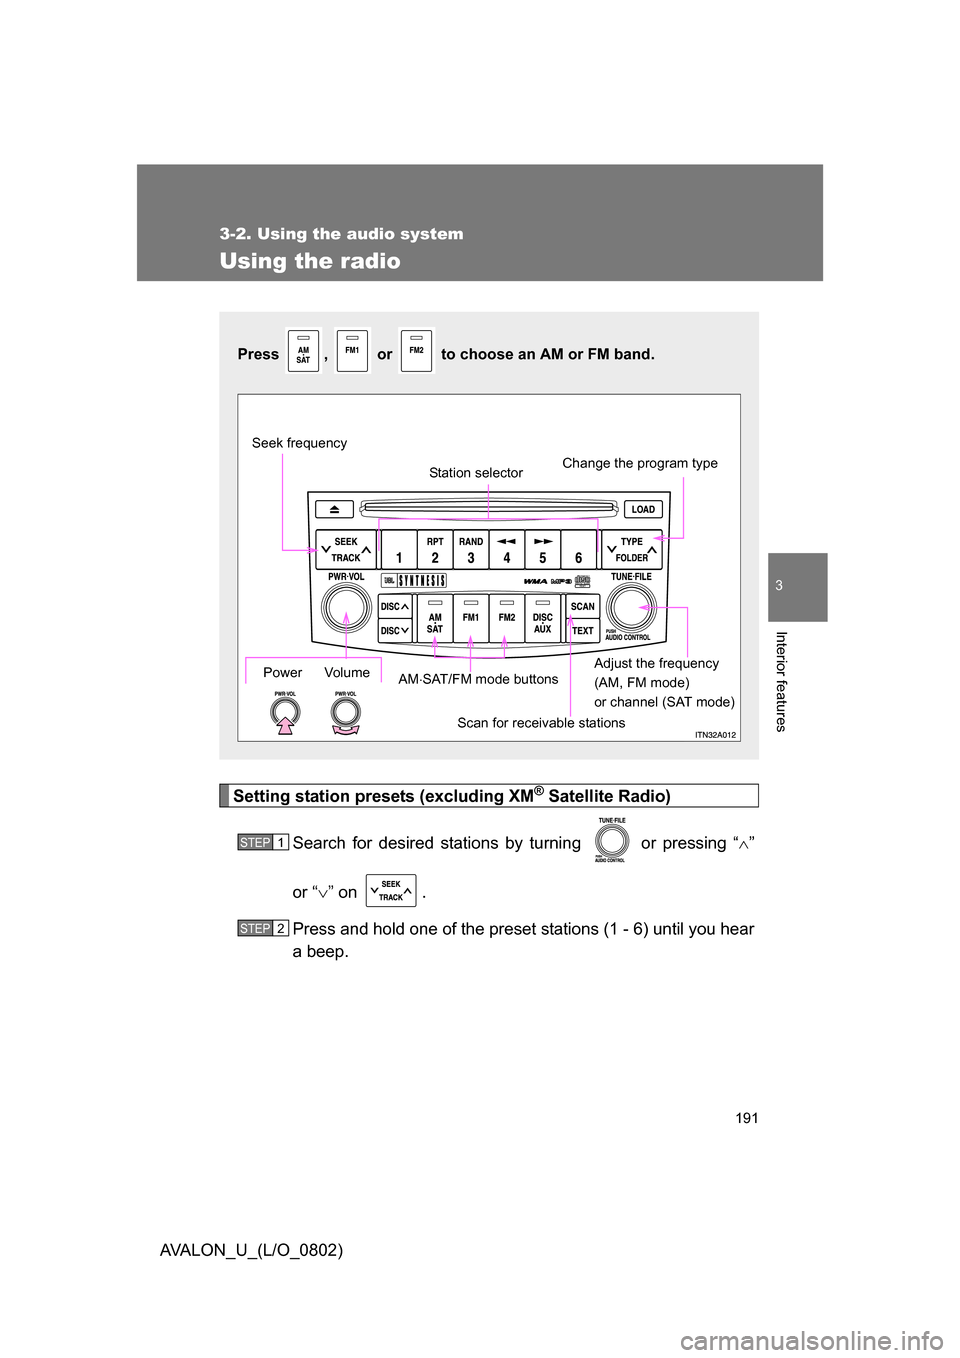
Setting station presets (excluding XM® Satellite Radio)
Search for desired stations by turning
or pressing “ ”
or “ ” on .
Press and hold one of the preset stations (1 - 6) until you hear
a beep.
Press , or to choose an AM or FM band.
Power Volume
Scan for receivable stations
Seek frequency
Station selector
Adjust the frequency
(AM, FM mode)
or channel (SAT mode)
AM
SAT/FM mode buttons Change the program type
STEP1
STEP2
Page 193 of 452
193
3-2. Using the audio system
3
Interior features
AVALON_U_(L/O_0802)
XM® Satellite Radio (if equipped)
■ Receiving XM
® Satellite Radio
Press until “SAT” shows in the display.
The display changes as follows each time the button is pressed.
“AM” “SAT1” “SAT2” “SAT3”
Turn to select a desired channel from all the categories
or press “ ” or “ ” on to select a desired channel in
the current category.
STEP1
STEP2
Page 195 of 452
195
3-2. Using the audio system
3
Interior features
AVALON_U_(L/O_0802)
■
When the battery is disconnected
All preset stations are erased.
■ Reception sensitivity
● Maintaining perfect radio reception at all times is difficult due to the con-
tinually changing position of the antenna, differences in signal strength
and surrounding objects, such as trains, transmitters, etc.
● The radio antenna is mounted inside the rear window. To maintain clear
radio reception, do not attach metallic window tinting or other metallic
objects to the antenna wire mounted inside the rear window.
■ Receiving XM
® Satellite Radio
An XM
® Satellite Radio is a tuner designed exclusively to receive broadcasts
provided under a separate subscription. Availability is limited to the 48 con-
tiguous states and 10 Canadian provinces.
● XM
® subscriptions
For detailed information about XM® Satellite Radio or to subscribe:
U.S.A–
Visit on the web at www.xmradio.com
or call 1-800-967-2346.
Canada–
Visit on the web at www.xmradio.ca
or call 1-877-438-9677.
● Radio ID
You will need the radio ID when activating XM
® service or reporting a
problem. Select “CH000” using , and the receiver’s 8-character ID
number will appear.
● Satellite tuner
The tuner supports only Audio Services (Music and Talk) and the accom-
panying Text Information of XM
® Satellite Radio.
Page 197 of 452
197
3-2. Using the audio system
3
Interior features
AVALON_U_(L/O_0802)
Contact the XM® Listener Care Center at 1-800-967-2346 (U.S.A.) or 1-877-
438-9677 (Canada).
■ Certifications for the radio tuner
This equipment has been tested and found to comply with the limits for a
class B digital device, pursuant to Part 15 of the FCC Rules. These limits are
designed to provide reasonable protection against harmful interference in a
residential installation. This equipment generates, uses and can radiate
radio frequency energy and, if not installed and used in accordance with the
instructions, may cause harmful interference to radio communications. How-
ever, there is no guarantee that interference will not occur in a particular
installation.
If this equipment does cause harmful interference to radio or television
reception, which can be determined by turning the equipment off and on, the
user is encouraged to try to correct the interference by trying one or more of
the following:
● Reorienting or relocating the receiving antenna.
● Increasing the separation between the equipment and receiver.
● Connecting the equipment into an outlet on a circuit different from that to
which the receiver is connected.
● Consulting the dealer or an experienc ed radio/TV technician for help.
---
The channel you selected is no longer available.
Wait for about 2 seconds until the radio returns to
the previous channel or “CH001”. If it does not
change automatically, select another channel.
Page 199 of 452
199
3-2. Using the audio system
3
Interior features
AVALON_U_(L/O_0802)
Loading a CD
■ Loading a CD
Press .
Insert a CD when the indicator on the slot turns from amber to
green.
■ Loading multiple CDs
Press and hold until you hear a beep.
Insert a CD when the indicator on the slot turns from amber to
green.
Insert the next CD when the indicator on the slot turns from
amber to green.
Repeat steps 2 and 3 until you have inserted all CDs.
To cancel the operation, press . If you do not insert a CD
within 15 seconds, loading will be canceled automatically.
Ejecting CDs
■ Ejecting a CD
To select the CD to be ejected, press “ ” or “ ” on .
Press and remove the CD.
■ Ejecting all CDs
Press and hold until you hear a beep, then remove the CDs.
STEP1
STEP2
STEP1
STEP2
STEP3
STEP1
STEP2
Page 201 of 452
201
3-2. Using the audio system
3
Interior features
AVALON_U_(L/O_0802)
Random playback
■ Current CD
Press .
Tracks are played in random order until the button is pressed again.
■All CDs
Press and hold until you hear a beep.
Tracks on all loaded CDs are played in random order until the button is
pressed again.
Repeat play
■ To repeat a track
Press .
■ To repeat all of the tracks on a CD
Press and hold until you hear a beep.
Switching the display
Press .
Each time the button is pressed, the display changes in the order of
“Track no./Elapsed time” “CD title” “Track name”.
Page 203 of 452
203
3-2. Using the audio system
3
Interior features
AVALON_U_(L/O_0802)
■
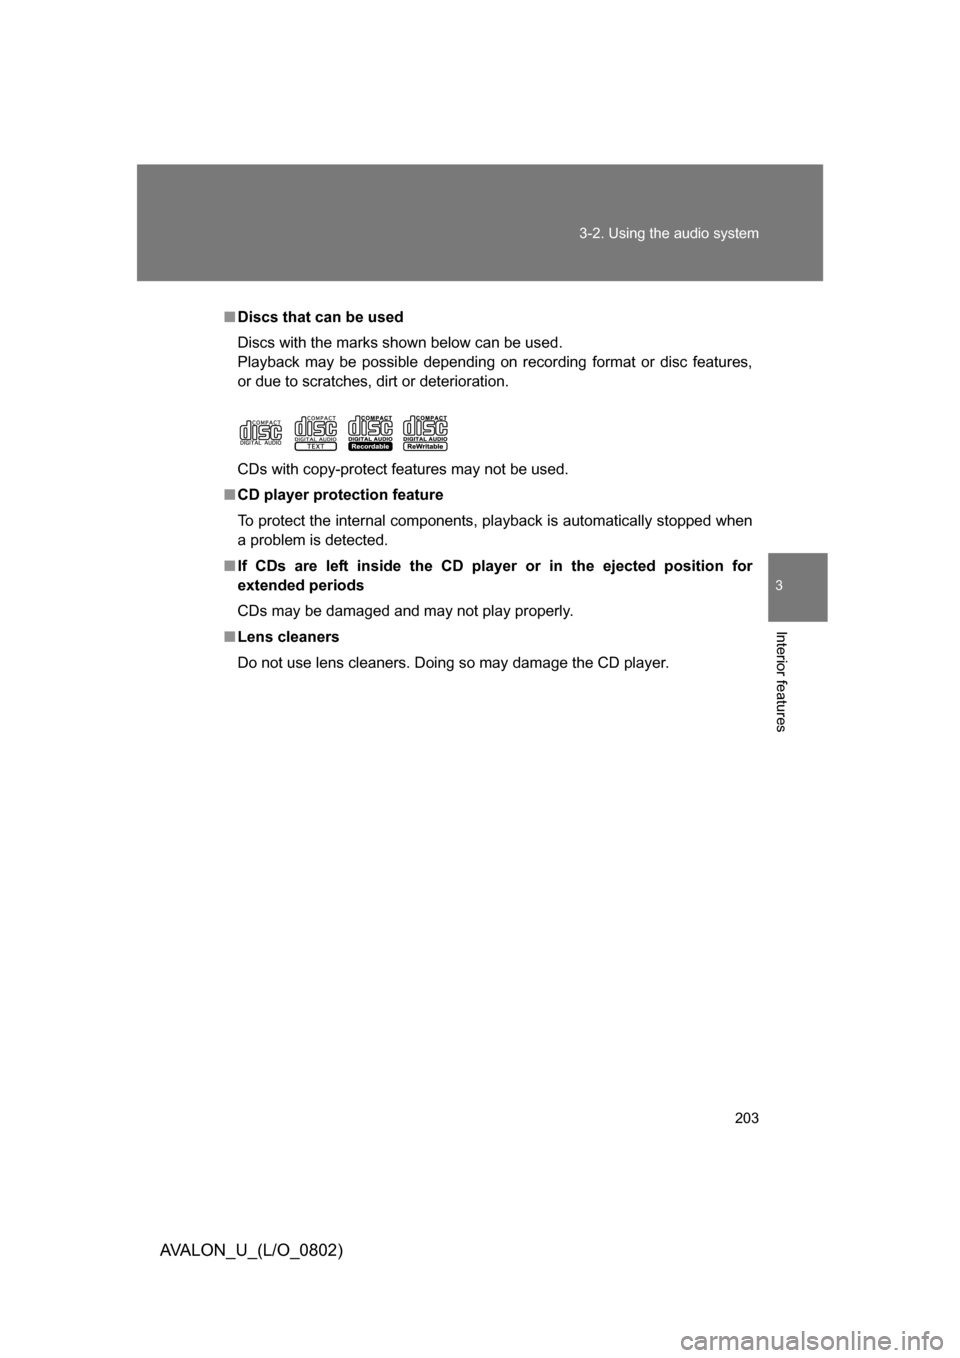
Discs that can be used
Discs with the marks shown below can be used.
Playback may be possible depending on recording format or disc features,
or due to scratches, dirt or deterioration.
CDs with copy-protect features may not be used.
■ CD player protection feature
To protect the internal components, playback is automatically stopped when
a problem is detected.
■ If CDs are left inside the CD pla yer or in the ejected position for
extended periods
CDs may be damaged and may not play properly.
■ Lens cleaners
Do not use lens cleaners. Doing so may damage the CD player.
Page 205 of 452
205
3-2. Using the audio system
3
Interior features
AVALON_U_(L/O_0802)
NOTICE
■
Player precautions
Failure to follow the precautions below may result in damage to the discs or
the player itself.
● Do not insert anything other than discs into the disc slot.
● Do not apply oil to the player.
● Store discs away from direct sunlight.
● Never try to disassemble any part of the player.
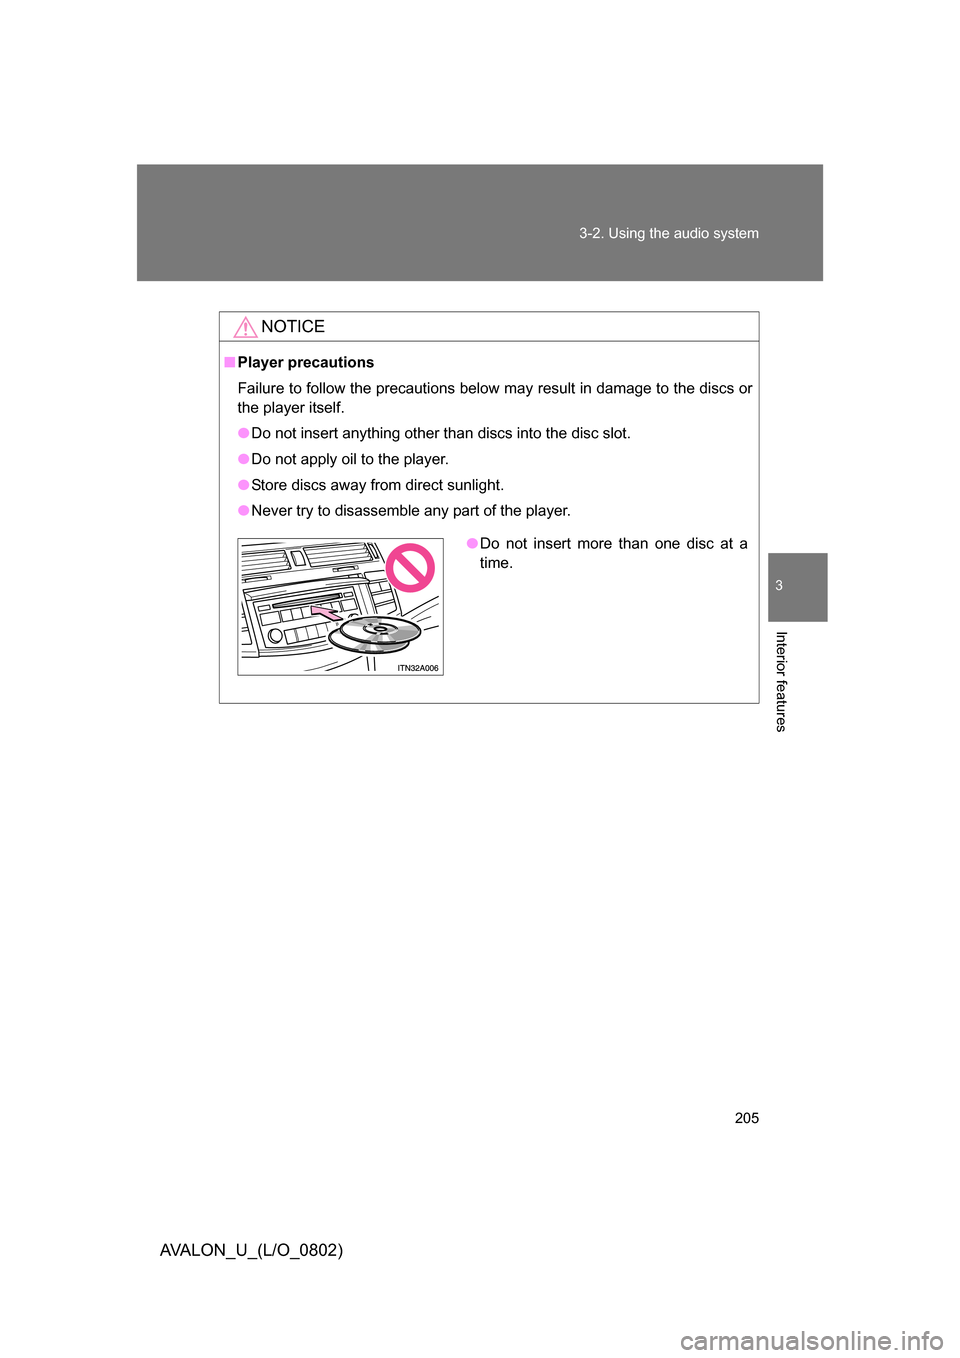
●Do not insert more than one disc at a
time.
Page 207 of 452
207
3-2. Using the audio system
3
Interior features
AVALON_U_(L/O_0802)
Loading, ejecting and sele
cting MP3 and WMA discs
Refer to the section titled “Using the CD player” for details. ( P. 198)
Selecting a folder
■ Selecting a folder
Press “ ” or “ ” on .
■ Selecting the desired folder by cueing the first file of each
folder
Press and hold until you hear a beep. When the desired
folder is reached, press the button again.
Returning to the first folder
Press and hold “ ” on until you hear a beep.
Selecting and scanning files
■ Selecting one file at a time
Turn or press “ ” or “ ” on to select the desired file.
■ Selecting a desired file by cueing the files in the folder
Press .
When the desired file is reached, press the button again.
Fast-forwarding and reversing files
To fast-reverse, press and hold .
To fast-forward, press and hold .