TOYOTA AVALON HYBRID 2016 XX40 / 4.G Owners Manual
Manufacturer: TOYOTA, Model Year: 2016, Model line: AVALON HYBRID, Model: TOYOTA AVALON HYBRID 2016 XX40 / 4.GPages: 492, PDF Size: 7.16 MB
Page 181 of 492
1814-2. Driving procedures
4
Driving
AVALON_HV_U (01999-07002)
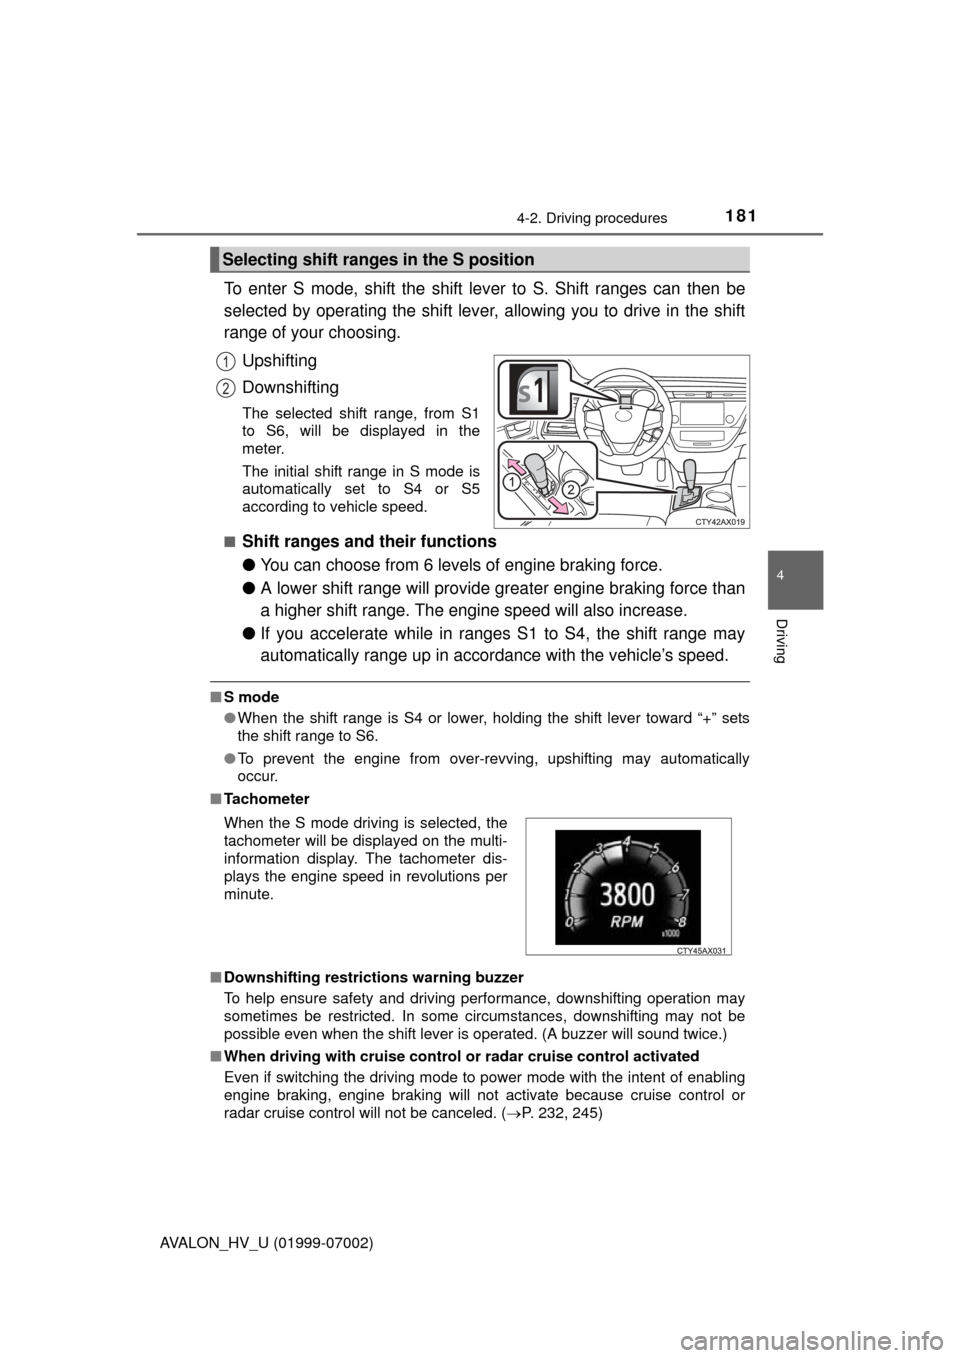
To enter S mode, shift the shift lever to S. Shift ranges can then be
selected by operating the shift lever, allowing you to drive in the shift
range of your choosing.Upshifting
Downshifting
The selected shift range, from S1
to S6, will be displayed in the
meter.
The initial shift range in S mode is
automatically set to S4 or S5
according to vehicle speed.
■
Shift ranges and their functions
● You can choose from 6 levels of engine braking force.
● A lower shift range will provide gr eater engine braking force than
a higher shift range. The eng ine speed will also increase.
● If you accelerate while in ranges S1 to S4, the shift range may
automatically range up in accordance with the vehicle’s speed.
■S mode
●When the shift range is S4 or lower, holding the shift lever toward “+” sets
the shift range to S6.
● To prevent the engine from over-revving, upshifting may automatically
occur.
■ Tachometer
■ Downshifting restrictions warning buzzer
To help ensure safety and driving performance, downshifting operation may
sometimes be restricted. In some circumstances, downshifting may not be
possible even when the shift lever is operated. (A buzzer will sound twice.)
■ When driving with cruise control or radar cruise control activated
Even if switching the driving mode to power mode with the intent of enabling
engine braking, engine braking will not activate because cruise control or
radar cruise control will not be canceled. ( P. 232, 245)
Selecting shift ranges in the S position
1
2
When the S mode driving is selected, the
tachometer will be displayed on the multi-
information display. The tachometer dis-
plays the engine speed in revolutions per
minute.
Page 182 of 492

1824-2. Driving procedures
AVALON_HV_U (01999-07002)■
If the S indicator does not come on or the D indicator is displayed even
after shifting the shift lever to S
This may indicate a malfunction in the automatic transmission system. Have
the vehicle inspected by your Toyota dealer immediately.
(In this situation, the transmission will operate in the same manner as when
the shift lever is in D.)
■ If the shift lever cannot be shifted from P
P. 420
■ AI-SHIFT
AI-SHIFT automatically selects the suitable gear according to driver perfor-
mance and driving conditions.
AI-SHIFT automatically operates when the shift lever is in the D position.
(Shifting the shift lever to the S position cancels the function.)
WARNING
■When driving on slippery road surfaces
Do not accelerate or shift gears suddenly.
Sudden changes in engine braking may cause the vehicle to spin or skid,
resulting in an accident.
NOTICE
■Hybrid battery (traction battery) charge precaution
If the shift lever is in N, the hybrid battery (traction battery) will not be
charged even when the engine is running. Therefore, if the vehicle is left
with the shift lever in N for a long period of time, the hybrid battery (traction
battery) will discharge, and this may result in the vehicle not being able to
start.
Page 183 of 492
1834-2. Driving procedures
4
Driving
AVALON_HV_U (01999-07002)
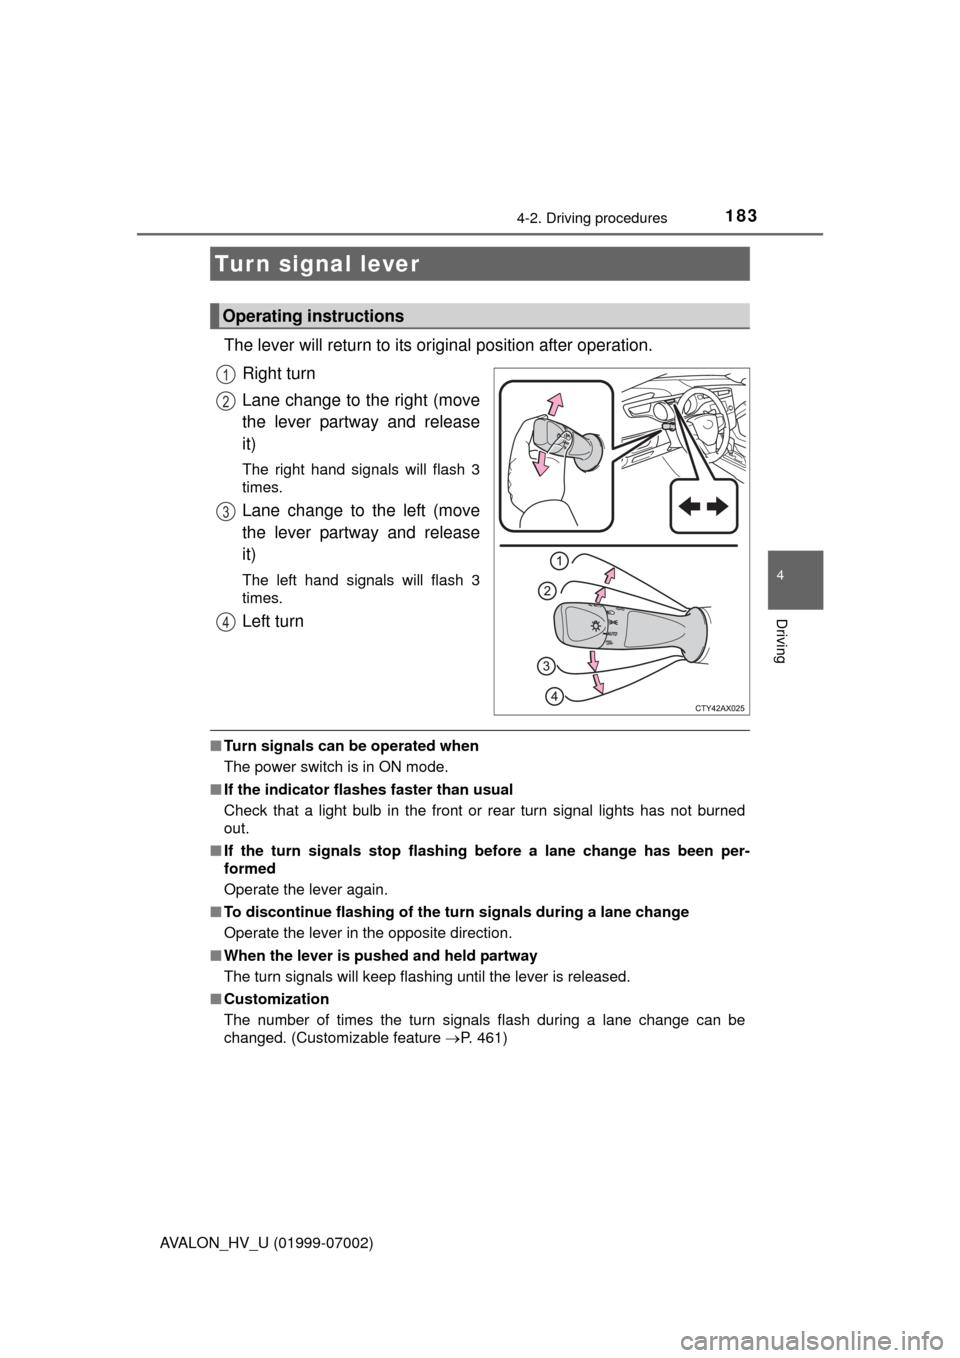
The lever will return to its original position after operation.
Right turn
Lane change to the right (move
the lever partway and release
it)
The right hand signals will flash 3
times.
Lane change to the left (move
the lever partway and release
it)
The left hand signals will flash 3
times.
Left turn
■ Turn signals can be operated when
The power switch is in ON mode.
■ If the indicator flashes faster than usual
Check that a light bulb in the front or rear turn signal lights has not burned
out.
■ If the turn signals stop flashing before a lane change has been per-
formed
Operate the lever again.
■ To discontinue flashing of the turn signals during a lane change
Operate the lever in the opposite direction.
■ When the lever is pushed and held partway
The turn signals will keep flashing until the lever is released.
■ Customization
The number of times the turn signals flash during a lane change can be
changed. (Customizable feature P. 461)
Turn signal lever
Operating instructions
1
2
3
4
Page 184 of 492
1844-2. Driving procedures
AVALON_HV_U (01999-07002)
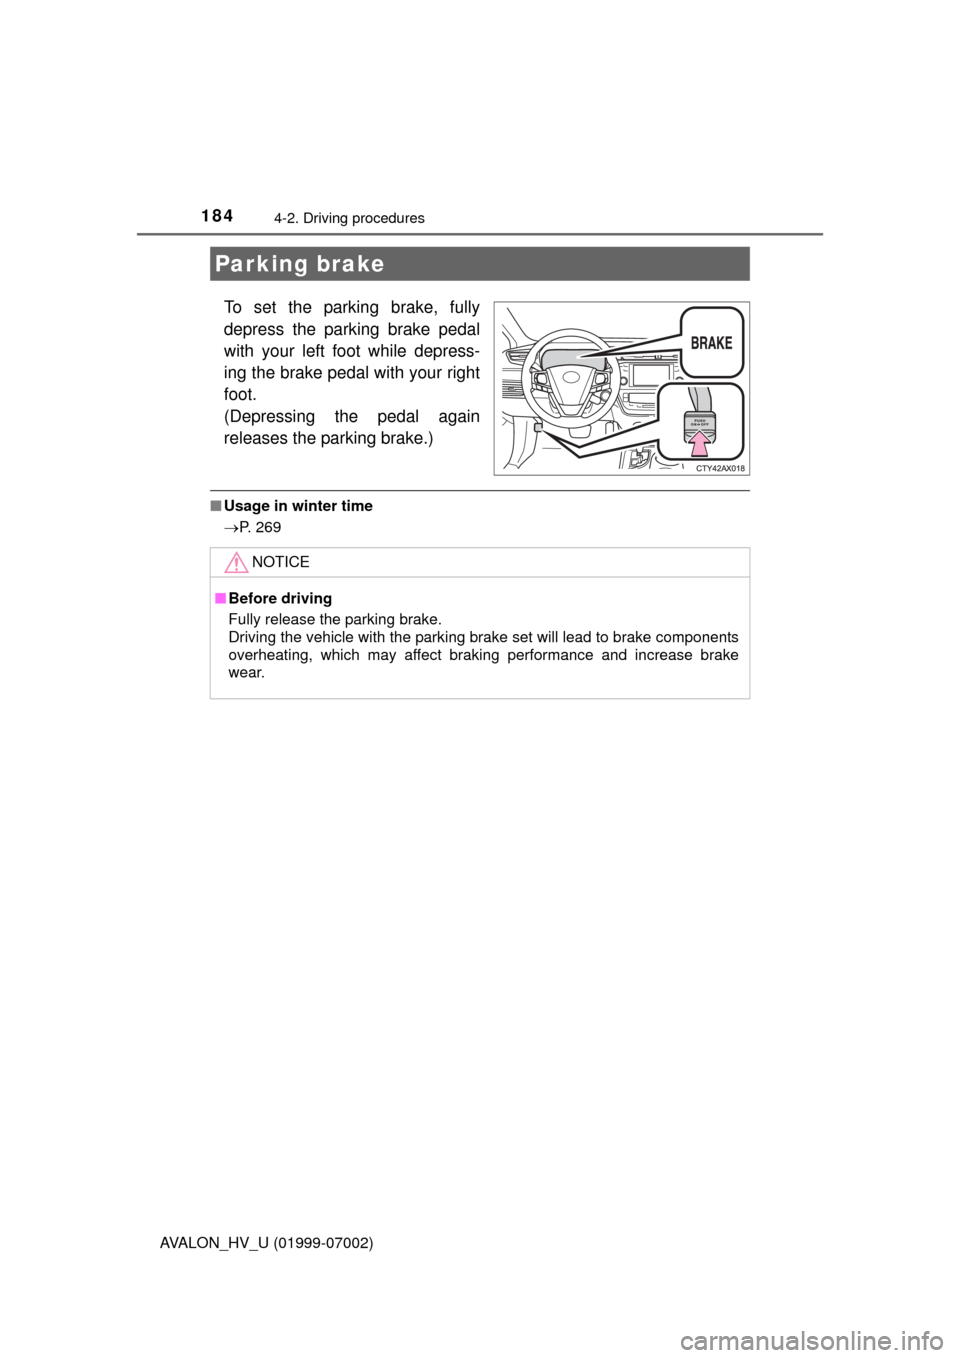
To set the parking brake, fully
depress the parking brake pedal
with your left foot while depress-
ing the brake pedal with your right
foot.
(Depressing the pedal again
releases the parking brake.)
■Usage in winter time
P. 269
Parking brake
NOTICE
■Before driving
Fully release the parking brake.
Driving the vehicle with the parking brake set will lead to brake components
overheating, which may affect braking performance and increase brake
wear.
Page 185 of 492
185
4
Driving
AVALON_HV_U (01999-07002)
4-3. Operating the lights and wipers
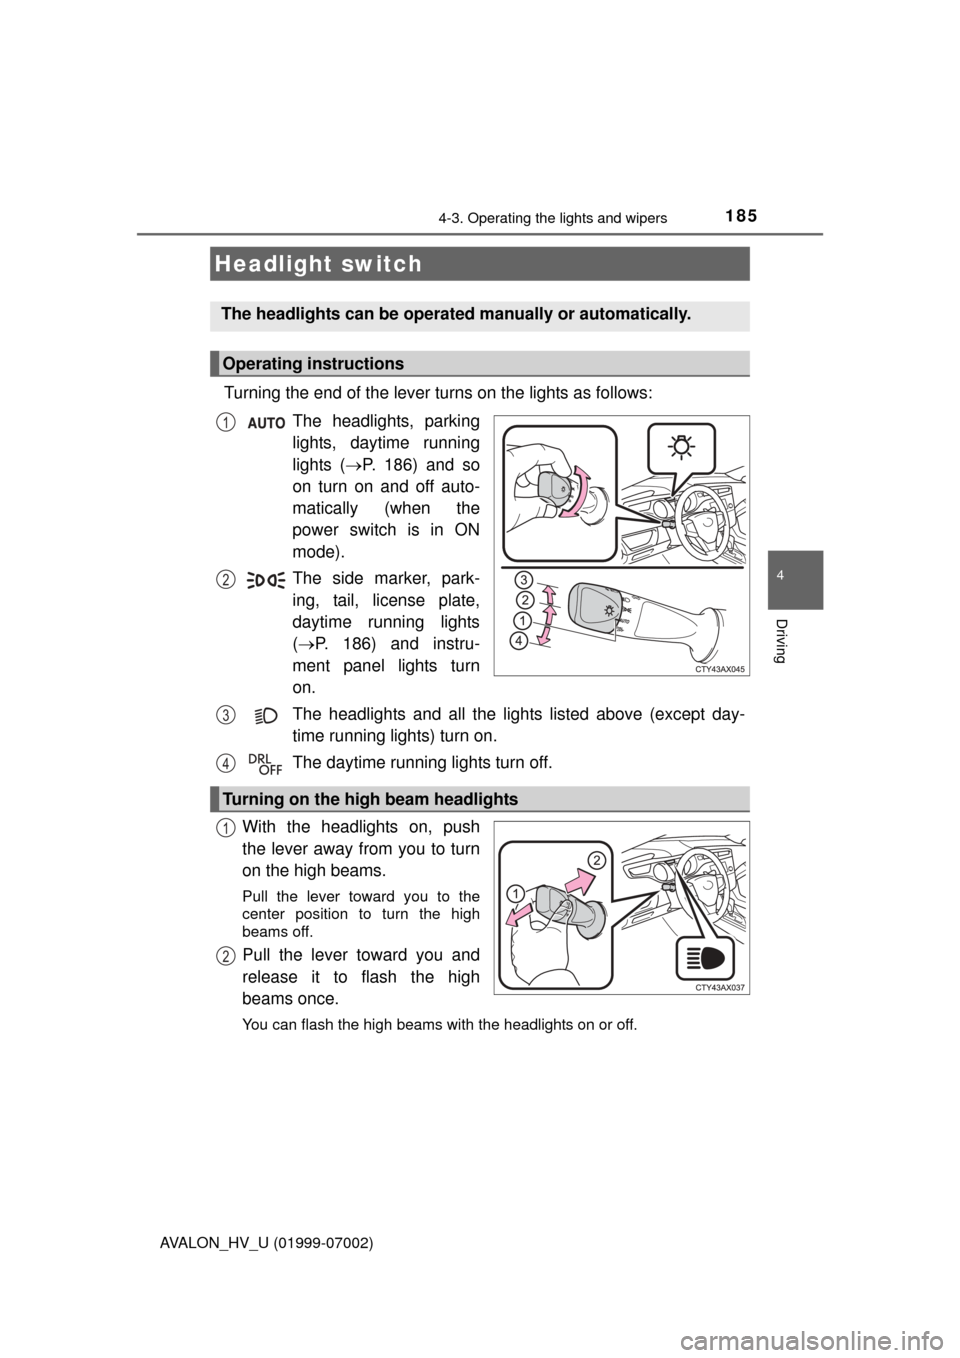
Turning the end of the lever turns on the lights as follows:The headlights, parking
lights, daytime running
lights (P. 186) and so
on turn on and off auto-
matically (when the
power switch is in ON
mode).
The side marker, park-
ing, tail, license plate,
daytime running lights
( P. 186) and instru-
ment panel lights turn
on.
The headlights and all the lights listed above (except day-
time running lights) turn on.
The daytime running lights turn off.
With the headlights on, push
the lever away from you to turn
on the high beams.
Pull the lever toward you to the
center position to turn the high
beams off.
Pull the lever toward you and
release it to flash the high
beams once.
You can flash the high beams with the headlights on or off.
Headlight switch
The headlights can be operated manually or automatically.
Operating instructions
1
2
Turning on the high beam headlights
3
4
1
2
Page 186 of 492
1864-3. Operating the lights and wipers
AVALON_HV_U (01999-07002)
■Daytime running light system ( vehicles with halogen headlights)
● To make your vehicle more visible to other drivers during daytime driving,
the daytime running lights turn on automatically whenever the hybrid system
is started and the parking brake is released with the headlight switch off or in
the “AUTO” position. (Illuminate dimmer than the headlight high beam.)
Daytime running lights are not designed for use at night.
Daytime running lights can be turned off by operating the switch.
● Compared to turning on the headlights, the daytime running light system
offers greater durability and consumes less electricity, so it can help improve
fuel economy.
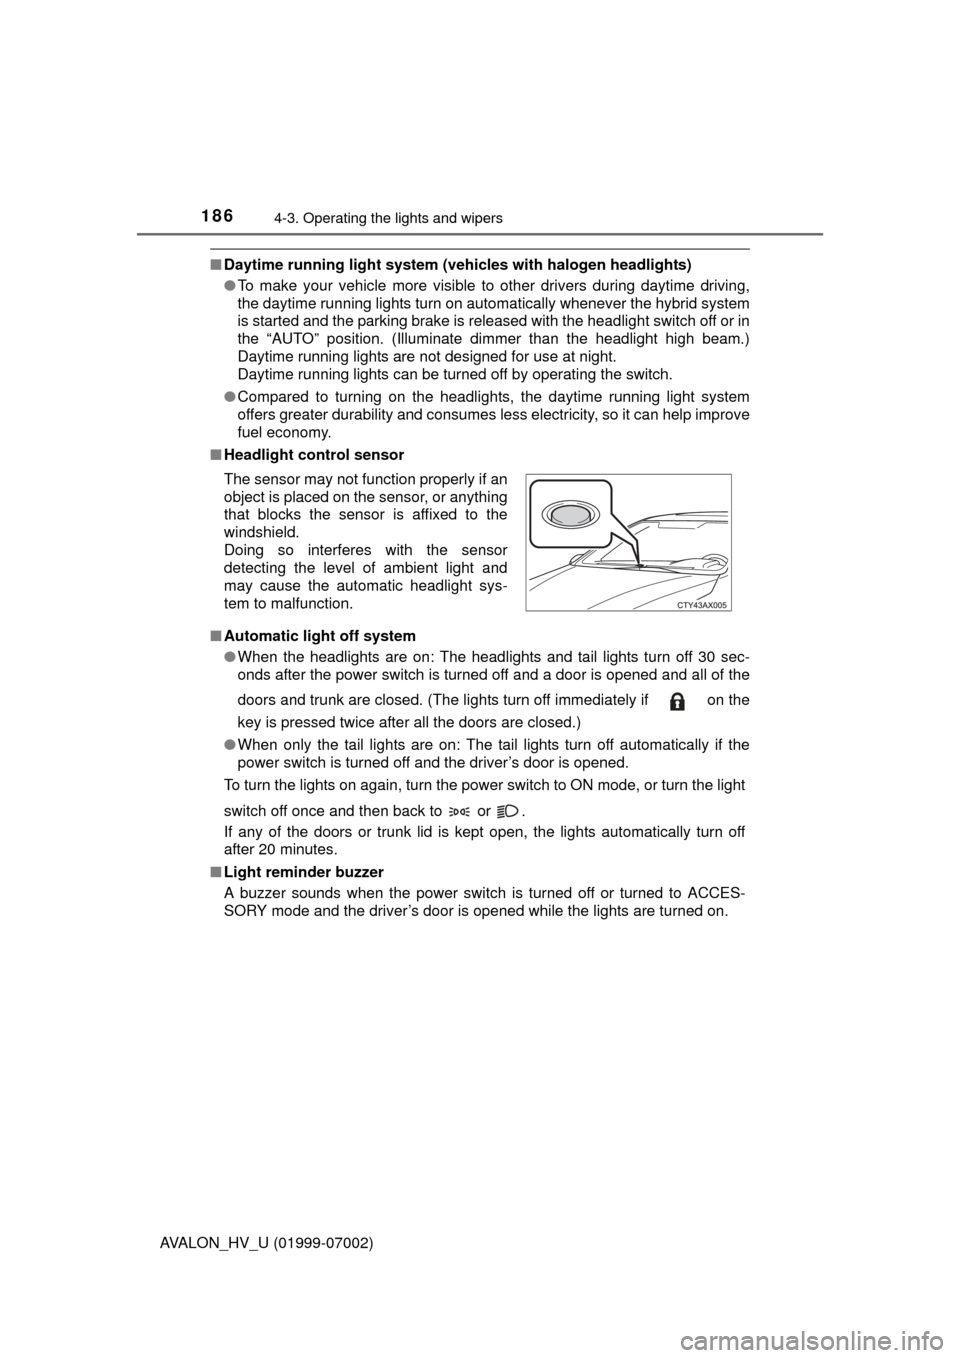
■ Headlight control sensor
■ Automatic light off system
●When the headlights are on: The headlights and tail lights turn off 30 sec-
onds after the power switch is turned off and a door is opened and all of the
doors and trunk are closed. (The lights turn off immediately if on the
key is pressed twice after all the doors are closed.)
● When only the tail lights are on: The tail lights turn off automatically if the
power switch is turned off and the driver’s door is opened.
To turn the lights on again, turn the power switch to ON mode, or turn the light
switch off once and then back to or .
If any of the doors or trunk lid is kept open, the lights automatically turn off
after 20 minutes.
■ Light reminder buzzer
A buzzer sounds when the power switch is turned off or turned to ACCES-
SORY mode and the driver’s door is opened while the lights are turned on. The sensor may not function properly if an
object is placed on the sensor, or anything
that blocks the sensor is affixed to the
windshield.
Doing so interferes with the sensor
detecting the level of ambient light and
may cause the automatic headlight sys-
tem to malfunction.
Page 187 of 492

1874-3. Operating the lights and wipers
4
Driving
AVALON_HV_U (01999-07002)■
Automatic headlight leveling system (if equipped)
The level of the headlights is automatically adjusted according to the number
of passengers and the loading condition of the vehicle to ensure that the
headlights do not interfere with other road users.
■ Customization
Settings (e.g. light sensor sensitivity) can be changed.
(Customizable features: P. 461)
NOTICE
■To prevent 12-volt battery discharge
Do not leave the lights on longer than necessary when the hybrid system is
off.
Page 188 of 492
1884-3. Operating the lights and wipers
AVALON_HV_U (01999-07002)
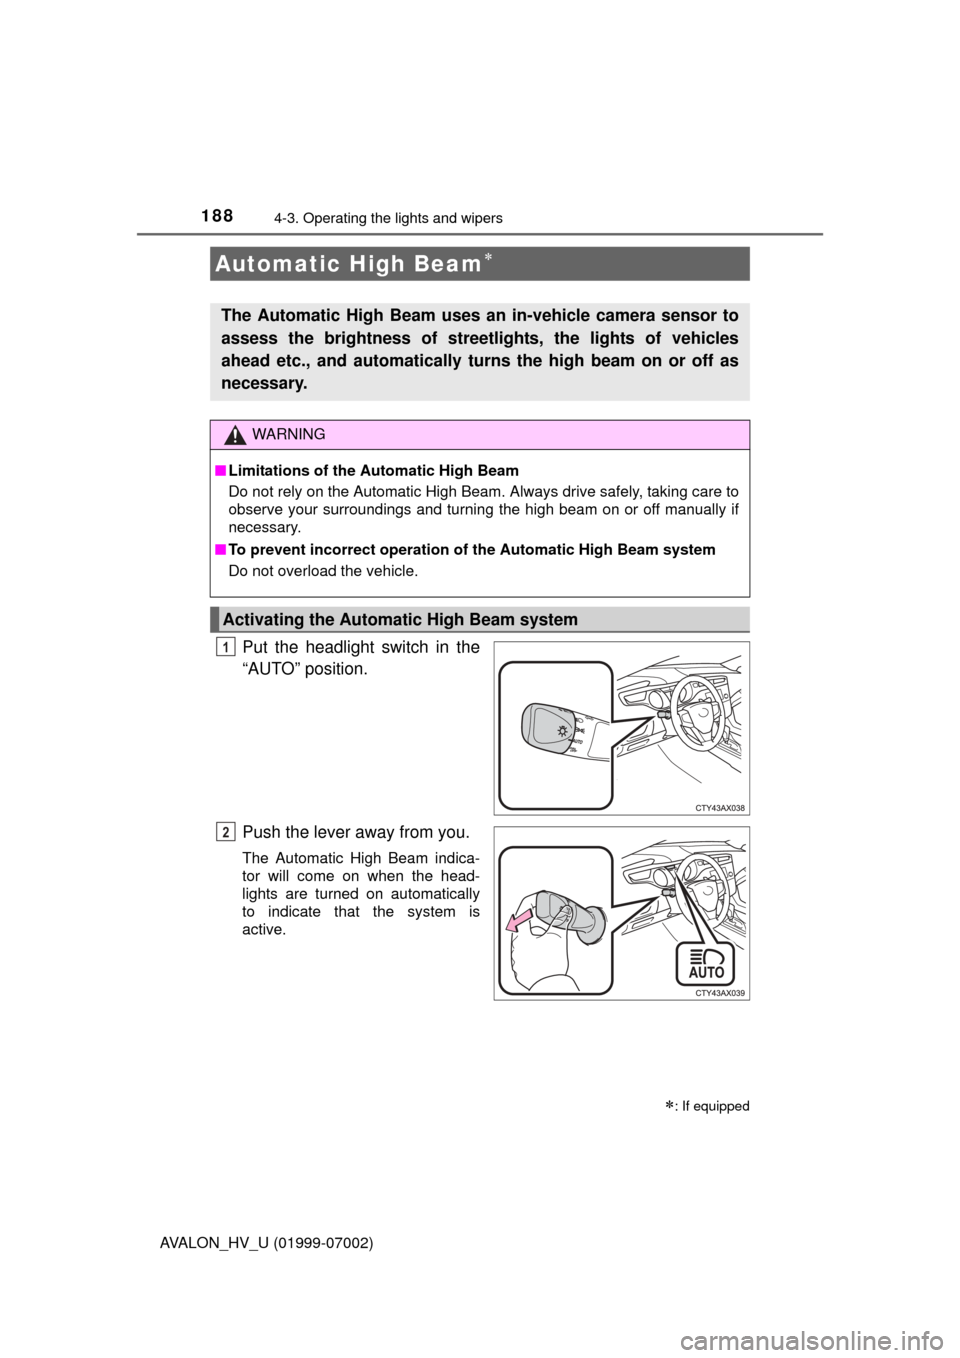
Put the headlight switch in the
“AUTO” position.
Push the lever away from you.
The Automatic High Beam indica-
tor will come on when the head-
lights are turned on automatically
to indicate that the system is
active.
Automatic High Beam
: If equipped
The Automatic High Beam uses an in-vehicle camera sensor to
assess the brightness of streetlights, the lights of vehicles
ahead etc., and automatically turns the high beam on or off as
necessary.
WARNING
■Limitations of the Automatic High Beam
Do not rely on the Automatic High Beam. Always drive safely, taking care to
observe your surroundings and turning the high beam on or off manually if
necessary.
■ To prevent incorrect operation of the Automatic High Beam system
Do not overload the vehicle.
Activating the Automatic High Beam system
1
2
Page 189 of 492
1894-3. Operating the lights and wipers
4
Driving
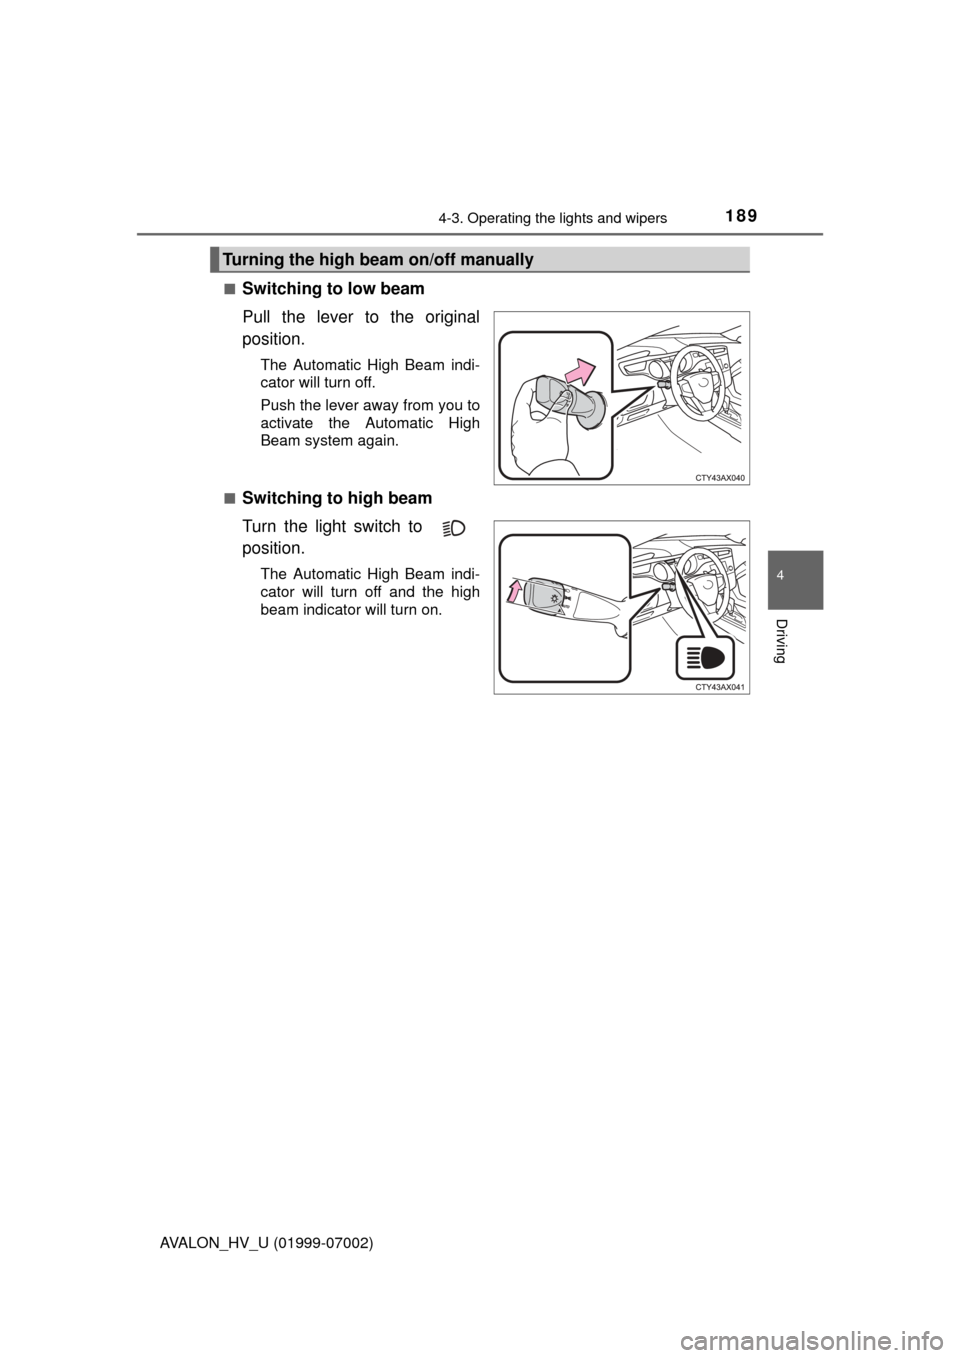
AVALON_HV_U (01999-07002)■
Switching to low beam
Pull the lever to the original
position.
The Automatic High Beam indi-
cator will turn off.
Push the lever away from you to
activate the Automatic High
Beam system again.
■
Switching to high beam
Turn the light switch to
position.
The Automatic High Beam indi-
cator will turn off and the high
beam indicator will turn on.
Turning the high beam on/off manually
Page 190 of 492

1904-3. Operating the lights and wipers
AVALON_HV_U (01999-07002)
■High beam automatic turning on or off conditions
●When all of the following conditions are fulfilled, the high beam will be auto-
matically turned on (after approximately 1 second):
• Vehicle speed is above approximately 25 mph (40 km/h).
• The area ahead of the vehicle is dark.
• There are no vehicles ahead with headlights or tail lights turned on.
• There are few streetlights on the road ahead.
● If any of the following conditions are fulfilled, the high beam will be automat-
ically turned off:
• Vehicle speed drops below approximately 19 mph (30 km/h).
• The area ahead of the vehicle is not dark.
• Vehicles ahead have headlights or tail lights turned on.
• There are many streetlights on the road ahead.
■ Camera sensor detection information
●The high beam may not be automatically turned off in the following situa-
tions:
• When oncoming vehicles suddenly appear from a curve
• When the vehicle is cut in front of by another vehicle
• When vehicles ahead are hidden from sight due to repeated curves, road
dividers or roadside trees
• When vehicles ahead appear from the faraway lane on wide road
• When vehicles ahead have no lights
● The high beam may be turned off if a vehicle ahead that is using fog lights
without using the headlights is detected.
● House lights, street lights, traffic signals, and illuminated billboards or signs
may cause the high beam to switch to the low beams, or the low beams to
remain on.
● The following factors may affect the amount of time taken to turn the high
beam on or off:
• The brightness of headlights, fog lights, and tail lights of vehicles ahead
• The movement and direction of vehicles ahead
• When a vehicle ahead only has operational lights on one side
• When a vehicle ahead is a two-wheeled vehicle
• The condition of the road (gradient, curve, condition of the road surface
etc.)
• The number of passengers and amount of luggage
● The high beam may be turned on or off when the driver does not expect it.
● Bicycles or similar objects may not be detected.