brake light TOYOTA AVENSIS 2011 User Guide
[x] Cancel search | Manufacturer: TOYOTA, Model Year: 2011, Model line: AVENSIS, Model: TOYOTA AVENSIS 2011Pages: 772, PDF Size: 34.43 MB
Page 211 of 772
211 2-1. Driving procedures
2
When driving
AVENSIS_EE (OM20B44E)
Manual transmission
Check that the parking brake is set.
Check that the shift lever is set in “N”.
Sit in the driver’s seat and firmly depress the clutch pedal.
The “ENGINE START STOP” switch indicator turns green.
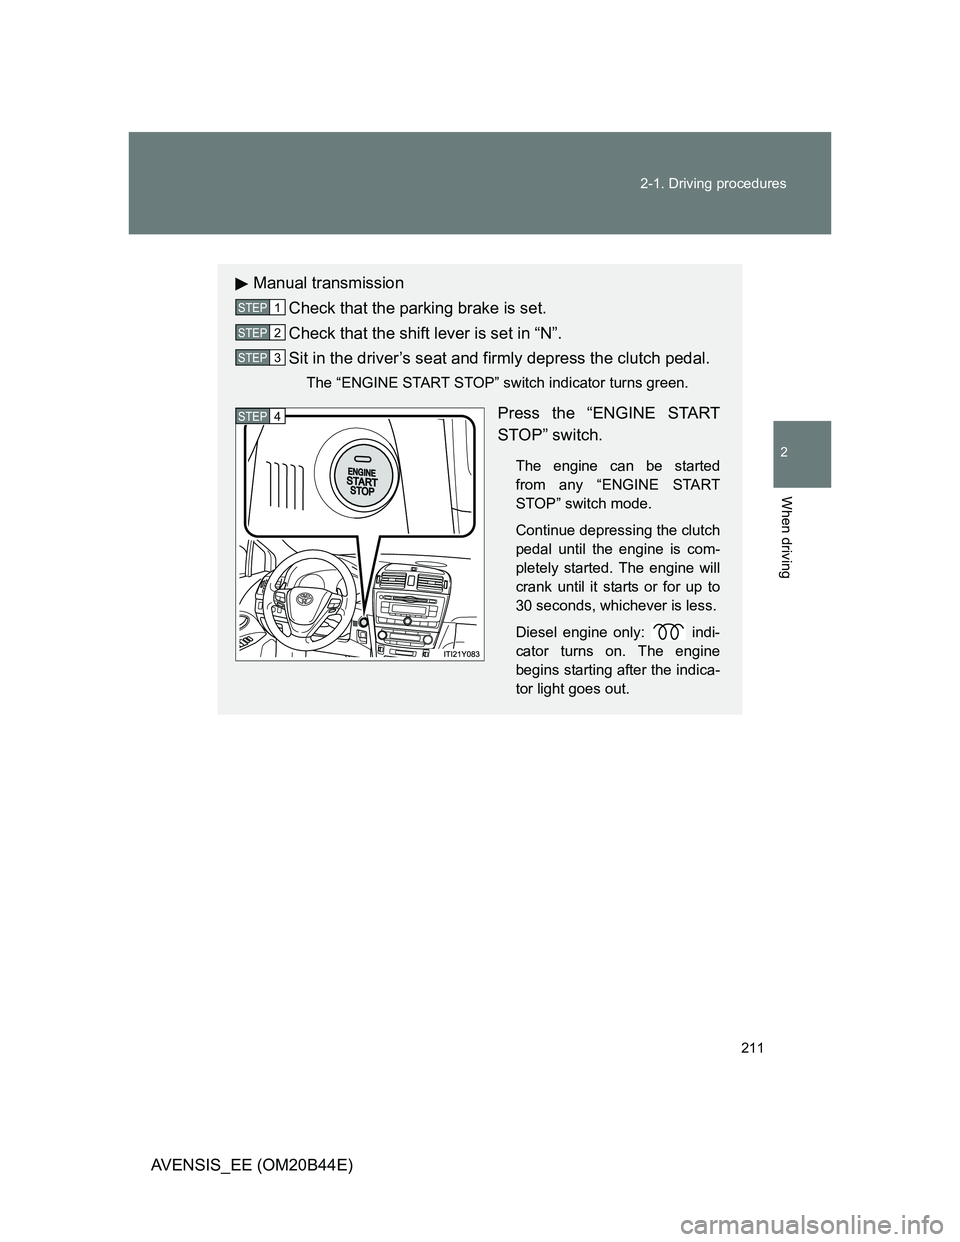
Press the “ENGINE START
STOP” switch.
The engine can be started
from any “ENGINE START
STOP” switch mode.
Continue depressing the clutch
pedal until the engine is com-
pletely started. The engine will
crank until it starts or for up to
30 seconds, whichever is less.
Diesel engine only: indi-
cator turns on. The engine
begins starting after the indica-
tor light goes out.
STEP1
STEP2
STEP3
STEP4
Page 215 of 772
215
2-1. Driving procedures
2
When driving
AVENSIS_EE (OM20B44E)
Engine (ignition) switch (vehicles without smart entr y & start system)
Starting the engine
Multidrive
Check that the parking brake is set.
Check that the shift lever is set in “P”.
Sit in the driver’s seat and firmly depress the brake pedal.
Turn the engine switch to the “START” position and start
the engine.
Automatic transmission (diesel engine)
Check that the parking brake is set.
Check that the shift lever is set in “P”.
Sit in the driver’s seat and firmly depress the brake pedal.
Turn the engine switch to the “ON” position.
indicator light turns on.
After indicator light goes out, turn the engine switch
to the “START” position and start the engine.
Manual transmission (gasoline engine)
Check that the parking brake is set.
Check that the shift lever is set in “N”.
Sit in the driver’s seat and firmly depress the clutch pedal.
Turn the engine switch to the “START” position and start
the engine.
STEP1
STEP2
STEP3
STEP4
STEP1
STEP2
STEP3
STEP4
STEP5
STEP1
STEP2
STEP3
STEP4
Page 216 of 772
216 2-1. Driving procedures
AVENSIS_EE (OM20B44E)
Manual transmission (diesel engine)
Check that the parking brake is set.
Check that the shift lever is set in “N”.
Sit in the driver’s seat and firmly depress the clutch pedal.
Turn the engine switch to the “ON” position.
indicator light turns on.
After indicator light goes out, turn the engine switch
to the “START” position and start the engine.
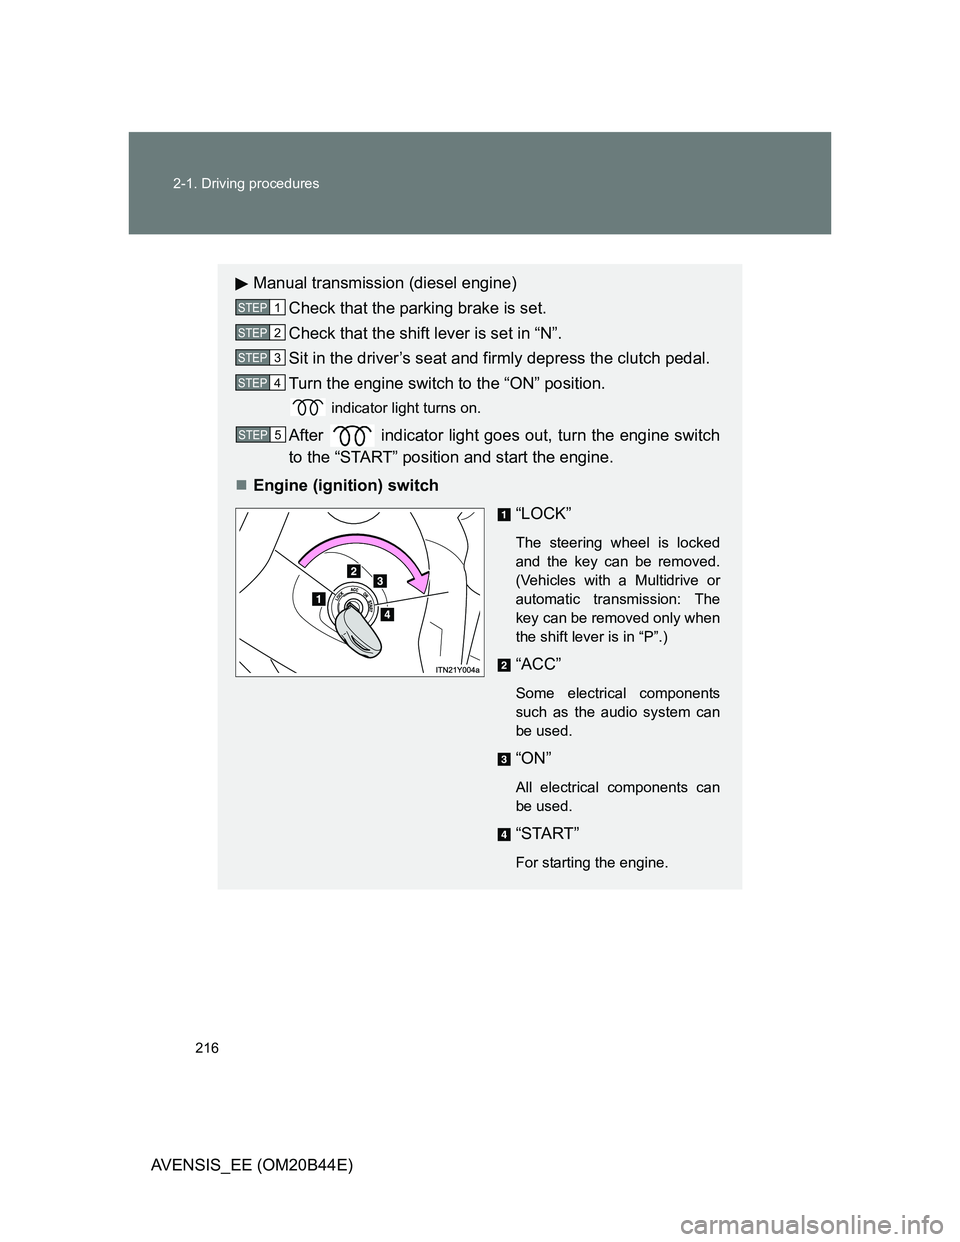
Engine (ignition) switch
“LOCK”
The steering wheel is locked
and the key can be removed.
(Vehicles with a Multidrive or
automatic transmission: The
key can be removed only when
the shift lever is in “P”.)
“ACC”
Some electrical components
such as the audio system can
be used.
“ON”
All electrical components can
be used.
“START”
For starting the engine.
STEP1
STEP2
STEP3
STEP4
STEP5
Page 237 of 772
237
2-1. Driving procedures
2
When driving
AVENSIS_EE (OM20B44E)
Parking brake
Parking brake operation
Vehicles with smart entry & start system
When the “ENGINE START STOP” switch is not in IGNITION ON mode,
the parking brake cannot be released using the parking brake switch.
Vehicles without smart entry & start system
When the engine switch is not in the “ON” position, the parking brake can-
not be released using the parking brake switch.
Automatic release function (vehicles with a manual transmission)
When starting, if the shift lever is engaged, the accelerator pedal and clutch
pedal are operated while the parking brake is applied, the parking brake will
be automatically released, thus making starting off easier.
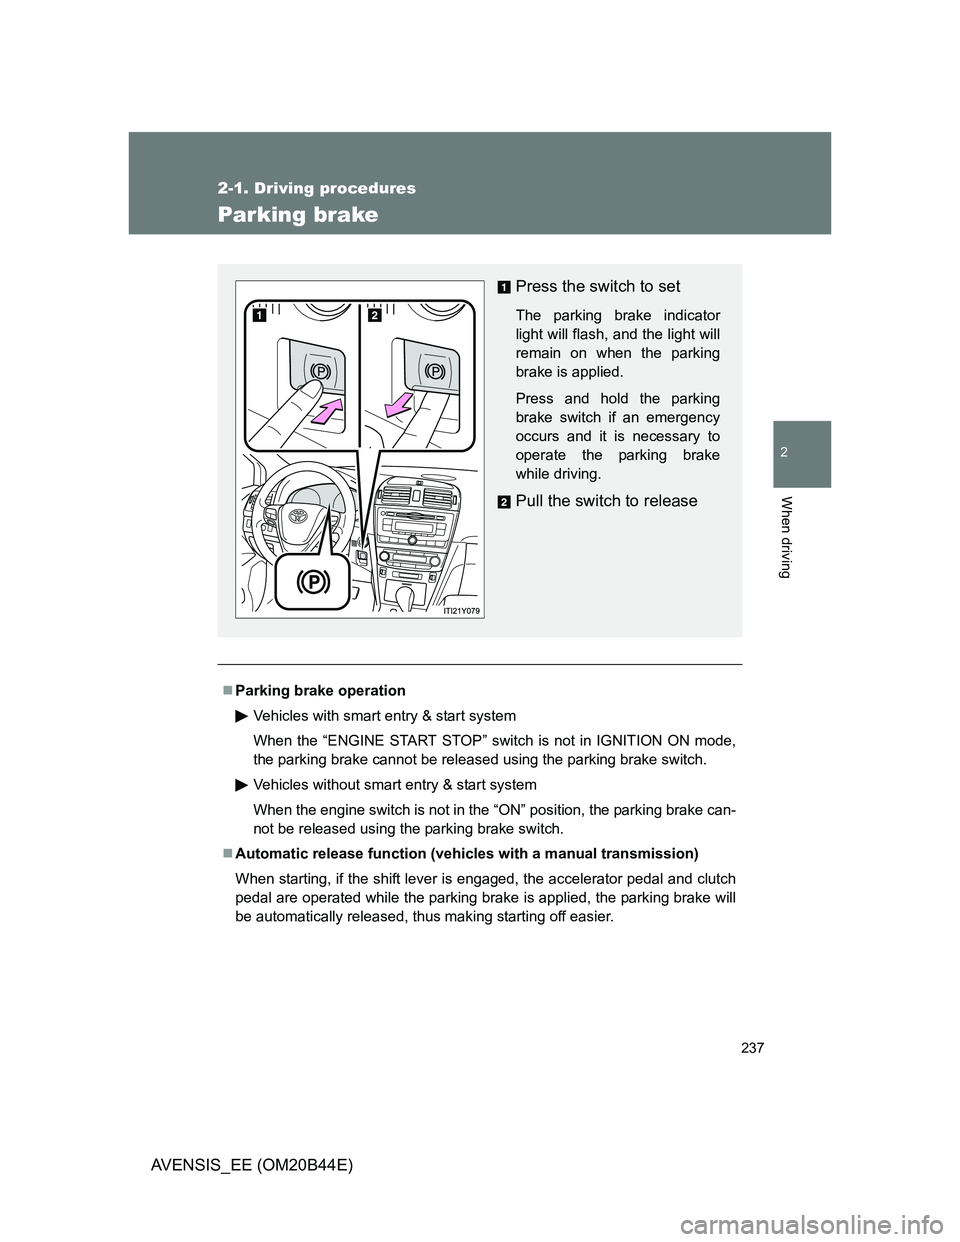
Press the switch to set
The parking brake indicator
light will flash, and the light will
remain on when the parking
brake is applied.
Press and hold the parking
brake switch if an emergency
occurs and it is necessary to
operate the parking brake
while driving.
Pull the switch to release
Page 238 of 772
238 2-1. Driving procedures
AVENSIS_EE (OM20B44E)
Automatic apply function (vehicles with a manual transmission)
To prevent the parking brake from being left accidentally unapplied, the
parking brake will be applied automatically under the following conditions
when the “ENGINE START STOP” switch is switched to ACCESSORY
mode (vehicles with smart entry & start system), or the engine switch is
switched to the “ACC” position (vehicles without smart entry & start sys-
tem):
• Automatic apply mode is ON
• The vehicle is stopped
Switching automatic apply mode
Automatic apply mode is initially set to ON, but it can be switched
between ON and OFF as the situation demands.
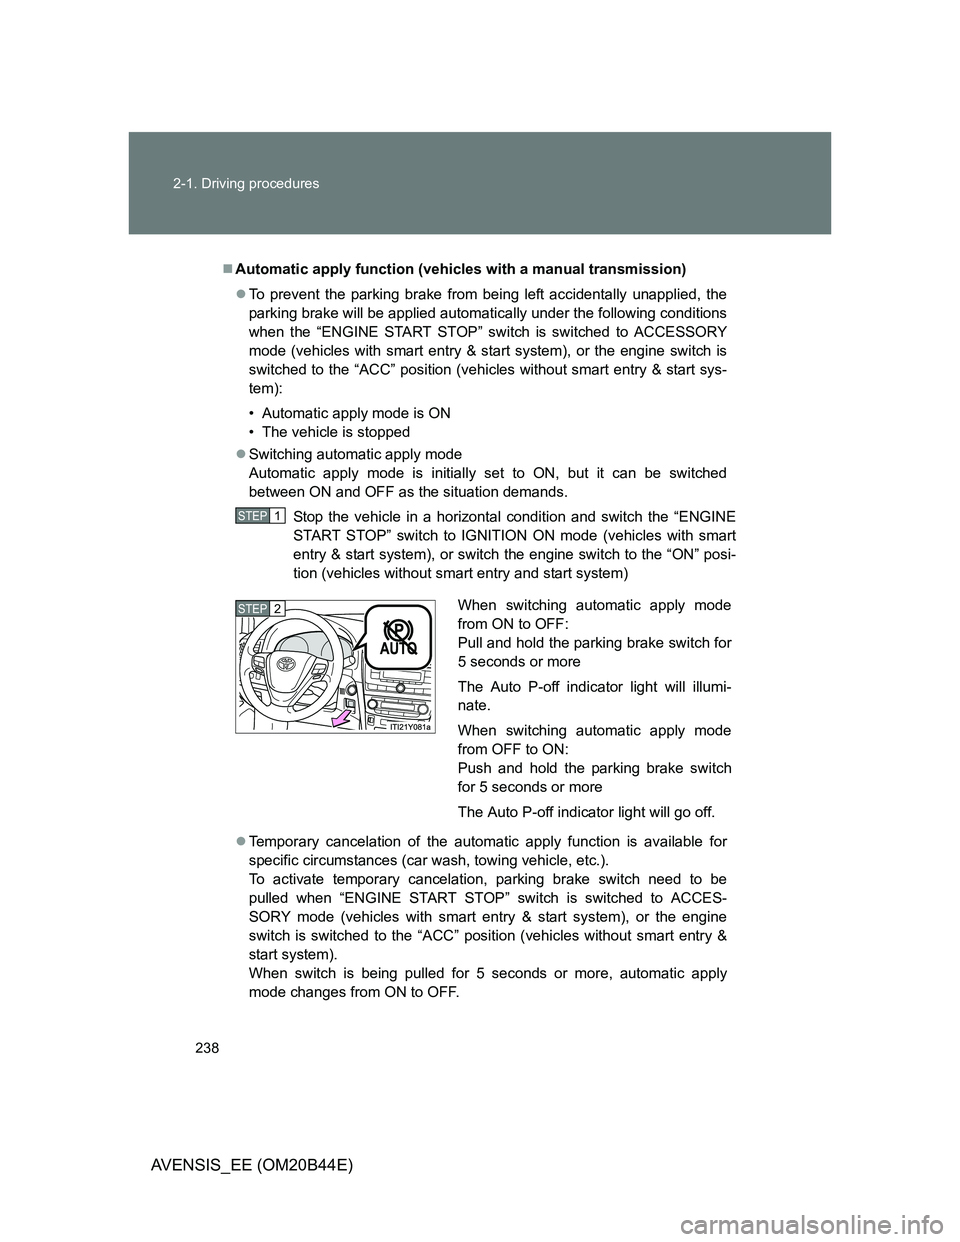
Stop the vehicle in a horizontal condition and switch the “ENGINE
START STOP” switch to IGNITION ON mode (vehicles with smart
entry & start system), or switch the engine switch to the “ON” posi-
tion (vehicles without smart entry and start system)
Temporary cancelation of the automatic apply function is available for
specific circumstances (car wash, towing vehicle, etc.).
To activate temporary cancelation, parking brake switch need to be
pulled when “ENGINE START STOP” switch is switched to ACCES-
SORY mode (vehicles with smart entry & start system), or the engine
switch is switched to the “ACC” position (vehicles without smart entry &
start system).
When switch is being pulled for 5 seconds or more, automatic apply
mode changes from ON to OFF.
STEP1
When switching automatic apply mode
from ON to OFF:
Pull and hold the parking brake switch for
5 seconds or more
The Auto P-off indicator light will illumi-
nate.
When switching automatic apply mode
from OFF to ON:
Push and hold the parking brake switch
for 5 seconds or more
The Auto P-off indicator light will go off.STEP2
Page 239 of 772
239 2-1. Driving procedures
2
When driving
AVENSIS_EE (OM20B44E)
Parking brake operation sound
When the parking brake operates, a motor sound (whirring sound) may be
heard. This does not indicate a malfunction.
When the system is overheating
The system may become temporarily unavailable in order to prevent over-
heating caused by repeated unnecessary switch operation.
In this event, leaving the system to cool down for a short time will allow nor-
mal operation to resume.
When there is a malfunction in the system
Warning light will turn on or flash. (P. 617)
Usage in winter time
P. 344
CAUTION
When leaving the vehicle
Make sure that the parking brake indicator light is illuminated. If the parking
brake is not applied, the vehicle could move, possibly leading to an accident.
Page 247 of 772
247 2-2. Instrument cluster
2
When driving
AVENSIS_EE (OM20B44E)
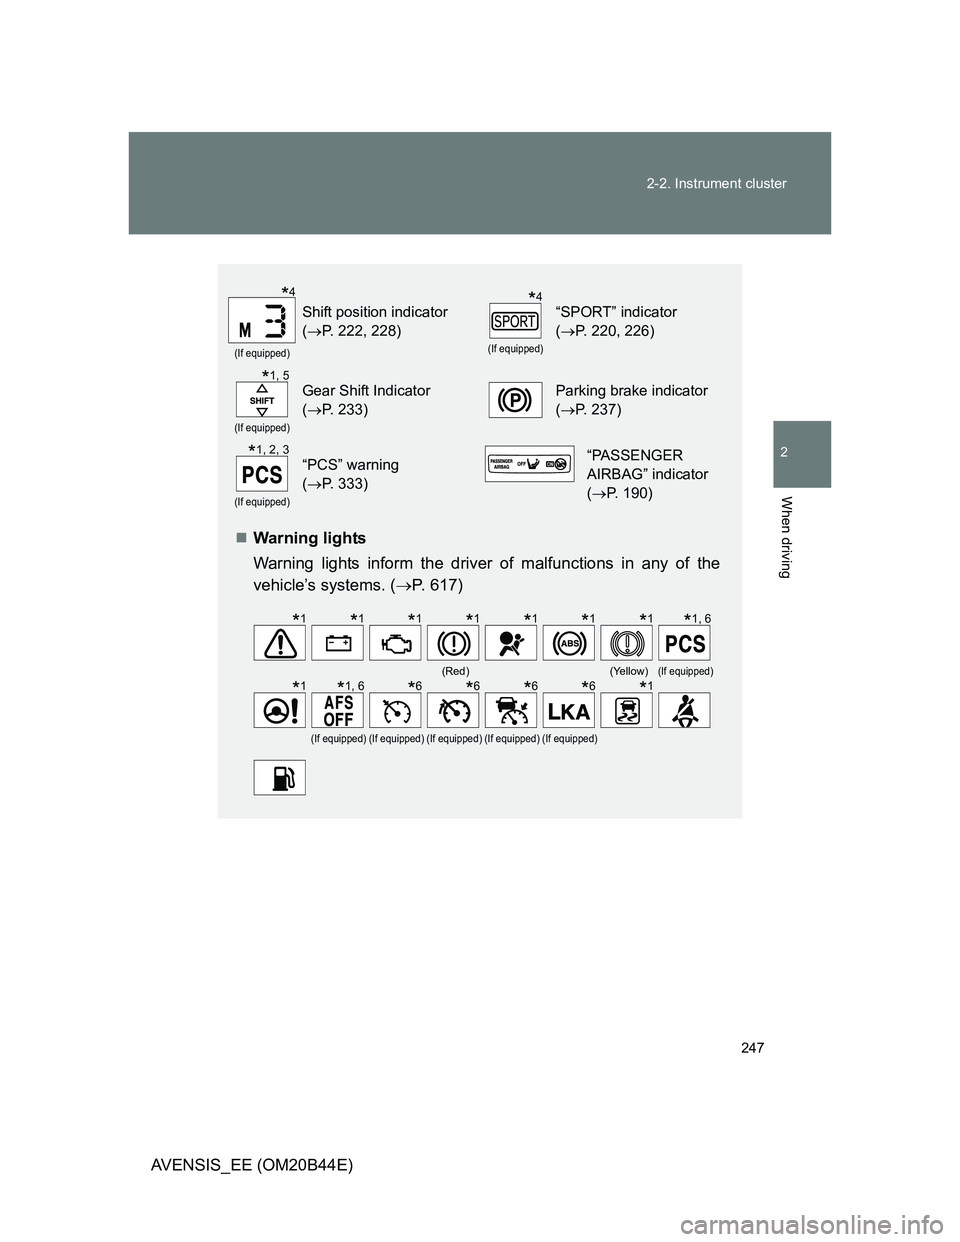
Warning lights
Warning lights inform the driver of malfunctions in any of the
vehicle’s systems. (P. 617)
(If equipped)
Shift position indicator
(P. 222, 228)
(If equipped)
“SPORT” indicator
(P. 220, 226)
(If equipped)
Gear Shift Indicator
(P. 233)Parking brake indicator
(P. 237)
(If equipped)
“PCS” warning
(P. 333)“PASSENGER
AIRBAG” indicator
(P. 190)
(Red)(Yellow)(If equipped)
(If equipped)(If equipped)(If equipped)(If equipped)(If equipped)
*4*4
*1, 5
*1, 2, 3
*1*1*1*1*1*1*1*1, 6
*1*1, 6*6*6*6*6*1
Page 264 of 772
264 2-3. Operating the lights and wipers
AVENSIS_EE (OM20B44E)
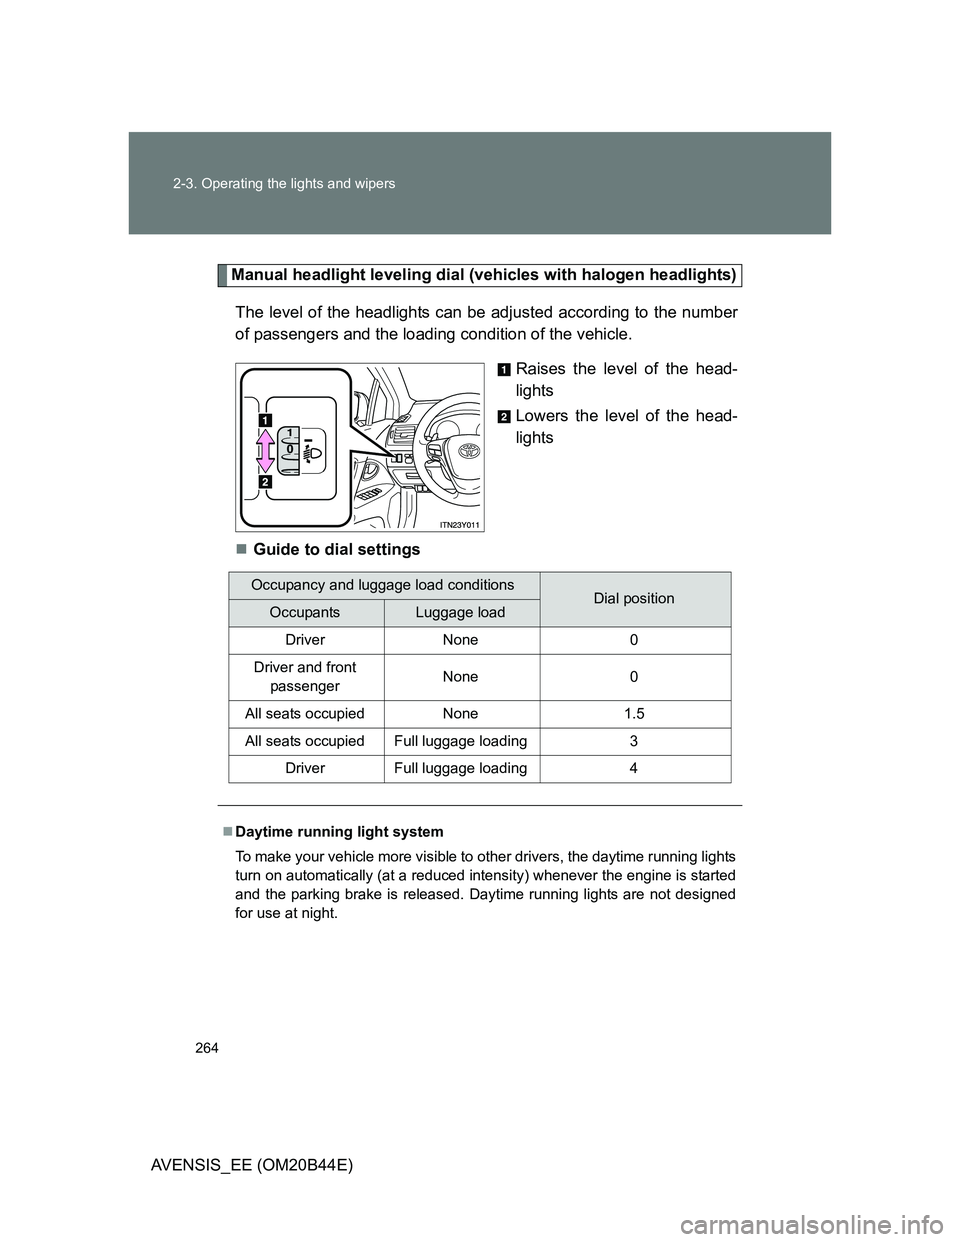
Manual headlight leveling dial (vehicles with halogen headlights)
The level of the headlights can be adjusted according to the number
of passengers and the loading condition of the vehicle.
Raises the level of the head-
lights
Lowers the level of the head-
lights
Guide to dial settings
Occupancy and luggage load conditionsDial positionOccupantsLuggage load
Driver None 0
Driver and front
passengerNone 0
All seats occupied None 1.5
All seats occupied Full luggage loading 3
Driver Full luggage loading 4
Daytime running light system
To make your vehicle more visible to other drivers, the daytime running lights
turn on automatically (at a reduced intensity) whenever the engine is started
and the parking brake is released. Daytime running lights are not designed
for use at night.
Page 327 of 772
327
2-4. Using other driving systems
2
When driving
AVENSIS_EE (OM20B44E)
Driving assist systems
To help enhance driving safety and performance, the following sys-
tems operate automatically in response to various driving situations.
Be aware, however, that these systems are supplementary and
should not be relied upon too heavily when operating the vehicle.
ABS (Anti-lock Brake System)
Helps to prevent wheel lock when the brakes are applied suddenly, or if
the brakes are applied while driving on a slippery road surface.
Brake assist
Generates an increased level of braking force after the brake pedal is
depressed, when the system detects a panic stop situation.
VSC (Vehicle Stability Control)
Helps the driver to control skidding when swerving suddenly or turning
on slippery road surfaces.
TRC (Traction Control)
Helps to maintain drive power and prevent the front wheels from spin-
ning when starting the vehicle or accelerating on slippery roads.
EPS (Electric Power Steering)
Employs an electric motor to reduce the amount of effort needed to turn
the steering wheel.
VSC+ (Vehicle Stability Control+)
Provides cooperative control of the ABS, TRC, VSC and EPS.
Helps to maintain directional stability when swerving on slippery road
surfaces by controlling steering performance.
PCS (Pre-Crash Safety) (if equipped)
P. 333
Emergency brake signal (if equipped)
When the brakes are applied suddenly, the stop lights automatically
flash to alert the vehicle behind.
Page 330 of 772
330 2-4. Using other driving systems
AVENSIS_EE (OM20B44E)
Sounds and vibrations caused by the ABS, brake assist, TRC and VSC
A sound may be heard from the engine compartment when the engine is
started or just after the vehicle begins to move. This sound does not indi-
cate that a malfunction has occurred in any of these systems.
Any of the following conditions may occur when the above systems are
operating. None of these indicates that a malfunction has occurred.
• Vibrations may be felt through the vehicle body and steering.
• A motor sound may be heard after the vehicle comes to a stop.
• The brake pedal may pulsate slightly after the ABS is activated.
• The brake pedal may move down slightly after the ABS is activated.
EPS operation sound
When the steering wheel operates, a motor sound (whirring sound) may be
heard. This does not indicate a malfunction.
Reduced effectiveness of EPS
The effectiveness of EPS is reduced to prevent the system from overheating
when there is frequent steering input over an extended period of time. The
steering wheel may feel heavy as a result. Should this occur, refrain from
excessive steering input or stop the vehicle and turn the engine off. The sys-
tem should return to normal after about 10 minutes.