TOYOTA CAMRY 2015 XV50 / 9.G Owners Manual
CAMRY 2015 XV50 / 9.G
TOYOTA
TOYOTA
https://www.carmanualsonline.info/img/14/6250/w960_6250-0.png
TOYOTA CAMRY 2015 XV50 / 9.G Owners Manual
Trending: towing capacity, low beam, brake fluid, brake rotor, service indicator, ECU, battery location
Page 121 of 568
121
3
Operation of each component
CAMRY_U (OM33A86U)
3-3. Adjusting the seats
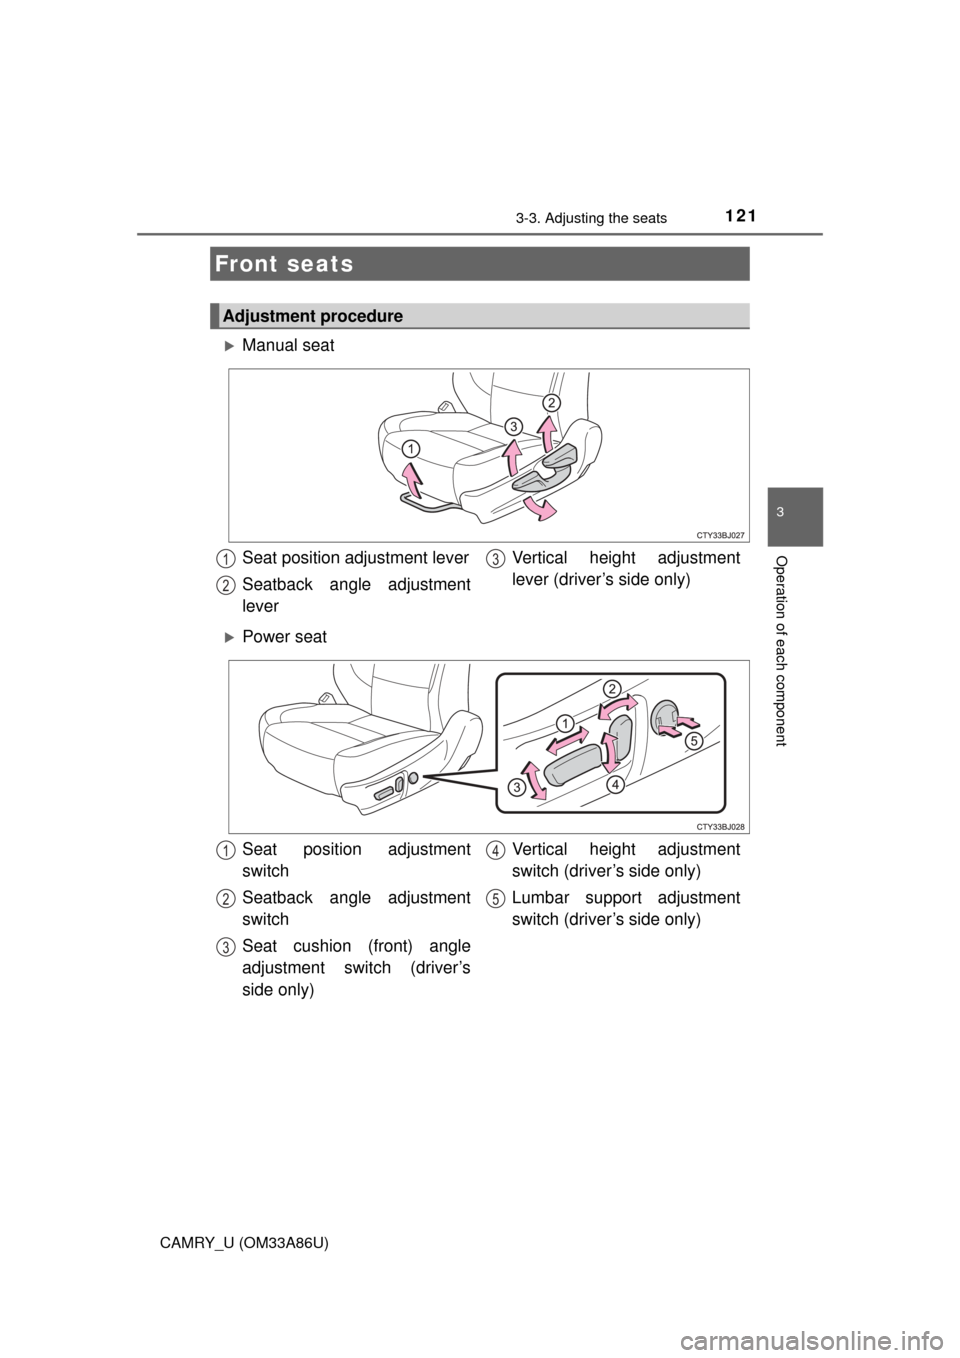
Manual seat
Power seat
Front seats
Adjustment procedure
Seat position adjustment lever
Seatback angle adjustment
lever Vertical height adjustment
lever (driver’s side only)1
2
3
Seat position adjustment
switch
Seatback angle adjustment
switch
Seat cushion (front) angle
adjustment switch (driver’s
side only)Vertical height adjustment
switch (driver’s side only)
Lumbar support adjustment
switch (driver’s side only)1
2
3
4
5
Page 122 of 568

1223-3. Adjusting the seats
CAMRY_U (OM33A86U)
WARNING
■When adjusting the seat position
● Take care when adjusting the seat position to ensure that other passen-
gers are not injured by the moving seat.
● Do not put your hands under the seat or near the moving parts to avoid
injury.
Fingers or hands may become jammed in the seat mechanism.
● Make sure to leave enough space around the feet so they do not get stuck.
■ Seat adjustment
● Be careful that the seat does not hit passengers or luggage.
● To reduce the risk of sliding under the lap belt during a collision, do not
recline the seat more than necessary.
If the seat is too reclined, the lap belt may slide past the hips and apply
restraint forces directly to the abdomen, or your neck may contact the
shoulder belt, increasing the risk of death or serious injury in the event of
an accident.
Adjustments should not be made while driving as the seat may unexpect-
edly move and cause the driver to lose control of the vehicle.
● Manual seat only: After adjusting the seat, make sure that the seat is
locked in position.
Page 123 of 568
1233-3. Adjusting the seats
3
Operation of each component
CAMRY_U (OM33A86U)
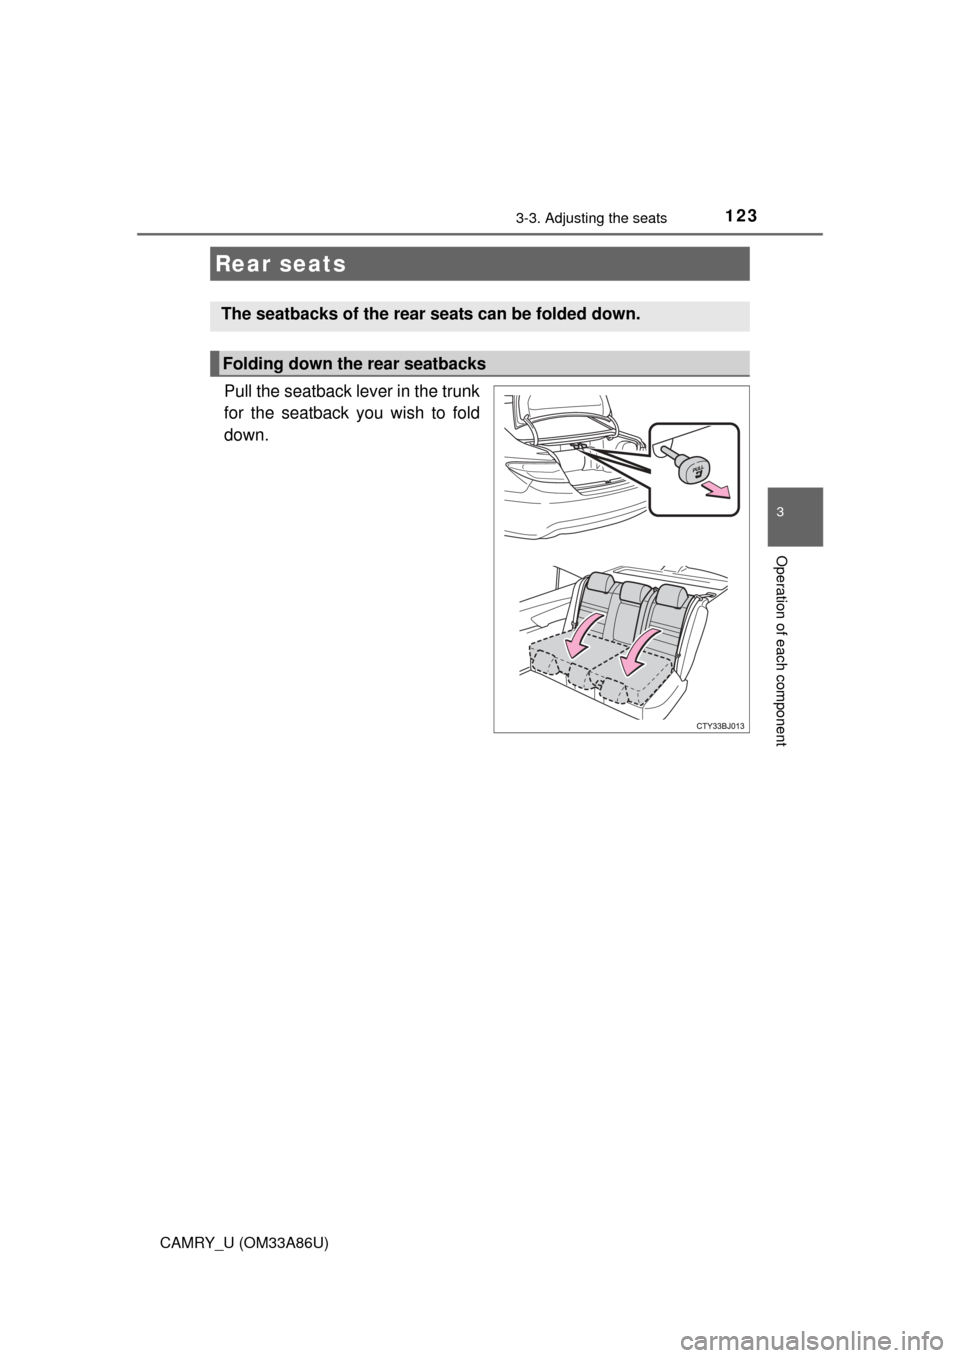
Pull the seatback lever in the trunk
for the seatback you wish to fold
down.
Rear seats
The seatbacks of the rear seats can be folded down.
Folding down the rear seatbacks
Page 124 of 568

1243-3. Adjusting the seats
CAMRY_U (OM33A86U)
WARNING
■When folding the rear seatbacks down
Observe the following precautions. Failure to do so may result in death or
serious injury.
● Do not fold the seatbacks down while driving.
● Stop the vehicle on level ground, set the parking brake and shift the shift
lever to P.
● Do not allow anyone to sit on a folded seatback or in the trunk while driv-
ing.
● Do not allow children to enter the trunk.
■ When returning the seat to its original position
● Ensure that the seat belt does not get caught between or behind the seats.
● If the seat belt has been released from its guide, pass the seat belt through
its guide. ( P. 30)
■ Seat adjustment
Be careful not to get hands or feet pinched between the rear console box
and the rear seat when folding down the rear seatback.
■ After returning the seatback to the upright position
Observe the following precautions. Failure to do so may result in death or
serious injury.
● Make sure the seatback is securely locked by pressing it forward and rear-
ward on the top.
● Check that the seat belts are not twisted or caught in the seatback.
● Make sure that the seat belt is passing through its guide.
NOTICE
■When the left seatback is folded down
Make sure the luggage loaded in the enlarged trunk will not damage the
webbing of the rear center seat belt.
Page 125 of 568
1253-3. Adjusting the seats
3
Operation of each component
CAMRY_U (OM33A86U)
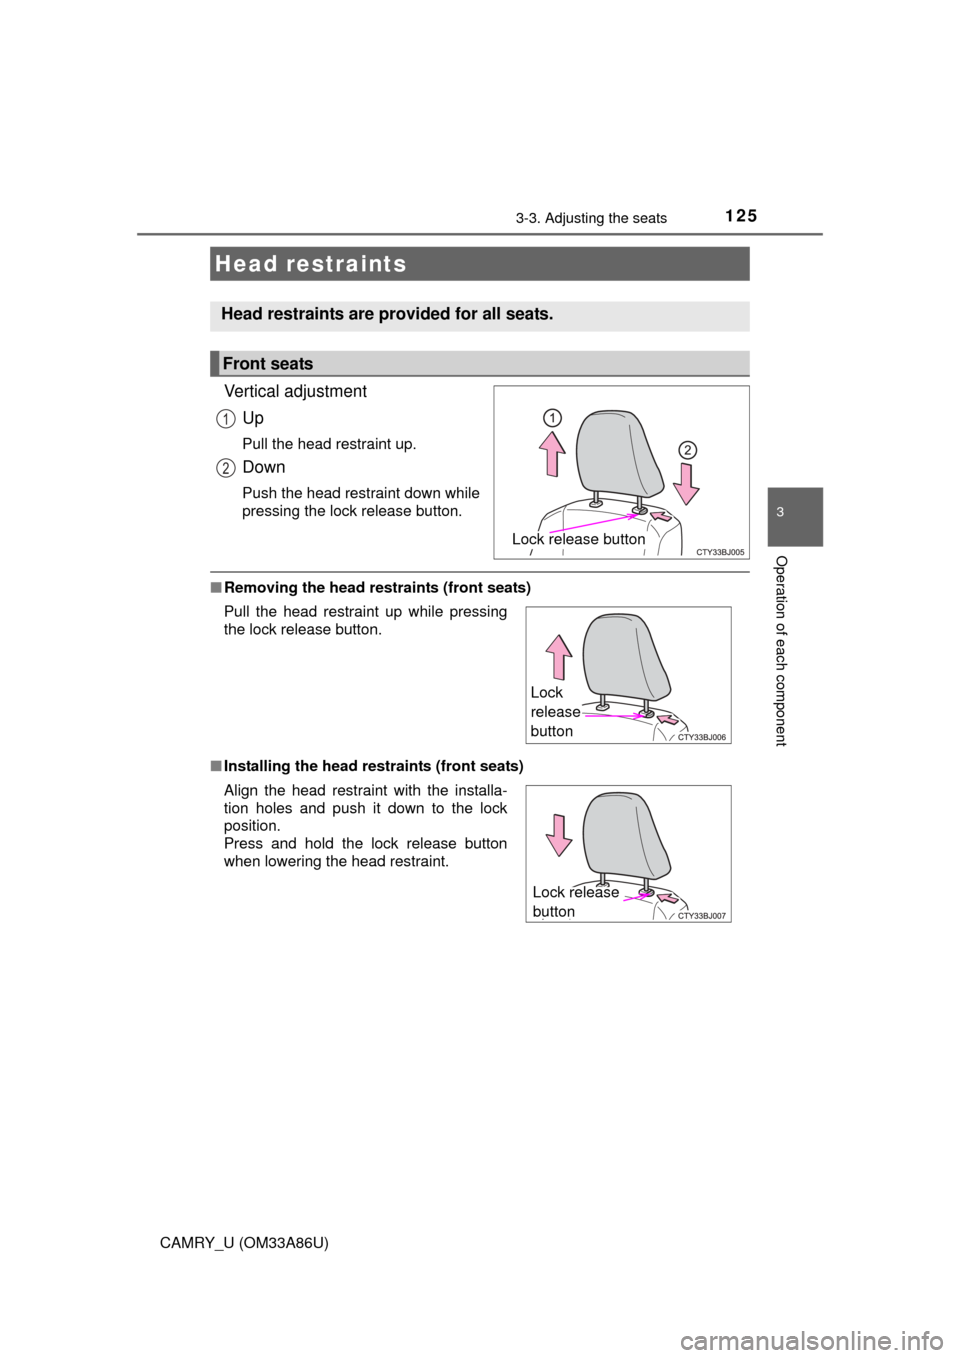
Vertical adjustmentUp
Pull the head restraint up.
Down
Push the head restraint down while
pressing the lock release button.
■Removing the head restraints (front seats)
■ Installing the head restraints (front seats)
Head restraints
Head restraints are provided for all seats.
Front seats
Lock release button
1
2
Pull the head restraint up while pressing
the lock release button.
Align the head restraint with the installa-
tion holes and push it down to the lock
position.
Press and hold the lock release button
when lowering the head restraint.
Lock
release
button
Lock release
button
Page 126 of 568
1263-3. Adjusting the seats
CAMRY_U (OM33A86U)■
Adjusting the height of the head restraints (front seats)
Make sure that the head restraints are
adjusted so that the center of the head
restraint is closest to the top of your ears.
WARNING
■ Head restraint precautions (front seats)
Observe the following precautions regarding the head restraints. Failure to
do so may result in death or serious injury.
● Use the head restraints designed for each respective seat.
● Adjust the head restraints to the correct position at all times.
● After adjusting the head restraints, push down on them and make sure
they are locked in position.
● Do not drive with the head restraints removed.
Page 127 of 568
127
3
Operation of each component
CAMRY_U (OM33A86U)
3-4. Adjusting the steering wheel and mirrors
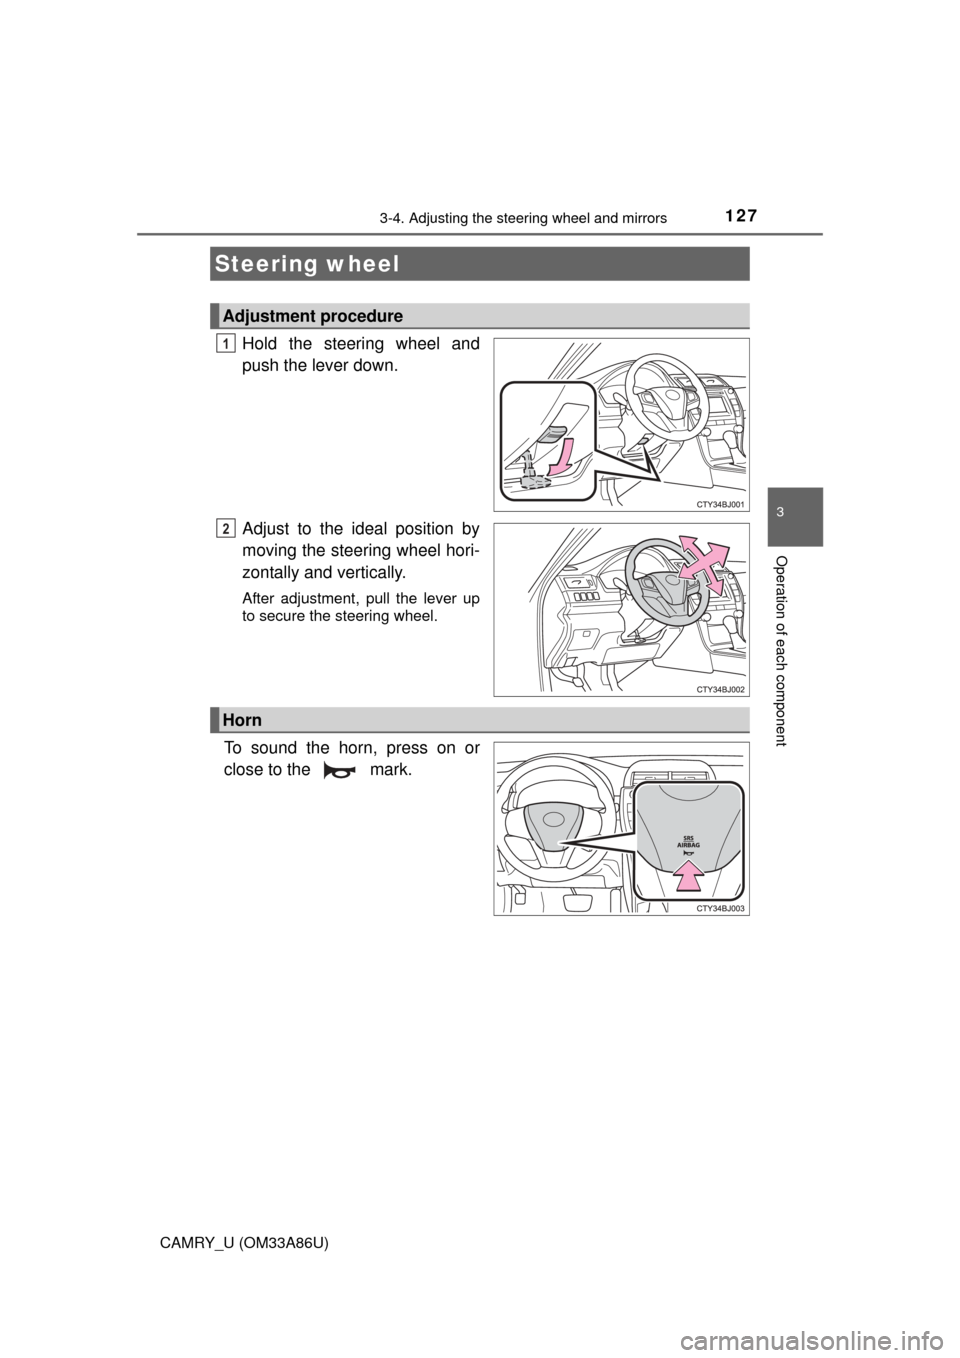
Hold the steering wheel and
push the lever down.
Adjust to the ideal position by
moving the steering wheel hori-
zontally and vertically.
After adjustment, pull the lever up
to secure the steering wheel.
To sound the horn, press on or
close to the mark.
Steering wheel
Adjustment procedure
1
2
Horn
Page 128 of 568
1283-4. Adjusting the steering wheel and mirrors
CAMRY_U (OM33A86U)
WARNING
■Caution while driving
Do not adjust the steering wheel while driving.
Doing so may cause the driver to mishandle the vehicle and cause an acci-
dent, resulting in death or serious injury.
■ After adjusting the steering wheel
Make sure that the steering wheel is securely locked.
Otherwise, the steering wheel may move suddenly, possibly causing an
accident, and resulting in death or serious injury. Also, the horn may not
sound if the steering wheel is not securely locked.
Page 129 of 568
1293-4. Adjusting the steering wheel and mirrors
3
Operation of each component
CAMRY_U (OM33A86U)
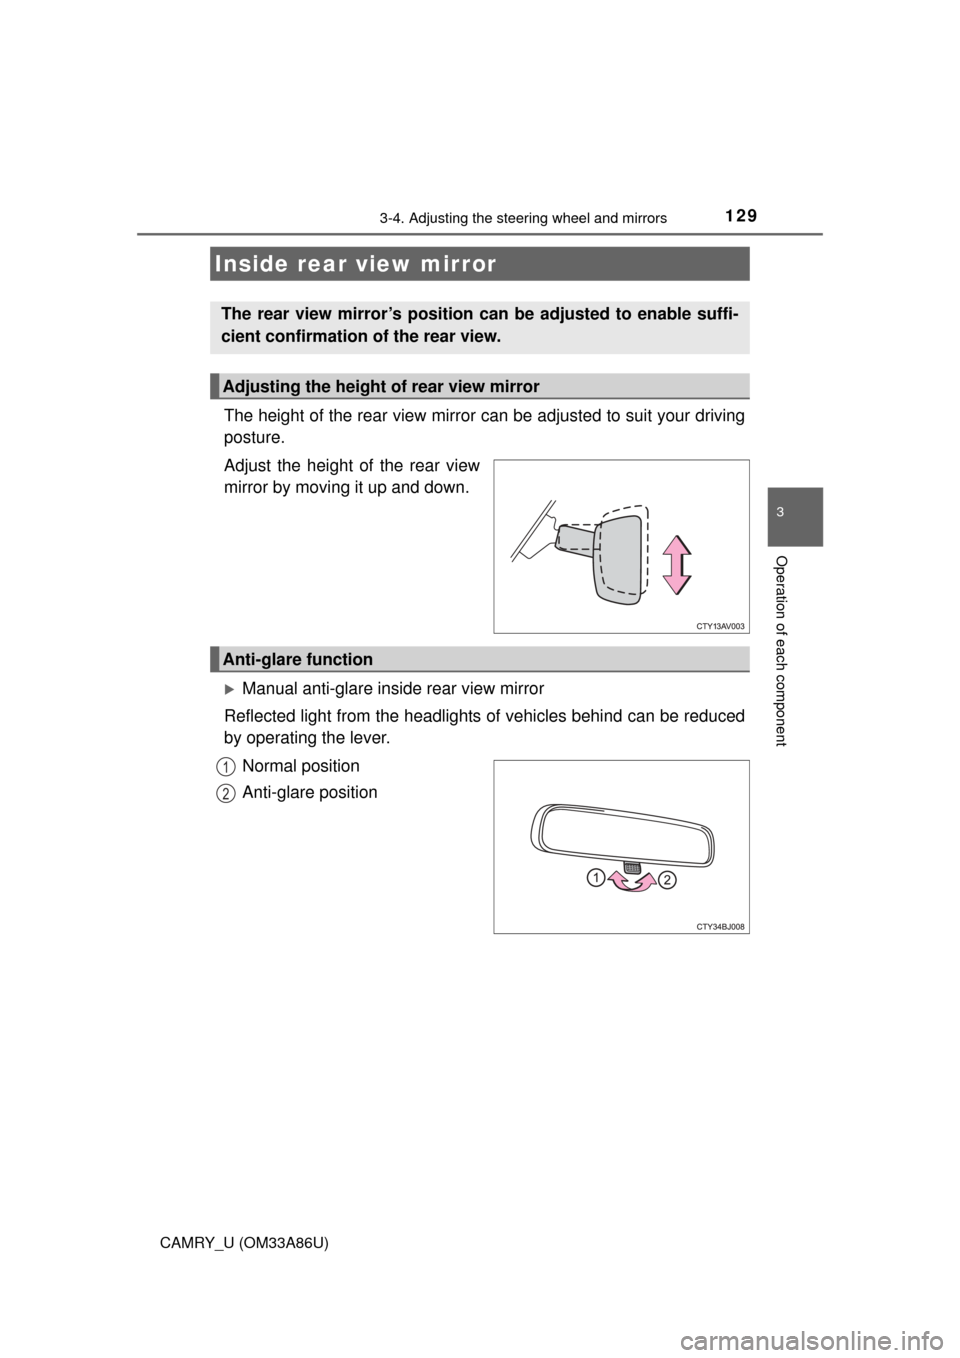
The height of the rear view mirror can be adjusted to suit your driving
posture.
Adjust the height of the rear view
mirror by moving it up and down.
Manual anti-glare inside rear view mirror
Reflected light from the headlights of vehicles behind can be reduced
by operating the lever.
Normal position
Anti-glare position
Inside rear view mirror
The rear view mirror’s position can be adjusted to enable suffi-
cient confirmation of the rear view.
Adjusting the height of rear view mirror
Anti-glare function
1
2
Page 130 of 568
1303-4. Adjusting the steering wheel and mirrors
CAMRY_U (OM33A86U)
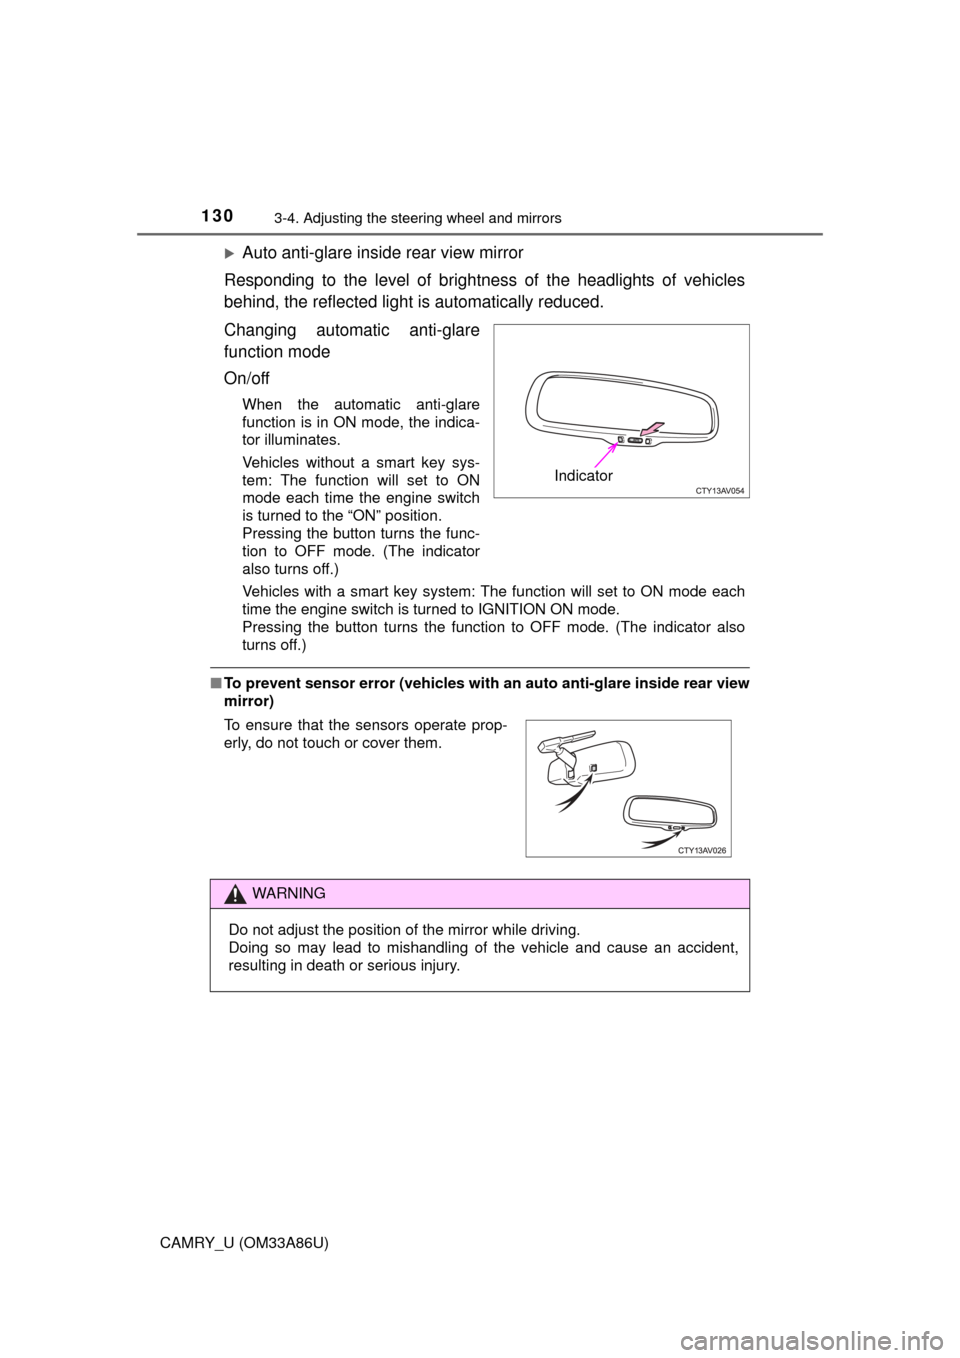
Auto anti-glare inside rear view mirror
Responding to the level of brightness of the headlights of vehicles
behind, the reflected light is automatically reduced.
Changing automatic anti-glare
function mode
On/off
When the automatic anti-glare
function is in ON mode, the indica-
tor illuminates.
Vehicles without a smart key sys-
tem: The function will set to ON
mode each time the engine switch
is turned to the “ON” position.
Pressing the button turns the func-
tion to OFF mode. (The indicator
also turns off.)
Vehicles with a smart key system: The function will set to ON mode each
time the engine switch is turned to IGNITION ON mode.
Pressing the button turns the function to OFF mode. (The indicator also
turns off.)
■ To prevent sensor error (vehicles with an auto anti-glare inside rear view
mirror)
Indicator
To ensure that the sensors operate prop-
erly, do not touch or cover them.
WARNING
Do not adjust the position of the mirror while driving.
Doing so may lead to mishandling of the vehicle and cause an accident,
resulting in death or serious injury.
Trending: inflation pressure, spark plugs, driver seat adjustment, airbag disable, automatic transmission fluid, Beam part, audio
