CD player TOYOTA CAMRY HYBRID 2008 XV40 / 8.G User Guide
[x] Cancel search | Manufacturer: TOYOTA, Model Year: 2008, Model line: CAMRY HYBRID, Model: TOYOTA CAMRY HYBRID 2008 XV40 / 8.GPages: 440, PDF Size: 6.78 MB
Page 196 of 440
196 3-2. Using the audio system
■Discs that can be used
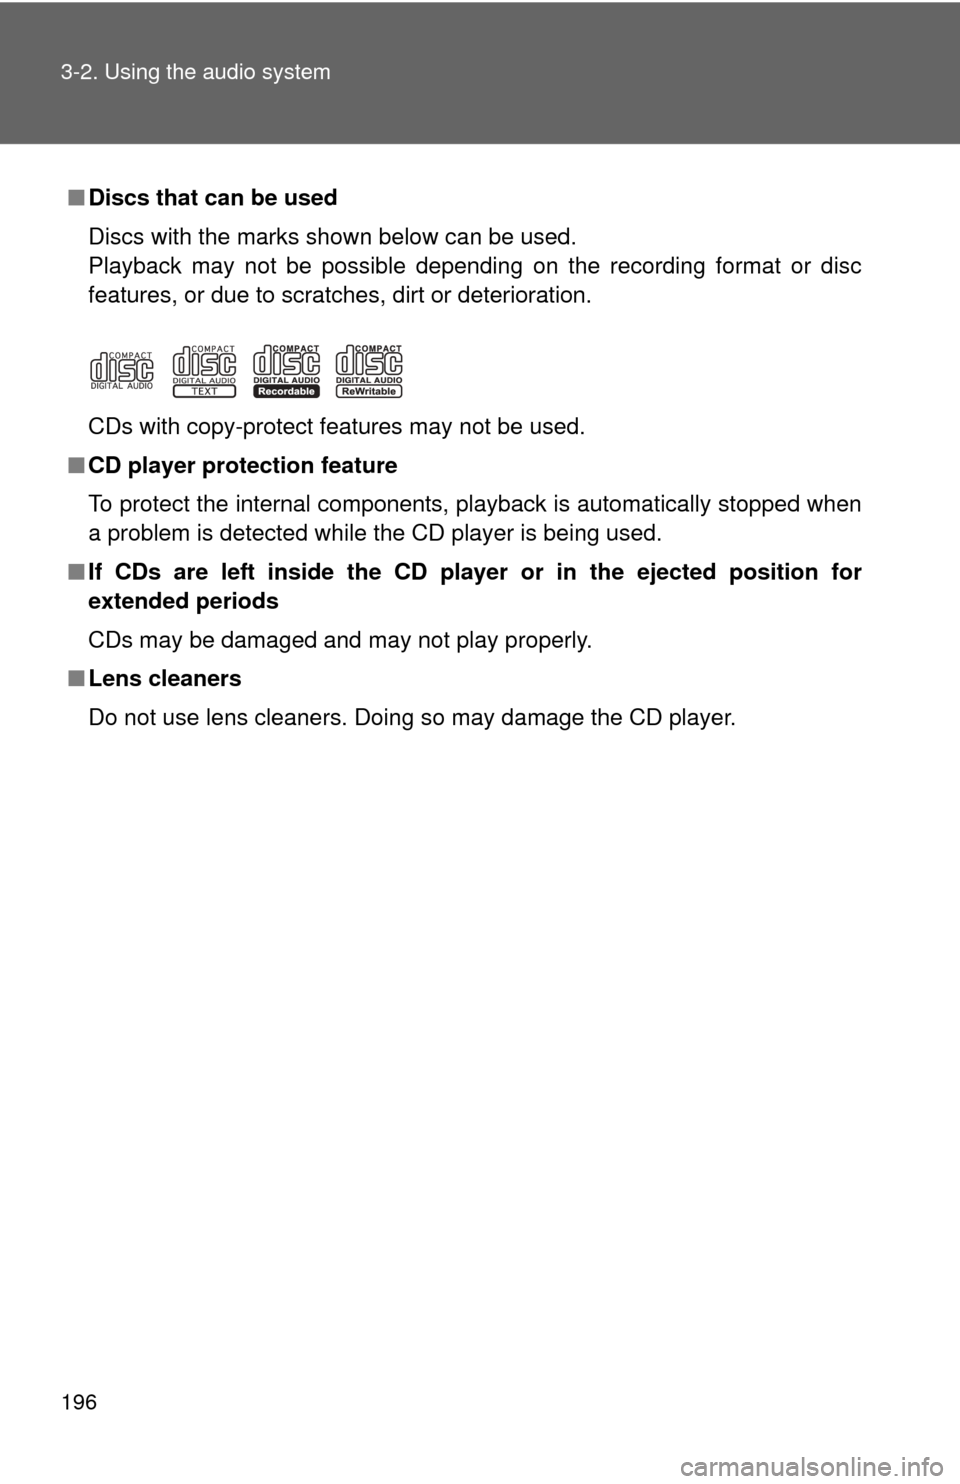
Discs with the marks shown below can be used.
Playback may not be possible depending on the recording format or disc
features, or due to scratches, dirt or deterioration.
CDs with copy-protect features may not be used.
■ CD player protection feature
To protect the internal components, playback is automatically stopped when
a problem is detected while the CD player is being used.
■ If CDs are left inside the CD player or in the ejected position for
extended periods
CDs may be damaged and may not play properly.
■ Lens cleaners
Do not use lens cleaners. Doing so may damage the CD player.
Page 197 of 440
197
3-2. Using the audio system
3
Interior features
NOTICE
■
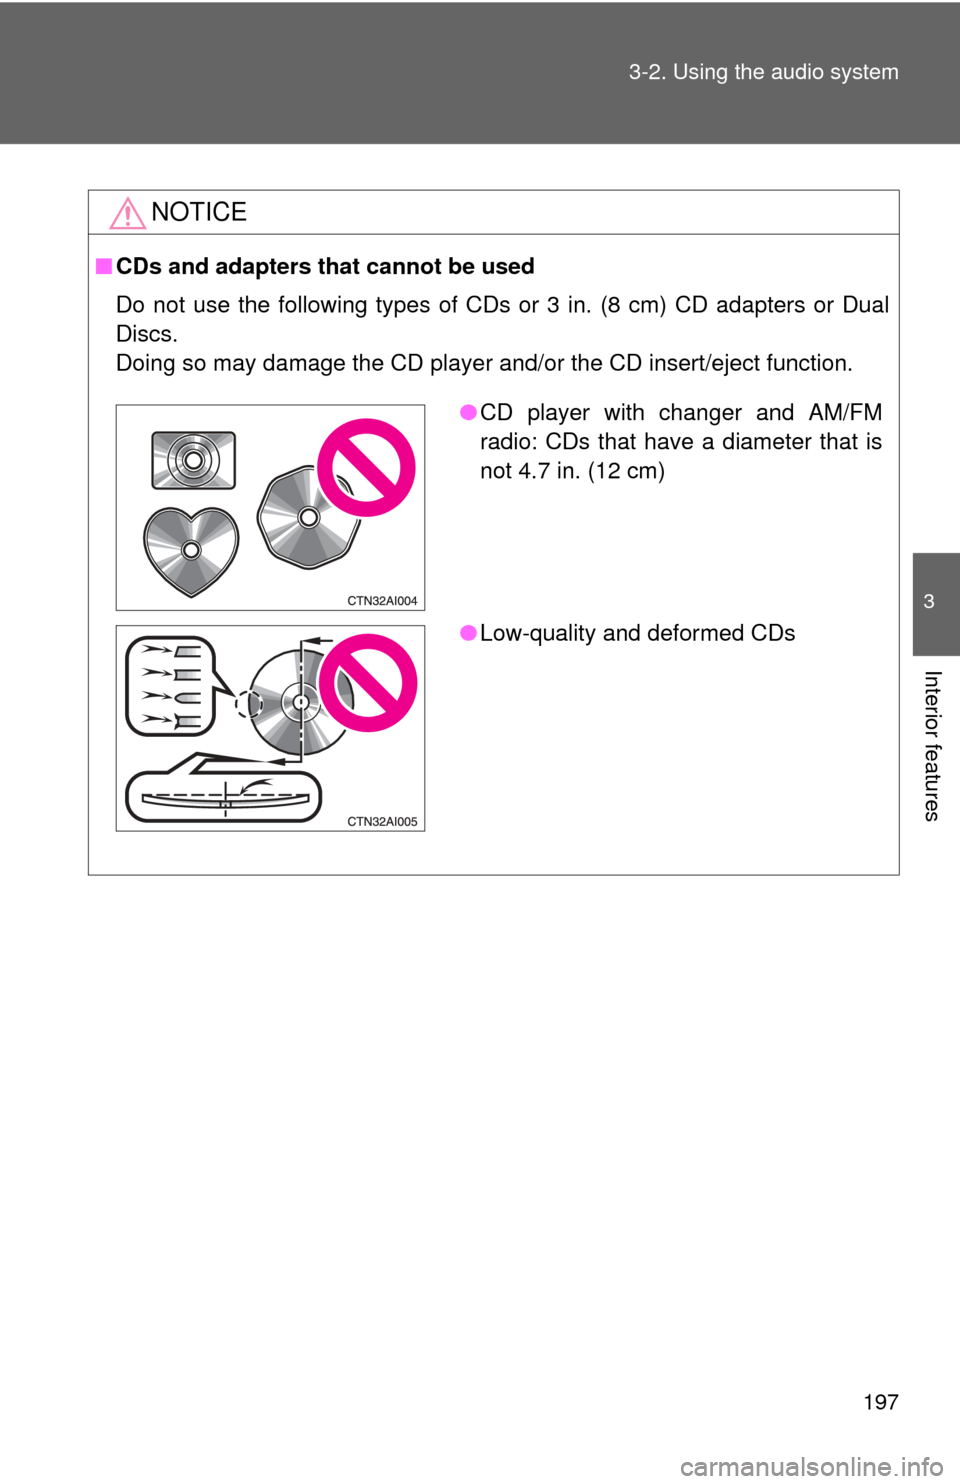
CDs and adapters that cannot be used
Do not use the following types of CDs or 3 in. (8 cm) CD adapters or Dual
Discs.
Doing so may damage the CD player and/or the CD insert/eject function.
●CD player with changer and AM/FM
radio: CDs that have a diameter that is
not 4.7 in. (12 cm)
● Low-quality and deformed CDs
Page 198 of 440
198 3-2. Using the audio system
NOTICE
■CD player precautions
Failure to follow the precautions below may result in serious damage to the
CDs or the player itself.
●Do not insert anything other than CDs into the CD slot.
● Do not apply oil to the CD player.
● Store CDs away from direct sunlight.
● Never try to disassemble any part of the CD player.
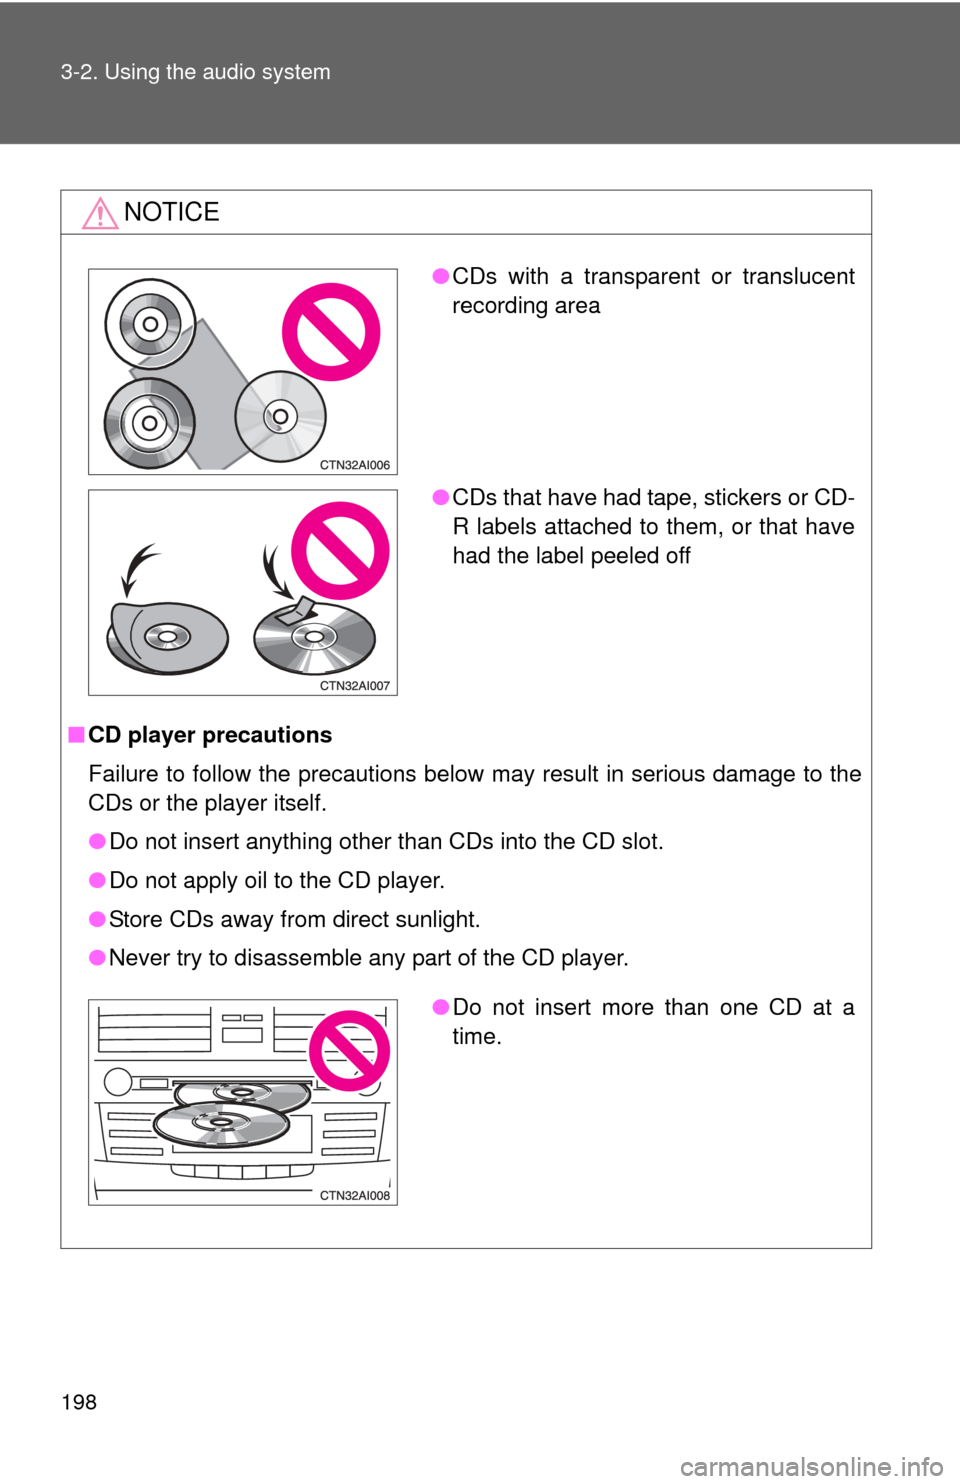
●CDs with a transparent or translucent
recording area
● CDs that have had tape, stickers or CD-
R labels attached to them, or that have
had the label peeled off
●Do not insert more than one CD at a
time.
Page 199 of 440
199
3-2. Using the audio system
3
Interior features
Playing MP3 and WMA discs
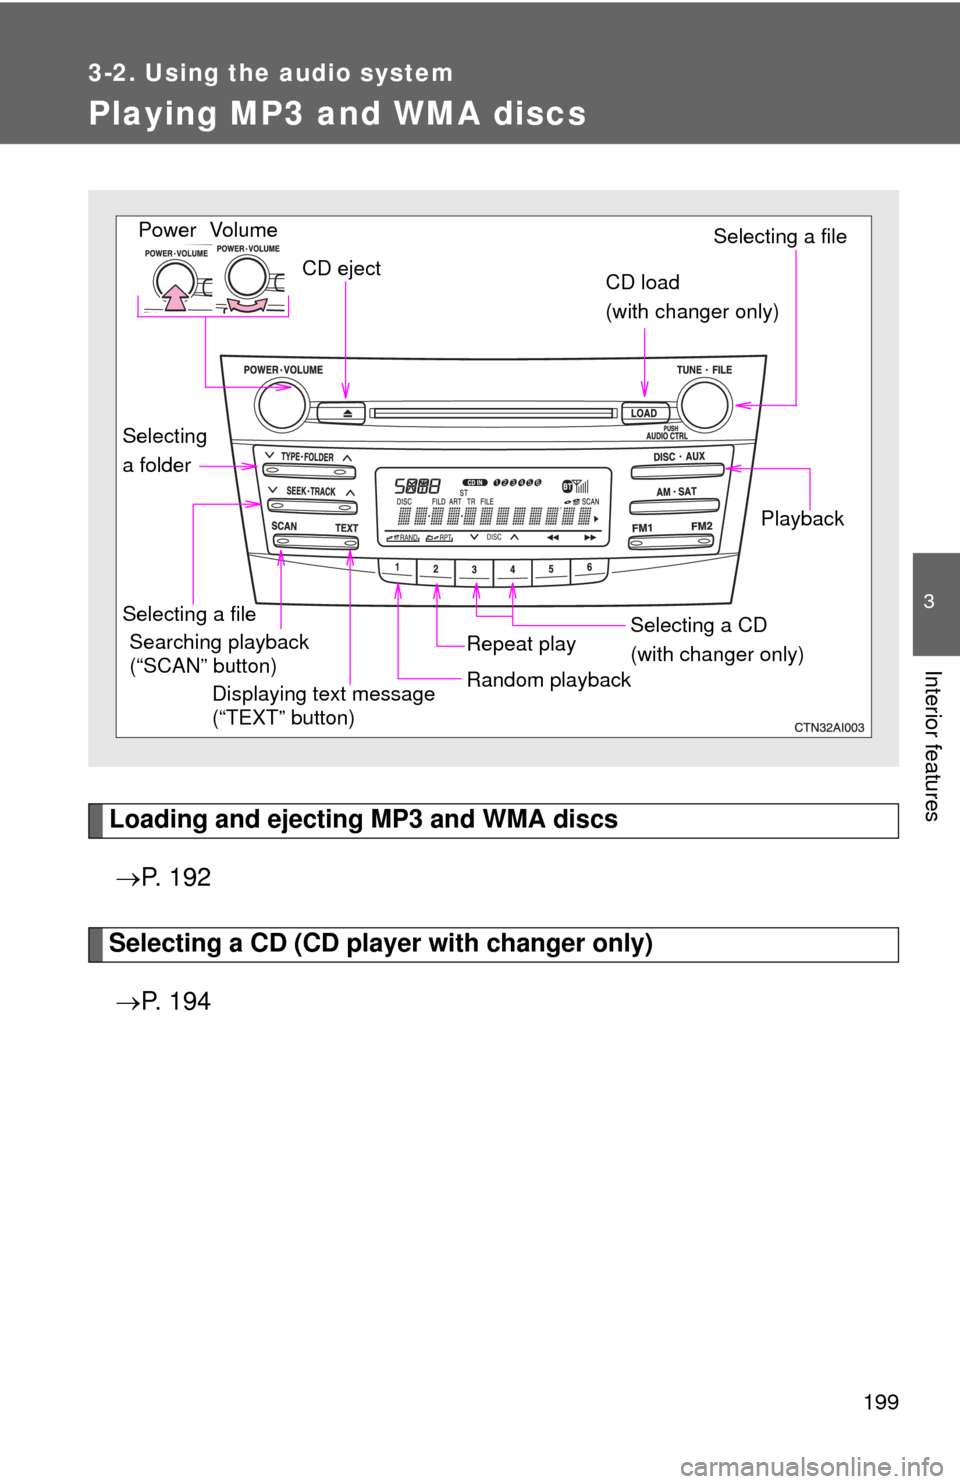
Loading and ejecting MP3 and WMA discs P. 1 9 2
Selecting a CD (CD player with changer only)
P. 1 9 4
Vol um e
Random playbackSelecting a file
PlaybackPower
CD eject
Displaying text message
(“TEXT” button)
Selecting a file Selecting a CD
(with changer only)
CD load
(with changer only)
Repeat playSearching playback
(“SCAN” button)
Selecting
a folder
Page 202 of 440
202 3-2. Using the audio system
■Display
P. 195
■ Canceling random and repeat playback
P. 195
■ Error messages
“ERROR”: This indicates a problem ei ther with the CD or inside the
player. The CD may be dirty, damaged or inserted up-side
down.
“WAIT”: Operation has stopped due to a high temperature inside the
player. Wait for a while and then press . Contact your
Toyota dealer if the CD still cannot be played.
“NO MUSIC”: This indicates that the MP3/WMA file is not included in the CD.
■ Discs that can be used
P. 196
■ CD player protection feature
P. 196
■ If CDs are left inside the CD player or in the ejected position for
extended periods
P. 196
■ Lens cleaners
P. 196
Page 206 of 440

206 3-2. Using the audio system
NOTICE
■CDs and adapters that cannot be used ( P. 197)
■ CD player precautions ( P. 198)
Page 207 of 440
207
3-2. Using the audio system
3
Interior features
Optimal use of the audio system
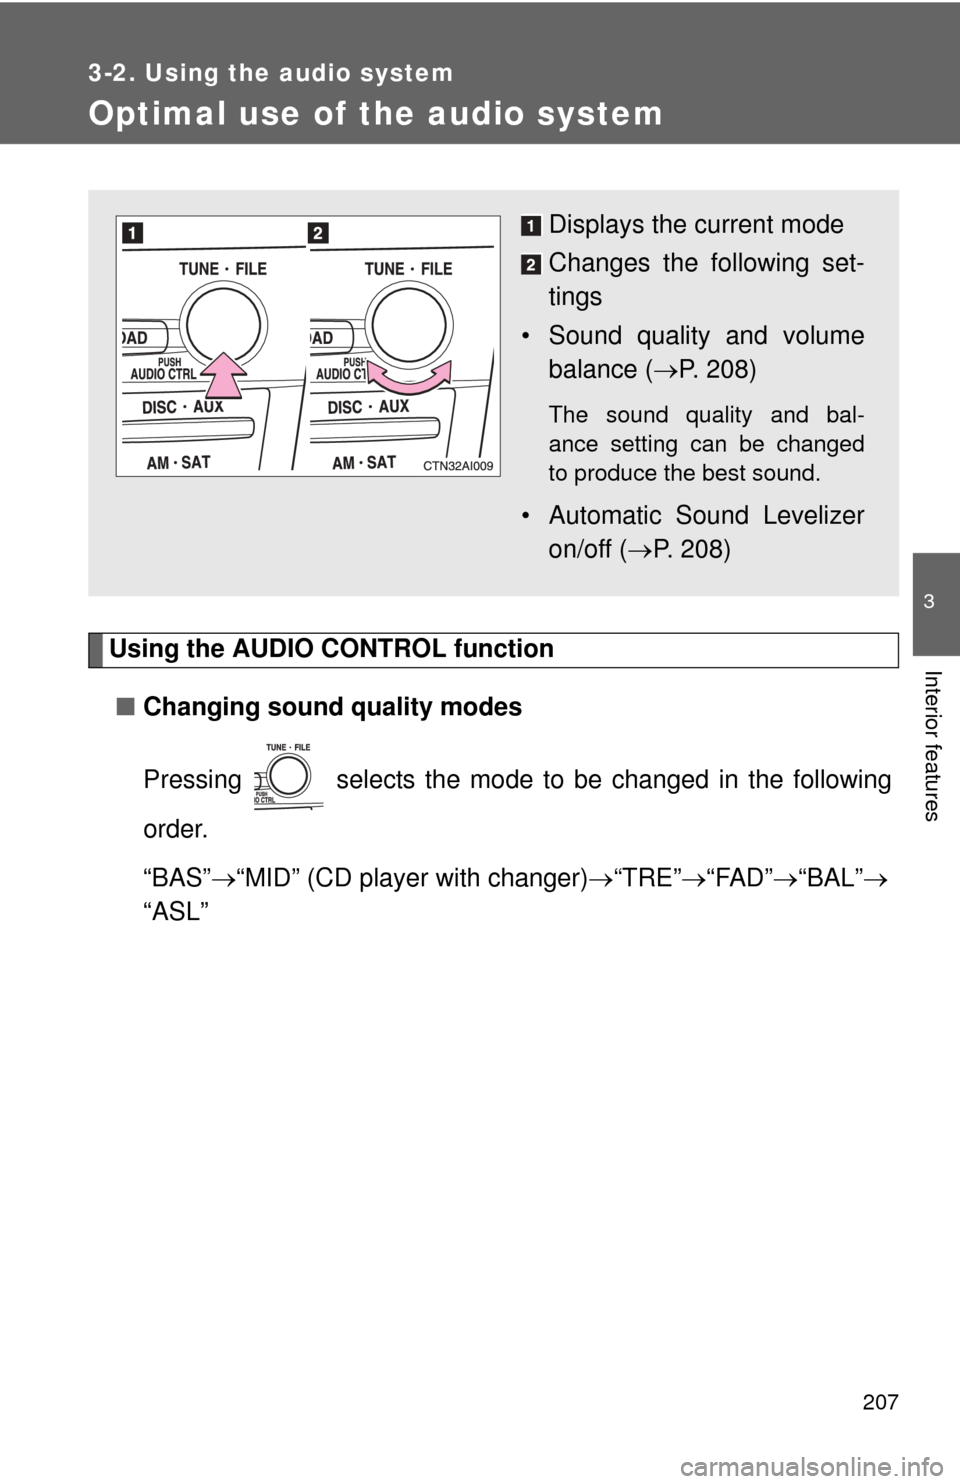
Using the AUDIO CONTROL function■ Changing sound quality modes
Pressing selects the mode to be changed in the following
order.
“BAS” “MID” (CD player with changer) “TRE” “FAD” “BAL”
“ASL”
Displays the current mode
Changes the following set-
tings
• Sound quality and volume balance ( P. 208)
The sound quality and bal-
ance setting can be changed
to produce the best sound.
• Automatic Sound Levelizer
on/off ( P. 208)
Page 208 of 440
208 3-2. Using the audio system
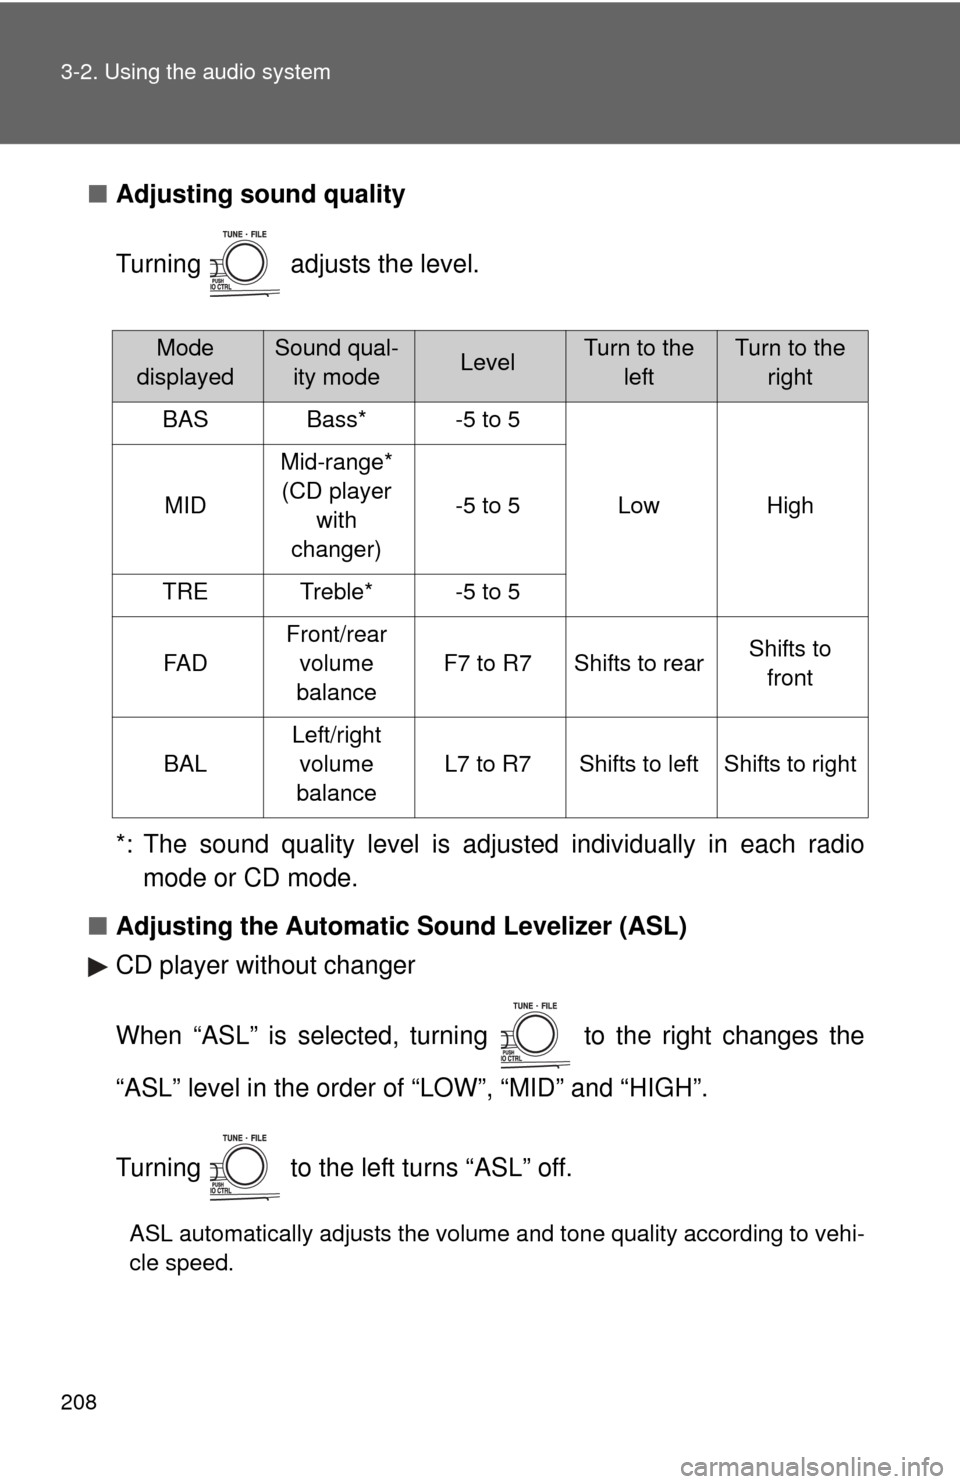
■Adjusting sound quality
Turning adjusts the level.
*: The sound quality level is adjusted individually in each radio
mode or CD mode.
■ Adjusting the Automatic Sound Levelizer (ASL)
CD player without changer
When “ASL” is selected, turning to the right changes the
“ASL” level in the order of “LOW”, “MID” and “HIGH”.
Turning to the left turns “ASL” off.
ASL automatically adjusts the volume and tone quality according to vehi-
cle speed.
Mode
displayedSound qual- ity modeLevelTurn to the leftTurn to the right
BASBass*-5 to 5
LowHighMID
Mid-range*(CD player with
changer)
-5 to 5
TRETreble*-5 to 5
FA D
Front/rear volume
balance
F7 to R7Shifts to rearShifts to front
BAL
Left/right volume
balance
L7 to R7Shifts to leftShifts to right
Page 209 of 440
209
3-2. Using the audio system
3
Interior features
CD player with changer
When “ASL” is selected, turning to the right turns “ASL” on,
and turning to the left turns “ASL” off.
“ASL” automatically adjusts the volume and tone quality according to the
noise level as you drive your vehicle.
■
Trademark owned by SRS Labs, In c. (CD player without changer only)
The audio systems utilize SRS FOCUS
and SRS TruBass audio
enhancement technologies, under license from SRS Labs, Inc., in all modes
except AM radio mode.
FOCUS, TruBass, SRS and
symbols are trademarks of SRS Labs,
Inc.
FOCUS and TruBass technologies are incorporated under license from
SRS Labs, Inc.
Page 211 of 440
211
3-2. Using the audio system
3
Interior features
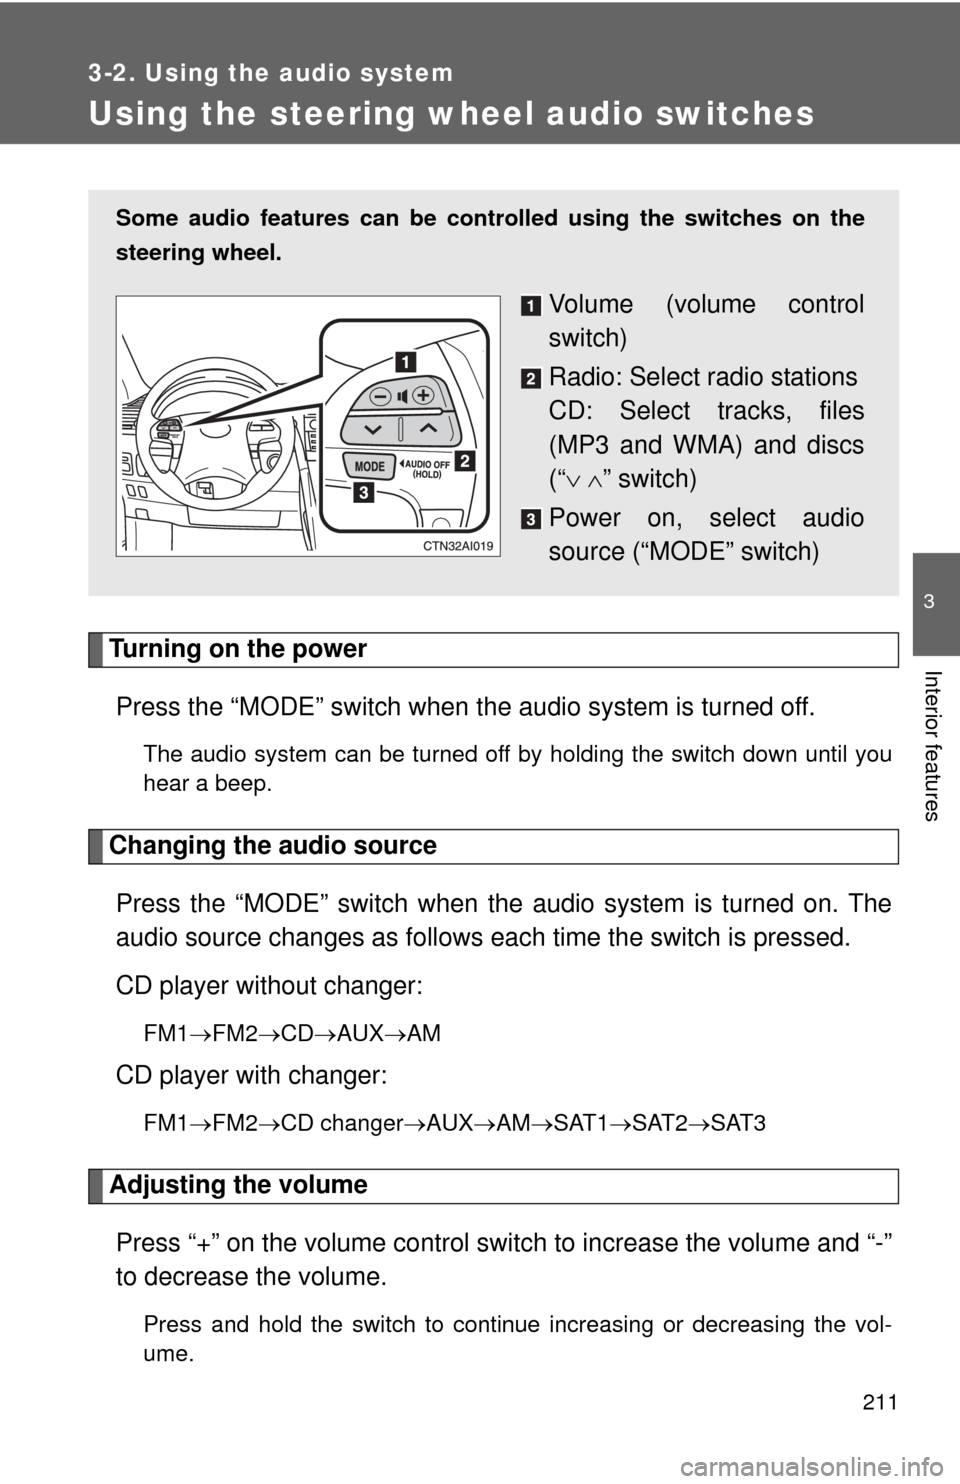
Using the steering wheel audio switches
Turning on the powerPress the “MODE” switch when th e audio system is turned off.
The audio system can be turned off by holding the switch down until you
hear a beep.
Changing the audio source
Press the “MODE” switch when the audio system is turned on. The
audio source changes as follows each time the switch is pressed.
CD player without changer:
FM1 FM2 CD AUXAM
CD player with changer:
FM1FM2 CD changer AUXAMSAT1 SAT2SAT3
Adjusting the volume
Press “+” on the volume control switch to increase the volume and “-”
to decrease the volume.
Press and hold the switch to continue increasing or decreasing the vol-
ume.
Some audio features can be cont rolled using the switches on the
steering wheel.
Volume (volume control
switch)
Radio: Select radio stations
CD: Select tracks, files
(MP3 and WMA) and discs
(“ ” switch)
Power on, select audio
source (“MODE” switch)