light TOYOTA CAMRY HYBRID 2018 Accessories, Audio & Navigation (in English)
[x] Cancel search | Manufacturer: TOYOTA, Model Year: 2018, Model line: CAMRY HYBRID, Model: TOYOTA CAMRY HYBRID 2018Pages: 340, PDF Size: 7.43 MB
Page 32 of 340
32
1. BASIC INFORMATION BEFORE OPERATION
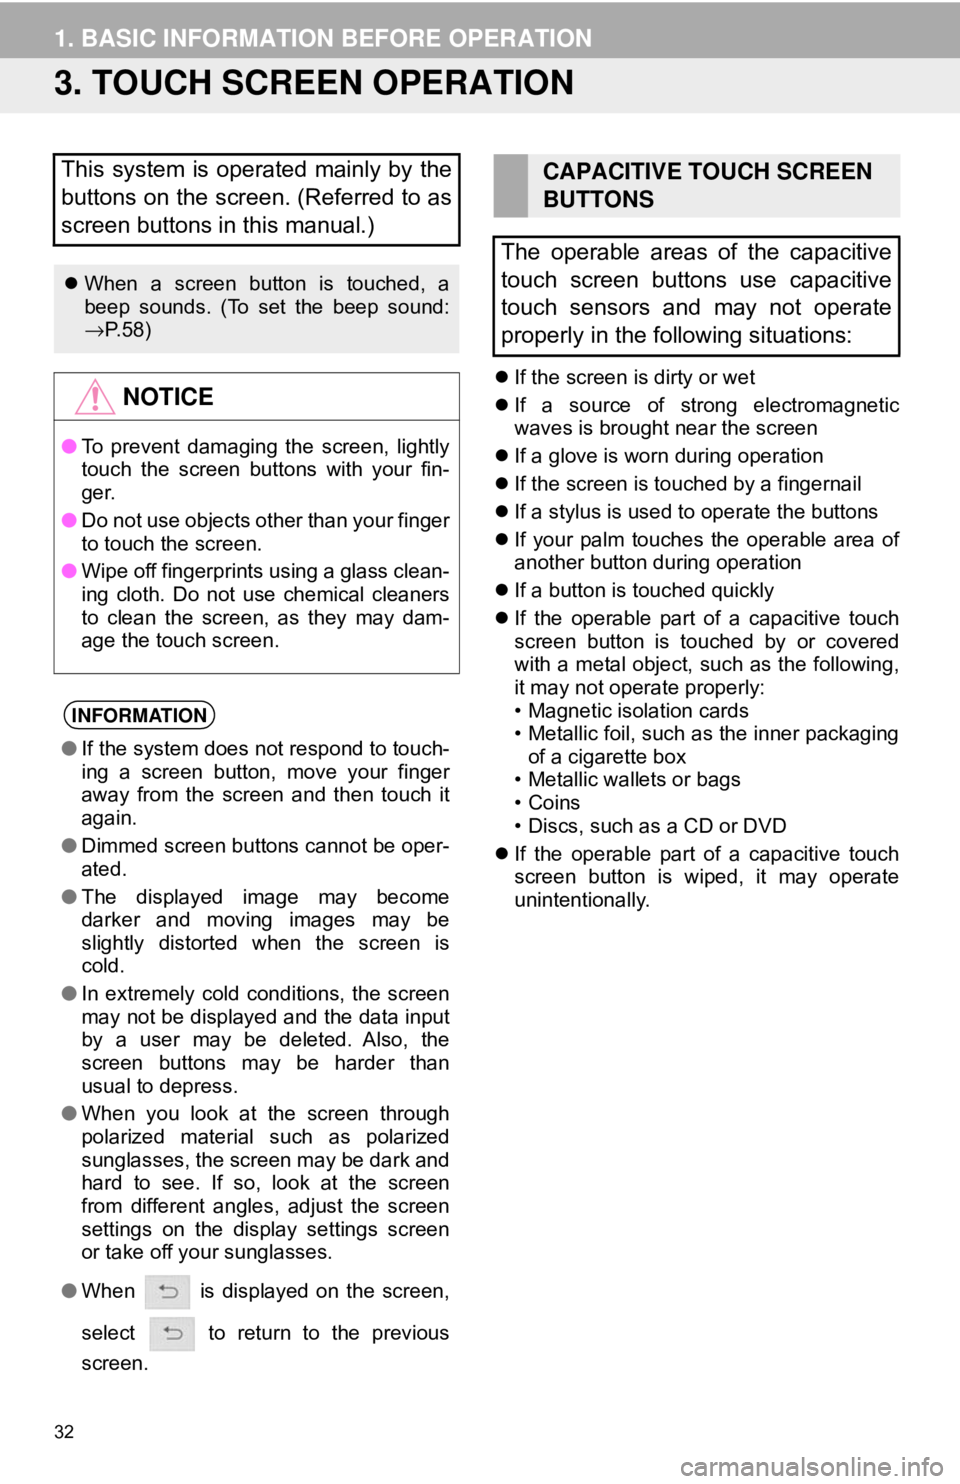
3. TOUCH SCREEN OPERATION
If the screen is dirty or wet
If a source of strong electromagnetic
waves is brought near the screen
If a glove is worn during operation
If the screen is touched by a fingernail
If a stylus is used to operate the buttons
If your palm touches the operable area of
another button during operation
If a button is touched quickly
If the operable part of a capacitive touch
screen button is touched by or covered
with a metal object, such as the following,
it may not operate properly:
• Magnetic isolation cards
• Metallic foil, such as the inner packaging
of a cigarette box
• Metallic wallets or bags
• Coins
• Discs, such as a CD or DVD
If the operable part of a capacitive touch
screen button is wiped, it may operate
unintentionally.
This system is operated mainly by the
buttons on the screen. (Referred to as
screen buttons in this manual.)
When a screen button is touched, a
beep sounds. (To set the beep sound:
→P. 5 8 )
NOTICE
● To prevent damaging the screen, lightly
touch the screen buttons with your fin-
ger.
● Do not use objects other than your finger
to touch the screen.
● Wipe off fingerprints using a glass clean-
ing cloth. Do not use chemical cleaners
to clean the screen, as they may dam-
age the touch screen.
INFORMATION
●If the system does not respond to touch-
ing a screen button, move your finger
away from the screen and then touch it
again.
● Dimmed screen buttons cannot be oper-
ated.
● The displayed image may become
darker and moving images may be
slightly distorted when the screen is
cold.
● In extremely cold conditions, the screen
may not be displayed and the data input
by a user may be deleted. Also, the
screen buttons may be harder than
usual to depress.
● When you look at the screen through
polarized material such as polarized
sunglasses, the screen may be dark and
hard to see. If so, look at the screen
from different angles, adjust the screen
settings on the display settings screen
or take off your sunglasses.
● When is displayed on the screen,
select to return to the previous
screen.
CAPACITIVE TOUCH SCREEN
BUTTONS
The operable areas of the capacitive
touch screen buttons use capacitive
touch sensors and may not operate
properly in the following situations:
Page 39 of 340

39
1. BASIC INFORMATION BEFORE OPERATION
BASIC FUNCTION
2
6. SCREEN ADJUSTMENT
1Press the “MENU” button.
2Select “Display” .
3Select the desired items to be set.
1Select “Day Mode” .
The contrast and brightness of the
screen display and the image of the
camera display can be adjusted. The
screen can also be turned off, and/or
changed to either day or night mode.
No.FunctionPage
Select to turn the screen off.
To turn it on, press any but-
ton.⎯
Select to turn day mode on/
off.39
Select to adjust the screen
display.
40Select to adjust the camera
display.
INFORMATION
●When the screen is viewed through
polarized sunglasses, a rainbow pattern
may appear on the screen due to optical
characteristics of the screen. If this is
disturbing, please operate the screen
without polarized sunglasses.
CHANGING BETWEEN DAY
AND NIGHT MODE
Depending on the position of the head-
light switch, the screen changes to day
or night mode. This feature is available
when the headlight is switched on.
INFORMATION
● If the screen is set to day mode with the
headlight switch turned on, this condition
is memorized even with the engine
Page 59 of 340
59
3. OTHER SETTINGS
BASIC FUNCTION
2
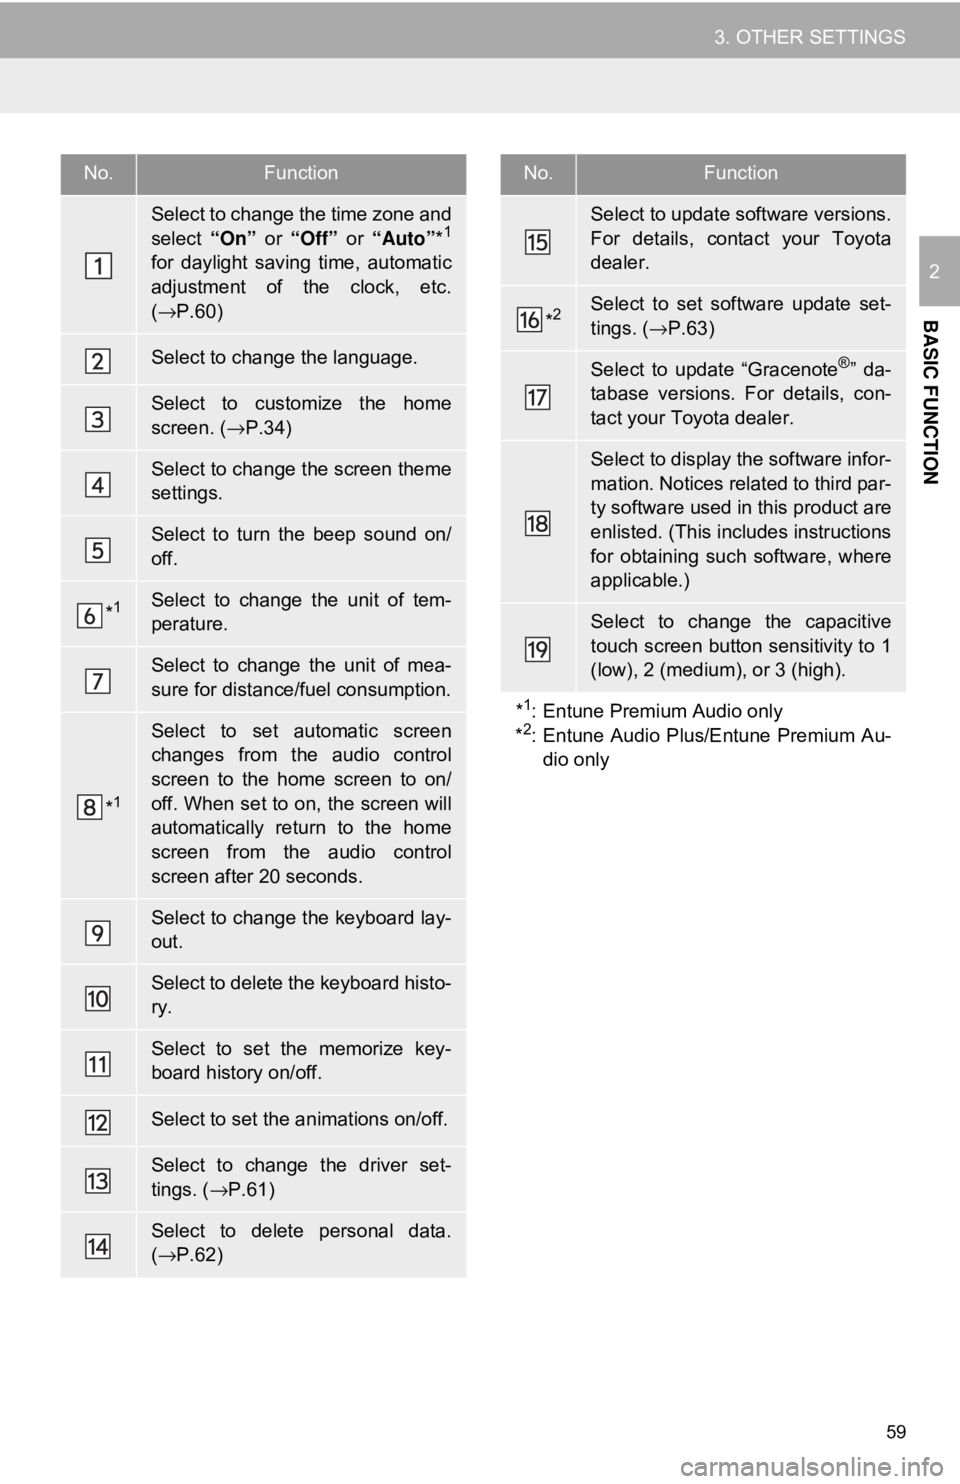
No.Function
Select to change the time zone and
select “On” or “Off” or “Auto”*1
for daylight saving time, automatic
adjustment of the clock, etc.
(→ P.60)
Select to change the language.
Select to customize the home
screen. (→ P.34)
Select to change the screen theme
settings.
Select to turn the beep sound on/
off.
*1Select to change the unit of tem-
perature.
Select to change the unit of mea-
sure for distance/fuel consumption.
*1
Select to set automatic screen
changes from the audio control
screen to the home screen to on/
off. When set to on, the screen will
automatically return to the home
screen from the audio control
screen after 20 seconds.
Select to change the keyboard lay-
out.
Select to delete the keyboard histo-
ry.
Select to set the memorize key-
board history on/off.
Select to set the animations on/off.
Select to change the driver set-
tings. (→P.61)
Select to delete personal data.
(→ P.62)
Select to update software versions.
For details, contact your Toyota
dealer.
*2Select to set software update set-
tings. ( →P.63)
Select to update “Gracenote®” da-
tabase versions. For details, con-
tact your Toyota dealer.
Select to display the software infor-
mation. Notices related to third par-
ty software used in this product are
enlisted. (This includes instructions
for obtaining such software, where
applicable.)
Select to change the capacitive
touch screen button sensitivity to 1
(low), 2 (medium), or 3 (high).
*
1: Entune Premium Audio only
*2: Entune Audio Plus/Entune Premium Au- dio only
No.Function
Page 60 of 340

60
3. OTHER SETTINGS
1Display the general settings screen.
(→P.58)
2Select “Clock”.
3Select the desired items to be set.
■TIME ZONE
1Select “Time Zone” .
2Select the desired time zone.
Entune Premium Audio only:
If “Auto” is selected, the time zone is
selected automatically by current vehicle
position.
CLOCK SETTINGS
No.Function
Select to change the time zone.
( → P.60)
Select to set daylight saving time
on/off/auto*1.
*2
Select to set automatic adjustment
of the clock by GPS on/off.
When set to off, the clock can be
manually adjusted. ( →P.61)
Select to set the 24 hour time for-
mat on/off.
When set to off, the clock is dis-
played in 12 hour time format.
*
1: Entune Premium Audio only
*2: Entune Audio Plus/Entune Premium Au- dio only
A time zone can be selected and GMT
can be set.
Page 101 of 340
101
3. MEDIA OPERATION
AUDIO SYSTEM
3
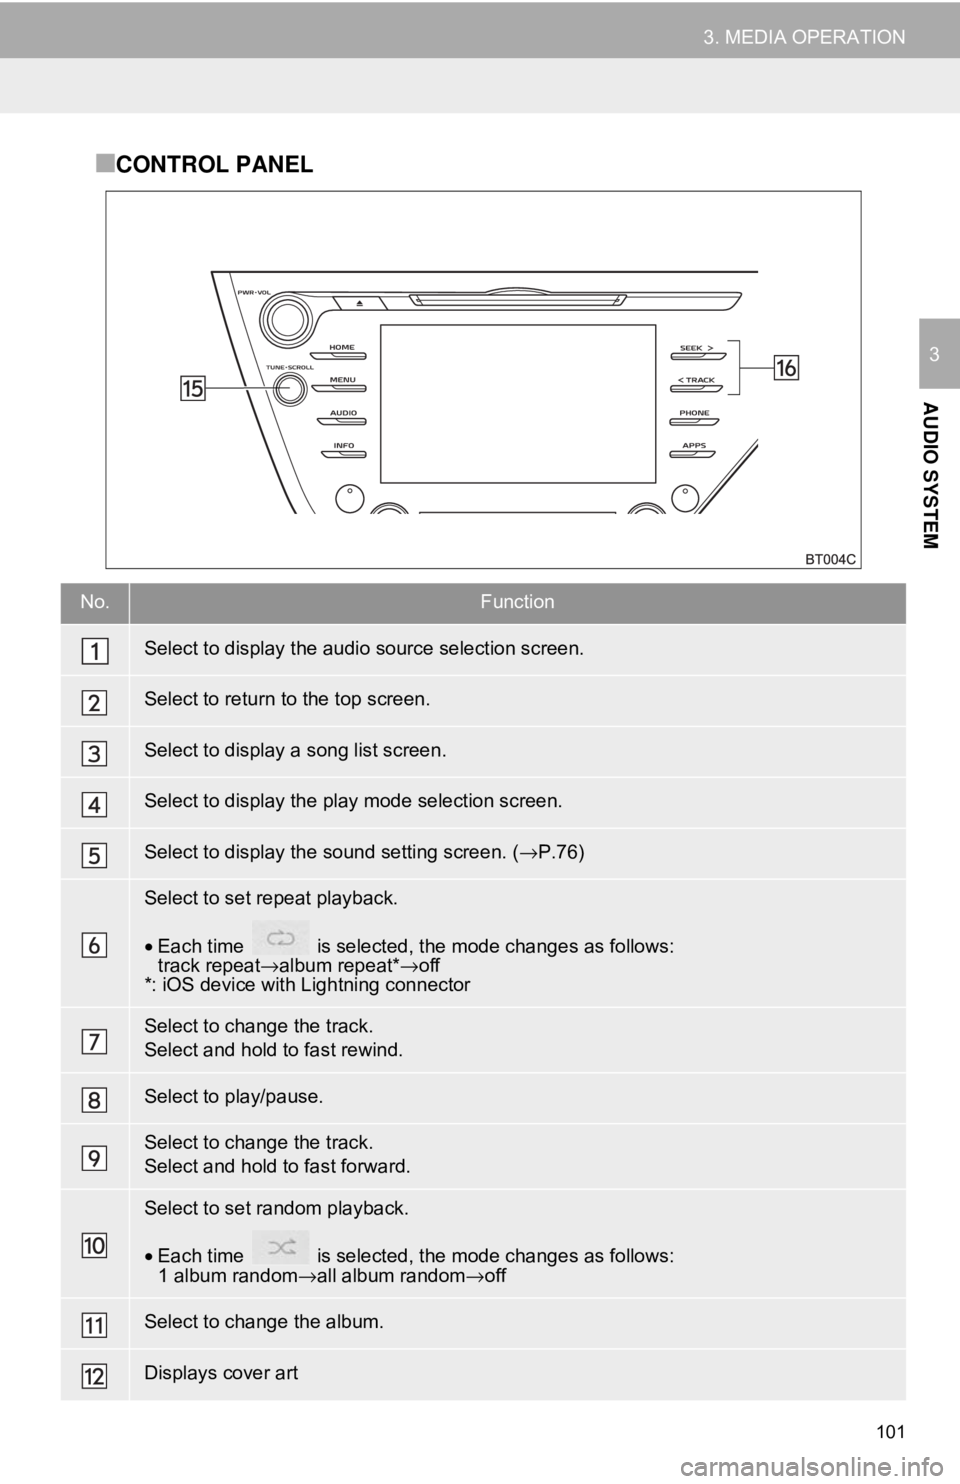
■CONTROL PANEL
No.Function
Select to display the audio source selection screen.
Select to return to the top screen.
Select to display a song list screen.
Select to display the play mode selection screen.
Select to display the sound setting screen. (→P.76)
Select to set repeat playback.
•Each time is selected, the mode changes as follows:
track repeat →album repeat* →off
*: iOS device with Lightning connector
Select to change the track.
Select and hold to fast rewind.
Select to play/pause.
Select to change the track.
Select and hold to fast forward.
Select to set random playback.
• Each time is selected, the mode changes as follows:
1 album random →all album random→ off
Select to change the album.
Displays cover art
Page 115 of 340
115
AUDIO SYSTEM
3
6. TIPS FOR OPERATING THE AUDIO SYSTEM
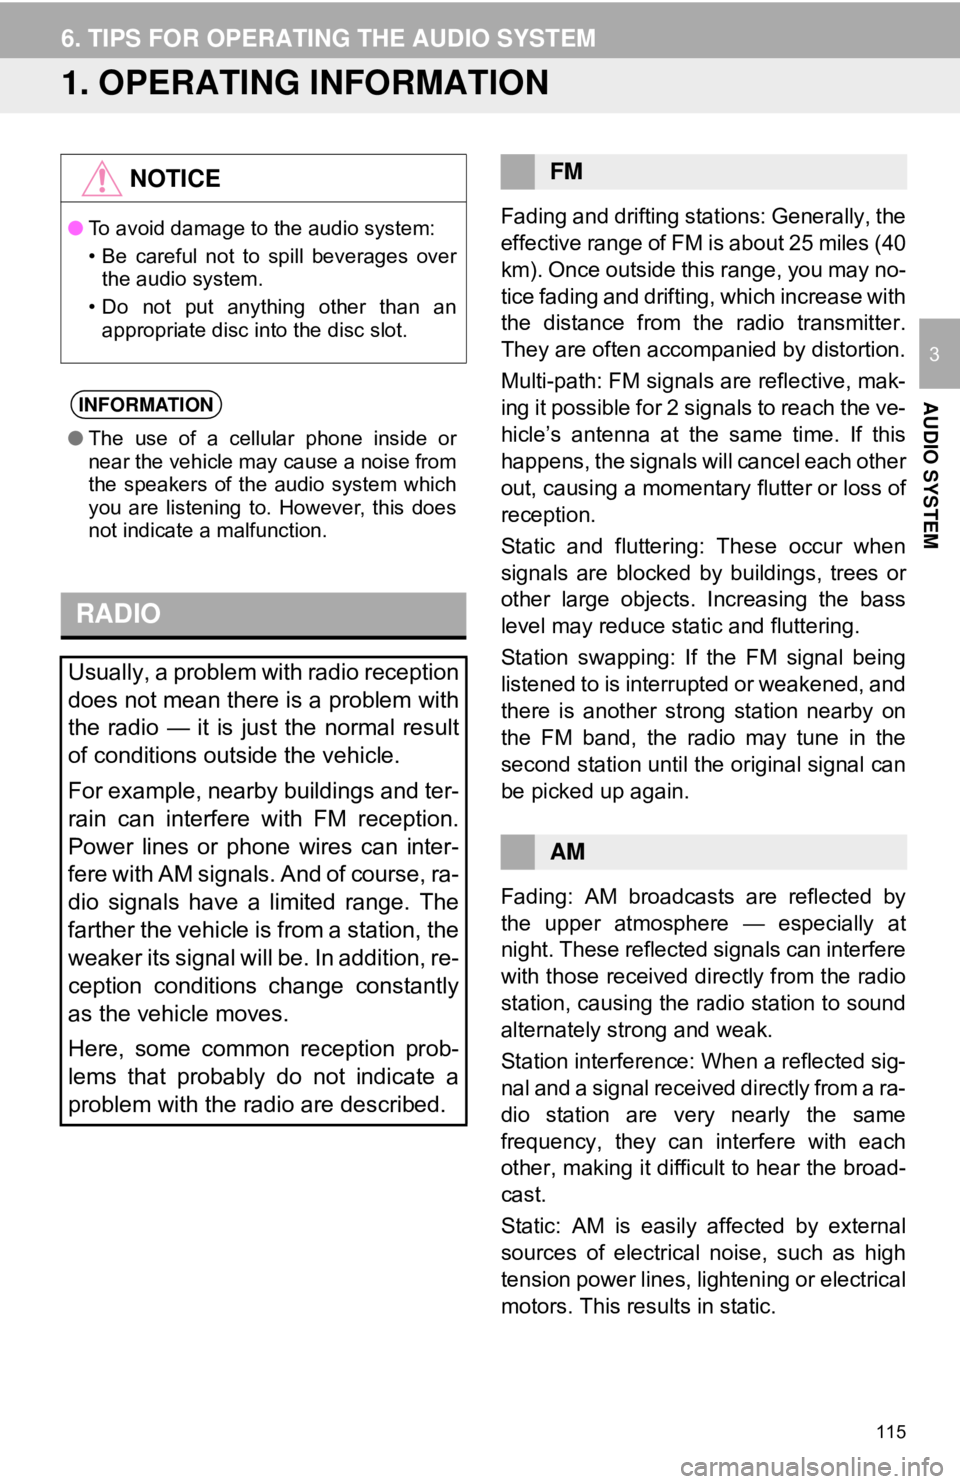
1. OPERATING INFORMATION
Fading and drifting stations: Generally, the
effective range of FM is about 25 miles (40
km). Once outside this range, you may no-
tice fading and drifting, which increase with
the distance from the radio transmitter.
They are often accompanied by distortion.
Multi-path: FM signals are reflective, mak-
ing it possible for 2 signals to reach the ve-
hicle’s antenna at the same time. If this
happens, the signals will cancel each other
out, causing a momentary flutter or loss of
reception.
Static and fluttering: These occur when
signals are blocked by buildings, trees or
other large objects. Increasing the bass
level may reduce static and fluttering.
Station swapping: If the FM signal being
listened to is interrupted or weakened, and
there is another st rong station nearby on
the FM band, the radio may tune in the
second station until the original signal can
be picked up again.
Fading: AM broadcasts are reflected by
the upper atmosphere — especially at
night. These reflected signals can interfere
with those received directly from the radio
station, causing the radio station to sound
alternately strong and weak.
Station interference: When a reflected sig-
nal and a signal received directly from a ra-
dio station are very nearly the same
frequency, they can interfere with each
other, making it difficult to hear the broad-
cast.
Static: AM is easily affected by external
sources of electrical noise, such as high
tension power lines, lightening or electrical
motors. This results in static.
NOTICE
● To avoid damage to the audio system:
• Be careful not to spill beverages over
the audio system.
• Do not put anything other than an appropriate disc into the disc slot.
INFORMATION
● The use of a cellular phone inside or
near the vehicle may cause a noise from
the speakers of the audio system which
you are listening to. However, this does
not indicate a malfunction.
RADIO
Usually, a problem with radio reception
does not mean there is a problem with
the radio — it is just the normal result
of conditions outside the vehicle.
For example, nearby buildings and ter-
rain can interfere with FM reception.
Power lines or phone wires can inter-
fere with AM signals. And of course, ra-
dio signals have a limited range. The
farther the vehicle is from a station, the
weaker its signal will be. In addition, re-
ception conditions change constantly
as the vehicle moves.
Here, some common reception prob-
lems that probably do not indicate a
problem with the radio are described.
FM
AM
Page 117 of 340
117
6. TIPS FOR OPERATING THE AUDIO SYSTEM
AUDIO SYSTEM
3
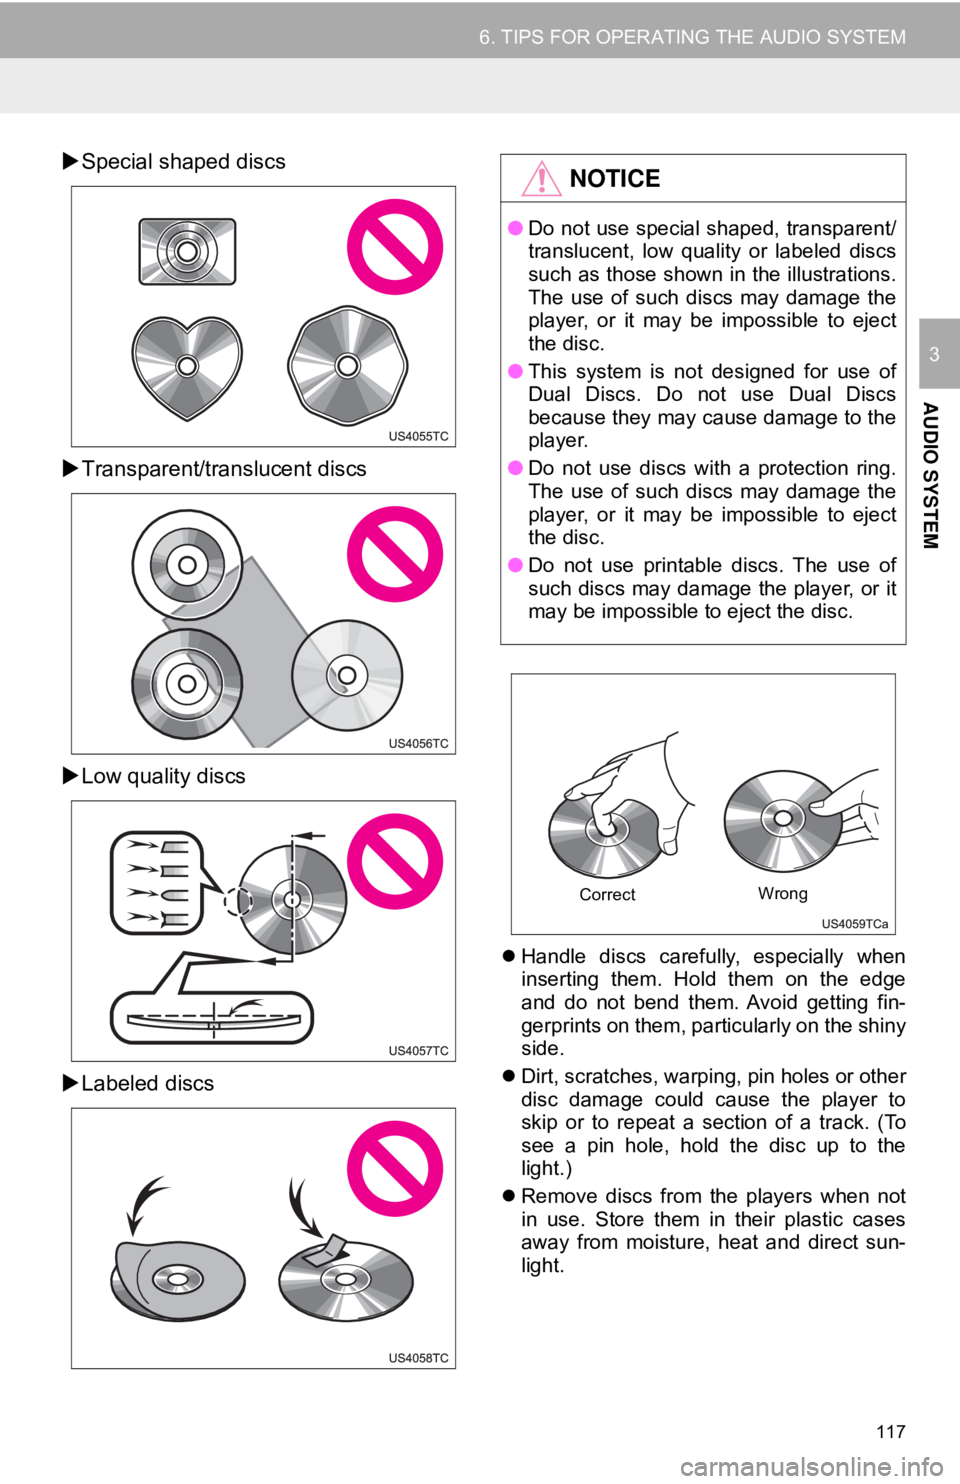
Special shaped discs
Transparent/translucent discs
Low quality discs
Labeled discs
Handle discs carefully, especially when
inserting them. Hold them on the edge
and do not bend them. Avoid getting fin-
gerprints on them, particularly on the shiny
side.
Dirt, scratches, warping, pin holes or other
disc damage could cause the player to
skip or to repeat a section of a track. (To
see a pin hole, hold the disc up to the
light.)
Remove discs from the players when not
in use. Store them in their plastic cases
away from moisture, heat and direct sun-
light.
NOTICE
● Do not use special shaped, transparent/
translucent, low quality or labeled discs
such as those shown in the illustrations.
The use of such discs may damage the
player, or it may be impossible to eject
the disc.
● This system is not designed for use of
Dual Discs. Do not use Dual Discs
because they may cause damage to the
player.
● Do not use discs with a protection ring.
The use of such discs may damage the
player, or it may be impossible to eject
the disc.
● Do not use printable discs. The use of
such discs may damage the player, or it
may be impossible to eject the disc.
Correct Wrong
Page 118 of 340
118
6. TIPS FOR OPERATING THE AUDIO SYSTEM
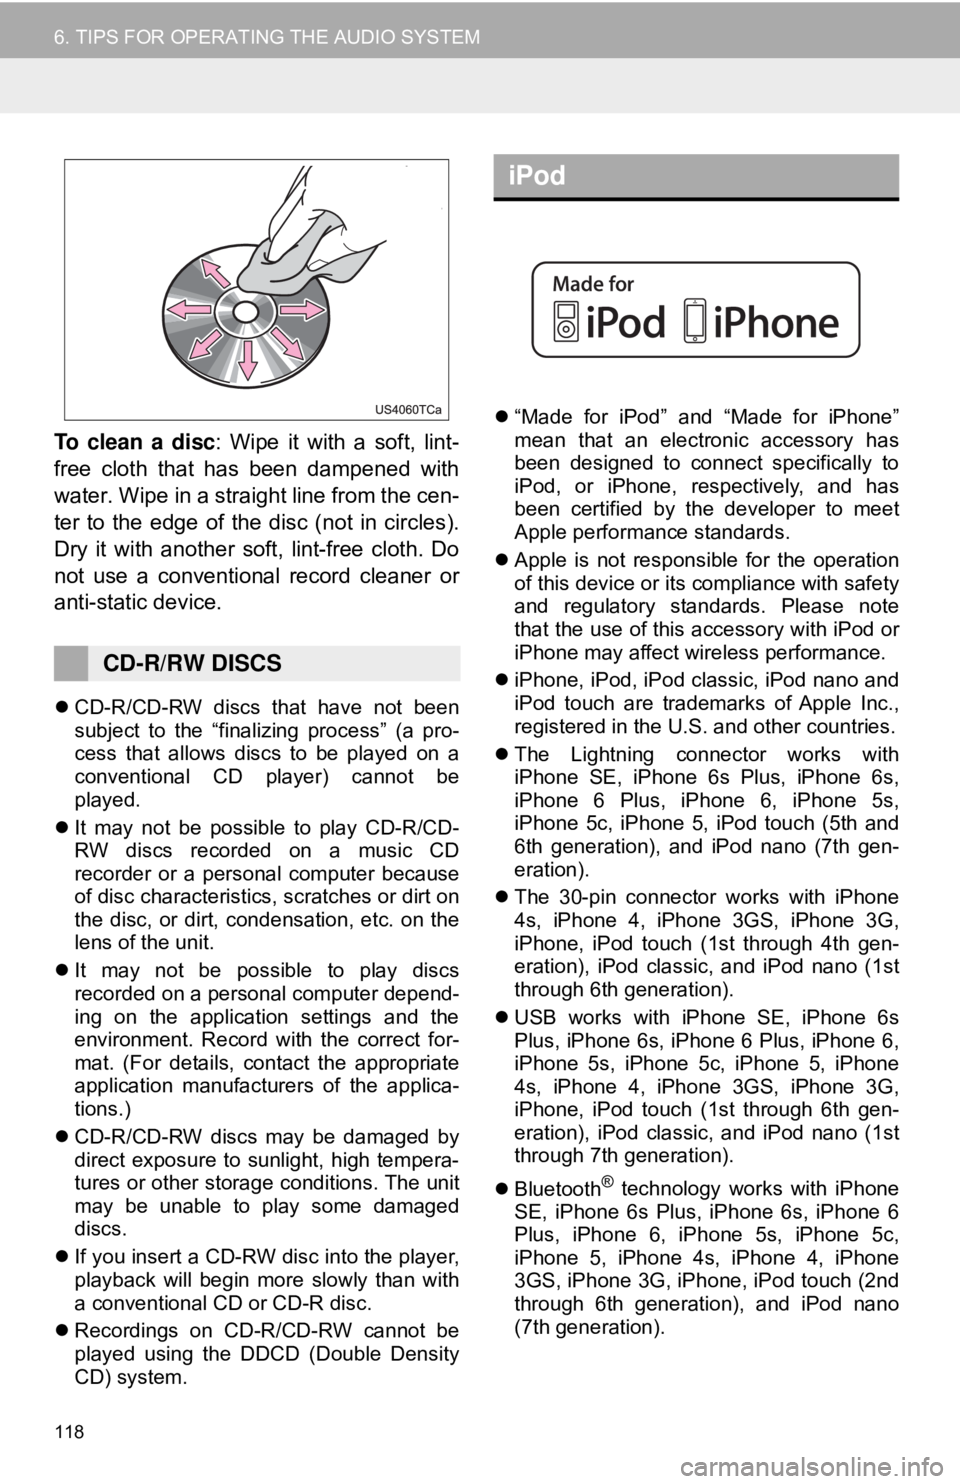
To clean a disc: Wipe it with a soft, lint-
free cloth that has been dampened with
water. Wipe in a straight line from the cen-
ter to the edge of the disc (not in circles).
Dry it with another soft, lint-free cloth. Do
not use a conventional record cleaner or
anti-static device.
CD-R/CD-RW discs that have not been
subject to the “finalizing process” (a pro-
cess that allows discs to be played on a
conventional CD player) cannot be
played.
It may not be possible to play CD-R/CD-
RW discs recorded on a music CD
recorder or a personal computer because
of disc characteristics, scratches or dirt on
the disc, or dirt, condensation, etc. on the
lens of the unit.
It may not be possible to play discs
recorded on a personal computer depend-
ing on the application settings and the
environment. Record with the correct for-
mat. (For details, contact the appropriate
application manufacturers of the applica-
tions.)
CD-R/CD-RW discs may be damaged by
direct exposure to sunlight, high tempera-
tures or other storage conditions. The unit
may be unable to play some damaged
discs.
If you insert a CD-RW disc into the player,
playback will begin more slowly than with
a conventional CD or CD-R disc.
Recordings on CD-R/CD-RW cannot be
played using the DDCD (Double Density
CD) system.
“Made for iPod” and “Made for iPhone”
mean that an electronic accessory has
been designed to connect specifically to
iPod, or iPhone, respectively, and has
been certified by the developer to meet
Apple performance standards.
Apple is not responsible for the operation
of this device or its compliance with safety
and regulatory standards. Please note
that the use of this accessory with iPod or
iPhone may affect wireless performance.
iPhone, iPod, iPod classic, iPod nano and
iPod touch are trademarks of Apple Inc.,
registered in the U.S. and other countries.
The Lightning connector works with
iPhone SE, iPhone 6s Plus, iPhone 6s,
iPhone 6 Plus, iPhone 6, iPhone 5s,
iPhone 5c, iPhone 5, iPod touch (5th and
6th generation), and iPod nano (7th gen-
eration).
The 30-pin connector works with iPhone
4s, iPhone 4, iPhone 3GS, iPhone 3G,
iPhone, iPod touch (1st through 4th gen-
eration), iPod classic, and iPod nano (1st
through 6th generation).
USB works with iPhone SE, iPhone 6s
Plus, iPhone 6s, iPhone 6 Plus, iPhone 6,
iPhone 5s, iPhone 5c, iPhone 5, iPhone
4s, iPhone 4, iPhone 3GS, iPhone 3G,
iPhone, iPod touch (1st through 6th gen-
eration), iPod classic, and iPod nano (1st
through 7th generation).
Bluetooth
® technology works with iPhone
SE, iPhone 6s Plus, iPhone 6s, iPhone 6
Plus, iPhone 6, iPhone 5s, iPhone 5c,
iPhone 5, iPhone 4s, iPhone 4, iPhone
3GS, iPhone 3G, iPhone, iPod touch (2nd
through 6th generation), and iPod nano
(7th generation).
CD-R/RW DISCS
iPod
Page 153 of 340
153
1. REAR VIEW MONITOR SYSTEM
PERIPHERAL MONITORING SYSTEM
6
3. THINGS YOU SHOULD KNOW
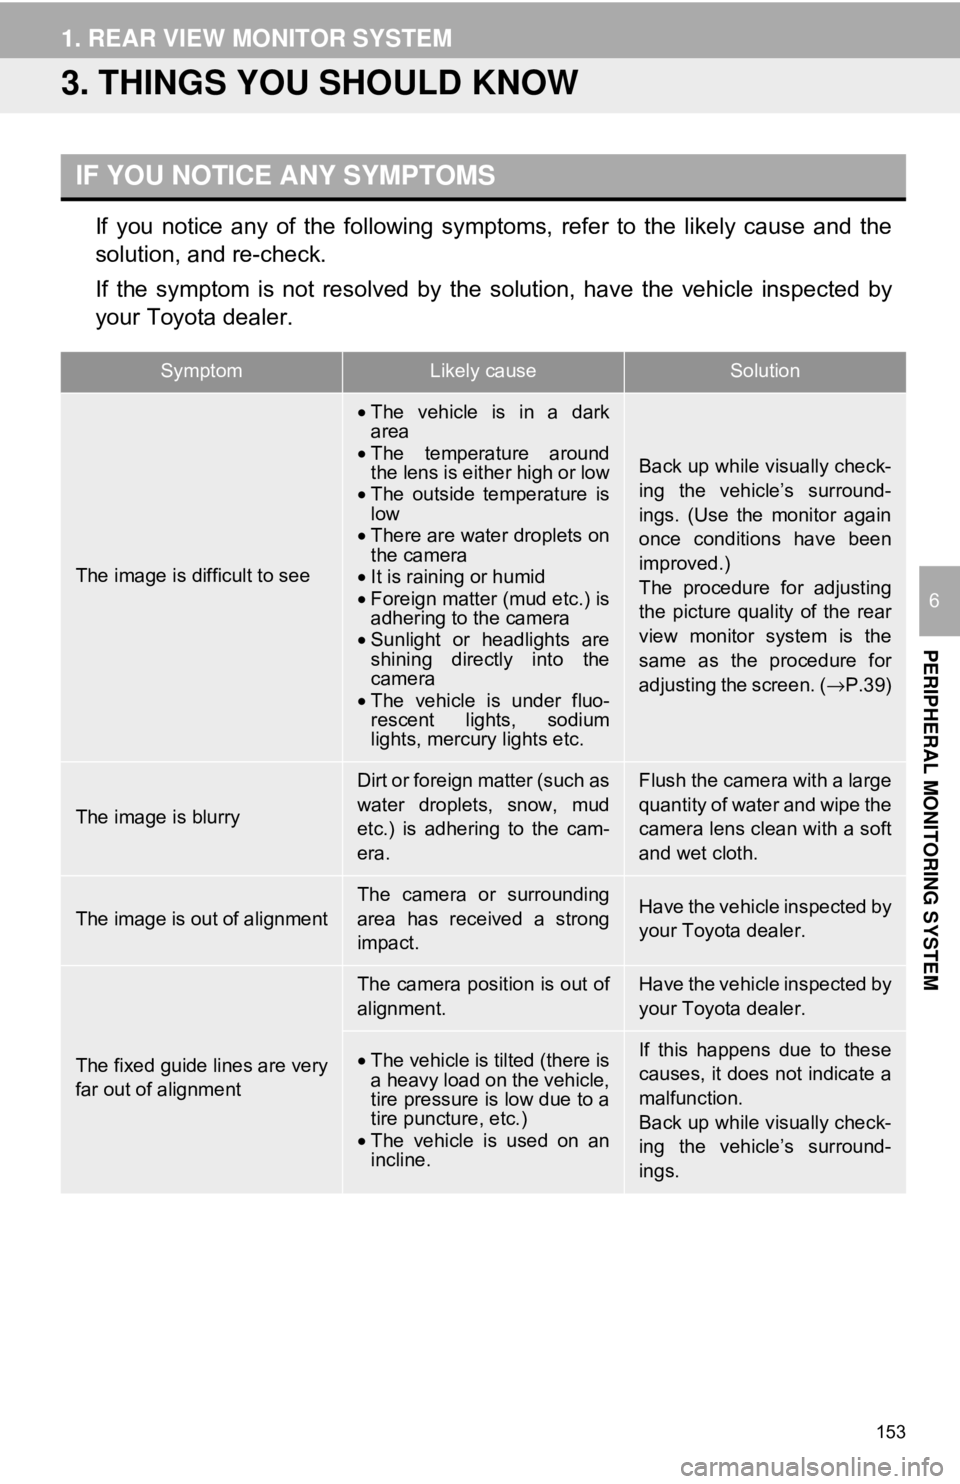
If you notice any of the following symptoms, refer to the likely cause and the
solution, and re-check.
If the symptom is not resolved by the solution, have the vehicle inspected by
your Toyota dealer.
IF YOU NOTICE ANY SYMPTOMS
SymptomLikely causeSolution
The image is difficult to see
•The vehicle is in a dark
area
• The temperature around
the lens is either high or low
• The outside temperature is
low
• There are water droplets on
the camera
• It is raining or humid
• Foreign matter (mud etc.) is
adhering to the camera
• Sunlight or headlights are
shining directly into the
camera
• The vehicle is under fluo-
rescent lights, sodium
lights, mercury lights etc.
Back up while visually check-
ing the vehicle’s surround-
ings. (Use the monitor again
once conditions have been
improved.)
The procedure for adjusting
the picture quality of the rear
view monitor system is the
same as the procedure for
adjusting the screen. ( →P.39)
The image is blurry
Dirt or foreign matter (such as
water droplets, snow, mud
etc.) is adhering to the cam-
era.Flush the camera with a large
quantity of water and wipe the
camera lens clean with a soft
and wet cloth.
The image is out of alignment
The camera or surrounding
area has received a strong
impact.Have the vehicle inspected by
your Toyota dealer.
The fixed guide lines are very
far out of alignment
The camera position is out of
alignment.Have the vehicle inspected by
your Toyota dealer.
•The vehicle is tilted (there is
a heavy load on the vehicle,
tire pressure is low due to a
tire puncture, etc.)
• The vehicle is used on an
incline.If this happens due to these
causes, it does not indicate a
malfunction.
Back up while visually check-
ing the vehicle’s surround-
ings.
Page 167 of 340
167
2. TOYOTA PARKING ASSIST MONITOR
PERIPHERAL MONITORING SYSTEM
6
6. THINGS YOU SHOULD KNOW
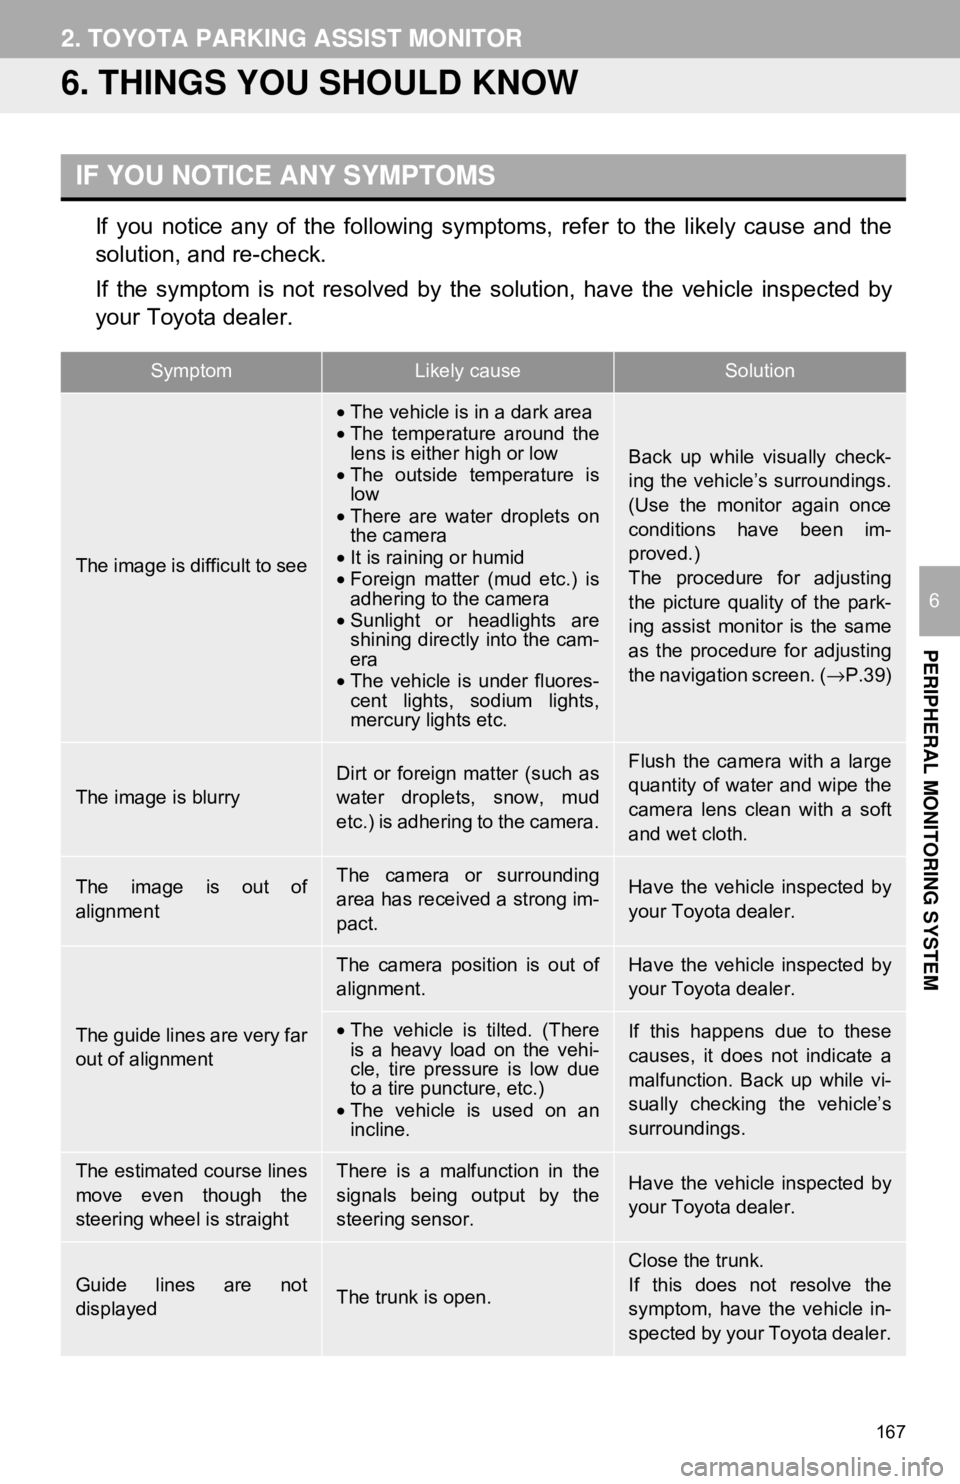
If you notice any of the following symptoms, refer to the likely cause and the
solution, and re-check.
If the symptom is not resolved by the solution, have the vehicle inspected by
your Toyota dealer.
IF YOU NOTICE ANY SYMPTOMS
SymptomLikely causeSolution
The image is difficult to see
•The vehicle is in a dark area
• The temperature around the
lens is either high or low
• The outside temperature is
low
• There are water droplets on
the camera
• It is raining or humid
• Foreign matter (mud etc.) is
adhering to the camera
• Sunlight or headlights are
shining directly into the cam-
era
• The vehicle is under fluores-
cent lights, sodium lights,
mercury lights etc.
Back up while visually check-
ing the vehicle’s surroundings.
(Use the monitor again once
conditions have been im-
proved.)
The procedure for adjusting
the picture quality of the park-
ing assist monitor is the same
as the procedure for adjusting
the navigation screen. (→ P.39)
The image is blurry
Dirt or foreign matter (such as
water droplets, snow, mud
etc.) is adhering to the camera.Flush the camera with a large
quantity of water and wipe the
camera lens clean with a soft
and wet cloth.
The image is out of
alignmentThe camera or surrounding
area has received a strong im-
pact.Have the vehicle inspected by
your Toyota dealer.
The guide lines are very far
out of alignment
The camera position is out of
alignment.Have the vehicle inspected by
your Toyota dealer.
•The vehicle is tilted. (There
is a heavy load on the vehi-
cle, tire pressure is low due
to a tire puncture, etc.)
• The vehicle is used on an
incline.If this happens due to these
causes, it does not indicate a
malfunction. Back up while vi-
sually checking the vehicle’s
surroundings.
The estimated course lines
move even though the
steering wheel is straightThere is a malfunction in the
signals being output by the
steering sensor.Have the vehicle inspected by
your Toyota dealer.
Guide lines are not
displayedThe trunk is open.
Close the trunk.
If this does not resolve the
symptom, have the vehicle in-
spected by your Toyota dealer.