sensor TOYOTA CAMRY HYBRID 2018 (in English) User Guide
[x] Cancel search | Manufacturer: TOYOTA, Model Year: 2018, Model line: CAMRY HYBRID, Model: TOYOTA CAMRY HYBRID 2018Pages: 596, PDF Size: 10.01 MB
Page 178 of 596
1783-4. Adjusting the steering wheel and mirrors
Auto anti-glare inside rear view mirror
Responding to the level of brightne ss of the headlights of vehicles
behind, the reflected light is automatically reduced.
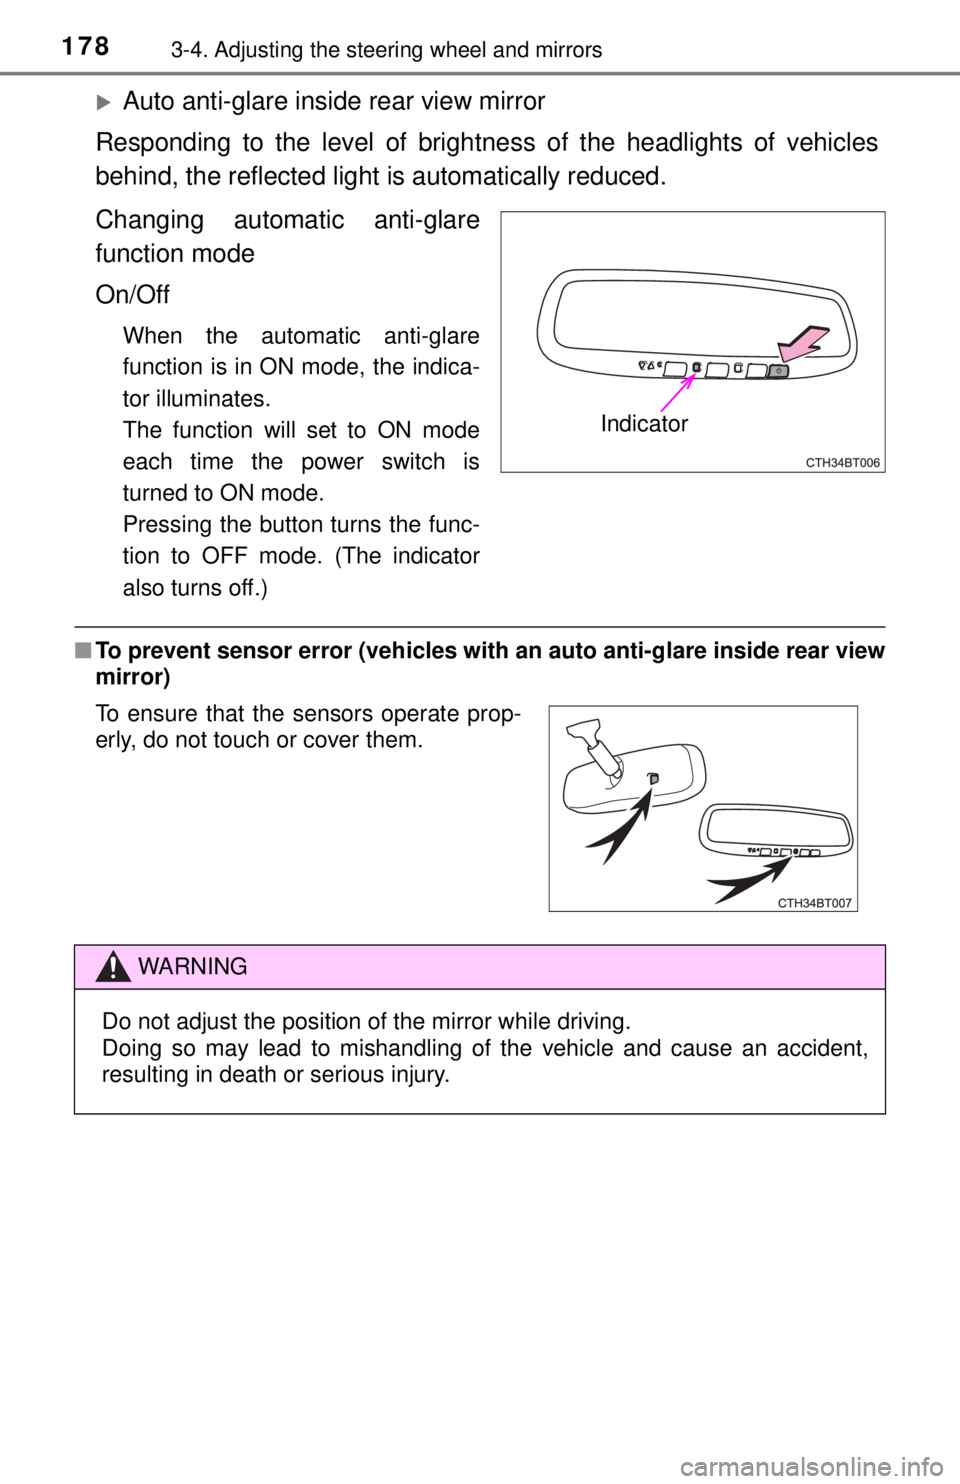
Changing automatic anti-glare
function mode
On/Off
When the automatic anti-glare
function is in ON mode, the indica-
tor illuminates.
The function will set to ON mode
each time the power switch is
turned to ON mode.
Pressing the button turns the func-
tion to OFF mode. (The indicator
also turns off.)
■ To prevent sensor error (vehicles with an auto anti-glare inside rear view
mirror)
Indicator
To ensure that the sensors operate prop-
erly, do not touch or cover them.
WARNING
Do not adjust the position of the mirror while driving.
Doing so may lead to mishandling of the vehicle and cause an accident,
resulting in death or serious injury.
Page 228 of 596
2284-3. Operating the lights and wipers
AFS (Adaptive Front-lighting System) secures excellent visibility at
intersections and on curves by auto matically adjusting the direction of
the light axis of the headlights according to vehicle speed and the
degree of the tire’s angle as controlled by steering input.
AFS operates at speeds of 6 mph (10 km/h) or higher.
■Daytime running light system
●Type A:
The daytime running lights illuminate the headlights and, they are darker
than the headlights.
Type B:
The daytime running lights illuminate the parking lights and, they are
brighter than parking lights.
● To make your vehicle more visible to other drivers during daytime driving,
the daytime running lights turn on automatically when all of the following
conditions are met. (The daytime running lights are not designed for use at
night.)
• The hybrid system is starting
• The parking brake released
• The headlight switch is in (Canada only), or (when the
surroundings are bright) position
The daytime running lights remain on after they illuminate due to the condi-
tions above, even if the parking brake is set again.
● For U.S.A.: Daytime running lights can be turned off by operating the switch.
● Compared to turning on the headlights, the daytime running light system
offers greater durability and consumes less electricity, so it can help improve
fuel economy.
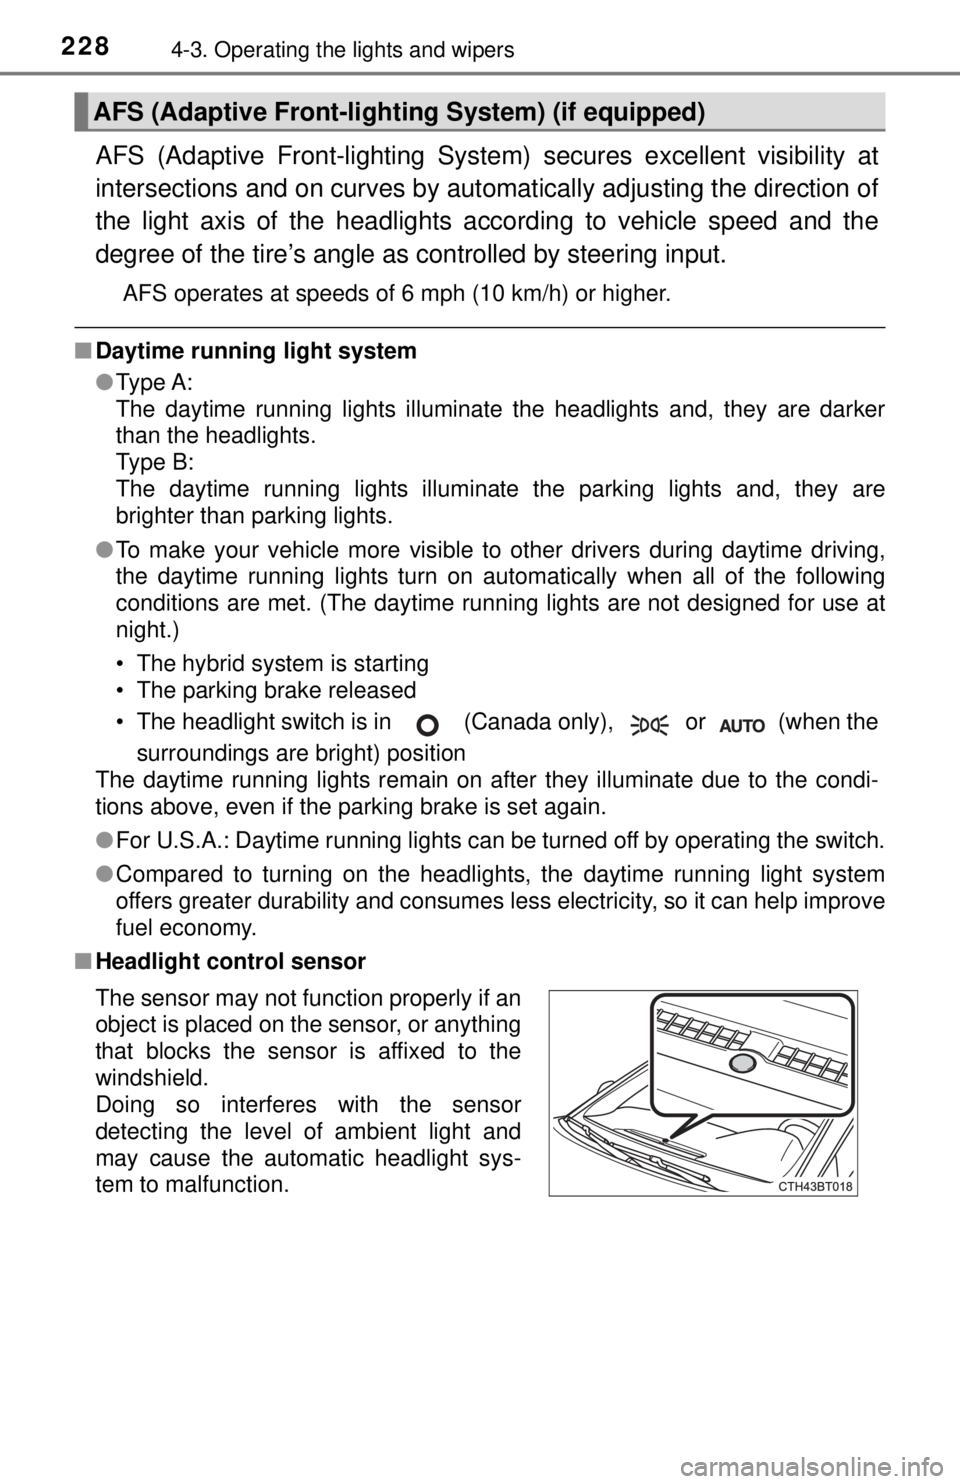
■ Headlight control sensor
AFS (Adaptive Front-lighting System) (if equipped)
The sensor may not function properly if an
object is placed on the sensor, or anything
that blocks the sensor is affixed to the
windshield.
Doing so interferes with the sensor
detecting the level of ambient light and
may cause the automatic headlight sys-
tem to malfunction.
Page 230 of 596
2304-3. Operating the lights and wipers
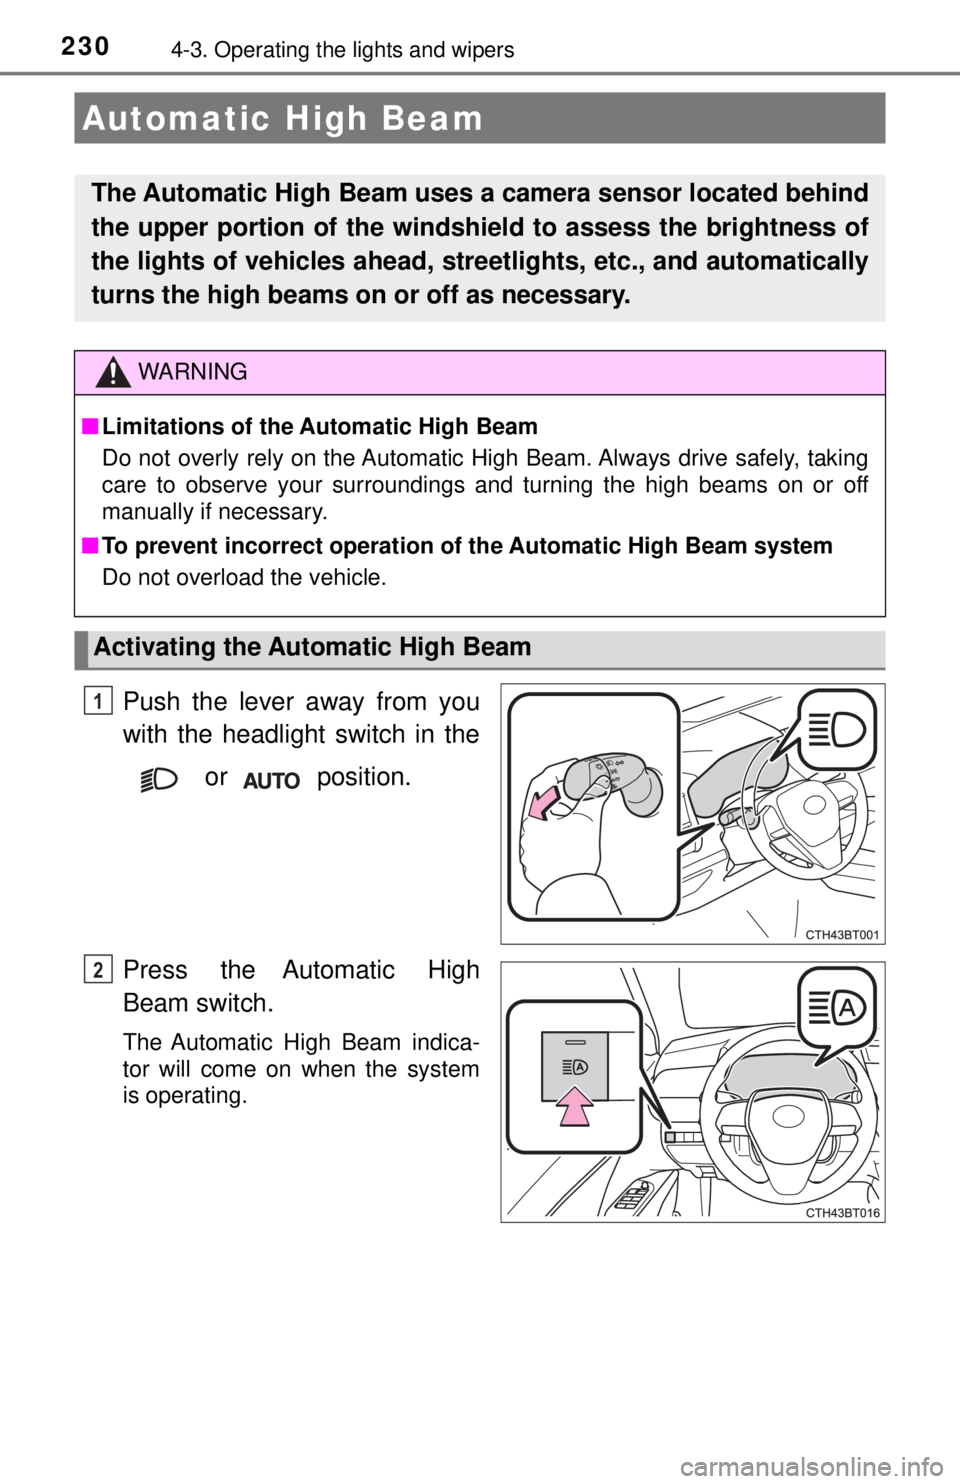
Push the lever away from you
with the headlight switch in the or position.
Press the Automatic High
Beam switch.
The Automatic High Beam indica-
tor will come on when the system
is operating.
Automatic High Beam
The Automatic High Beam uses a camera sensor located behind
the upper portion of the windshiel d to assess the brightness of
the lights of vehicles ahead, streetlights, etc., and automatically
turns the high beams on or off as necessary.
WARNING
■ Limitations of the Automatic High Beam
Do not overly rely on the Automatic High Beam. Always drive safely, taking
care to observe your surroundings and turning the high beams on or off
manually if necessary.
■ To prevent incorrect operation of the Automatic High Beam system
Do not overload the vehicle.
Activating the Automatic High Beam
1
2
Page 232 of 596

2324-3. Operating the lights and wipers
■Conditions to turn the high beams on/off automatically
●When all of the following conditions are met, the high beams will be turned
on automatically (after approximately 1 second):
• The vehicle speed is approximately 21 mph (34 km/h) or more.
• The area ahead of the vehicle is dark.
• There are no vehicles ahead with headlights or tail lights turned on.
• There are few streetlights on the road ahead.
● If any of the following conditions is met, the high beams will turn off automat-
ically:
• The vehicle speed is below approximately 17 mph (27 km/h).
• The area ahead of the vehicle is not dark.
• Vehicles ahead have their headlights or tail lights turned on.
• There are many streetlights on the road ahead.
■ Camera sensor detection information
●The high beams may not be automatically turned off in the following situa-
tions:
• When a vehicle suddenly appears from around a curve
• When the vehicle is cut in front of by another vehicle
• When vehicles ahead cannot be detected due to repeated curves, road
dividers or roadside trees
• When vehicles ahead appear in a faraway lane on a wide road
• When the lights of vehicles ahead are not on
● The high beams may be turned off if a vehicle ahead that is using fog lights
without its headlights turned on is detected.
● House lights, street lights, traffic signals, and illuminated billboards or signs
and other reflective objects may cause the high beams to change to the low
beams, or the low beams to remain on.
● The following factors may affect the amount of time taken for the high
beams to turn on or off:
• The brightness of the headlights, fog lights, and tail lights of vehicles
ahead
• The movement and direction of vehicles ahead
• When a vehicle ahead only has operational lights on one side
• When a vehicle ahead is a two-wheeled vehicle
• The condition of the road (gradient, curve, condition of the road surface,
etc.)
• The number of passengers and amount of luggage in the vehicle
● The high beams may turn on or off unexpectedly.
● Bicycles or similar vehicles may not be detected.
Page 233 of 596

2334-3. Operating the lights and wipers
4
Driving
●In the following situations the system may not be able to correctly detect the
surrounding brightness level. This may cause the low beams to remain on
or the high beams to flash or dazzle pedestrians or vehicles ahead. In such
a case, it is necessary to manually switch between the high and low beams.
• When driving in inclement weather (heavy rain, snow, fog, sandstorms,
etc.)
• When the windshield is obscured by fog, mist, ice, dirt, etc.
• When the windshield is cracked or damaged
• When the camera sensor is deformed or dirty
• When the temperature of the camera sensor is extremely high
• When the surrounding brightness level is equal to that of headlights, tai\
l
lights or fog lights
• When headlights or tail lights of vehicles ahead are turned off, dirty, changing color, or not aimed properly
• When the vehicle is hit by water, snow, dust, etc. from a preceding vehi- cle
• When driving through an area of in termittently changing brightness and
darkness
• When frequently and repeatedly driving ascending/descending roads, or roads with rough, bumpy or uneven surfaces (such as stone-paved
roads, gravel roads, etc.)
• When frequently and repeatedly taking curves or driving on a winding road
• When there is a highly reflective object ahead of the vehicle, such as a sign or mirror
• When the back of a preceding vehicle is highly reflective, such as a con-
tainer on a truck
• When the vehicle's headlights are damaged or dirty, or are not aimed properly
• When the vehicle is listing or titling due to a flat tire, a trailer being towed,
etc.
• When the headlights are changed between the high beams and low
beams repeatedly in an abnormal manner
• When the driver believes that the high beams may be flashing or dazzling pedestrians or other drivers
■ Temporarily lowering sensor sensitivity
The sensitivity of the sensor can be temporarily lowered.
Turn the power switch off while the following conditions are met.
• The headlight switch is in .
• The headlight switch lever is in high beam position.
Turn the power switch to the ON mode.
Within 5 seconds after , repeat pulling the headlight switch lever to the
original position then pushing it to the high beam position quickly 9 times,
then leave the lever in high beam position.
Automatic High Beam (headlights) may turn on even when the vehicle is
stopped.
1
2
32
Page 243 of 596
2434-5. Using the driving support systems
4
Driving
The pre-collision system is equipped with a sophisticated computer
that will record cert ain data, such as:
• Accelerator status
• Brake status
• Vehicle speed
• Operation status of the pre-collision system functions
• Information (such as the distanc e and relative speed between your
vehicle and the vehicle ahead or other objects)
• Images from the camera sensor (available only when the pre-colli-
sion braking function or the pre-collision brake assist function was
operating)
The pre-collision system does not record conversations, sounds or
images of the inside of the vehicle.
● Data usage
Toyota may use the data recorded in this computer to diagnose
malfunctions, conduct research and development, and improve
quality.
Toyota will not disclose the recor ded data to a third party except:
• With the consent of the vehicle owner or with the consent of the lessee if the vehicle is leased
• In response to an official request by the police, a court of law or a
government agency
• For use by Toyota in a lawsuit
• For research purposes where the data is not tied to a specific vehicle or vehicle owner
● Recorded images can be erased using a specialized device.
The image recording function can be disabled. However, if the func-
tion is disabled, data from when the pre-collision system operates
will not be available.
Vehicle data recording
Page 244 of 596
2444-5. Using the driving support systems
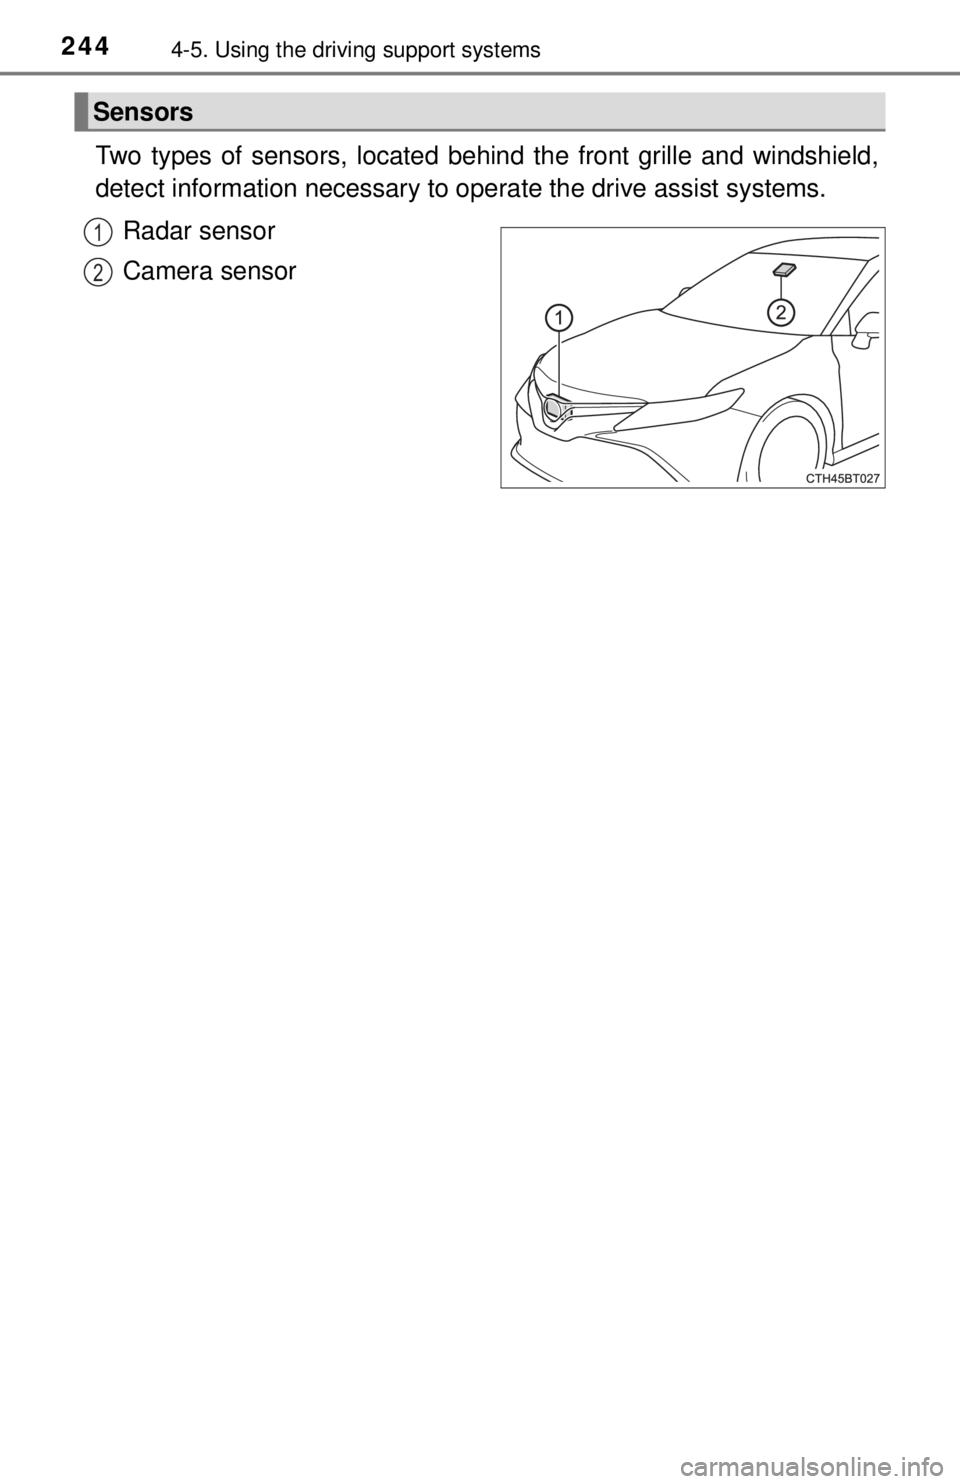
Two types of sensors, located behin d the front grille and windshield,
detect information necessary to operate the drive assist systems.
Radar sensor
Camera sensor
Sensors
1
2
Page 245 of 596
2454-5. Using the driving support systems
4
Driving
WARNING
■To avoid malfunction of the radar sensor
Observe the following precautions.
Otherwise, the radar sensor may not operate properly, possibly leading to
an accident resulting in death or serious injury.
● Keep the radar sensor and front grille emblem clean at all times.
● Do not attach accessories, stickers (including transparent stickers) or
other items to the radar sensor, front grille emblem or surrounding area.
● Do not subject the radar sensor or surrounding area to a strong impact.
If the radar sensor, front grille, or front bumper has been subjected to a
strong impact, have the vehicle inspected by your Toyota dealer.
● Do not disassemble the radar sensor.
● Do not modify or paint the radar s ensor, front grille emblem or surrounding
area.
● If the radar sensor, front grille, or front bumper needs to be removed and
installed, or replaced, contact your Toyota dealer.
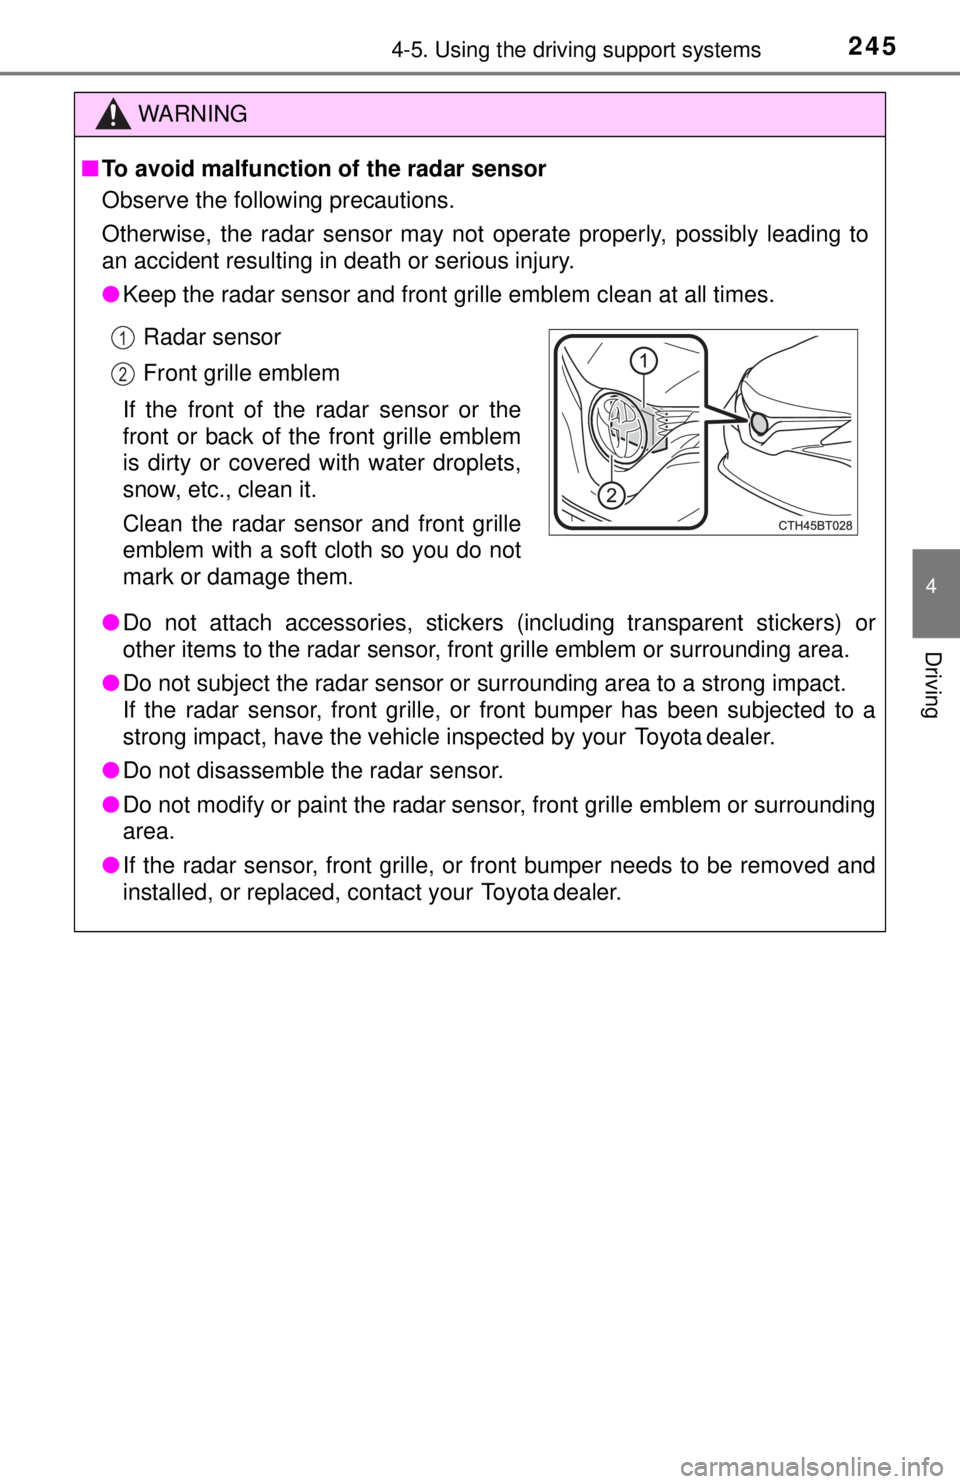
Radar sensor
Front grille emblem
If the front of the radar sensor or the
front or back of the front grille emblem
is dirty or covered with water droplets,
snow, etc., clean it.
Clean the radar sensor and front grille
emblem with a soft cloth so you do not
mark or damage them.1
2
Page 246 of 596
2464-5. Using the driving support systems
WARNING
■To avoid malfunction of the camera sensor
Observe the following precautions.
Otherwise, the camera sensor may not operate properly, possibly leading to
an accident resulting in death or serious injury.
● Keep the windshield clean at all times.
• If the windshield is dirty or covered with an oily film, water droplets,
snow, etc., clear the windshield.
• If a glass coating agent is applied to the windshield, it will still be neces- sary to use the windshield wipers to remove water droplets, etc. from
the area of the windshield in front of the camera sensor.
• If the inner side of the windshield where the camera sensor is installed is dirty, contact your Toyota dealer.
● If the part of the windshield in front of the camera sensor is fogged up or
covered with condensation or ice, use the windshield defogger to remove
the fog, condensation or ice. ( →P. 348)
● If water droplets cannot be properly removed from the area of the wind-
shield in front of the camera sensor by the windshield wipers, replace the
wiper insert or wiper blade.
If the wiper inserts or wiper blades need to be replaced, contact your Toy-
ota dealer.
● Do not attach window tinting to the windshield.
● Replace the windshield if it is damaged or cracked.
If the windshield needs to be replaced, contact your Toyota dealer.
● Do not get the camera sensor wet.
● Do not allow bright lights to shine into the camera sensor.
● Do not dirty or damage the camera sensor.
When cleaning the inside of the windshield, do not allow glass cleaner to
contact the lens. Also, do not touch the lens.
If the lens is dirty or damaged, contact your Toyota dealer.
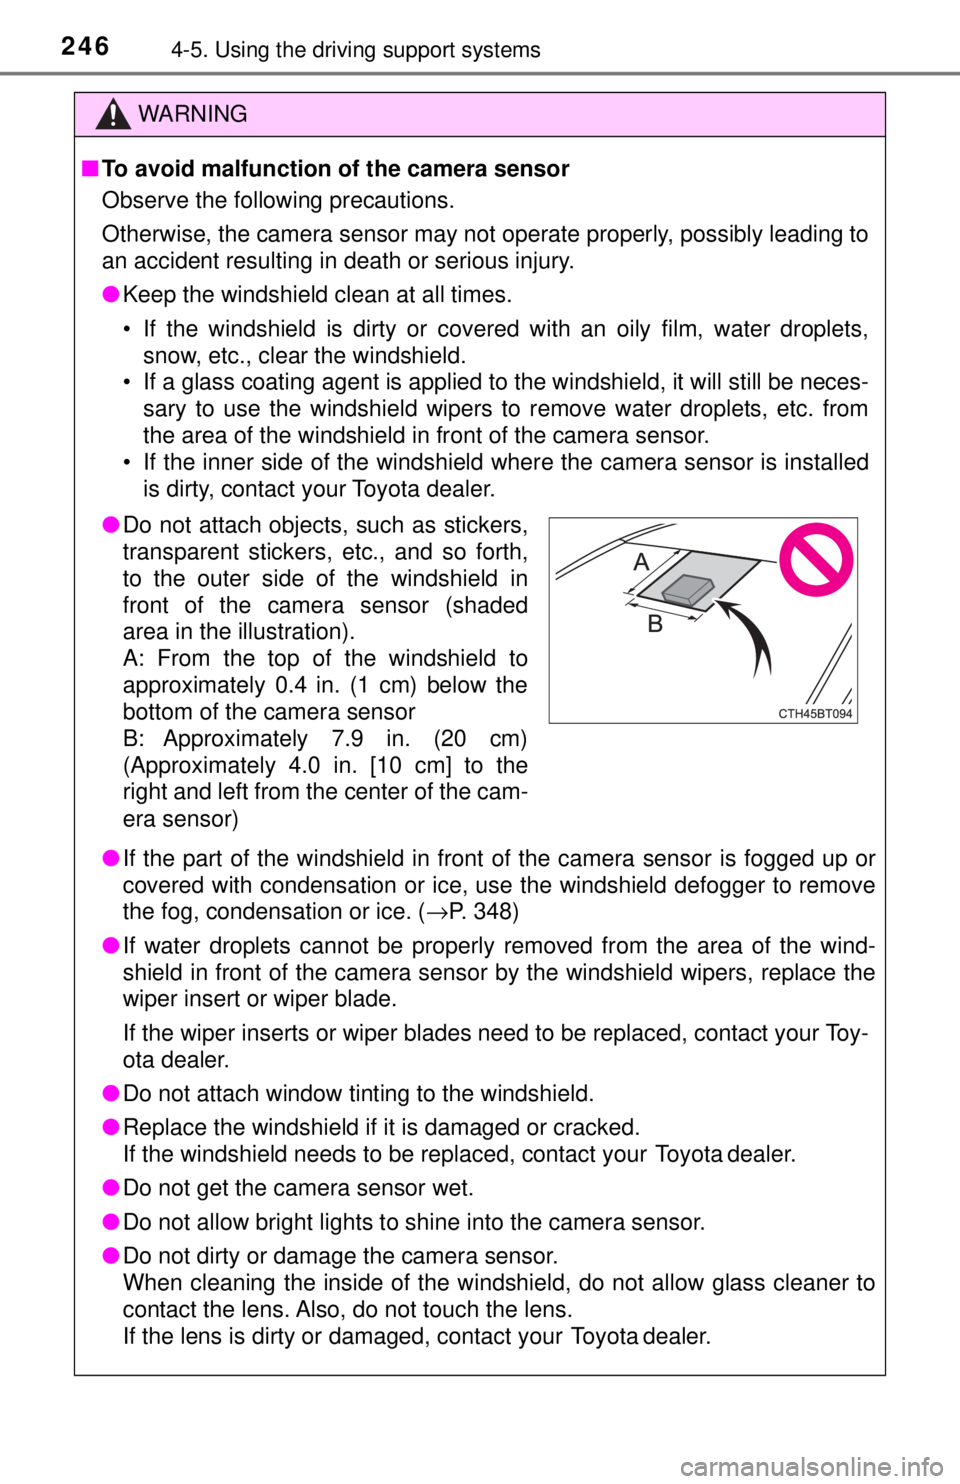
●Do not attach objects, such as stickers,
transparent stickers, etc., and so forth,
to the outer side of the windshield in
front of the camera sensor (shaded
area in the illustration).
A: From the top of the windshield to
approximately 0.4 in. (1 cm) below the
bottom of the camera sensor
B: Approximately 7.9 in. (20 cm)
(Approximately 4.0 in. [10 cm] to the
right and left from the center of the cam-
era sensor)
Page 247 of 596

2474-5. Using the driving support systems
4
Driving
WARNING
●Do not subject the camera sensor to a strong impact.
● Do not change the installation position or direction of the camera sensor or
remove it.
● Do not disassemble the camera sensor.
● Do not modify any components of the vehicle around the camera sensor
(inside rear view mirror, etc.) or ceiling.
● Do not attach any accessories that may obstruct the camera sensor to the
hood, front grille or front bumper. Contact your Toyota dealer for details.
● If a surfboard or other long object is to be mounted on the roof, make sure
that it will not obstruct the camera sensor.
● Do not modify the headlights or other lights.