bulb TOYOTA CAMRY HYBRID 2018 Owners Manual (in English)
[x] Cancel search | Manufacturer: TOYOTA, Model Year: 2018, Model line: CAMRY HYBRID, Model: TOYOTA CAMRY HYBRID 2018Pages: 596, PDF Size: 10.25 MB
Page 4 of 596
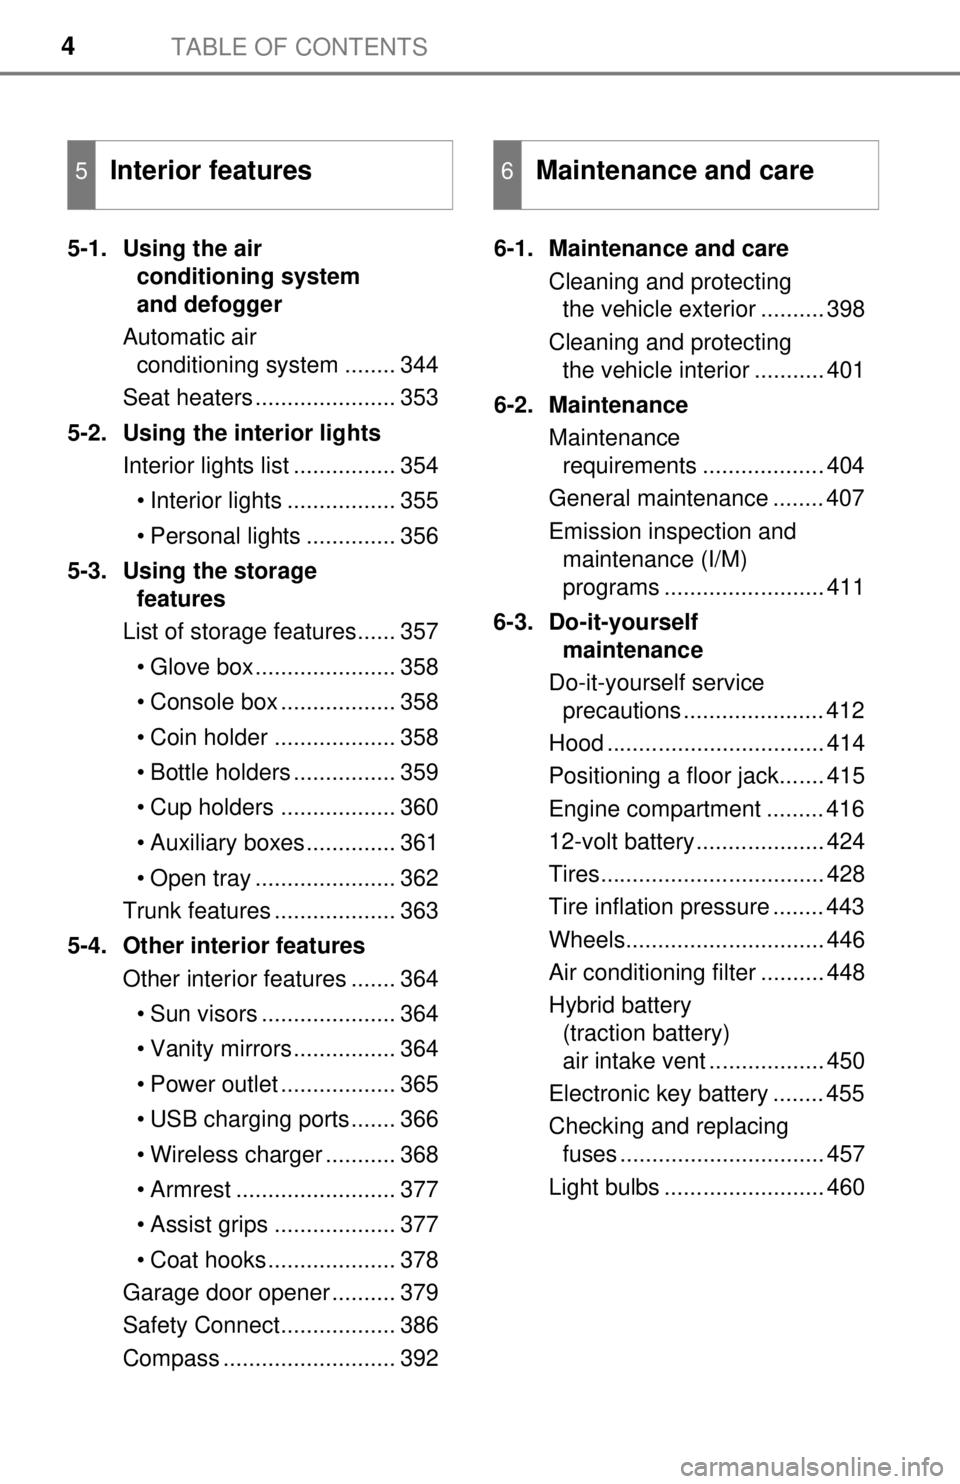
TABLE OF CONTENTS4
5-1. Using the air conditioning system
and defogger
Automatic air conditioning system ........ 344
Seat heaters ...................... 353
5-2. Using the interior lights Interior lights list ................ 354
• Interior lights ................. 355
• Personal lights .............. 356
5-3. Using the storage features
List of storage features...... 357
• Glove box...................... 358
• Console box .................. 358
• Coin holder ................... 358
• Bottle holders ................ 359
• Cup holders .................. 360
• Auxiliary boxes.............. 361
• Open tray ...................... 362
Trunk features ................... 363
5-4. Other interior features Other interior features ....... 364
• Sun visors ..................... 364
• Vanity mirrors................ 364
• Power outlet .................. 365
• USB charging ports....... 366
• Wireless charger ........... 368
• Armrest ......................... 377
• Assist grips ................... 377
• Coat hooks.................... 378
Garage door opener .......... 379
Safety Connect.................. 386
Compass ........................... 392 6-1. Maintenance and care
Cleaning and protecting the vehicle exterior .......... 398
Cleaning and protecting the vehicle interior ........... 401
6-2. Maintenance Maintenance requirements ................... 404
General maintenance ........ 407
Emission inspection and maintenance (I/M)
programs ......................... 411
6-3. Do-it-yourself maintenance
Do-it-yourself service precautions ...................... 412
Hood .................................. 414
Positioning a floor jack....... 415
Engine compartment ......... 416
12-volt battery .................... 424
Tires................................... 428
Tire inflation pressure ........ 443
Wheels............................... 446
Air conditioning filter .......... 448
Hybrid battery (traction battery)
air intake vent .................. 450
Electronic key battery ........ 455
Checking and replacing fuses ................................ 457
Light bulbs ......................... 460
5Interior features6Maintenance and care
Page 15 of 596
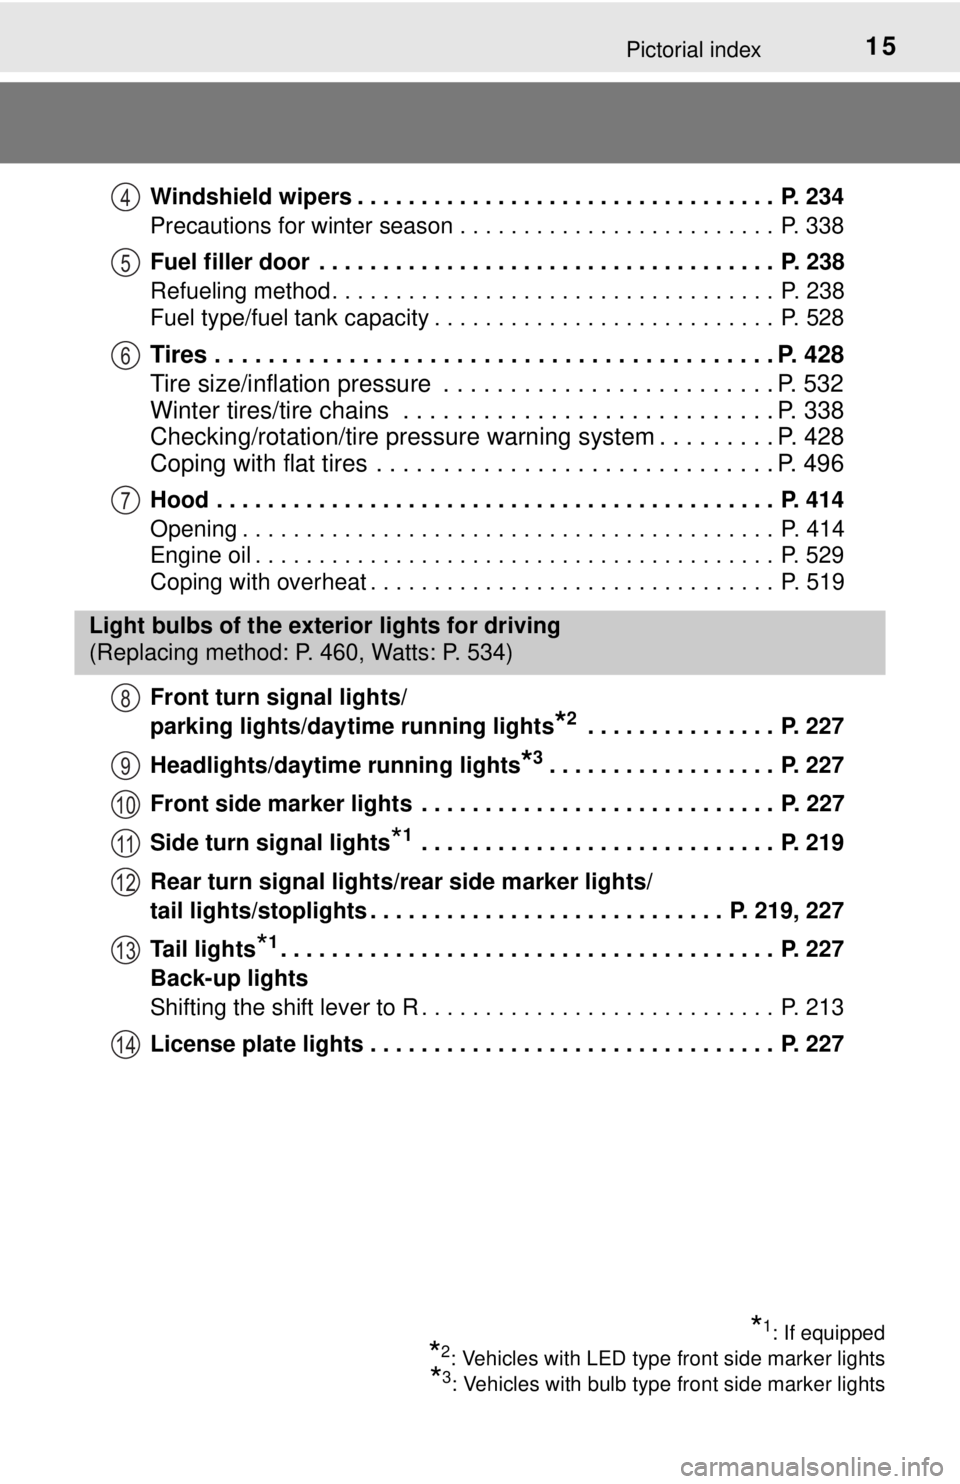
15Pictorial index
Windshield wipers . . . . . . . . . . . . . . . . . . . . . . . . . . . . . . . . . P. 234
Precautions for winter season . . . . . . . . . . . . . . . . . . . . . . . . . P. 338
Fuel filler door . . . . . . . . . . . . . . . . . . . . . . . . . . . . . . . . . . . . P. 238
Refueling method . . . . . . . . . . . . . . . . . . . . . . . . . . . . . . . . . . . P. 238
Fuel type/fuel tank capacity . . . . . . . . . . . . . . . . . . . . . . . . . . . P. 528
Tires . . . . . . . . . . . . . . . . . . . . . . . . . . . . . . . . . . . . . . . . . . P. 428
Tire size/inflation pressure . . . . . . . . . . . . . . . . . . . . . . . . . P. 532
Winter tires/tire chains . . . . . . . . . . . . . . . . . . . . . . . . . . . . P. 338
Checking/rotation/tire pressure warning system . . . . . . . . . P. 428
Coping with flat tires . . . . . . . . . . . . . . . . . . . . . . . . . . . . . . P. 496
Hood . . . . . . . . . . . . . . . . . . . . . . . . . . . . . . . . . . . . . . . . . . . . P. 414
Opening . . . . . . . . . . . . . . . . . . . . . . . . . . . . . . . . . . . . . . . . . . P. 414
Engine oil . . . . . . . . . . . . . . . . . . . . . . . . . . . . . . . . . . . . . . . . . P. 529
Coping with overheat . . . . . . . . . . . . . . . . . . . . . . . . . . . . . . . . P. 519
Front turn signal lights/
parking lights/daytime running lights
*2 . . . . . . . . . . . . . . . P. 227
Headlights/daytime running lights
*3. . . . . . . . . . . . . . . . . . P. 227
Front side marker lights . . . . . . . . . . . . . . . . . . . . . . . . . . . . P. 227
Side turn signal lights
*1 . . . . . . . . . . . . . . . . . . . . . . . . . . . . P. 219
Rear turn signal lights/r ear side marker lights/
tail lights/stoplights . . . . . . . . . . . . . . . . . . . . . . . . . . . . P. 219, 227
Tail lights
*1. . . . . . . . . . . . . . . . . . . . . . . . . . . . . . . . . . . . . . . P. 227
Back-up lights
Shifting the shift lever to R . . . . . . . . . . . . . . . . . . . . . . . . . . . . P. 213
License plate lights . . . . . . . . . . . . . . . . . . . . . . . . . . . . . . . . P. 227
4
5
6
7
Light bulbs of the exterior lights for driving
(Replacing method: P. 460, Watts: P. 534)
*1: If equipped
*2: Vehicles with LED type front side marker lights
*3: Vehicles with bulb type front side marker lights
8
9
10
11
12
13
14
Page 219 of 596
2194-2. Driving procedures
4
Driving
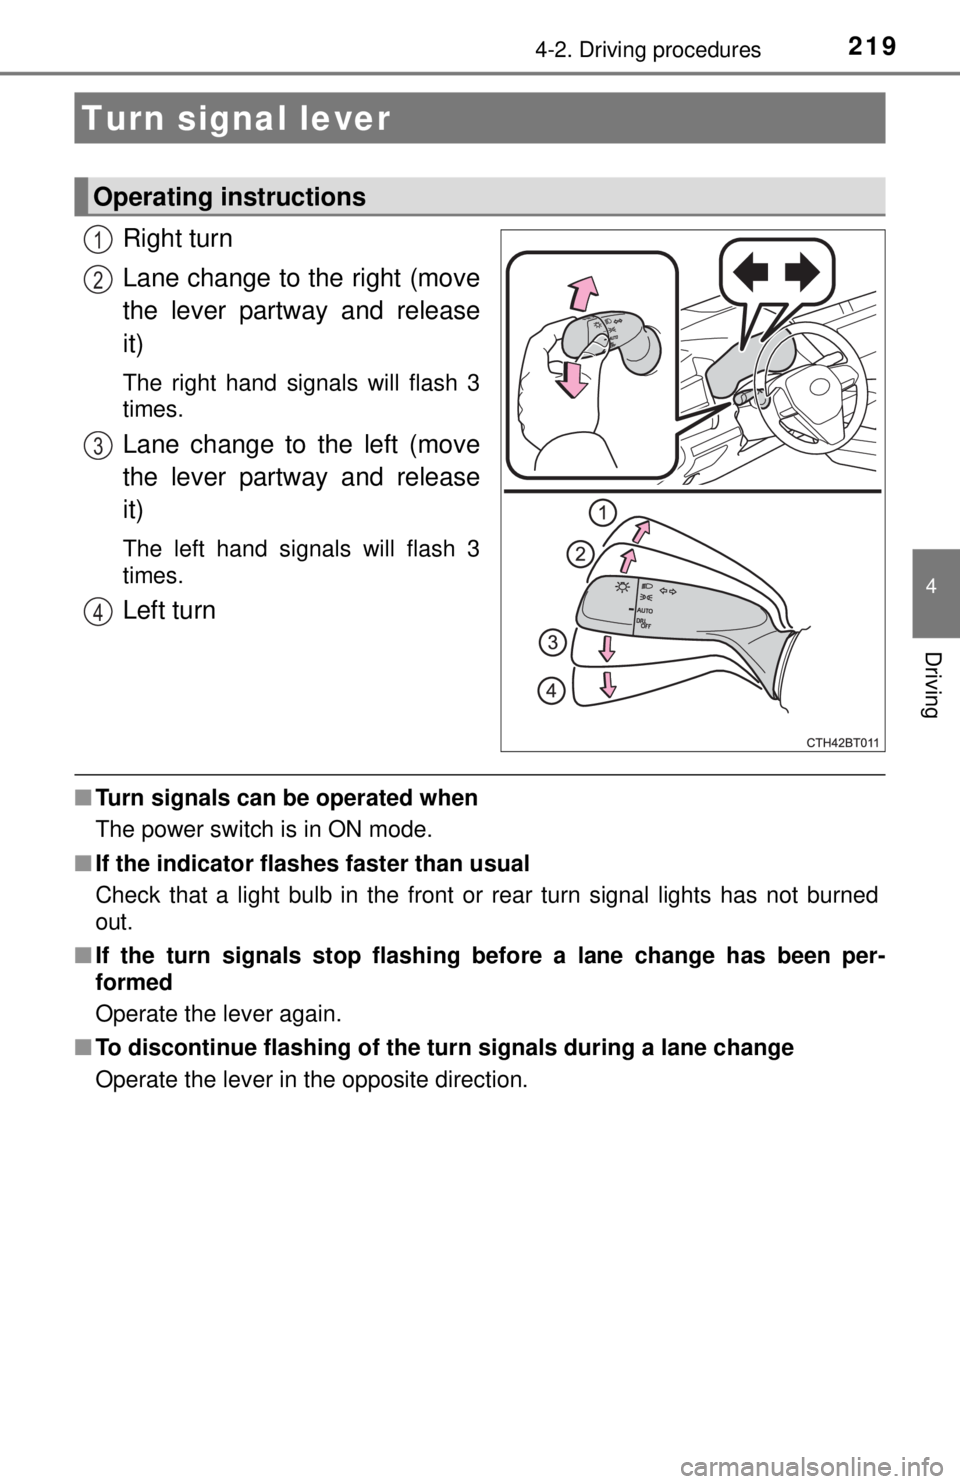
Right turn
Lane change to the right (move
the lever partway and release
it)
The right hand signals will flash 3
times.
Lane change to the left (move
the lever partway and release
it)
The left hand signals will flash 3
times.
Left turn
■Turn signals can be operated when
The power switch is in ON mode.
■ If the indicator flashes faster than usual
Check that a light bulb in the front or rear turn signal lights has not burned
out.
■ If the turn signals stop flashing before a lane change has been per-
formed
Operate the lever again.
■ To discontinue flashing of the turn signals during a lane change
Operate the lever in the opposite direction.
Turn signal lever
Operating instructions
1
2
3
4
Page 397 of 596
397
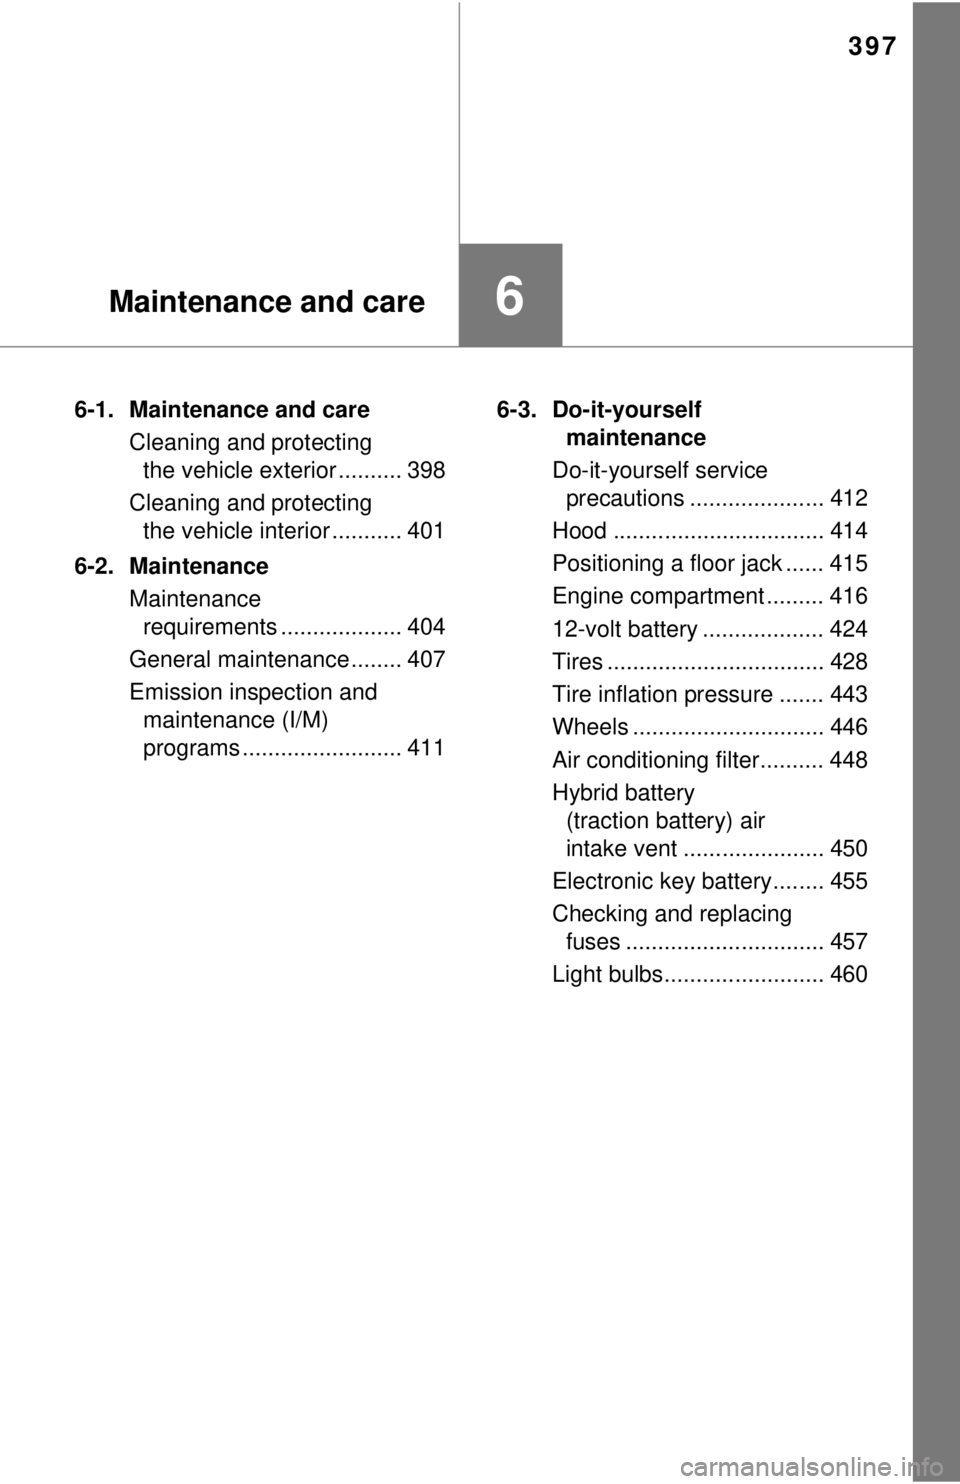
6Maintenance and care
6-1. Maintenance and careCleaning and protecting the vehicle exterior .......... 398
Cleaning and protecting the vehicle interior ........... 401
6-2. Maintenance Maintenance requirements ................... 404
General maintenance ........ 407
Emission inspection and maintenance (I/M)
programs ......................... 411 6-3. Do-it-yourself
maintenance
Do-it-yourself service precautions ..................... 412
Hood ................................. 414
Positioning a floor jack ...... 415
Engine compartment ......... 416
12-volt battery ................... 424
Tires .................................. 428
Tire inflation pressure ....... 443
Wheels .............................. 446
Air conditioning filter.......... 448
Hybrid battery (traction battery) air
intake vent ...................... 450
Electronic key battery........ 455
Checking and replacing fuses ............................... 457
Light bulbs......................... 460
Page 412 of 596
4126-3. Do-it-yourself maintenance
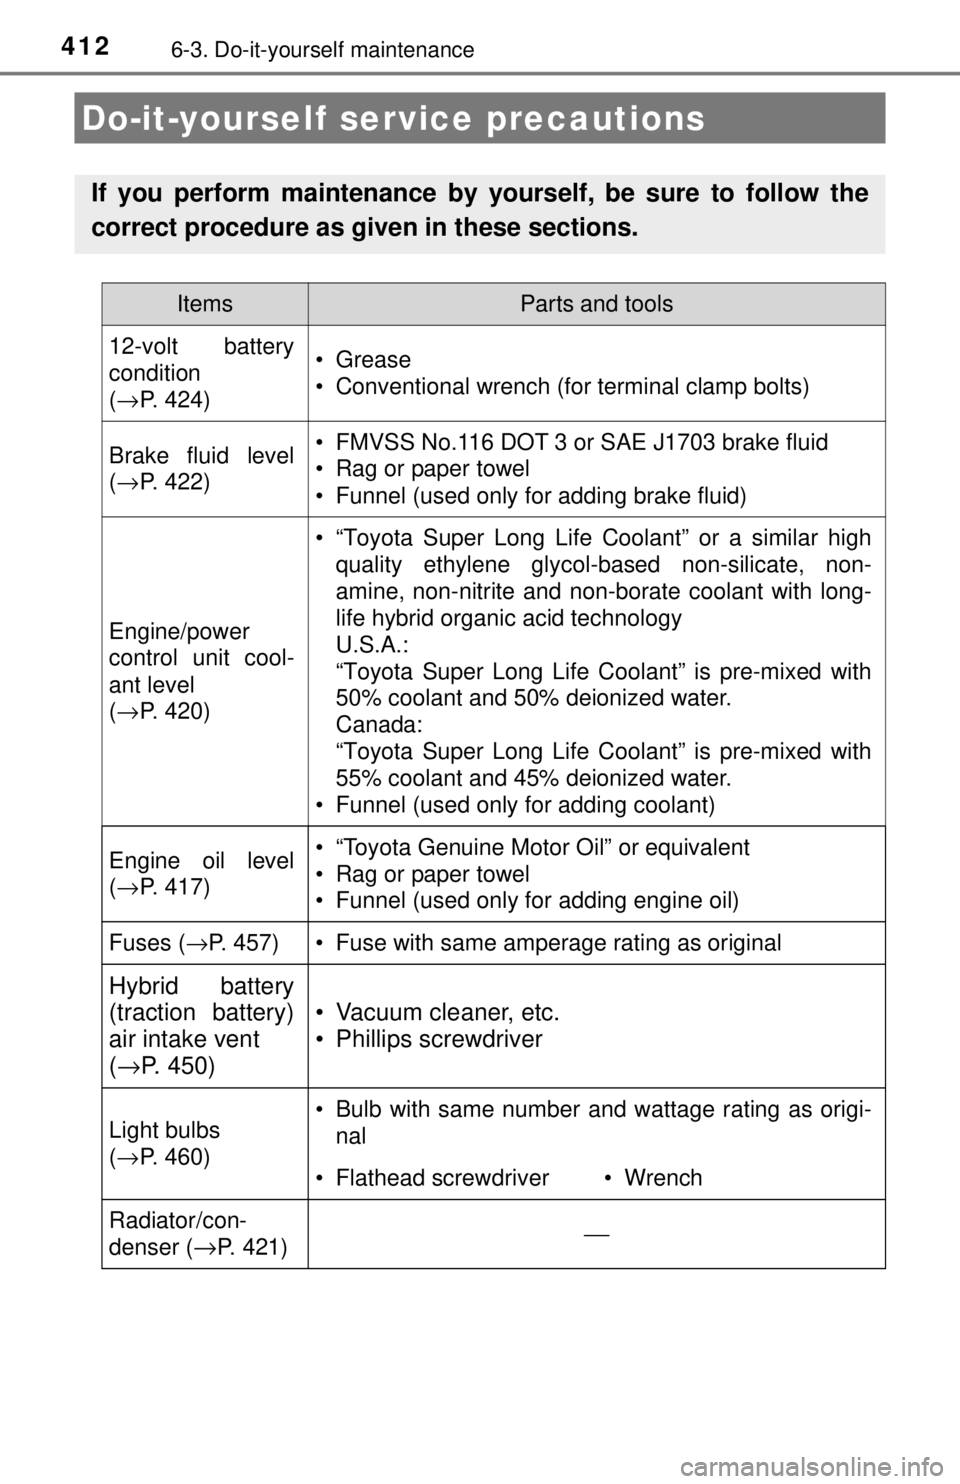
Do-it-yourself service precautions
If you perform maintenance by yourself, be sure to follow the
correct procedure as given in these sections.
ItemsParts and tools
12-volt battery
condition
(→ P. 424)•Grease
• Conventional wrench (for terminal clamp bolts)
Brake fluid level
(→ P. 422)• FMVSS No.116 DOT 3 or SAE J1703 brake fluid
• Rag or paper towel
• Funnel (used only for adding brake fluid)
Engine/power
control unit cool-
ant level
(→ P. 420)
• “Toyota Super Long Life Coolant” or a similar high
quality ethylene glycol-based non-silicate, non-
amine, non-nitrite and non-borate coolant with long-
life hybrid organic acid technology
U.S.A.:
“Toyota Super Long Life Coolant” is pre-mixed with
50% coolant and 50% deionized water.
Canada:
“Toyota Super Long Life Coolant” is pre-mixed with
55% coolant and 45% deionized water.
• Funnel (used only for adding coolant)
Engine oil level
( → P. 417)• “Toyota Genuine Motor Oil” or equivalent
• Rag or paper towel
• Funnel (used only for adding engine oil)
Fuses ( →P. 457)• Fuse with same amperage rating as original
Hybrid battery
(traction battery)
air intake vent
(→ P. 450)
• Vacuum cleaner, etc.
• Phillips screwdriver
Light bulbs
(→ P. 460)• Bulb with same number and wattage rating as origi-
nal
• Flathead screwdriver• Wrench
Radiator/con-
denser (
→P. 421)⎯
Page 459 of 596
4596-3. Do-it-yourself maintenance
6
Maintenance and care
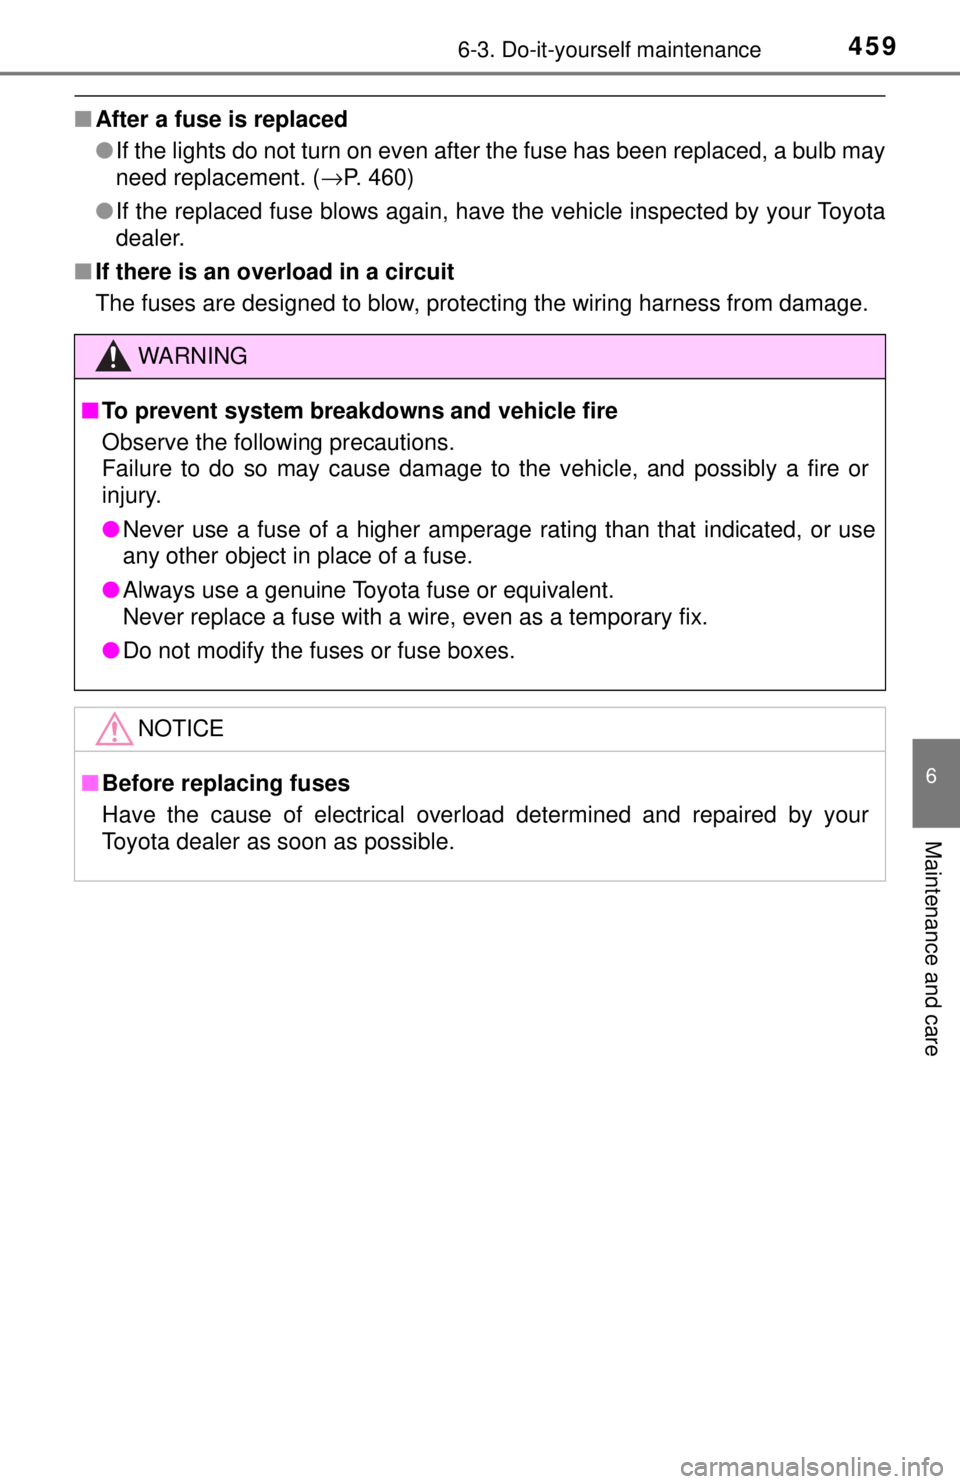
■After a fuse is replaced
●If the lights do not turn on even after the fuse has been replaced, a bulb may
need replacement. ( →P. 460)
● If the replaced fuse blows again, have the vehicle inspected by your Toyota
dealer.
■ If there is an overload in a circuit
The fuses are designed to blow, protecting the wiring harness from damage.
WARNING
■To prevent system breakdowns and vehicle fire
Observe the following precautions.
Failure to do so may cause damage to the vehicle, and possibly a fire or
injury.
● Never use a fuse of a higher amperage rating than that indicated, or use\
any other object in place of a fuse.
● Always use a genuine Toyota fuse or equivalent.
Never replace a fuse with a wire, even as a temporary fix.
● Do not modify the fuses or fuse boxes.
NOTICE
■Before replacing fuses
Have the cause of electrical overload determined and repaired by your
Toyota dealer as soon as possible.
Page 460 of 596
4606-3. Do-it-yourself maintenance
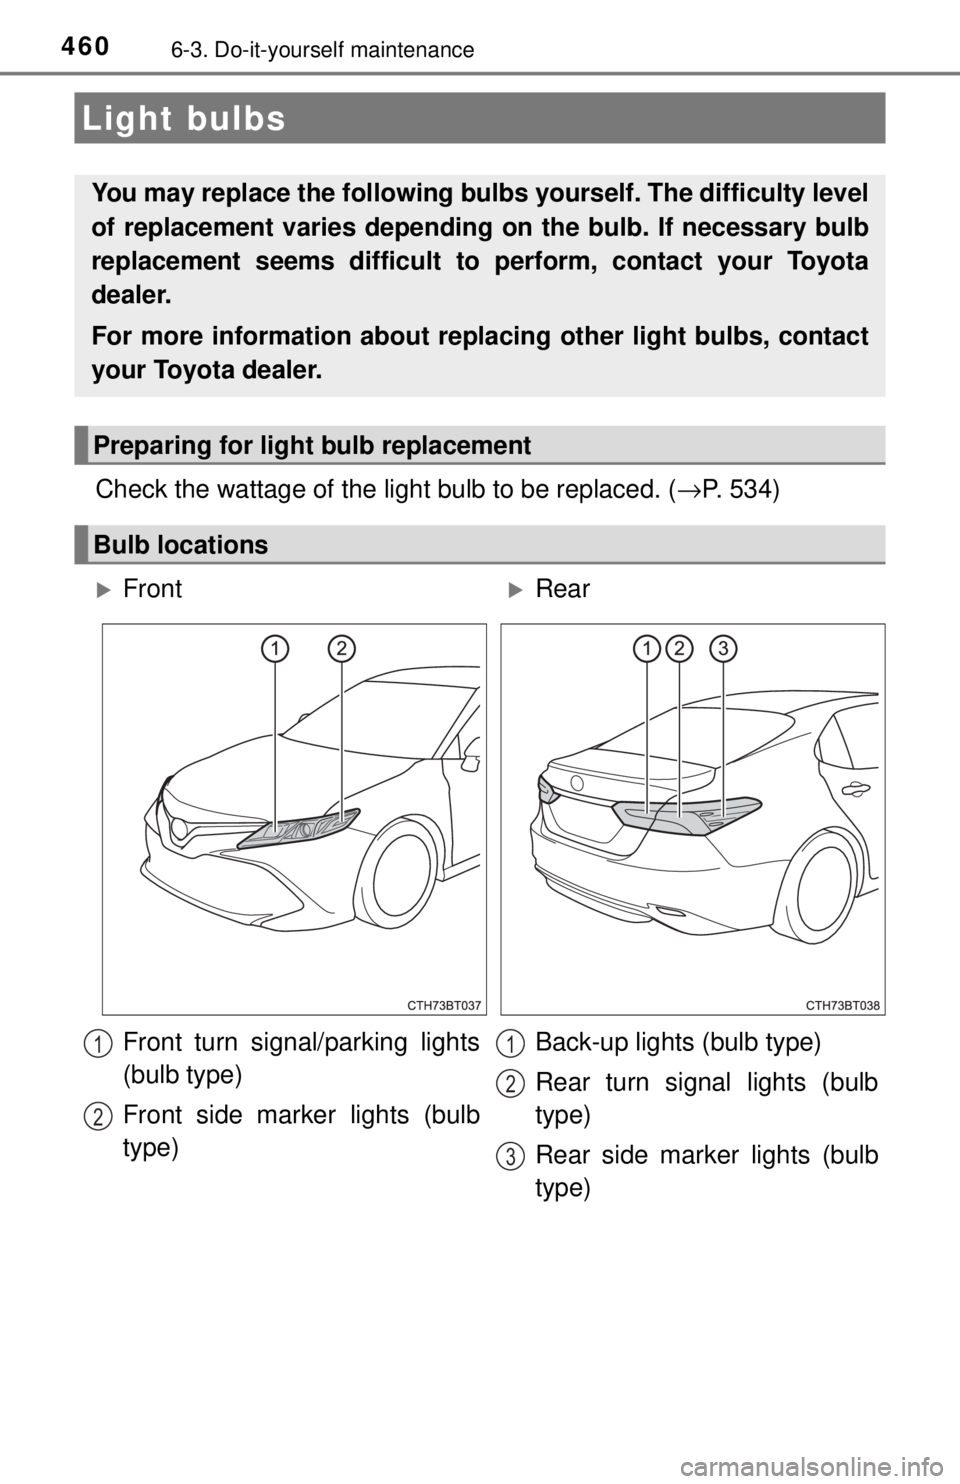
Check the wattage of the light bulb to be replaced. (→P. 534)
Light bulbs
You may replace the following bulb s yourself. The difficulty level
of replacement varies depending on the bulb. If necessary bulb
replacement seems difficult to perform, contact your Toyota
dealer.
For more information about replacing other light bulbs, contact
your Toyota dealer.
Preparing for light bulb replacement
Bulb locations
FrontRear
Front turn signal/parking lights
(bulb type)
Front side marker lights (bulb
type) Back-up lights (bulb type)
Rear turn signal lights (bulb
type)
Rear side marker lights (bulb
type)
1
2
1
2
3
Page 461 of 596
4616-3. Do-it-yourself maintenance
6
Maintenance and care
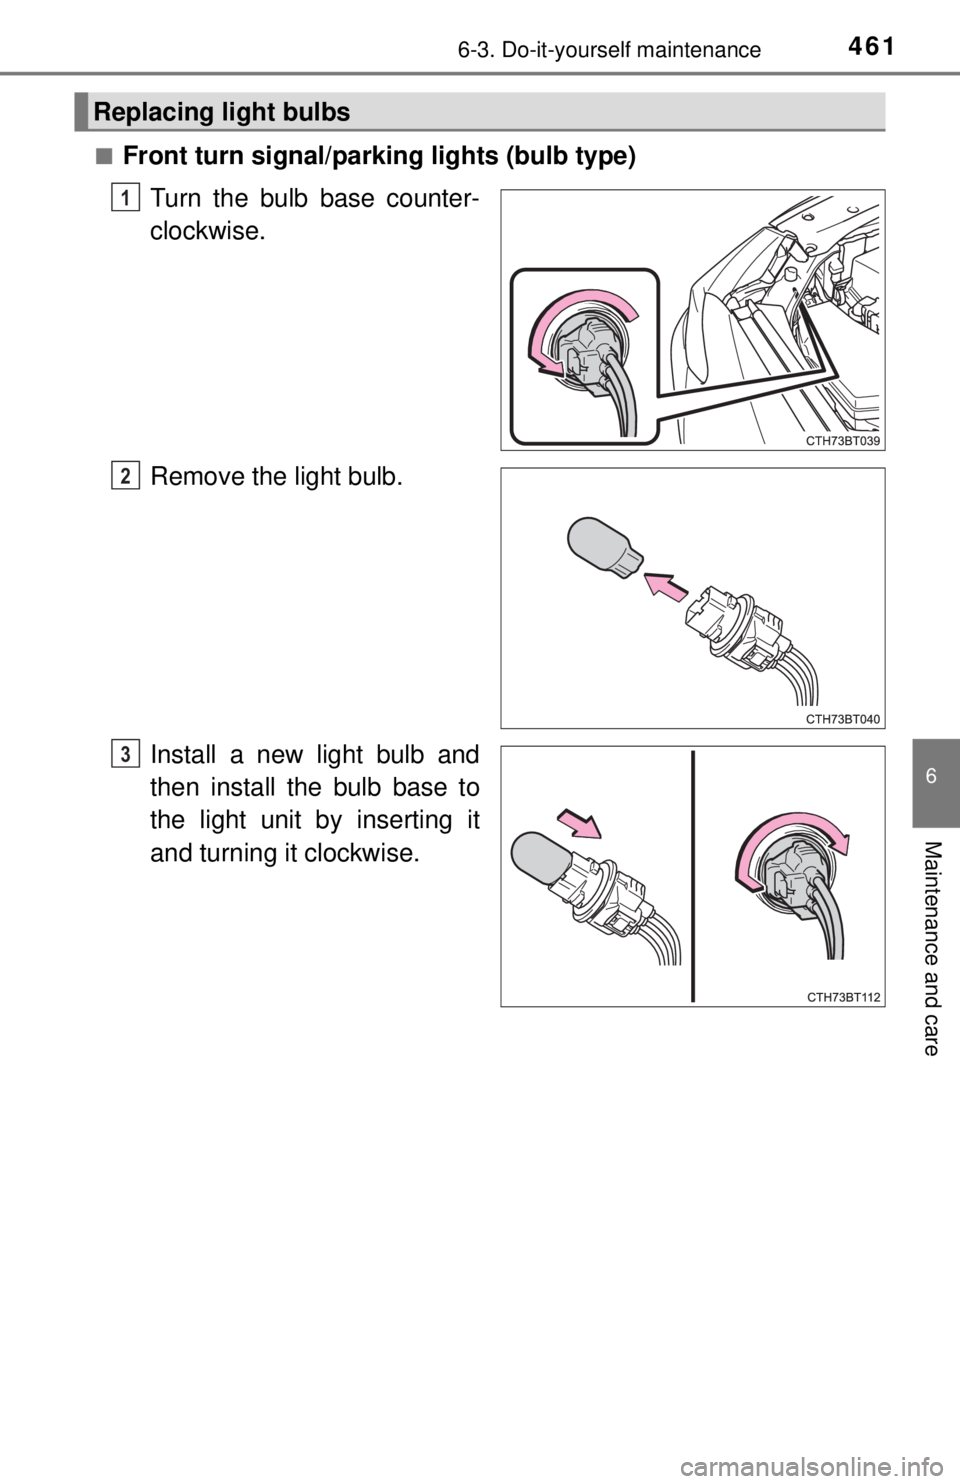
■Front turn signal/parking lights (bulb type)Turn the bulb base counter-
clockwise.
Remove the light bulb.
Install a new light bulb and
then install the bulb base to
the light unit by inserting it
and turning it clockwise.
Replacing light bulbs
1
2
3
Page 462 of 596
4626-3. Do-it-yourself maintenance
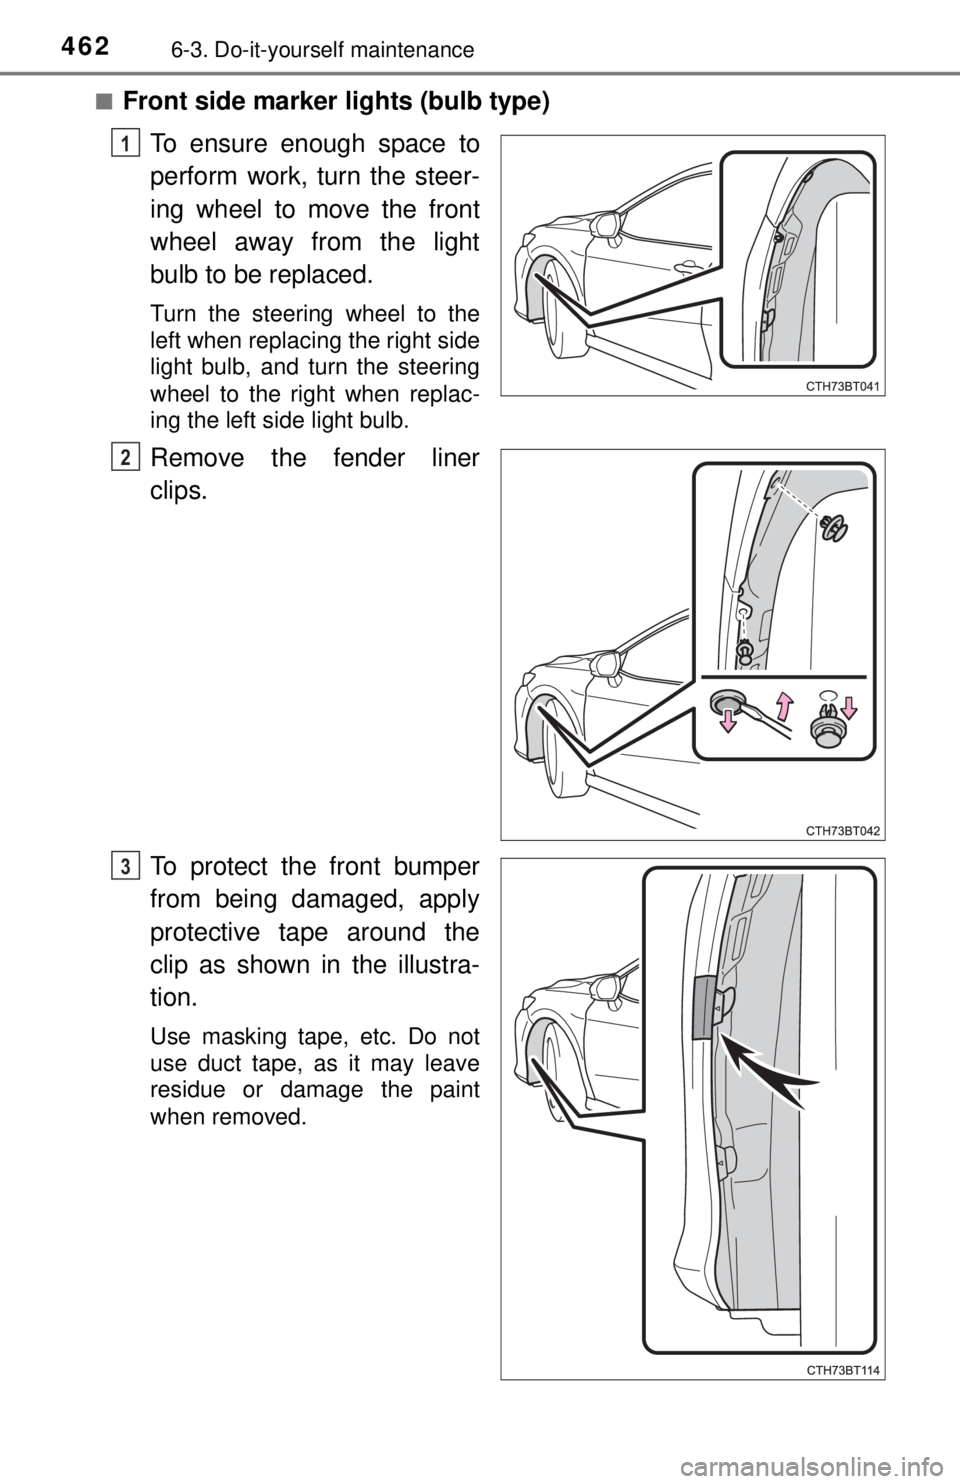
■Front side marker lights (bulb type)To ensure enough space to
perform work, turn the steer-
ing wheel to move the front
wheel away from the light
bulb to be replaced.
Turn the steering wheel to the
left when replacing the right side
light bulb, and turn the steering
wheel to the right when replac-
ing the left side light bulb.
Remove the fender liner
clips.
To protect the front bumper
from being damaged, apply
protective tape around the
clip as shown in the illustra-
tion.
Use masking tape, etc. Do not
use duct tape, as it may leave
residue or damage the paint
when removed.
1
2
3
Page 463 of 596
4636-3. Do-it-yourself maintenance
6
Maintenance and care
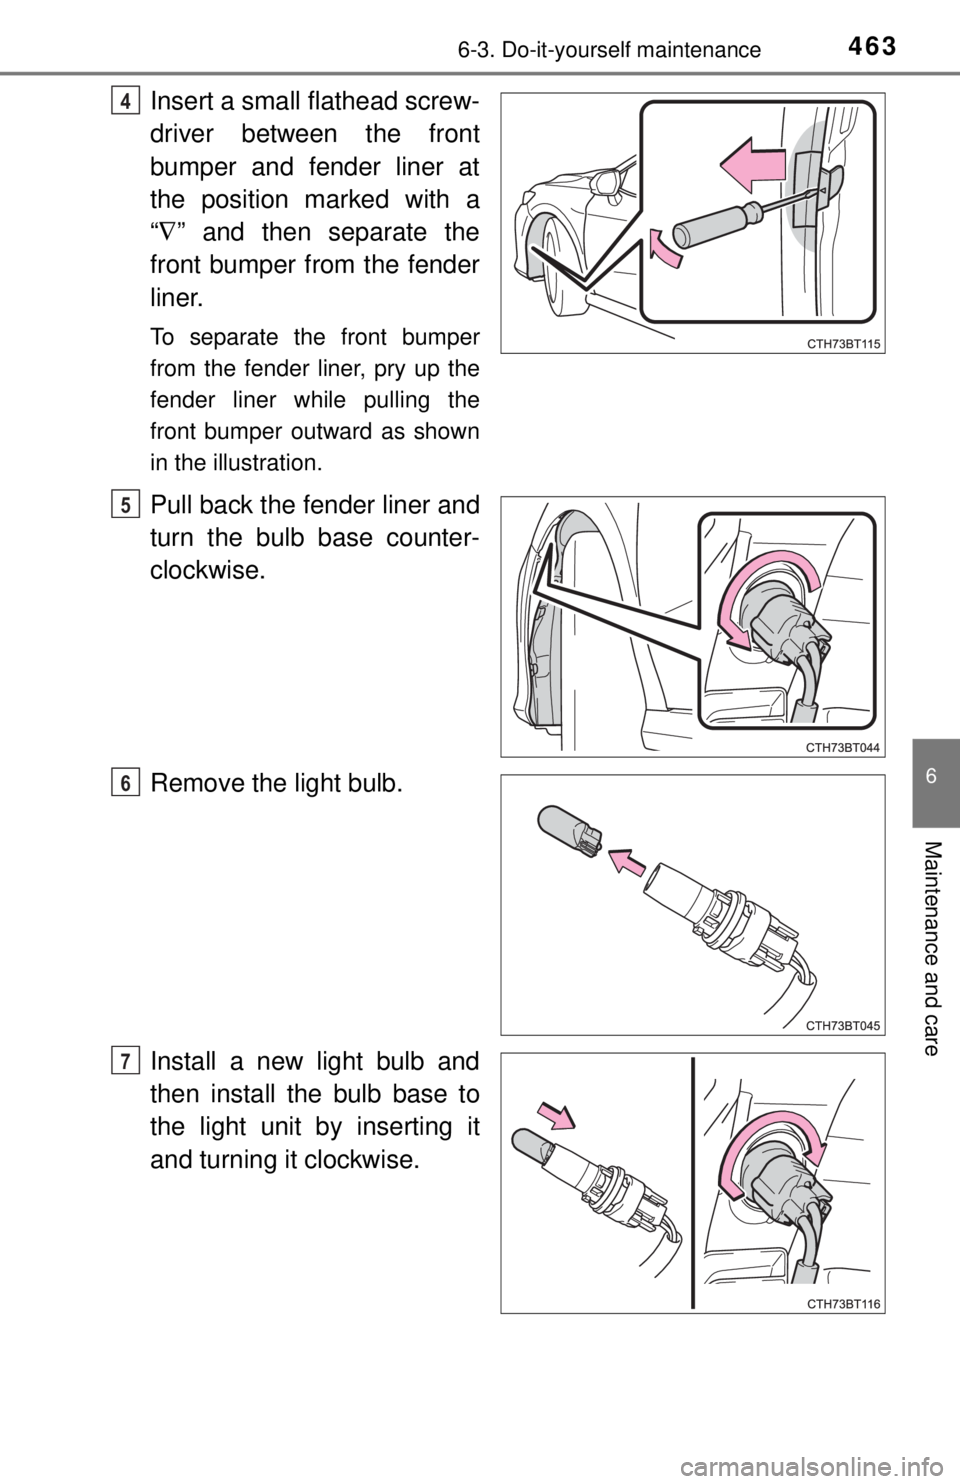
Insert a small flathead screw-
driver between the front
bumper and fender liner at
the position marked with a
“∇ ” and then separate the
front bumper from the fender
liner.
To separate the front bumper
from the fender liner, pry up the
fender liner while pulling the
front bumper outward as shown
in the illustration.
Pull back the fender liner and
turn the bulb base counter-
clockwise.
Remove the light bulb.
Install a new light bulb and
then install the bulb base to
the light unit by inserting it
and turning it clockwise.
4
5
6
7