remove seats TOYOTA CAMRY V20 1986 Service Information
[x] Cancel search | Manufacturer: TOYOTA, Model Year: 1986, Model line: CAMRY V20, Model: TOYOTA CAMRY V20 1986Pages: 2389, PDF Size: 84.44 MB
Page 1233 of 2389
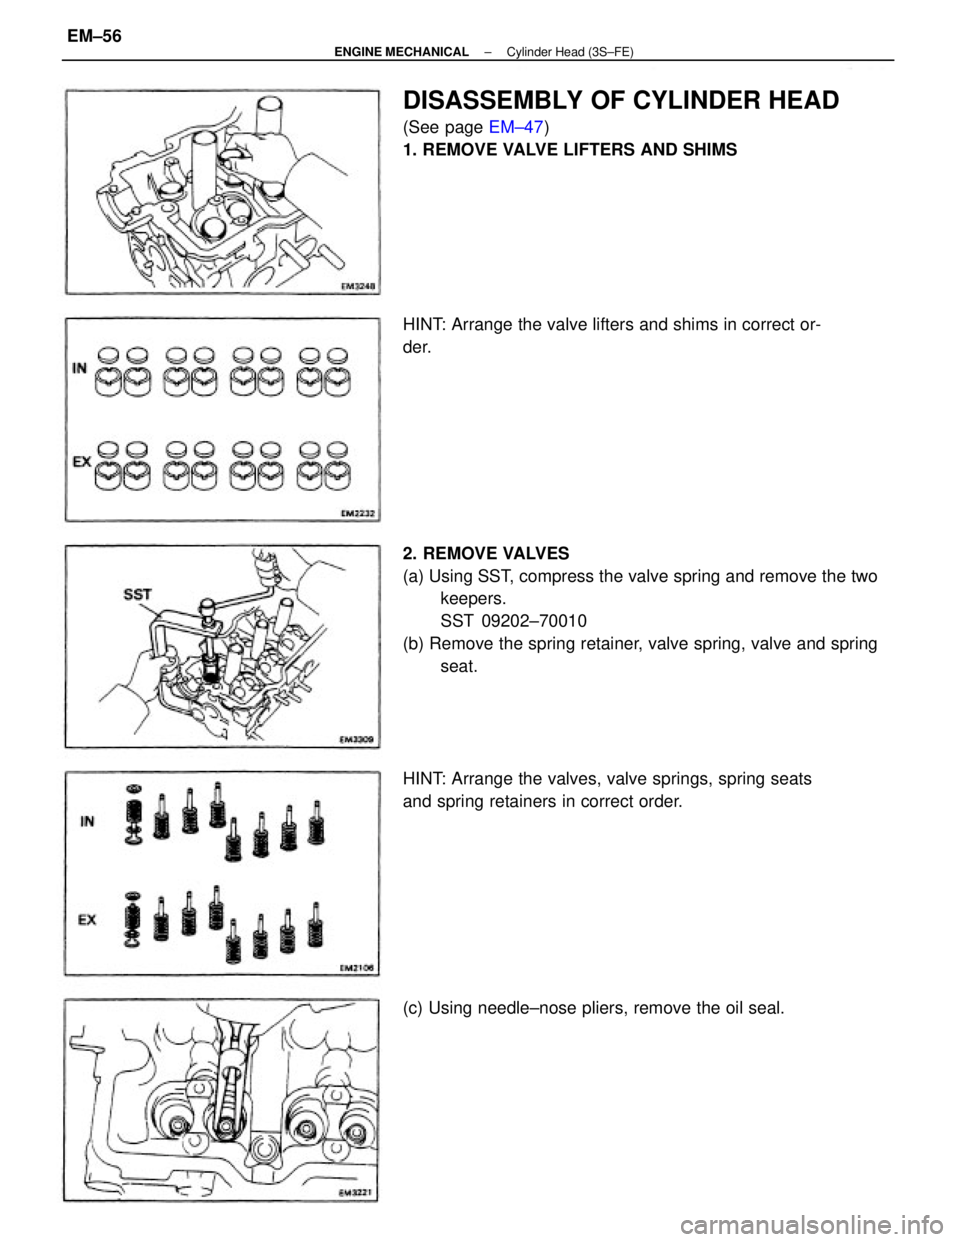
2. REMOVE VALVES
(a) Using SST, compress the valve spring and remove the two
keepers.
SST 09202±70010
(b) Remove the spring retainer, valve spring, valve and spring
seat.
DISASSEMBLY OF CYLINDER HEAD
(See page EM±47)
1. REMOVE VALVE LIFTERS AND SHIMS
HINT: Arrange the valves, valve springs, spring seats
and spring retainers in correct order. HINT: Arrange the valve lifters and shims in correct or-
der.
(c) Using needle±nose pliers, remove the oil seal.
± ENGINE MECHANICALCylinder Head (3S±FE)EM±56
Page 1238 of 2389
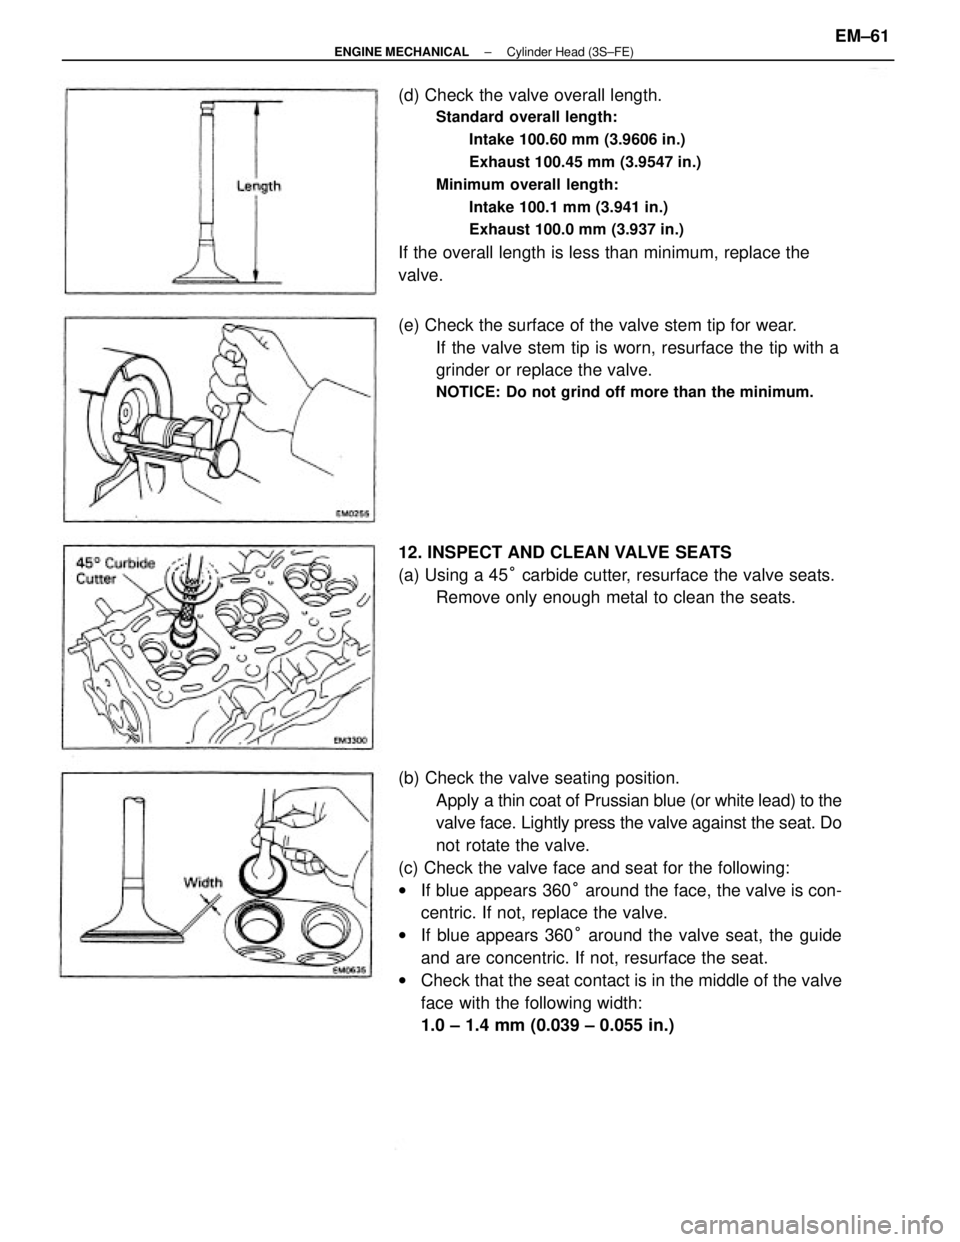
(b) Check the valve seating position.
Apply a thin coat of Prussian blue (or white lead) to the
valve face. Lightly press the valve against the seat. Do
not rotate the valve.
(c) Check the valve face and seat for the following:
wIf blue appears 360° around the face, the valve is con-
centric. If not, replace the valve.
wIf blue appears 360° around the valve seat, the guide
and are concentric. If not, resurface the seat.
wCheck that the seat contact is in the middle of the valve
face with the following width:
1.0 ± 1.4 mm (0.039 ± 0.055 in.) (d) Check the valve overall length.
Standard overall length:
Intake 100.60 mm (3.9606 in.)
Exhaust 100.45 mm (3.9547 in.)
Minimum overall length:
Intake 100.1 mm (3.941 in.)
Exhaust 100.0 mm (3.937 in.)
If the overall length is less than minimum, replace the
valve.
(e) Check the surface of the valve stem tip for wear.
If the valve stem tip is worn, resurface the tip with a
grinder or replace the valve.
NOTICE: Do not grind off more than the minimum.
12. INSPECT AND CLEAN VALVE SEATS
(a) Using a 45° carbide cutter, resurface the valve seats.
Remove only enough metal to clean the seats.
± ENGINE MECHANICALCylinder Head (3S±FE)EM±61
Page 1261 of 2389
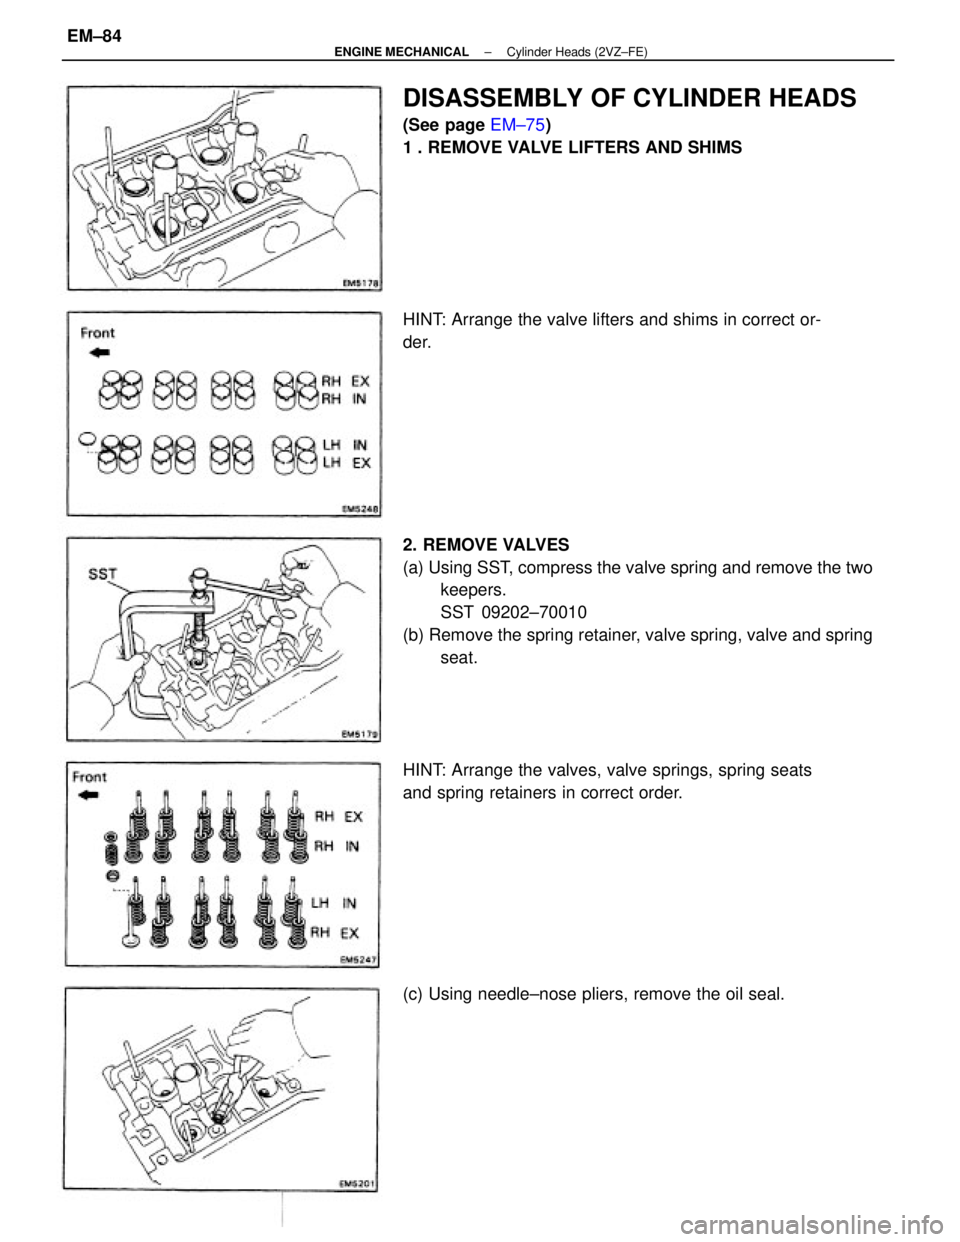
2. REMOVE VALVES
(a) Using SST, compress the valve spring and remove the two
keepers.
SST 09202±70010
(b) Remove the spring retainer, valve spring, valve and spring
seat.
DISASSEMBLY OF CYLINDER HEADS
(See page EM±75)
1 . REMOVE VALVE LIFTERS AND SHIMS
HINT: Arrange the valves, valve springs, spring seats
and spring retainers in correct order.
(c) Using needle±nose pliers, remove the oil seal. HINT: Arrange the valve lifters and shims in correct or-
der.
± ENGINE MECHANICALCylinder Heads (2VZ±FE)EM±84
Page 1266 of 2389

(b) Check the valve seating position.
Apply a thin coat of Prussian blue (or white lead) to the
valve face. Lightly press the valve against the seat. Do
not rotate the valve.
(c) Check the valve face and seat for the following:
wIf blue appears 360° around the face, the valve is con-
centric. If not, replace the valve.
wIf blue appears 360° around the valve seat, the guide
and face are concentric. If not, resurface the seat.
wCheck that the seat contact is in the middle of the valve
face with the following width:
1.0 ± 1.4 mm (0.039 ± 0.055 in.) (d) Check the valve overall length.
Standard overall length:
Intake 96.1 mm (3.783 in.)
Exhaust 96.2 mm (3.787 in.)
Minimum overall length:
Intake 95.6 mm (3.754 in.)
Exhaust 95.7 mm (3.768 in.)
If the overall length is less than minimum, replace the
valve. (c) Check the valve head margin thickness.
Standard margin thickness: 1.0 mm (0.039 in.)
Minimum margin thickness: 0.5 mm (0.020 in.)
If the margin thickness is less than minimum, replace
the valve.
(e) Check the surface of the valve stem tip for wear.
If the valve stem tip is worn, resurface the tip with a
grinder or replace the valve.
NOTICE: Do not grind off more than the minimum.
12. INSPECT AND CLEAN VALVE SEATS
(a) Using a 455 carbide cutter, resurface the valve seats.
Remove only enough metal to clean the seats.
± ENGINE MECHANICALCylinder Heads (2VZ±FE)EM±89
Page 1926 of 2389
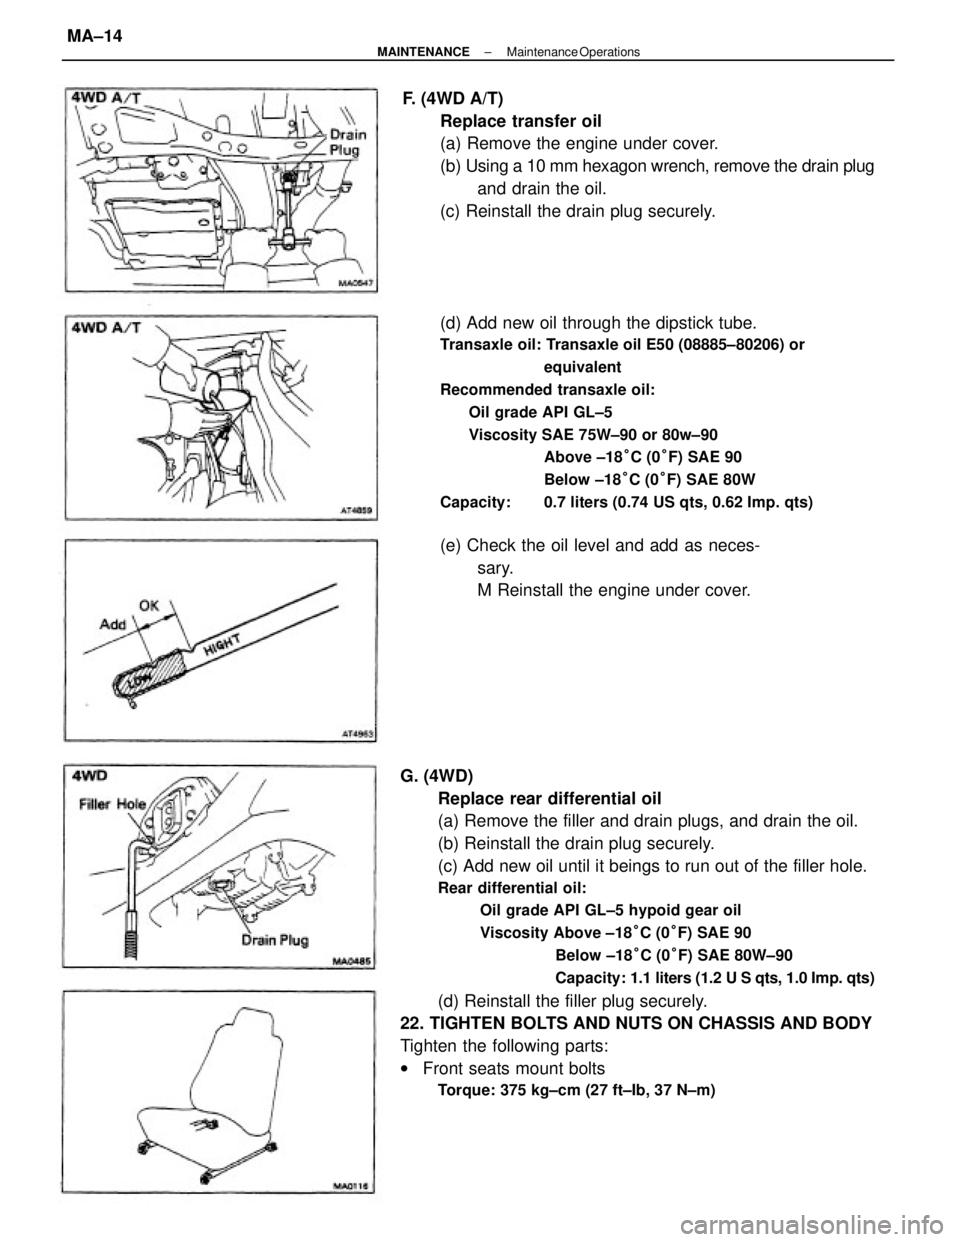
G. (4WD)
Replace rear differential oil
(a) Remove the filler and drain plugs, and drain the oil.
(b) Reinstall the drain plug securely.
(c) Add new oil until it beings to run out of the filler hole.
Rear differential oil:
Oil grade API GL±5 hypoid gear oil
Viscosity Above ±18°C (0°F) SAE 90
Below ±18°C (0°F) SAE 80W±90
Capacity: 1.1 liters (1.2 U S qts, 1.0 Imp. qts)
(d) Reinstall the filler plug securely.
22. TIGHTEN BOLTS AND NUTS ON CHASSIS AND BODY
Tighten the following parts:
wFront seats mount bolts
Torque: 375 kg±cm (27 ft±Ib, 37 N±m)
(d) Add new oil through the dipstick tube.
Transaxle oil: Transaxle oil E50 (08885±80206) or
equivalent
Recommended transaxle oil:
Oil grade API GL±5
Viscosity SAE 75W±90 or 80w±90
Above ±18°C (0°F) SAE 90
Below ±18°C (0°F) SAE 80W
Capacity: 0.7 liters (0.74 US qts, 0.62 Imp. qts)
F. (4WD A/T)
Replace transfer oil
(a) Remove the engine under cover.
(b) Using a 10 mm hexagon wrench, remove the drain plug
and drain the oil.
(c) Reinstall the drain plug securely.
(e) Check the oil level and add as neces-
sary.
M Reinstall the engine under cover.
± MAINTENANCEMaintenance OperationsMA±14
Page 1990 of 2389
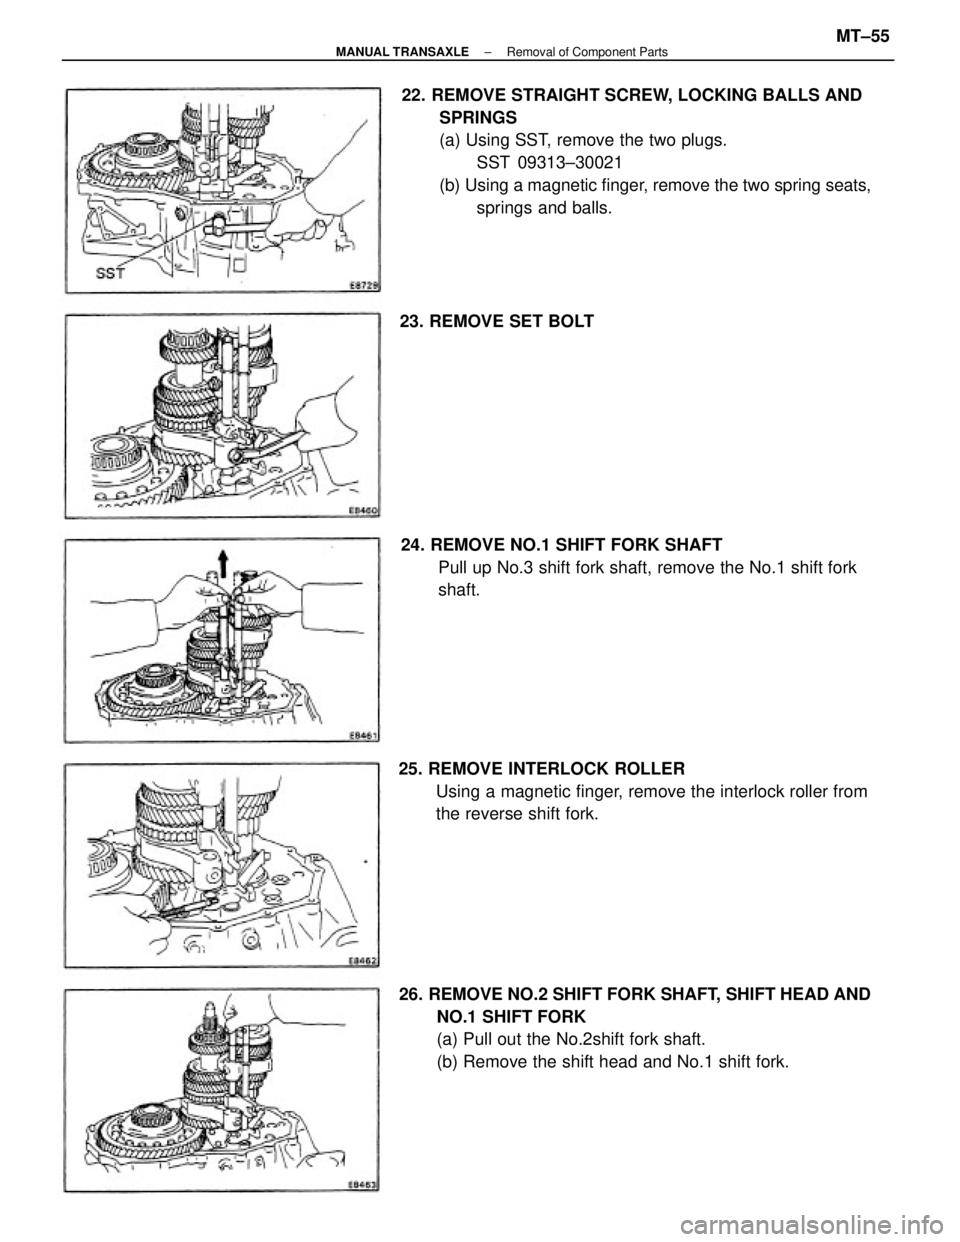
22. REMOVE STRAIGHT SCREW, LOCKING BALLS AND
SPRINGS
(a) Using SST, remove the two plugs.
SST 09313±30021
(b) Using a magnetic finger, remove the two spring seats,
springs and balls.
26. REMOVE NO.2 SHIFT FORK SHAFT, SHIFT HEAD AND
NO.1 SHIFT FORK
(a) Pull out the No.2shift fork shaft.
(b) Remove the shift head and No.1 shift fork. 25. REMOVE INTERLOCK ROLLER
Using a magnetic finger, remove the interlock roller from
the reverse shift fork. 24. REMOVE NO.1 SHIFT FORK SHAFT
Pull up No.3 shift fork shaft, remove the No.1 shift fork
shaft. 23. REMOVE SET BOLT
± MANUAL TRANSAXLERemoval of Component PartsMT±55
Page 2068 of 2389
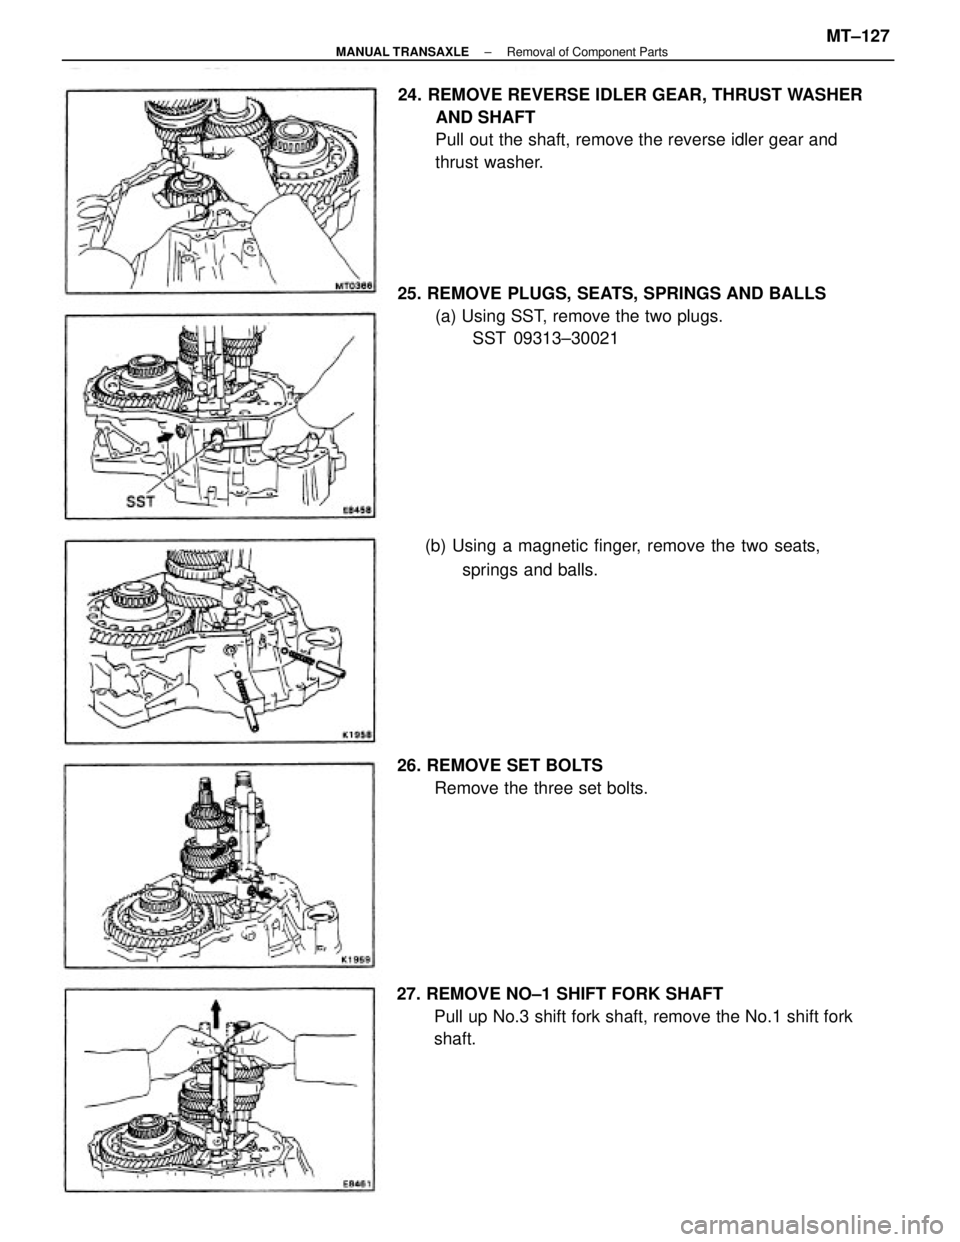
24. REMOVE REVERSE IDLER GEAR, THRUST WASHER
AND SHAFT
Pull out the shaft, remove the reverse idler gear and
thrust washer.
25. REMOVE PLUGS, SEATS, SPRINGS AND BALLS
(a) Using SST, remove the two plugs.
SST 09313±30021
27. REMOVE NO±1 SHIFT FORK SHAFT
Pull up No.3 shift fork shaft, remove the No.1 shift fork
shaft. (b) Using a magnetic finger, remove the two seats,
springs and balls.
26. REMOVE SET BOLTS
Remove the three set bolts.
± MANUAL TRANSAXLERemoval of Component PartsMT±127