TOYOTA COROLLA 2013 11.G User Guide
COROLLA 2013 11.G
TOYOTA
TOYOTA
https://www.carmanualsonline.info/img/14/6332/w960_6332-0.png
TOYOTA COROLLA 2013 11.G User Guide
Page 306 of 532
306 3-4. Using the hands-free phone system (for cellular phone)
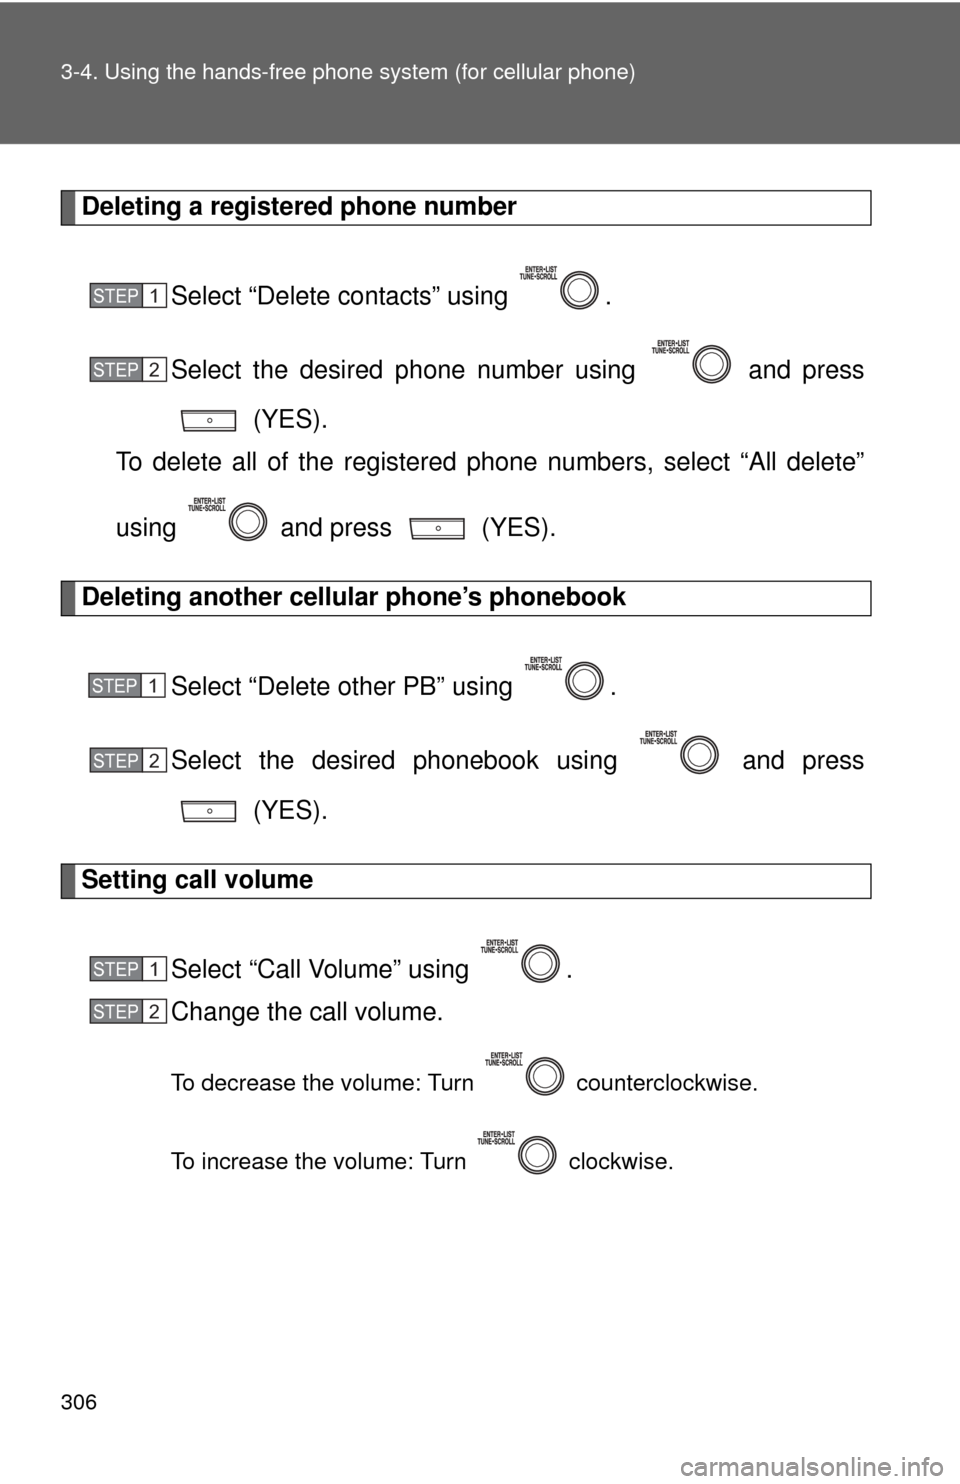
Deleting a registered phone number
Select “Delete contacts” using .
Select the desired phone number using and press (YES).
To delete all of the registered phone numbers, select “All delete”
using and press (YES).
Deleting another cellular phone’s phonebook
Select “Delete other PB” using .
Select the desired phonebook using and press (YES).
Setting call volume
Select “Call Volume” using .
Change the call volume.
To decrease the volume: Turn counterclockwise.
To increase the volume: Turn clockwise.
STEP 1
STEP 2
STEP 1
STEP 2
STEP 1
STEP 2
Page 307 of 532
307
3-4. Using the hand
s-free phone system (for cellular phone)
3
Interior features
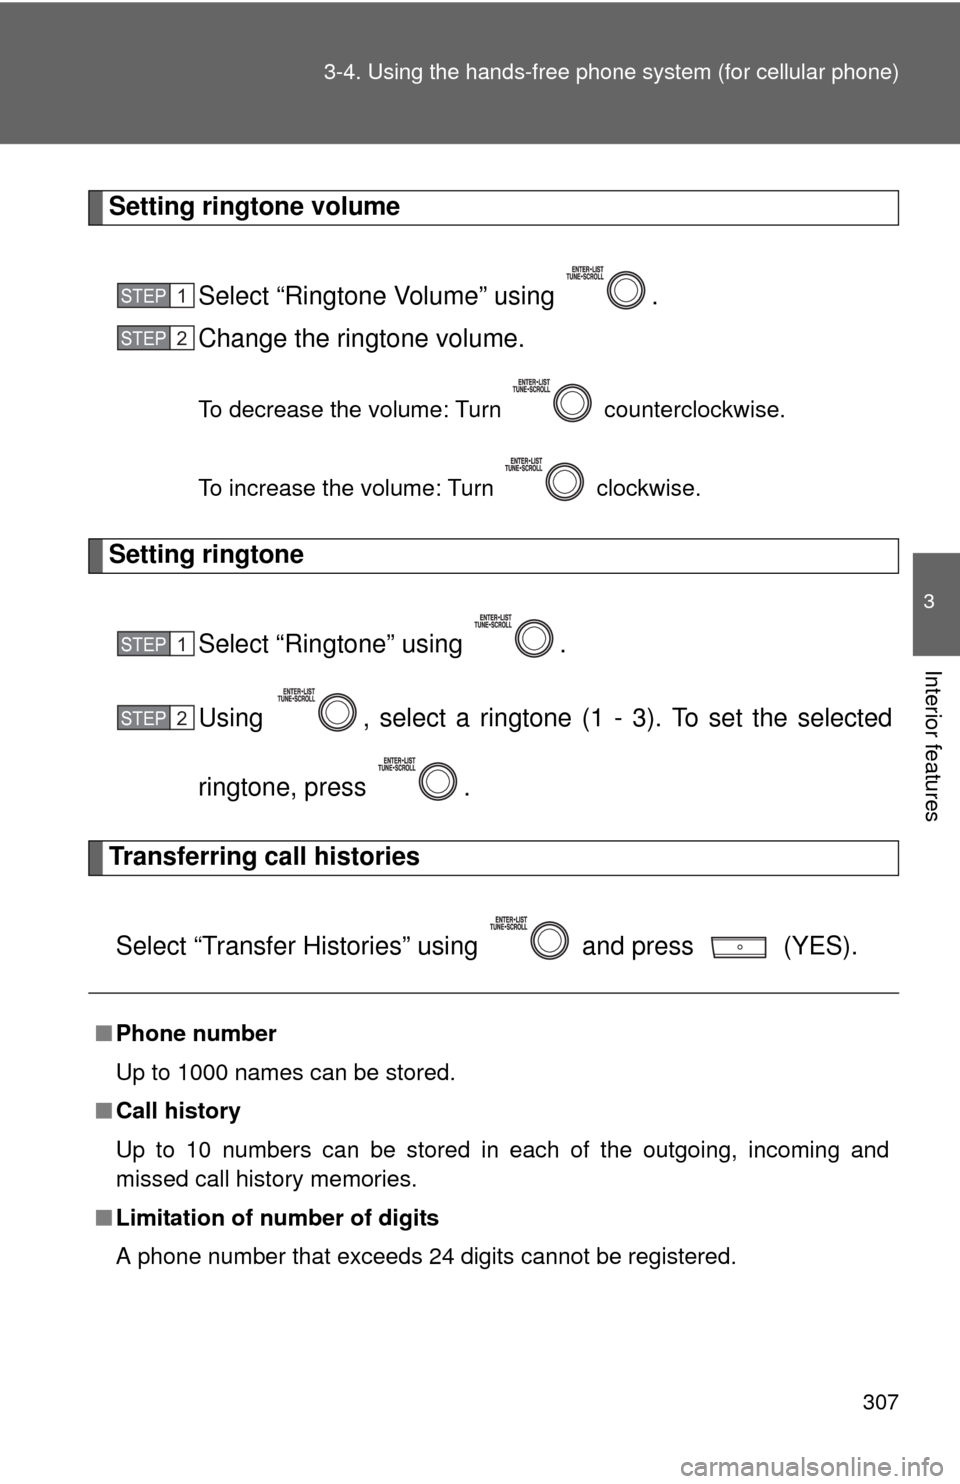
Setting ringtone volume
Select “Ringtone Volume” using .
Change the ringtone volume.
To decrease the volume: Turn counterclockwise.
To increase the volume: Turn clockwise.
Setting ringtoneSelect “Ringtone” using .
Using , select a ringtone (1 - 3). To set the selected
ringtone, press .
Transferring call histories
Select “Transfer Histories” using and press (YES).
■ Phone number
Up to 1000 names can be stored.
■ Call history
Up to 10 numbers can be stored in each of the outgoing, incoming and
missed call history memories.
■ Limitation of number of digits
A phone number that exceeds 24 digits cannot be registered.
STEP 1
STEP 2
STEP 1
STEP 2
Page 323 of 532
323
3-7. Other interior features
3
Interior features
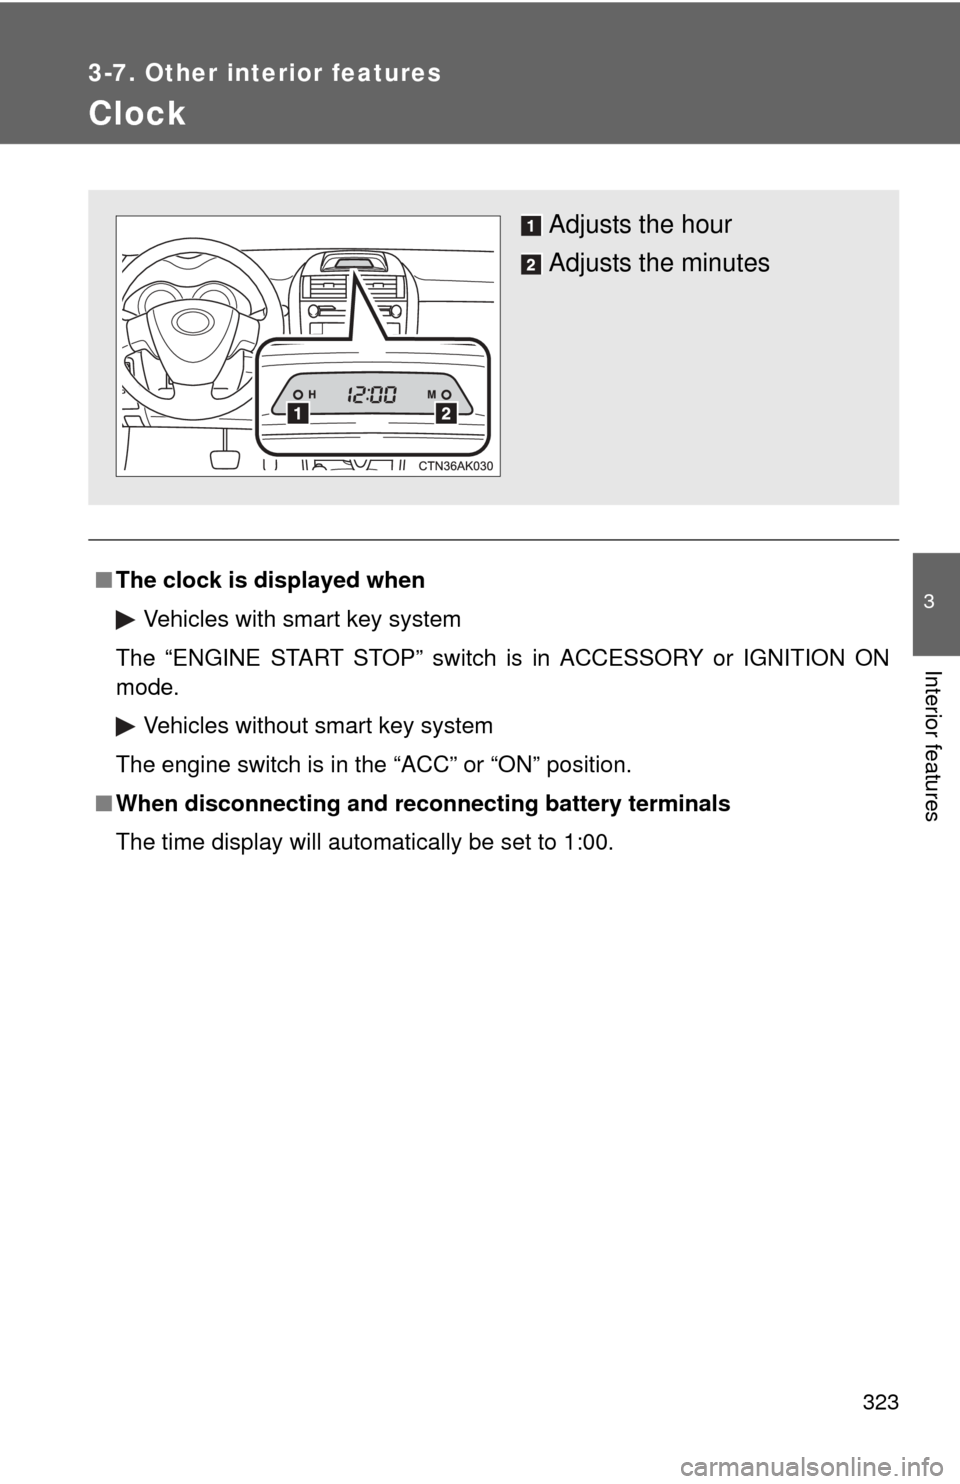
Clock
■The clock is displayed when
Vehicles with smart key system
The “ENGINE START STOP” switch is in ACCESSORY or IGNITION ON
mode. Vehicles without smart key system
The engine switch is in the “ACC” or “ON” position.
■ When disconnecting and reco nnecting battery terminals
The time display will automatically be set to 1:00.
Adjusts the hour
Adjusts the minutes
Page 360 of 532
360 4-3. Do-it-yourself maintenance
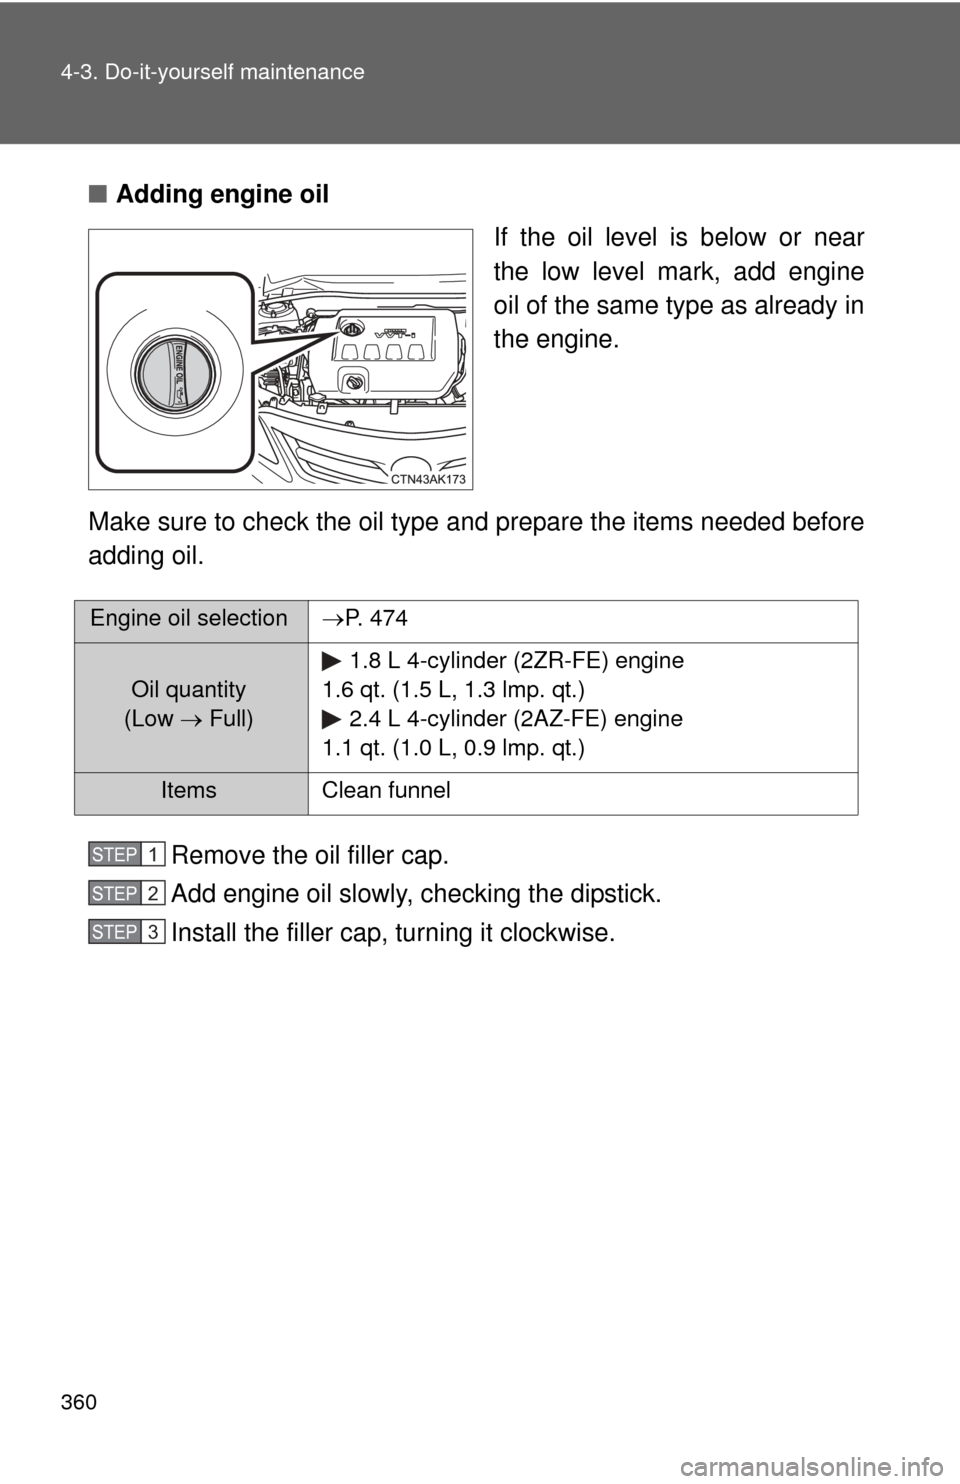
■Adding engine oil
If the oil level is below or near
the low level mark, add engine
oil of the same type as already in
the engine.
Make sure to check the oil type and prepare the items needed before
adding oil.
Remove the oil filler cap.
Add engine oil slowly, checking the dipstick.
Install the filler cap, turning it clockwise.
Engine oil selection P. 4 7 4
Oil quantity
(Low Full) 1.8 L 4-cylinder (2ZR-FE) engine
1.6 qt. (1.5 L, 1.3 lmp. qt.) 2.4 L 4-cylinder (2AZ-FE) engine
1.1 qt. (1.0 L, 0.9 lmp. qt.)
Items Clean funnel
STEP 1
STEP 2
STEP 3
Page 397 of 532
397
4-3. Do-it-yourself maintenance
4
Maintenance and care
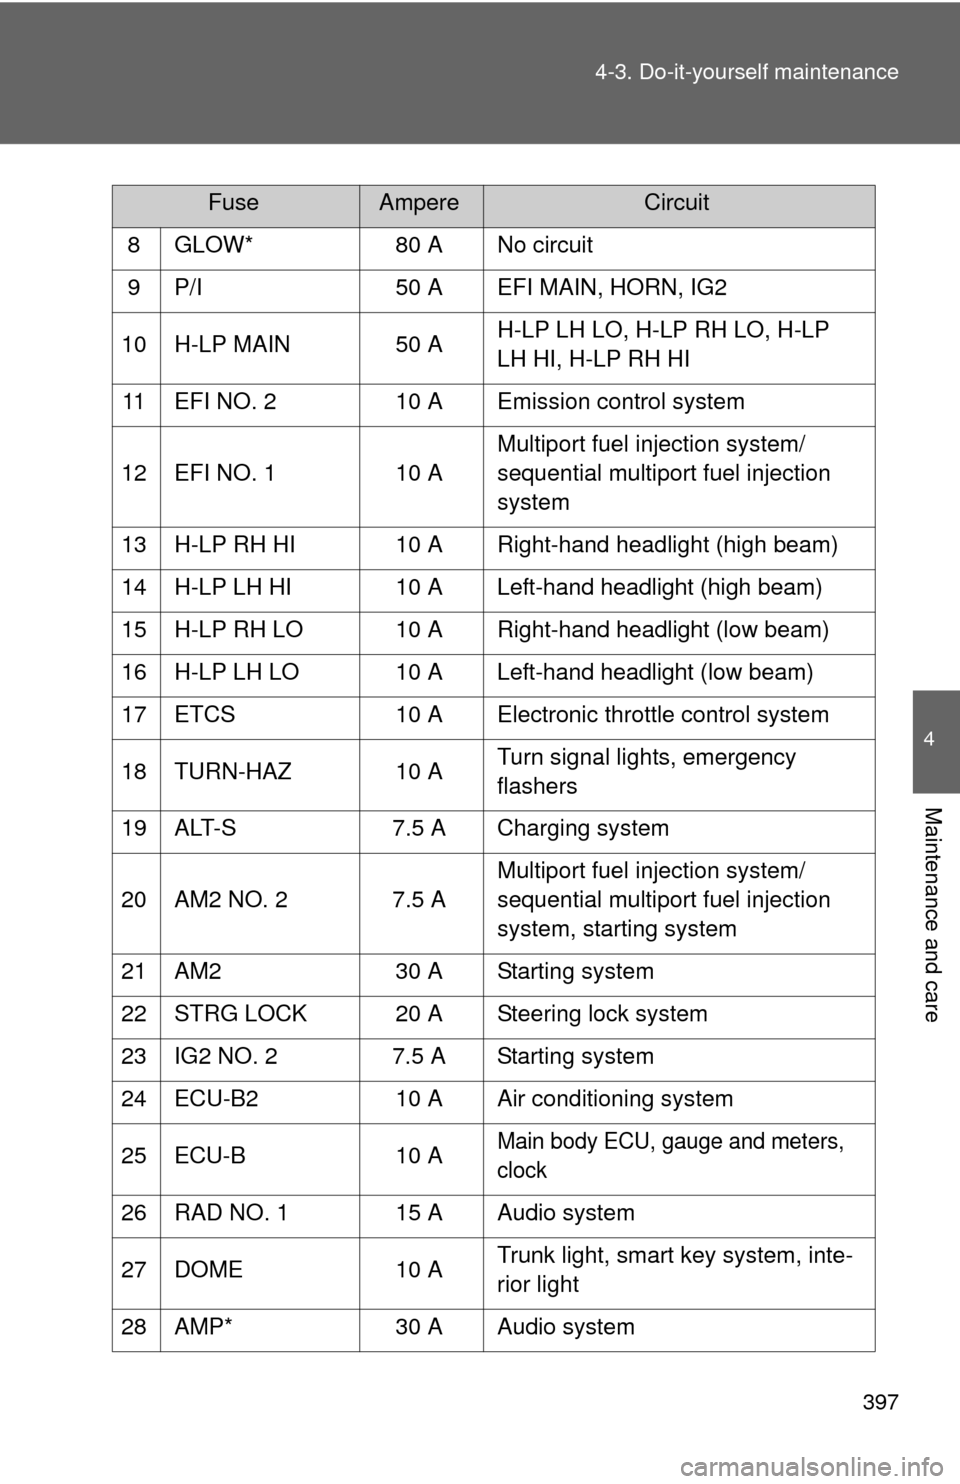
8 GLOW*
80 A No circuit
9 P/I 50 A EFI MAIN, HORN, IG2
10 H-LP MAIN 50 A H-LP LH LO, H-LP RH LO, H-LP
LH HI, H-LP RH HI
11 EFI NO. 2 10 A Emission control system
12 EFI NO. 1 10 AMultiport fuel injection system/
sequential multiport fuel injection
system
13 H-LP RH HI 10 A Right-hand headlight (high beam)
14 H-LP LH HI 10 A Left-hand headlight (high beam)
15 H-LP RH LO 10 A Right-hand headlight (low beam)
16 H-LP LH LO 10 A Left-hand headlight (low beam)
17 ETCS 10 A Electronic throttle control system
18 TURN-HAZ 10 A Turn signal lights, emergency
flashers
19 ALT-S 7.5 A Charging system
20 AM2 NO. 2 7.5 A Multiport fuel injection system/
sequential multiport fuel injection
system, starting system
21 AM2 30 A Starting system
22 STRG LOCK 20 A Steering lock system
23 IG2 NO. 2 7.5 A Starting system
24 ECU-B2 10 A Air conditioning system
25 ECU-B 10 A
Main body ECU, gauge and meters,
clock
26 RAD NO. 1 15 A Audio system
27 DOME 10 A Trunk light, smart key system, inte-
rior light
28 AMP* 30 A Audio system
FuseAmpereCircuit
Page 404 of 532
404 4-3. Do-it-yourself maintenance
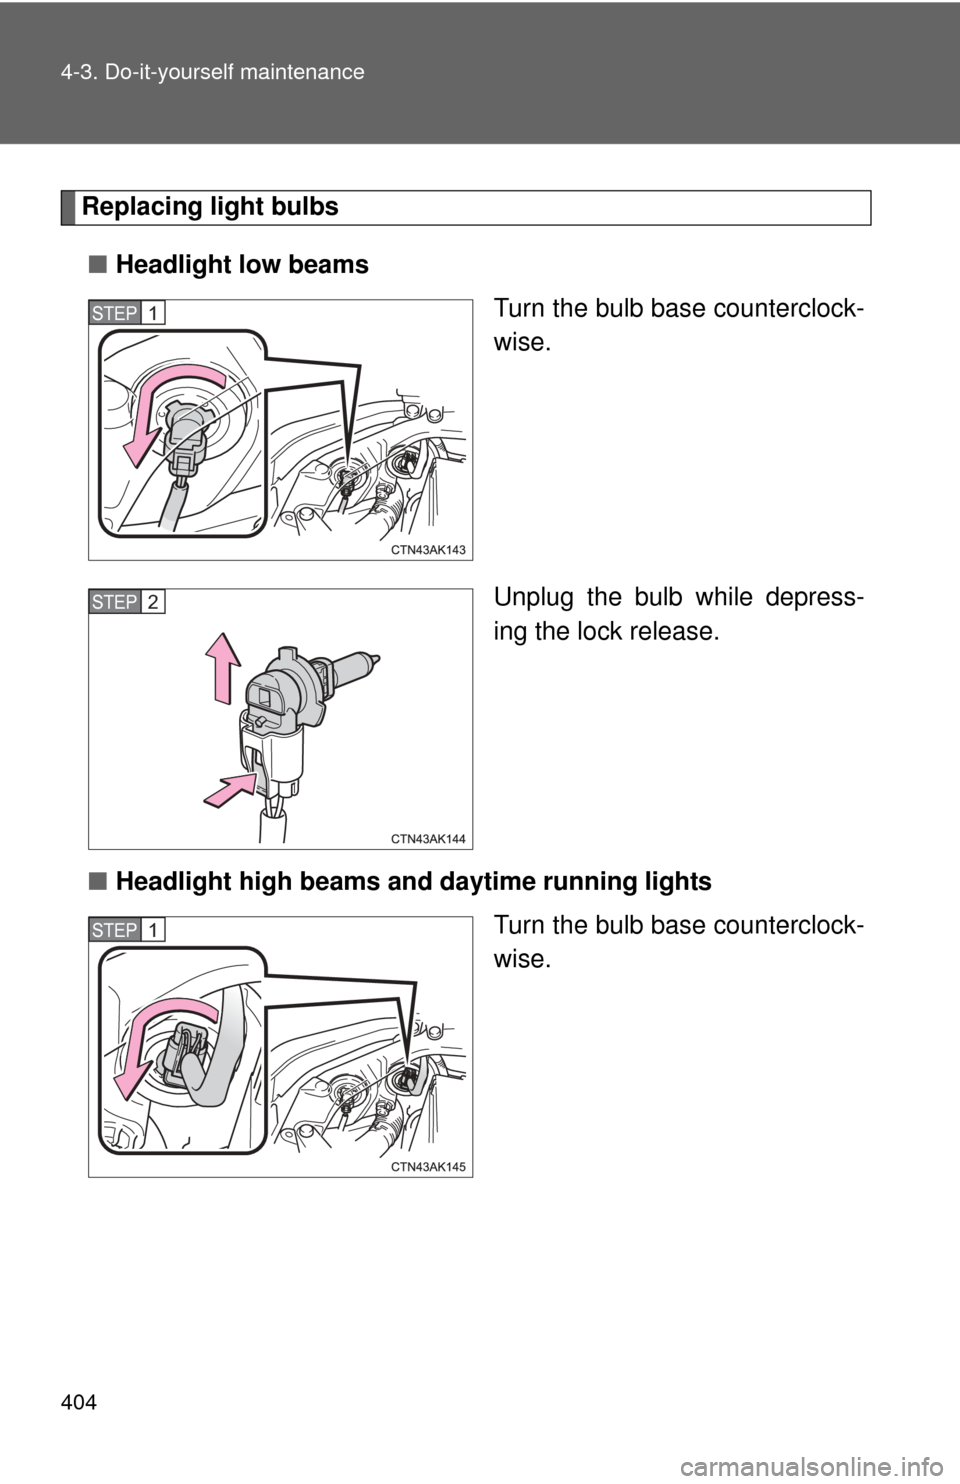
Replacing light bulbs■ Headlight low beams
Turn the bulb base counterclock-
wise.
Unplug the bulb while depress-
ing the lock release.
■ Headlight high beams and daytime running lights
Turn the bulb base counterclock-
wise.
STEP 1
STEP 2
STEP 1
Page 406 of 532
406 4-3. Do-it-yourself maintenance
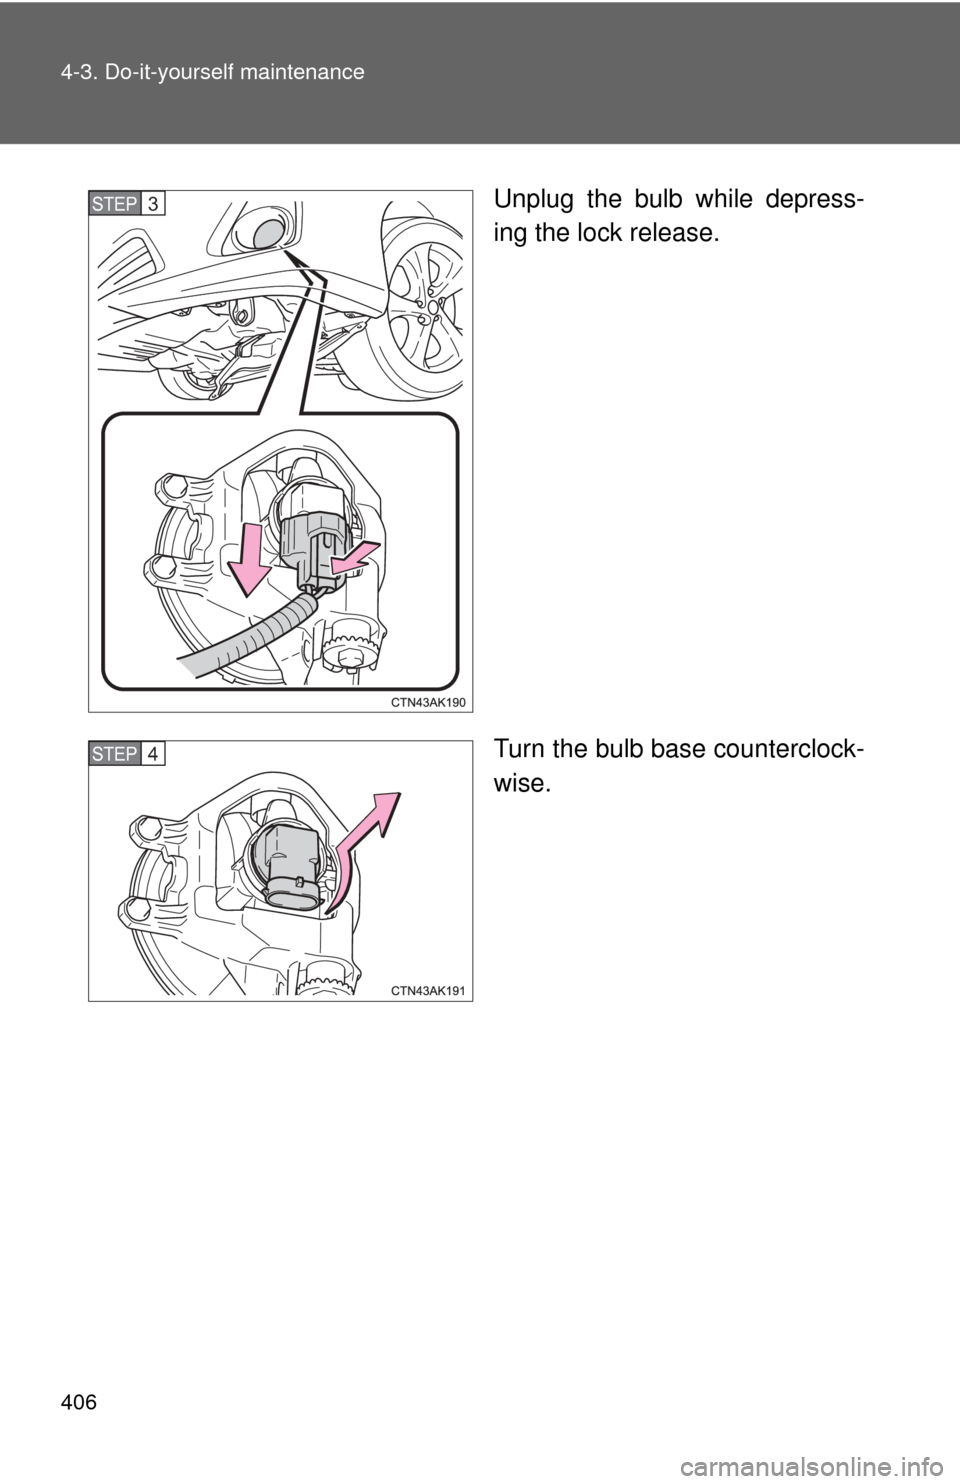
Unplug the bulb while depress-
ing the lock release.
Turn the bulb base counterclock-
wise.STEP 3
STEP 4
Page 408 of 532
408 4-3. Do-it-yourself maintenance
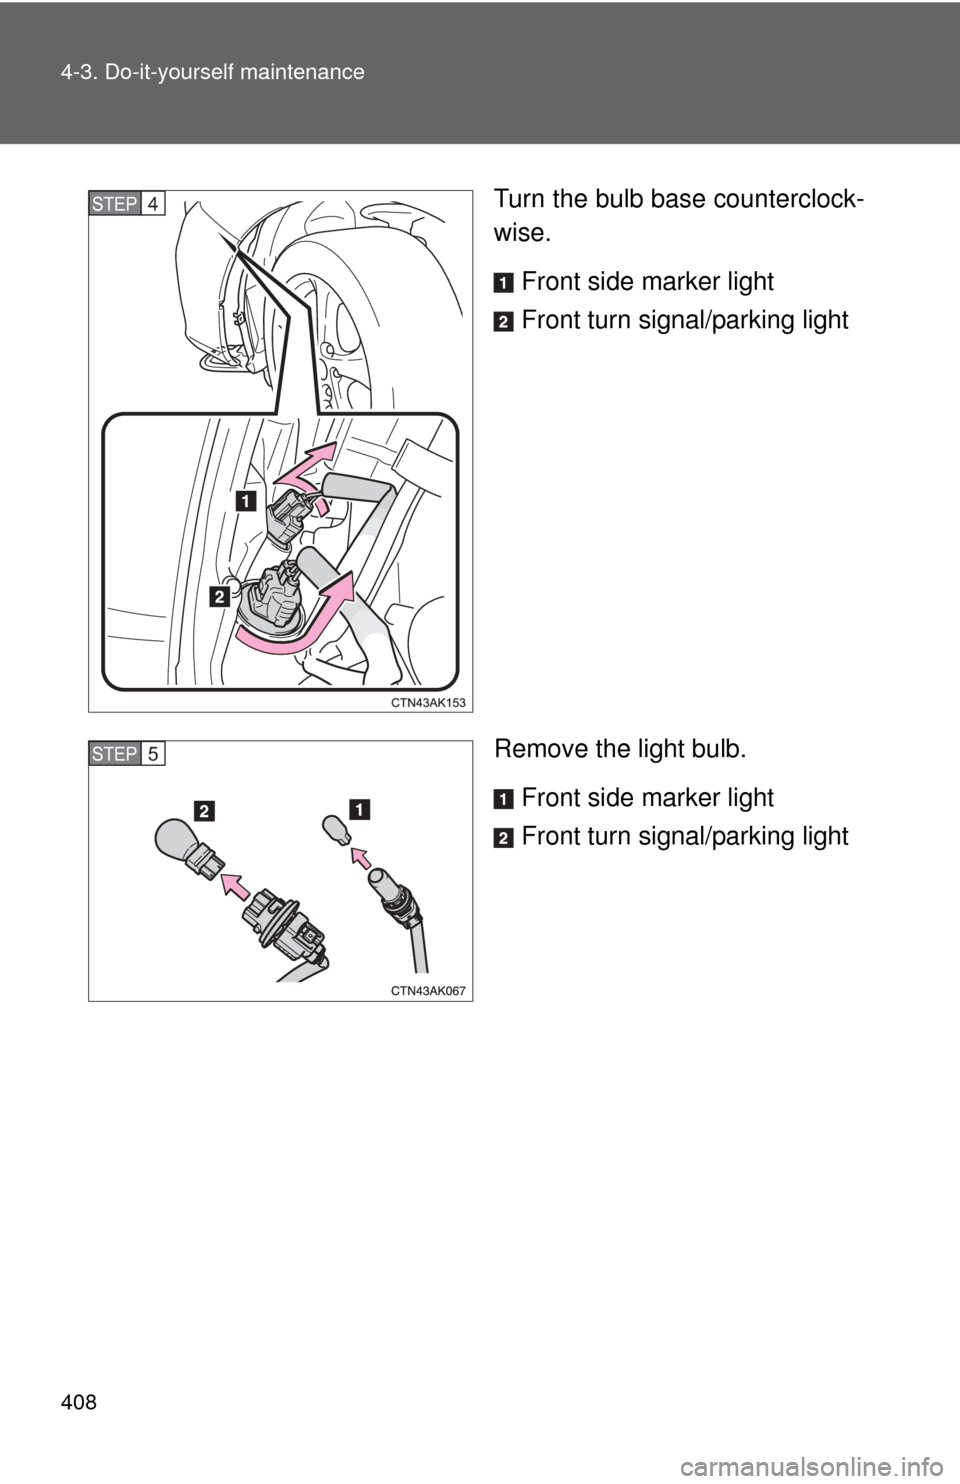
Turn the bulb base counterclock-
wise.Front side marker light
Front turn signal/parking light
Remove the light bulb. Front side marker light
Front turn signal/parking lightSTEP 4
STEP 5
Page 409 of 532
409
4-3. Do-it-yourself maintenance
4
Maintenance and care
■
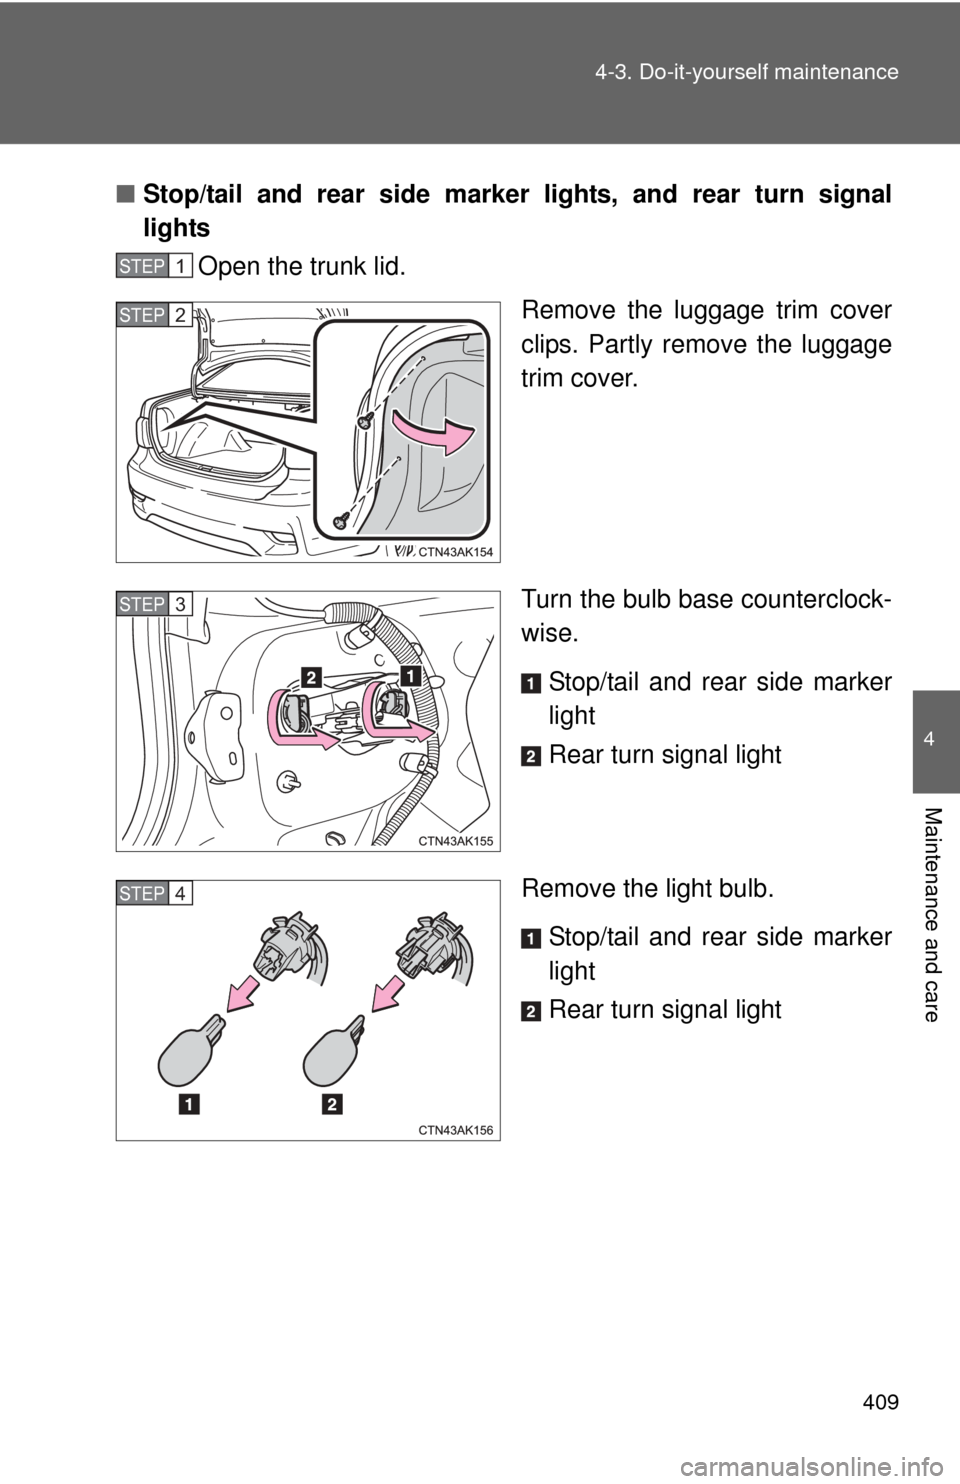
Stop/tail and rear side marker lights, and rear turn signal
lights
Open the trunk lid.
Remove the luggage trim cover
clips. Partly remove the luggage
trim cover.
Turn the bulb base counterclock-
wise.
Stop/tail and rear side marker
light
Rear turn signal light
Remove the light bulb. Stop/tail and rear side marker
light
Rear turn signal light
STEP 1
STEP 2
STEP 3
STEP 4
Page 410 of 532
410 4-3. Do-it-yourself maintenance
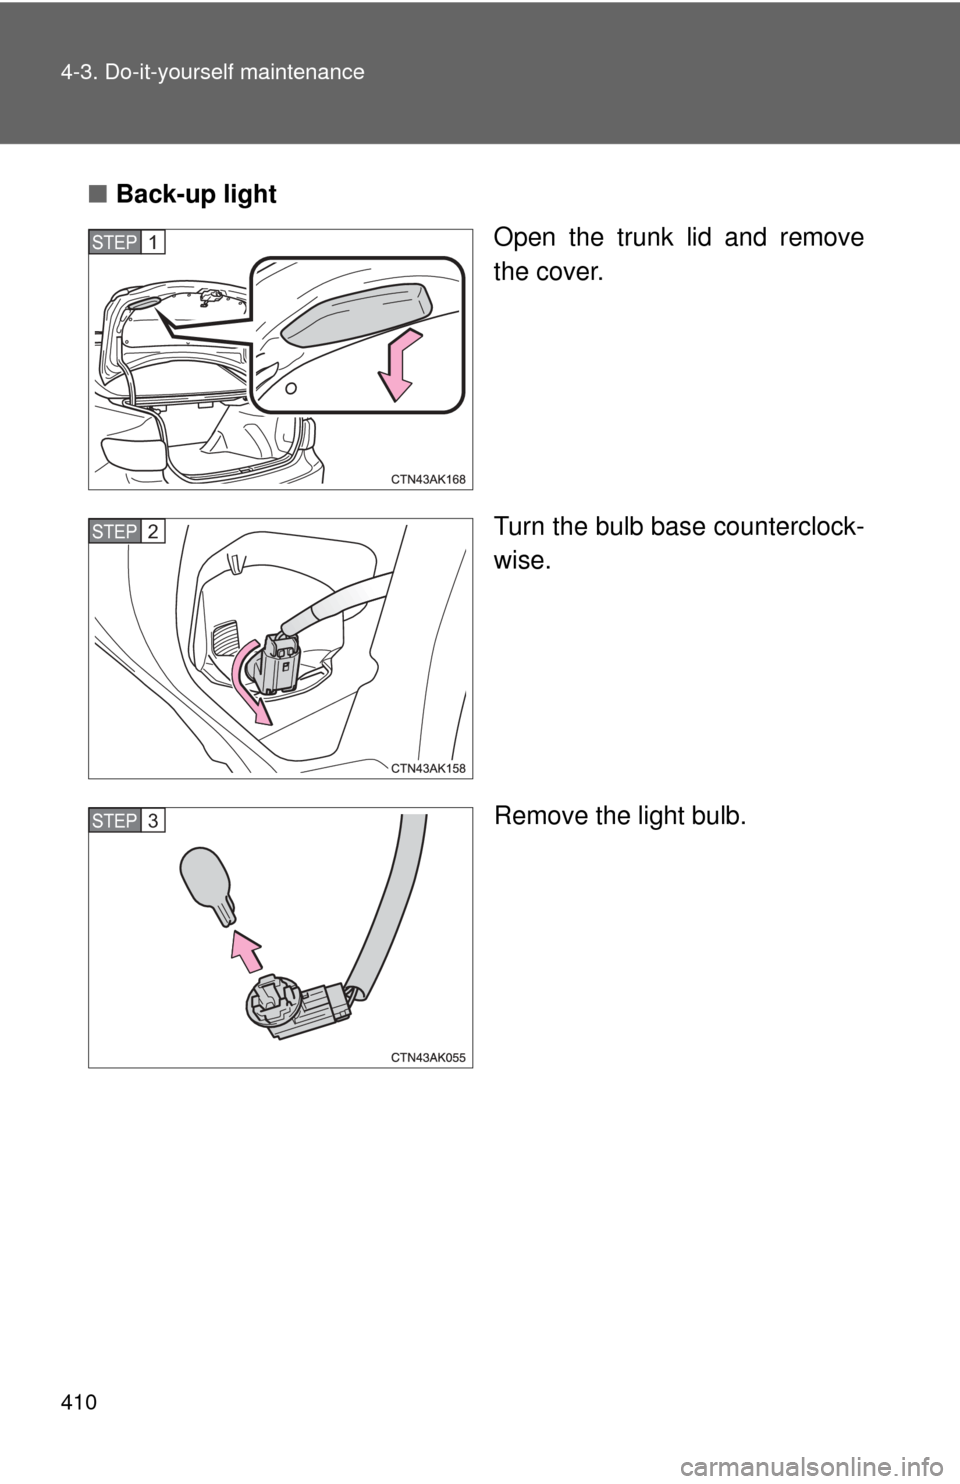
■Back-up light
Open the trunk lid and remove
the cover.
Turn the bulb base counterclock-
wise.
Remove the light bulb.
STEP 1
STEP 2
STEP 3
