headlights TOYOTA COROLLA 2013 11.G Owners Manual
[x] Cancel search | Manufacturer: TOYOTA, Model Year: 2013, Model line: COROLLA, Model: TOYOTA COROLLA 2013 11.GPages: 532, PDF Size: 8.55 MB
Page 6 of 532
6
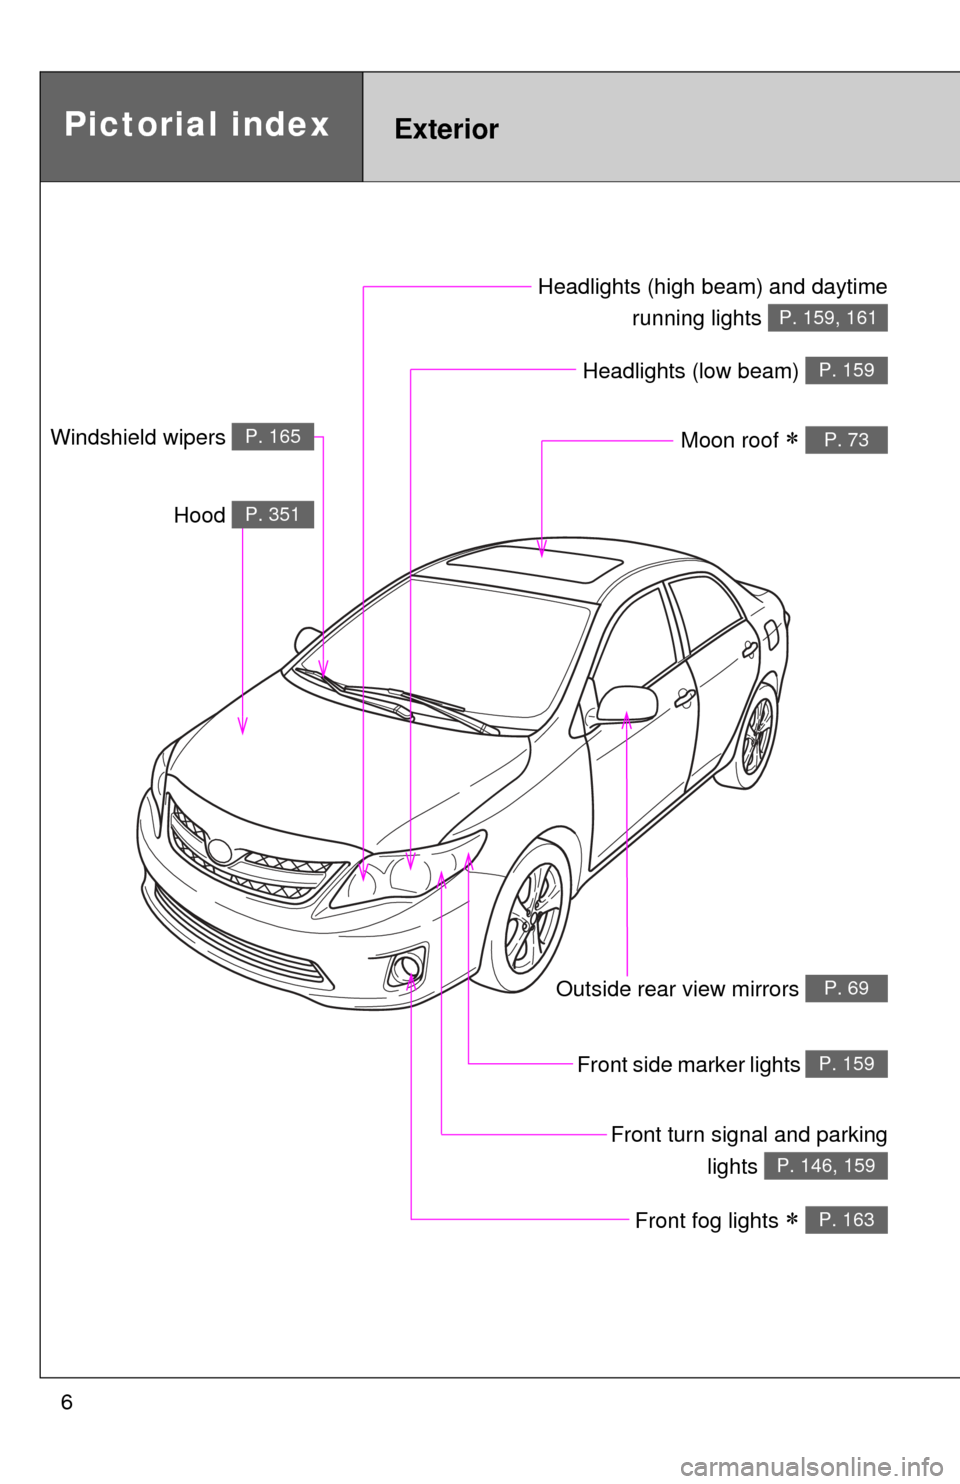
Headlights (low beam) P. 159
Pictorial indexExterior
Front fog lights P. 163
Front turn signal and parkinglights
P. 146, 159
Outside rear view mirrors P. 69
Front side marker lights P. 159
Headlights (high beam) and daytimerunning lights
P. 159, 161
Moon roof P. 73
Hood P. 351
Windshield wipers P. 165
Page 67 of 532
67
1
1-3. Adjustable components (seats, mirrors, steering wheel)
Before driving
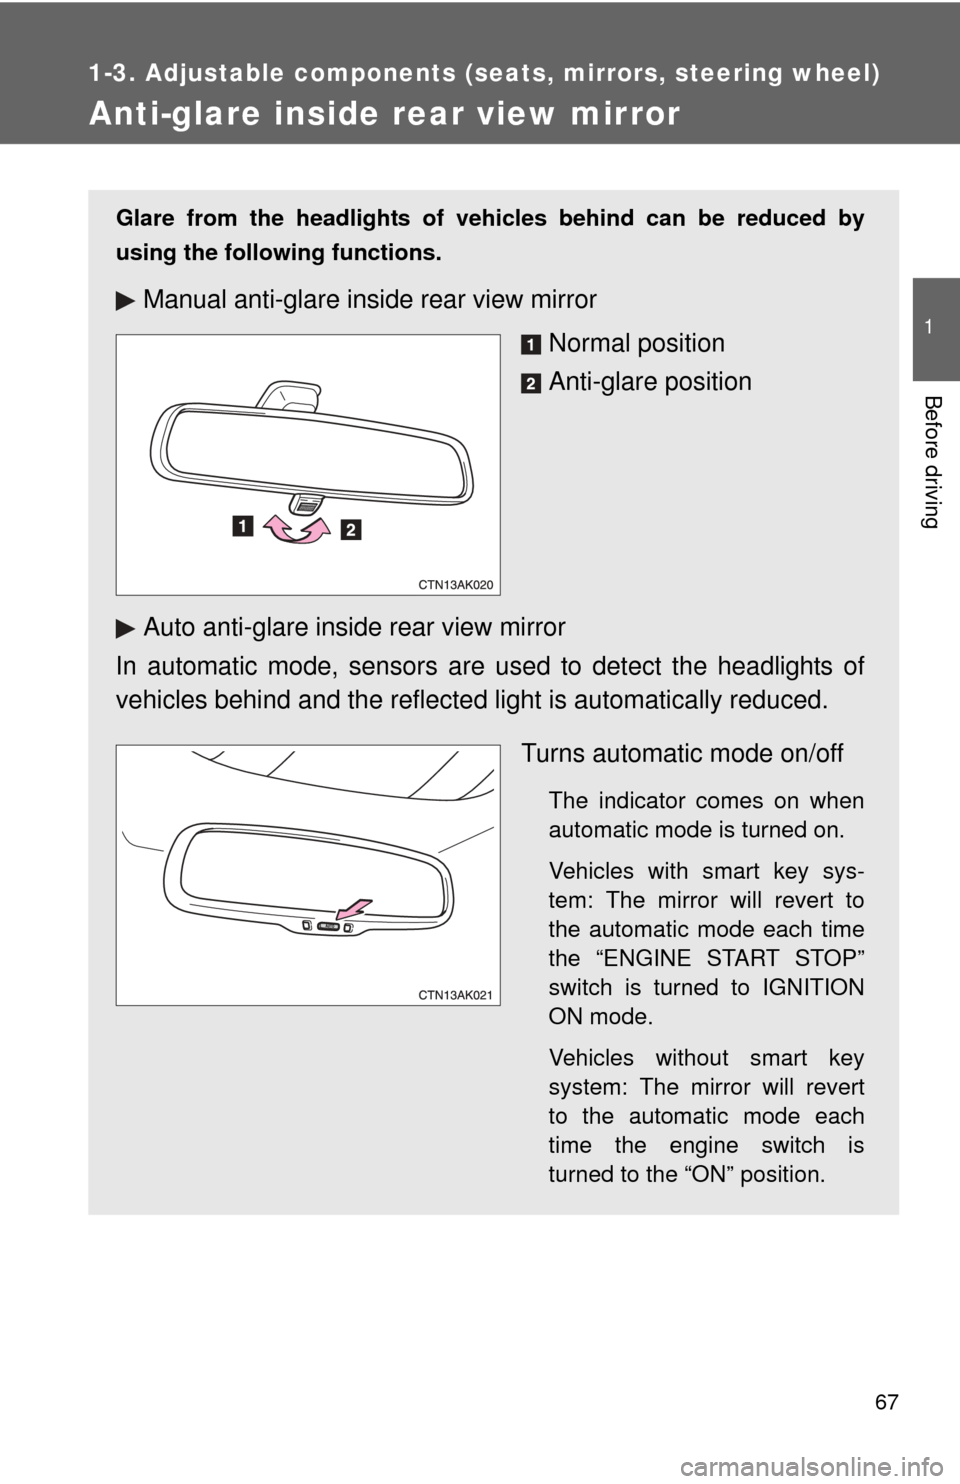
Anti-glare inside rear view mirror
Glare from the headlights of vehicles behind can be reduced by
using the following functions.
Manual anti-glare inside rear view mirrorNormal position
Anti-glare position
Auto anti-glare inside rear view mirror
In automatic mode, sensors are used to detect the headlights of
vehicles behind and the reflecte d light is automatically reduced.
Turns automatic mode on/off
The indicator comes on when
automatic mode is turned on.
Vehicles with smart key sys-
tem: The mirror will revert to
the automatic mode each time
the “ENGINE START STOP”
switch is turned to IGNITION
ON mode.
Vehicles without smart key
system: The mirror will revert
to the automatic mode each
time the engine switch is
turned to the “ON” position.
Page 159 of 532
159
2
When driving
2-3. Operating the lights and wipers
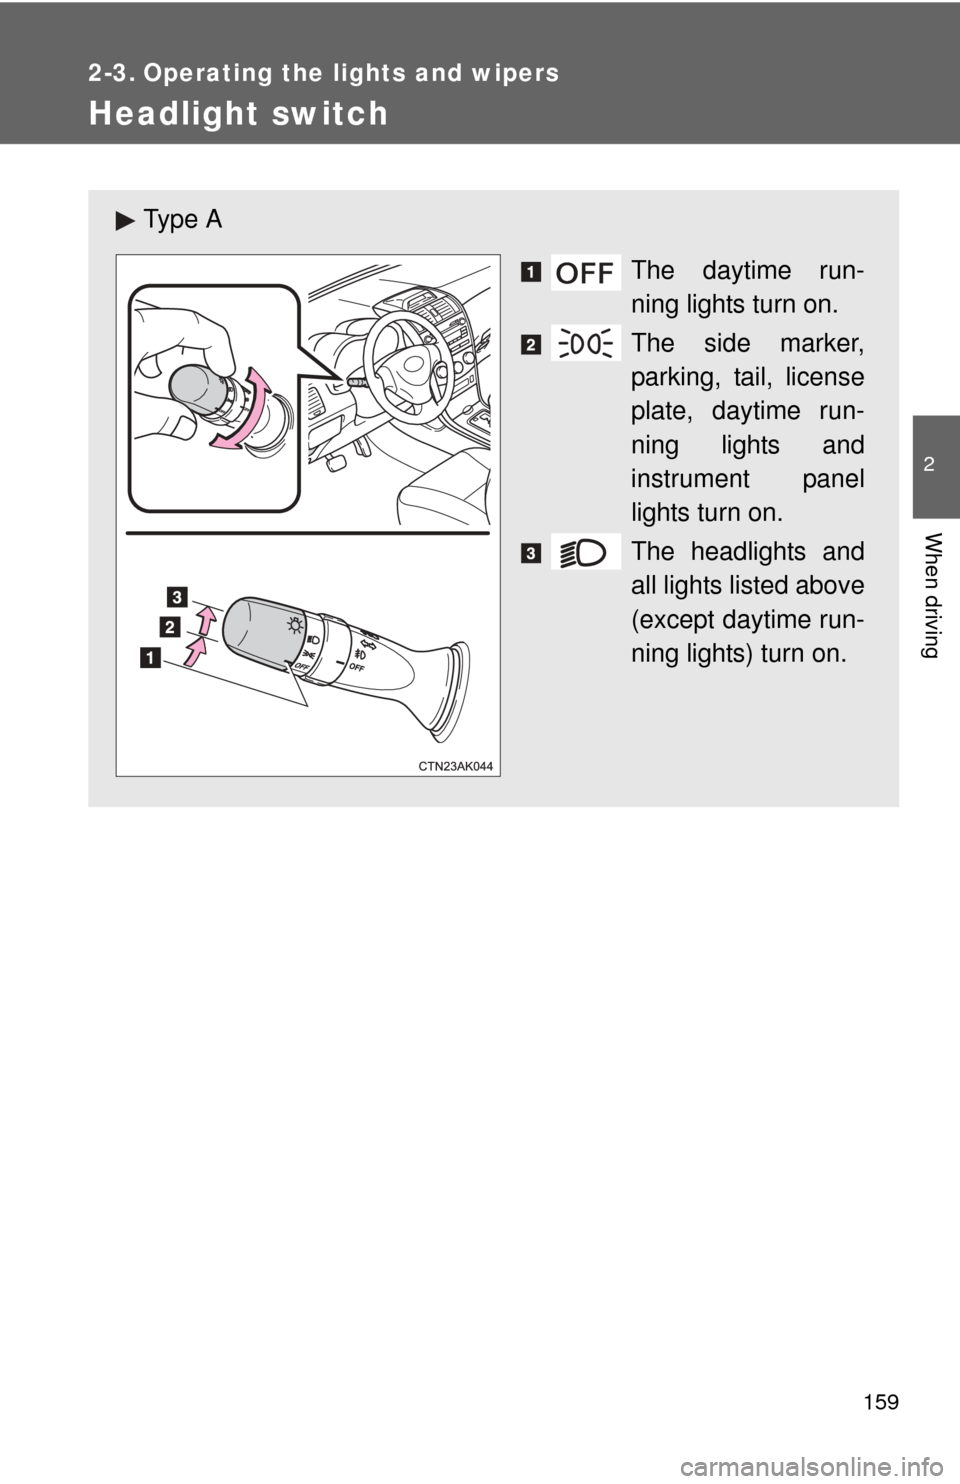
Headlight switch
Ty p e AThe daytime run-
ning lights turn on.
The side marker,
parking, tail, license
plate, daytime run-
ning lights and
instrument panel
lights turn on.
The headlights and
all lights listed above
(except daytime run-
ning lights) turn on.
Page 160 of 532
160 2-3. Operating the lights and wipers
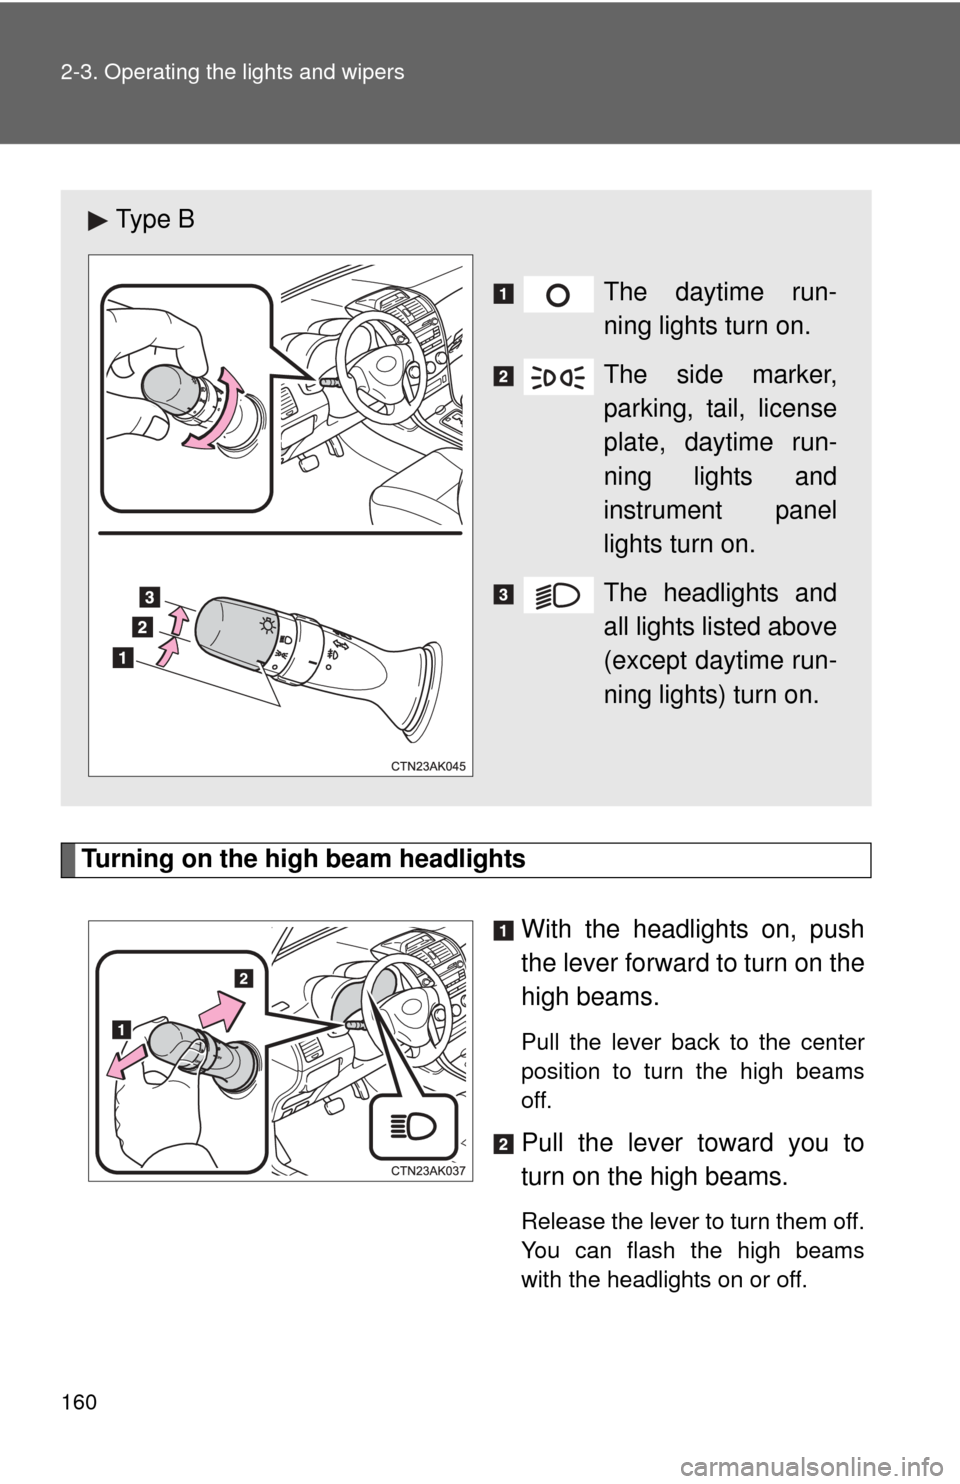
Turning on the high beam headlightsWith the headlights on, push
the lever forward to turn on the
high beams.
Pull the lever back to the center
position to turn the high beams
off.
Pull the lever toward you to
turn on the high beams.
Release the lever to turn them off.
You can flash the high beams
with the headlights on or off.
Ty p e B
The daytime run-
ning lights turn on.
The side marker,
parking, tail, license
plate, daytime run-
ning lights and
instrument panel
lights turn on.
The headlights and
all lights listed above
(except daytime run-
ning lights) turn on.
Page 161 of 532
161
2-3. Operating the lights and wipers
2
When driving
■
Daytime running light system
●To make your vehicle more visible to other drivers, the headlights turn on
automatically whenever the engine is started and the parking brake is
released.
● Compared to turning on the headlights, the daytime running light system
offers greater durability and consumes less electricity, so it can help
improve fuel economy.
● Vehicles with daytime running light control sensor: The brightness of
headlights will automatically change depending on the darkness of the
surroundings. The other exterior lights and instrument panel lights auto-
matically turn on or off.
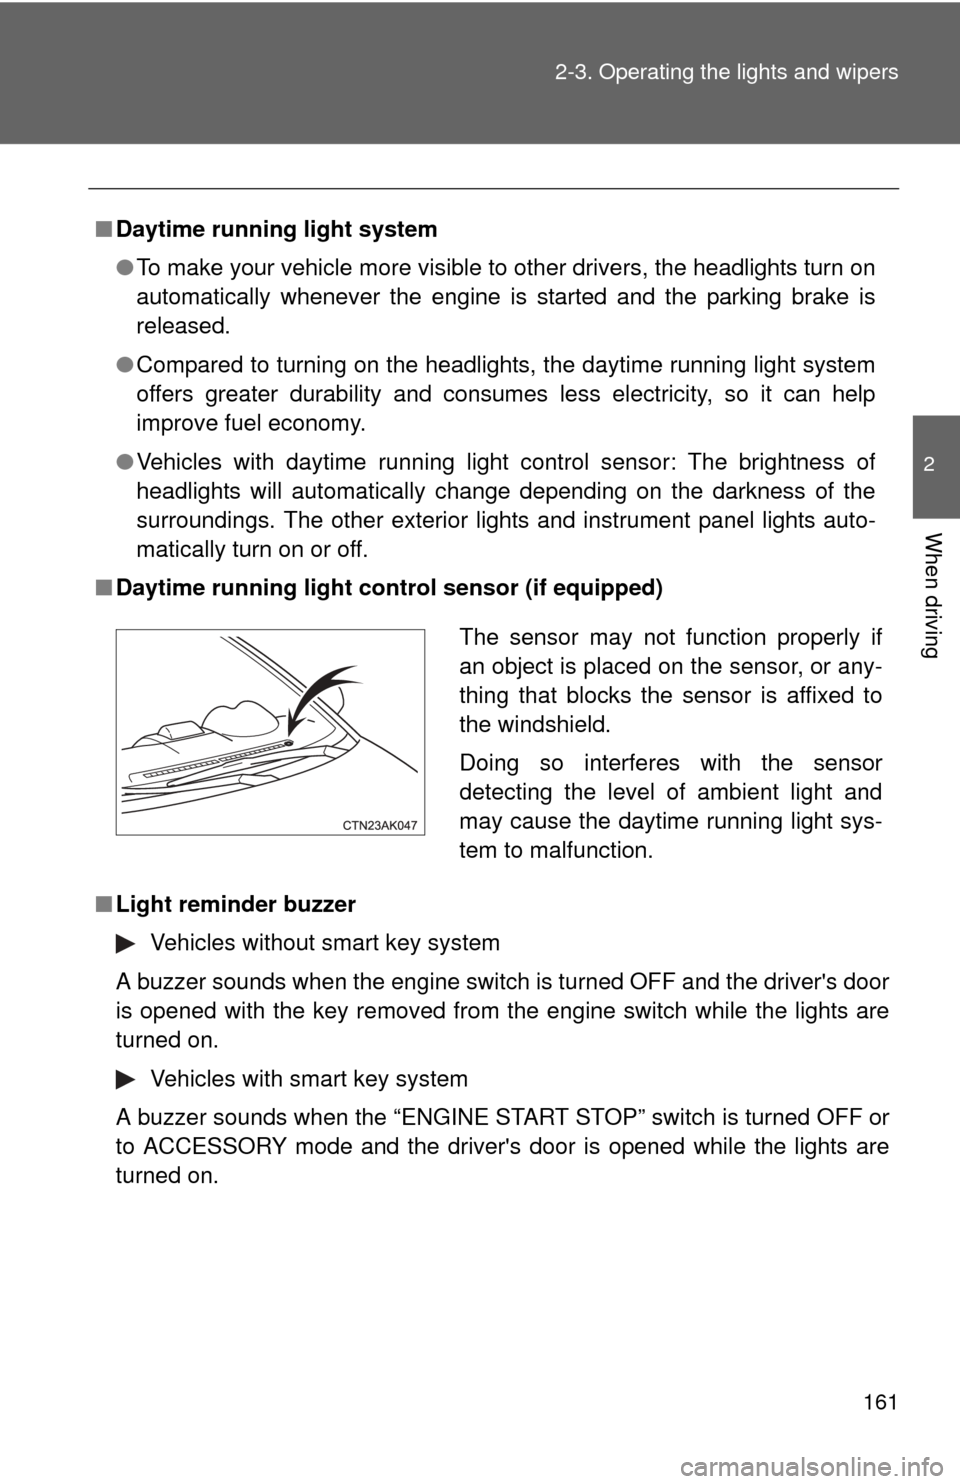
■ Daytime running light control sensor (if equipped)
■ Light reminder buzzer
Vehicles without smart key system
A buzzer sounds when the engine switch is turned OFF and the driver's door
is opened with the key removed from the engine switch while the lights are
turned on.
Vehicles with smart key system
A buzzer sounds when the “ENGINE START STOP” switch is turned OFF or
to ACCESSORY mode and the driver's door is opened while the lights are
turned on.
The sensor may not function properly if
an object is placed on the sensor, or any-
thing that blocks the sensor is affixed to
the windshield.
Doing so interferes with the sensor
detecting the level of ambient light and
may cause the daytime running light sys-
tem to malfunction.
Page 163 of 532
163
2-3. Operating the lights and wipers
2
When driving
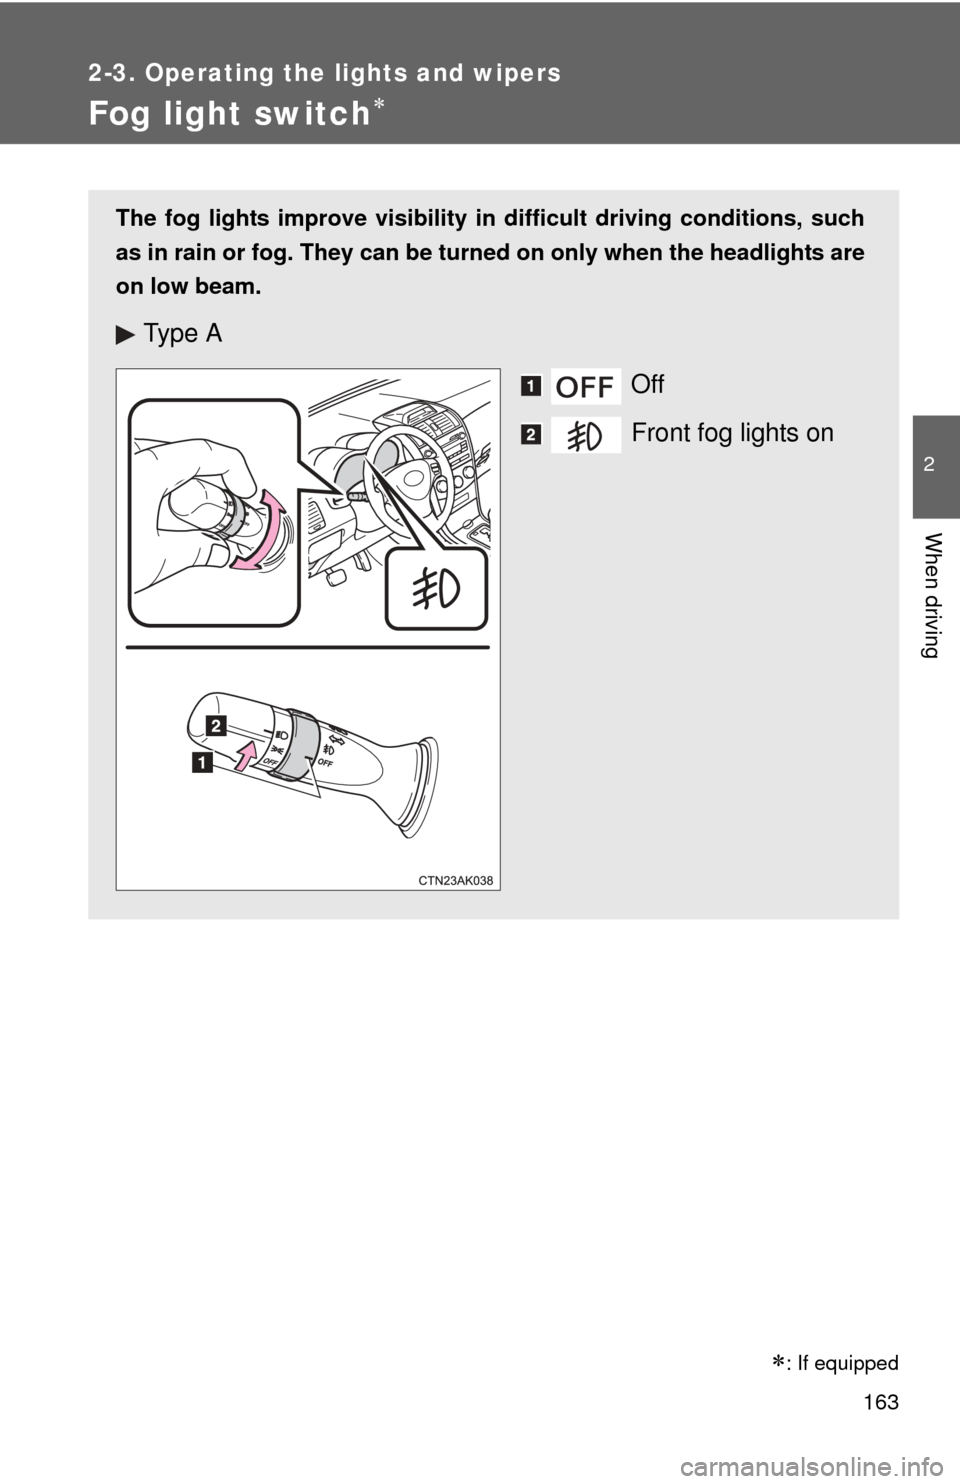
Fog light switch
The fog lights improve visibility in difficult driving conditions, such
as in rain or fog. They can be turned on only when the headlights are
on low beam.
Ty p e A
Off
Front fog lights on
�
: If equipped
Page 413 of 532
413
4-3. Do-it-yourself maintenance
4
Maintenance and care
CAUTION
■
Replacing light bulbs
●Turn off the headlights. Do not attempt to replace the bulb immediately
after turning off the headlights.
The bulbs become very hot and may cause burns.
● Do not touch the glass portion of the light bulb with bare hands. Hold the
bulb by the plastic or metal portion.
If the bulb is scratched or dropped it may blow out or crack.
● Fully install light bulbs and any parts used to secure them. Failing to do so
may result in heat damage, fire, or water entering the headlight unit. This
may damage the headlights or cause condensation to build up on the lens.
■ To prevent damage or fire
Make sure bulbs are fully seated and locked.
Page 448 of 532
448
5-2. Steps to take in an emergency
If the engine will not star t
If the engine still does not start after following the correct starting
procedure (P. 131, 135) or releasing the steering lock ( P. 133,
137), confirm the fo llowing points.
■The engine will not start even when the starter motor oper-
ates normally.
One of the following may be the cause of the problem.
●There may not be sufficient fuel in the vehicle’s tank.
Refuel the vehicle.
● The engine may be flooded.
Try to restart the engine once more following correct starting
procedures. ( P. 131, 135)
● There may be a malfunction in the engine immobilizer system.
( P. 8 1 )
■ The starter motor turns over slowly, the interior lights and
headlights are dim, or the horn does not sound or sounds at
a low volume.
One of the following may be the cause of the problem.
●The battery may be discharged. ( P. 455)
● The battery terminal connec tions may be loose or corroded.
■ The starter motor does not turn over (vehicles with smart
key system).
One of the following may be the cause of the problem.
●The engine starting system may be malfunctioning due to an
electrical problem such as an open circuit or a blown fuse.
However, an interim measure is available to start the engine.
( P. 449)
● The electronic key battery is depleted. However, an interim
measure is available to start the engine. ( P. 453)
Page 449 of 532
5
When trouble arises
449
5-2. Steps to take in an emergency
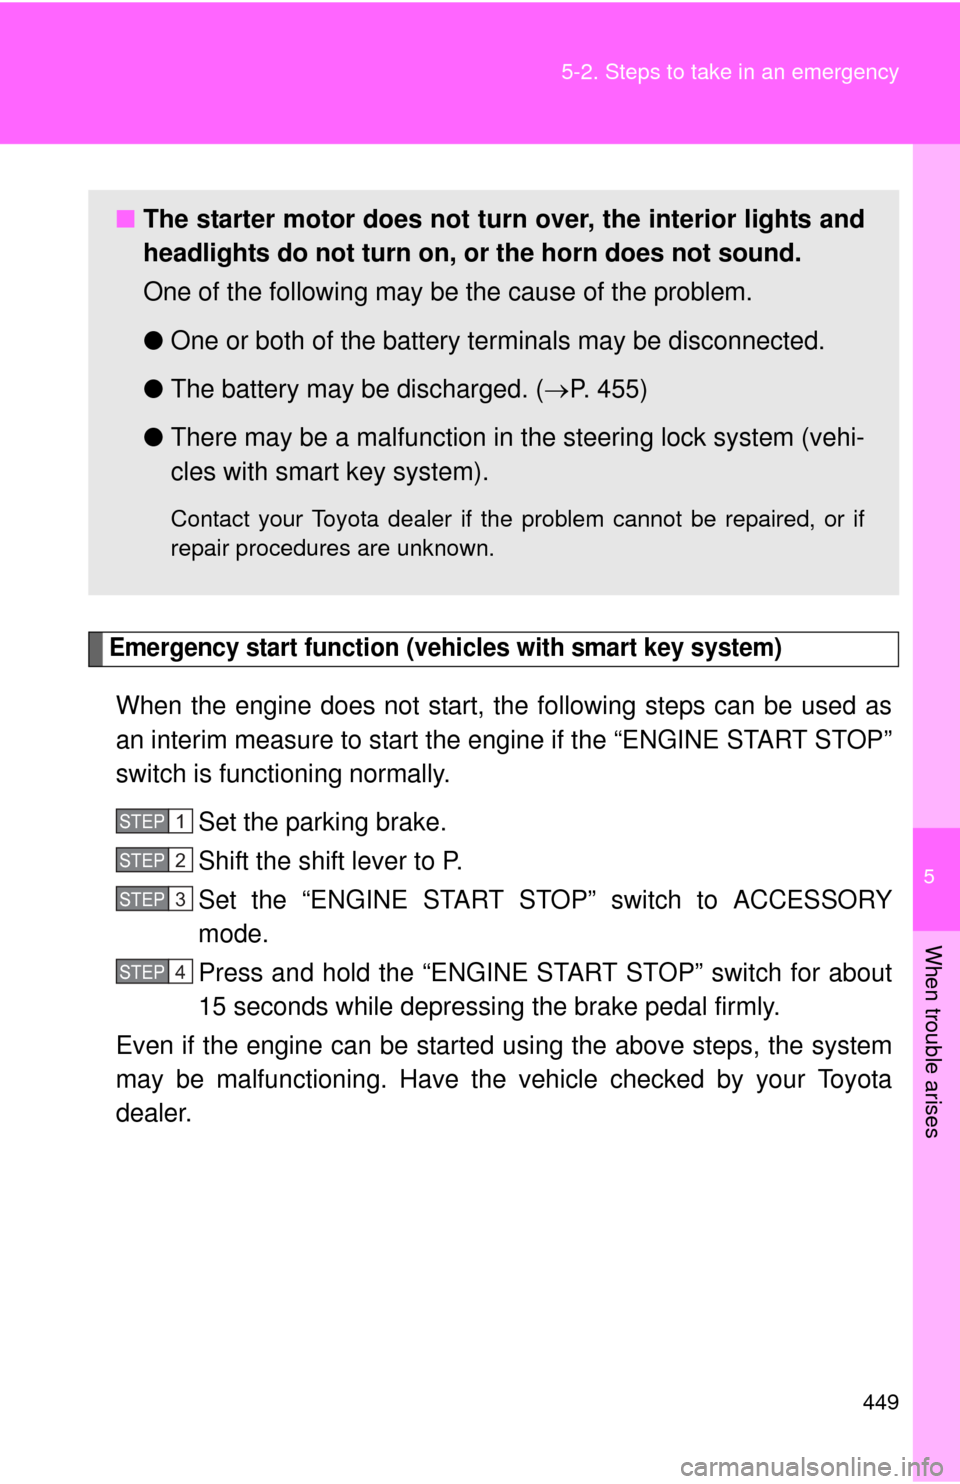
Emergency start function (vehicles with smart key system)
When the engine does not start, the following steps can be used as
an interim measure to start the engine if the “ENGINE START STOP”
switch is functioning normally.
Set the parking brake.
Shift the shift lever to P.
Set the “ENGINE START ST OP” switch to ACCESSORY
mode.
Press and hold the “ENGINE START STOP” switch for about
15 seconds while depressing the brake pedal firmly.
Even if the engine can be start ed using the above steps, the system
may be malfunctioning. Have the vehicle checked by your Toyota
dealer.
■ The starter motor does not turn over, the interior lights and
headlights do not turn on, or the horn does not sound.
One of the following may be the cause of the problem.
● One or both of the battery terminals may be disconnected.
● The battery may be discharged. ( P. 455)
● There may be a malfunction in the steering lock system (vehi-
cles with smart key system).
Contact your Toyota dealer if the problem cannot be repaired, or if
repair procedures are unknown.
STEP 1
STEP 2
STEP 3
STEP 4
Page 458 of 532
458 5-2. Steps to take in an emergency
■Avoiding a discharged battery
●Turn off the headlights and the audio system while the engine is turned
off.
● Turn off any unnecessary electrical components when the vehicle is run-
ning at a low speed for an extended period, such as in heavy traffic, etc.
■ Charging the battery
The electricity stored in the battery will discharge gradually even when the
vehicle is not in use, due to natural discharge and the draining effects of cer-
tain electrical appliances. If the vehicle is left for a long time, the battery may
discharge, and the engine may be unable to start. (The battery recharges
automatically during driving.)
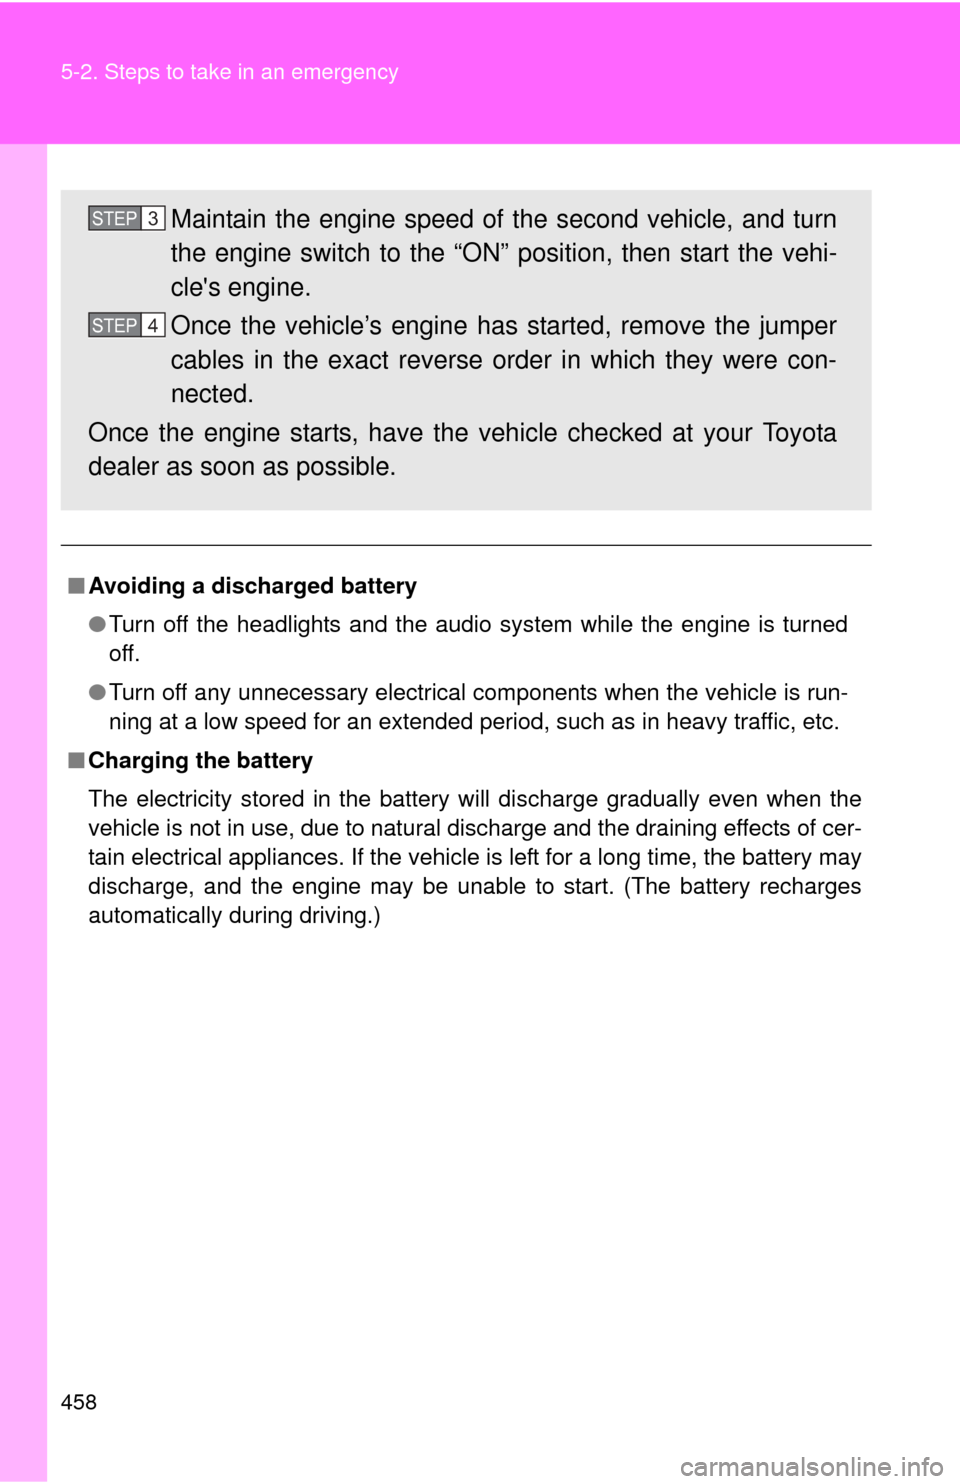
Maintain the engine speed of the second vehicle, and turn
the engine switch to the “ON” position, then start the vehi-
cle's engine.
Once the vehicle’s engine has started, remove the jumper
cables in the exact reverse order in which they were con-
nected.
Once the engine starts, have the vehicle checked at your Toyota
dealer as soon as possible.STEP 3
STEP 4