remote control TOYOTA COROLLA 2020 (in English) Owner's Manual
[x] Cancel search | Manufacturer: TOYOTA, Model Year: 2020, Model line: COROLLA, Model: TOYOTA COROLLA 2020Pages: 588, PDF Size: 13.49 MB
Page 115 of 588
1153-2. Opening, closing and locking the doors
COROLLA_U
3
Before driving
●If there is another electronic key in
the detection area, it may take
slightly longer to unlock the doors
after the door handle is gripped.
■When the vehicle is not driven
for extended periods
●To prevent theft of the vehicle, do
not leave the electronic key within
6 ft. (2 m) of the vehicle.
●The smart key system can be
deactivated in advance. ( P.548)
●Setting the electronic key to bat-
tery-saving mode helps to reduce
key battery depletion. ( P. 1 1 3 )
■To operate the system properly
●Make sure to carry the electronic
key when operating the system.
Do not get the electronic key too
close to the vehicle when operat-
ing the system from the outside of
the vehicle.
Depending on the position and hold-
ing condition of the electronic key,
the key may not be detected cor-
rectly and the system may not oper-
ate properly. (The alarm may go off
accidentally, or the door lock pre-
vention function may not operate.)
●Do not leave the electronic key
inside the trunk.
The key confinement prevention
function may not operate, depend-
ing on the location of the key (the
inside edge of the trunk), condi-
tions (inside a metal bag, close to
metallic objects) and the radio
waves in the surrounding area.
( P. 1 1 0 )
■If the smart key system does
not operate properly
●Locking and unlocking the doors:
P. 5 1 3
●Starting the engine: P. 5 1 4
■Customization
Some functions can be customized.
( P.548)
■If the smart key system has
been deactivated in a custom-
ized setting
●Locking and unlocking the doors:
Use the wireless remote control or
mechanical key. ( P.103, 513)
●Starting the engine and changing
engine switch modes: P. 5 1 4
●Stopping the engine: P. 1 5 0
■Certification for the smart key system
Except for vehicles sold in Canada
Page 128 of 588
1283-5. Opening and closing the windows
COROLLA_Upushing the switch in the
one-touch opening direction, and
hold it there for approximately 4
seconds or more.
6 Pull and hold the power window
switch in the one-touch closing
direction again. After the door
window is completely closed,
continue holding the switch for a
further 1 second or more.
If you release the switch while the
window is moving, start again from
the beginning.
If the window reverses and cannot
be fully closed or opened, have the
vehicle inspected by your Toyota
dealer.
■Door lock linked window opera-
tion
●Vehicles without a smart key sys-
tem: The power windows can be
opened and closed using the key.
*
( P.104)
Vehicles with a smart key system:
The power windows can be
opened and closed using the
mechanical key.
* ( P.514)
●The power windows can be
opened using the wireless remote
control.
* (with a wireless remote
control function) ( P.103)
*: These settings must be custom-
ized at your Toyota dealer.
■Customization
Some functions can be customized.
( P.548)
WARNING
Observe the following precau-
tions. Failure to do so may result
in death or serious injury.
■Closing the windows
●The driver is responsible for all
the power window operations,
including the operation for the
passengers. In order to prevent
accidental operation, especially
by a child, do not let a child
operate the power windows. It is
possible for children and other
passengers to have body parts
caught in the power window.
Also, when riding with a child, it
is recommended to use the win-
dow lock switch. (
P.129)
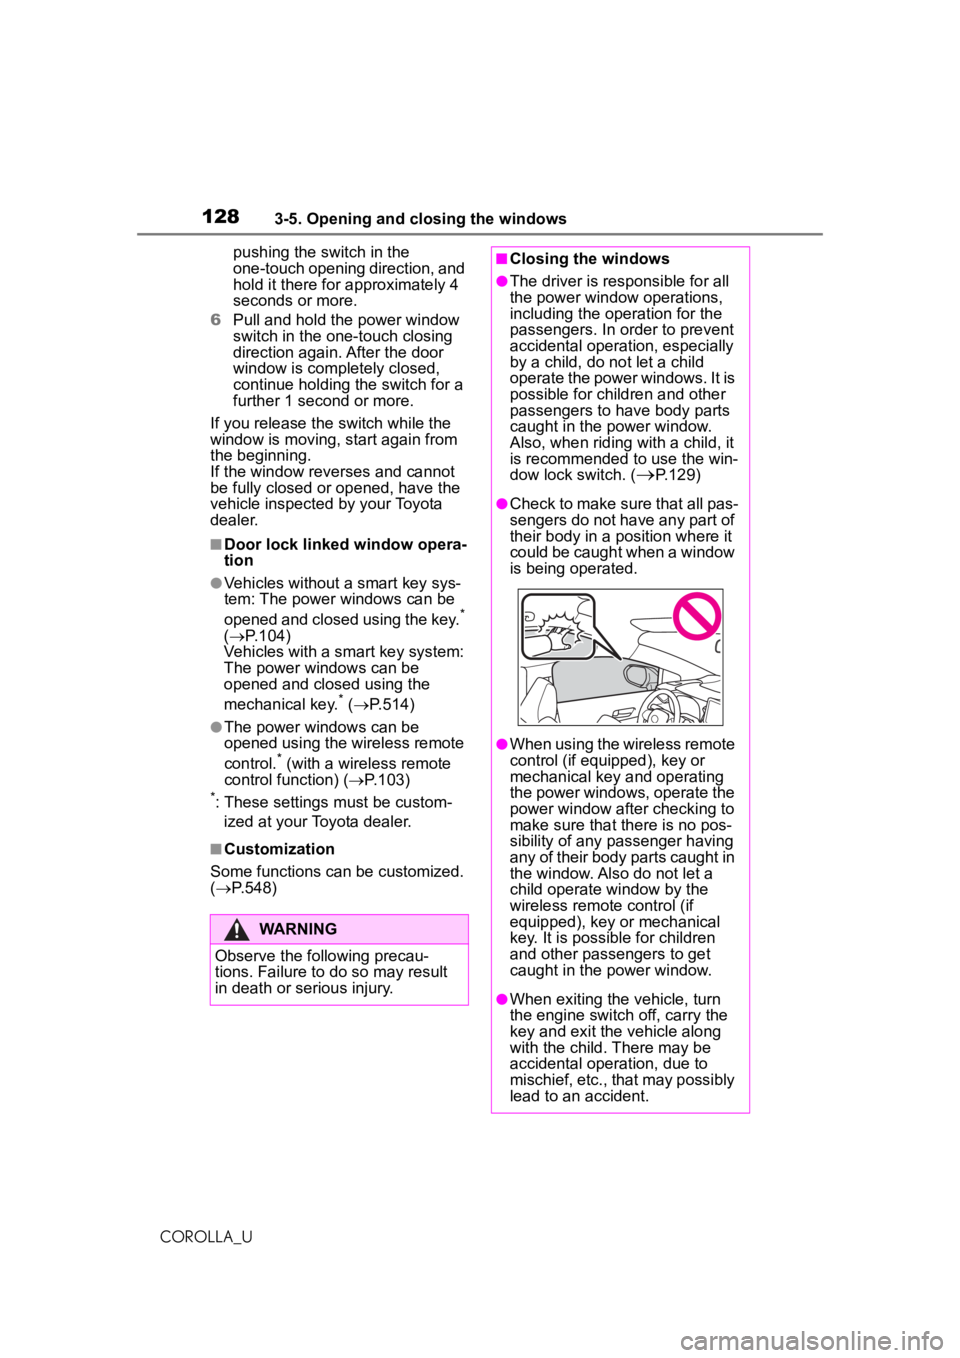
●Check to make sure that all pas-
sengers do not have any part of
their body in a position where it
could be caught when a window
is being operated.
●When using the wireless remote
control (if equipped), key or
mechanical key and operating
the power windows, operate the
power window after checking to
make sure that there is no pos-
sibility of any passenger having
any of their body parts caught in
the window. Also do not let a
child operate window by the
wireless remote control (if
equipped), key or mechanical
key. It is possible for children
and other passengers to get
caught in the power window.
●When exiting the vehicle, turn
the engine switch off, carry the
key and exit the vehicle along
with the child. There may be
accidental operation, due to
mischief, etc., that may possibly
lead to an accident.
Page 130 of 588
1303-5. Opening and closing the windows
COROLLA_U
*: If equipped
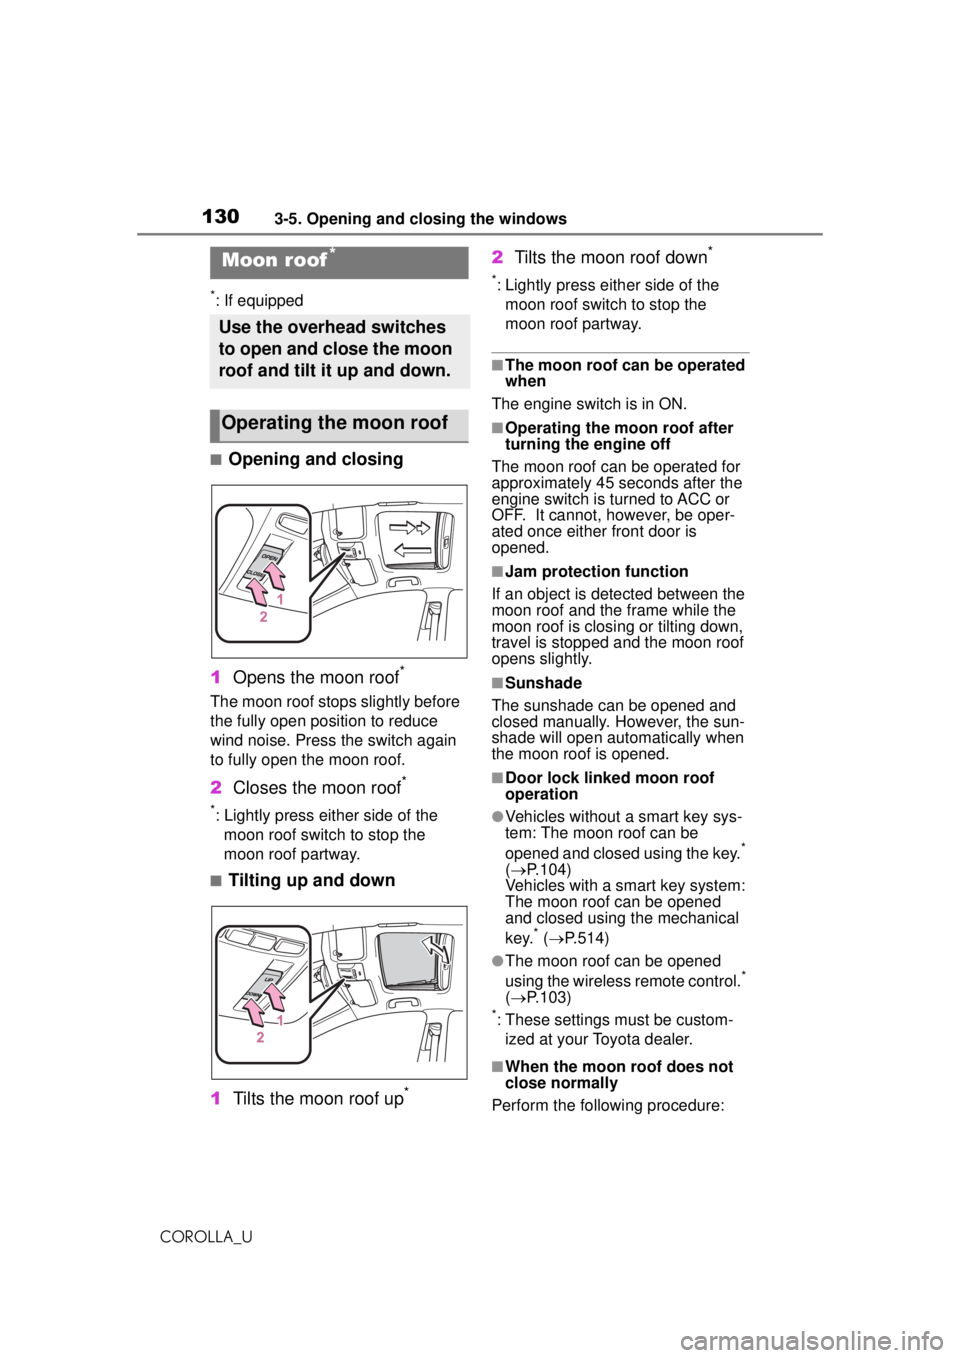
■Opening and closing
1 Opens the moon roof
*
The moon roof stops slightly before
the fully open position to reduce
wind noise. Press the switch again
to fully open the moon roof.
2Closes the moon roof*
*: Lightly press either side of the
moon roof switch to stop the
moon roof partway.
■Tilting up and down
1 Tilts the moon roof up
*
2Tilts the moon roof down*
*: Lightly press either side of the
moon roof switch to stop the
moon roof partway.
■The moon roof can be operated
when
The engine switch is in ON.
■Operating the moon roof after
turning the engine off
The moon roof can be operated for
approximately 45 seconds after the
engine switch is turned to ACC or
OFF. It cannot, however, be oper-
ated once either front door is
opened.
■Jam protection function
If an object is detected between the
moon roof and the frame while the
moon roof is closing or tilting down,
travel is stopped and the moon roof
opens slightly.
■Sunshade
The sunshade can be opened and
closed manually. However, the sun-
shade will open autom atically when
the moon roof is opened.
■Door lock linked moon roof
operation
●Vehicles without a smart key sys-
tem: The moon roof can be
opened and closed using the key.
*
( P.104)
Vehicles with a smart key system:
The moon roof can be opened
and closed using the mechanical
key.
* ( P.514)
●The moon roof can be opened
using the wireless remote control.*
( P.103)
*: These settings must be custom-
ized at your Toyota dealer.
■When the moon roof does not
close normally
Perform the following procedure:
Moon roof*
Use the overhead switches
to open and close the moon
roof and tilt it up and down.
Operating the moon roof
Page 132 of 588
1323-5. Opening and closing the windows
COROLLA_U
WARNING
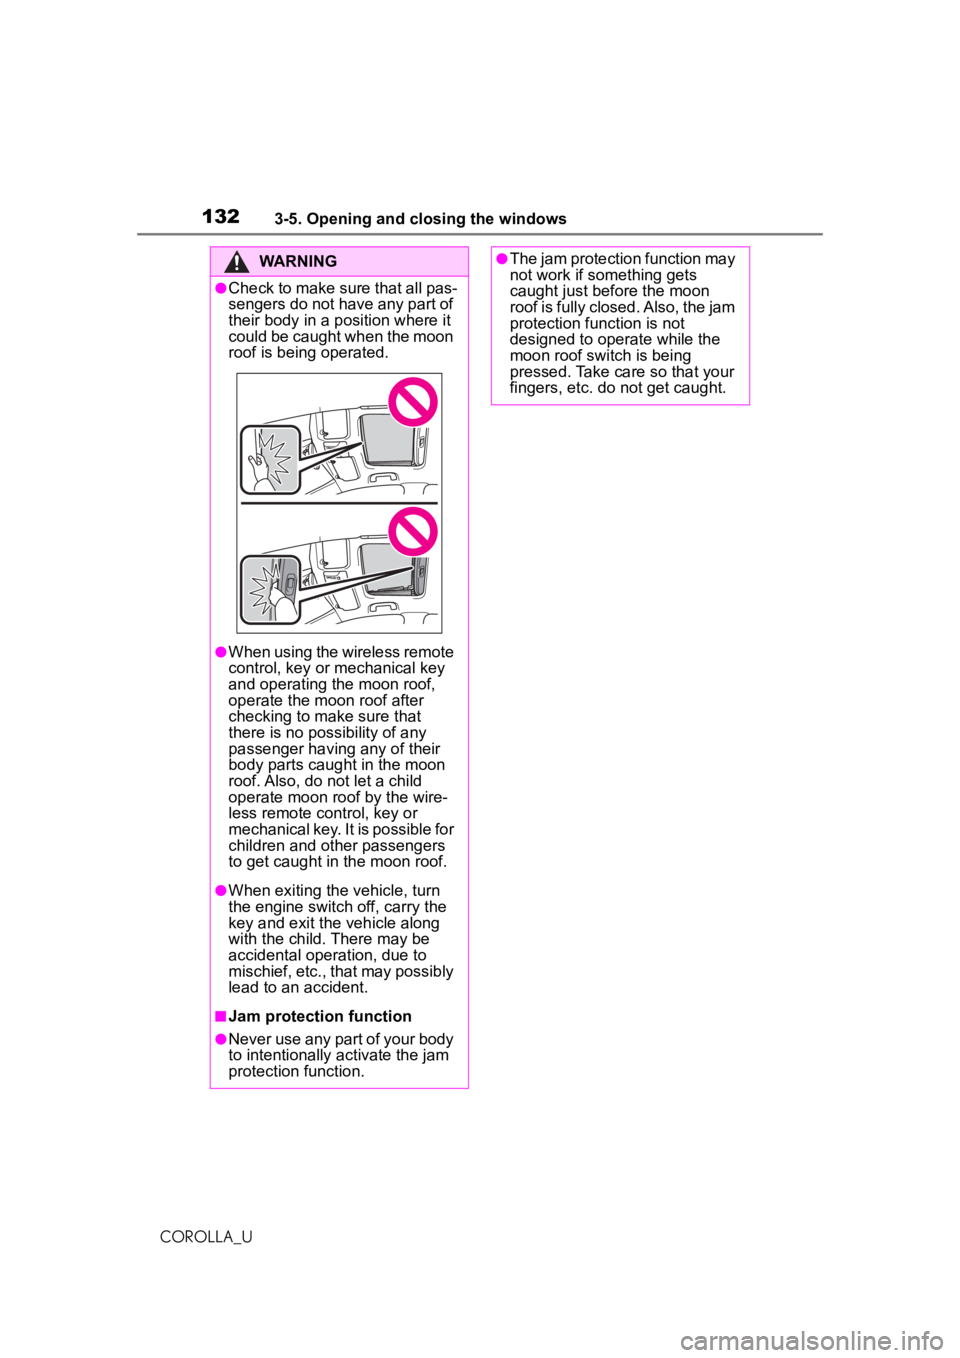
●Check to make sure that all pas-
sengers do not have any part of
their body in a position where it
could be caught when the moon
roof is being operated.
●When using the wireless remote
control, key or mechanical key
and operating the moon roof,
operate the moon roof after
checking to make sure that
there is no possibility of any
passenger having any of their
body parts caught in the moon
roof. Also, do not let a child
operate moon roof by the wire-
less remote control, key or
mechanical key. It is possible for
children and other passengers
to get caught in the moon roof.
●When exiting the vehicle, turn
the engine switch off, carry the
key and exit the vehicle along
with the child. There may be
accidental operation, due to
mischief, etc., that may possibly
lead to an accident.
■Jam protection function
●Never use any part of your body
to intentionally activate the jam
protection function.
●The jam protection function may
not work if something gets
caught just before the moon
roof is fully closed. Also, the jam
protection function is not
designed to operate while the
moon roof switch is being
pressed. Take care so that your
fingers, etc. do not get caught.
Page 171 of 588
1714-3. Operating the lights and wipers
COROLLA_U
4
Driving
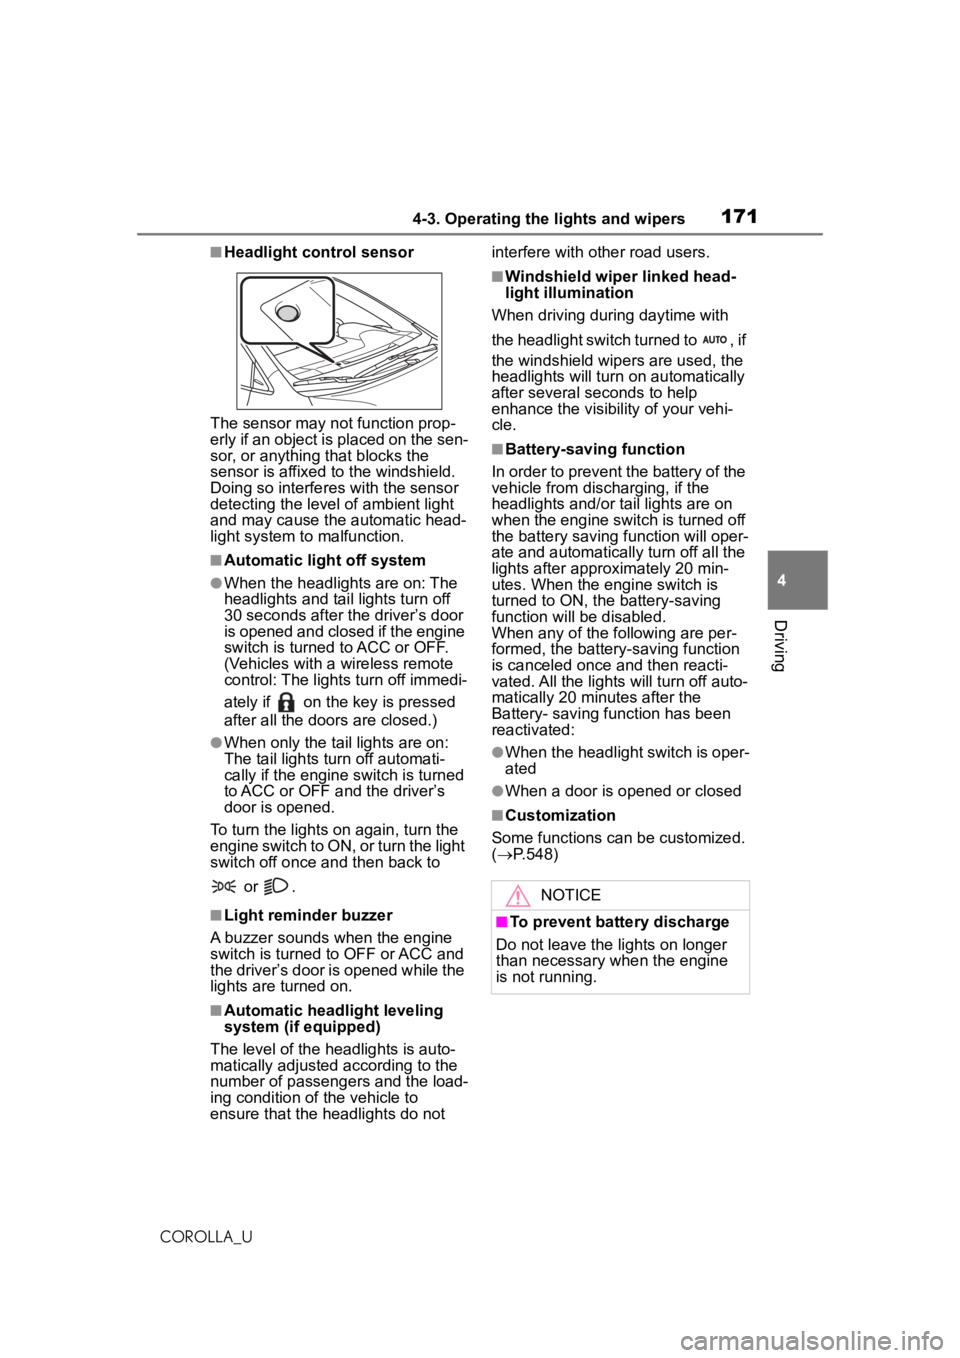
■Headlight control sensor
The sensor may not function prop-
erly if an object is placed on the sen-
sor, or anything that blocks the
sensor is affixed to the windshield.
Doing so interferes with the sensor
detecting the level of ambient light
and may cause the automatic head-
light system to malfunction.
■Automatic light off system
●When the headlights are on: The
headlights and tail lights turn off
30 seconds after the driver’s door
is opened and closed if the engine
switch is turned to ACC or OFF.
(Vehicles with a wireless remote
control: The lights turn off immedi-
ately if on the key is pressed
after all the doors are closed.)
●When only the tail lights are on:
The tail lights turn off automati-
cally if the engine switch is turned
to ACC or OFF and the driver’s
door is opened.
To turn the lights on again, turn the
engine switch to ON, or turn the light
switch off once and then back to
or .
■Light reminder buzzer
A buzzer sounds when the engine
switch is turned to OFF or ACC and
the driver’s door is opened while the
lights are turned on.
■Automatic headlight leveling
system (if equipped)
The level of the headlights is auto-
matically adjusted according to the
number of passengers and the load-
ing condition of the vehicle to
ensure that the headlights do not interfere with other road users.
■Windshield wiper linked head-
light illumination
When driving during daytime with
the headlight switch turned to , if
the windshield wipers are used, the
headlights will turn on automatically
after several seconds to help
enhance the visibility of your vehi-
cle.
■Battery-saving function
In order to prevent the battery of the
vehicle from discharging, if the
headlights and/or tail lights are on
when the engine switch is turned off
the battery saving function will oper-
ate and automatically turn off all the
lights after approximately 20 min-
utes. When the engine switch is
turned to ON, the battery-saving
function will be disabled.
When any of the following are per-
formed, the battery-saving function
is canceled once and then reacti-
vated. All the lights will turn off auto-
matically 20 minutes after the
Battery- saving function has been
reactivated:
●When the headlight switch is oper-
ated
●When a door is opened or closed
■Customization
Some functions can be customized.
( P.548)
NOTICE
■To prevent battery discharge
Do not leave the lights on longer
than necessary when the engine
is not running.
Page 280 of 588
2805-3. Connectivity settings
COROLLA_UThis is a profile to use the “Toyota
Entune” function.
A2DP (Advanced Audio Dis-
tribution Profile) Ver. 1.0 (Rec-
ommended: Ver. 1.3)
This is a profile to transmit stereo
audio or high quality sound to the
audio/visual system.
AVRCP (Audio/Video Remote
Control Profile) Ver. 1.0 (Rec-
ommended: Ver. 1.6)
This is a profile to allow remote
control the A/V equipment.
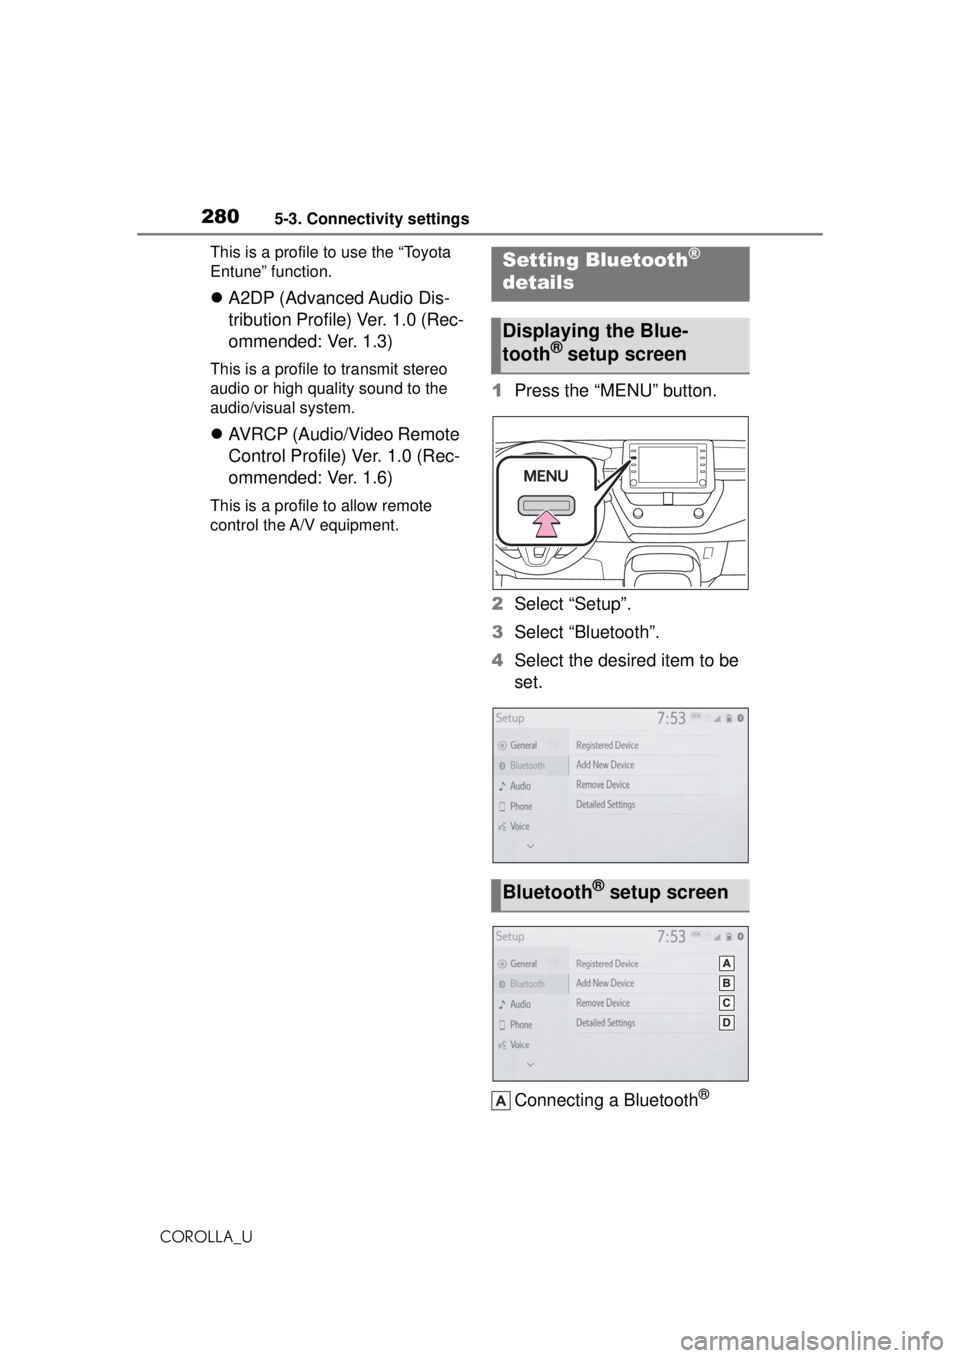
1 Press the “MENU” button.
2 Select “Setup”.
3 Select “Bluetooth”.
4 Select the desired item to be
set.
Connecting a Bluetooth
®
Setting Bluetooth®
details
Displaying the Blue-
tooth® setup screen
Bluetooth® setup screen
Page 321 of 588
3215-8. Audio/visual remote controls
COROLLA_U
5
Entune audio
5-8.Audio/visual remote controls
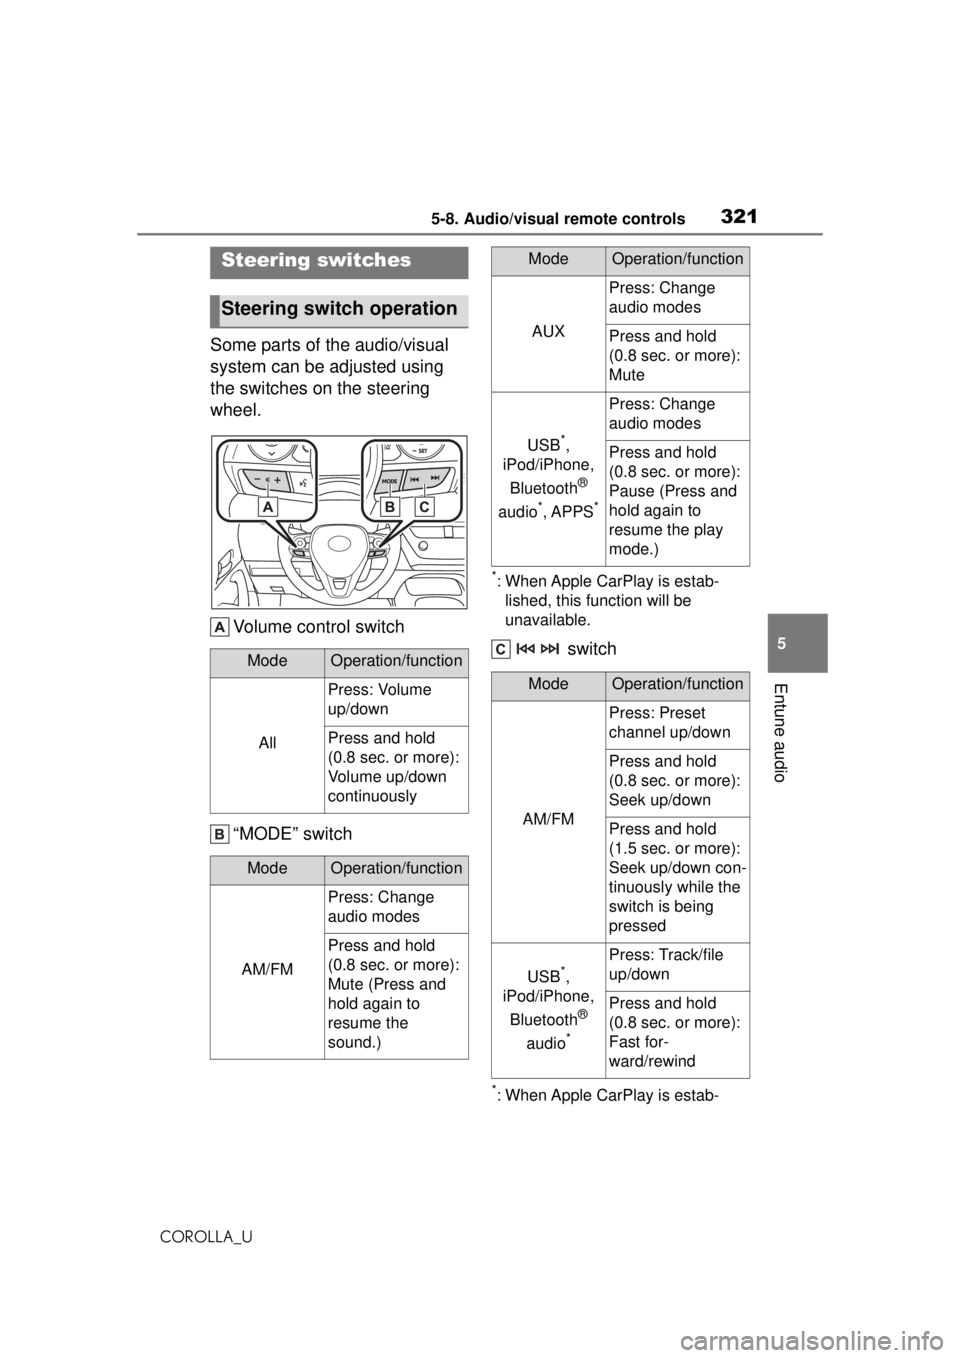
Some parts of the audio/visual
system can be adjusted using
the switches on the steering
wheel. Volume control switch
“MODE” switch
*: When Apple CarPlay is estab-lished, this function will be
unavailable.
switch
*: When Apple CarPlay is estab-
Steering switches
Steering switch operation
ModeOperation/function
All
Press: Volume
up/down
Press and hold
(0.8 sec. or more):
Volume up/down
continuously
ModeOperation/function
AM/FM
Press: Change
audio modes
Press and hold
(0.8 sec. or more):
Mute (Press and
hold again to
resume the
sound.)
AUX
Press: Change
audio modes
Press and hold
(0.8 sec. or more):
Mute
USB*,
iPod/iPhone,
Bluetooth
®
audio
*, APPS*
Press: Change
audio modes
Press and hold
(0.8 sec. or more):
Pause (Press and
hold again to
resume the play
mode.)
ModeOperation/function
AM/FM
Press: Preset
channel up/down
Press and hold
(0.8 sec. or more):
Seek up/down
Press and hold
(1.5 sec. or more):
Seek up/down con-
tinuously while the
switch is being
pressed
USB*,
iPod/iPhone,
Bluetooth
®
audio
*
Press: Track/file
up/down
Press and hold
(0.8 sec. or more):
Fast for-
ward/rewind
ModeOperation/function
Page 322 of 588

3225-8. Audio/visual remote controls
COROLLA_Ulished, this function will be
unavailable.
In the APPS mode, some operation
may be done on the screen depend
on the selected APPS.
Page 415 of 588
4156-4. Other interior features
COROLLA_U
6
Interior features
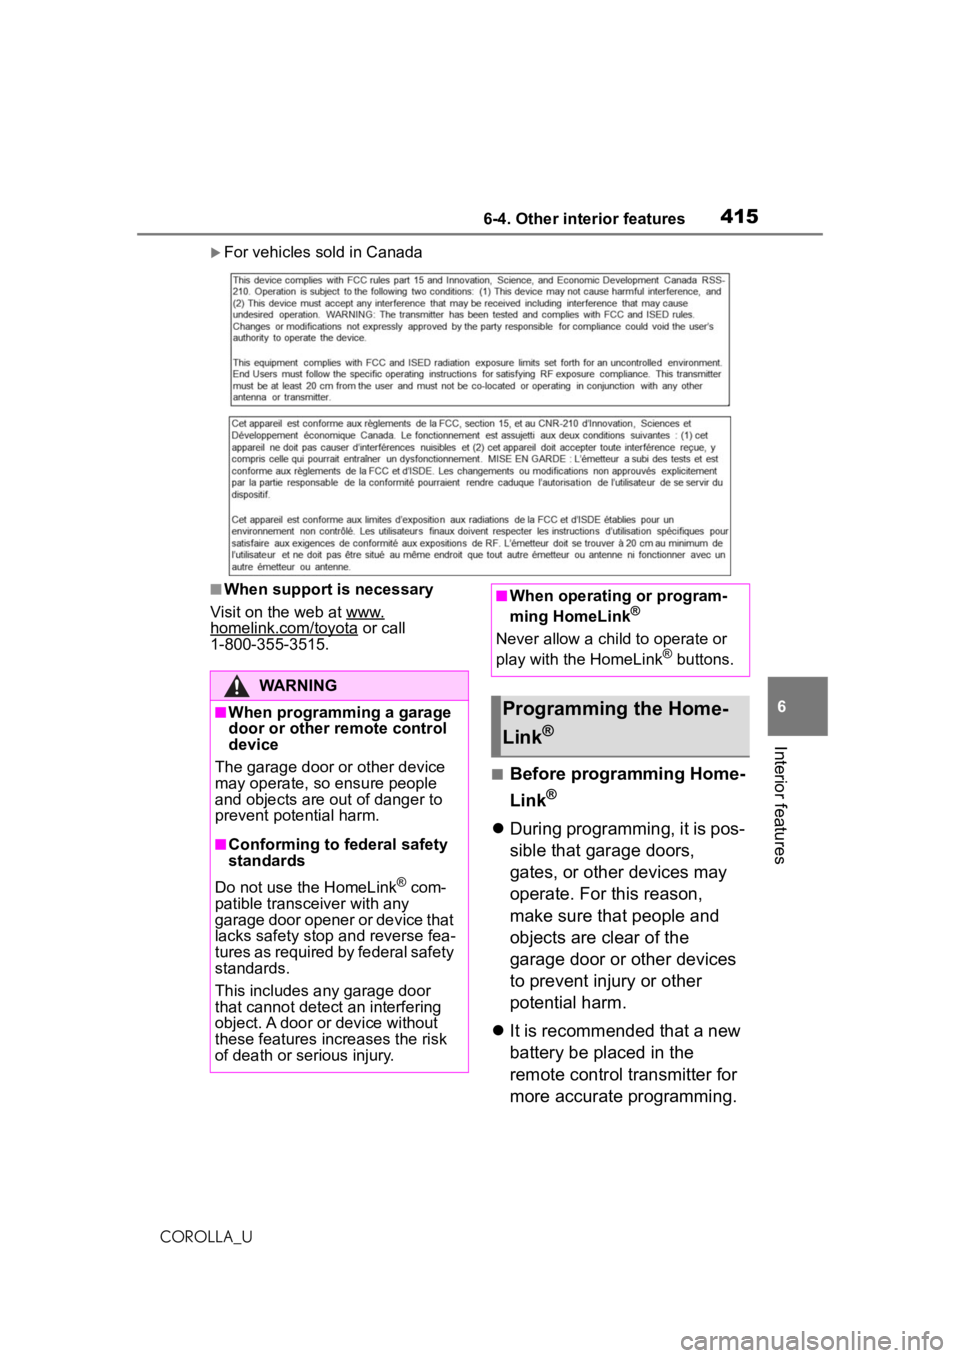
For vehicles sold in Canada
■When support is necessary
Visit on the web at www.
homelink.com/toyota or call
1-800-355-3515.
■Before programming Home-
Link
®
During programming, it is pos-
sible that garage doors,
gates, or other devices may
operate. For this reason,
make sure that people and
objects are clear of the
garage door or other devices
to prevent injury or other
potential harm.
It is recommended that a new
battery be placed in the
remote control transmitter for
more accurate programming.
WARNING
■When programming a garage
door or other remote control
device
The garage door or other device
may operate, so ensure people
and objects are out of danger to
prevent potential harm.
■Conforming to federal safety
standards
Do not use the HomeLink
® com-
patible transceiver with any
garage door opener or device that
lacks safety stop and reverse fea-
tures as required by federal safety
standards.
This includes any garage door
that cannot detect an interfering
object. A door or device without
these features increases the risk
of death or serious injury.
■When operating or program-
ming HomeLink®
Never allow a child to operate or
play with the HomeLink® buttons.
Programming the Home-
Link
®
Page 416 of 588
4166-4. Other interior features
COROLLA_U
Garage door opener motors
manufactured after 1995 may
be equipped with rolling code
protection. If this is the case,
you may need a stepladder or
other sturdy, safe device to
reach the “Learn” or “Smart”
button on the garage door
opener motor.
■Programming HomeLink®
Steps 1 through 3 must be per-
formed within 60 seconds, oth-
erwise the indicator light will
stop flashing and programming
will not be able to be completed.
1 Press and release the Home-
Link
® button you want to pro-
gram and check that the
HomeLink
® indicator light
flashes (orange).
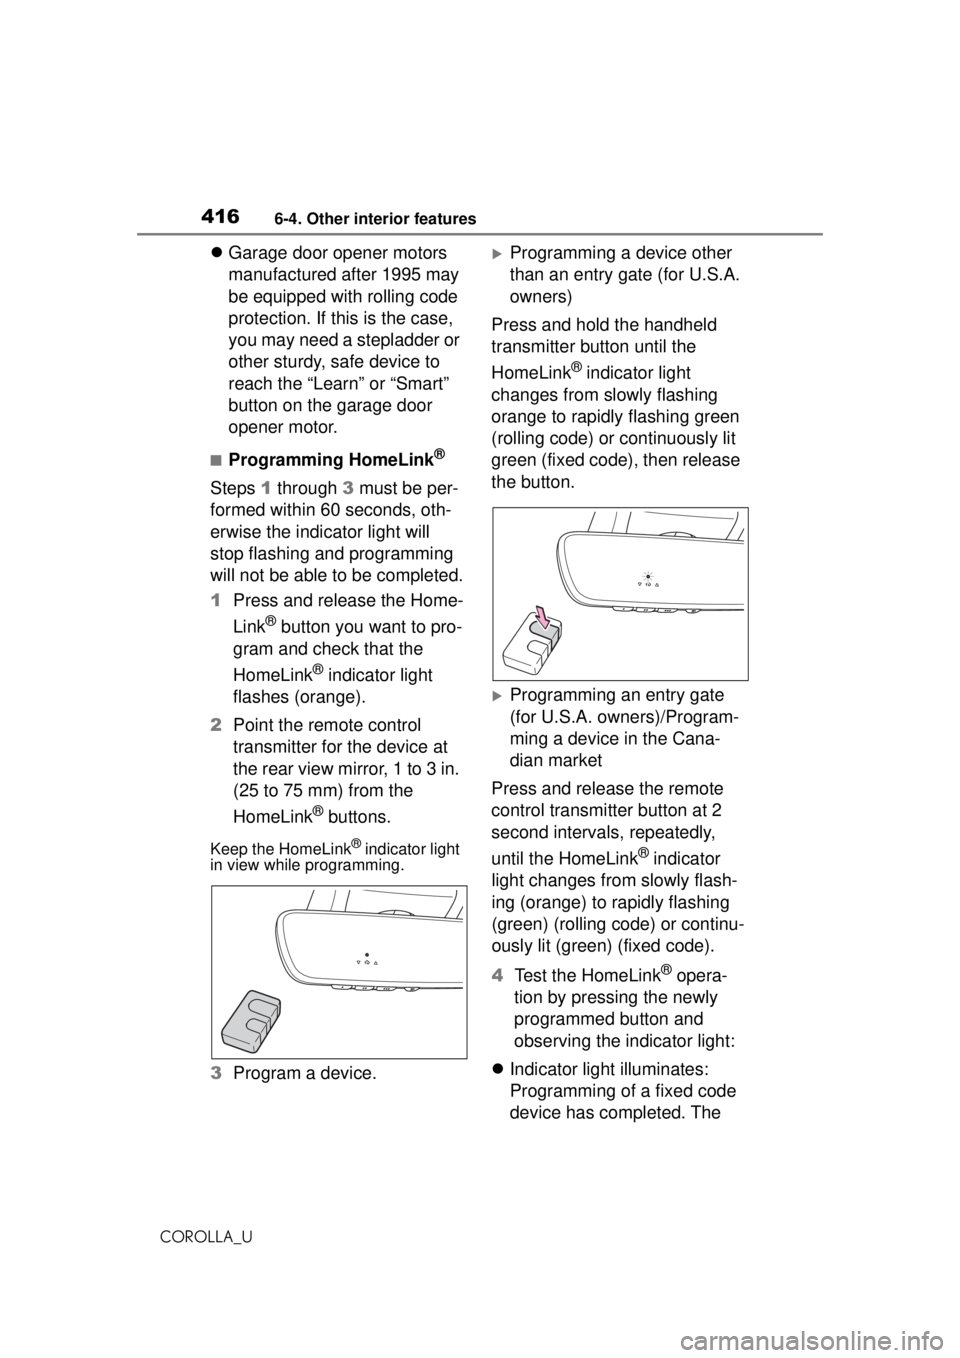
2 Point the remote control
transmitter for the device at
the rear view mirror, 1 to 3 in.
(25 to 75 mm) from the
HomeLink
® buttons.
Keep the HomeLink® indicator light
in view while programming.
3 Program a device.
Programming a device other
than an entry gate (for U.S.A.
owners)
Press and hold the handheld
transmitter button until the
HomeLink
® indicator light
changes from slowly flashing
orange to rapidly flashing green
(rolling code) or continuously lit
green (fixed code), then release
the button.
Programming an entry gate
(for U.S.A. owners)/Program-
ming a device in the Cana-
dian market
Press and release the remote
control transmitter button at 2
second intervals, repeatedly,
until the HomeLink
® indicator
light changes from slowly flash-
ing (orange) to rapidly flashing
(green) (rolling code) or continu-
ously lit (green) (fixed code).
4 Test the HomeLink
® opera-
tion by pressing the newly
programmed button and
observing the indicator light:
Indicator light illuminates:
Programming of a fixed code
device has completed. The