display TOYOTA COROLLA CROSS 2023 Owners Manual
[x] Cancel search | Manufacturer: TOYOTA, Model Year: 2023, Model line: COROLLA CROSS, Model: TOYOTA COROLLA CROSS 2023Pages: 500, PDF Size: 15.11 MB
Page 275 of 500
2754-5. Using the driving support systems
4
Driving
conditions including normal driv-
ing, during cornering, on a
uphill, when starting off, during
acceleration, on a slippery roads
due to snow or rain, thus con-
tributing to stable operability and
driving stability.
■The Secondary Collision
Brake
When the SRS airbag sensor
detects a collision and the sys-
tem operates, the brakes and
brake lights are automatically
controlled to reduce the vehicle
speed and help reduce the pos-
sibility of further damage due to
a secondary collision.
■When the TRAC/VSC systems
are operating
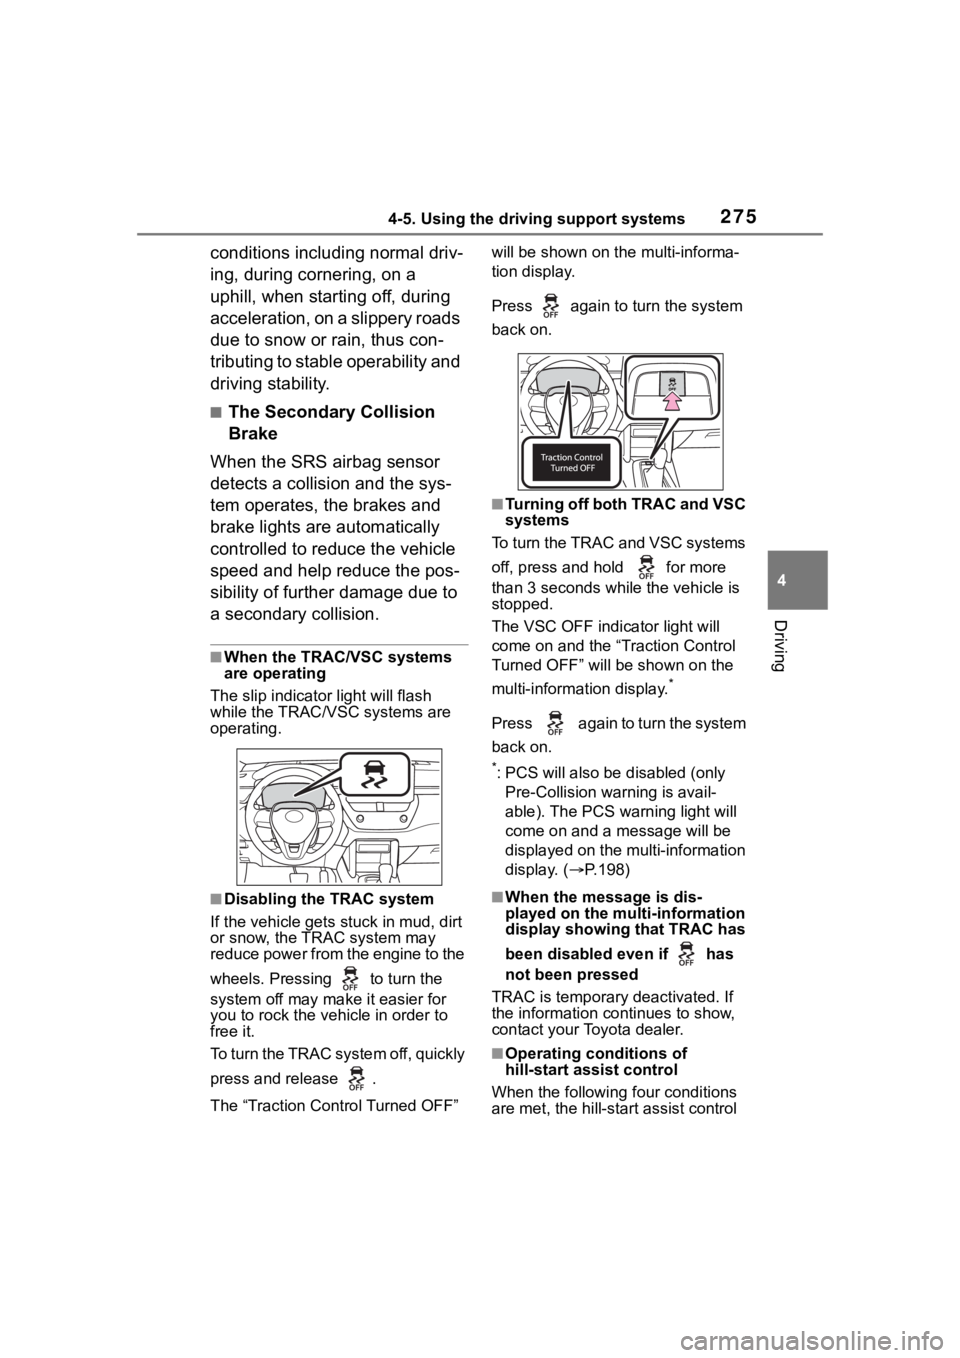
The slip indicator light will flash
while the TRAC/VSC systems are
operating.
■Disabling the TRAC system
If the vehicle gets stuck in mud, dirt
or snow, the TRAC system may
reduce power from the engine to the
wheels. Pressing to turn the
system off may mak e it easier for
you to rock the vehicle in order to
free it.
To turn the TRAC system off, quickly
press and release .
The “Traction Control Turned OFF” will be shown on the multi-informa-
tion display.
Press again to turn the system
back on.
■Turning off both TRAC and VSC
systems
To turn the TRAC and VSC systems
off, press and hold for more
than 3 seconds while the vehicle is
stopped.
The VSC OFF indicator light will
come on and the “Traction Control
Turned OFF” will be shown on the
multi-information display.
*
Press again to turn the system
back on.
*: PCS will also be disabled (only
Pre-Collision warning is avail-
able). The PCS warning light will
come on and a message will be
displayed on the multi-information
display. ( P.198)
■When the message is dis-
played on the multi-information
display showing that TRAC has
been disabled even if has
not been pressed
TRAC is temporary deactivated. If
the information continues to show,
contact your Toyota dealer.
■Operating conditions of
hill-start assist control
When the following four conditions
are met, the hill-star t assist control
Page 286 of 500
2865-1. Using the air conditioning system and defogger
5-1.Using the air conditioning system and defogger
*: If equipped
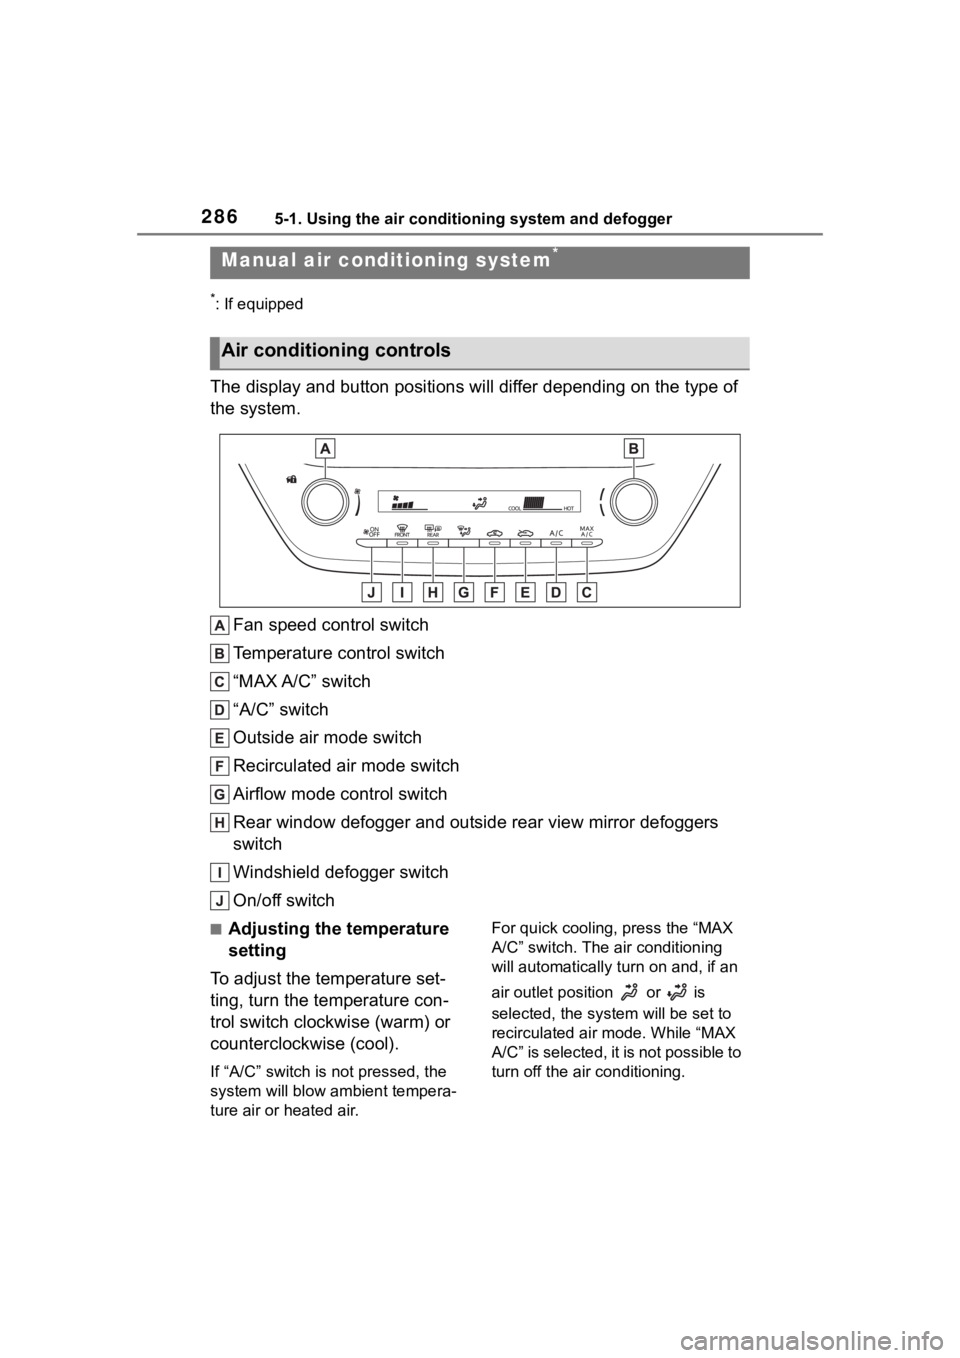
The display and button positions will differ depending on the type of
the system.
Fan speed control switch
Temperature control switch
“MAX A/C” switch
“A/C” switch
Outside air mode switch
Recirculated air mode switch
Airflow mode control switch
Rear window defogger and outside rear view mirror defoggers
switch
Windshield defogger switch
On/off switch
■Adjusting the temperature
setting
To adjust the temperature set-
ting, turn the temperature con-
trol switch clockwise (warm) or
counterclockwise (cool).
If “A/C” switch is not pressed, the
system will blow a mbient tempera-
ture air or heated air. For quick cooling, press the “MAX
A/C” switch. The air conditioning
will automatically turn
on and, if an
air outlet position or is
selected, the sys tem will be set to
recirculated air mode. While “MAX
A/C” is selected, it is not possible to
turn off the air conditioning.
Manual air condi tioning system*
Air conditioning controls
Page 292 of 500
2925-1. Using the air conditioning system and defogger
*: If equipped
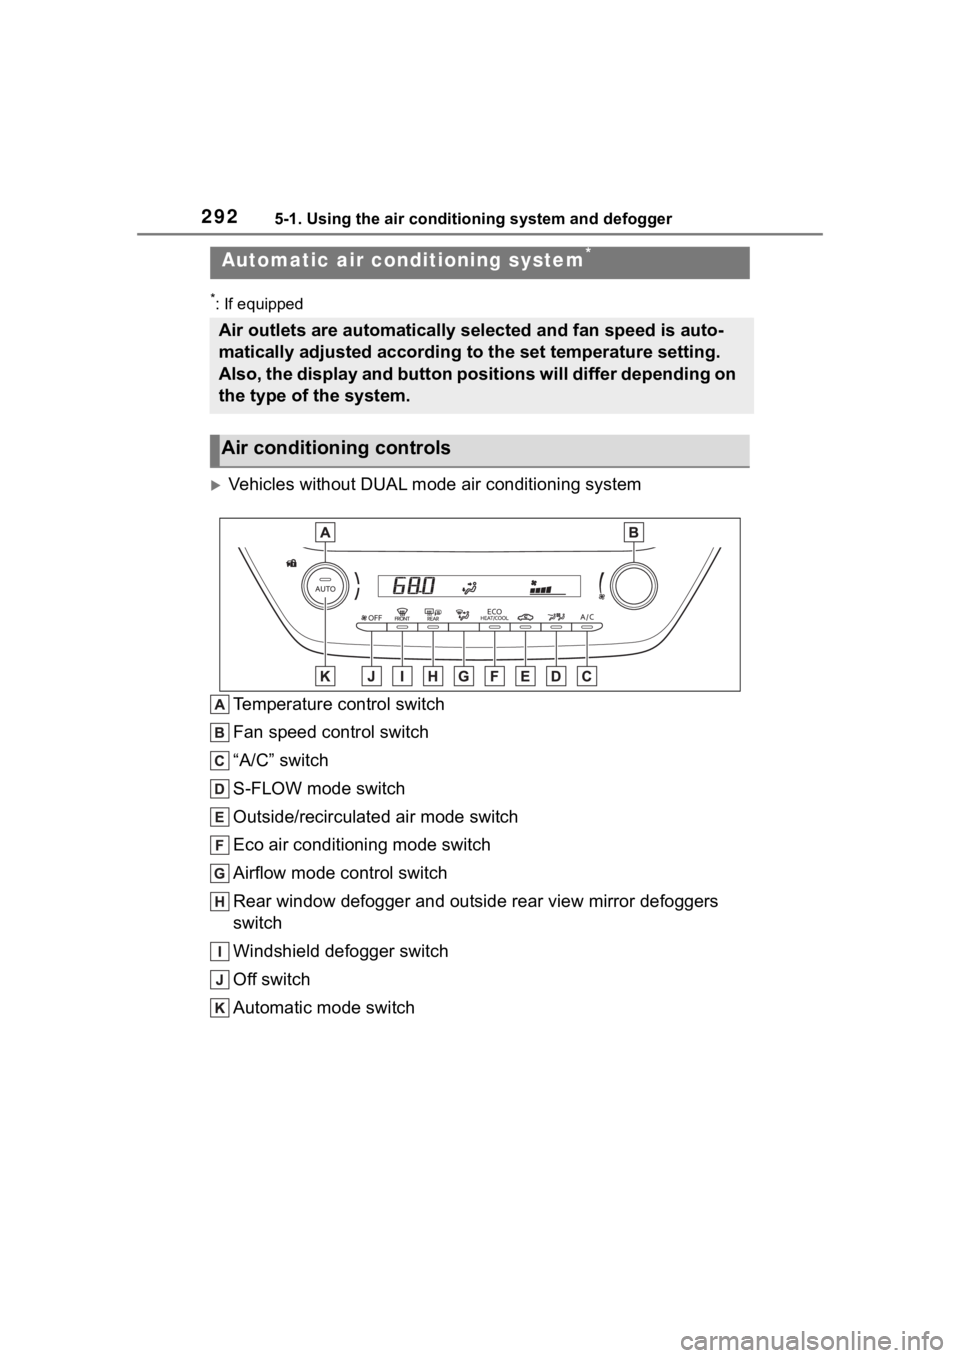
Vehicles without DUAL mode air conditioning system
Temperature control switch
Fan speed control switch
“A/C” switch
S-FLOW mode switch
Outside/recirculated air mode switch
Eco air conditioning mode switch
Airflow mode control switch
Rear window defogger and outside rear view mirror defoggers
switch
Windshield defogger switch
Off switch
Automatic mode switch
Automatic air conditioning system*
Air outlets are automatically selected and fan speed is auto-
matically adjusted according to the set temperature setting.
Also, the display and button positions will differ depending on
the type of the system.
Air conditioning controls
Page 335 of 500

3356-2. Maintenance
6
Maintenance and care
■Resetting the message indicat-
ing maintenance is required
After the required maintenance is
performed according to the mainte-
nance schedule, please reset the
message.
To reset the messa ge, follow the
procedure described below:
4.2-inch display
1 Press or of the meter
control switch to select .
2 Press or to select “Vehi-
cle Settings” and then press and
hold .
3 Press or to select
“Scheduled Maintenance” and
then press .
4 Press or to select “Yes”
and then press .
A message will be displayed on the
multi-information display when the
reset procedure has been com-
pleted.
7-inch display
1 Press or of the meter
control switch to select .
2 Press or to select “Vehi-
cle Settings” and then press and
hold .
3 Press or to select
“Scheduled Maintenance” and
then press .
4 Press or to select “Yes”
and then press .
A message will be displayed on the
multi-information display when the
reset procedure has been com-
pleted.
You can perform some mainte-
nance procedures by yourself.
Please be aware that do-it-your-
self maintenance may affect
warranty coverage.
The use of Toyota repair manuals is
recommended.
For details about warranty cover-
age, refer to the separate “Owner’s
Warranty Informat ion Booklet” or
“Owner’s Manual Supplement”.
Do-it-yourself mainte-
nance
Page 350 of 500
3506-3. Do-it-yourself maintenance
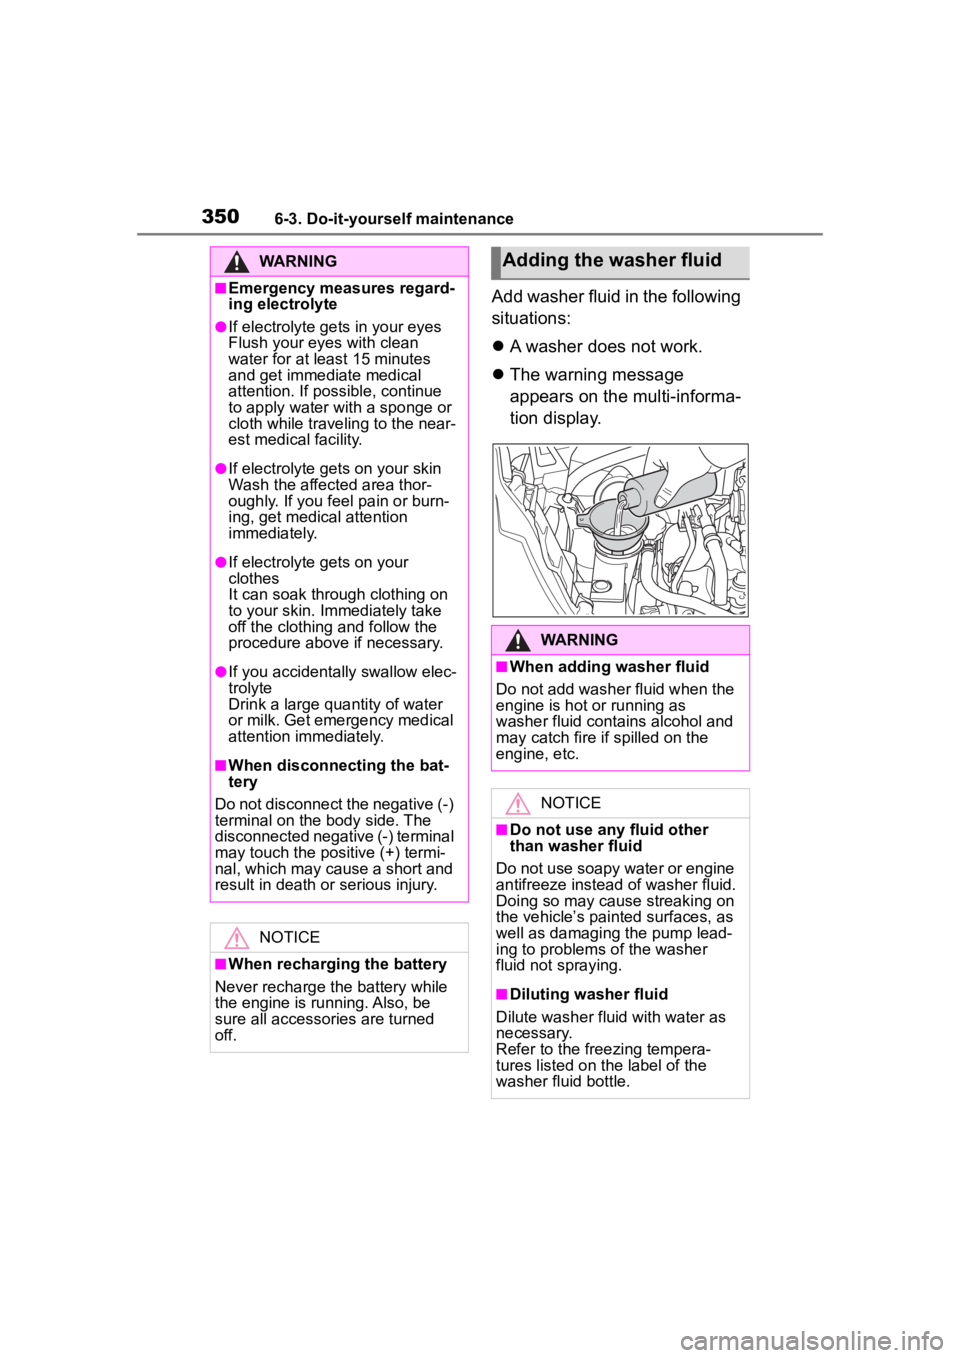
Add washer fluid in the following
situations:
A washer does not work.
The warning message
appears on the multi-informa-
tion display.
WARNING
■Emergency measures regard-
ing electrolyte
●If electrolyte gets in your eyes
Flush your eyes with clean
water for at least 15 minutes
and get immediate medical
attention. If possible, continue
to apply water with a sponge or
cloth while traveling to the near-
est medical facility.
●If electrolyte gets on your skin
Wash the affected area thor-
oughly. If you fee l pain or burn-
ing, get medical attention
immediately.
●If electrolyte gets on your
clothes
It can soak through clothing on
to your skin. Immediately take
off the clothing and follow the
procedure above if necessary.
●If you accidentally swallow elec-
trolyte
Drink a large quantity of water
or milk. Get emergency medical
attention immediately.
■When disconnecting the bat-
tery
Do not disconnect the negative (-)
terminal on the body side. The
disconnected negative (-) terminal
may touch the positive (+) termi-
nal, which may cause a short and
result in death or serious injury.
NOTICE
■When recharging the battery
Never recharge the battery while
the engine is running. Also, be
sure all accessories are turned
off.
Adding the washer fluid
WARNING
■When adding washer fluid
Do not add washer fluid when the
engine is hot or running as
washer fluid contains alcohol and
may catch fire if spilled on the
engine, etc.
NOTICE
■Do not use any fluid other
than washer fluid
Do not use soapy water or engine
antifreeze instead of washer fluid.
Doing so may cause streaking on
the vehicle’s painted surfaces, as
well as damaging the pump lead-
ing to problems of the washer
fluid not spraying.
■Diluting washer fluid
Dilute washer fluid with water as
necessary.
Refer to the freezing tempera-
tures listed on the label of the
washer fluid bottle.
Page 353 of 500
3536-3. Do-it-yourself maintenance
6
Maintenance and care
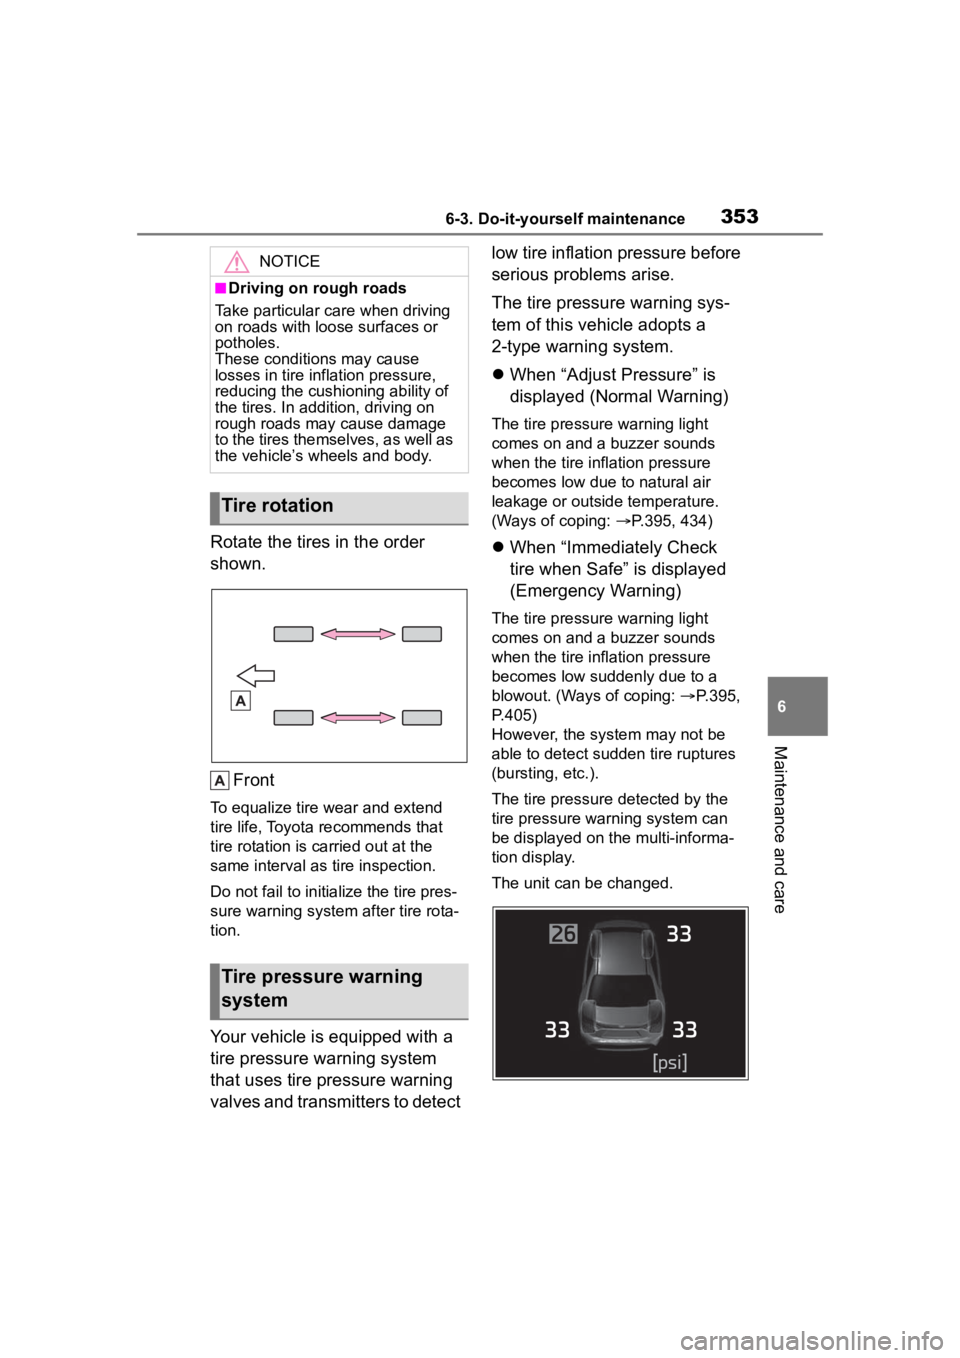
Rotate the tires in the order
shown.Front
To equalize tire wear and extend
tire life, Toyota recommends that
tire rotation is c arried out at the
same interval as tire inspection.
Do not fail to initialize the tire pres-
sure warning system after tire rota-
tion.
Your vehicle is equipped with a
tire pressure warning system
that uses tire pressure warning
valves and transmitters to detect low tire inflation pressure before
serious problems arise.
The tire pressure warning sys-
tem of this vehicle adopts a
2-type warning system.
When “Adjust Pressure” is
displayed (Normal Warning)
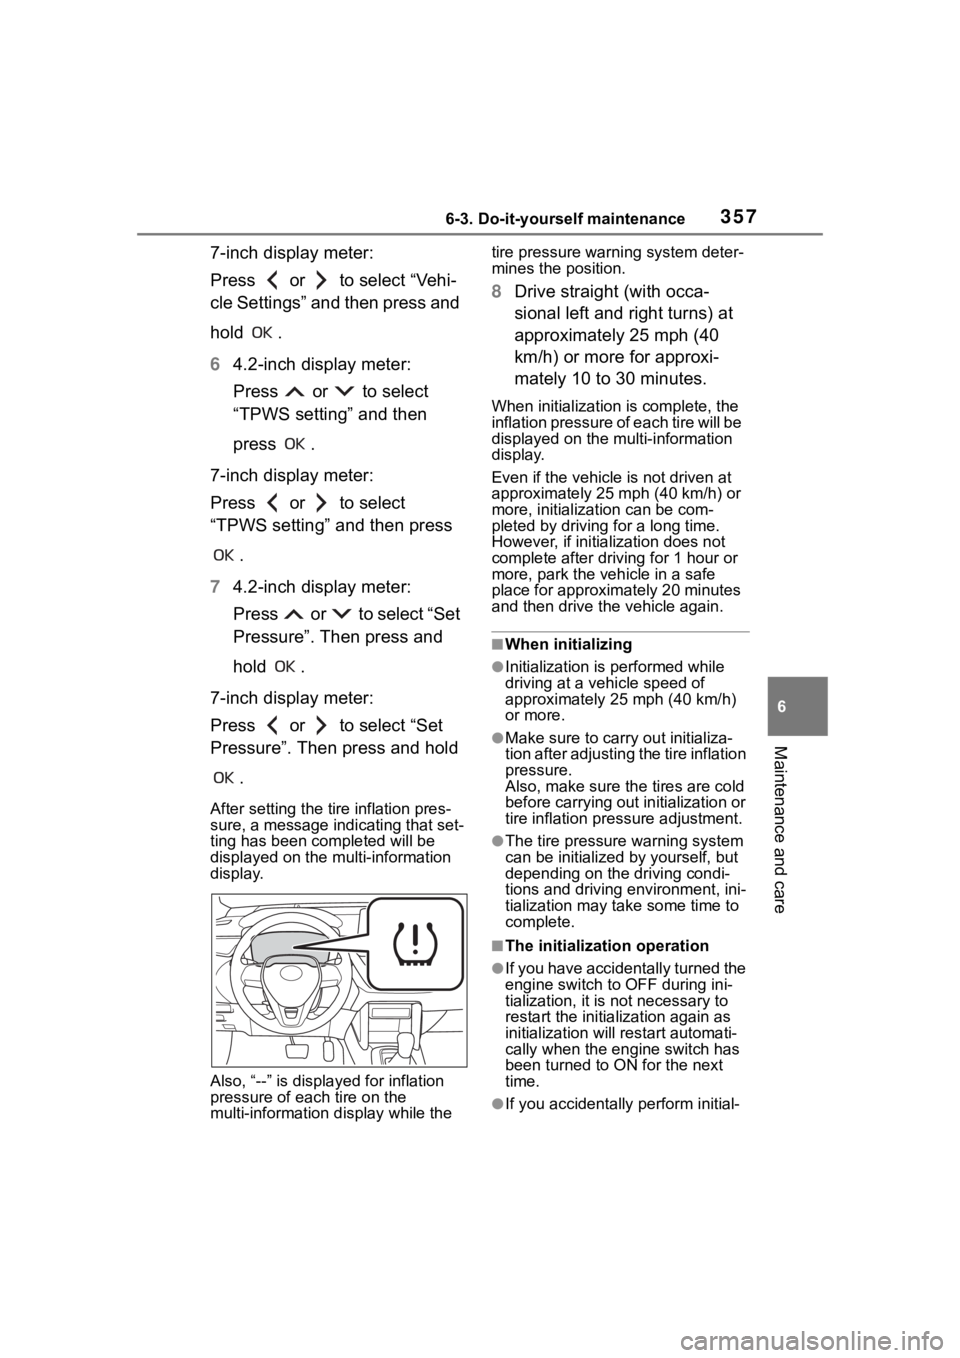
The tire pressure warning light
comes on and a buzzer sounds
when the tire inflation pressure
becomes low due to natural air
leakage or outside temperature.
(Ways of coping: P.395, 434)
When “Immediately Check
tire when Safe” is displayed
(Emergency Warning)
The tire pressure warning light
comes on and a buzzer sounds
when the tire inflation pressure
becomes low suddenly due to a
blowout. (Ways of coping: P.395,
P.405)
However, the system may not be
able to detect sudden tire ruptures
(bursting, etc.).
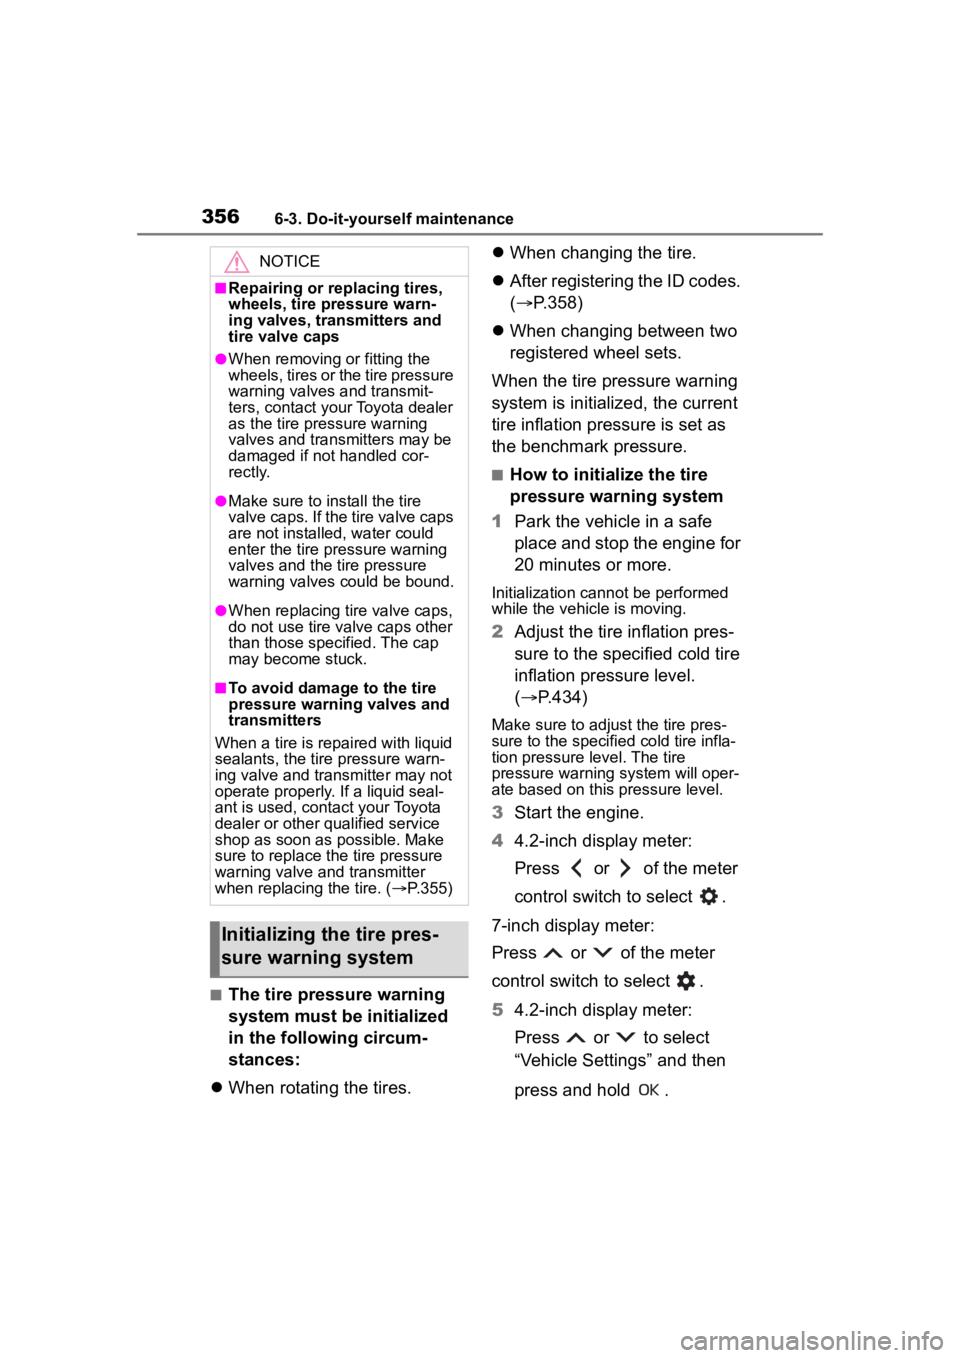
The tire pressure detected by the
tire pressure warning system can
be displayed on the multi-informa-
tion display.
The unit can be changed.
NOTICE
■Driving on rough roads
Take particular care when driving
on roads with loose surfaces or
potholes.
These conditions may cause
losses in tire inf lation pressure,
reducing the cushio ning ability of
the tires. In addit ion, driving on
rough roads may cause damage
to the tires themselves, as well as
the vehicle’s wheels and body.
Tire rotation
Tire pressure warning
system
Page 354 of 500

3546-3. Do-it-yourself maintenance
■How to change the unit
4.2-inch display
1 Park the vehicle in a safe
place and turn the engine
switch off.
Changing the unit cannot be per-
formed while the vehicle is moving.
2Turn the engine switch to
ON.
3 Select of the multi-infor-
mation display and then
press .
4 Press or to select
“Vehicle Settings” and then
press and hold .
5 Press or to select
“TPWS setting” and then
press .
6 Press or to select
“Pressure unit setting”.
7 Press or to select the
desired unit and then press
.
7.0-inch display
1 Park the vehicle in a safe
place and turn the engine
switch off.
Changing the unit cannot be per-
formed while the vehicle is moving.
2Turn the engine switch to
ON. 3
Select of the multi-infor-
mation display and then
press .
4 Press or to select
“Vehicle Settings” and then
press and hold .
5 Press or to select
“TPWS setting” and then
press .
6 Press or to select
“Pressure unit setting”.
7 Press or to select the
desired unit and then press
.
■Routine tire inflation pressure
checks
The tire pressure warning system
does not replace routine tire inflation
pressure checks . Make sure to
check tire inflation pressure as part
of your routine o f daily vehicle
checks.
■Tire inflation pressure
●It may take a few minutes to dis-
play the tire inflation pressure
after the engine switch is turned to
ON. It may also take a few min-
utes to display the tire inflation
pressure after infl ation pressure
has been adjusted.
●Tire inflation pressure changes
with temperature.
The displayed values may also be
different from the values mea-
sured using a tire pressure gauge.
■Situations in which the tire
pressure warning system may
not operate properly
●In the following cases, the tire
Page 355 of 500

3556-3. Do-it-yourself maintenance
6
Maintenance and care
pressure warning system may not
operate properly.
• If non-genuine Toyota wheels are
used.
• A tire has been replaced with a tire that is not an OE (Original
Equipment) tire.
• A tire has been replaced with a tire that is not of the specified size.
• Tire chains, etc. are equipped.
• An auxiliary-supported run-flat tire is equipped.
• If a window tint that affects the radio wave signals is installed.
• If there is a lot of snow or ice on
the vehicle, particularly around the
wheels or wheel housings.
• If the tire inflation pressure is
extremely higher than the speci-
fied level.
• If wheel without tire pressure
warning valves a nd transmitters
are used.
• If the ID code on the tire pressure
warning valves and transmitters is
not registered in the tire pressure
warning computer.
●Performance may be affected in
the following situations.
• Near a TV tower, electric power plant, gas station, radio station,
large display, airpo rt or other facil-
ity that generates strong radio
waves or electrical noise
• When carrying a portable radio,
cellular phone, cordless phone or
other wireless communication
device
●If tire position information is not
correctly displayed due to the
radio wave conditions, the display
may be corrected by driving and
changing the radio wave condi-
tions.
●When the vehicle is parked, the
time taken for the warning to start
or go off could be extended.
●When tire inflation pressure
declines rapidly for example when
a tire has burst, the warning may
not function.
■Warning performance of the tire
pressure warning system
The warning of the tire pressure
warning system w ill change in
accordance with the conditions
under which it was initialized. For
this reason, the system may give a
warning even if th e tire pressure
does not reach a low enough level,
or if the pressure is higher than the
pressure that was adjusted to when
the system was initialized.
When replacing tires or wheels,
tire pressure warning valves and
transmitters must also be
installed.
When new tire pressure warning
valves and transmitters are
installed, new ID codes must be
registered in the tire pressure
warning computer and the tire
pressure warning system must
be initialized. ( P.358)
■When replacing the tires and
wheels
If the ID code of the tire pressure
warning valve and tr ansmitter is not
registered, the tire pressure warning
system will not work properly. After
driving for about 20 minutes, the tire
pressure warning light blinks for 1
minute and stays on to indicate a
system malfunction.
Installing tire pressure
warning valves and trans-
mitters
Page 356 of 500
3566-3. Do-it-yourself maintenance
■The tire pressure warning
system must be initialized
in the following circum-
stances:
When rotating the tires.
When changing the tire.
After registering the ID codes.
( P.358)
When changing between two
registered wheel sets.
When the tire pressure warning
system is initialized, the current
tire inflation pressure is set as
the benchmark pressure.
■How to initialize the tire
pressure warning system
1 Park the vehicle in a safe
place and stop the engine for
20 minutes or more.
Initialization cannot be performed
while the vehicle is moving.
2Adjust the tire inflation pres-
sure to the specified cold tire
inflation pressure level.
( P.434)
Make sure to adjust the tire pres-
sure to the specifie d cold tire infla-
tion pressure level. The tire
pressure warning system will oper-
ate based on this pressure level.
3Start the engine.
4 4.2-inch display meter:
Press or of the meter
control switch to select .
7-inch display meter:
Press or of the meter
control switch to select .
5 4.2-inch display meter:
Press or to select
“Vehicle Settings” and then
press and hold .
NOTICE
■Repairing or replacing tires,
wheels, tire pressure warn-
ing valves, transmitters and
tire valve caps
●When removing or fitting the
wheels, tires or the tire pressure
warning valves and transmit-
ters, contact your Toyota dealer
as the tire pr essure warning
valves and transmitters may be
damaged if not handled cor-
rectly.
●Make sure to install the tire
valve caps. If the tire valve caps
are not installed, water could
enter the tire pressure warning
valves and the tire pressure
warning valves could be bound.
●When replacing ti re valve caps,
do not use tire valve caps other
than those specified. The cap
may become stuck.
■To avoid damage to the tire
pressure warning valves and
transmitters
When a tire is repaired with liquid
sealants, the tire pressure warn-
ing valve and transmitter may not
operate properly. If a liquid seal-
ant is used, contact your Toyota
dealer or other qualified service
shop as soon as possible. Make
sure to replace the tire pressure
warning valve and transmitter
when replaci ng the tire. (P.355)
Initializing the tire pres-
sure warning system
Page 357 of 500
3576-3. Do-it-yourself maintenance
6
Maintenance and care
7-inch display meter:
Press or to select “Vehi-
cle Settings” and then press and
hold .
64.2-inch display meter:
Press or to select
“TPWS setting” and then
press .
7-inch display meter:
Press or to select
“TPWS setting” and then press .
7 4.2-inch display meter:
Press or to select “Set
Pressure”. Then press and
hold .
7-inch display meter:
Press or to select “Set
Pressure”. Then press and hold .
After setting the tire inflation pres-
sure, a message indicating that set-
ting has been completed will be
displayed on the multi-information
display.
Also, “--” is displa yed for inflation
pressure of each tire on the
multi-information display while the tire pressure warning system deter-
mines the position.
8
Drive straight (with occa-
sional left and right turns) at
approximately 25 mph (40
km/h) or more for approxi-
mately 10 to 30 minutes.
When initialization is complete, the
inflation pressure of each tire will be
displayed on the multi-information
display.
Even if the vehicle is not driven at
approximately 25 mph (40 km/h) or
more, initialization can be com-
pleted by driving for a long time.
However, if initialization does not
complete after driving for 1 hour or
more, park the vehicle in a safe
place for approximately 20 minutes
and then drive the vehicle again.
■When initializing
●Initialization is p erformed while
driving at a veh icle speed of
approximately 25 mph (40 km/h)
or more.
●Make sure to carry out initializa-
tion after adjusting the tire inflation
pressure.
Also, make sure the tires are cold
before carrying out initialization or
tire inflation pressure adjustment.
●The tire pressure warning system
can be initialized by yourself, but
depending on the driving condi-
tions and driving environment, ini-
tialization may take some time to
complete.
■The initialization operation
●If you have accidentally turned the
engine switch to OFF during ini-
tialization, it is not necessary to
restart the initialization again as
initialization will re start automati-
cally when the engine switch has
been turned to ON for the next
time.
●If you accidentally perform initial-