language TOYOTA COROLLA HATCHBACK 2020 Accessories, Audio & Navigation (in English)
[x] Cancel search | Manufacturer: TOYOTA, Model Year: 2020, Model line: COROLLA HATCHBACK, Model: TOYOTA COROLLA HATCHBACK 2020Pages: 258, PDF Size: 5.97 MB
Page 3 of 258
3TABLE OF CONTENTS
COROLLA_HB_Navi_(U)
1
2
3
4
5
6
7
8
9
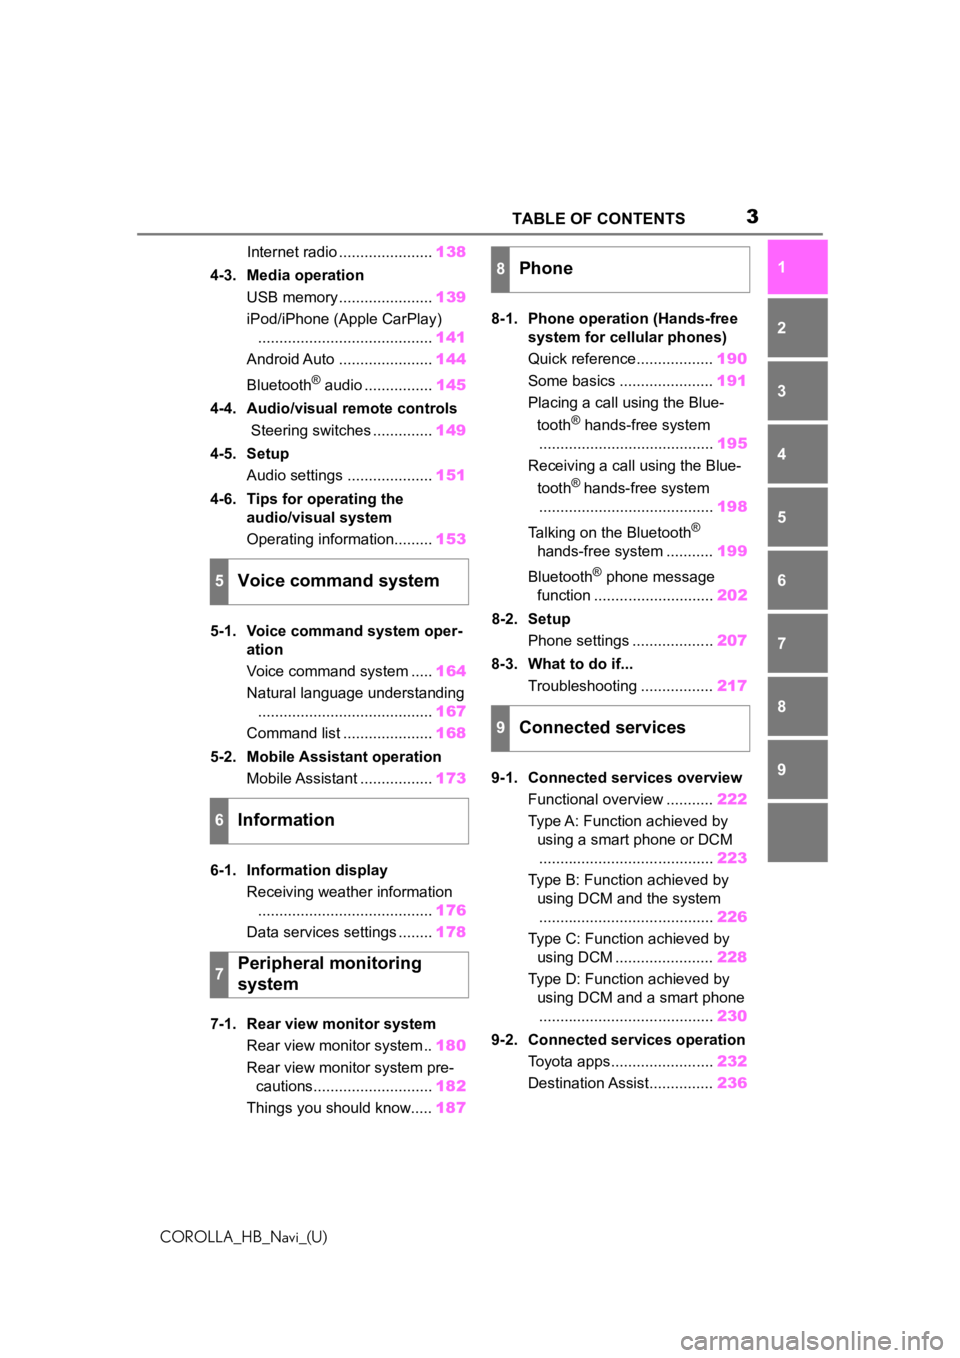
Internet radio ...................... 138
4-3. Media operation USB memory ...................... 139
iPod/iPhone (Apple CarPlay) ......................................... 141
Android Auto ...................... 144
Bluetooth
® audio ................ 145
4-4. Audio/visual remote controls Steering switches .............. 149
4-5. Setup Audio settings .................... 151
4-6. Tips for operating the audio/visual system
Operating information......... 153
5-1. Voice command system oper- ation
Voice command system ..... 164
Natural language understanding ......................................... 167
Command list ..................... 168
5-2. Mobile Assistant operation Mobile Assistant ................. 173
6-1. Information display Receiving weather information......................................... 176
Data services settings ........ 178
7-1. Rear view monitor system Rear view monitor system .. 180
Rear view monitor system pre- cautions............................ 182
Things you should know..... 1878-1. Phone operation (Hands-free
system for cellular phones)
Quick reference.................. 190
Some basics ...................... 191
Placing a call using the Blue-
tooth
® hands-free system
......................................... 195
Receiving a call using the Blue-
tooth
® hands-free system
......................................... 198
Talking on the Bluetooth
®
hands-free system ........... 199
Bluetooth
® phone message
function ............................ 202
8-2. Setup Phone settings ................... 207
8-3. What to do if... Troubleshooting ................. 217
9-1. Connected services overview Functional overview ........... 222
Type A: Function achieved by using a smart phone or DCM......................................... 223
Type B: Function achieved by using DCM and the system......................................... 226
Type C: Function achieved by using DCM ....................... 228
Type D: Function achieved by using DCM and a smart phone......................................... 230
9-2. Connected services operation Toyota apps........................ 232
Destination Assist............... 2365Voice command system
6Information
7Peripheral monitoring
system
8Phone
9Connected services
Page 18 of 258
181-1. Basic function
COROLLA_HB_Navi_(U)
An antenna for the Bluetooth®
connection is built into the
instrument panel.
The condition of the Bluetooth
®
connection may deteriorate and
the system may not function
when a Bluetooth
® phone is
used in the following conditions
and/or places:
The cellular phone is obstructed
by certain objects (such as
when it is behind the seat or in
the glove box or console box).
The cellular phone is touching or
is covered with metal materials.
Leave the Bluetooth
® phone in a
place where the condition of the
Bluetooth
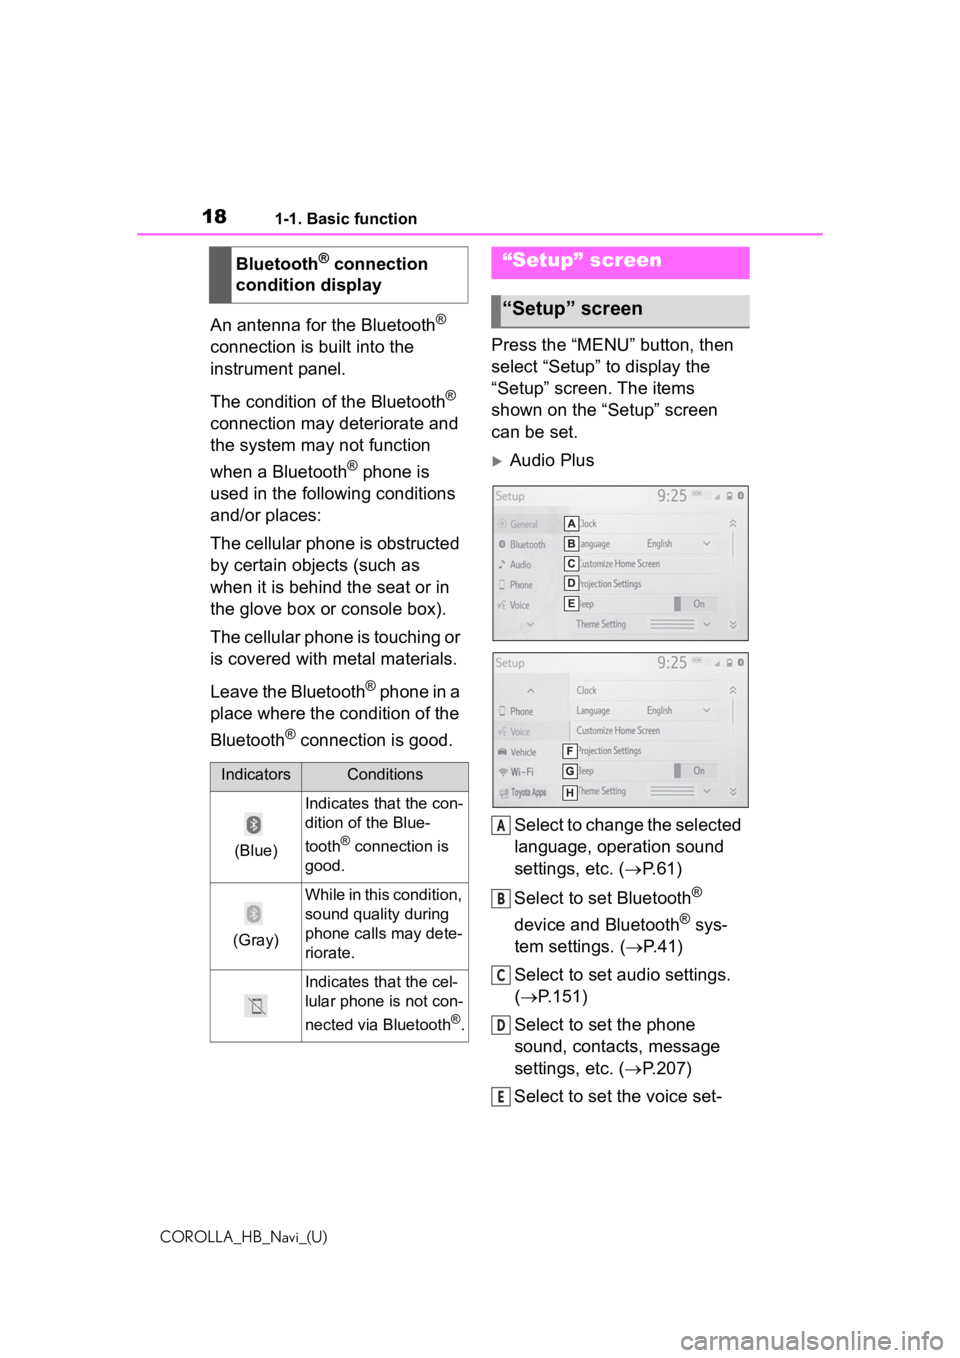
® connection is good. Press the “MENU” button, then
select “Setup” to display the
“Setup” screen. The items
shown on the “Setup” screen
can be set.
Audio Plus
Select to change the selected
language, operation sound
settings, etc. ( P.61)
Select to set Bluetooth
®
device and Bluetooth
® sys-
tem settings. ( P.41)
Select to set audio settings.
( P.151)
Select to set the phone
sound, contacts, message
settings, etc. ( P.207)
Select to set the voice set-
Bluetooth
® connection
condition display
IndicatorsConditions
(Blue)
Indicates that the con-
dition of the Blue-
tooth
® connection is
good.
(Gray)
While in this condition,
sound quality during
phone calls may dete-
riorate.
Indicates that the cel-
lular phone is not con-
nected via Bluetooth
®.
“Setup” screen
“Setup” screen
A
B
C
D
E
Page 19 of 258
191-1. Basic function
COROLLA_HB_Navi_(U)
1
Quick guide
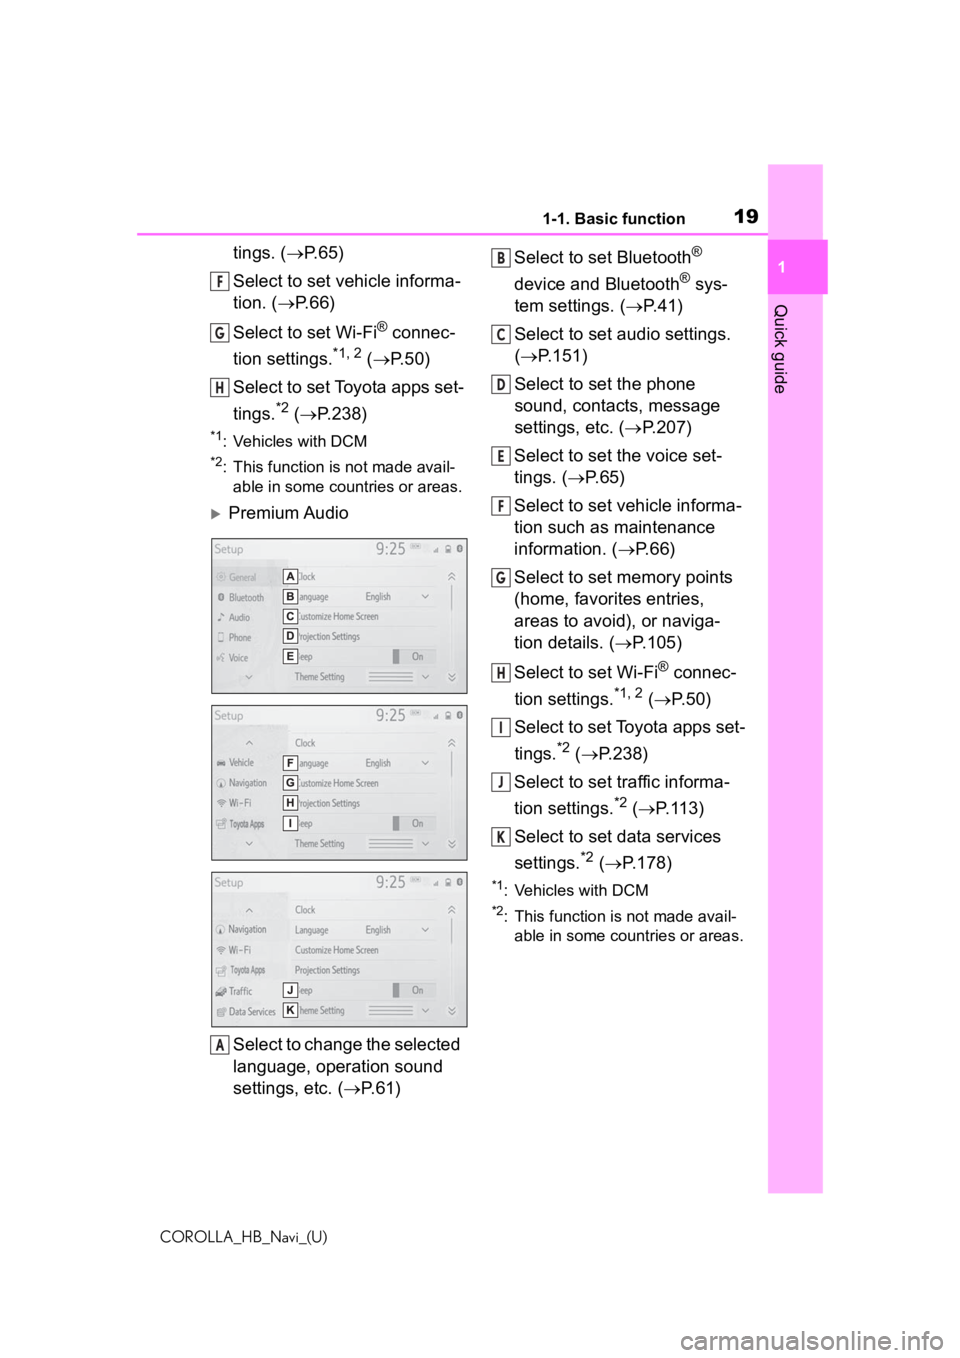
tings. ( P.65)
Select to set vehicle informa-
tion. ( P. 6 6 )
Select to set Wi-Fi
® connec-
tion settings.
*1, 2 ( P.50)
Select to set Toyota apps set-
tings.
*2 ( P.238)
*1: Vehicles with DCM
*2: This function is not made avail-
able in some countries or areas.
Premium Audio
Select to change the selected
language, operation sound
settings, etc. ( P. 6 1 ) Select to set Bluetooth
®
device and Bluetooth
® sys-
tem settings. ( P.41)
Select to set audio settings.
( P.151)
Select to set the phone
sound, contacts, message
settings, etc. ( P.207)
Select to set the voice set-
tings. ( P.65)
Select to set vehicle informa-
tion such as maintenance
information. ( P.66)
Select to set memory points
(home, favorites entries,
areas to avoid), or naviga-
tion details. ( P.105)
Select to set Wi-Fi
® connec-
tion settings.
*1, 2 ( P. 5 0 )
Select to set Toyota apps set-
tings.
*2 ( P.238)
Select to set traffic informa-
tion settings.
*2 ( P.113)
Select to set data services
settings.
*2 ( P.178)
*1: Vehicles with DCM
*2: This function is not made avail-
able in some countries or areas.
F
G
H
A
B
C
D
E
F
G
H
I
J
K
Page 61 of 258
612-4. Other settings
COROLLA_HB_Navi_(U)
2
Basic function
2-4.Other settings
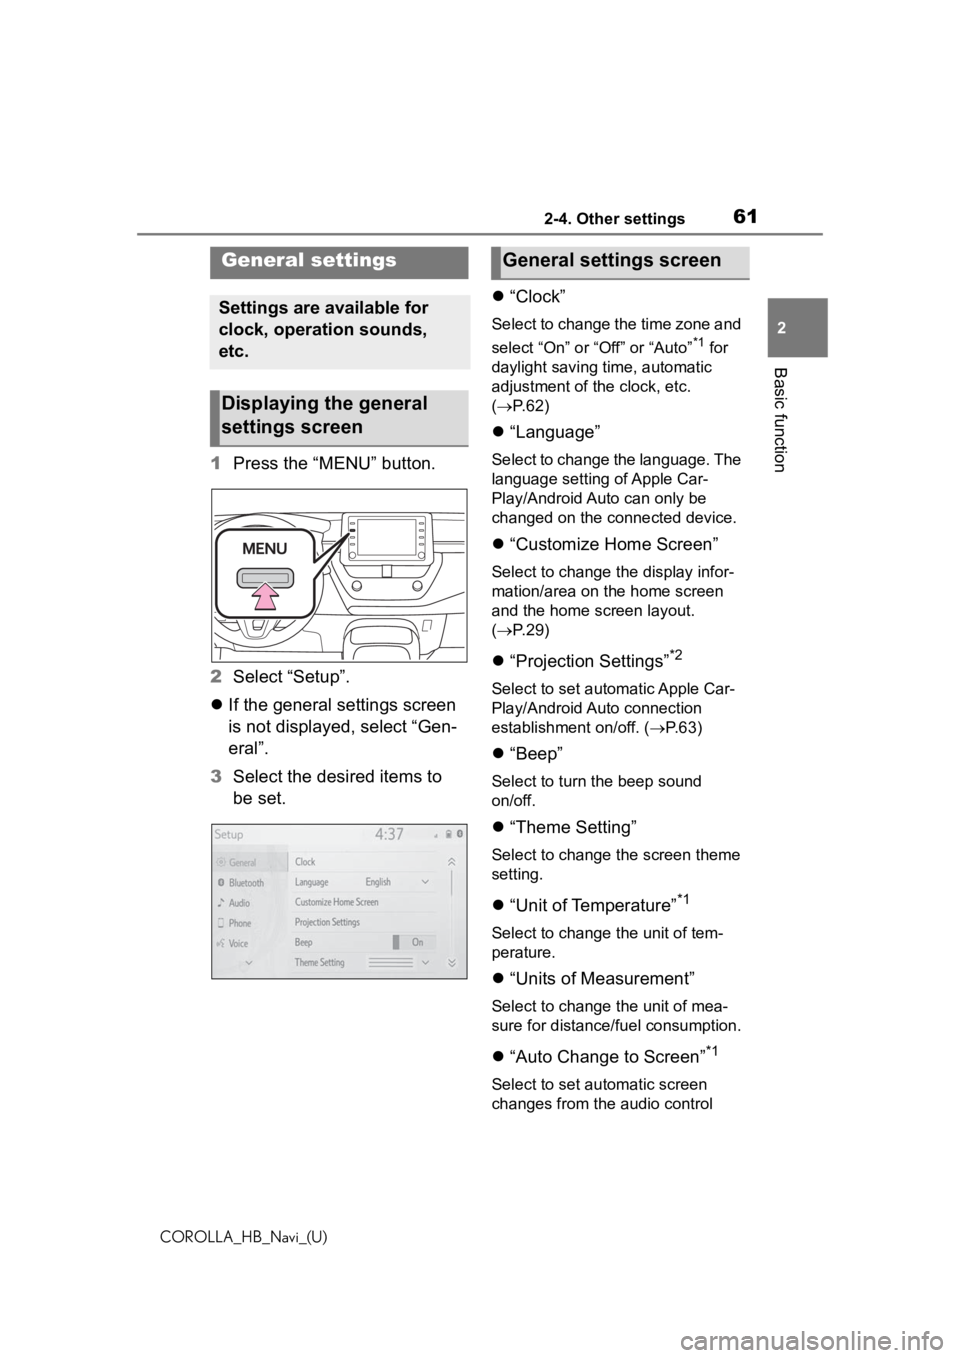
1 Press the “MENU” button.
2 Select “Setup”.
If the general settings screen
is not displayed, select “Gen-
eral”.
3 Select the desired items to
be set.
“Clock”
Select to change the time zone and
select “On” or “Off” or “Auto”
*1 for
daylight saving time, automatic
adjustment of the clock, etc.
( P. 6 2 )
“Language”
Select to change the language. The
language setting of Apple Car-
Play/Android Auto can only be
changed on the connected device.
“Customize Home Screen”
Select to change the display infor-
mation/area on the home screen
and the home screen layout.
( P. 2 9 )
“Projection Settings”*2
Select to set automatic Apple Car-
Play/Android Auto connection
establishment on/off. ( P.63)
“Beep”
Select to turn the beep sound
on/off.
“Theme Setting”
Select to change the screen theme
setting.
“Unit of Temperature”*1
Select to change the unit of tem-
perature.
“Units of Measurement”
Select to change the unit of mea-
sure for distance/fuel consumption.
“Auto Change to Screen”*1
Select to set automatic screen
changes from the audio control
General settings
Settings are available for
clock, operation sounds,
etc.
Displaying the general
settings screen
General settings screen
Page 64 of 258
642-4. Other settings
COROLLA_HB_Navi_(U)
system via USB. (P.55)
Depending on the system,
this setting cannot be
changed when a device is
connected to the system via
USB. Disconnect the device
before attempting to change
the setting.
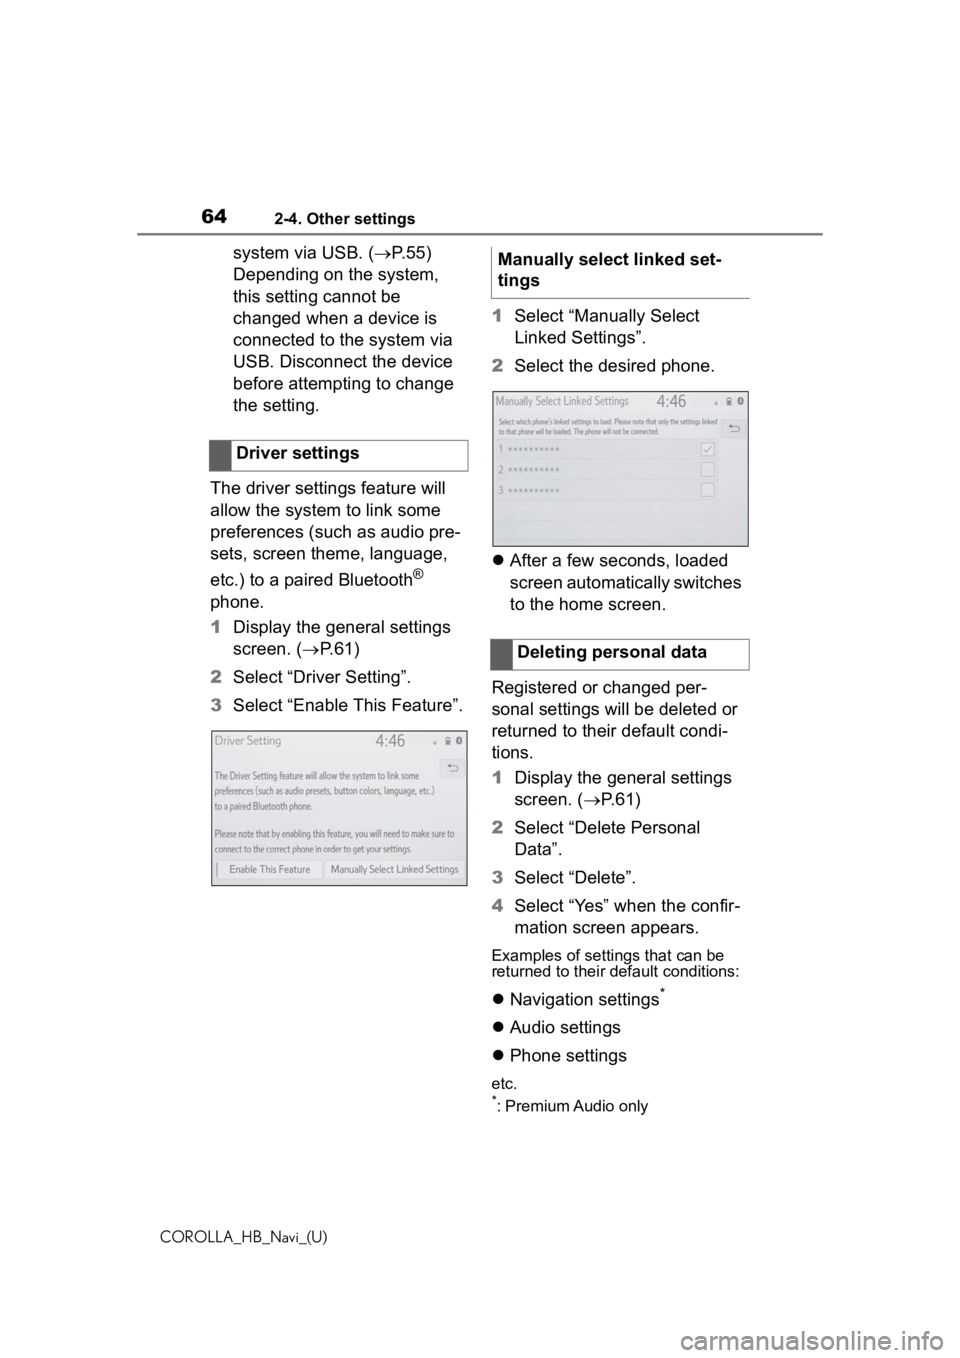
The driver settings feature will
allow the system to link some
preferences (such as audio pre-
sets, screen theme, language,
etc.) to a paired Bluetooth
®
phone.
1 Display the general settings
screen. ( P.61)
2 Select “Driver Setting”.
3 Select “Enable This Feature”. 1
Select “Manually Select
Linked Settings”.
2 Select the desired phone.
After a few seconds, loaded
screen automatically switches
to the home screen.
Registered or changed per-
sonal settings will be deleted or
returned to their default condi-
tions.
1 Display the general settings
screen. ( P. 6 1 )
2 Select “Delete Personal
Data”.
3 Select “Delete”.
4 Select “Yes” when the confir-
mation screen appears.
Examples of settings that can be
returned to their default conditions:
Navigation settings*
Audio settings
Phone settings
etc.*: Premium Audio only
Driver settings
Manually select linked set-
tings
Deleting personal data
Page 163 of 258
163
COROLLA_HB_Navi_(U)
5
5
Voice command system
Voice commandsystem
.5-1. Voice command system operation
Voice command system .................................. 164
Natural language under- standing..................... 167
Command list .............. 168
5-2. Mobile Assistant opera- tion
Mobile Assistant .......... 173
Page 167 of 258
1675-1. Voice command system operation
COROLLA_HB_Navi_(U)
5
Voice command system
*: Premium Audio with DCM only. This function is not made avail-
able in some countries or areas.
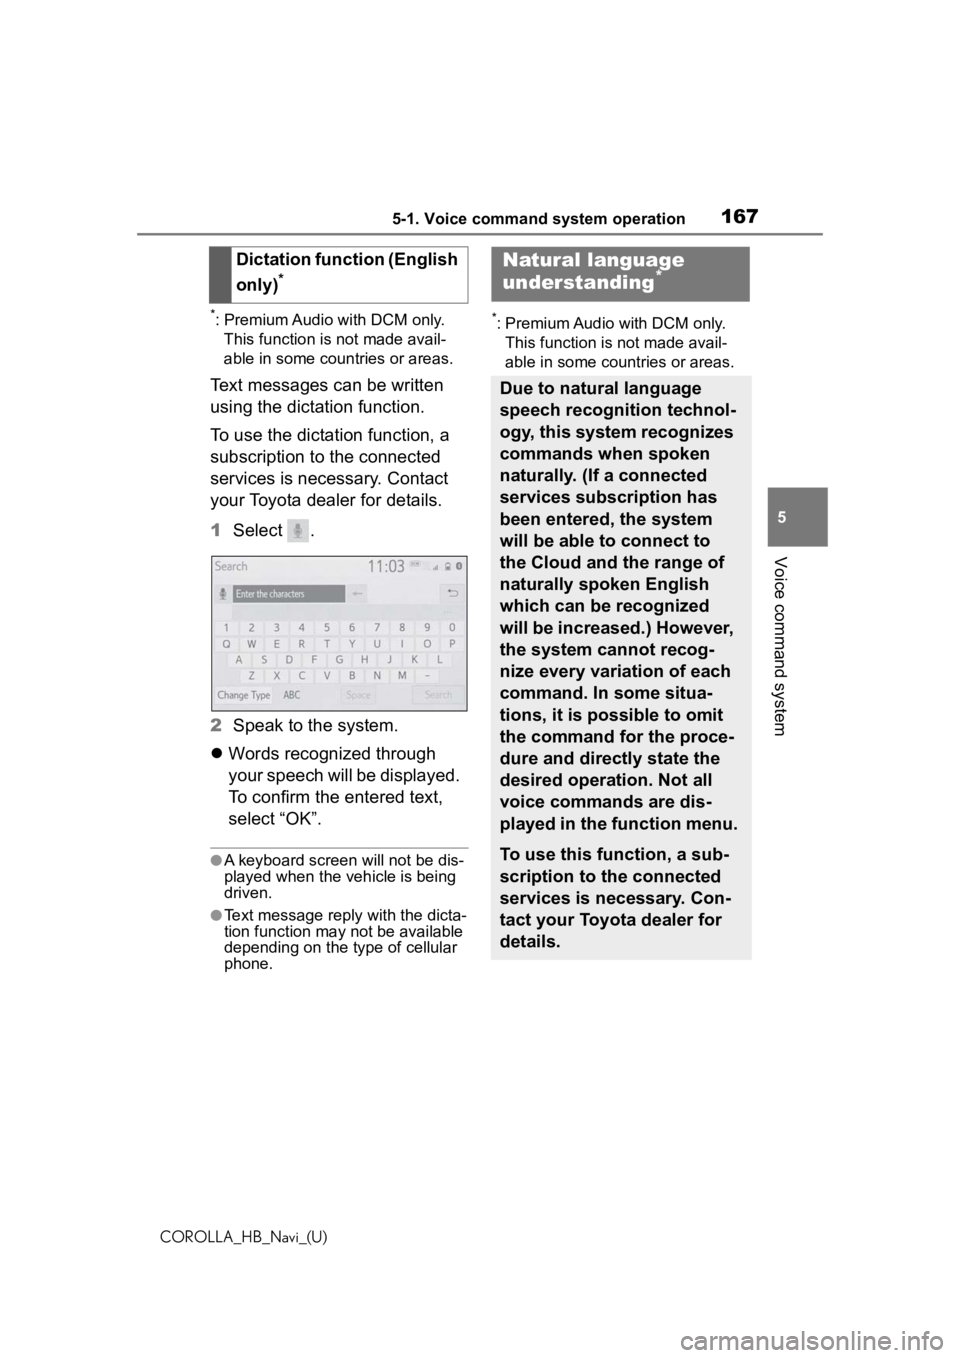
Text messages can be written
using the dictation function.
To use the dictation function, a
subscription to the connected
services is necessary. Contact
your Toyota dealer for details.
1 Select .
2 Speak to the system.
Words recognized through
your speech will be displayed.
To confirm the entered text,
select “OK”.
●A keyboard screen will not be dis-
played when the vehicle is being
driven.
●Text message reply with the dicta-
tion function may n ot be available
depending on the type of cellular
phone.
*: Premium Audio with DCM only.
This function is not made avail-
able in some countries or areas.
Dictation function (English
only)
*
Natural language
understanding*
Due to natural language
speech recognition technol-
ogy, this system recognizes
commands when spoken
naturally. (If a connected
services subscription has
been entered, the system
will be able to connect to
the Cloud and the range of
naturally spoken English
which can be recognized
will be increased.) However,
the system cannot recog-
nize every variation of each
command. In some situa-
tions, it is possible to omit
the command for the proce-
dure and directly state the
desired operation. Not all
voice commands are dis-
played in the function menu.
To use this function, a sub-
scription to the connected
services is necessary. Con-
tact your Toyota dealer for
details.
Page 168 of 258
1685-1. Voice command system operation
COROLLA_HB_Navi_(U)
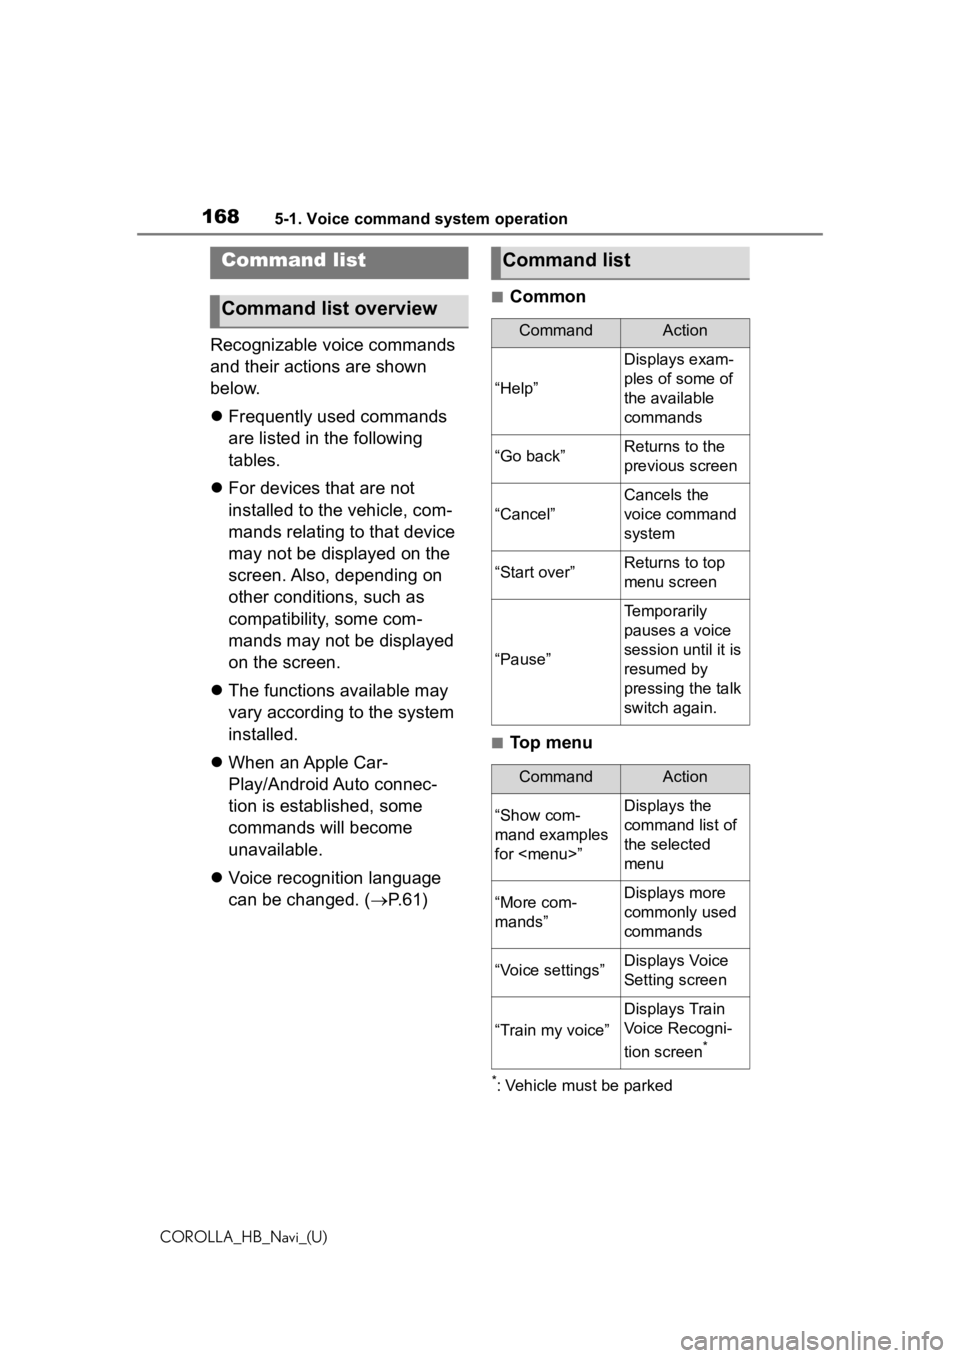
Recognizable voice commands
and their actions are shown
below.
Frequently used commands
are listed in the following
tables.
For devices that are not
installed to the vehicle, com-
mands relating to that device
may not be displayed on the
screen. Also, depending on
other conditions, such as
compatibility, some com-
mands may not be displayed
on the screen.
The functions available may
vary according to the system
installed.
When an Apple Car-
Play/Android Auto connec-
tion is established, some
commands will become
unavailable.
Voice recognition language
can be changed. ( P.61)
■Common
■Top menu
*: Vehicle must be parked
Command list
Command list overview
Command list
CommandAction
“Help”
Displays exam-
ples of some of
the available
commands
“Go back”Returns to the
previous screen
“Cancel”
Cancels the
voice command
system
“Start over”Returns to top
menu screen
“Pause”
Temporarily
pauses a voice
session until it is
resumed by
pressing the talk
switch again.
CommandAction
“Show com-
mand examples
for
Page 169 of 258
1695-1. Voice command system operation
COROLLA_HB_Navi_(U)
5
Voice command system
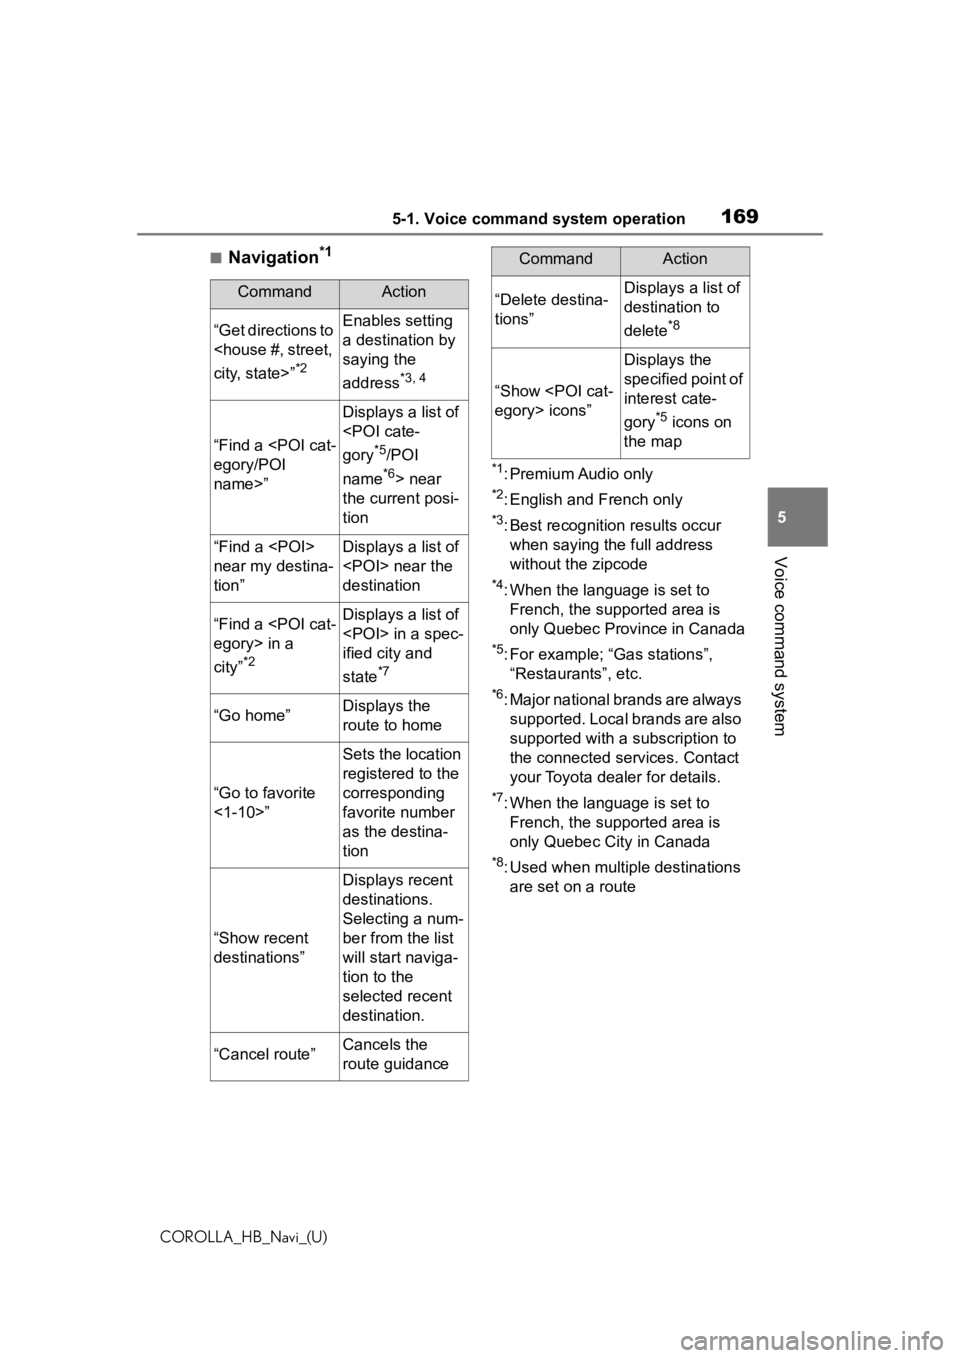
■Navigation*1
*1: Premium Audio only
*2: English and French only
*3: Best recognitio n results occur
when saying the full address
without the zipcode
*4: When the language is set to French, the supported area is
only Quebec Province in Canada
*5: For example; “Ga s stations”,
“Restaurants”, etc.
*6: Major national brands are always supported. Local brands are also
supported with a subscription to
the connected services. Contact
your Toyota dealer for details.
*7: When the language is set to French, the supported area is
only Quebec City in Canada
*8: Used when multiple destinations are set on a route
CommandAction
“Get directions to
*2
Enables setting
a destination by
saying the
address
*3, 4
“Find a
name>”
Displays a list of
*5/POI
name
*6> near
the current posi-
tion
“Find a
near my destina-
tion”Displays a list of
destination
“Find a
city”
*2
Displays a list of
ified city and
state
*7
“Go home”Displays the
route to home
“Go to favorite
<1-10>”
Sets the location
registered to the
corresponding
favorite number
as the destina-
tion
“Show recent
destinations”
Displays recent
destinations.
Selecting a num-
ber from the list
will start naviga-
tion to the
selected recent
destination.
“Cancel route”Cancels the
route guidance
“Delete destina-
tions”Displays a list of
destination to
delete
*8
“Show
Displays the
specified point of
interest cate-
gory
*5 icons on
the map
CommandAction
Page 215 of 258
2158-2. Setup
COROLLA_HB_Navi_(U)
8
Phone
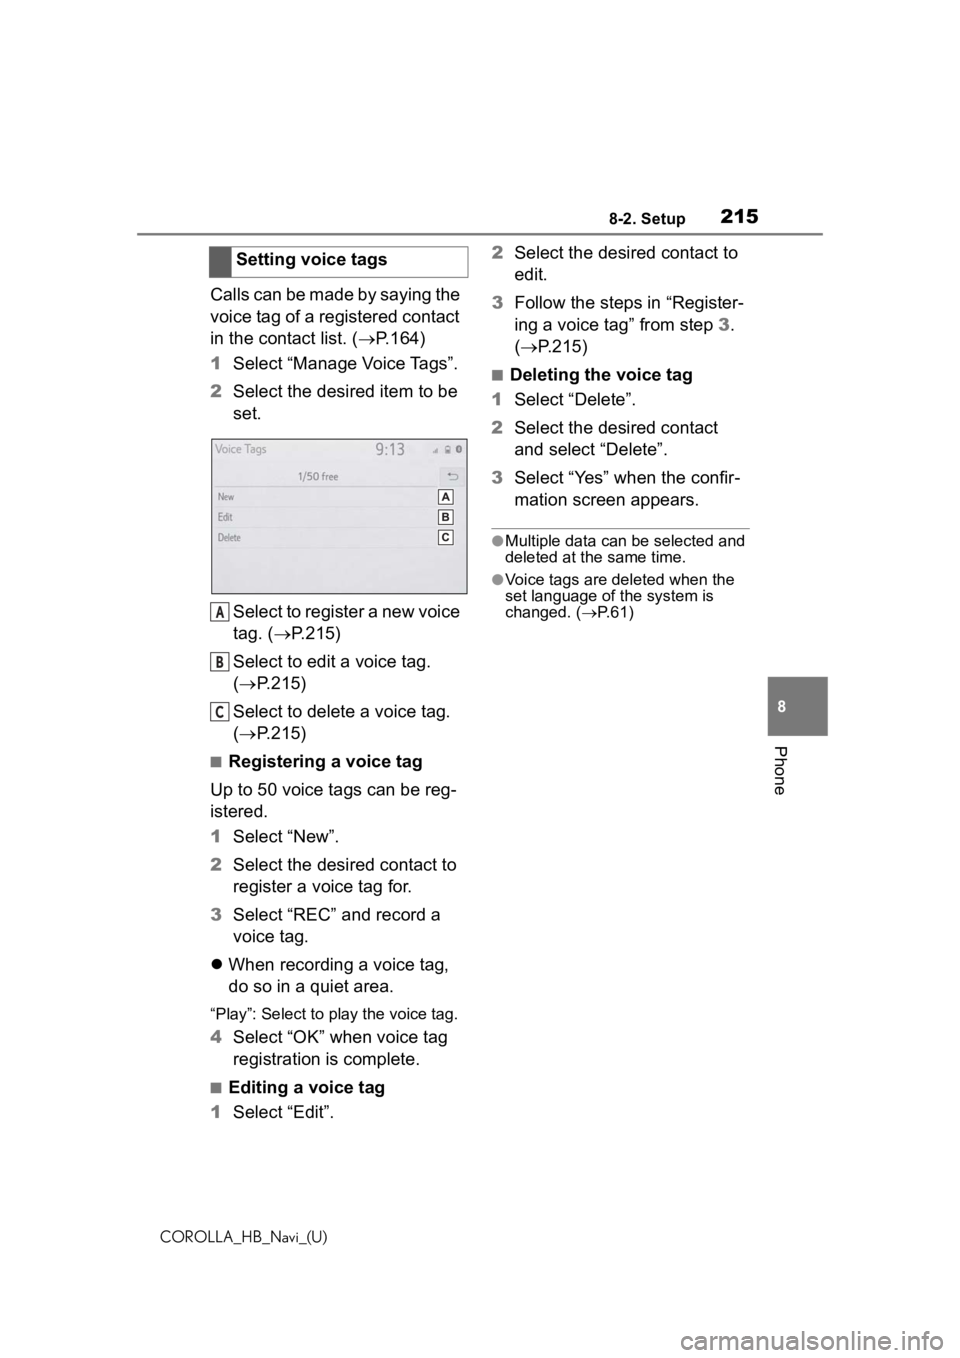
Calls can be made by saying the
voice tag of a registered contact
in the contact list. ( P.164)
1 Select “Manage Voice Tags”.
2 Select the desired item to be
set.
Select to register a new voice
tag. ( P.215)
Select to edit a voice tag.
( P.215)
Select to delete a voice tag.
( P.215)
■Registering a voice tag
Up to 50 voice tags can be reg-
istered.
1 Select “New”.
2 Select the desired contact to
register a voice tag for.
3 Select “REC” and record a
voice tag.
When recording a voice tag,
do so in a quiet area.
“Play”: Select to play the voice tag.
4 Select “OK” when voice tag
registration is complete.
■Editing a voice tag
1 Select “Edit”. 2
Select the desired contact to
edit.
3 Follow the steps in “Register-
ing a voice tag” from step 3.
( P.215)
■Deleting the voice tag
1 Select “Delete”.
2 Select the desired contact
and select “Delete”.
3 Select “Yes” when the confir-
mation screen appears.
●Multiple data can be selected and
deleted at the same time.
●Voice tags are deleted when the
set language of the system is
changed. ( P.61)
Setting voice tags
A
B
C