heater TOYOTA COROLLA HATCHBACK 2023 Owners Manual
[x] Cancel search | Manufacturer: TOYOTA, Model Year: 2023, Model line: COROLLA HATCHBACK, Model: TOYOTA COROLLA HATCHBACK 2023Pages: 436, PDF Size: 8.72 MB
Page 3 of 436
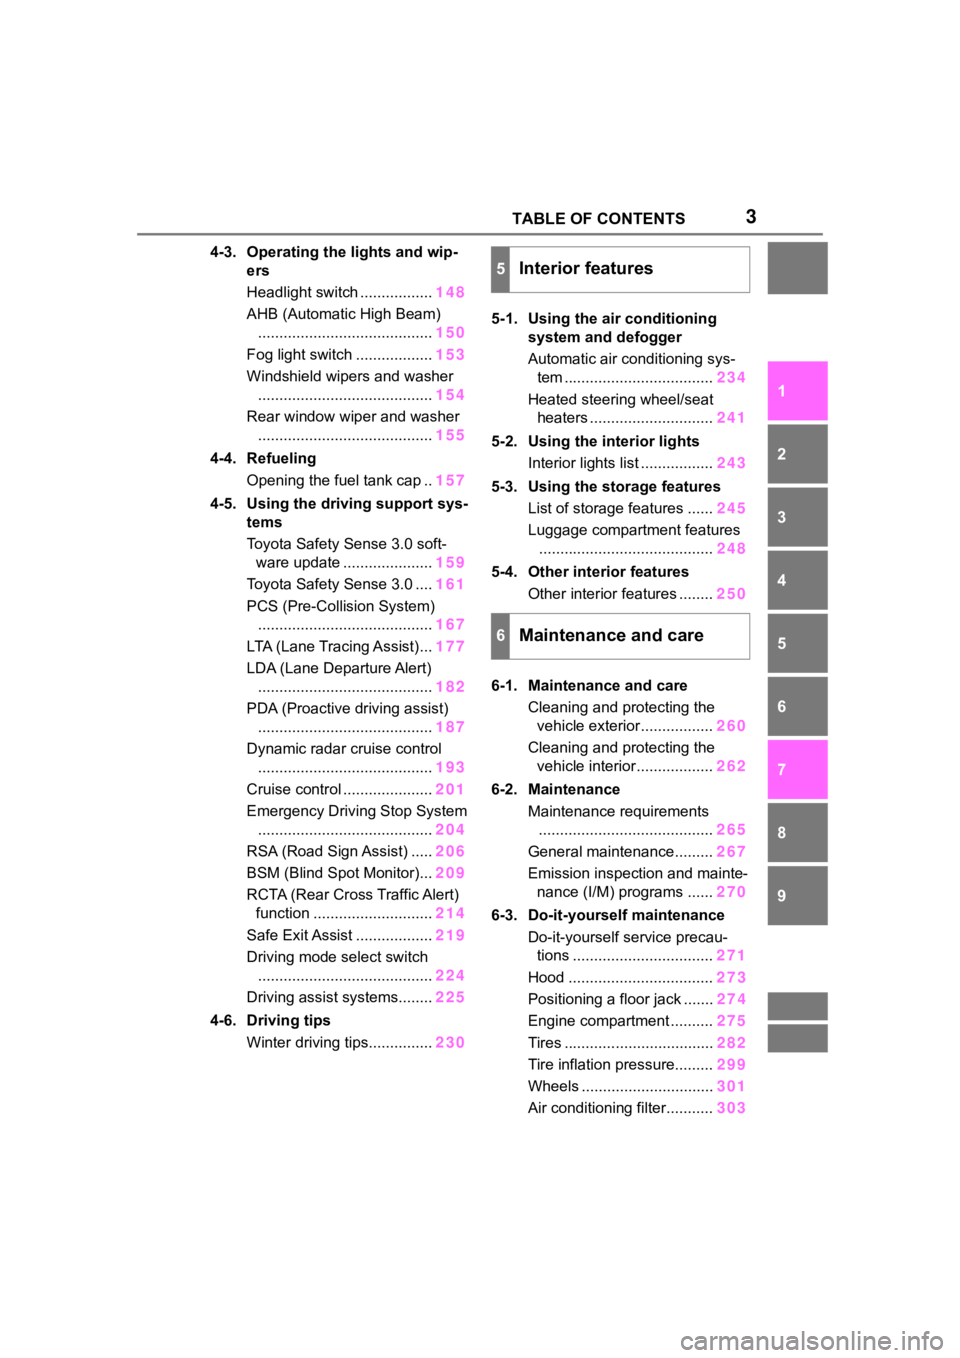
3TABLE OF CONTENTS
1
2
3
4
5
6
7
8
9
10
4-3. Operating the lights and wip-ers
Headlight switch ................. 148
AHB (Automatic High Beam) ......................................... 150
Fog light switch .................. 153
Windshield wipers and washer ......................................... 154
Rear window wiper and washer ......................................... 155
4-4. Refueling Opening the fuel tank cap .. 157
4-5. Using the driving support sys- tems
Toyota Safety Sense 3.0 soft-ware update ..................... 159
Toyota Safety Sense 3.0 .... 161
PCS (Pre-Collision System) ......................................... 167
LTA (Lane Tracing Assist)... 177
LDA (Lane Departure Alert) ......................................... 182
PDA (Proactive driving assist) ......................................... 187
Dynamic radar cruise control ......................................... 193
Cruise control ..................... 201
Emergency Driving Stop System ......................................... 204
RSA (Road Sign Assist) ..... 206
BSM (Blind Spot Monitor)... 209
RCTA (Rear Cross Traffic Alert) function ............................ 214
Safe Exit Assist .................. 219
Driving mode select switch ......................................... 224
Driving assist systems........ 225
4-6. Driving tips Winter driving tips............... 2305-1. Using the air conditioning
system and defogger
Automatic air conditioning sys-tem ................................... 234
Heated steering wheel/seat heaters ............................. 241
5-2. Using the interior lights Interior lights list ................. 243
5-3. Using the storage features List of storage features ...... 245
Luggage compartment features ......................................... 248
5-4. Other interior features Other interior features ........ 250
6-1. Maintenance and care Cleaning and protecting the vehicle exterior................. 260
Cleaning and protecting the vehicle interior.................. 262
6-2. Maintenance Maintenance requirements......................................... 265
General maintenance......... 267
Emission inspection and mainte- nance (I/M) programs ...... 270
6-3. Do-it-yourself maintenance Do-it-yourself service precau-tions ................................. 271
Hood .................................. 27
3
Positioning a floor jack .......27
4
Engine compartment .......... 275
Tires ................................... 282
Tire inflation pressure......... 299
Wheels ............................... 301
Air conditioning filter........... 303
5Interior features
6Maintenance and care
Page 18 of 436
18Pictorial index
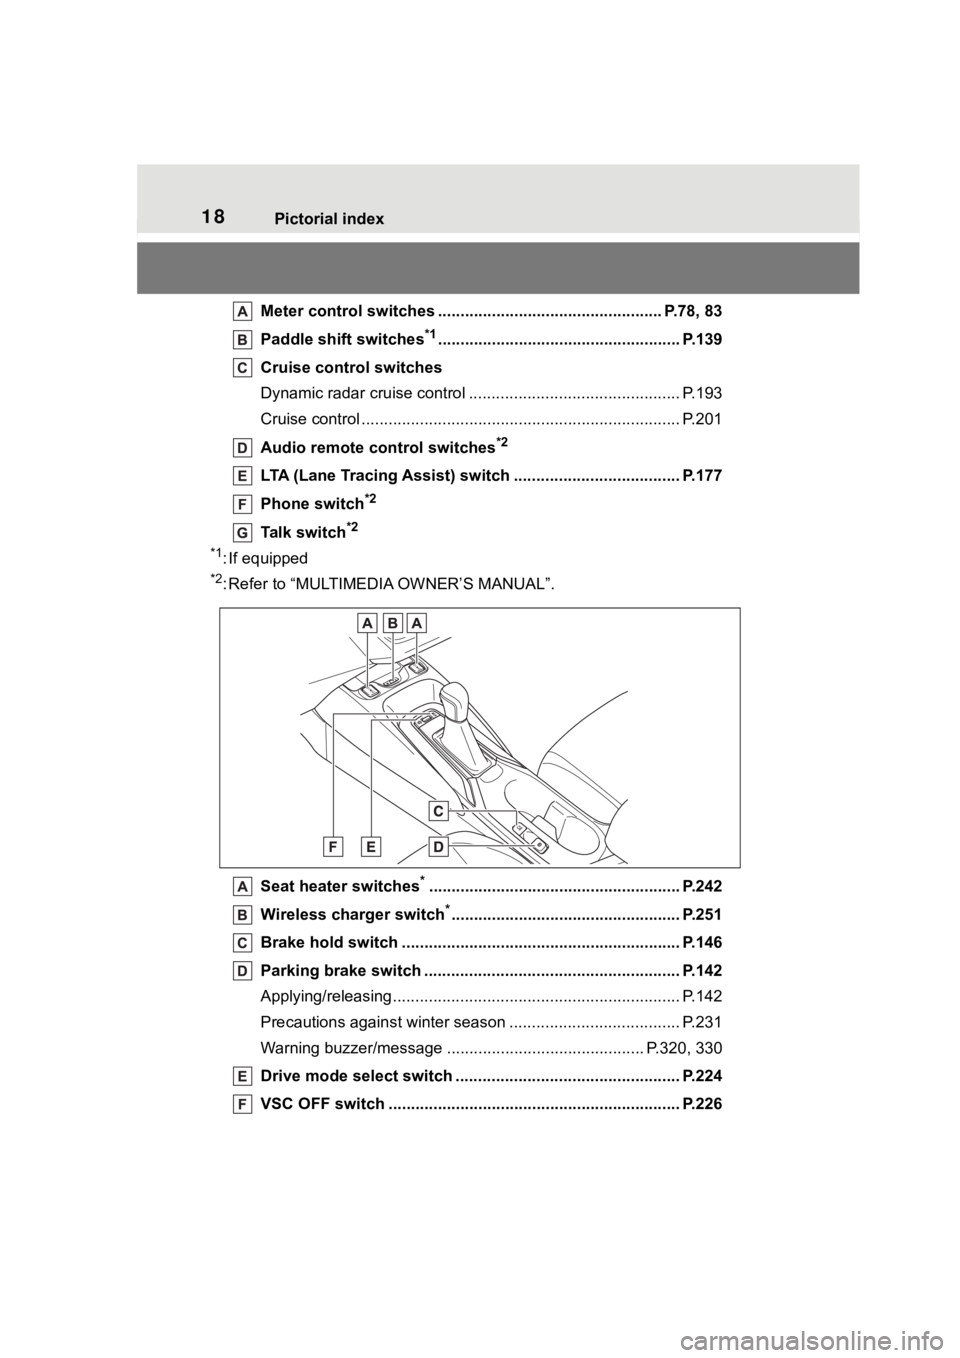
Meter control switches .................................................. P.78, 83
Paddle shift switches
*1...................................................... P.139
Cruise control switches
Dynamic radar cruise control ................................... ............ P.193
Cruise control ................................................. ...................... P.201
Audio remote control switches
*2
LTA (Lane Tracing Assist) switch ............................... ...... P.177
Phone switch
*2
Talk switch*2
*1
: If equipped
*2: Refer to “MULTIMEDIA OWNER’S MANUAL”.
Seat heater switches
*........................................................ P.242
Wireless cha rger switch
*................................................... P.251
Brake hold switch .............................................. ................ P.146
Parking brake switch ........................................... .............. P.142
Applying/releasing............................................. ................... P.142
Precautions against winter season .............................. ........ P.231
Warning buzzer/me ssage ......................................... ... P.320, 330
Drive mode select switch ....................................... ........... P.224
VSC OFF switch ................................................. ................ P.226
Page 164 of 436
1644-5. Using the driving support systems
WARNING
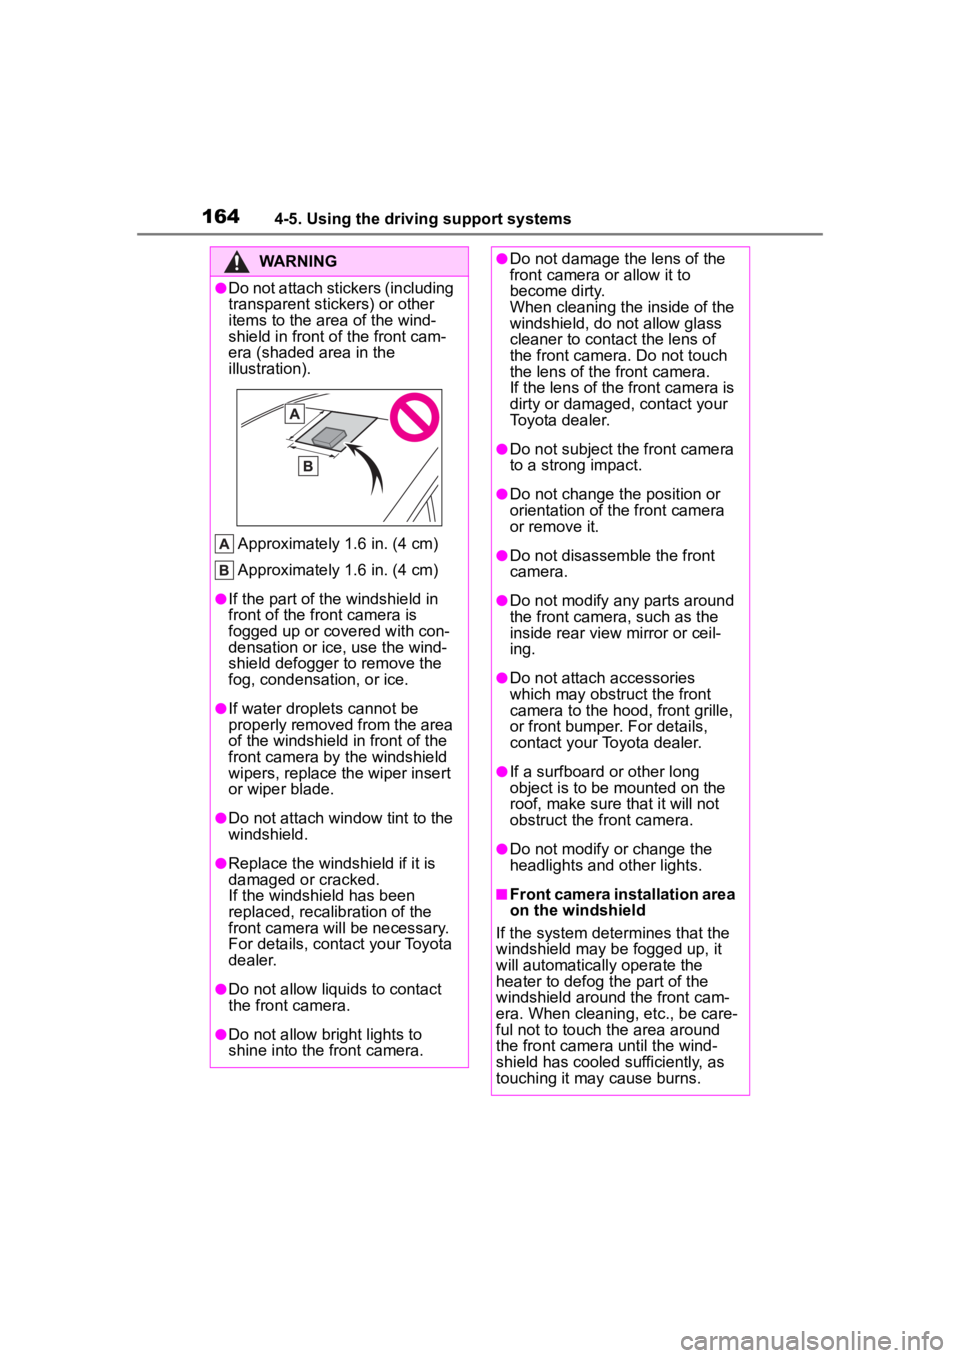
●Do not attach stickers (including
transparent stickers) or other
items to the area of the wind-
shield in front of the front cam-
era (shaded area in the
illustration).
Approximately 1.6 in. (4 cm)
Approximately 1.6 in. (4 cm)
●If the part of the windshield in
front of the front camera is
fogged up or covered with con-
densation or ice, use the wind-
shield defogger to remove the
fog, condensation, or ice.
●If water droplets cannot be
properly removed from the area
of the windshield in front of the
front camera by the windshield
wipers, replace the wiper insert
or wiper blade.
●Do not attach win dow tint to the
windshield.
●Replace the windshield if it is
damaged or cracked.
If the windshield has been
replaced, recalib ration of the
front camera will be necessary.
For details, contact your Toyota
dealer.
●Do not allow liquids to contact
the front camera.
●Do not allow bright lights to
shine into the front camera.
●Do not damage th e lens of the
front camera o r allow it to
become dirty.
When cleaning the inside of the
windshield, do not allow glass
cleaner to contact the lens of
the front camera. Do not touch
the lens of the front camera.
If the lens of the front camera is
dirty or damaged, contact your
Toyota dealer.
●Do not subject the front camera
to a strong impact.
●Do not change the position or
orientation of the front camera
or remove it.
●Do not disassemble the front
camera.
●Do not modify any parts around
the front camera , such as the
inside rear view mirror or ceil-
ing.
●Do not attach accessories
which may obstruct the front
camera to the hood, front grille,
or front bumper. For details,
contact your Toyota dealer.
●If a surfboard or other long
object is to be mounted on the
roof, make sure that it will not
obstruct the front camera.
●Do not modify or change the
headlights and other lights.
■Front camera installation area
on the windshield
If the system determines that the
windshield may be fogged up, it
will automatically operate the
heater to defog t he part of the
windshield aroun d the front cam-
era. When cleaning, etc., be care-
ful not to touch the area around
the front camera until the wind-
shield has cooled sufficiently, as
touching it may cause burns.
Page 233 of 436

233
5
5
Interior features
Interior features
.5-1. Using the air conditioning system and defogger
Automatic air conditioning system ....................... 234
Heated steering wheel/seat heaters ...................... 241
5-2. Using the interior lights Interior lights list .......... 243
5-3. Using the storage features List of storage features.................................. 245
Luggage compartment fea- tures .......................... 248
5-4. Other interior features Other interior features . 250
Page 238 of 436
2385-1. Using the air conditioning system and defogger
from entering the vehicle interior
and helping to cool the vehicle
when the outside air temperature
is high.
●Outside/recirculated air mode may
automatically switch depending on
the temperature setting or the
inside temperature.
■Operation of the air condition-
ing system in Eco air condition-
ing mode
●In Eco air conditioning mode, the
air conditioning system is con-
trolled as follows t o prioritize fuel
efficiency:
• Heater and compressor operation controlled to restrict heating/cool-
ing capacity
• Fan speed restr icted when auto-
matic mode is selected
●To improve air co nditioning perfor-
mance, perform the following
operations:
• Turn off eco air conditioning mode ( P.237)
• Adjust the fan speed
■When the outside temperature
falls to nearly 32°F (0°C)
The dehumidification function may
not operate even when “A/C” switch
is pressed.
■Ventilation and air conditioning
odors
●To let fresh air in, set the air condi-
tioning system to the outside air
mode.
●During use, various odors from
inside and outside the vehicle may
enter into and a ccumulate in the
air conditioning system. This may
then cause odor to be emitted
from the vents.
●To reduce potential odors from
occurring:
• It is recommended that the air
conditioning system be set to out-
side air mode prior to turning the
vehicle off.
• The start timing of the blower may
be delayed for a short period of time immediately after the air con-
ditioning system is started in auto-
matic mode.
●When parking, the system auto-
matically switches to outside air
mode to encourage better air cir-
culation throughout the vehicle,
helping to reduce odors that occur
when starting the vehicle.
■Air conditioning filter
P.303
■Air conditioning system refrig-
erant
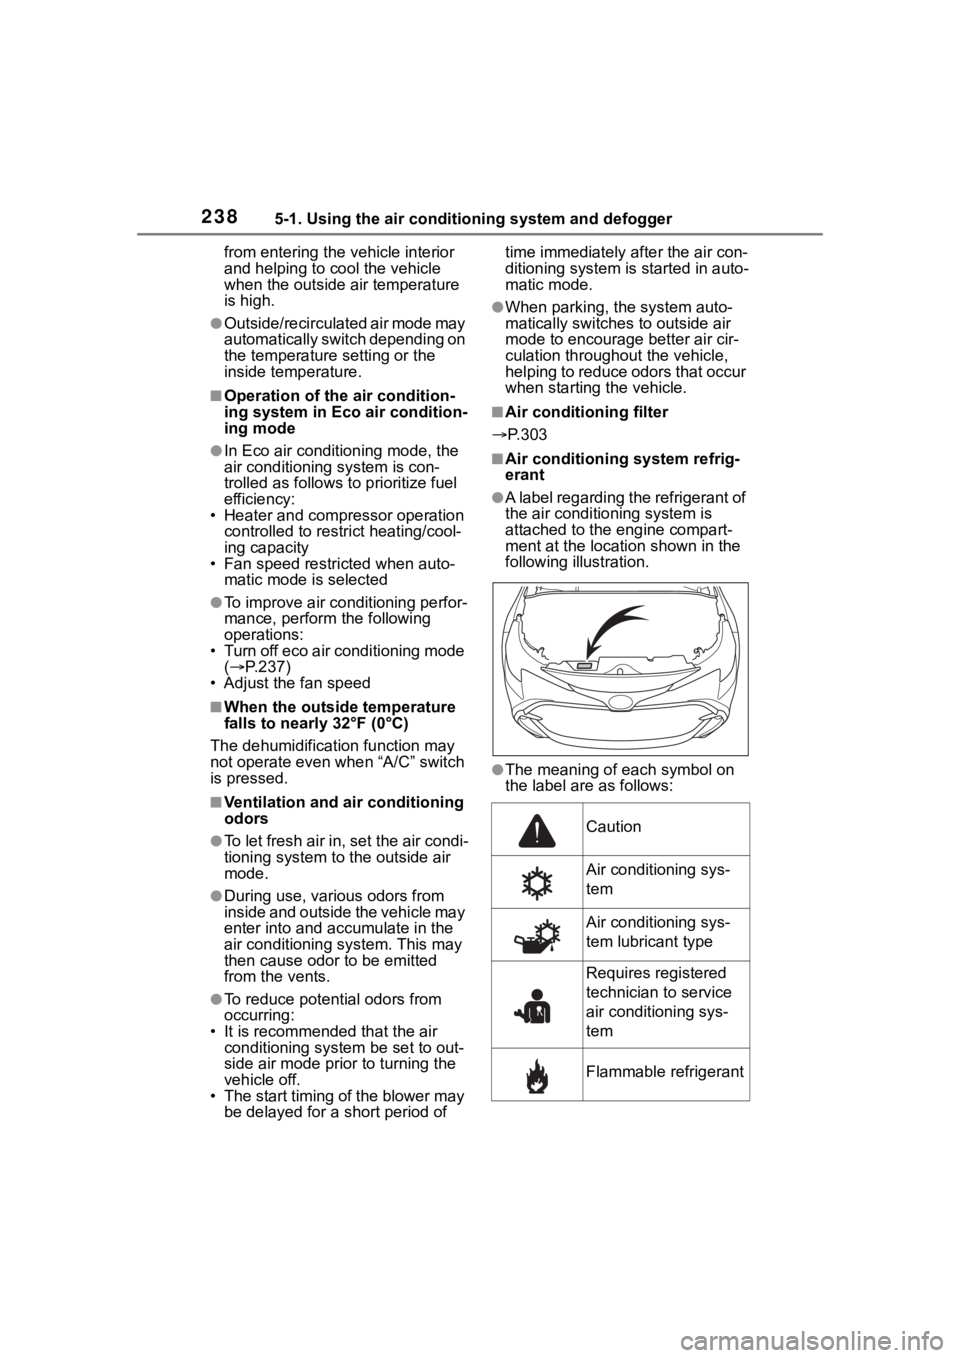
●A label regarding the refrigerant of
the air conditioning system is
attached to the e ngine compart-
ment at the locati on shown in the
following illustration.
●The meaning of each symbol on
the label are as follows:
Caution
Air conditioning sys-
tem
Air conditioning sys-
tem lubricant type
Requires registered
technician to service
air conditioning sys-
tem
Flammable refrigerant
Page 241 of 436
2415-1. Using the air conditioning system and defogger
5
Interior features
*: If equipped
WARNING
■To prevent the windshield
defogger from operating
improperly
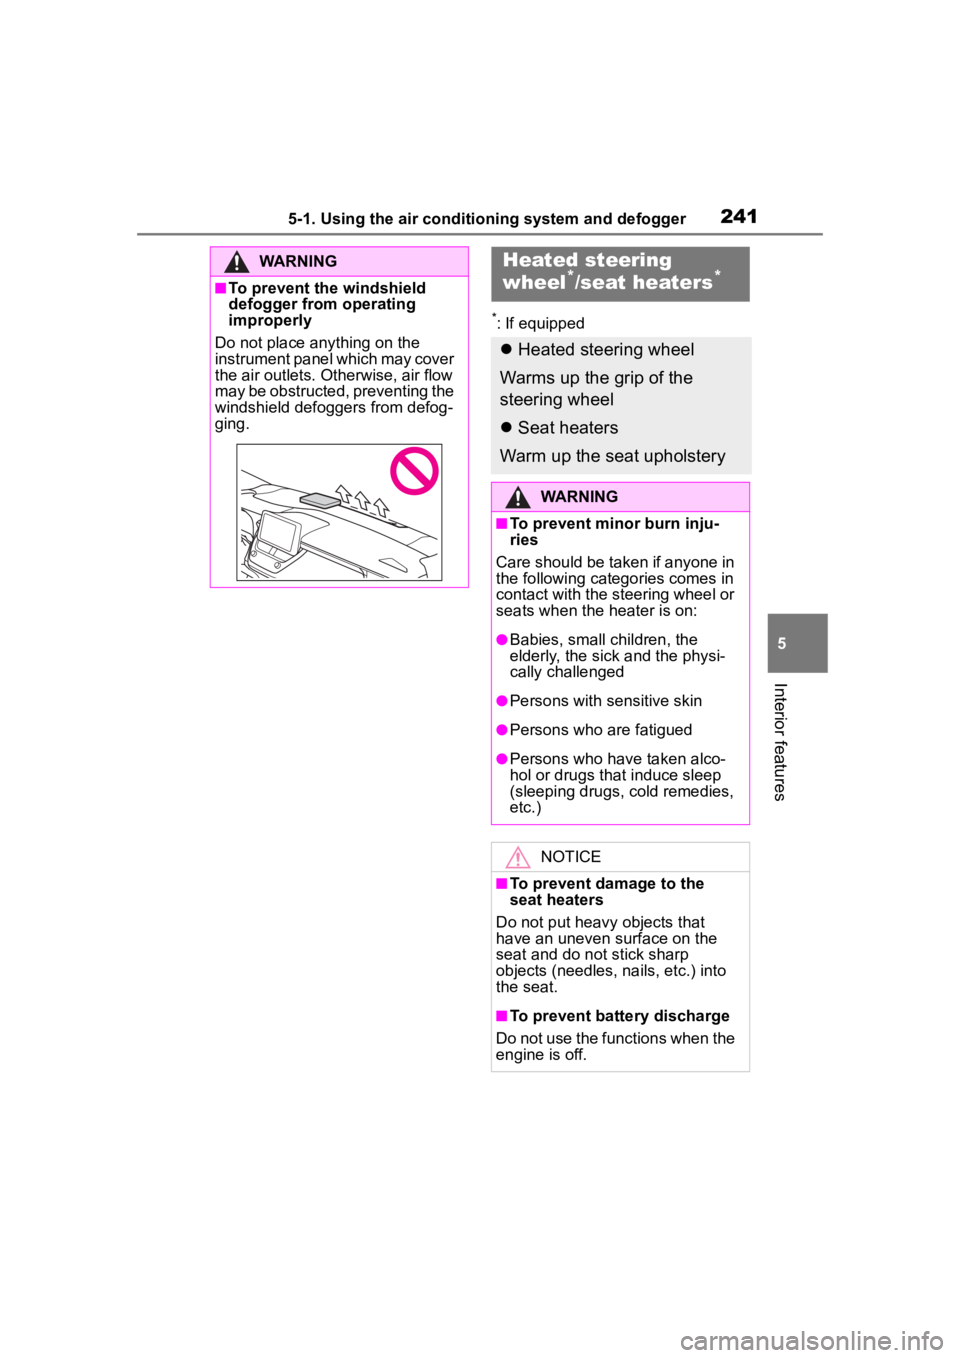
Do not place anything on the
instrument panel which may cover
the air outlets. Otherwise, air flow
may be obstructed, preventing the
windshield defoggers from defog-
ging.
Heated steering
wheel*/seat heaters*
Heated steering wheel
Warms up the grip of the
steering wheel
Seat heaters
Warm up the seat upholstery
WARNING
■To prevent minor burn inju-
ries
Care should be taken if anyone in
the following categories comes in
contact with the steering wheel or
seats when the heater is on:
●Babies, small children, the
elderly, the sick and the physi-
cally challenged
●Persons with sensitive skin
●Persons who are fatigued
●Persons who have taken alco-
hol or drugs that induce sleep
(sleeping drugs, cold remedies,
etc.)
NOTICE
■To prevent damage to the
seat heaters
Do not put heavy objects that
have an uneven surface on the
seat and do not stick sharp
objects (needles, nails, etc.) into
the seat.
■To prevent battery discharge
Do not use the functions when the
engine is off.
Page 242 of 436
2425-1. Using the air conditioning system and defogger
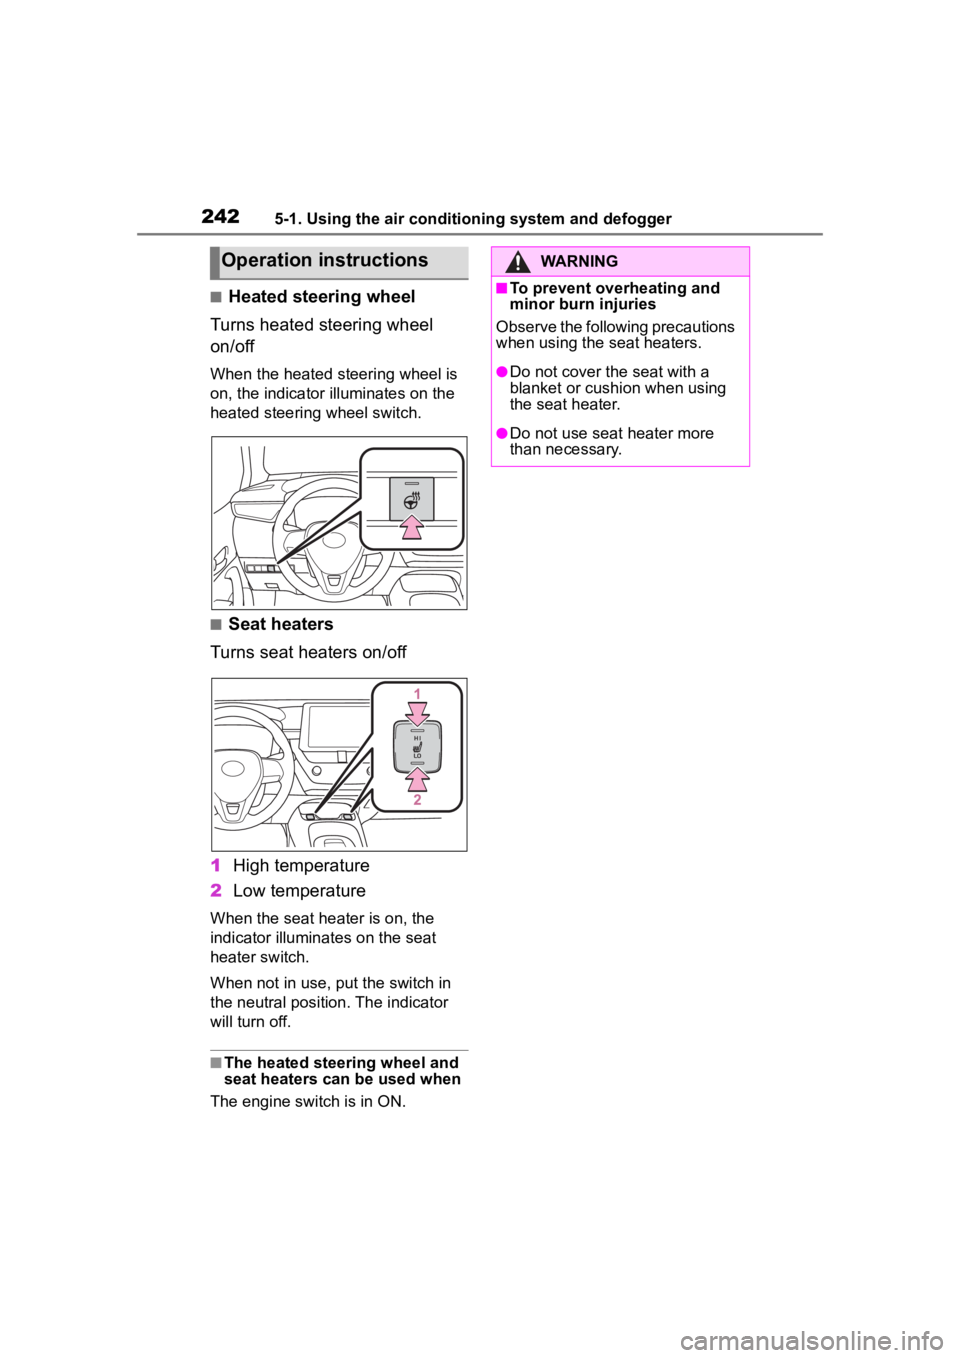
■Heated steering wheel
Turns heated steering wheel
on/off
When the heated steering wheel is
on, the indicator illuminates on the
heated steering wheel switch.
■Seat heaters
Turns seat heaters on/off
1 High temperature
2 Low temperature
When the seat hea ter is on, the
indicator illumina tes on the seat
heater switch.
When not in use, put the switch in
the neutral position. The indicator
will turn off.
■The heated steering wheel and
seat heaters can be used when
The engine switch is in ON.
Operation instructionsWARNING
■To prevent overheating and
minor burn injuries
Observe the following precautions
when using the seat heaters.
●Do not cover the seat with a
blanket or cushion when using
the seat heater.
●Do not use seat heater more
than necessary.
Page 264 of 436
2646-1. Maintenance and care
Remove dirt using a
water-dampened soft cloth or
synthetic chamois.
Wipe the surface with a dry,
soft cloth to remove any
remaining moisture.
■Cleaning the areas with
satin-finish metal accents
The metal areas use a layer of real
metal for the surface. It is necessary
to clean them regularly. If dirty areas
are left uncleaned for long periods
of time, they may be difficult to
clean.
Remove dirt and dust using a
vacuum cleaner.
Wipe off any excess dirt and
dust with a soft cloth damp-
ened with diluted detergent.
Use a diluted water solution of
approximately 5% neutral wool
detergent.
Wring out any excess water
from the cloth and thoroughly
wipe off all remaining traces
of detergent.
Wipe the surface with a dry,
soft cloth to remove any
remaining moisture. Allow the
leather to dry in a shaded and
ventilated area.
■Caring for leather areas
Toyota recommends cleaning the
interior of the vehicle at least twice a
year to maintain t he quality of the
vehicle’s interior.
Remove dirt and dust using a
vacuum cleaner.
Wipe it off with a soft cloth
dampened with neutral deter-
gent diluted to approximately
1%.
Wring out any excess water
from the cloth and thoroughly
wipe off remaining traces of
detergent and water.
NOTICE
■Cleaning the inside of the rear
window
●Do not use glass cleaner to
clean the rear window, as this
may cause damage to the rear
window defogger heater wires
or antenna. Use a cloth damp-
ened with lukewarm water to
gently wipe the window clean.
Wipe the window in strokes run-
ning parallel to the heater wires
or antenna.
●Be careful not to scratch or
damage the heater wires or
antenna.
Cleaning the areas with
satin-finish metal accents
Cleaning the leather areas
Cleaning the synthetic
leather areas
Page 334 of 436
3347-2. Steps to take in an emergency
multi-information display is malfunc-
tioning. Have the vehicle inspected
by your Toyota dealer immediately.
■If a message that indicates the
need for referring to Owner’s
Manual is displayed
●If “Engine Coolant Temp High” is
displayed, follow the instructions
accordingly. ( P.362)
●If any of the following messages
are displayed on the multi-infor-
mation display, it may indicate a
malfunction. Have the vehicle
inspected by you r Toyota dealer
immediately.
• “Smart Key System Malfunction”
●If any of the following messages
are displayed on the multi-infor-
mation display, it may indicate a
malfunction. Immediately stop the
vehicle and contact your Toyota
dealer.
• “Braking Power Low”
• “Charging System Malfunction”
• “Oil Pressure Low”
Stop the vehicle in a safe
place on a hard, flat surface.
Set the parking brake.
Shift the shift lever to P.
NOTICE
■If “High Power Consumption
Partial Limit on AC/Heater
Operation” is displayed fre-
quently
There is a possible malfunction
relating to the charging system or
the battery may be deteriorating.
Have the vehicle inspected by
your Toyota dealer.
If you have a flat tire
(vehicles without
spare tire)
Your vehicle is not equipped
with a spare tire, but instead
is equipped with an emer-
gency tire puncture repair
kit.
A puncture caused by a nail
or screw passing through
the tire tread can be
repaired temporarily using
the emergency tire puncture
repair kit. (The kit contains a
bottle of sealant. The seal-
ant can be used only once
to temporarily repair one
tire without removing the
nail or screw from the tire.)
After temporarily repairing
the tire with the kit, have the
tire repaired or replaced by
your Toyota dealer.
WARNING
■If you have a flat tire
Do not continue driving with a flat
tire.
Driving even a short distance with
a flat tire can damage the tire and
the wheel beyond repair, which
could result in an accident.
Before repairing the tire
Page 380 of 436
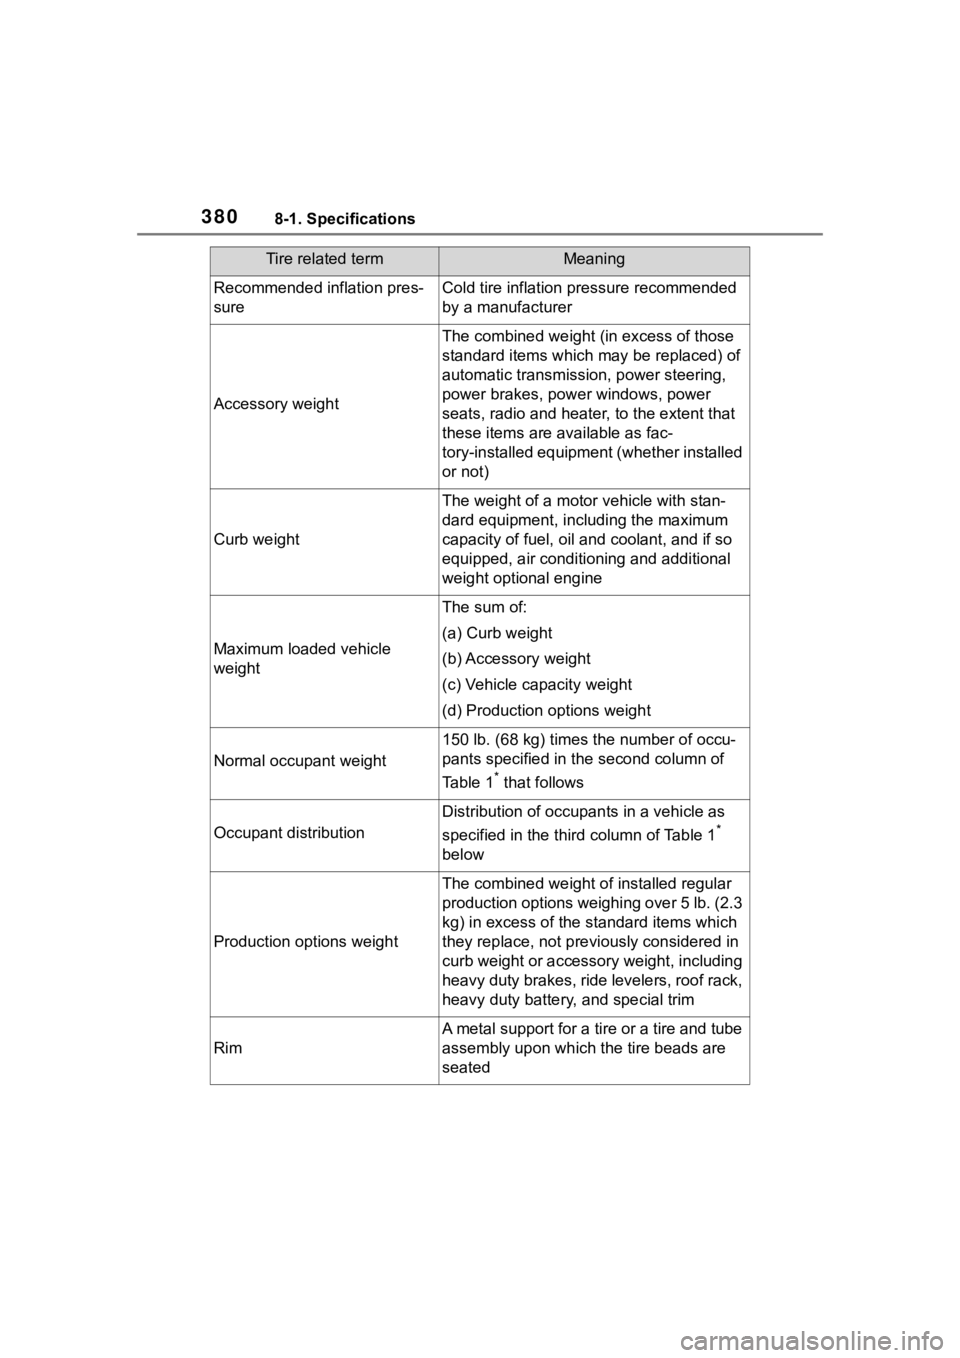
3808-1. Specifications
Recommended inflation pres-
sureCold tire inflation pressure recommended
by a manufacturer
Accessory weight
The combined weight (in excess of those
standard items which may be replaced) of
automatic transmission, power steering,
power brakes, power windows, power
seats, radio and heater, to the extent that
these items are available as fac-
tory-installed equipment (whether installed
or not)
Curb weight
The weight of a motor vehicle with stan-
dard equipment, including the maximum
capacity of fuel, oil and coolant, and if so
equipped, air conditioning and additional
weight optional engine
Maximum loaded vehicle
weight
The sum of:
(a) Curb weight
(b) Accessory weight
(c) Vehicle capacity weight
(d) Production options weight
Normal occupant weight
150 lb. (68 kg) times the number of occu-
pants specified in the second column of
Table 1
* that follows
Occupant distribution
Distribution of occupan ts in a vehicle as
specified in the thi rd column of Table 1
*
below
Production options weight
The combined weight o f installed regular
production options weighing over 5 lb. (2.3
kg) in excess of the s tandard items which
they replace, not previously considered in
curb weight or accessory weight, including
heavy duty brakes, ride levelers, roof rack,
heavy duty battery, and special trim
Rim
A metal support for a tire or a tire and tube
assembly upon which the tire beads are
seated
Tire related termMeaning