warning light TOYOTA COROLLA HATCHBACK 2023 Manual PDF
[x] Cancel search | Manufacturer: TOYOTA, Model Year: 2023, Model line: COROLLA HATCHBACK, Model: TOYOTA COROLLA HATCHBACK 2023Pages: 436, PDF Size: 8.72 MB
Page 296 of 436

2966-3. Do-it-yourself maintenance
8Select “OK” and then press
.
The tire pressure warning light will
slowly blink 3 times and a message
indicating that ID code registration
is being performed will be displayed
on the multi-inform ation display.
Wheel set changing will be can-
celed and registration will begin.
When registration is being per-
formed, the tire pressure warning
light will blink for approximately 1
minute then illuminate and “---” will
be displayed for the inflation pres-
sure of each tire on the multi-infor-
mation display.
9 Drive straight (with occa-
sional left and right turns) at
approximately 25 mph (40
km/h) or more for approxi-
mately 10 to 30 minutes.
When registration is complete, the
tire pressure warni ng light will turn
off and a message indicating that
registration has been completed
will be displayed on the multi-infor-
mation display.
Registration may take longer than
normal to complete if the vehicle
speed cannot be maintained at
approximately 25 mph (40 km/h) or
more. If registration cannot be com-
pleted after driving for 1 hour or
more, perform the registration pro-
cedure again from the beginning.
10 If the tire inflation pressure of
the wheel set installed differs
from that of the previous set,
it will be necessary to per-
form the tire inflation pres-
sure setting procedure of the
tire pressure warning system.
If the specified tire inflation pres-
sure is the same, i t will not be nec-
essary to perform the tire inflation
pressure setting procedure.
■When registering ID codes
●Normally, ID codes registration
can be completed within approxi-
mately 30 minutes.
●ID code registrati on is performed
while driving at a vehicle speed of
approximately 25 mph (40 km/h)
or more.
■If ID codes are not registered
easily
●In the following situations, ID code
registration may take longer than
usual to be completed or may not
be possible.
• When the vehicle has not been
parked for approximately 20 min-
utes or more before being driven
• Vehicle is not dr iven at approxi-
mately 25 mph (40 km/h) or more
• Vehicle is driven on unpaved roads
• Vehicle is driven near other vehi-
cles and system cannot recog-
nize tire pressure warning valve
and transmitters o f your vehicle
over those of other vehicles
• Wheel with tire p ressure warning
valve and transmitter installed is
inside or near the vehicle
●If the vehicle is reversed during
registration, all data collected until
then will be cleared. Perform driv-
ing again.
●If the tire pressur e warning light
does not blink 3 times when start-
ing ID code registration proce-
dure to step 8, the procedure may
not have started. Perform the pro-
cedure again from the beginning.
●If registration does not complete
after driving for 1 hour or more,
perform the ID code registration
procedure again from the begin-
ning.
●If the ID codes c annot be regis-
tered even when performing the
above procedure, contact your
Toyota dealer.
Page 297 of 436
2976-3. Do-it-yourself maintenance
6
Maintenance and care
■Canceling ID code registration
To cancel ID code registration after
it has been started, select “Register
Valve / ID” again on the multi-infor-
mation display.
If ID code registration has been can-
celed, the tire pressure warning light
will turn off.
If the warning light does not turn off,
ID code registration may not have
been cancelled corr ectly. To cancel
registration, selec t “Register Valve /
ID” on the multi-information display.
Your vehicle is equipped with a
tire pressure warning system
with a function to register two
sets of ID codes. This allows for
registration of a second wheel
set, for example a winter set.
The wheel set can be changed
only if a second wheel set has
been registered to the system. If
a second wheel set has not
been registered, it will not be
possible to change to the
selected wheel set.
ID codes can be registered by
yourself.
Only a change between both
registered wheel set is possi-
ble, mixing between these
wheel sets is not supported.
While registering ID codes, it
may not be possible to
change between wheel sets
normally. Cancel registration
before changing between
wheel sets.
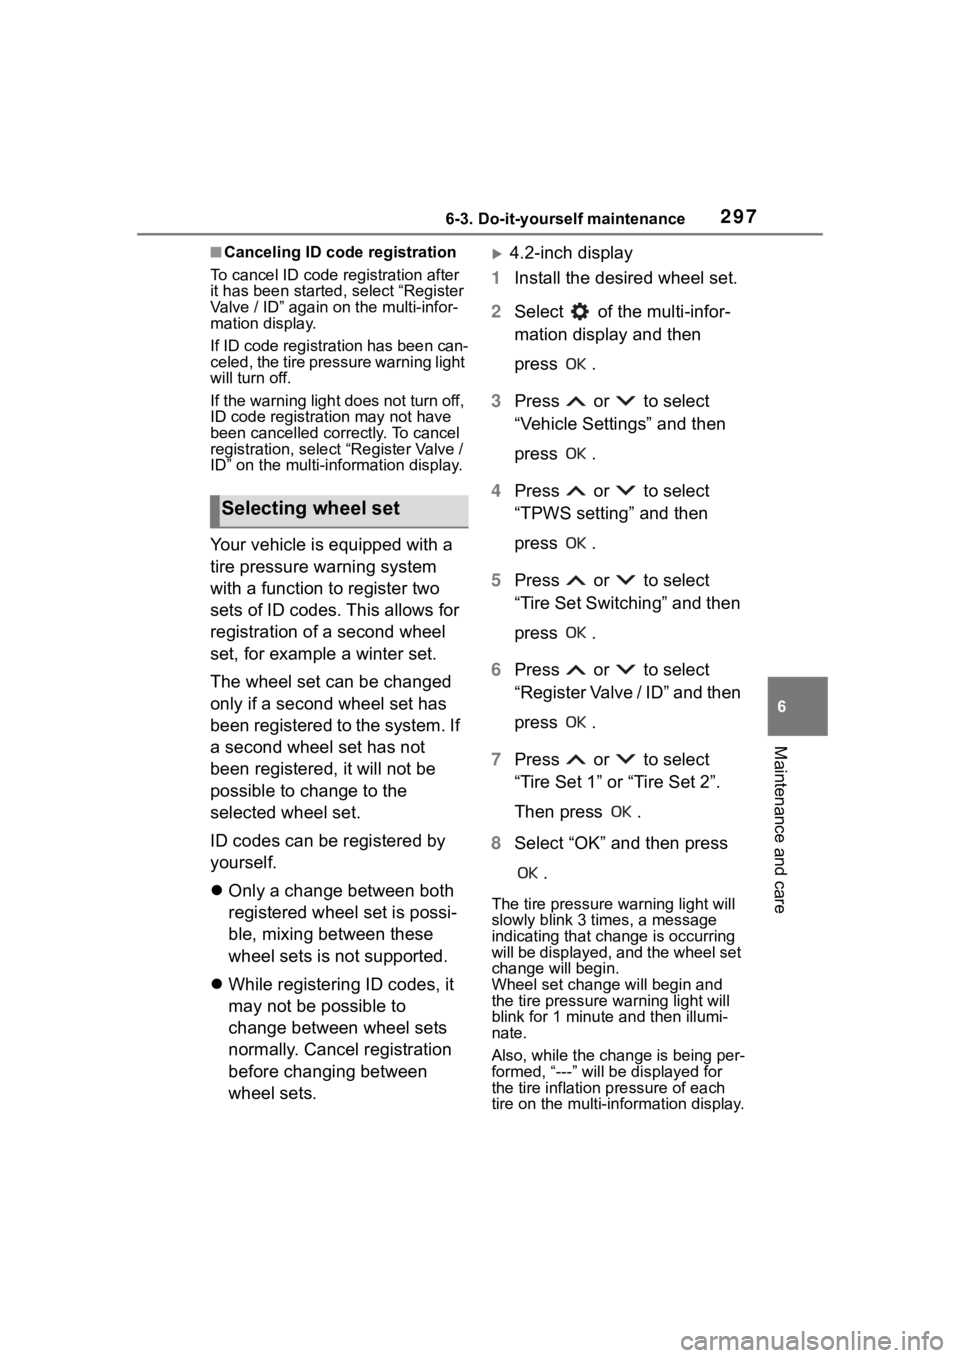
4.2-inch display
1 Install the desired wheel set.
2 Select of the multi-infor-
mation display and then
press .
3 Press or to select
“Vehicle Settings” and then
press .
4 Press or to select
“TPWS setting” and then
press .
5 Press or to select
“Tire Set Switching” and then
press .
6 Press or to select
“Register Valve / ID” and then
press .
7 Press or to select
“Tire Set 1” or “Tire Set 2”.
Then press .
8 Select “OK” and then press
.
The tire pressure warning light will
slowly blink 3 ti mes, a message
indicating that change is occurring
will be displayed, and the wheel set
change will begin.
Wheel set change will begin and
the tire pressure warning light will
blink for 1 minute and then illumi-
nate.
Also, while the change is being per-
formed, “---” will be displayed for
the tire inflation pressure of each
tire on the multi-in formation display.
Selecting wheel set
Page 298 of 436
2986-3. Do-it-yourself maintenance
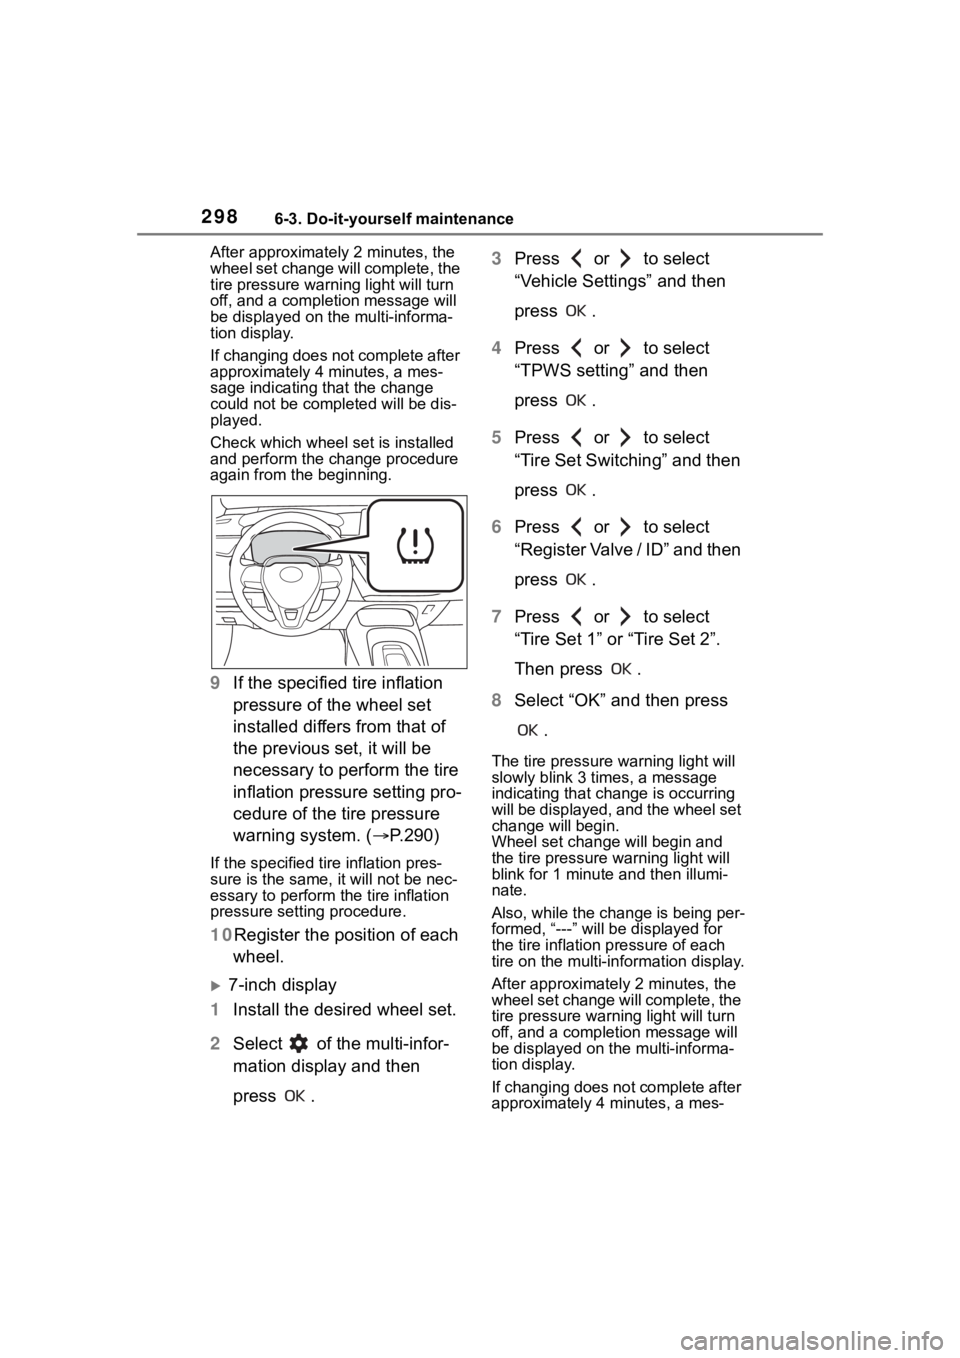
After approximately 2 minutes, the
wheel set change will complete, the
tire pressure warni ng light will turn
off, and a completion message will
be displayed on the multi-informa-
tion display.
If changing does not complete after
approximately 4 minutes, a mes-
sage indicating that the change
could not be compl eted will be dis-
played.
Check which wheel set is installed
and perform the change procedure
again from the beginning.
9 If the specified tire inflation
pressure of the wheel set
installed differs from that of
the previous set, it will be
necessary to perform the tire
inflation pressure setting pro-
cedure of the tire pressure
warning system. ( P.290)
If the specified tire inflation pres-
sure is the same, i t will not be nec-
essary to perform the tire inflation
pressure setting procedure.
10 Register the position of each
wheel.
7-inch display
1 Install the desired wheel set.
2 Select of the multi-infor-
mation display and then
press . 3
Press or to select
“Vehicle Settings” and then
press .
4 Press or to select
“TPWS setting” and then
press .
5 Press or to select
“Tire Set Switching” and then
press .
6 Press or to select
“Register Valve / ID” and then
press .
7 Press or to select
“Tire Set 1” or “Tire Set 2”.
Then press .
8 Select “OK” and then press
.
The tire pressure warning light will
slowly blink 3 ti mes, a message
indicating that change is occurring
will be displayed, and the wheel set
change will begin.
Wheel set change will begin and
the tire pressure warning light will
blink for 1 minute and then illumi-
nate.
Also, while the change is being per-
formed, “---” will be displayed for
the tire inflation pressure of each
tire on the multi-in formation display.
After approximatel y 2 minutes, the
wheel set change will complete, the
tire pressure warn ing light will turn
off, and a completion message will
be displayed on the multi-informa-
tion display.
If changing does not complete after
approximately 4 minutes, a mes-
Page 308 of 436
3086-3. Do-it-yourself maintenance
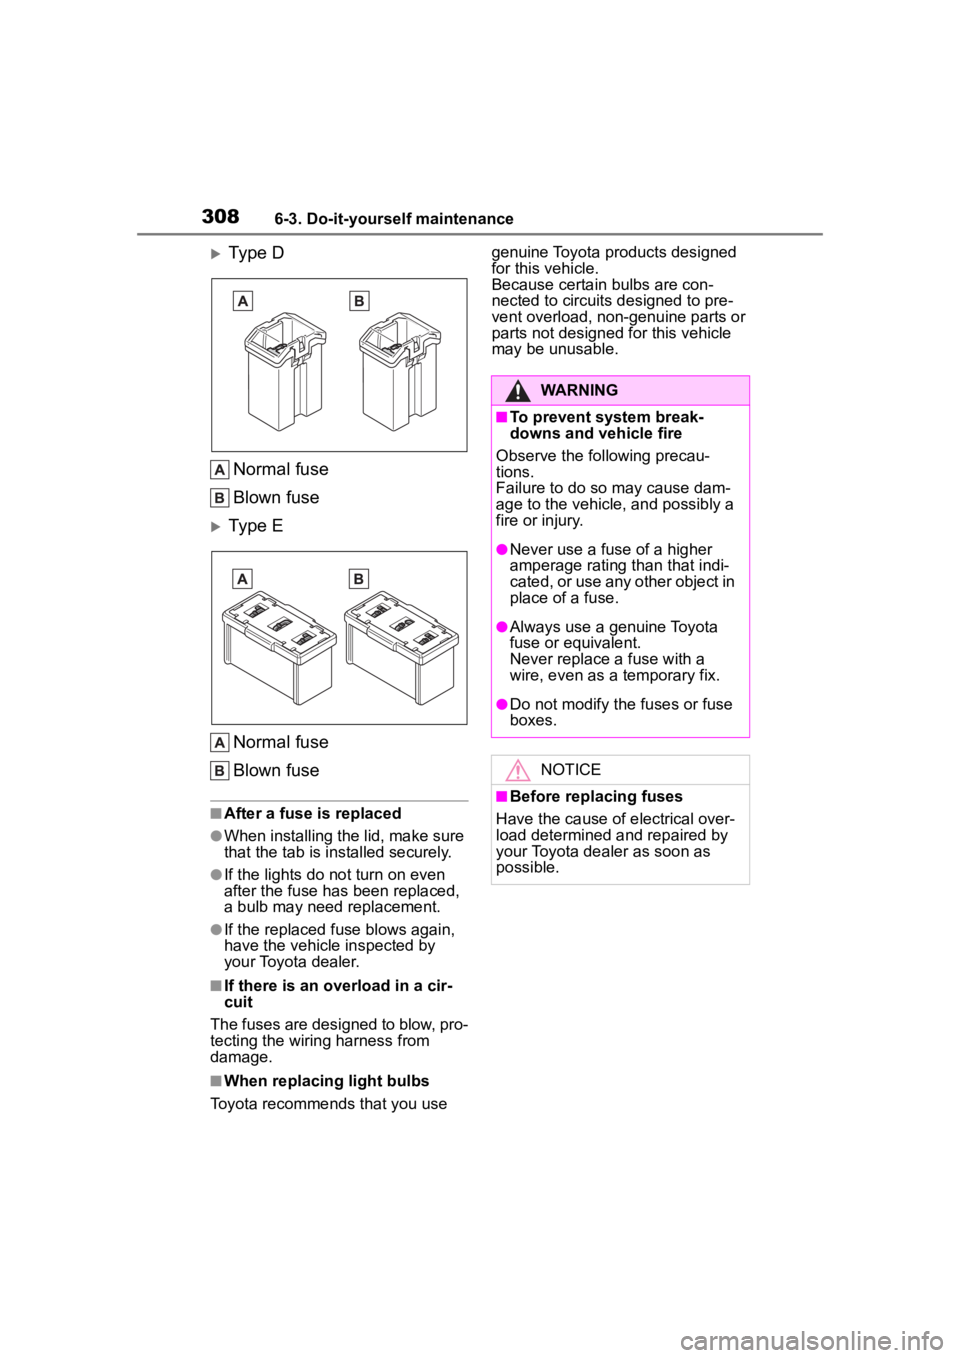
Type D
Normal fuse
Blown fuse
Type E
Normal fuse
Blown fuse
■After a fuse is replaced
●When installing the lid, make sure
that the tab is installed securely.
●If the lights do n ot turn on even
after the fuse has been replaced,
a bulb may need replacement.
●If the replaced fuse blows again,
have the vehicle inspected by
your Toyota dealer.
■If there is an overload in a cir-
cuit
The fuses are designed to blow, pro-
tecting the wiring harness from
damage.
■When replacing light bulbs
Toyota recommends that you use genuine Toyota pr
oducts designed
for this vehicle.
Because certain bulbs are con-
nected to circuits designed to pre-
vent overload, non-genuine parts or
parts not designed for this vehicle
may be unusable.
WARNING
■To prevent system break-
downs and vehicle fire
Observe the following precau-
tions.
Failure to do so may cause dam-
age to the vehicle, and possibly a
fire or injury.
●Never use a fuse of a higher
amperage rating than that indi-
cated, or use any other object in
place of a fuse.
●Always use a genuine Toyota
fuse or equivalent.
Never replace a fuse with a
wire, even as a temporary fix.
●Do not modify the fuses or fuse
boxes.
NOTICE
■Before replacing fuses
Have the cause of electrical over-
load determined and repaired by
your Toyota dealer as soon as
possible.
Page 310 of 436
3106-3. Do-it-yourself maintenance
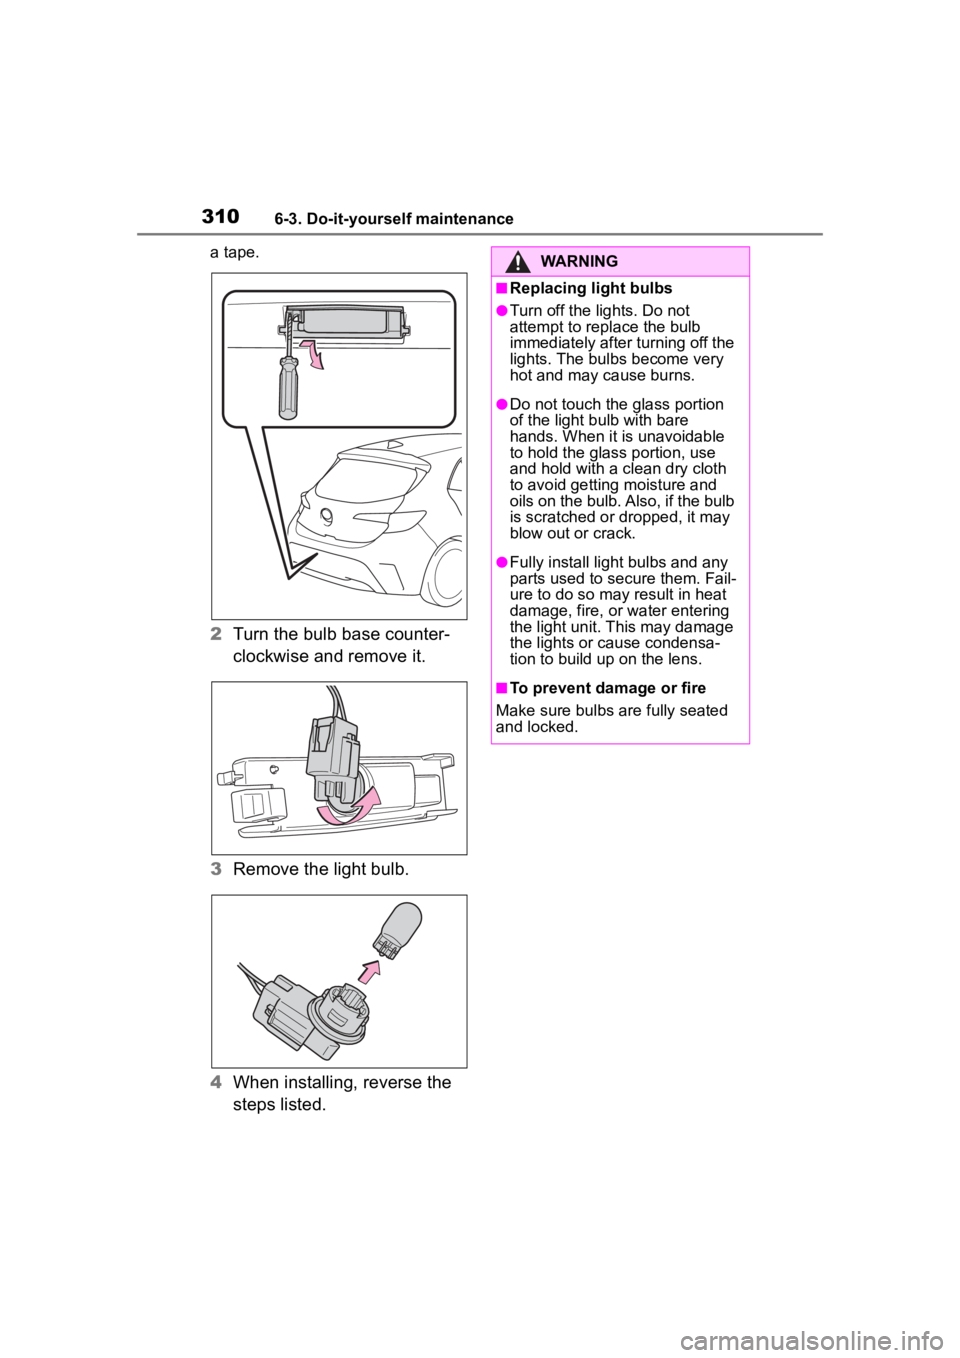
a tape.
2Turn the bulb base counter-
clockwise and remove it.
3 Remove the light bulb.
4 When installing, reverse the
steps listed.
WARNING
■Replacing light bulbs
●Turn off the lights. Do not
attempt to replace the bulb
immediately after turning off the
lights. The bulbs become very
hot and may cause burns.
●Do not touch the glass portion
of the light bulb with bare
hands. When it is unavoidable
to hold the glass portion, use
and hold with a clean dry cloth
to avoid getting moisture and
oils on the bulb. Also, if the bulb
is scratched or dropped, it may
blow out or crack.
●Fully install light bulbs and any
parts used to secure them. Fail-
ure to do so may result in heat
damage, fire, or water entering
the light unit. This may damage
the lights or cause condensa-
tion to build up on the lens.
■To prevent damage or fire
Make sure bulbs are fully seated
and locked.
Page 311 of 436
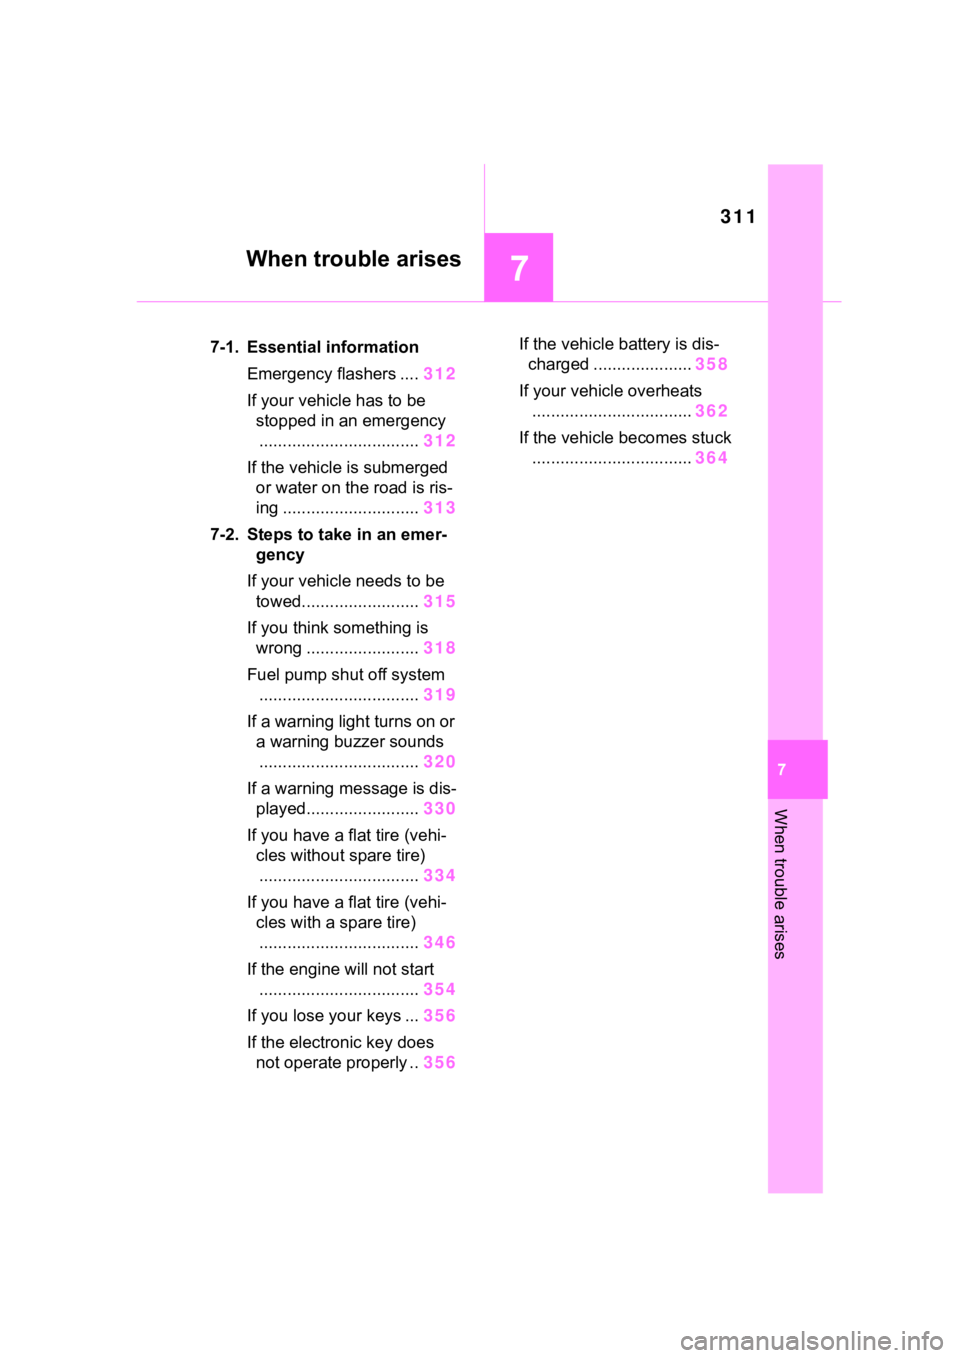
311
7
7
When trouble arises
When trouble arises
.7-1. Essential informationEmergency flashers .... 312
If your vehicle has to be stopped in an emergency.................................. 312
If the vehicle is submerged or water on the road is ris-
ing ............................. 313
7-2. Steps to take in an emer- gency
If your vehicle needs to be towed......................... 315
If you think something is wrong ........................ 318
Fuel pump shut off system .................................. 319
If a warning light turns on or a warning buzzer sounds.................................. 320
If a warning message is dis- played........................ 330
If you have a flat tire (vehi- cles without spare tire).................................. 334
If you have a flat tire (vehi- cles with a spare tire).................................. 346
If the engine will not start .................................. 354
If you lose your keys ... 356
If the electronic key does not operate properly .. 356If the vehicle
battery is dis-
charged ..................... 358
If your vehicle overheats .................................. 362
If the vehicle becomes stuck .................................. 364
Page 320 of 436
3207-2. Steps to take in an emergency
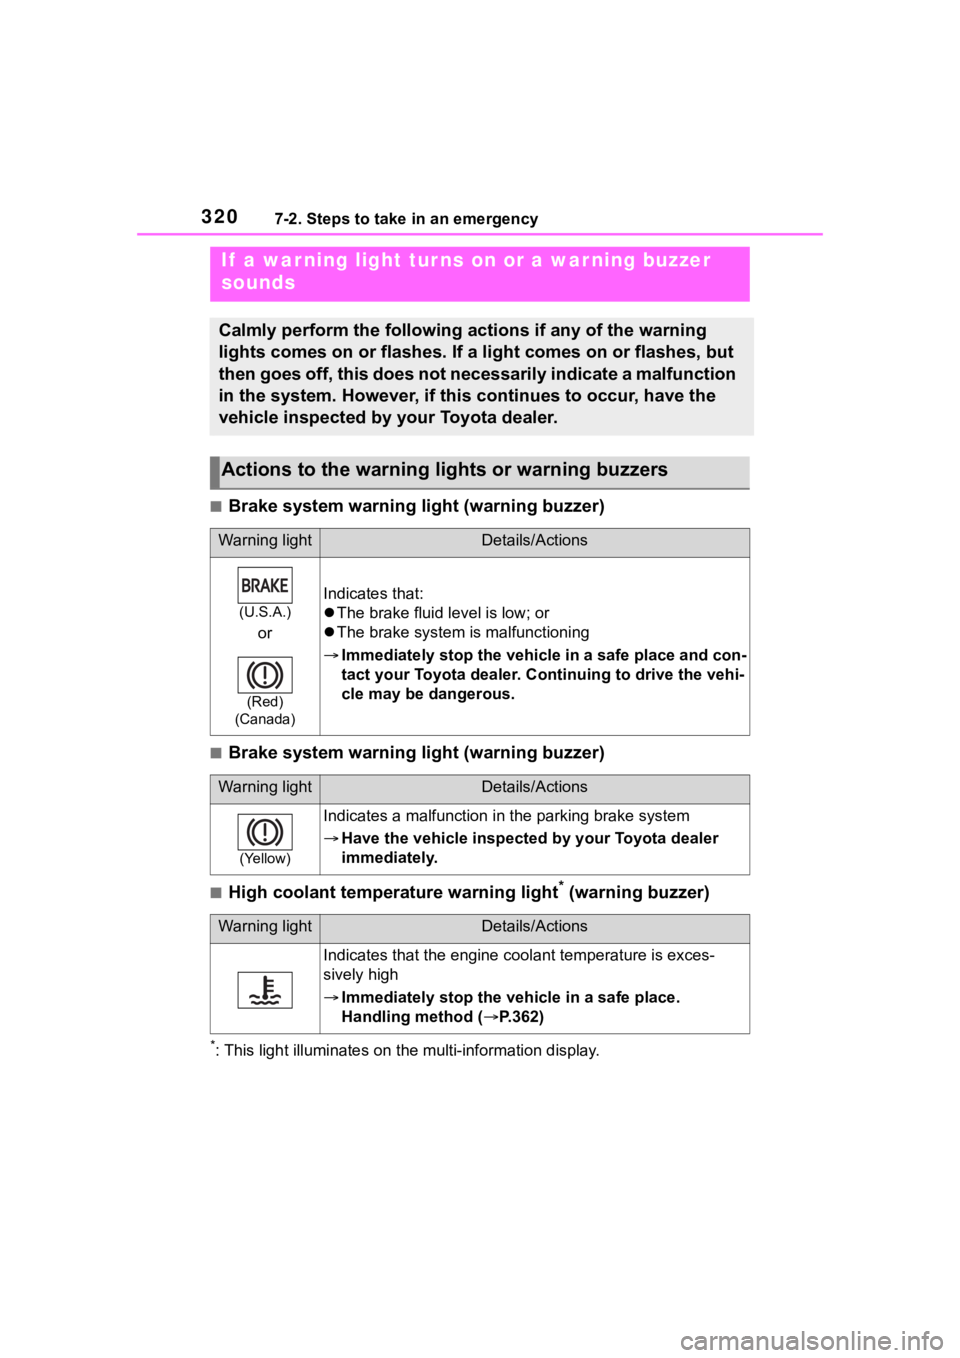
■Brake system warning light (warning buzzer)
■Brake system warning light (warning buzzer)
■High coolant temperature warning light* (warning buzzer)
*: This light illuminat es on the multi-information display.
If a war ning light tur ns on or a war ning buzzer
sounds
Calmly perform the following actions if any of the warning
lights comes on or flashes. If a light comes on or flashes, but
then goes off, this does not necessarily indicate a malfunction
in the system. However, if this continues to occur, have the
vehicle inspected by your Toyota dealer.
Actions to the warning lights or warning buzzers
Warning lightDetails/Actions
(U.S.A.)
or
(Red)
(Canada)
Indicates that:
The brake fluid level is low; or
The brake system is malfunctioning
Immediately stop the vehicle in a safe place and con-
tact your Toyota dealer. Continuing to drive the vehi-
cle may be dangerous.
Warning lightDetails/Actions
(Yellow)
Indicates a malfunction i n the parking brake system
Have the vehicle inspected by your Toyota dealer
immediately.
Warning lightDetails/Actions
Indicates that the engine c oolant temperature is exces-
sively high
Immediately stop the vehicle in a safe place.
Handling method ( P.362)
Page 321 of 436
3217-2. Steps to take in an emergency
7
When trouble arises
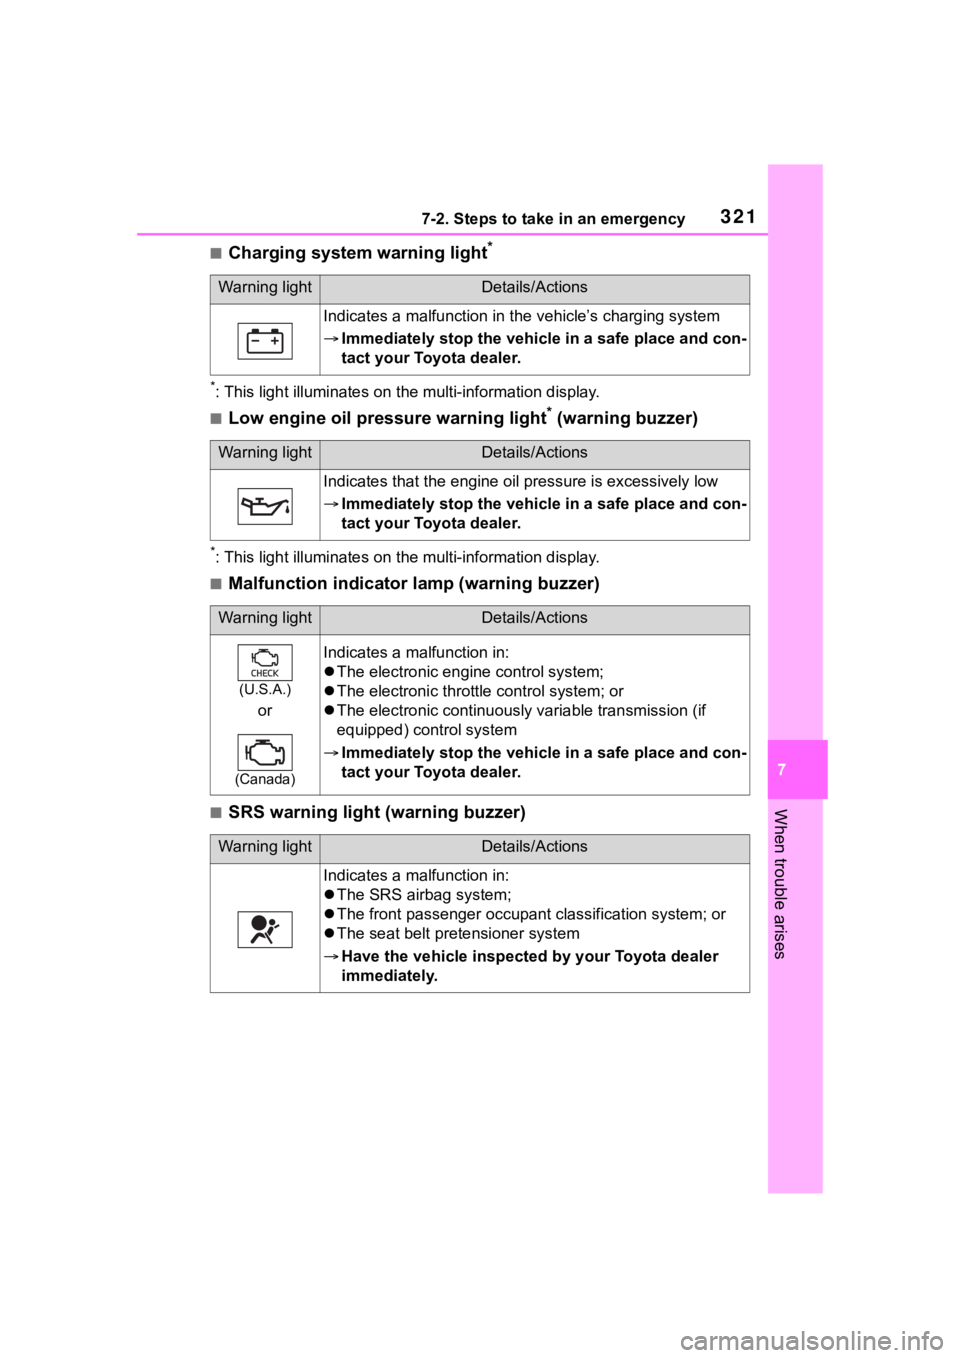
■Charging system warning light*
*: This light illuminat es on the multi-information display.
■Low engine oil pressure warning light* (warning buzzer)
*: This light illuminates on the multi-information display.
■Malfunction indicator lamp (warning buzzer)
■SRS warning light (warning buzzer)
Warning lightDetails/Actions
Indicates a malfunction in the vehicle’s charging system
Immediately stop the vehicle in a safe place and con-
tact your Toyota dealer.
Warning lightDetails/Actions
Indicates that the engine oil pressure is excessively low
Immediately stop the vehicle in a safe place and con-
tact your Toyota dealer.
Warning lightDetails/Actions
(U.S.A.)
or
(Canada)
Indicates a malfunction in:
The electronic engine control system;
The electronic throttle control system; or
The electronic continuousl y variable transmission (if
equipped) control system
Immediately stop the vehicle in a safe place and con-
tact your Toyota dealer.
Warning lightDetails/Actions
Indicates a malfunction in:
The SRS airb ag system;
The front passenger occupan t classification system; or
The seat belt pretensioner system
Have the vehicle inspected by your Toyota dealer
immediately.
Page 322 of 436
3227-2. Steps to take in an emergency
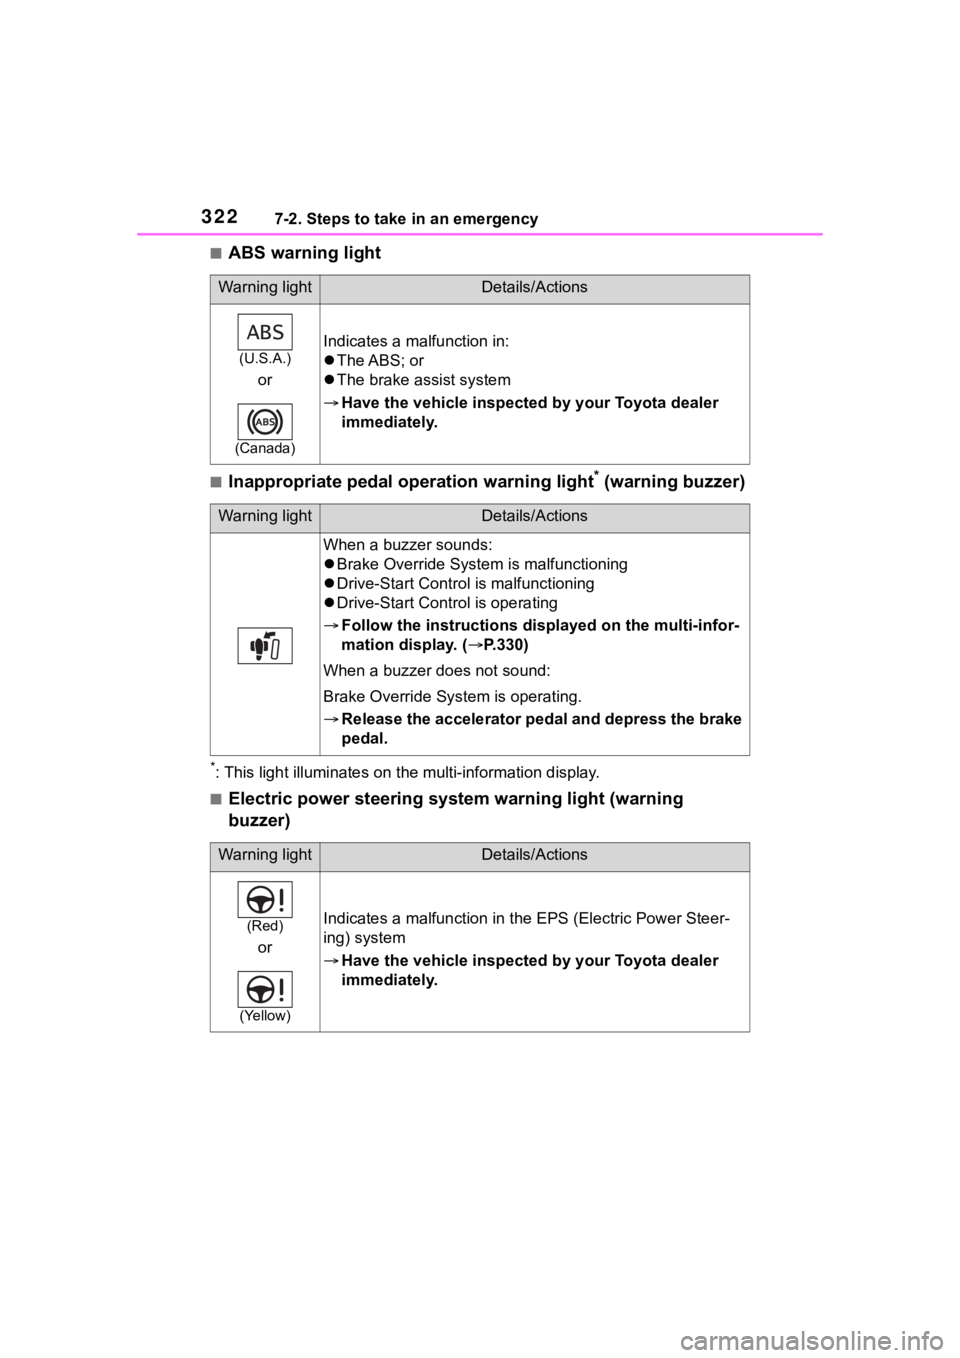
■ABS warning light
■Inappropriate pedal operation warning light* (warning buzzer)
*: This light illuminat es on the multi-information display.
■Electric power steering system warning light (warning
buzzer)
Warning lightDetails/Actions
(U.S.A.)
or
(Canada)
Indicates a malfunction in:
The ABS; or
The brake assist system
Have the vehicle inspected by your Toyota dealer
immediately.
Warning lightDetails/Actions
When a buzzer sounds:
Brake Override System is malfunctioning
Drive-Start Control is malfunctioning
Drive-Start Cont rol is operating
Follow the instructions di splayed on the multi-infor-
mation display. ( P.330)
When a buzzer does not sound:
Brake Override System is operating.
Release the accelerator pedal and depress the brake
pedal.
Warning lightDetails/Actions
(Red)
or
(Yellow)
Indicates a malfunction in th e EPS (Electric Power Steer-
ing) system
Have the vehicle inspected by your Toyota dealer
immediately.
Page 323 of 436
3237-2. Steps to take in an emergency
7
When trouble arises
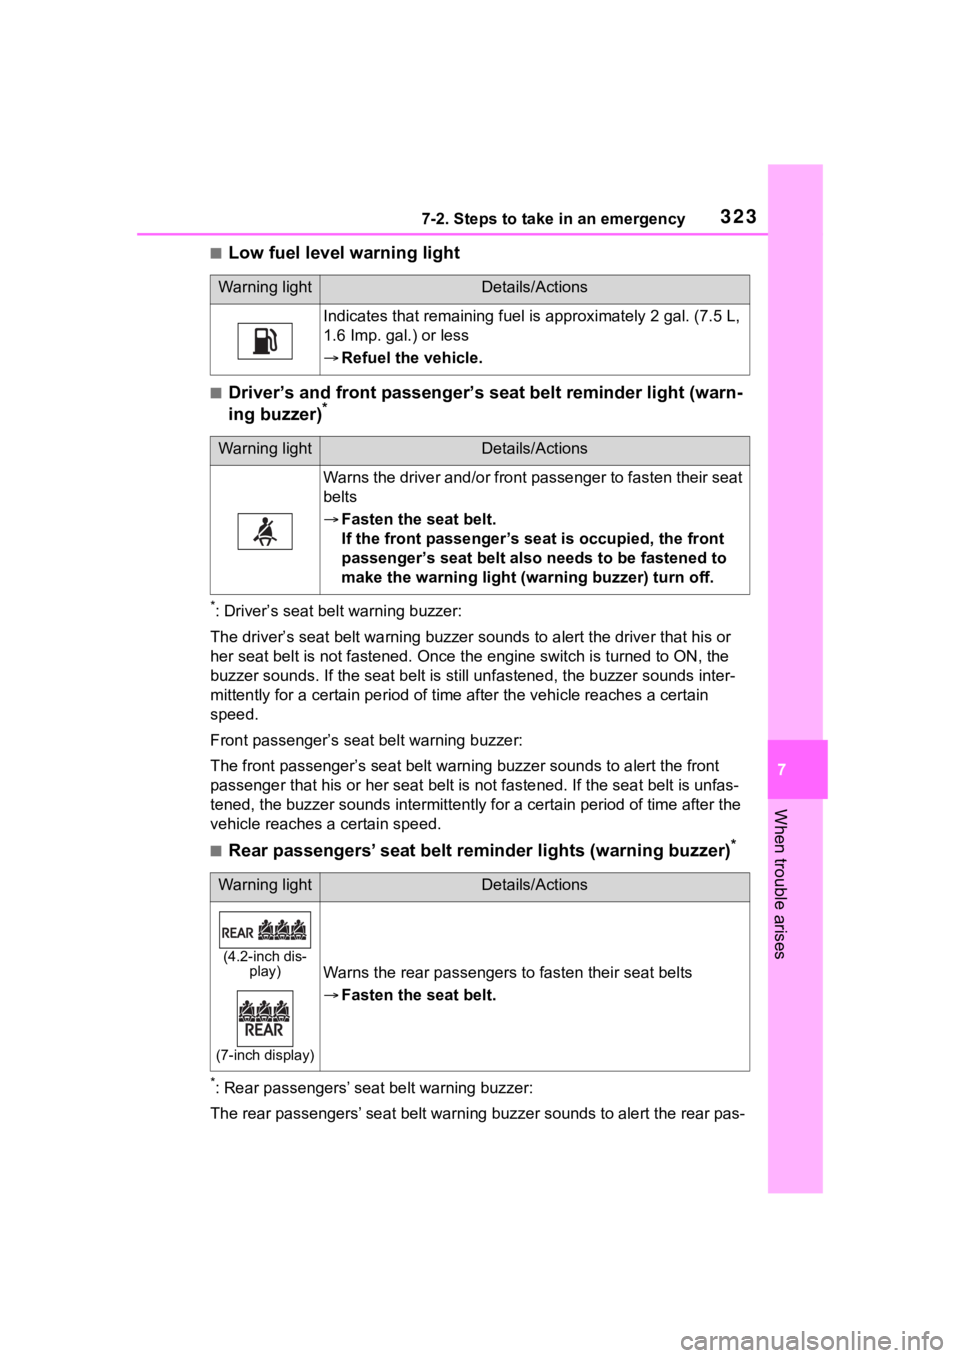
■Low fuel level warning light
■Driver’s and front passenger’s seat belt reminder light (warn-
ing buzzer)*
*: Driver’s seat belt warning buzzer:
The driver’s seat belt warning buzzer sounds to alert the driver that his or
her seat belt is not fastened. O nce the engine switch is turned to ON, the
buzzer sounds. If the seat belt is still un fastened, the buzzer sounds inter-
mittently for a certain period of time after the vehicle reache s a certain
speed.
Front passenger’s seat belt warning buzzer:
The front passenger’s seat belt w arning buzzer sounds to alert the front
passenger that his or her seat belt is not fastened. If the seat belt is unfas-
tened, the buzzer sounds intermittently for a certain period of time after the
vehicle reaches a certain speed.
■Rear passengers’ seat belt reminder lights (warning buzzer)*
*: Rear passengers’ seat belt warning buzzer:
The rear passengers’ seat belt warning buzzer sounds to alert t he rear pas-
Warning lightDetails/Actions
Indicates that remaining fuel is approximately 2 gal. (7.5 L,
1.6 Imp. gal.) or less
Refuel the vehicle.
Warning lightDetails/Actions
Warns the driver and/or front passenger to fasten their seat
belts
Fasten the seat belt.
If the front passenger’s se at is occupied, the front
passenger’s seat belt also needs to be fastened to
make the warning light (w arning buzzer) turn off.
Warning lightDetails/Actions
(4.2-inch dis-
play)
(7-inch display)
Warns the rear passengers to fasten their seat belts
Fasten the seat belt.