check engine light TOYOTA COROLLA HATCHBACK 2023 Owners Manual
[x] Cancel search | Manufacturer: TOYOTA, Model Year: 2023, Model line: COROLLA HATCHBACK, Model: TOYOTA COROLLA HATCHBACK 2023Pages: 436, PDF Size: 8.72 MB
Page 4 of 436

4TABLE OF CONTENTS
Electronic key battery .........304
Checking and replacing fuses ......................................... 306
Light bulbs .......................... 309
7-1. Essential information Emergency flashers ........... 312
If your vehicle has to be stopped in an emergency .............. 312
If the vehicle is submerged or water on the road is rising......................................... 313
7-2. Steps to take in an emergency If your vehicle needs to be towed......................................... 315
If you think something is wrong ......................................... 318
Fuel pump shut off system ......................................... 319
If a warning light turns on or a warning buzzer sounds .... 320
If a warning message is dis- played .............................. 330
If you have a flat tire (vehicles without spare tire) ............ 334
If you have a flat tire (vehicles with a spare tire) .............. 346
If the engine will not start ... 354
If you lose your keys .......... 356
If the electronic key does not operate properly ............... 356
If the vehicle battery is dis- charged ............................ 358
If your vehicle overheats .... 362
If the vehicle becomes stuck ......................................... 3648-1. Specifications
Maintenance data (fuel, oil level, etc.) .................................. 366
Fuel information ................. 373
Tire information .................. 375
8-2. Customization Customizable features ....... 386
8-3. Initialization Items to initialize ................ 395
9-1. For owners Reporting safety defects for U.S. owners ............................. 398
Reporting safety defects for Canadian owners ............. 398
Seat belt instructions for Cana- dian owners (in French) ... 399
SRS airbag instructions for Canadian owners (in French)......................................... 400
What to do if... (Troubleshooting) ......................................... 408
Alphabetical Index.............. 411
7When trouble arises
8Vehicle specifications
9For owners
Index
Page 14 of 436
14Pictorial index
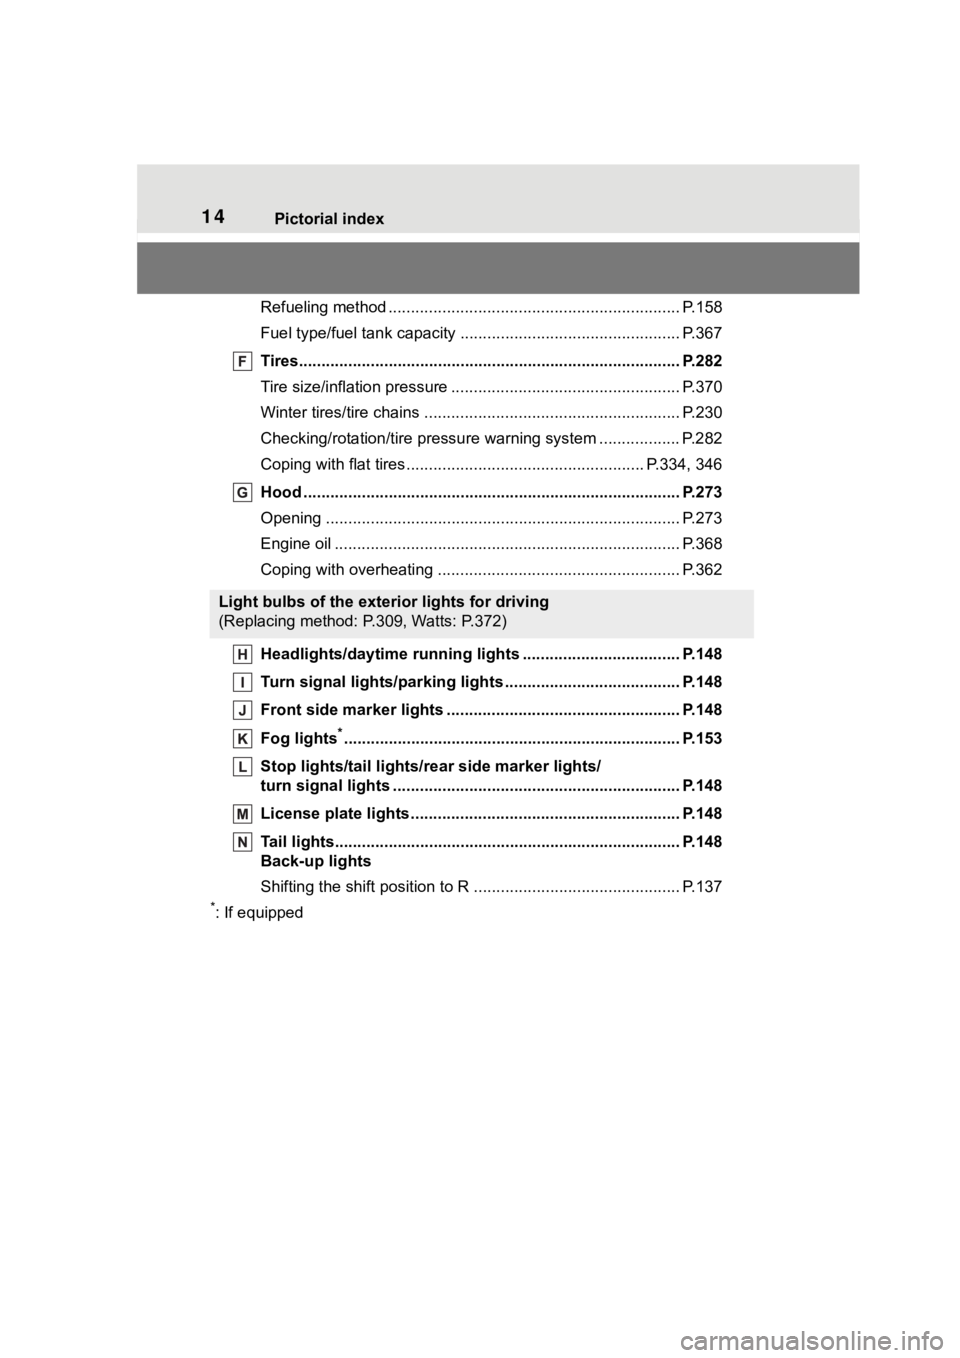
Refueling method ................................................................. P.158
Fuel type/fuel tan k capacity ................................... .............. P.367
Tires.......................................................... ........................... P.282
Tire size/inflation pressure ................................... ................ P.370
Winter tires/tire chains ....................................... .................. P.230
Checking/rotation/tire pressur e warning system ..................P.282
Coping with flat tires......................................... ............ P.334, 346
Hood ........................................................... ......................... P.273
Opening ............................................................................... P.273
Engine oil ..................................................... ........................ P.368
Coping with overheating ...................................................... P.362
Headlights/daytime running lights .............................. ..... P.148
Turn signal lights/parking lights .............................. ......... P.148
Front side marker lights ....................................... ............. P.148
Fog lights
*............................................................... ............ P.153
Stop lights/tail lights/ rear side marker lights/
turn signal lights ............................................. ................... P.148
License plate lights........................................... ................. P.148
Tail lights.................................................... ......................... P.148
Back-up lights
Shifting the shift position to R ............................... ............... P.137
*: If equipped
Light bulbs of the exterior lights for driving
(Replacing method: P.309, Watts: P.372)
Page 25 of 436
251-1. For safe use
1
For safety and security
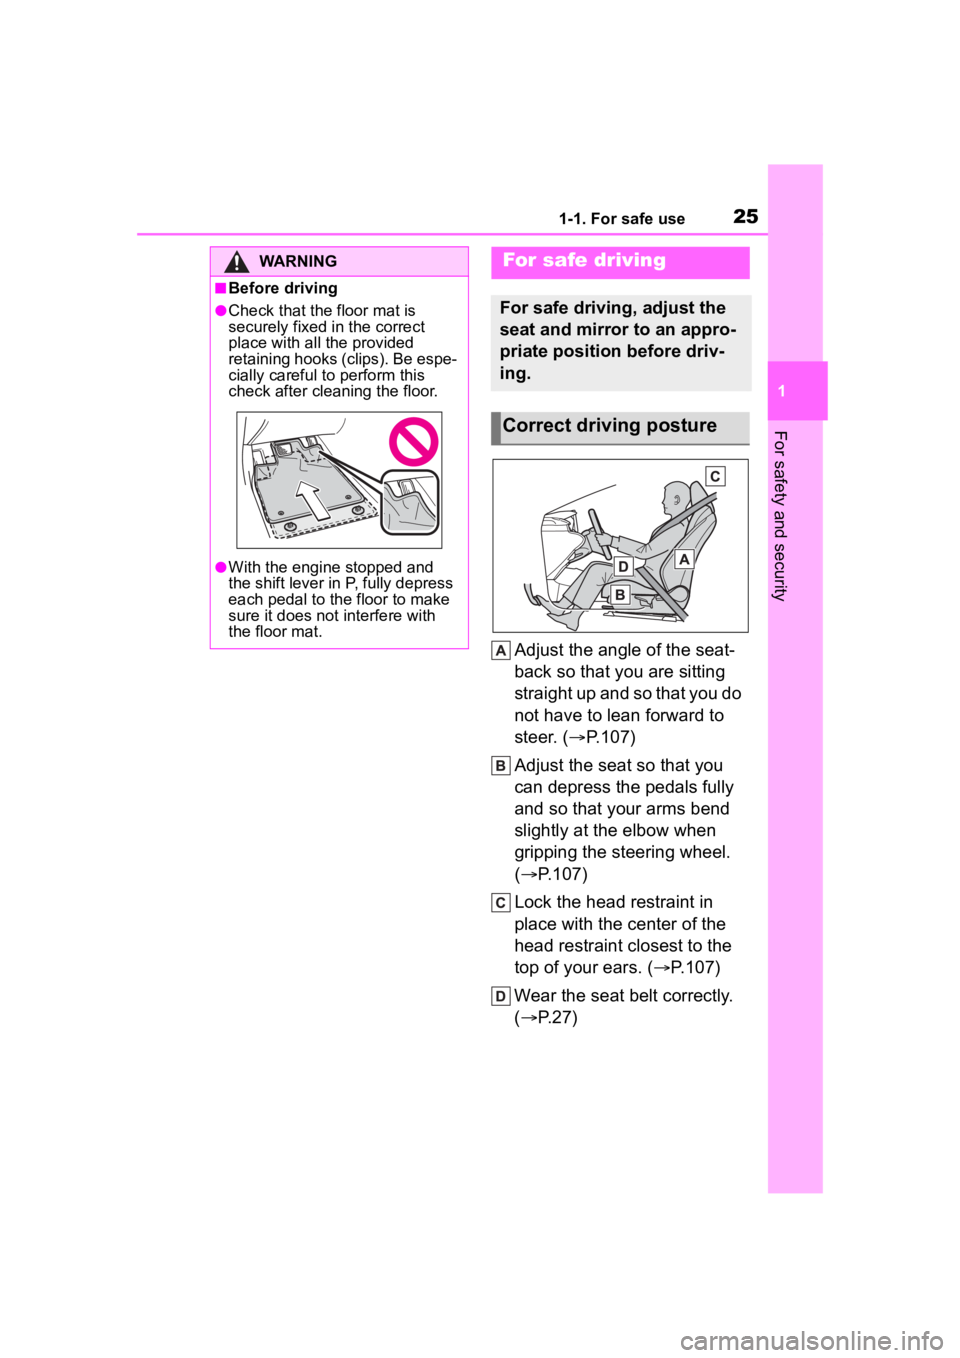
Adjust the angle of the seat-
back so that you are sitting
straight up and so that you do
not have to lean forward to
steer. (P.107)
Adjust the seat so that you
can depress the pedals fully
and so that your arms bend
slightly at the elbow when
gripping the steering wheel.
( P.107)
Lock the head restraint in
place with the center of the
head restraint closest to the
top of your ears. ( P.107)
Wear the seat belt correctly.
( P.27)
WARNING
■Before driving
●Check that the floor mat is
securely fixed in the correct
place with all the provided
retaining hooks (clips). Be espe-
cially careful to perform this
check after cleaning the floor.
●With the engine stopped and
the shift lever in P, fully depress
each pedal to the floor to make
sure it does not interfere with
the floor mat.
For safe driving
For safe driving, adjust the
seat and mirror to an appro-
priate position before driv-
ing.
Correct driving posture
Page 45 of 436
451-1. For safe use
1
For safety and security
Exhaust gas precau-
tions
Harmful substance to the
human body is included in
exhaust gases if inhaled.
WARNING
Exhaust gases include harmful
carbon monoxide (CO), which is
colorless and odorless. Observe
the following precautions.
Failure to do so may cause
exhaust gases enter the vehicle
and may lead to an accident
caused by light-headedness, or
may lead to death or a serious
health hazard.
■Important points while driving
●Keep the back door closed.
●If you smell exhaust gases in
the vehicle even when the back
door is closed, open the win-
dows and have the vehicle
inspected at your Toyota dealer
as soon as possible.
■When parking
●If the vehicle is in a poorly venti-
lated area or a closed area,
such as a garage, stop the
engine.
●Do not leave the vehicle with
the engine on for a long time.
If such a situation cannot be
avoided, park the vehicle in an
open space and ensure that
exhaust fumes do not enter the
vehicle interior.
●Do not leave the engine running
in an area with snow build-up,
or where it is snowing. If snow-
banks build up around the vehi-
cle while the engine is running,
exhaust gases may collect and
enter the vehicle.
■Exhaust pipe
The exhaust system needs to be
checked periodically. If there is a
hole or crack caused by corro-
sion, damage to a joint or abnor-
mal exhaust noise, be sure to
have the vehicle inspected and
repaired by your Toyota dealer.
Page 65 of 436
651-4. Theft deterrent system
1
For safety and security
*: If equipped
■Items to check before lock-
ing the vehicle
To prevent unexpected trigger-
ing of the alarm and vehicle
theft, make sure of the following:
Nobody is in the vehicle.
The windows are closed
before the alarm is set.
No valuables or other per-
sonal items are left in the
vehicle.
■Setting
Close the doors, back door and
hood, and lock all the doors.
The system will set automati-
cally after 30 seconds.
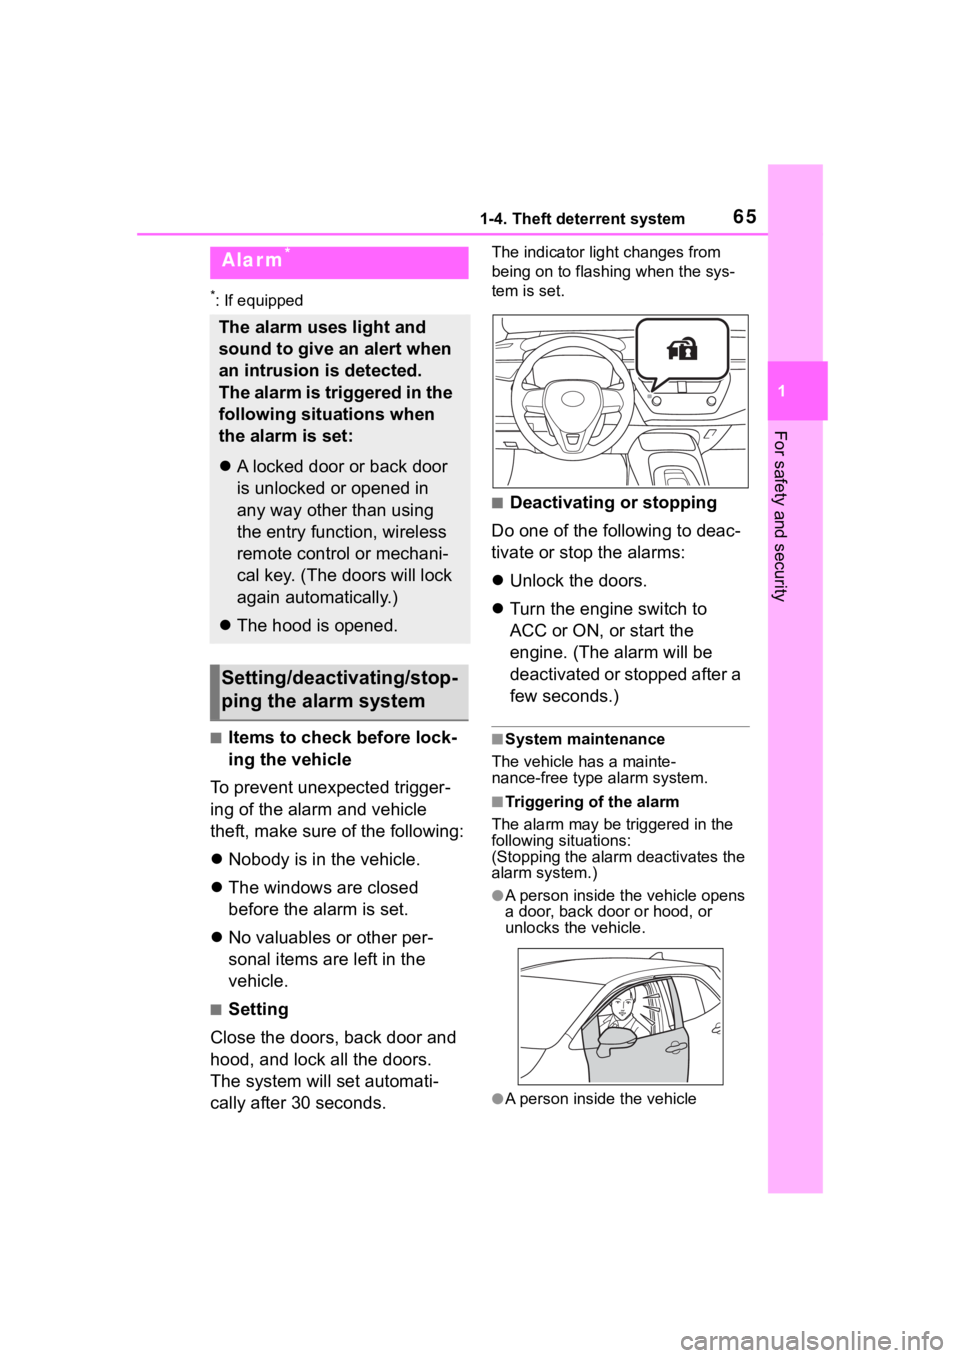
The indicator light changes from
being on to flashing when the sys-
tem is set.
■Deactivating or stopping
Do one of the following to deac-
tivate or stop the alarms:
Unlock the doors.
Turn the engine switch to
ACC or ON, or start the
engine. (The alarm will be
deactivated or stopped after a
few seconds.)
■System maintenance
The vehicle has a mainte-
nance-free type alarm system.
■Triggering of the alarm
The alarm may be triggered in the
following situations:
(Stopping the alarm deactivates the
alarm system.)
●A person inside the vehicle opens
a door, back door or hood, or
unlocks the vehicle.
●A person inside the vehicle
Alarm*
The alarm uses light and
sound to give an alert when
an intrusion is detected.
The alarm is triggered in the
following situations when
the alarm is set:
A locked door or back door
is unlocked or opened in
any way other than using
the entry function, wireless
remote control or mechani-
cal key. (The doors will lock
again automatically.)
The hood is opened.
Setting/deactivating/stop-
ping the alarm system
Page 70 of 436
702-1. Instrument cluster
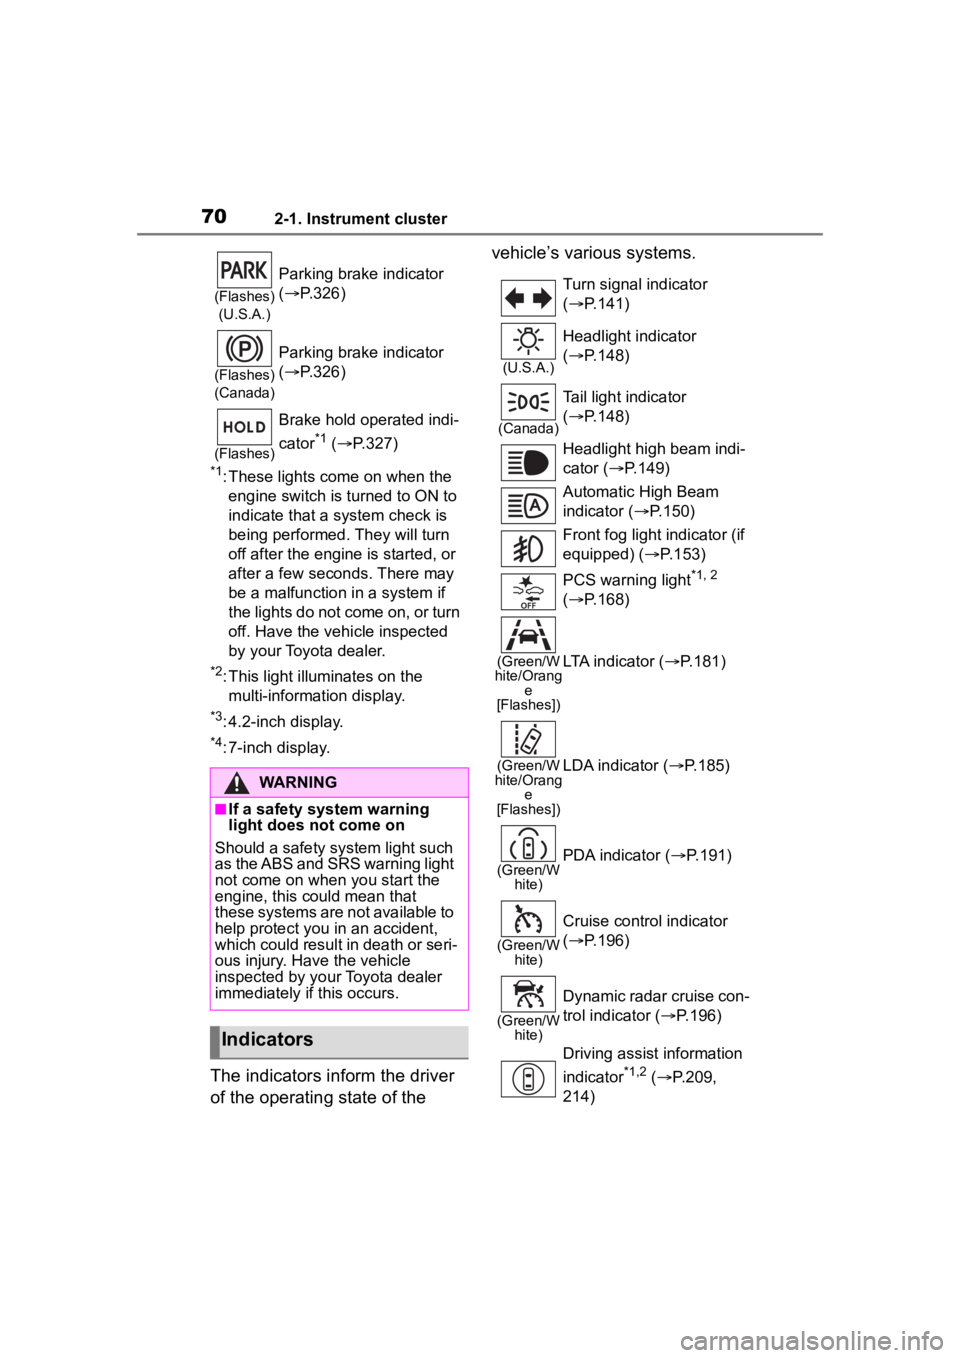
*1: These lights come on when the engine switch is turned to ON to
indicate that a system check is
being performed. They will turn
off after the engine is started, or
after a few seconds. There may
be a malfunction in a system if
the lights do not come on, or turn
off. Have the vehicle inspected
by your Toyota dealer.
*2: This light illuminates on the multi-information display.
*3: 4.2-inch display.
*4: 7-inch display.
The indicators inform the driver
of the operating state of the vehicle’s various systems.
(Flashes)
(U.S.A.)
Parking brake indicator
( P.326)
(Flashes)
(Canada)
Parking brake indicator
( P.326)
(Flashes)
Brake hold operated indi-
cator
*1 ( P.327)
WARNING
■If a safety system warning
light does not come on
Should a safety system light such
as the ABS and SRS warning light
not come on when you start the
engine, this could mean that
these systems are not available to
help protect you in an accident,
which could result in death or seri-
ous injury. Have the vehicle
inspected by your Toyota dealer
immediately if this occurs.
Indicators
Turn signal indicator
( P.141)
(U.S.A.)
Headlight indicator
( P.148)
(Canada)
Tail light indicator
( P.148)
Headlight high beam indi-
cator ( P.149)
Automatic High Beam
indicator ( P.150)
Front fog light indicator (if
equipped) ( P.153)
PCS warning light
*1, 2
( P.168)
(Green/W
hite/Orang e
[Flashes])LTA indicator ( P.181)
(Green/W
hite/Orang e
[Flashes])LDA indicator ( P.185)
(Green/W
hite)PDA indicator ( P.191)
(Green/W
hite)
Cruise control indicator
( P.196)
(Green/W
hite)
Dynamic radar cruise con-
trol indicator ( P.196)
Driving assist information
indicator
*1,2 ( P.209,
214)
Page 71 of 436
712-1. Instrument cluster
2
Vehicle status information and indicators
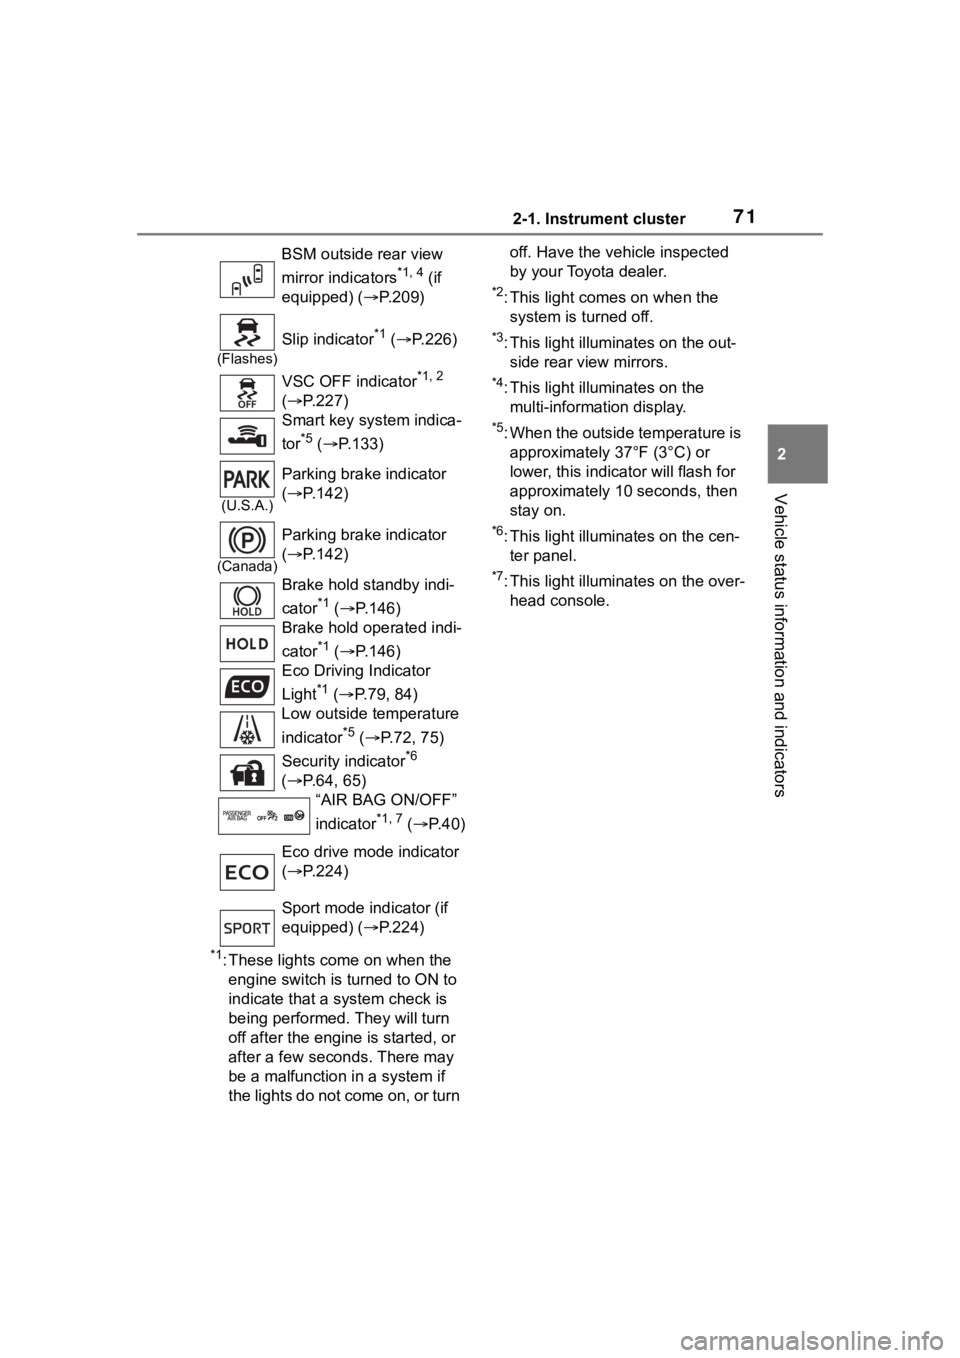
*1: These lights come on when the engine switch is turned to ON to
indicate that a system check is
being performed. They will turn
off after the engine is started, or
after a few seconds. There may
be a malfunction in a system if
the lights do not come on, or turn off. Have the vehicle inspected
by your Toyota dealer.
*2: This light comes on when the
system is turned off.
*3: This light illuminates on the out-side rear view mirrors.
*4: This light illuminates on the multi-information display.
*5: When the outside temperature is approximately 37°F (3°C) or
lower, this indicator will flash for
approximately 10 seconds, then
stay on.
*6: This light illuminates on the cen-ter panel.
*7: This light illuminates on the over-head console.
BSM outside rear view
mirror indicators
*1, 4 (if
equipped) ( P.209)
(Flashes)
Slip indicator*1 ( P.226)
VSC OFF indicator
*1, 2
( P.227)
Smart key system indica-
tor
*5 ( P.133)
(U.S.A.)
Parking brake indicator
( P.142)
(Canada)
Parking brake indicator
( P.142)
Brake hold standby indi-
cator
*1 ( P.146)
Brake hold operated indi-
cator
*1 ( P.146)
Eco Driving Indicator
Light
*1 ( P.79, 84)
Low outside temperature
indicator
*5 ( P.72, 75)
Security indicator
*6
( P.64, 65)
“AIR BAG ON/OFF”
indicator
*1, 7 ( P. 4 0 )
Eco drive mode indicator
( P.224)
Sport mode indicator (if
equipped) ( P.224)
Page 95 of 436
953-2. Opening, closing and locking the doors
3
Before driving
3-2.Opening, closing and locking the doors
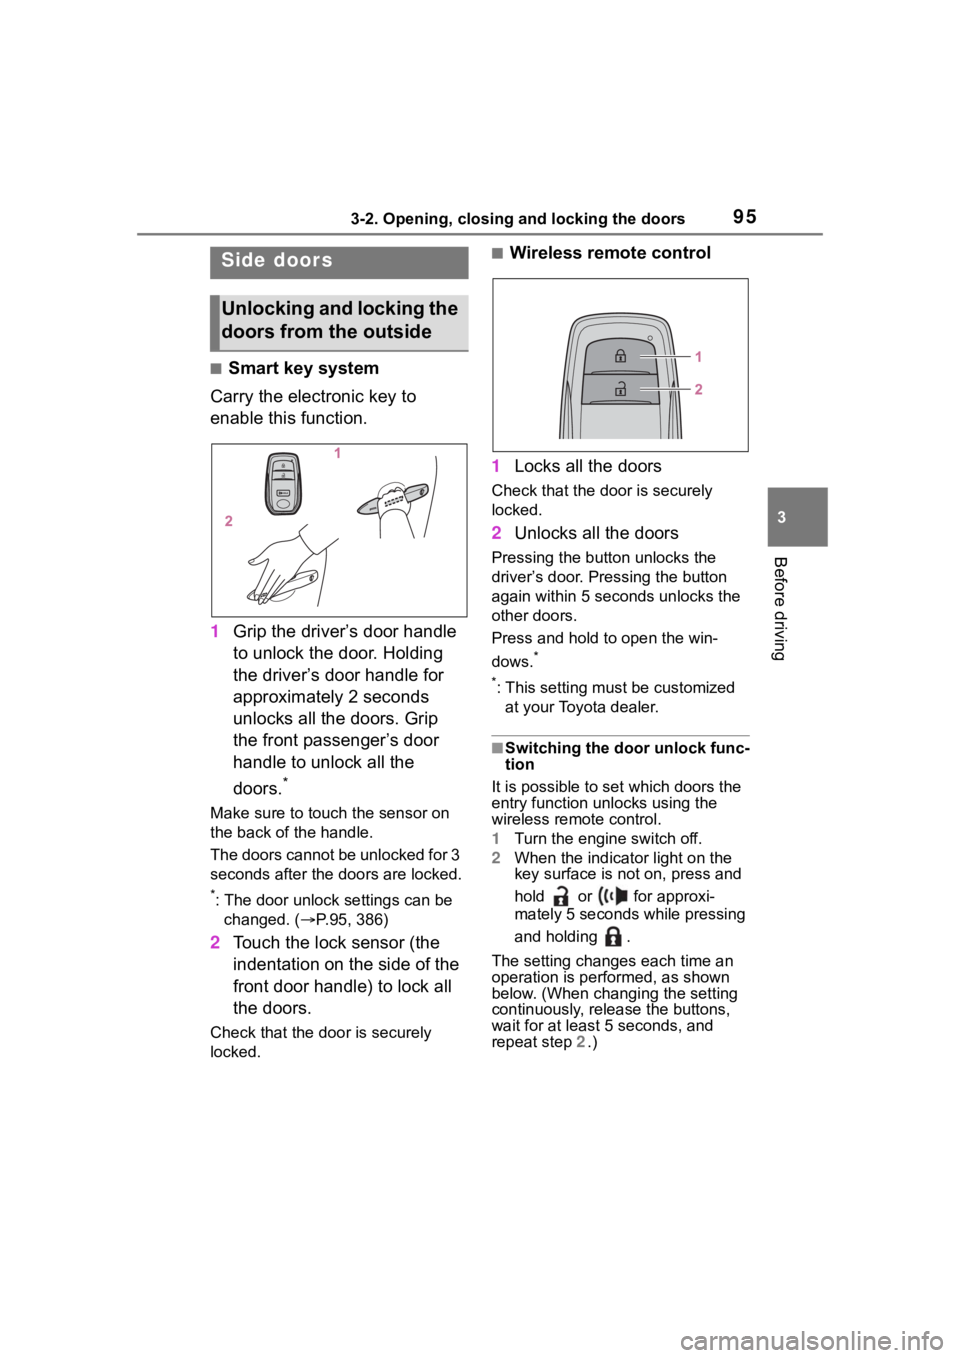
■Smart key system
Carry the electronic key to
enable this function.
1 Grip the driver’s door handle
to unlock the door. Holding
the driver’s door handle for
approximately 2 seconds
unlocks all the doors. Grip
the front passenger’s door
handle to unlock all the
doors.
*
Make sure to touch the sensor on
the back of the handle.
The doors cannot be unlocked for 3
seconds after the doors are locked.
*: The door unlock settings can be
changed. ( P.95, 386)
2 Touch the lock sensor (the
indentation on the side of the
front door handle) to lock all
the doors.
Check that the door is securely
locked.
■Wireless remote control
1 Locks all the doors
Check that the d oor is securely
locked.
2 Unlocks all the doors
Pressing the button unlocks the
driver’s door. Pressing the button
again within 5 seconds unlocks the
other doors.
Press and hold to open the win-
dows.
*
*
: This setting must be customized at your Toyota dealer.
■Switching the door unlock func-
tion
It is possible to set which doors the
entry function unlocks using the
wireless remote control.
1 Turn the engine switch off.
2 When the indicator light on the
key surface is not on, press and
hold or for approxi-
mately 5 seconds while pressing
and holding .
The setting changes each time an
operation is per formed, as shown
below. (When changing the setting
continuously, release the buttons,
wait for at least 5 seconds, and
repeat step 2 .)
Side doors
Unlocking and locking the
doors from the outside
Page 105 of 436

1053-2. Opening, closing and locking the doors
3
Before driving
■Note for the entry function
●Even when the electronic key is
within the effective range (detec-
tion areas), the system may not
operate properly in the following
cases:
• The electronic key is too close to the window or outside door han-
dle, near the ground, or in a high
place when the doors are locked
or unlocked.
• The electronic key is on the instru- ment panel, luggage cover or
floor, or in the door pockets or
glove box when the engine is
started or engine switch modes
are changed.
●Do not leave the electronic key on
top of the instrument panel or near
the door pockets when exiting the
vehicle. Depending on the radio
wave reception conditions, it may
be detected by the antenna out-
side the cabin and the door will
become lockable from the outside,
possibly trapping the electronic
key inside the vehicle.
●As long as the electronic key is
within the effective range, the
doors may be locked or unlocked
by anyone. However, only the
doors detecting the electronic key
can be used to unl ock the vehicle.
●Even if the electronic key is not
inside the vehicle, it may be possi-
ble to start the engine if the elec-
tronic key is near the window.
●The doors may unlock or lock if a
large amount of water splashes on
the door handle, such as in the
rain or in a car wash when the
electronic key is w ithin the effec-
tive range. (The doors will auto-
matically be locked after
approximately 60 seconds if the
doors are not opened and closed.)
●If the wireless remote control is
used to lock the doors when the
electronic key is near the vehicle,
there is a possib ility that the door
may not be unlocke d by the entry
function. (Use the wireless remote control to unlock the doors.)
●Touching the door lock or unlock
sensor while wearing gloves may
prevent lock or unlock operation.
●When the lock operation is per-
formed using the lock sensor, rec-
ognition signals will be shown up
to two consecutive times. After
this, no recognition signals will be
given.
●If the door handle becomes wet
while the electronic key is within
the effective range, the door may
lock and unlock repeatedly. In that
case, follow the
following correc-
tion procedures to wash the vehi-
cle:
• Place the electronic key in a loca-
tion 6 ft. (2 m) or more away from
the vehicle. (Take care to ensure
that the key is not stolen.)
• Set the electronic key to bat- tery-saving mode to disable the
smart key system. ( P.104)
●If the electronic key is inside the
vehicle and a door handle
becomes wet during a car wash, a
message may be shown on the
multi-information display and a
buzzer will sound outside the vehi-
cle. To turn off the alarm, lock all
the doors.
●The lock sensor may not work
properly if it comes into contact
with ice, snow, m ud, etc. Clean
the lock sensor and attempt to
operate it again.
●A sudden handle operation or a
handle operation immediately
after entering the effective range
may prevent the doors from being
unlocked. Touch the door unlock
sensor and check that the doors
are unlocked befo re pulling the
door handle again.
●If there is another electronic key in
the detection area, it may take
slightly longer to unlock the doors
after the door handle is gripped.
Page 124 of 436
1244-1. Before driving
WARNING
●During normal driving, do not
turn off the engine. Turning the
engine off while driving will not
cause loss of steering or brak-
ing control, but the power assist
to these systems will be lost.
This will make it more difficult to
steer and brake, so you should
pull over and stop the vehicle as
soon as it is safe to do so.
However, in the event of an
emergency, such as if it
becomes impossible to stop the
vehicle in the normal way:
P. 3 1 2
●Use engine braking (downshift)
to maintain a safe speed when
driving down a steep hill.
Using the brakes continuously
may cause the brakes to over-
heat and lose effectiveness.
(
P.137)
●Do not adjust the positions of
the steering wheel, the seat, or
the inside or outside rear view
mirrors while driving.
Doing so may result in a loss of
vehicle control.
●Always check that all passen-
gers’ arms, heads or other parts
of their body are not outside the
vehicle.
●Do not drive in excess of the
speed limit. Even if the legal
speed limit permits it, do not
drive over 85 mph (140 km/h)
unless your vehicle has
high-speed capabilit y tires. Driv-
ing over 85 mp h (140 km/h)
may result in tire failure, loss of
control and possible injury. Be
sure to consult a tire dealer to
determine whether the tires on
your vehicle are high-speed
capability tires or not before
driving at such speeds.
■When driving on slippery
road surfaces
●Sudden braking, acceleration
and steering may cause tire
slippage and reduce your ability
to control the vehicle.
●Sudden acceleration, engine
braking due to shifting, or
changes in engine speed could
cause the vehicle to skid.
●After driving through a puddle,
lightly depress the brake pedal
to make sure that the brakes
are functioning properly. Wet
brake pads may prevent the
brakes from functioning prop-
erly. If the brakes on only one
side are wet and not functioning
properly, steering control may
be affected.
■When shifting the shift lever
●Do not let the vehicle roll back-
ward while a fo rward driving
position is selected, or roll for-
ward while the shift lever is in R.
Doing so may cause the engine
to stall or lead to poor brake and
steering performance, resulting
in an accident or damage to the
vehicle.
●Do not shift the sh ift lever to P
while the vehicle is moving.
Doing so can damage the trans-
mission and may result in a loss
of vehicle control.
●Do not shift the sh ift lever to R
while the vehicle is moving for-
ward.
Doing so can damage the trans-
mission and may result in a loss
of vehicle control.
●Do not shift the shift lever to a
driving position while the vehicle
is moving backward.
Doing so can damage the trans-
mission and may result in a loss
of vehicle control.