TOYOTA COROLLA HYBRID 2023 Owners Manual
Manufacturer: TOYOTA, Model Year: 2023, Model line: COROLLA HYBRID, Model: TOYOTA COROLLA HYBRID 2023Pages: 496, PDF Size: 10.13 MB
Page 191 of 496
1914-3. Operating the lights and wipers
4
Driving
■Customization
Some functions can be customized.
( P.442)
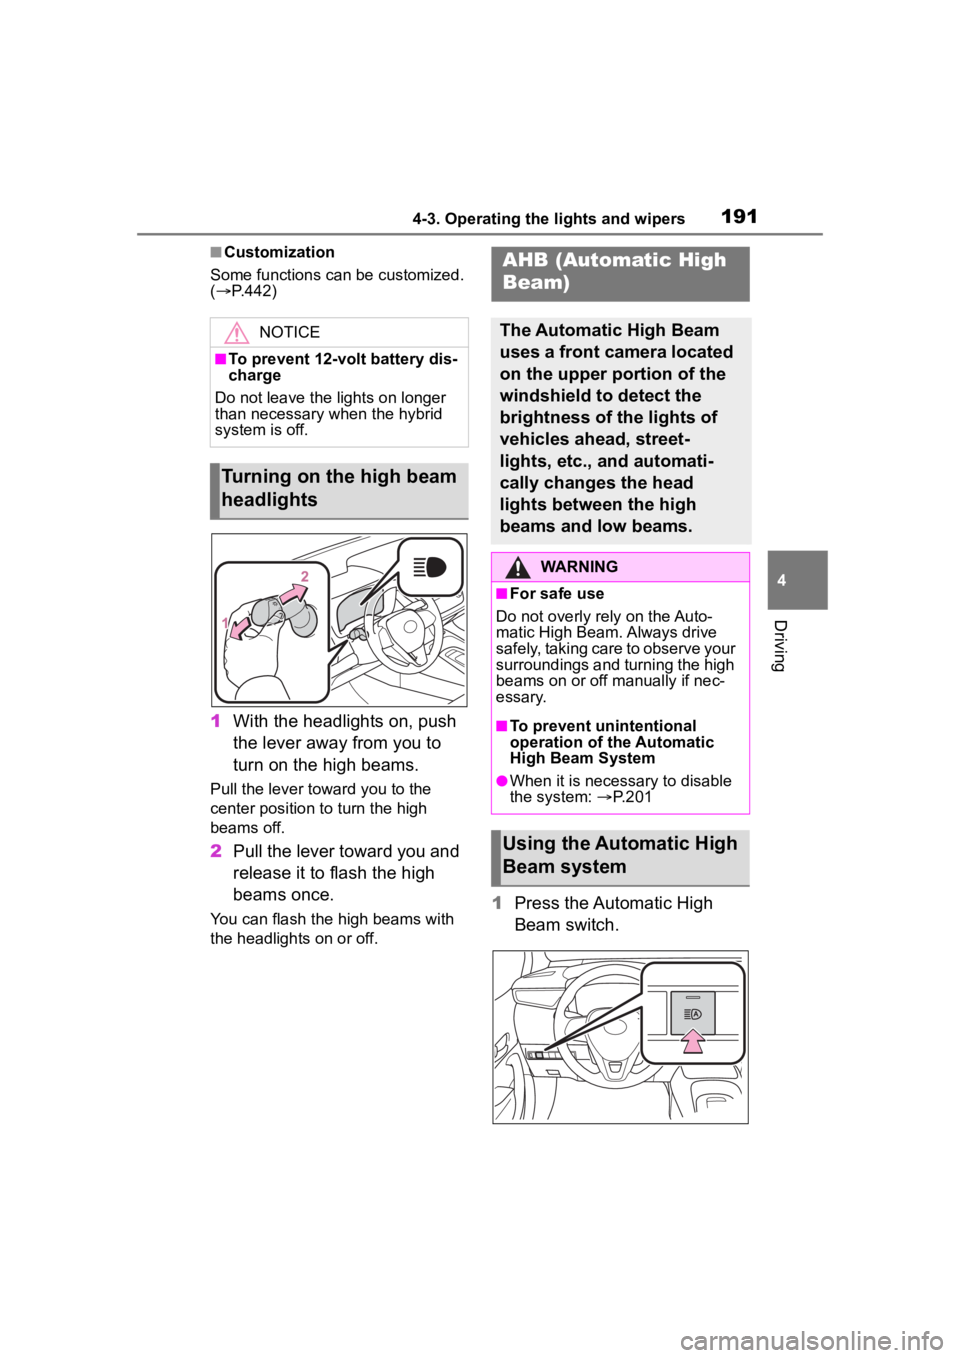
1 With the headlights on, push
the lever away from you to
turn on the high beams.
Pull the lever toward you to the
center position to turn the high
beams off.
2Pull the lever toward you and
release it to flash the high
beams once.
You can flash the high beams with
the headlights on or off.1Press the Automatic High
Beam switch.
NOTICE
■To prevent 12-volt battery dis-
charge
Do not leave the lights on longer
than necessary when the hybrid
system is off.
Turning on the high beam
headlights
AHB (Automatic High
Beam)
The Automatic High Beam
uses a front camera located
on the upper portion of the
windshield to detect the
brightness of the lights of
vehicles ahead, street-
lights, etc., and automati-
cally changes the head
lights between the high
beams and low beams.
WARNING
■For safe use
Do not overly rely on the Auto-
matic High Beam. Always drive
safely, taking care to observe your
surroundings and turning the high
beams on or off manually if nec-
essary.
■To prevent unintentional
operation of the Automatic
High Beam System
●When it is necessary to disable
the system: P.201
Using the Automatic High
Beam system
Page 192 of 496
1924-3. Operating the lights and wipers
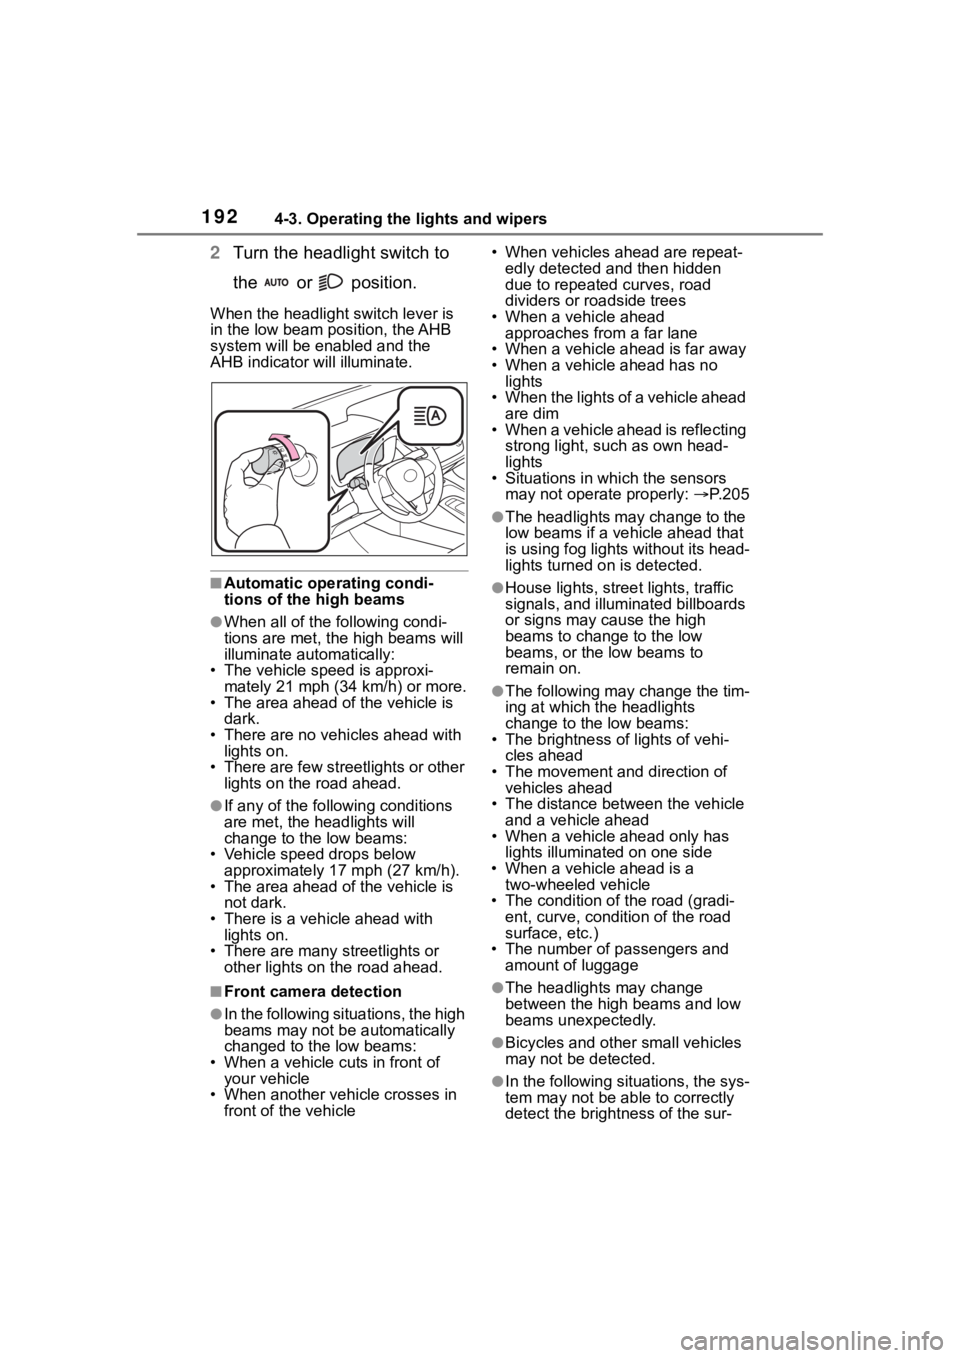
2Turn the headlight switch to
the or position.
When the headlight switch lever is
in the low beam position, the AHB
system will be enabled and the
AHB indicator will illuminate.
■Automatic operating condi-
tions of the high beams
●When all of the following condi-
tions are met, the high beams will
illuminate automatically:
• The vehicle speed is approxi-
mately 21 mph (34 km/h) or more.
• The area ahead of the vehicle is dark.
• There are no vehicles ahead with lights on.
• There are few streetlights or other
lights on the road ahead.
●If any of the following conditions
are met, the headlights will
change to the low beams:
• Vehicle speed drops below
approximately 17 mph (27 km/h).
• The area ahead of the vehicle is not dark.
• There is a vehi cle ahead with
lights on.
• There are many streetlights or
other lights on the road ahead.
■Front camera detection
●In the following situations, the high
beams may not be automatically
changed to the low beams:
• When a vehicle cuts in front of your vehicle
• When another vehicle crosses in front of the vehicle • When vehicles ahead are repeat-
edly detected and then hidden
due to repeated curves, road
dividers or roadside trees
• When a vehicle ahead approaches from a far lane
• When a vehicle ahead is far away
• When a vehicle ahead has no lights
• When the lights of a vehicle ahead are dim
• When a vehicle ahead is reflecting
strong light, such as own head-
lights
• Situations in which the sensors
may not operate properly: P. 2 0 5
●The headlights may change to the
low beams if a vehicle ahead that
is using fog lights without its head-
lights turned on is detected.
●House lights, street lights, traffic
signals, and illuminated billboards
or signs may cause the high
beams to change to the low
beams, or the low beams to
remain on.
●The following may change the tim-
ing at which the headlights
change to the low beams:
• The brightness o f lights of vehi-
cles ahead
• The movement and direction of vehicles ahead
• The distance between the vehicle and a vehicle ahead
• When a vehicle ahead only has
lights illuminate d on one side
• When a vehicle ahead is a two-wheeled vehicle
• The condition of the road (gradi- ent, curve, condition of the road
surface, etc.)
• The number of passengers and amount of luggage
●The headlights may change
between the high beams and low
beams unexpectedly.
●Bicycles and other small vehicles
may not be detected.
●In the following situations, the sys-
tem may not be able to correctly
detect the brightness of the sur-
Page 193 of 496
1934-3. Operating the lights and wipers
4
Driving
roundings. This may cause the
low beams to remain on or the
high beams to flash or dazzle
pedestrians or vehicles ahead. In
such a case, it is necessary to
manually change between the
high beams and low beams.
• When there are lights similar to headlights or tail li ghts in the sur-
rounding area
• When headlights or tail lights of vehicles ahead are turned off,
dirty, changing color, or not aimed
properly
• When the headlights are repeat-
edly changing between the high
beams and low beams.
• When use of the high beams is
inappropriate or when the high
beams may be flashing or daz-
zling pedestrians or other drivers.
• When the vehicle is used in an area in which vehicles travel on
the opposite side of the road of
the country for wh ich the vehicle
was designed, for example using
a vehicle designed for right-hand
traffic in a left-hand traffic area, or
vice versa
• When it is necessary to disable
the system: P. 2 0 1
• Situations in which the sensors may not operate properly: P. 2 0 5
■Temporarily reducing front
camera sensitivity (for the
U.S.A.)
The sensitivity o f the front camera
can be temporarily reduced.
1 Press the power switch off with
the following conditions met.
• The headlight switch is in the
or position.
• The headlight switch lever is in the low beam position.
• The automatic High Beam switch is on.
2 Press the power switch to ON.
3 Within 60 seconds after perform-
ing step 2, push the headlight
switch lever to the high beam
position then pull it to the original position quickly 10 times, then
leave the lever in its original posi-
tion.
■Changing to the high
beams
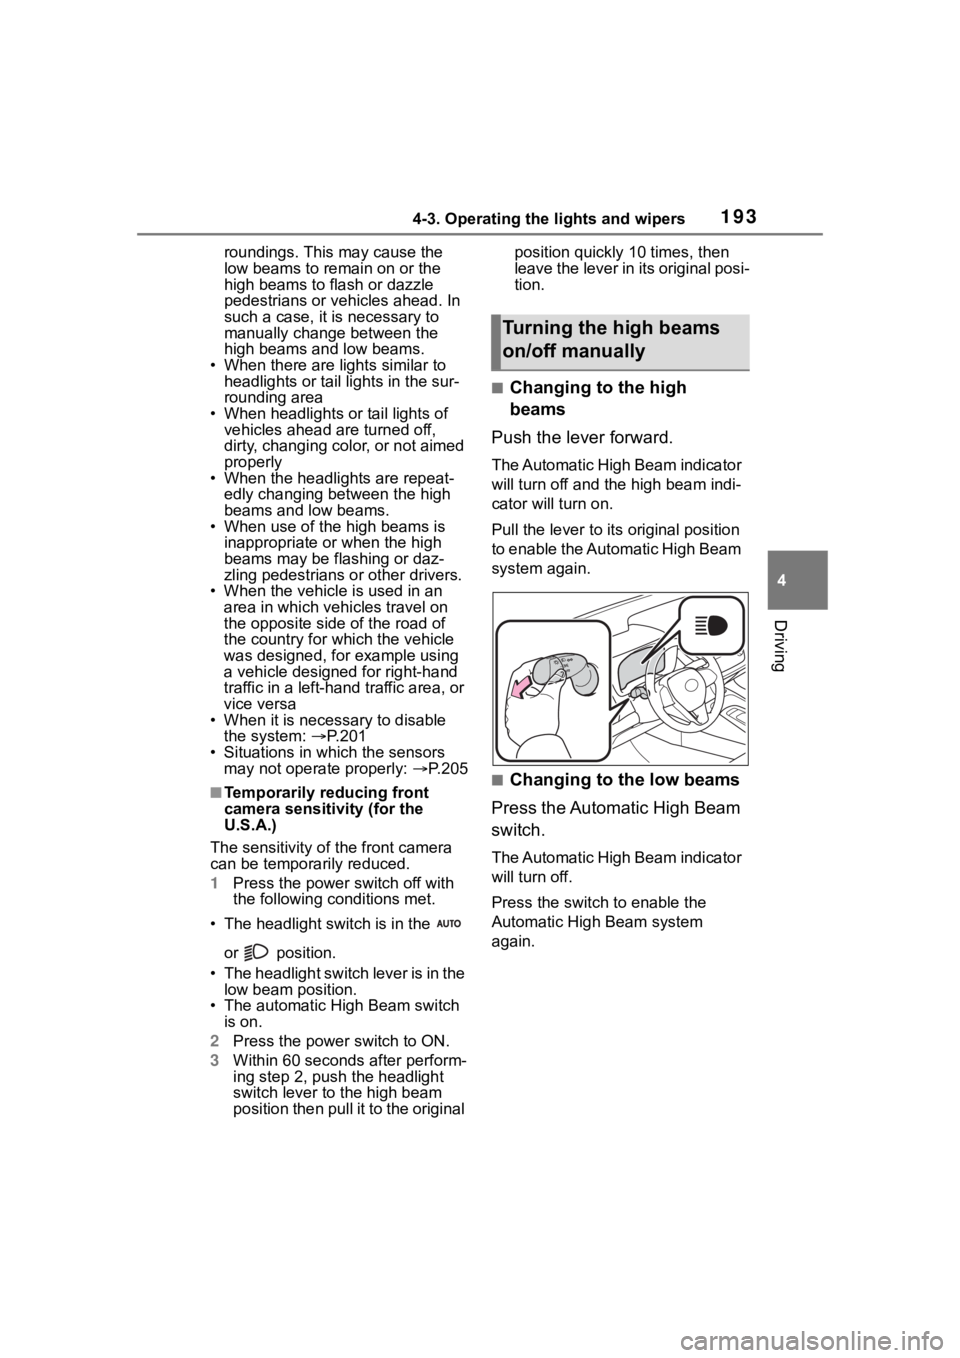
Push the lever forward.
The Automatic High Beam indicator
will turn off and the high beam indi-
cator will turn on.
Pull the lever to its original position
to enable the Automatic High Beam
system again.
■Changing to the low beams
Press the Automatic High Beam
switch.
The Automatic High Beam indicator
will turn off.
Press the switch to enable the
Automatic High Beam system
again.
Turning the high beams
on/off manually
Page 194 of 496
1944-3. Operating the lights and wipers
■Temporarily changing to
the low beams
It is recommended to switch to
the low beams when use of the
high beams is inappropriate or
when the high beams may
cause problems or distress to
other drivers or pedestrians
nearby.
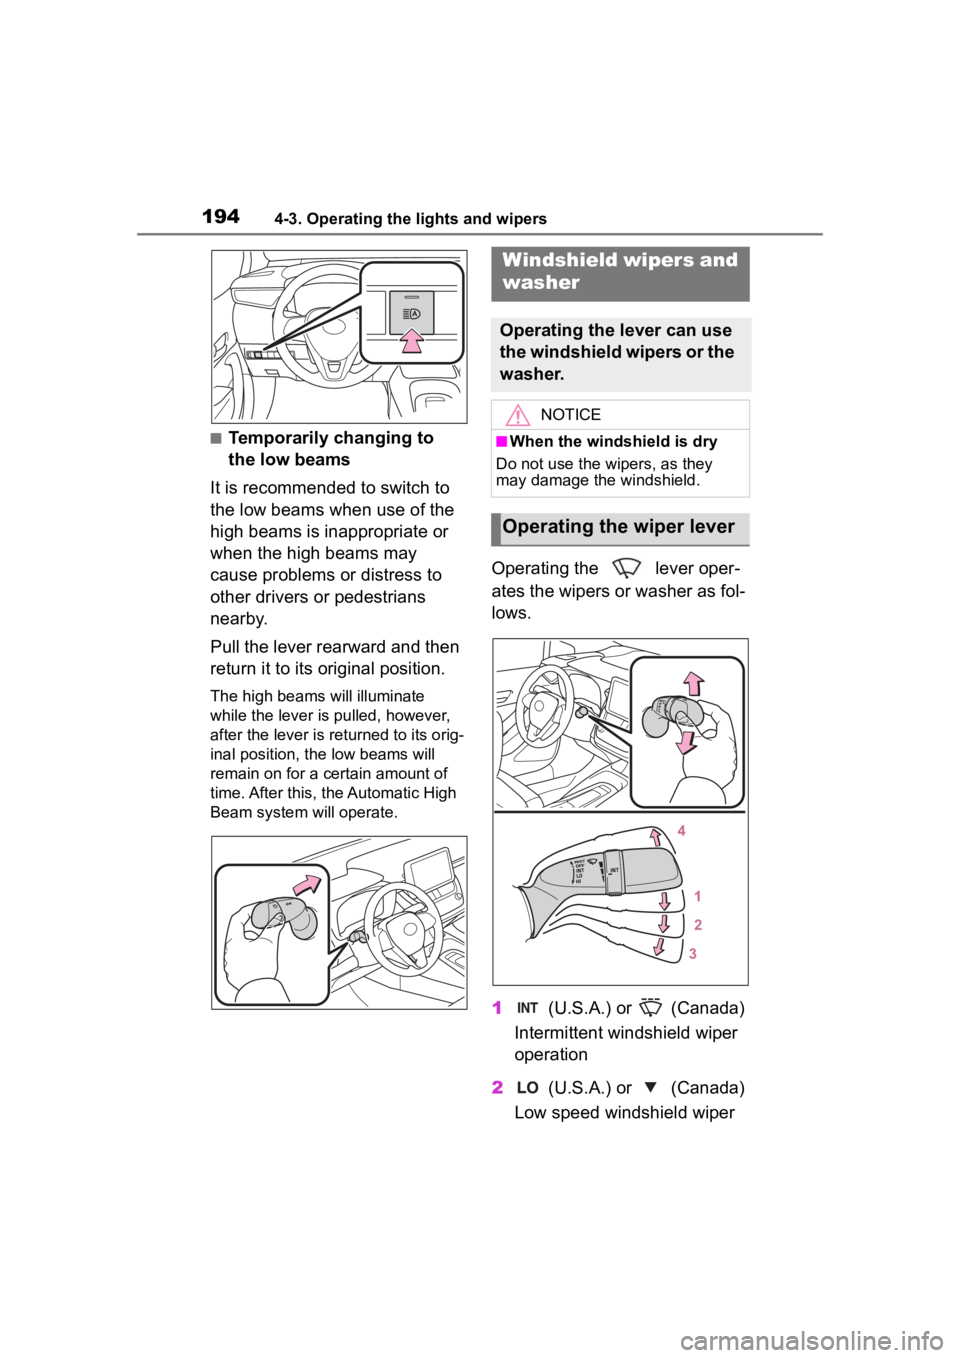
Pull the lever rearward and then
return it to its original position.
The high beams will illuminate
while the lever is pulled, however,
after the lever is returned to its orig-
inal position, t he low beams will
remain on for a certain amount of
time. After this, the Automatic High
Beam system will operate.
Operating the lever oper-
ates the wipers or washer as fol-
lows.
1 (U.S.A.) or (Canada)
Intermittent windshield wiper
operation
2 (U.S.A.) or (Canada)
Low speed windshield wiper
Windshield wipers and
washer
Operating the lever can use
the windshield wipers or the
washer.
NOTICE
■When the windshield is dry
Do not use the wipers, as they
may damage the windshield.
Operating the wiper lever
Page 195 of 496
1954-3. Operating the lights and wipers
4
Driving
operation
3 (U.S.A.) or (Canada)
High speed windshield wiper
operation
4 (U.S.A.) or (Canada)
Temporary operation
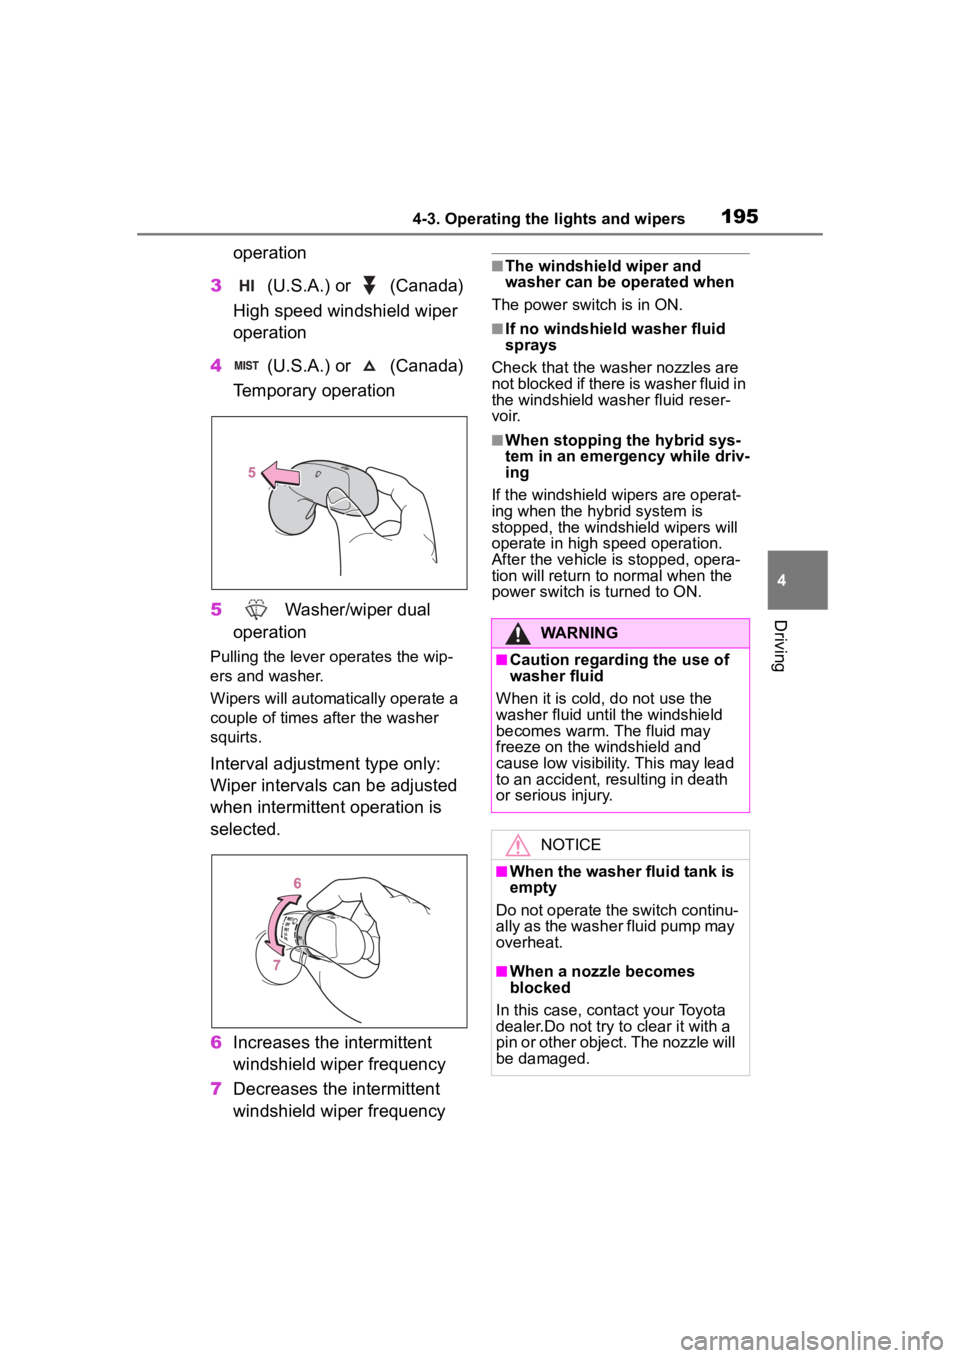
5 Washer/wiper dual
operation
Pulling the lever o perates the wip-
ers and washer.
Wipers will automatically operate a
couple of times after the washer
squirts.
Interval adjustment type only:
Wiper intervals can be adjusted
when intermittent operation is
selected.
6 Increases the intermittent
windshield wiper frequency
7 Decreases the intermittent
windshield wiper frequency
■The windshield wiper and
washer can be operated when
The power switch is in ON.
■If no windshield washer fluid
sprays
Check that the washer nozzles are
not blocked if there is washer fluid in
the windshield washer fluid reser-
voir.
■When stopping the hybrid sys-
tem in an emergency while driv-
ing
If the windshield wipers are operat-
ing when the hybr id system is
stopped, the windshield wipers will
operate in high speed operation.
After the vehicle is stopped, opera-
tion will return to normal when the
power switch is turned to ON.
WARNING
■Caution regarding the use of
washer fluid
When it is cold, do not use the
washer fluid unt il the windshield
becomes warm. The fluid may
freeze on the windshield and
cause low visibility. This may lead
to an accident, resulting in death
or serious injury.
NOTICE
■When the washer fluid tank is
empty
Do not operate the switch continu-
ally as the washer fluid pump may
overheat.
■When a nozzle becomes
blocked
In this case, contact your Toyota
dealer.Do not try to clear it with a
pin or other object. The nozzle will
be damaged.
Page 196 of 496
1964-4. Refueling
4-4.Refueling
Turn the power switch off and
ensure that all the doors and
windows are closed.
Confirm the type of fuel.
■Fuel types
P. 4 2 9
■Fuel tank opening for unleaded
gasoline
To help prevent incorrect fueling,
your vehicle has a fuel tank opening
that only accommodates the spe-
cial nozzle on unle aded fuel pumps.
Opening the fuel tank
cap
The fuel tank of your vehicle
has a special structure,
which requires a reduction
in fuel tank pressure before
refueling. After the opener
switch has been pressed, it
will take several seconds
until the vehicle is ready for
refueling.
Before refueling the vehi-
cle
WARNING
■When refueling the vehicle
Observe the following precautions
while refueling the vehicle. Failure
to do so may result in death or
serious injury.
●After exiting the vehicle and
before opening the fuel door,
touch an unpainted metal sur-
face to discharge any static
electricity. It is important to dis-
charge static electricity before
refueling because sparks result-
ing from static electricity can
cause fuel vapors to ignite while
refueling.
●Always hold the grips on the
fuel tank cap and turn it slowly
to remove it.
A whooshing sound may be
heard when the f uel tank cap is
loosened. Wait until the sound
cannot be heard before fully
removing the cap. In hot
weather, pressurized fuel may
spray out the filler neck and
cause injury.
●Do not allow anyone that has
not discharged static electricity
from their body to come close to
an open fuel tank.
●Do not inhale vaporized fuel.
Fuel contains substances that
are harmful if inhaled.
●Do not smoke while refueling
the vehicle.
Doing so may cause the fuel to
ignite and cause a fire.
●Do not return to the vehicle or
touch any person or object that
is statically charged.
This may cause static electricity
to build up, resulting in a possi-
ble ignition hazard.
■When refueling
Observe the following precautions
to prevent fuel overflowing from
the fuel tank:
●Securely insert the fuel nozzle
into the fuel filler neck.
●Stop filling the tank after the fuel
nozzle automatically clicks off.
Page 197 of 496
1974-4. Refueling
4
Driving
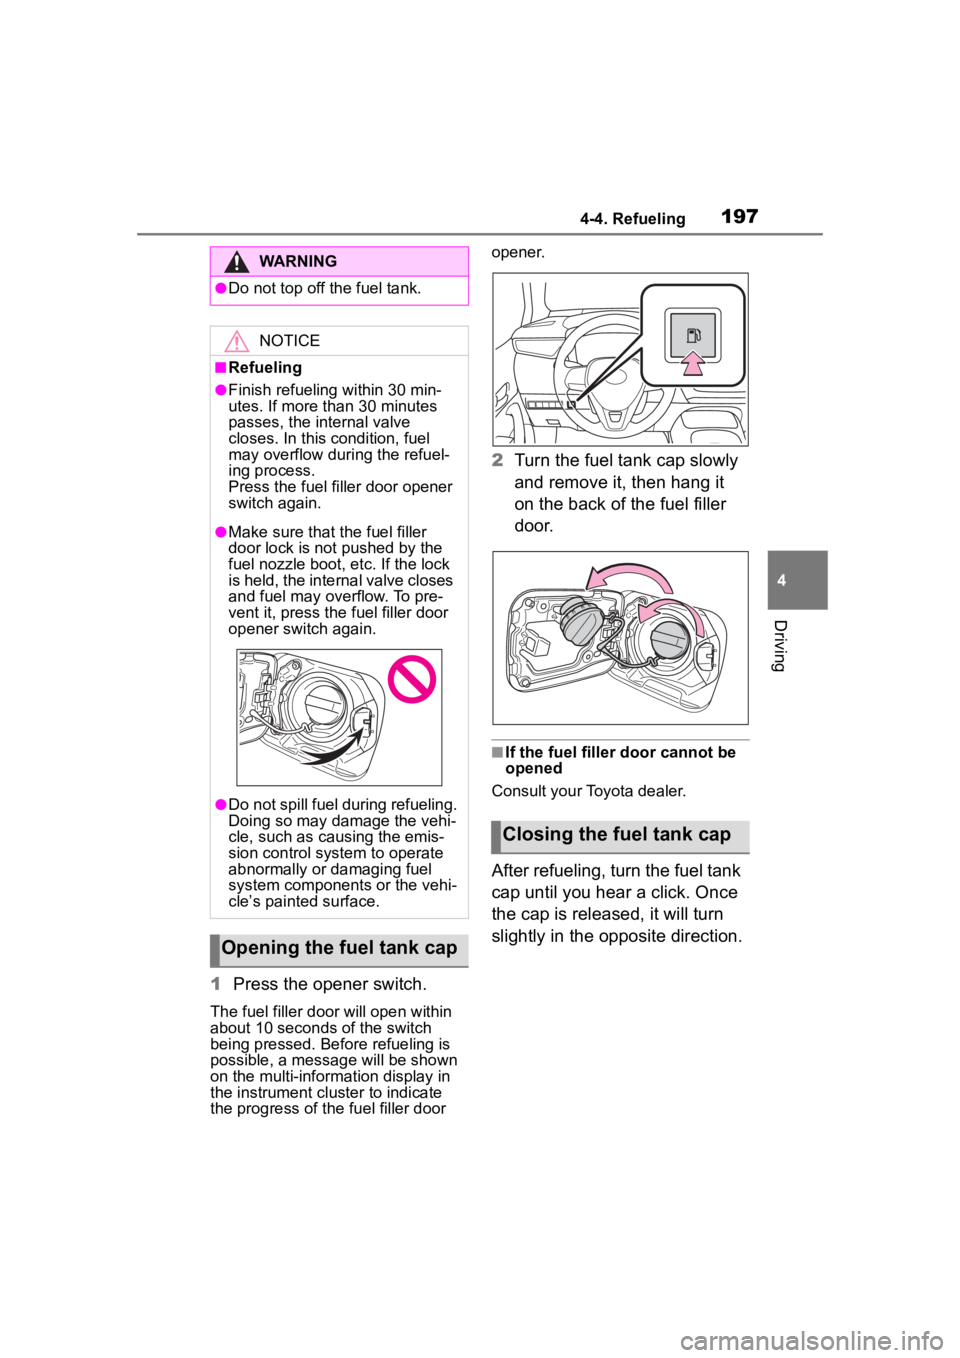
1Press the opener switch.
The fuel filler doo r will open within
about 10 seconds of the switch
being pressed. Before refueling is
possible, a message will be shown
on the multi-information display in
the instrument cluster to indicate
the progress of the fuel filler door opener.
2
Turn the fuel tank cap slowly
and remove it, then hang it
on the back of the fuel filler
door.
■If the fuel filler door cannot be
opened
Consult your Toyota dealer.
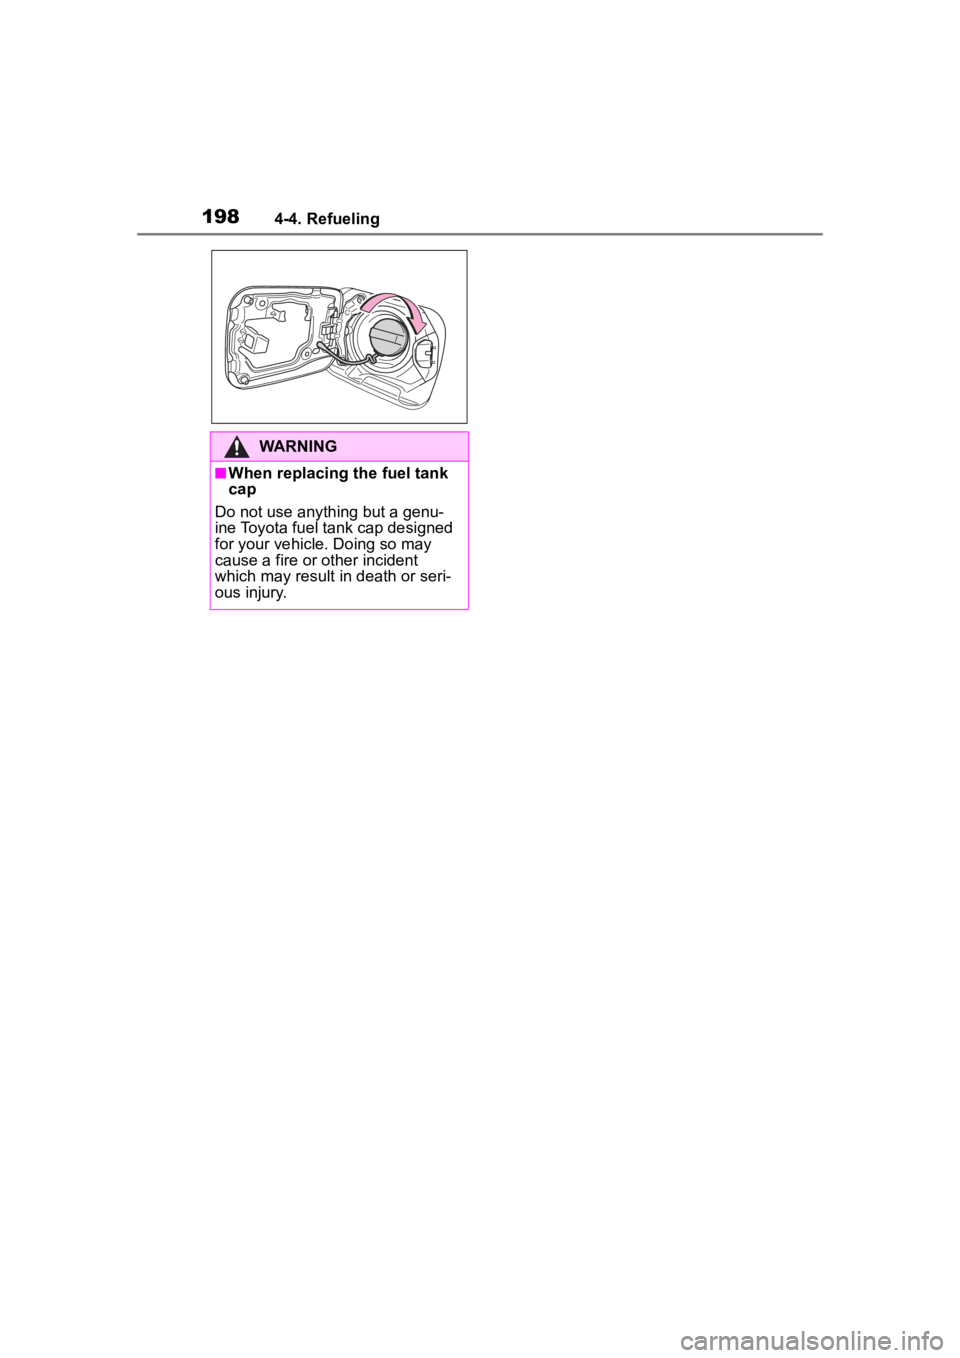
After refueling, turn the fuel tank
cap until you hear a click. Once
the cap is released, it will turn
slightly in the opposite direction.
WARNING
●Do not top off the fuel tank.
NOTICE
■Refueling
●Finish refueling within 30 min-
utes. If more than 30 minutes
passes, the internal valve
closes. In this condition, fuel
may overflow during the refuel-
ing process.
Press the fuel filler door opener
switch again.
●Make sure that the fuel filler
door lock is not pushed by the
fuel nozzle boot, etc. If the lock
is held, the internal valve closes
and fuel may overflow. To pre-
vent it, press the fuel filler door
opener switch again.
●Do not spill fuel during refueling.
Doing so may damage the vehi-
cle, such as causing the emis-
sion control system to operate
abnormally or damaging fuel
system components or the vehi-
cle’s painted surface.
Opening the fuel tank cap
Closing the fuel tank cap
Page 198 of 496
1984-4. Refueling
WARNING
■When replacing the fuel tank
cap
Do not use anything but a genu-
ine Toyota fuel tank cap designed
for your vehicle. Doing so may
cause a fire or other incident
which may result in death or seri-
ous injury.
Page 199 of 496
1994-5. Using the driving support systems
4
Driving
4-5.Using the driving support systems
*: If equipped
This Owner's Manual contains
information for Ver. 1. For the
latest information about the con-
trols, use, warnings/precautions,
etc. of each function of Toyota
Safety Sense, refer to the Digital
Owner's Manual at the Owner's
Manual website.
If the software of this system
has been updated after initial purchase of the vehicle, before
using this system, be sure to
read the Owner's Manual which
corresponds to the software ver-
sion of the system.
■Precautions for use
●Be aware that some functions
may temporarily be disabled if a
legal or safety related issue
occurs.
●If a connected services contract
has not been entered or has
expired, software updates will not
be able to be performed wire-
lessly.
If the software of this system
has been updated after initial
purchase of the vehicle, to
access the appropriate Owner’s
Manual, it is necessary to check
the software version of the sys-
tem and then visit the Owner's
Manual website.
The software version of the sys-
tem can be checked using One-
App.
Toyota Safety Sense
3.0 software update
*
It is necessary to enter a
connected services con-
tract, provided by Toyota, to
use these functions. For
details, contact your Toyota
dealer.
WARNING
■For safe use
When the Toyota Safety Sense
3.0 software is updated, the oper-
ating methods of functions may
change. Using this system without
knowing the correct operating
methods may lead to an accident
resulting in death or serious injury.
●Make sure to read the Digital
Owner's Manual which corre-
sponds to the software version
of the system, available at the
Owner's Manual website, before
using this system.
Content of the Toyota
Safety Sense Owner's
Manual
Checking your vehicle’s
Toyota Safety Sense ver-
sion
Checking the version
using OneApp
Page 200 of 496
2004-5. Using the driving support systems
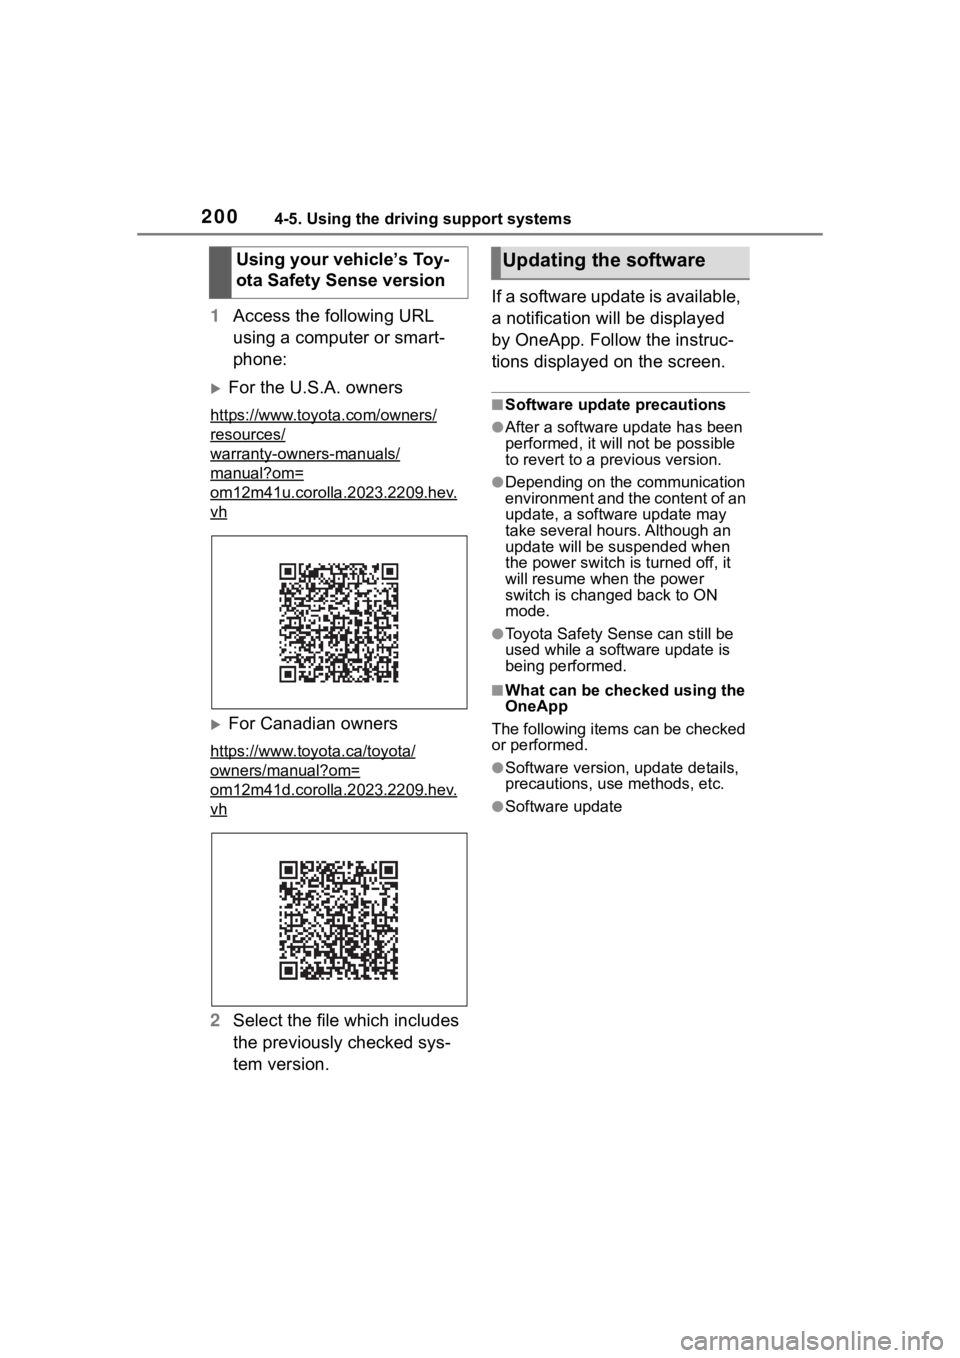
1Access the following URL
using a computer or smart-
phone:
For the U.S.A. owners
https://www.toyota.com/owners/
resources/
warranty-owners-manuals/
manual?om=
om12m41u.corolla.2023.2209.hev.
vh
For Canadian owners
https://www.toyota.ca/toyota/
owners/manual?om=
om12m41d.corolla.2023.2209.hev.
vh
2Select the file which includes
the previously checked sys-
tem version. If a software update is available,
a notification will be displayed
by OneApp. Follow the instruc-
tions displayed on the screen.
■Software update precautions
●After a software update has been
performed, it will not be possible
to revert to a pre
vious version.
●Depending on the communication
environment and the content of an
update, a software update may
take several hours. Although an
update will be suspended when
the power switch i s turned off, it
will resume when the power
switch is changed back to ON
mode.
●Toyota Safety Sense can still be
used while a software update is
being performed.
■What can be checked using the
OneApp
The following items can be checked
or performed.
●Software version, update details,
precautions, use methods, etc.
●Software update
Using your vehicle’s Toy-
ota Safety Sense versionUpdating the software