interior lights TOYOTA COROLLA HYBRID 2023 Owners Manual
[x] Cancel search | Manufacturer: TOYOTA, Model Year: 2023, Model line: COROLLA HYBRID, Model: TOYOTA COROLLA HYBRID 2023Pages: 496, PDF Size: 10.13 MB
Page 3 of 496
3TABLE OF CONTENTS
1
2
3
4
5
6
7
8
9
10
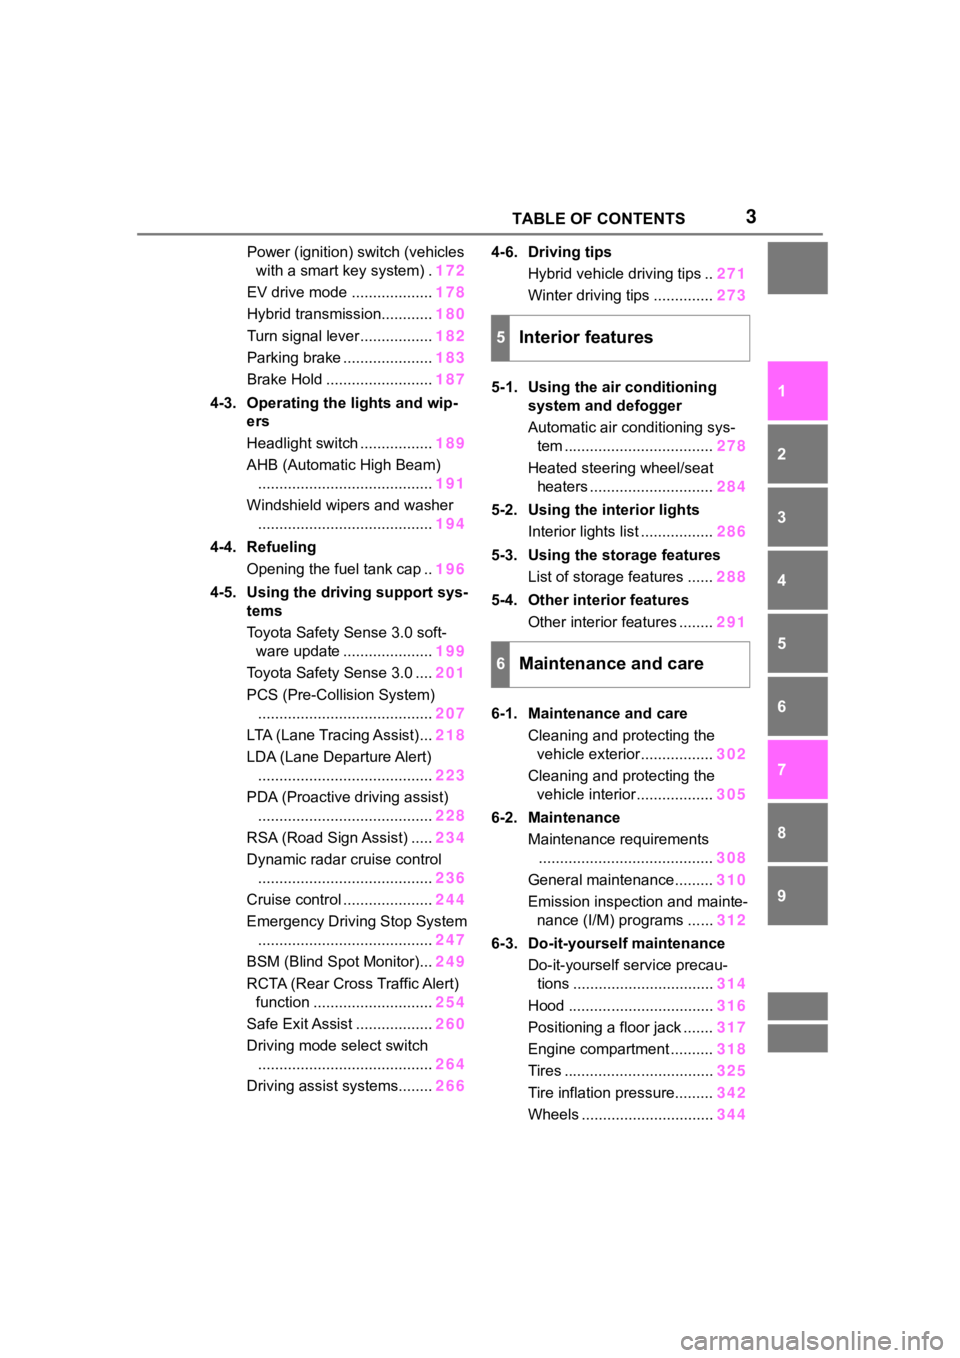
Power (ignition) switch (vehicles with a smart key system) . 172
EV drive mode ................... 178
Hybrid transmission............ 180
Turn signal lever................. 182
Parking brake ..................... 183
Brake Hold ......................... 187
4-3. Operating the lights and wip- ers
Headlight switch ................. 189
AHB (Automatic High Beam) ......................................... 191
Windshield wipers and washer ......................................... 194
4-4. Refueling Opening the fuel tank cap .. 196
4-5. Using the driving support sys- tems
Toyota Safety Sense 3.0 soft-ware update ..................... 199
Toyota Safety Sense 3.0 .... 201
PCS (Pre-Collision System) ......................................... 207
LTA (Lane Tracing Assist)... 218
LDA (Lane Departure Alert) ......................................... 223
PDA (Proactive driving assist) ......................................... 228
RSA (Road Sign Assist) ..... 234
Dynamic radar cruise control ......................................... 236
Cruise control ..................... 244
Emergency Driving Stop System ......................................... 247
BSM (Blind Spot Monitor)... 249
RCTA (Rear Cross Traffic Alert) function ............................ 254
Safe Exit Assist .................. 260
Driving mode select switch ......................................... 264
Driving assist systems........ 2664-6. Driving tips
Hybrid vehicle driving tips .. 271
Winter driving tips .............. 273
5-1. Using the air conditioning system and defogger
Automatic air conditioning sys-
tem ................................... 278
Heated steering wheel/seat heaters ............................. 284
5-2. Using the interior lights Interior lights list ................. 286
5-3. Using the storage features List of storage features ...... 288
5-4. Other interior features Other interior features ........ 291
6-1. Maintenance and care Cleaning and protecting the vehicle exterior................. 302
Cleaning and protecting the vehicle interior.................. 305
6-2. Maintenance Maintenance requirements......................................... 308
General maintenance......... 310
Emission inspection and mainte- nance (I/M) programs
......312
6-3. Do-it-yourself maintenance Do-it-yourself service precau-tions ................................. 314
Hood .................................. 316
Positioning a floor jack ....... 317
Engine compartment .......... 318
Tires ................................... 325
Tire inflation pressure......... 342
Wheels ............................... 344
5Interior features
6Maintenance and care
Page 21 of 496
21Pictorial index
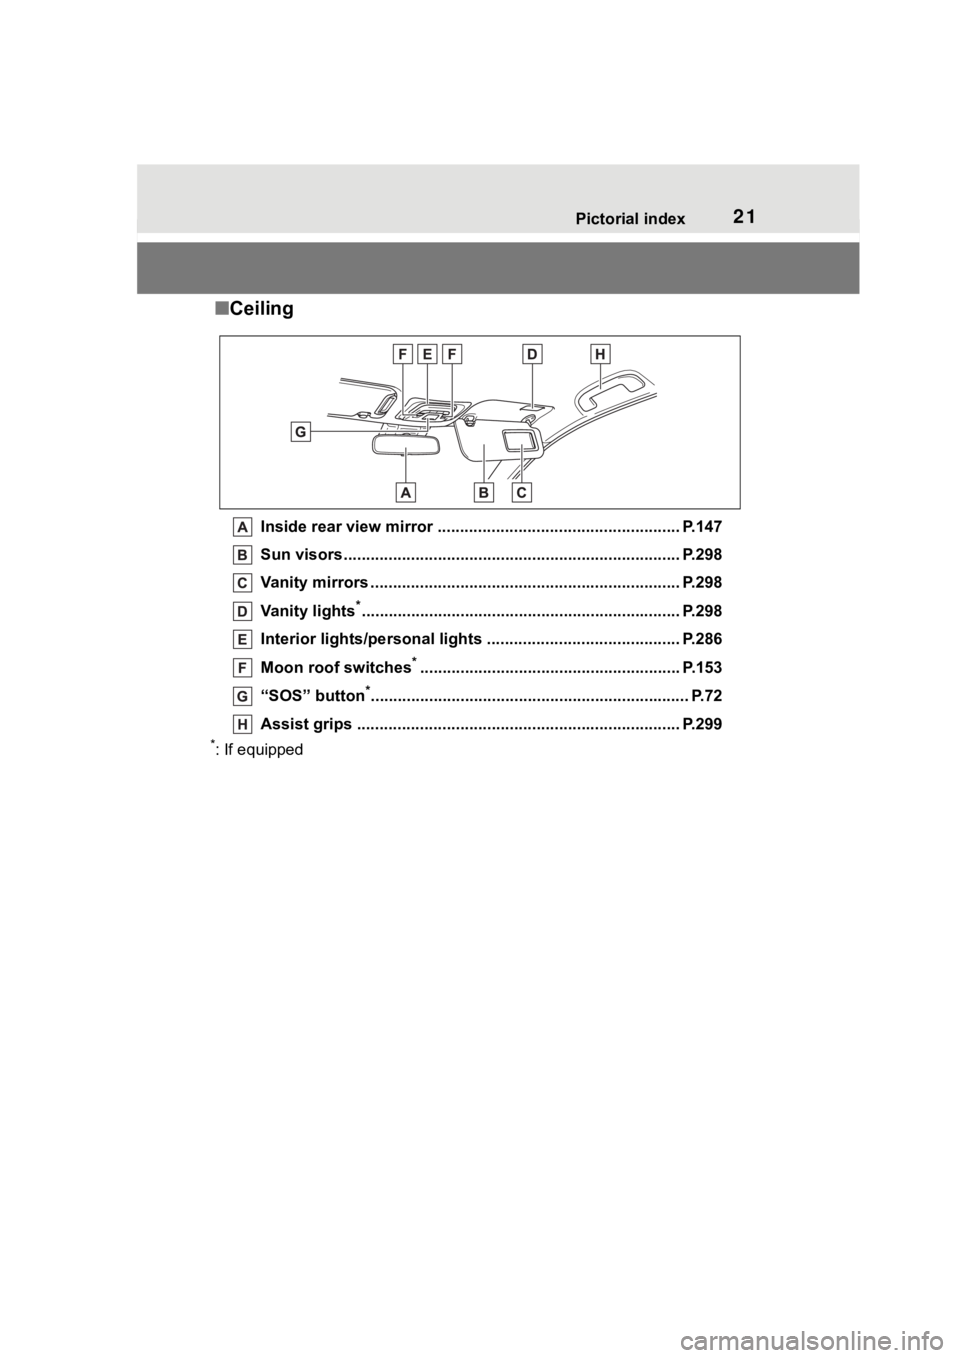
■Ceiling
Inside rear view mirror ........................................ .............. P.147
Sun visors..................................................... ...................... P.298
Vanity mirrors ................................................. .................... P.298
Vanity lights
*............................................................... ........ P.298
Interior lights/personal lights ................................ ........... P.286
Moon roof switches
*.......................................................... P.153
“SOS” button
*............................................................... ........ P.72
Assist grips ................................................... ..................... P.299
*: If equipped
Page 33 of 496
331-1. For safe use
1
For safety and security
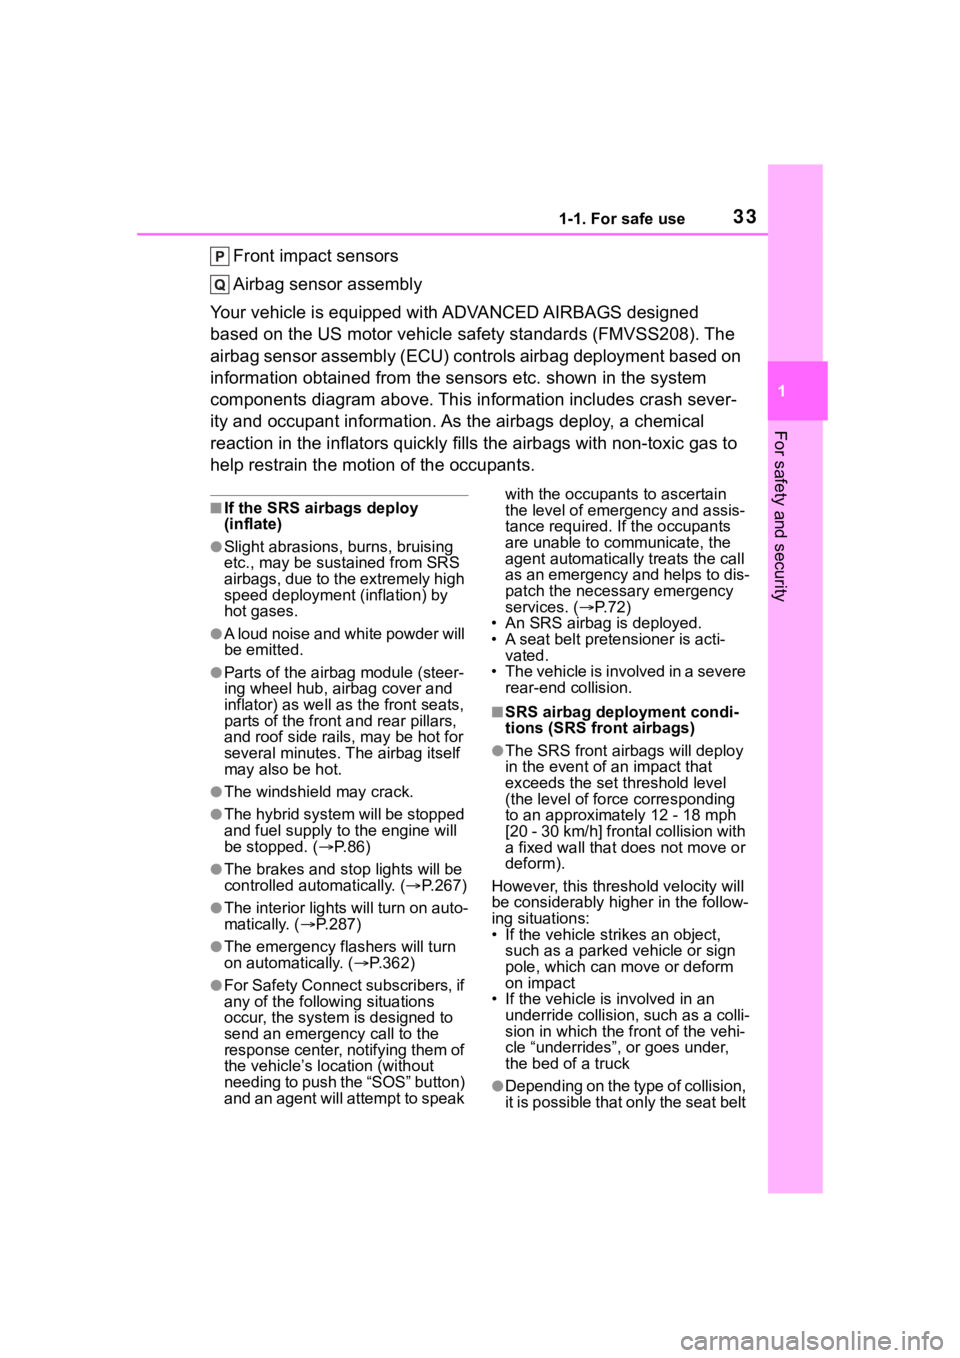
Front impact sensors
Airbag sensor assembly
Your vehicle is equipped with ADVANCED AIRBAGS designed
based on the US motor vehicle safety standards (FMVSS208). The
airbag sensor assembly (ECU) cont rols airbag deployment based on
information obtained from the sensors etc. shown in the system
components diagram above. This in formation includes crash sever-
ity and occupant information. As the airbags deploy, a chemical
reaction in the inflators quickly fills the airbags with non-toxic gas to
help restrain the motion of the occupants.
■If the SRS airbags deploy
(inflate)
●Slight abrasions, burns, bruising
etc., may be sustained from SRS
airbags, due to the extremely high
speed deployment (inflation) by
hot gases.
●A loud noise and white powder will
be emitted.
●Parts of the airbag module (steer-
ing wheel hub, airbag cover and
inflator) as well as the front seats,
parts of the front and rear pillars,
and roof side rails, may be hot for
several minutes. T he airbag itself
may also be hot.
●The windshield may crack.
●The hybrid system will be stopped
and fuel supply to the engine will
be stopped. ( P. 8 6 )
●The brakes and st op lights will be
controlled automatically. ( P.267)
●The interior lights will turn on auto-
matically. ( P.287)
●The emergency flashers will turn
on automatically. ( P.362)
●For Safety Connect subscribers, if
any of the following situations
occur, the system is designed to
send an emergency call to the
response center, notifying them of
the vehicle’s location (without
needing to push the “SOS” button)
and an agent will attempt to speak with the occupants to ascertain
the level of emergency and assis-
tance required. If the occupants
are unable to communicate, the
agent automatically treats the call
as an emergency and helps to dis-
patch the necessary emergency
services. (
P. 7 2 )
• An SRS airbag is deployed.
• A seat belt pretensioner is acti-
vated.
• The vehicle is involved in a severe
rear-end collision.
■SRS airbag deployment condi-
tions (SRS front airbags)
●The SRS front airbags will deploy
in the event of an impact that
exceeds the set threshold level
(the level of forc e corresponding
to an approximately 12 - 18 mph
[20 - 30 km/h] frontal collision with
a fixed wall that does not move or
deform).
However, this threshold velocity will
be considerably higher in the follow-
ing situations:
• If the vehicle strikes an object, such as a parked vehicle or sign
pole, which can move or deform
on impact
• If the vehicle is involved in an underride collision, such as a colli-
sion in which the front of the vehi-
cle “underrides”, or goes under,
the bed of a truck
●Depending on the type of collision,
it is possible that only the seat belt
Page 101 of 496
1012-1. Instrument cluster
2
Vehicle status information and indicators
■Changing the display
Press the display change button
until the desired item is dis-
played.
■Display items
Odometer
Displays the total distance the vehi-
cle has been driven.
Trip meter A/Trip meter B
Displays the distance the vehicle
has been driven since the meter
was last reset. Trip meters A and B
can be used to record and display
different distances independently.
To reset, display the desired trip
meter and press and hold the dis-
play change button.
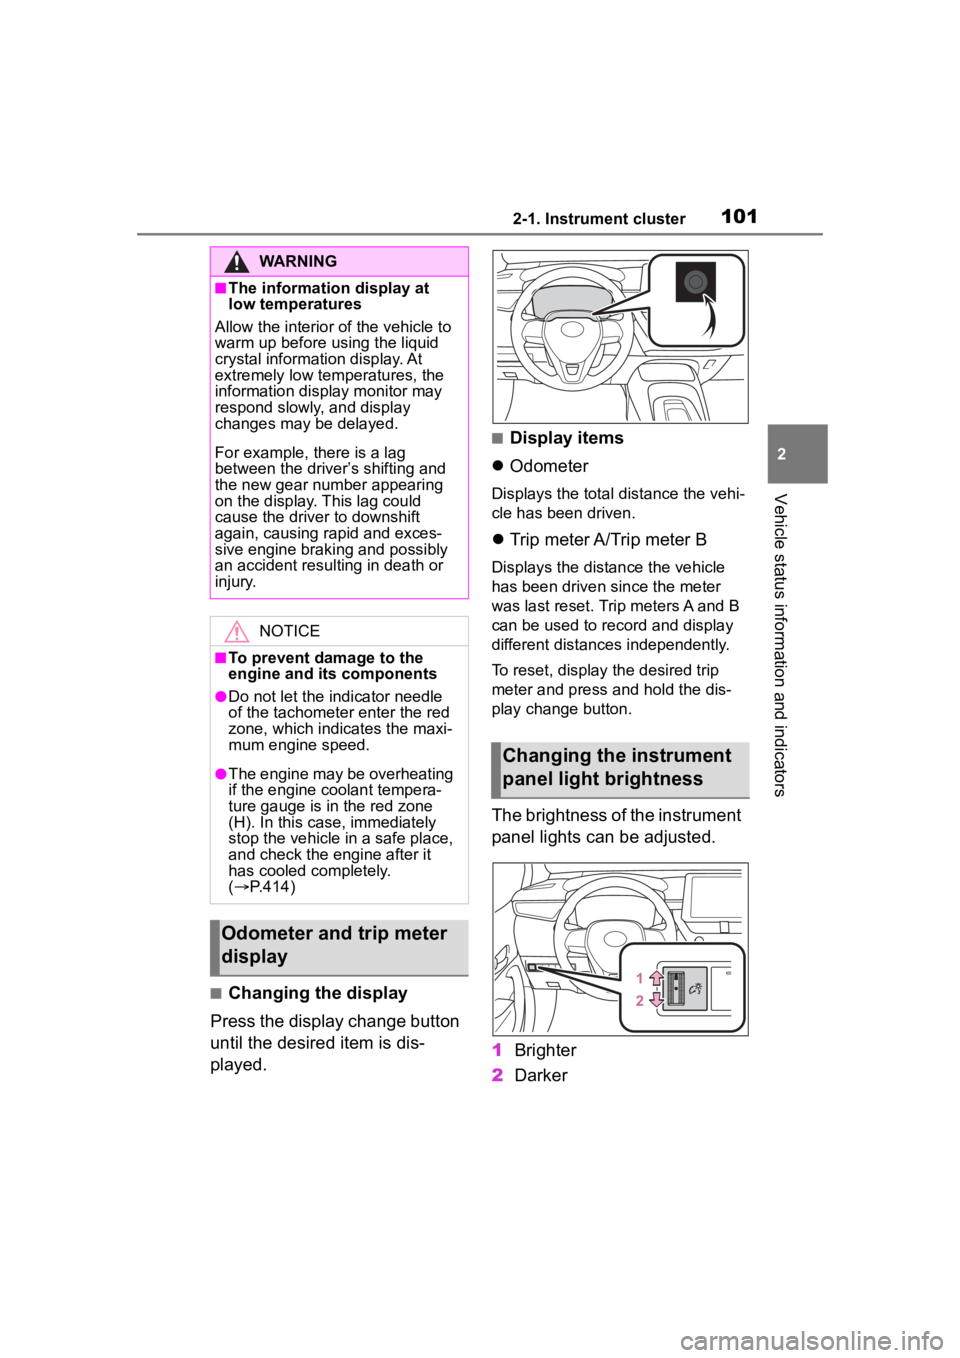
The brightness of the instrument
panel lights can be adjusted.
1 Brighter
2 Darker
WARNING
■The information display at
low temperatures
Allow the interior of the vehicle to
warm up before u sing the liquid
crystal informat ion display. At
extremely low temperatures, the
information display monitor may
respond slowly, and display
changes may be delayed.
For example, there is a lag
between the driver’s shifting and
the new gear number appearing
on the display. This lag could
cause the driver to downshift
again, causing rapid and exces-
sive engine braking and possibly
an accident resulting in death or
injury.
NOTICE
■To prevent damage to the
engine and its components
●Do not let the i ndicator needle
of the tachomete r enter the red
zone, which indicates the maxi-
mum engine speed.
●The engine may be overheating
if the engine coolant tempera-
ture gauge is in the red zone
(H). In this case, immediately
stop the vehicle in a safe place,
and check the engine after it
has cooled completely.
( P.414)
Odometer and trip meter
display
Changing the instrument
panel light brightness
Page 277 of 496
277
5
5
Interior features
Interior features
.5-1. Using the air conditioning system and defogger
Automatic air conditioning system ....................... 278
Heated steering wheel/seat heaters ...................... 284
5-2. Using the interior lights Interior lights list .......... 286
5-3. Using the storage features List of storage features.................................. 288
5-4. Other interior features Other interior features . 291
Page 286 of 496
2865-2. Using the interior lights
5-2.Using the interior lights
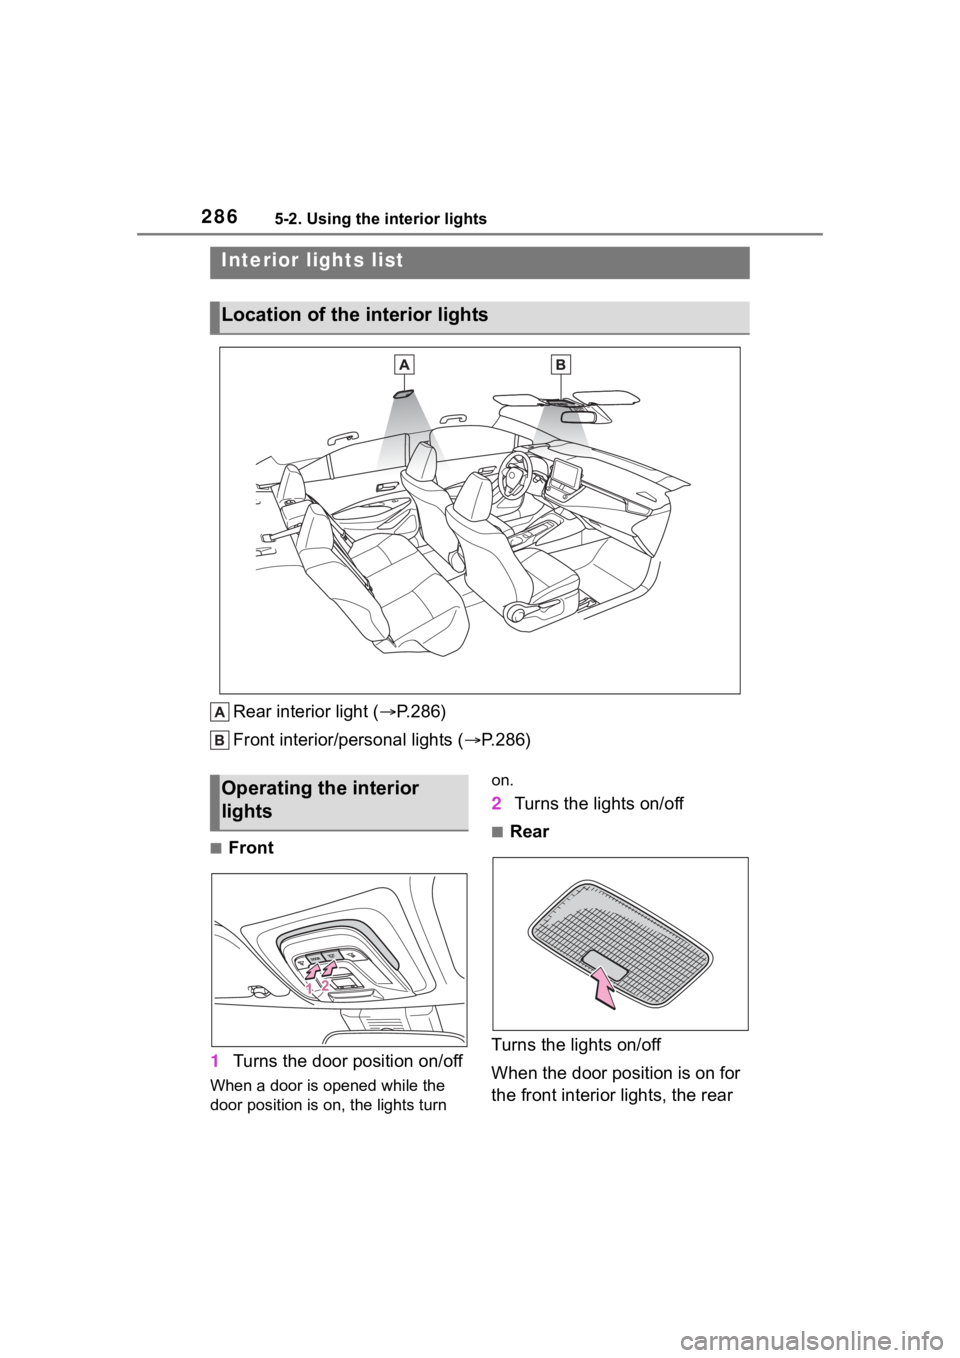
Rear interior light (P.286)
Front interior/personal lights ( P.286)
■Front
1 Turns the door position on/off
When a door is opened while the
door position is on, the lights turn on.
2
Turns the lights on/off
■Rear
Turns the lights on/off
When the door position is on for
the front interior lights, the rear
Interior lights list
Location of the i nterior lights
Operating the interior
lights
Page 287 of 496
2875-2. Using the interior lights
5
Interior features
interior light will turn on when a
door is open and turn off when
all of them are closed.
When the rear interior light is on
linked to the door position for
the front interior lights, it will not
turn off even though the switch
is pressed.
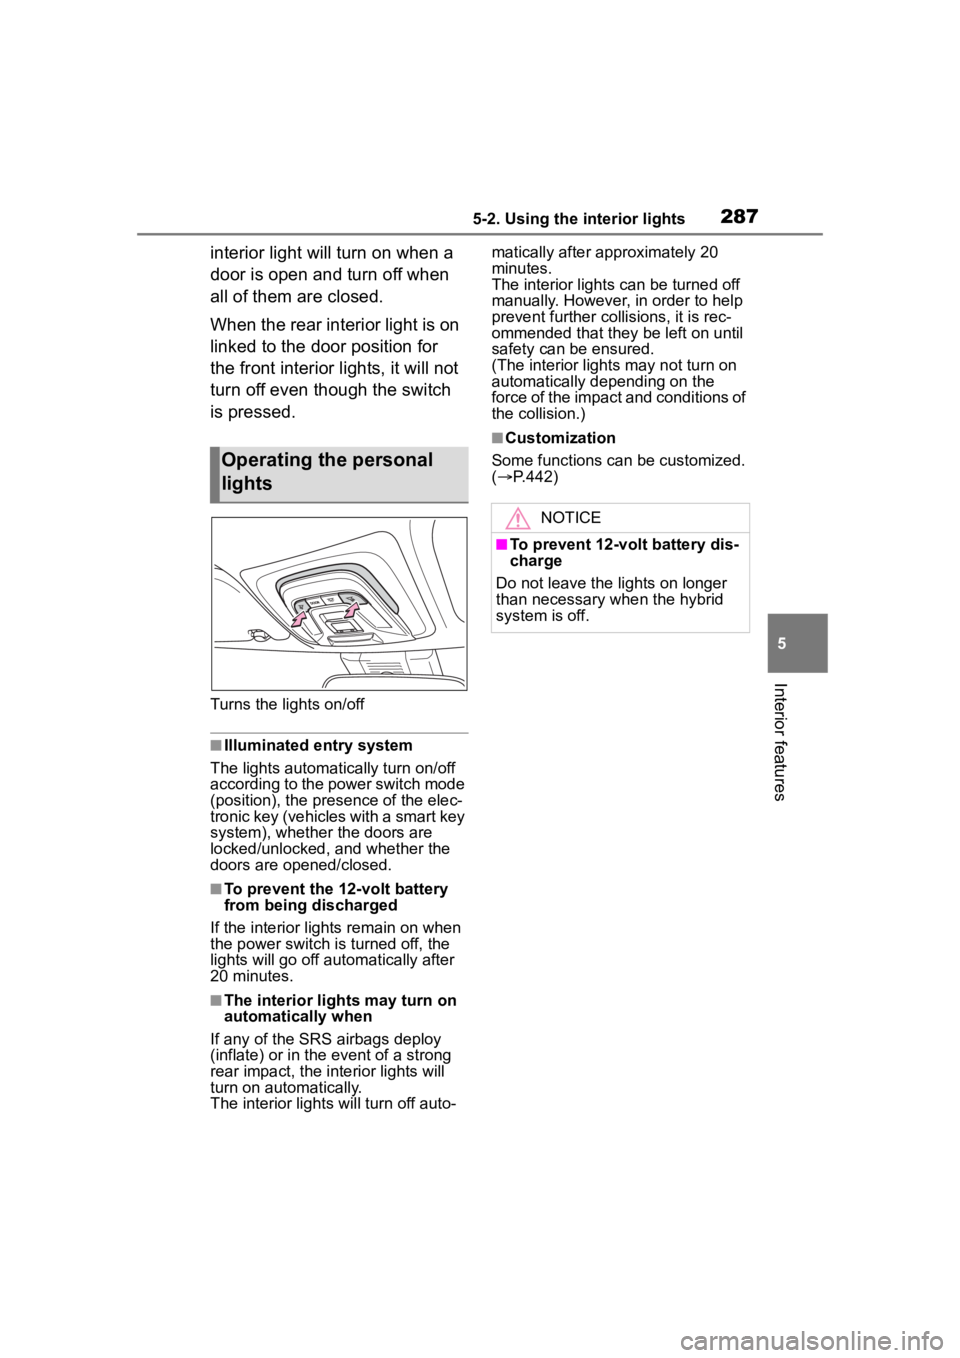
Turns the lights on/off
■Illuminated entry system
The lights automatically turn on/off
according to the power switch mode
(position), the presence of the elec-
tronic key (vehicles with a smart key
system), whether the doors are
locked/unlocked, and whether the
doors are opened/closed.
■To prevent the 12-volt battery
from being discharged
If the interior lights remain on when
the power switch is turned off, the
lights will go off automatically after
20 minutes.
■The interior lights may turn on
automatically when
If any of the SRS airbags deploy
(inflate) or in the event of a strong
rear impact, the interior lights will
turn on automatically.
The interior lights will turn off auto- matically after approximately 20
minutes.
The interior lights can be turned off
manually. However, in order to help
prevent further co
llisions, it is rec-
ommended that they be left on until
safety can be ensured.
(The interior lights may not turn on
automatically depending on the
force of the impact and conditions of
the collision.)
■Customization
Some functions can be customized.
( P.442)
Operating the personal
lights
NOTICE
■To prevent 12-volt battery dis-
charge
Do not leave the lights on longer
than necessary when the hybrid
system is off.
Page 289 of 496
2895-3. Using the storage features
5
Interior features
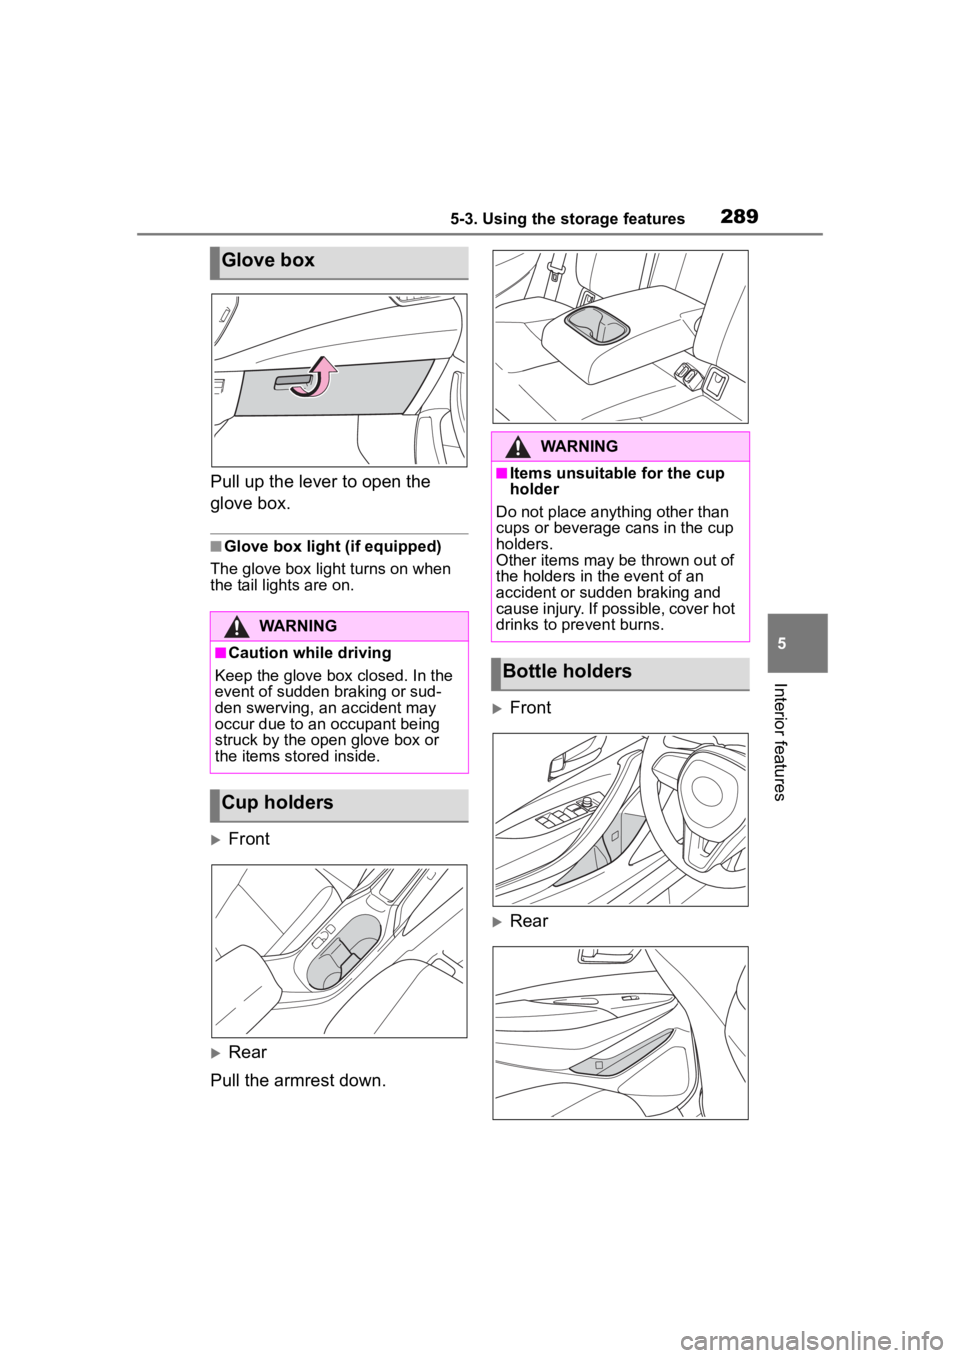
Pull up the lever to open the
glove box.
■Glove box light (if equipped)
The glove box light turns on when
the tail lights are on.
Front
Rear
Pull the armrest down.
Front
Rear
Glove box
WARNING
■Caution while driving
Keep the glove box closed. In the
event of sudden braking or sud-
den swerving, an accident may
occur due to an occupant being
struck by the open glove box or
the items stored inside.
Cup holders
WARNING
■Items unsuitable for the cup
holder
Do not place anyth ing other than
cups or beverage cans in the cup
holders.
Other items may be thrown out of
the holders in the event of an
accident or sudden braking and
cause injury. If possible, cover hot
drinks to pre vent burns.
Bottle holders
Page 294 of 496
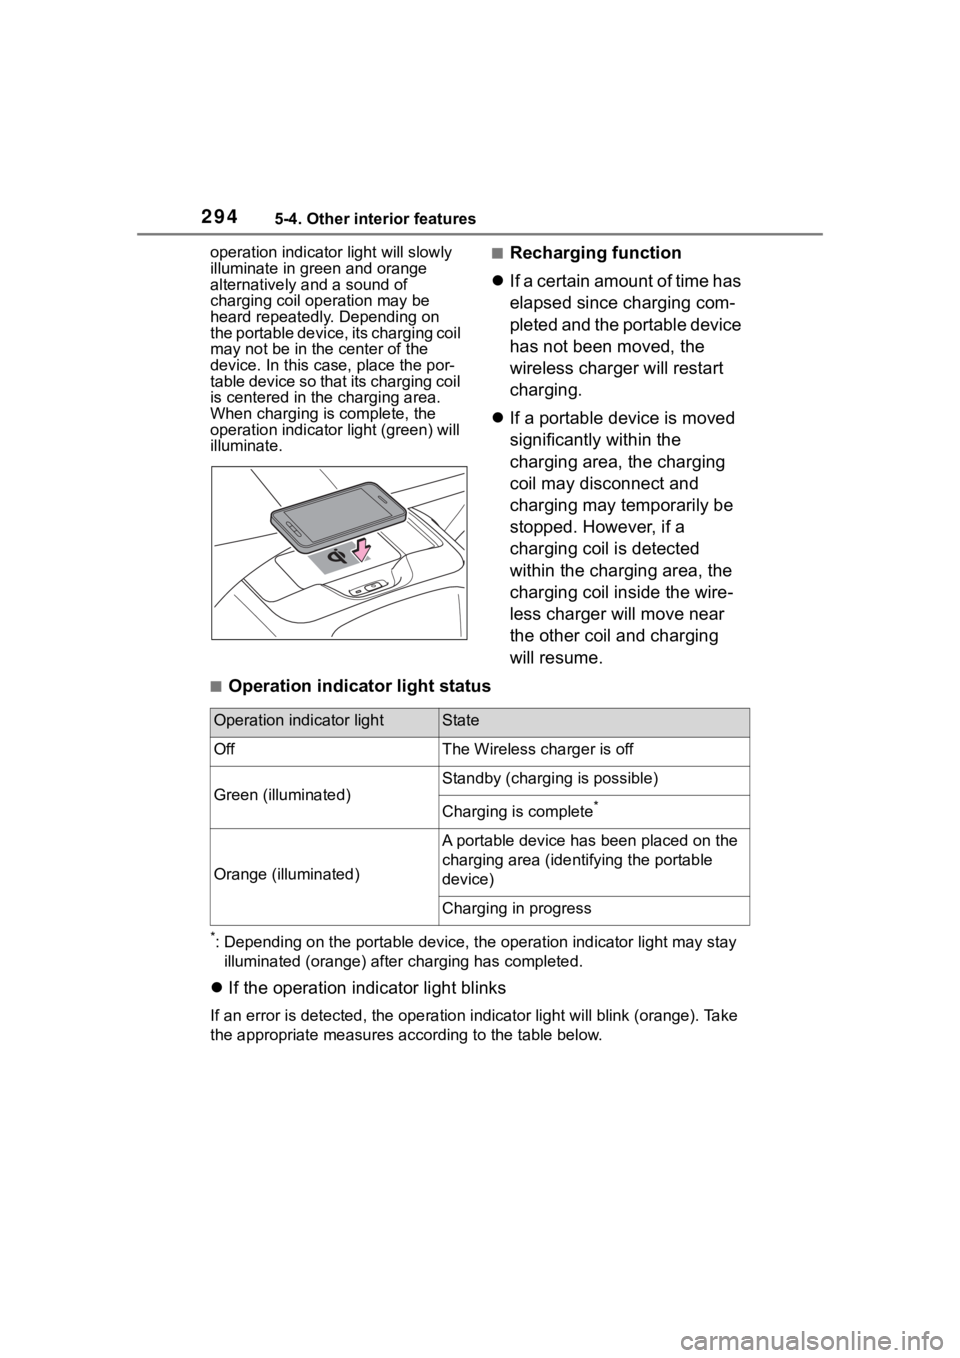
2945-4. Other interior features
operation indicator light will slowly
illuminate in green and orange
alternatively and a sound of
charging coil operation may be
heard repeatedly. Depending on
the portable device, its charging coil
may not be in the center of the
device. In this case, place the por-
table device so that its charging coil
is centered in the charging area.
When charging is complete, the
operation indicator light (green) will
illuminate.■Recharging function
If a certain amount of time has
elapsed since charging com-
pleted and the portable device
has not been moved, the
wireless charger will restart
charging.
If a portable device is moved
significantly within the
charging area, the charging
coil may disconnect and
charging may temporarily be
stopped. However, if a
charging coil is detected
within the charging area, the
charging coil inside the wire-
less charger will move near
the other coil and charging
will resume.
■Operation indicator light status
*: Depending on the portable devic e, the operation indicator light may stay
illuminated (orange) after charging has completed.
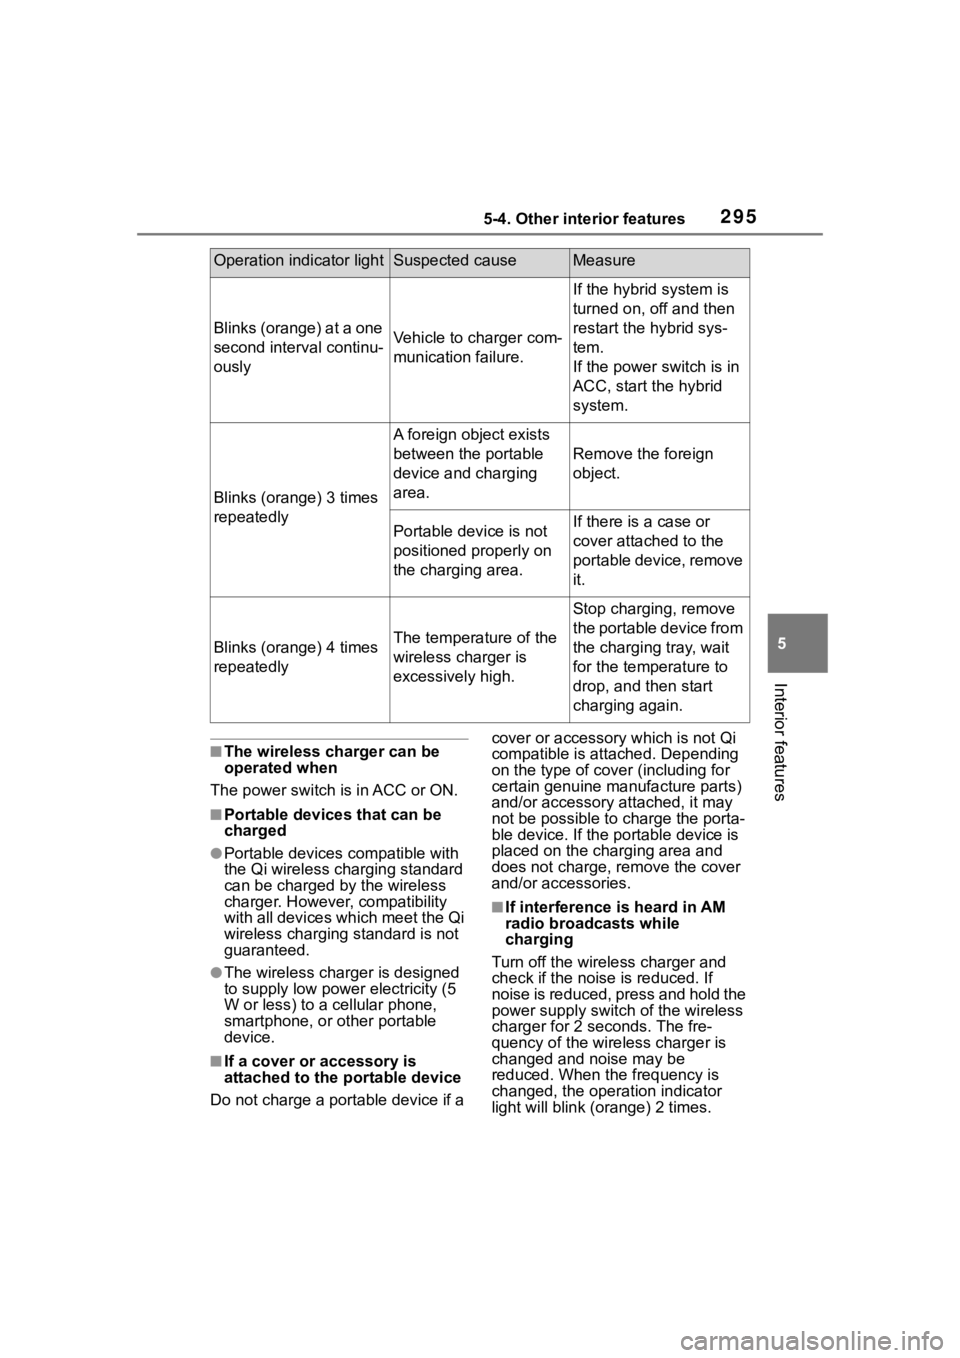
If the operation indicator light blinks
If an error is detec ted, the operation in dicator light will blink (orange). Take
the appropriate measures according to the table below.
Operation indicator lightState
OffThe Wireless charger is off
Green (illuminated)
Standby (charging is possible)
Charging is complete*
Orange (illuminated)
A portable device has been placed on the
charging area (identifying the portable
device)
Charging in progress
Page 295 of 496
2955-4. Other interior features
5
Interior features
■The wireless charger can be
operated when
The power switch i s in ACC or ON.
■Portable devices that can be
charged
●Portable devices compatible with
the Qi wireless charging standard
can be charged by the wireless
charger. However, compatibility
with all devices which meet the Qi
wireless charging standard is not
guaranteed.
●The wireless charger is designed
to supply low power electricity (5
W or less) to a cellular phone,
smartphone, or other portable
device.
■If a cover or accessory is
attached to the portable device
Do not charge a portable device if a cover or accessory w
hich is not Qi
compatible is atta ched. Depending
on the type of cover (including for
certain genuine manufacture parts)
and/or accessory a ttached, it may
not be possible to charge the porta-
ble device. If the portable device is
placed on the charging area and
does not charge, remove the cover
and/or accessories.
■If interference is heard in AM
radio broadcasts while
charging
Turn off the wireless charger and
check if the noise is reduced. If
noise is reduced, press and hold the
power supply switch of the wireless
charger for 2 se conds. The fre-
quency of the wireless charger is
changed and noise may be
reduced. When the frequency is
changed, the operation indicator
light will blink (orange) 2 times.
Operation indicator lightSuspected causeMeasure
Blinks (orange) at a one
second interval continu-
ouslyVehicle to charger com-
munication failure.
If the hybrid system is
turned on, off and then
restart the hybrid sys-
tem.
If the power switch is in
ACC, start the hybrid
system.
Blinks (orange) 3 times
repeatedly
A foreign object exists
between the portable
device and charging
area.
Remove the foreign
object.
Portable device is not
positioned properly on
the charging area.If there is a case or
cover attached to the
portable device, remove
it.
Blinks (orange) 4 times
repeatedlyThe temperature of the
wireless charger is
excessively high.
Stop charging, remove
the portable device from
the charging tray, wait
for the temperature to
drop, and then start
charging again.