TOYOTA FJ CRUISER 2009 1.G Owners Manual
FJ CRUISER 2009 1.G
TOYOTA
TOYOTA
https://www.carmanualsonline.info/img/14/6364/w960_6364-0.png
TOYOTA FJ CRUISER 2009 1.G Owners Manual
Trending: winter tires, adding oil, roof, remote control, engine oil, key, jump cable
Page 261 of 432
261
3-5. Other interior features
3
Interior features
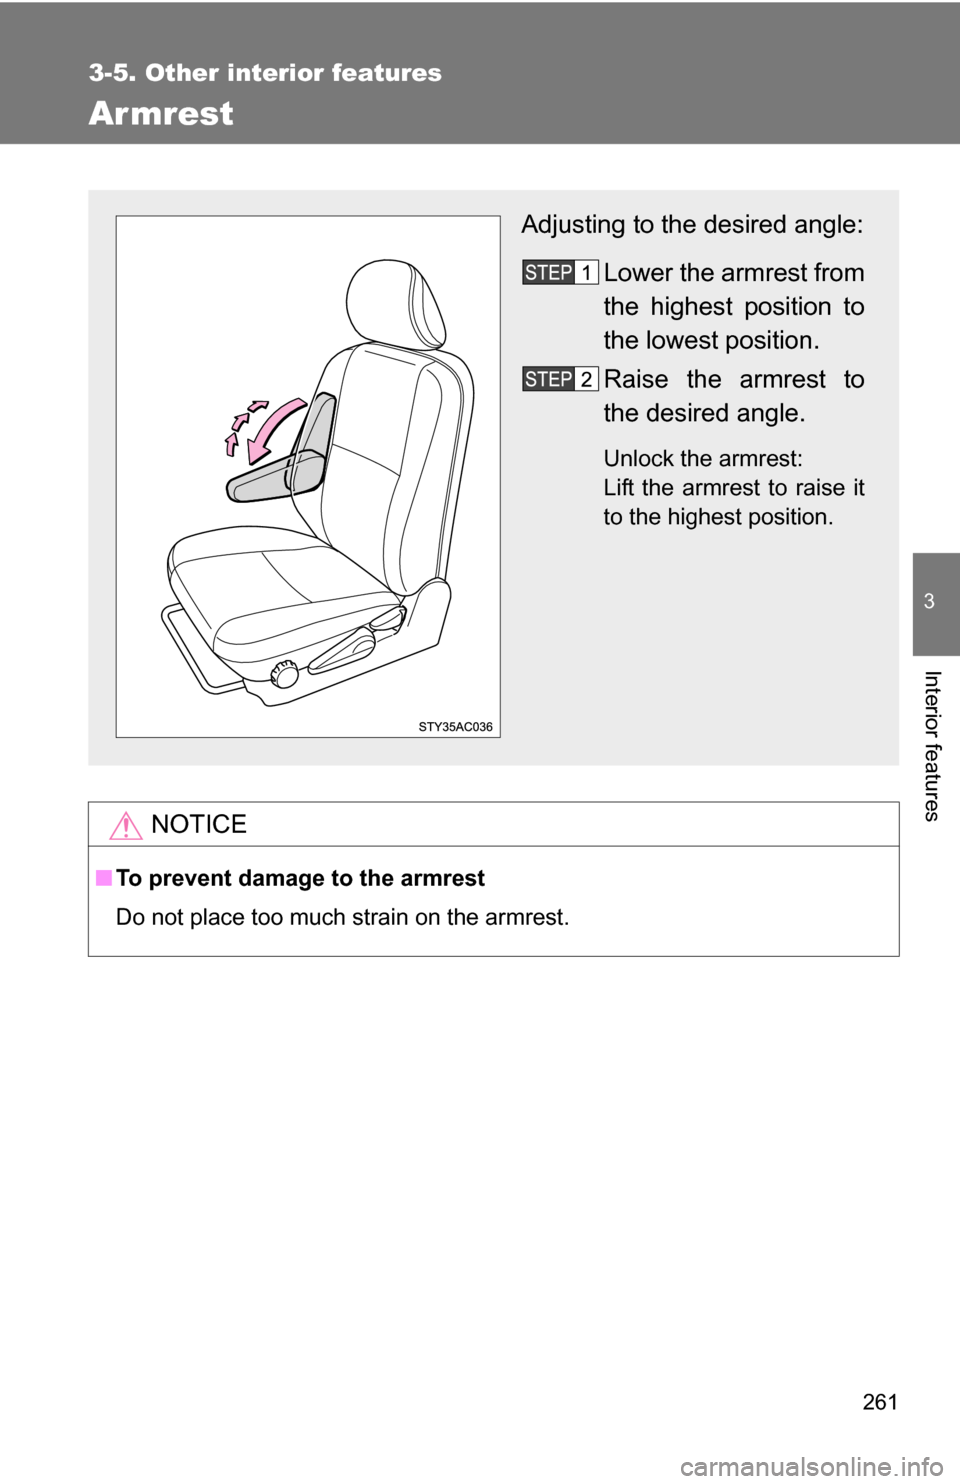
Armrest
NOTICE
■To prevent damage to the armrest
Do not place too much strain on the armrest.
Adjusting to the desired angle:
Lower the armrest from
the highest position to
the lowest position.
Raise the armrest to
the desired angle.
Unlock the armrest:
Lift the armrest to raise it
to the highest position.
Page 262 of 432
262
3-5. Other interior features
Floor mat
CAUTION
■When inserting the floor mat
Observe the following precautions.
Failure to do so may result in the floor mat slipping and interfering wi\
th the
movement of the pedals during driving, resulting in an accident.
●Make sure the floor mat is properly placed on the vehicle carpet and the
correct side faces upward.
● Do not place floor mats on top of existing mats.
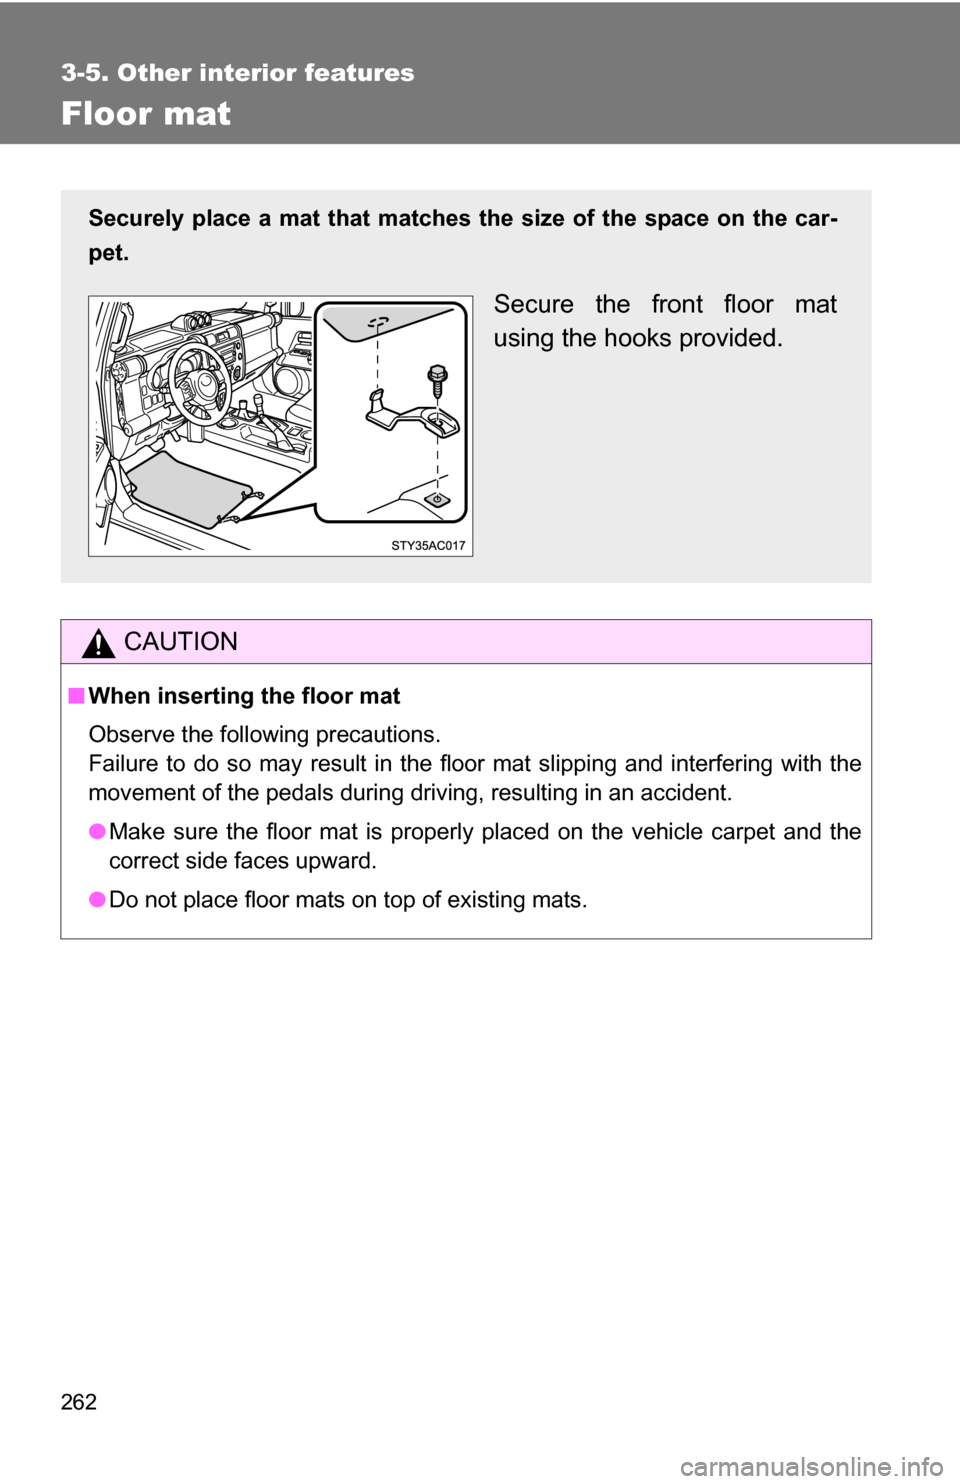
Securely place a mat that matches the size of the space on the car-
pet.
Secure the front floor mat
using the hooks provided.
Page 263 of 432
263
3-5. Other interior features
3
Interior features
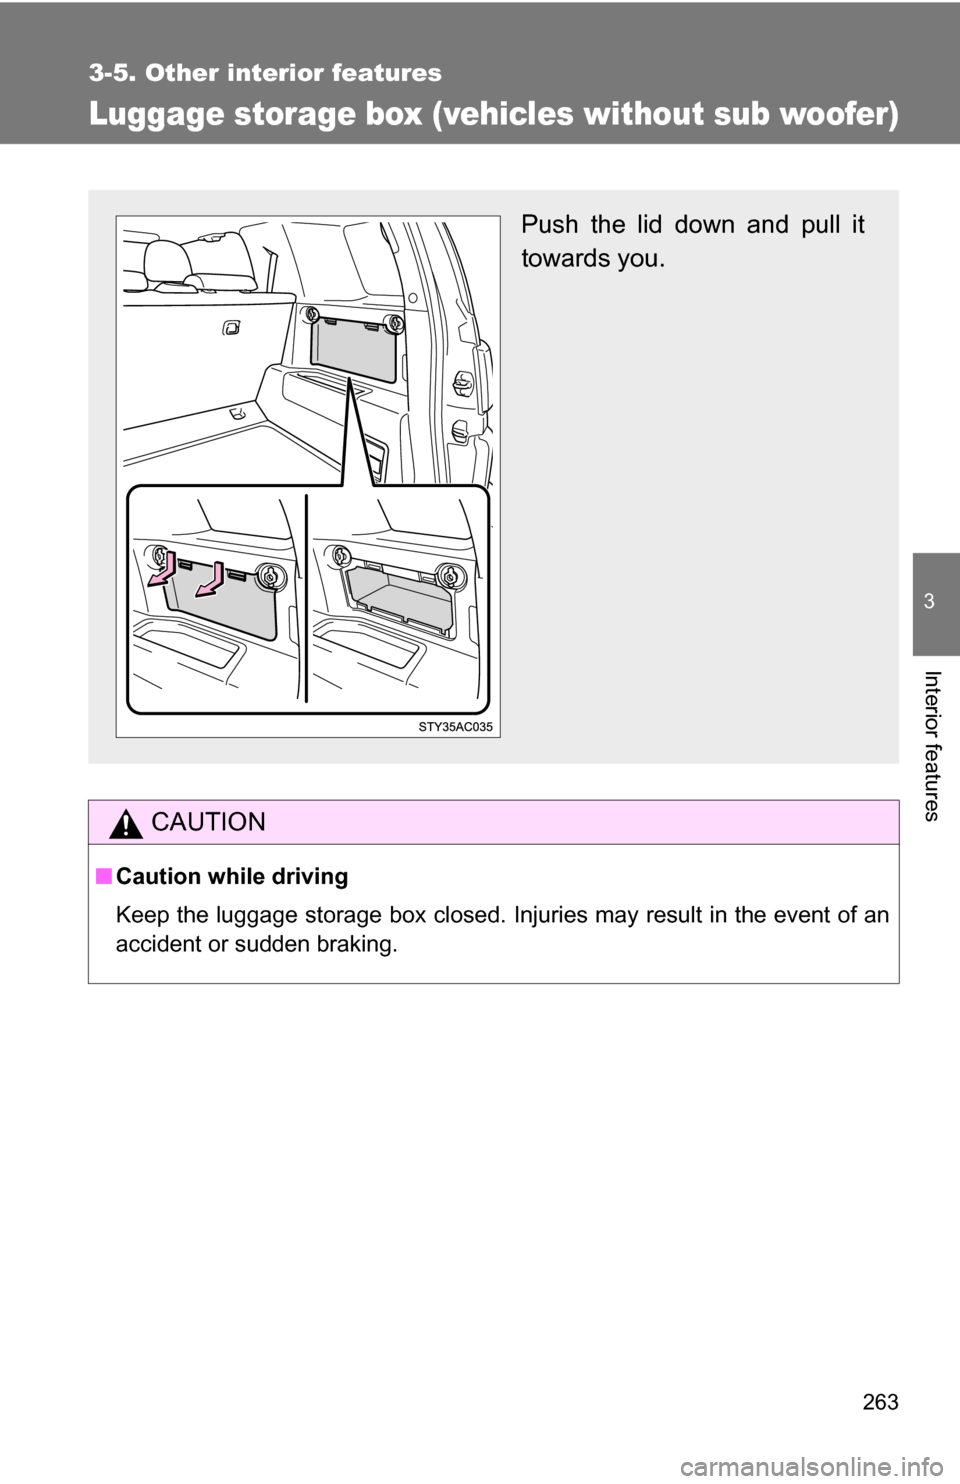
Luggage storage box (vehicles without sub woofer)
CAUTION
■Caution while driving
Keep the luggage storage box closed. Injuries may result in the event of an
accident or sudden braking.
Push the lid down and pull it
towards you.
Page 264 of 432
264
3-5. Other interior features
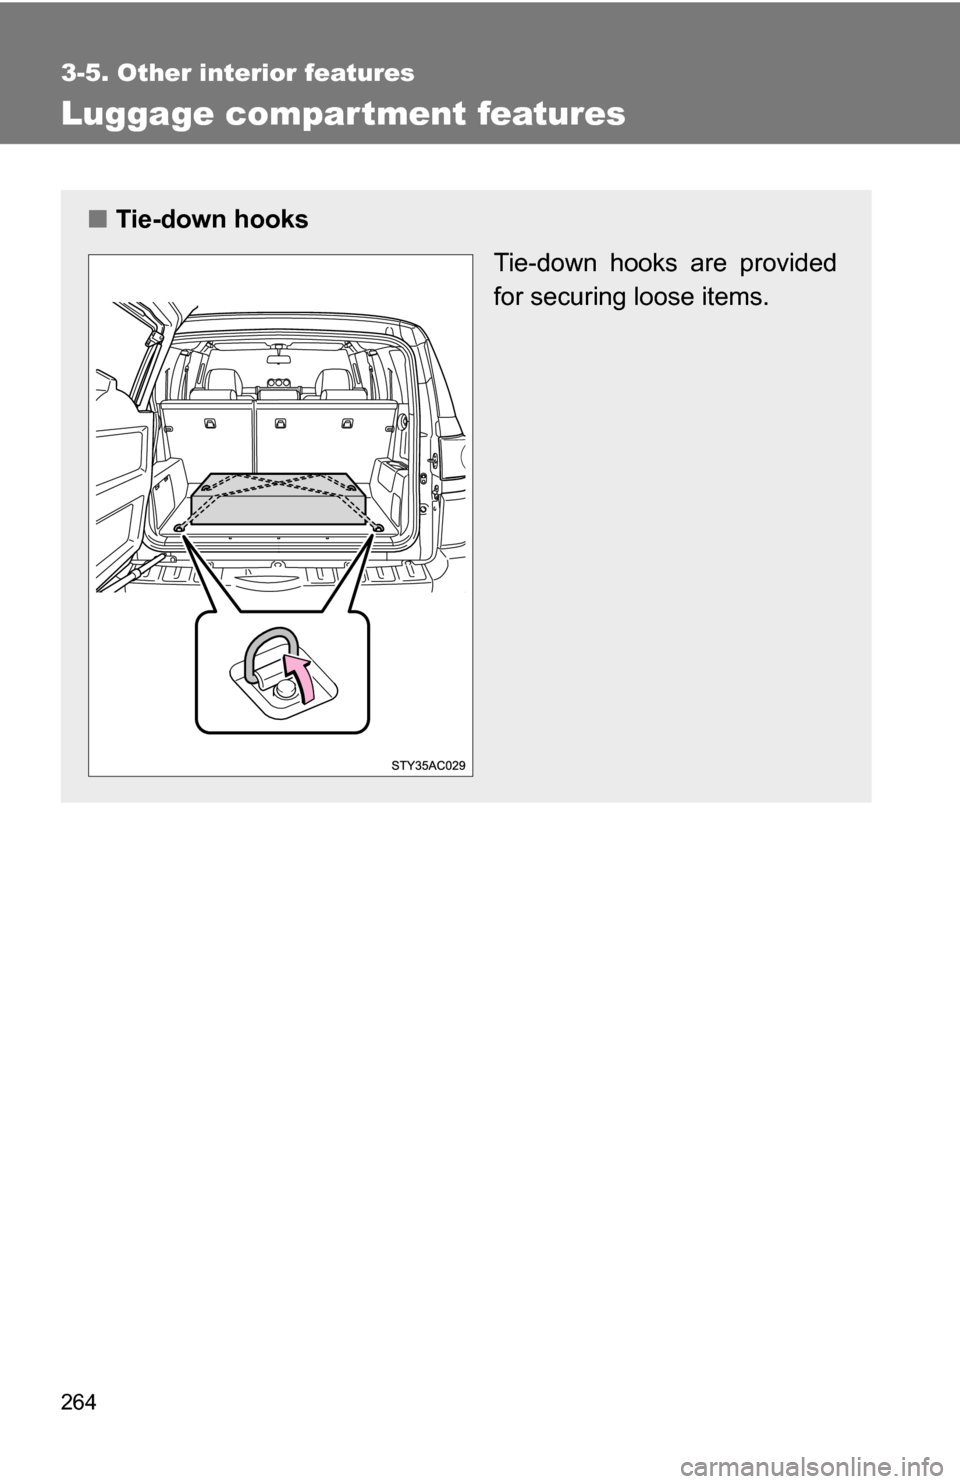
Luggage compartment features
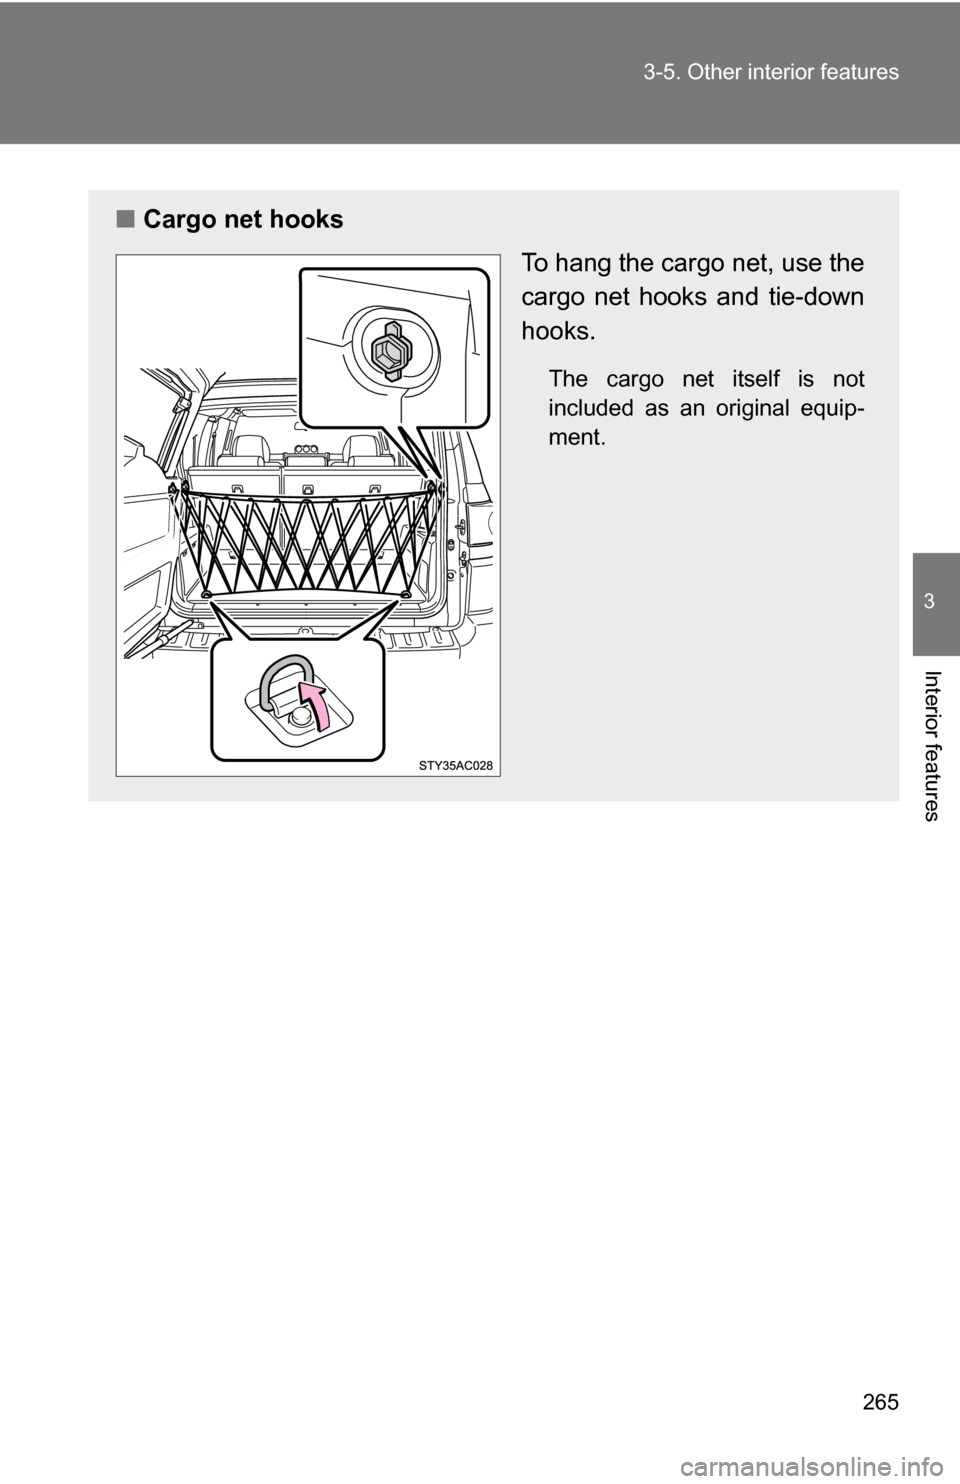
■Tie-down hooks
Tie-down hooks are provided
for securing loose items.
Page 265 of 432
265
3-5. Other interior features
3
Interior features
■
Cargo net hooks
To hang the cargo net, use the
cargo net hooks and tie-down
hooks.
The cargo net itself is not
included as an original equip-
ment.
Page 266 of 432
266 3-5. Other interior features
CAUTION
■When the tie-down hooks and car go net hooks are not in use
To avoid injury, always return the tie-down hooks and cargo net hooks to
their positions when they are not in use.
NOTICE
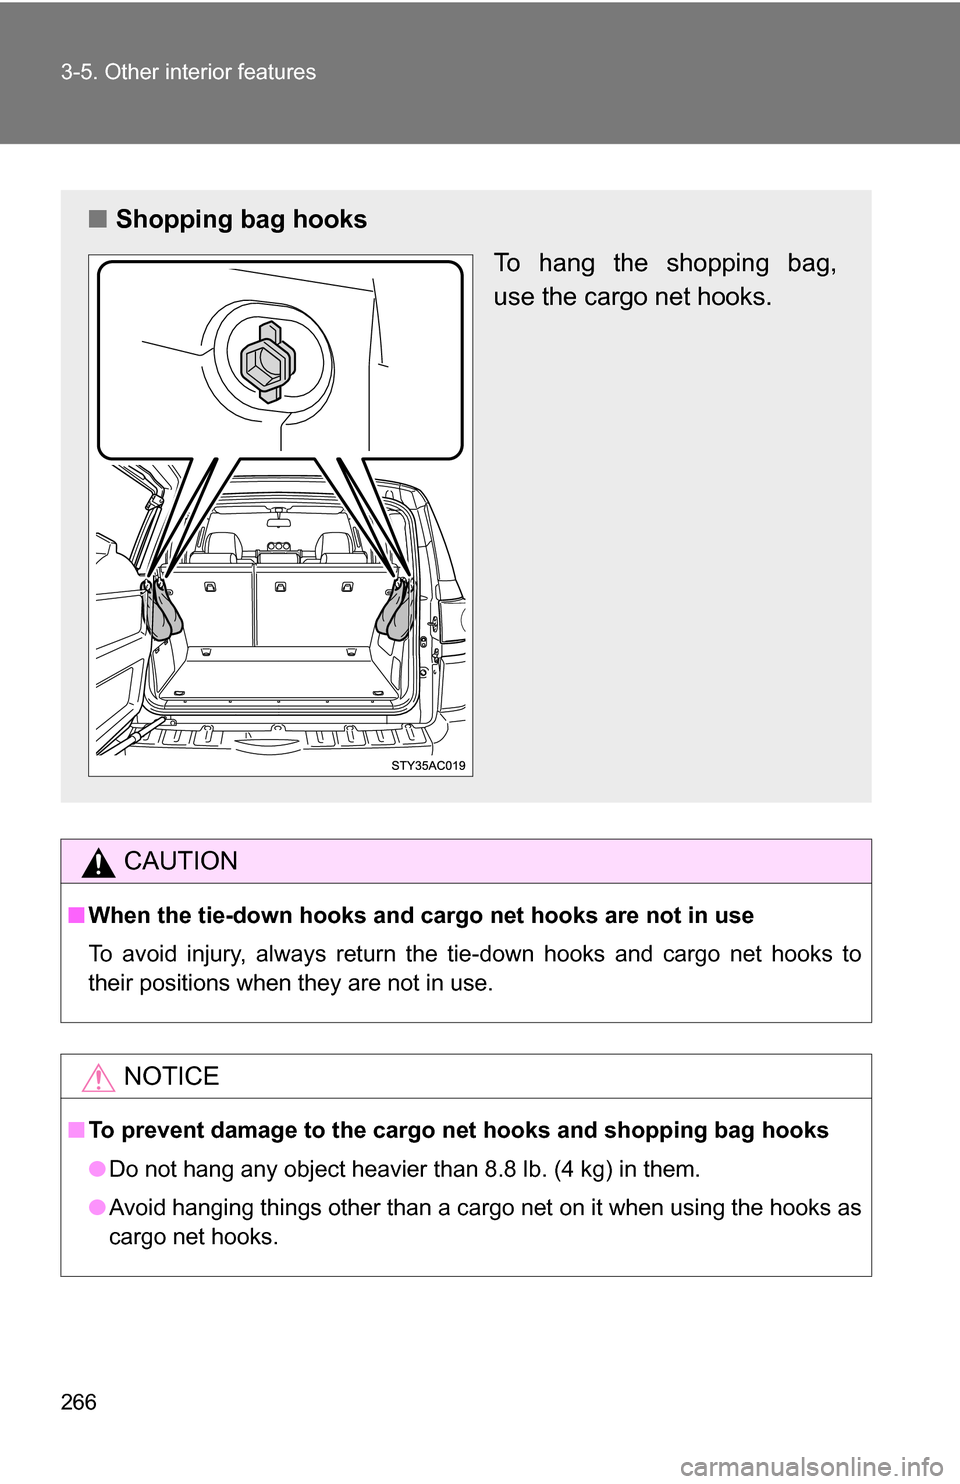
■ To prevent damage to the cargo net hooks and shopping bag hooks
●Do not hang any object heavier than 8.8 lb. (4 kg) in them.
● Avoid hanging things other than a cargo net on it when using the hooks as
cargo net hooks.
■ Shopping bag hooks
To hang the shopping bag,
use the cargo net hooks.
Page 267 of 432
267
3-5. Other interior features
3
Interior features
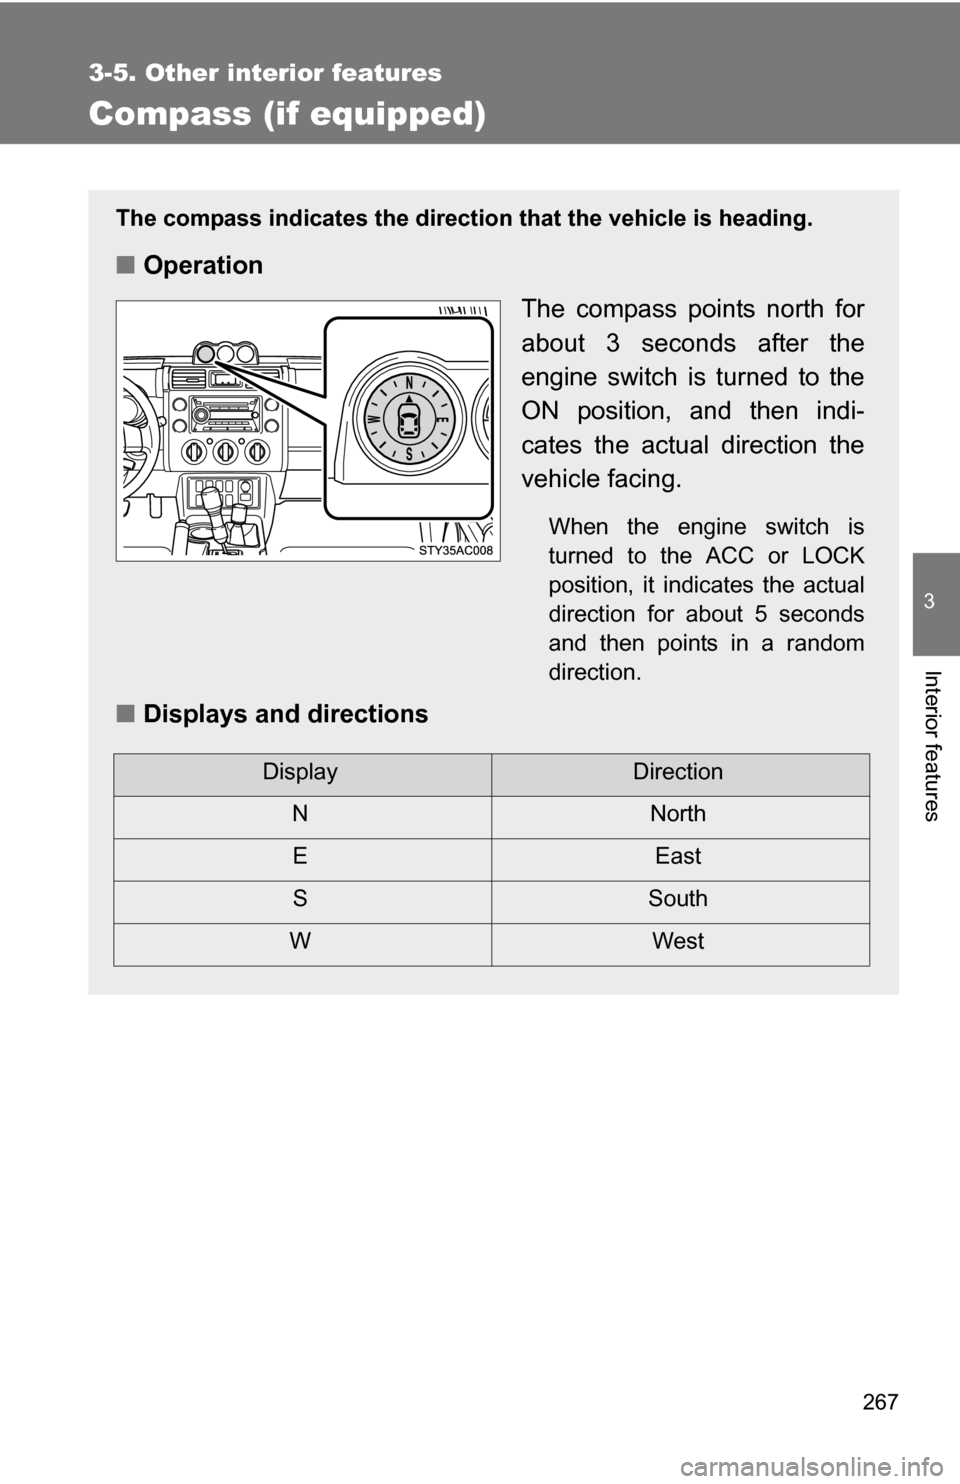
Compass (if equipped)
The compass indicates the direction that the vehicle is heading.
■Operation
The compass points north for
about 3 seconds after the
engine switch is turned to the
ON position, and then indi-
cates the actual direction the
vehicle facing.
When the engine switch is
turned to the ACC or LOCK
position, it indicates the actual
direction for about 5 seconds
and then points in a random
direction.
■Displays and directions
DisplayDirection
NNorth
EEast
SSouth
WWest
Page 268 of 432
268 3-5. Other interior features
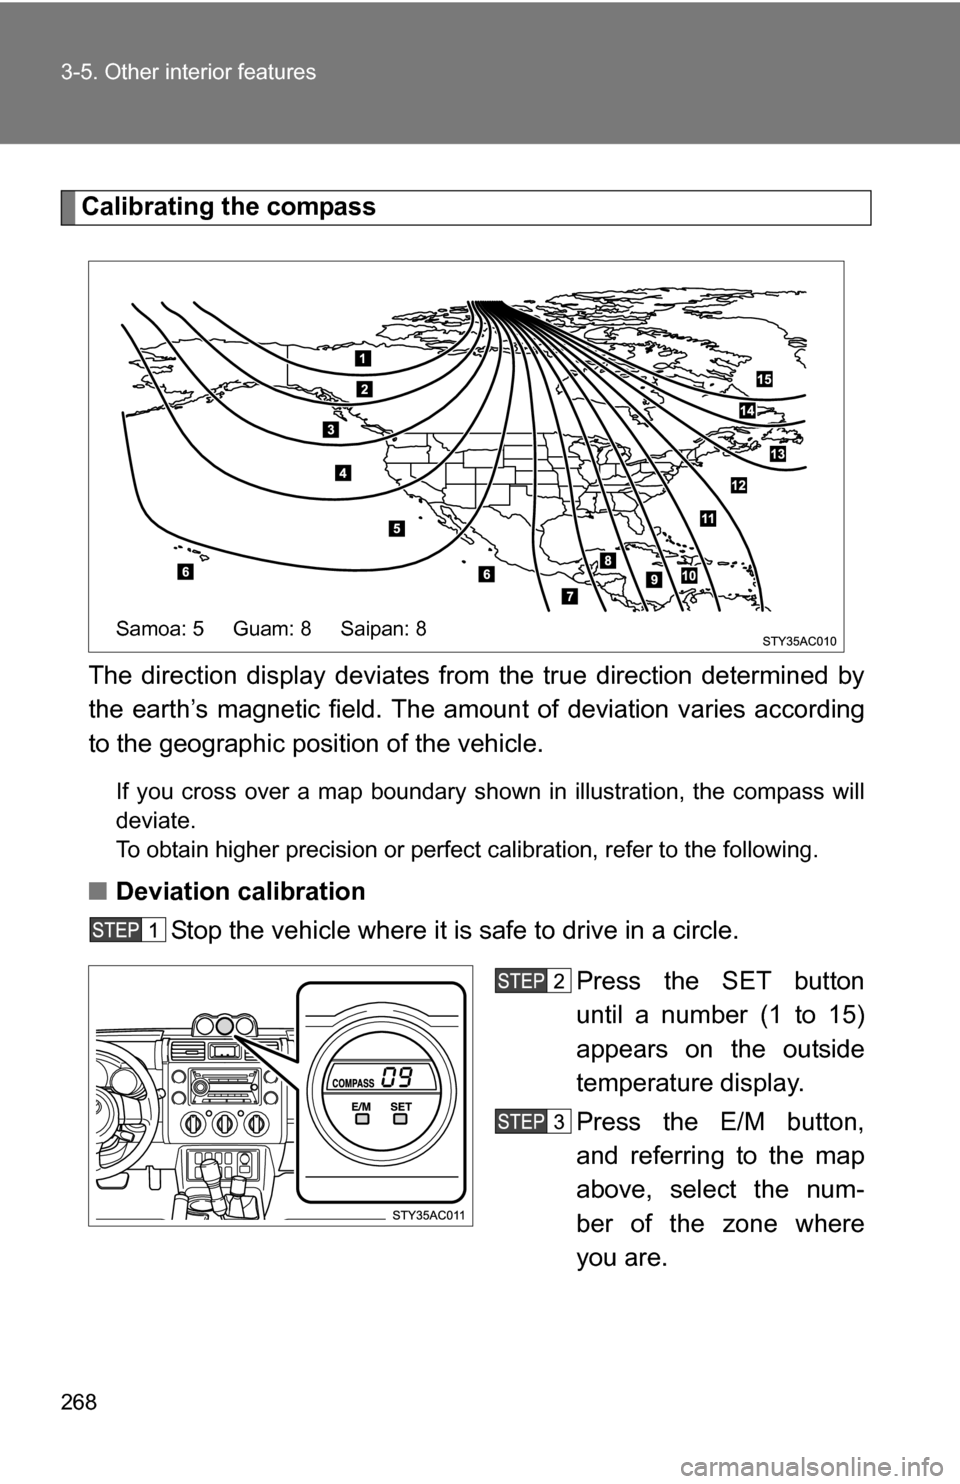
Calibrating the compassThe direction display deviates fr om the true direction determined by
the earth’s magnetic field. The amoun t of deviation varies according
to the geographic position of the vehicle.
If you cross over a map boundary shown in illustration, the compass will
deviate.
To obtain higher precision or perfect calibration, refer to the following.
■Deviation calibration
Stop the vehicle where it is safe to drive in a circle.
Press the SET button
until a number (1 to 15)
appears on the outside
temperature display.
Press the E/M button,
and referring to the map
above, select the num-
ber of the zone where
you are.
Samoa: 5 Guam: 8 Saipan: 8
Page 269 of 432
269
3-5. Other interior features
3
Interior features
After calibration, leave the system for 6 seconds or press the
SET button for about 2 seconds.
If the display returns to the outside temperature display, the calibra-
tion is complete.
■
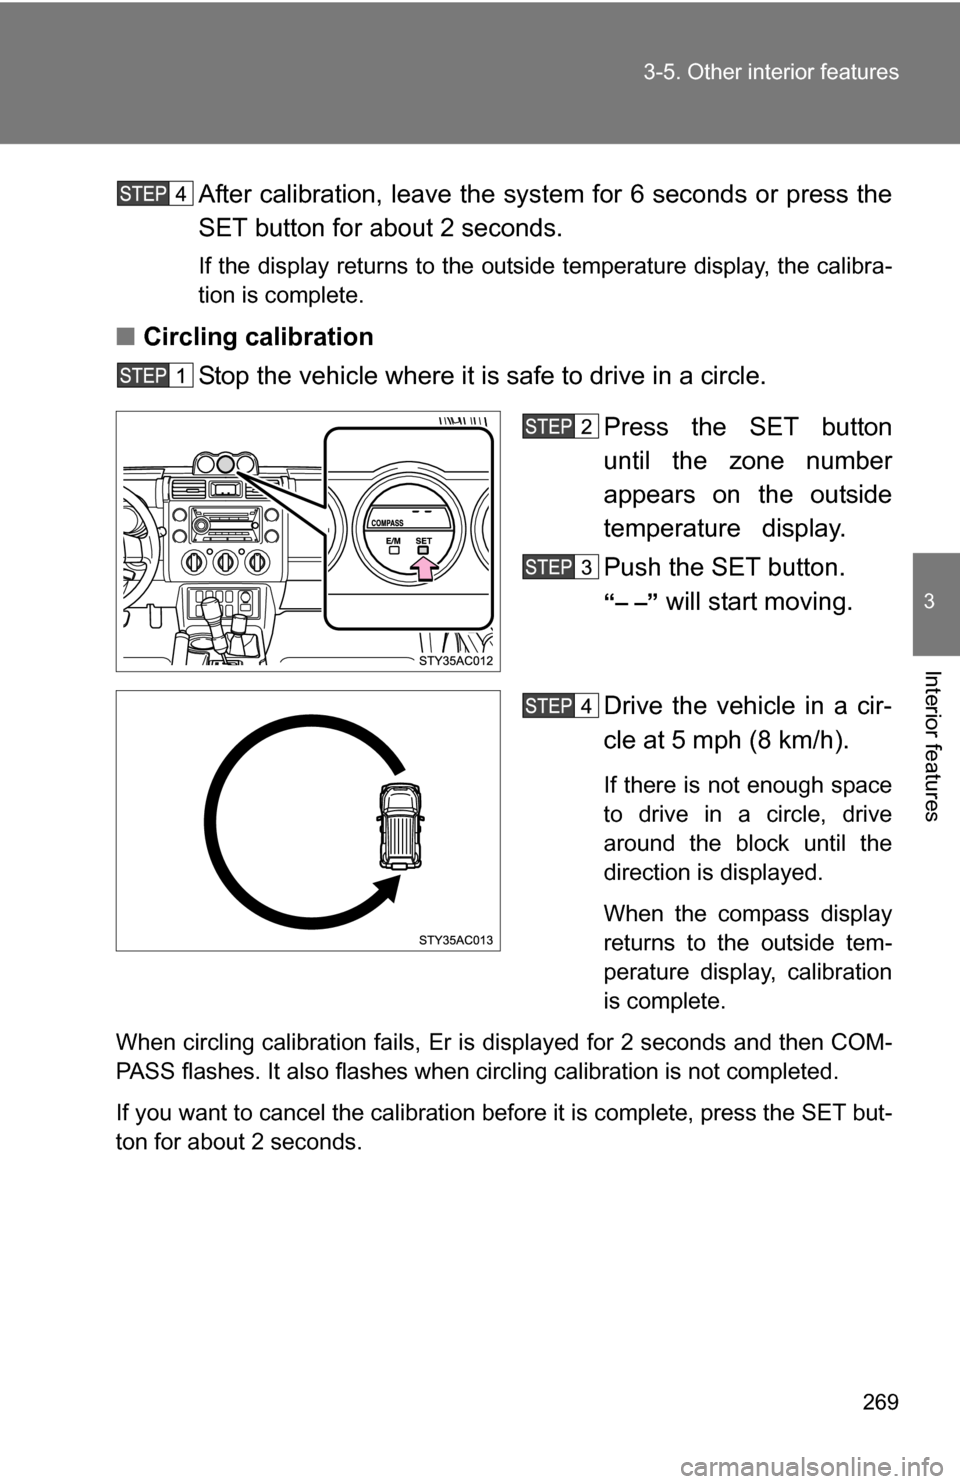
Circling calibration
Stop the vehicle where it is safe to drive in a circle.
Press the SET button
until the zone number
appears on the outside
temperature display.
Push the SET button.
“– –” will start moving.
Drive the vehicle in a cir-
cle at 5 mph (8 km/h).
If there is not enough space
to drive in a circle, drive
around the block until the
direction is displayed.
When the compass display
returns to the outside tem-
perature display, calibration
is complete.
When circling calibration fails, Er is displayed for 2 seconds and then COM-
PASS flashes. It also flashes when circling calibration is not completed.
If you want to cancel the calibration before it is complete, press the SET but-
ton for about 2 seconds.
Page 270 of 432
270 3-5. Other interior features
■Conditions unfavorable to correct operation
The compass may not show the correct direction in the following conditions:
●The vehicle is stopped immediately after turning.
The compass does not adjust while the vehicle is stopped.
● The engine switch is turned off immediately after turning.
● The vehicle is on an inclined surface.
● The vehicle is in a place where the earth’s magnetic field is subject to
interference by artificial magnetic fields (underground car park/parking
lot, under a steel tower, between buildings, roof car park/parking lot, near
an intersection, near a large vehicle, etc.).
● The vehicle has become magnetized.
(There is a magnet or metal object on or near the accessory meter.)
● The battery has been disconnected.
■ When disconnecting and reco nnecting battery terminals
COMPASS flashes and the compass is reset to its initial mode.
CAUTION
■ While driving the vehicle
Do not adjust the display. Be sure to adjust the display only when the vehicle
is stopped.
■ When doing the circling calibration
Be sure to secure a wide space, and watch out for people and vehicles in the
neighborhood. Do not violate any local traffic rules while performing circling
calibration.
Trending: clutch, weight, mirror, service schedule, wheel bolt torque, warning lights, cruise control
