wheel TOYOTA FJ CRUISER 2009 1.G Quick Reference Guide
[x] Cancel search | Manufacturer: TOYOTA, Model Year: 2009, Model line: FJ CRUISER, Model: TOYOTA FJ CRUISER 2009 1.GPages: 24, PDF Size: 1.5 MB
Page 3 of 24
1
INDEX
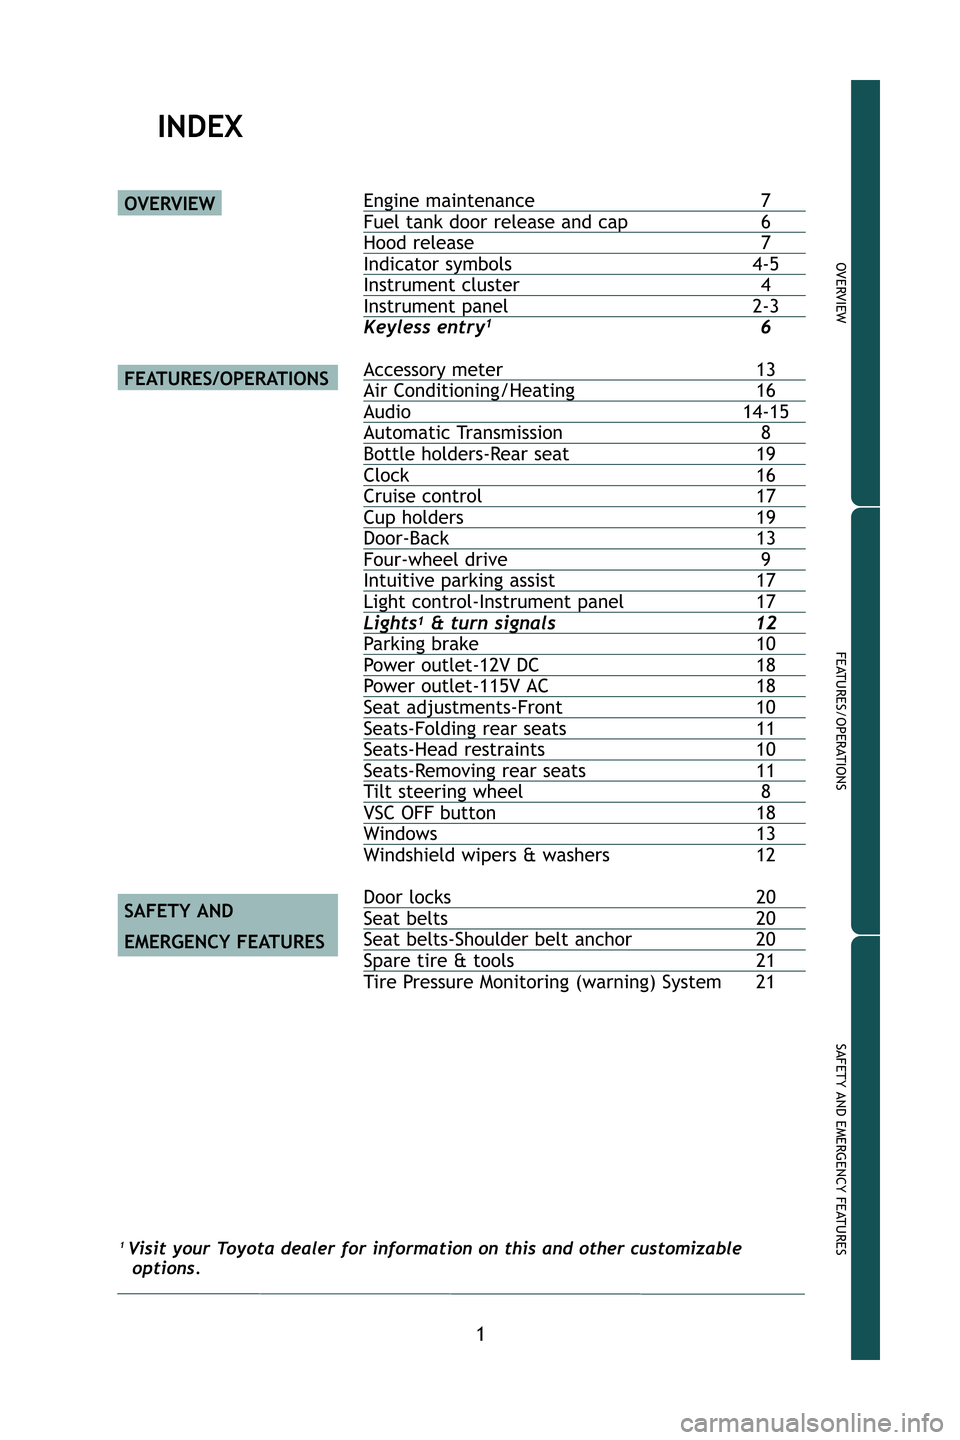
Engine maintenance7Fuel tank door release and cap6Hood release 7Indicator symbols4-5Instrument cluster 4Instrument panel2-3
Keyless entry16
Accessory meter 13Air Conditioning/Heating 16Audio 14-15Automatic Transmission 8Bottle holders-Rear seat19Clock 16Cruise control17Cup holders19Door-Back 13Four-wheel drive 9Intuitive parking assist17Light control-Instrument panel17Lights1& turn signals 12Parking brake 10Power outlet-12V DC 18Power outlet-115V AC18Seat adjustments-Front10Seats-Folding rear seats11Seats-Head restraints 10Seats-Removing rear seats11Tilt steering wheel 8VSC OFF button 18Windows 13
Windshield wipers & washers 12
Door locks 20Seat belts20Seat belts-Shoulder belt anchor20Spare tire & tools21
Tire Pressure Monitoring (warning) System 21
OVERVIEW
FEATURES/OPERATIONS
SAFETY AND EMERGENCY FEATURES
OVERVIEW
FEATURES/OPERATIONS
SAFETY AND
EMERGENCY FEATURES
1Visit your Toyota dealer for information on this and other customizable
options.
M2.qxd 7/28/08 3:06 PM Page 1
Page 4 of 24
OVERVIEW
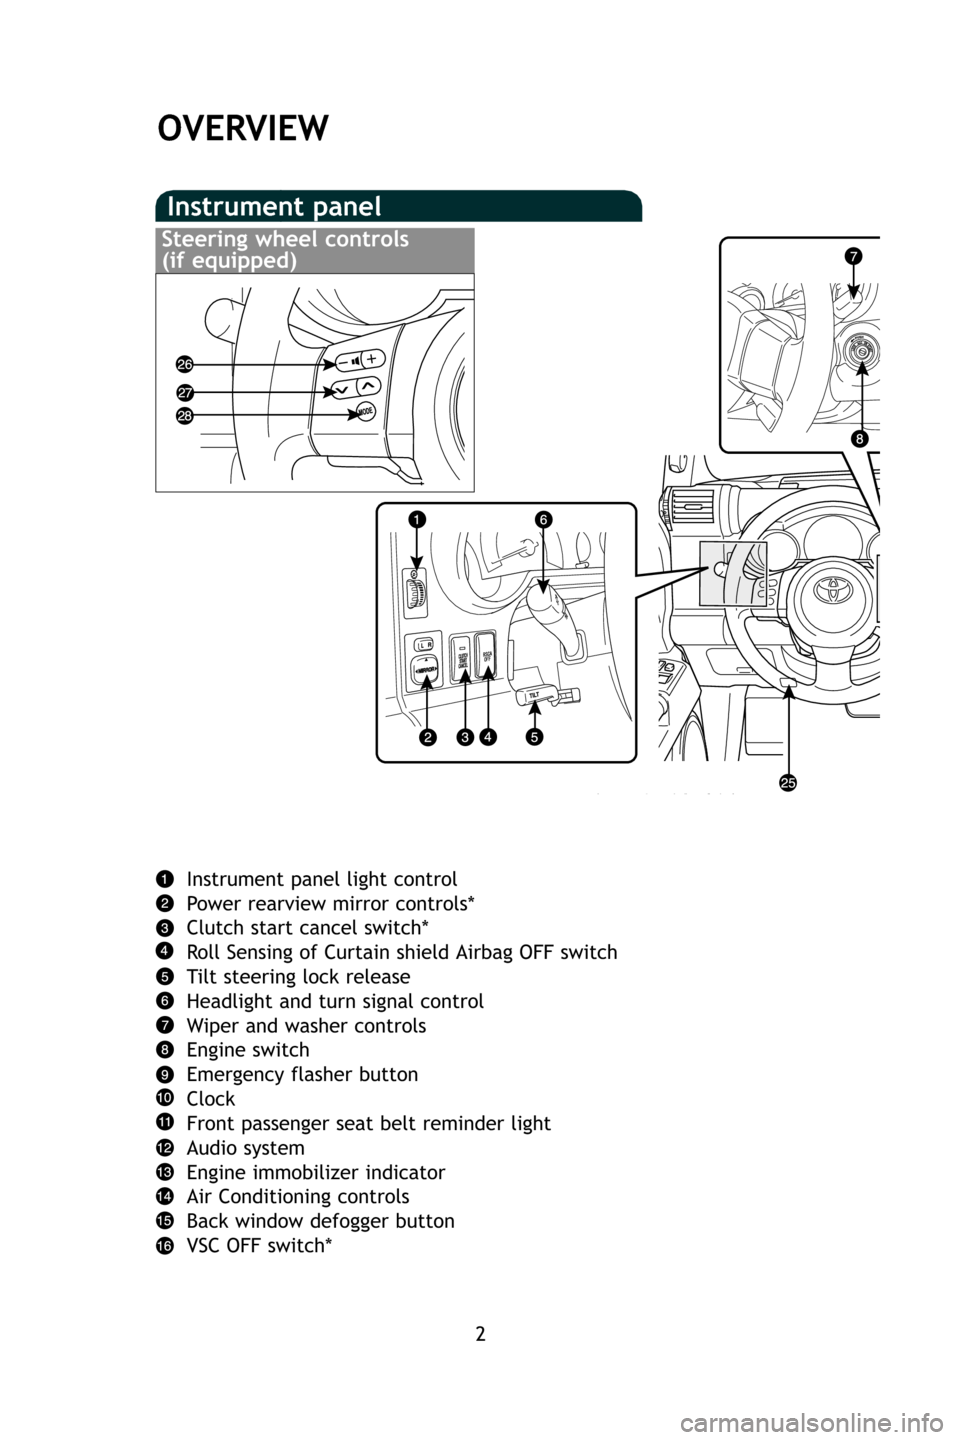
Instrument panel
2
Instrument panel light control
Power rearview mirror controls*
Clutch start cancel switch*
Roll Sensing of Curtain shield Airbag OFF switch
Tilt steering lock release
Headlight and turn signal control
Wiper and washer controls
Engine switch
Emergency flasher button
Clock
Front passenger seat belt reminder light
Audio system
Engine immobilizer indicator
Air Conditioning controls
Back window defogger button
VSC OFF switch*
Steering wheel controls
(if equipped)
M2.qxd 7/28/08 3:06 PM Page 2
Page 7 of 24
5
OVERVIEW
FEATURES/OPERATIONS
SAFETY AND EMERGENCY FEATURES
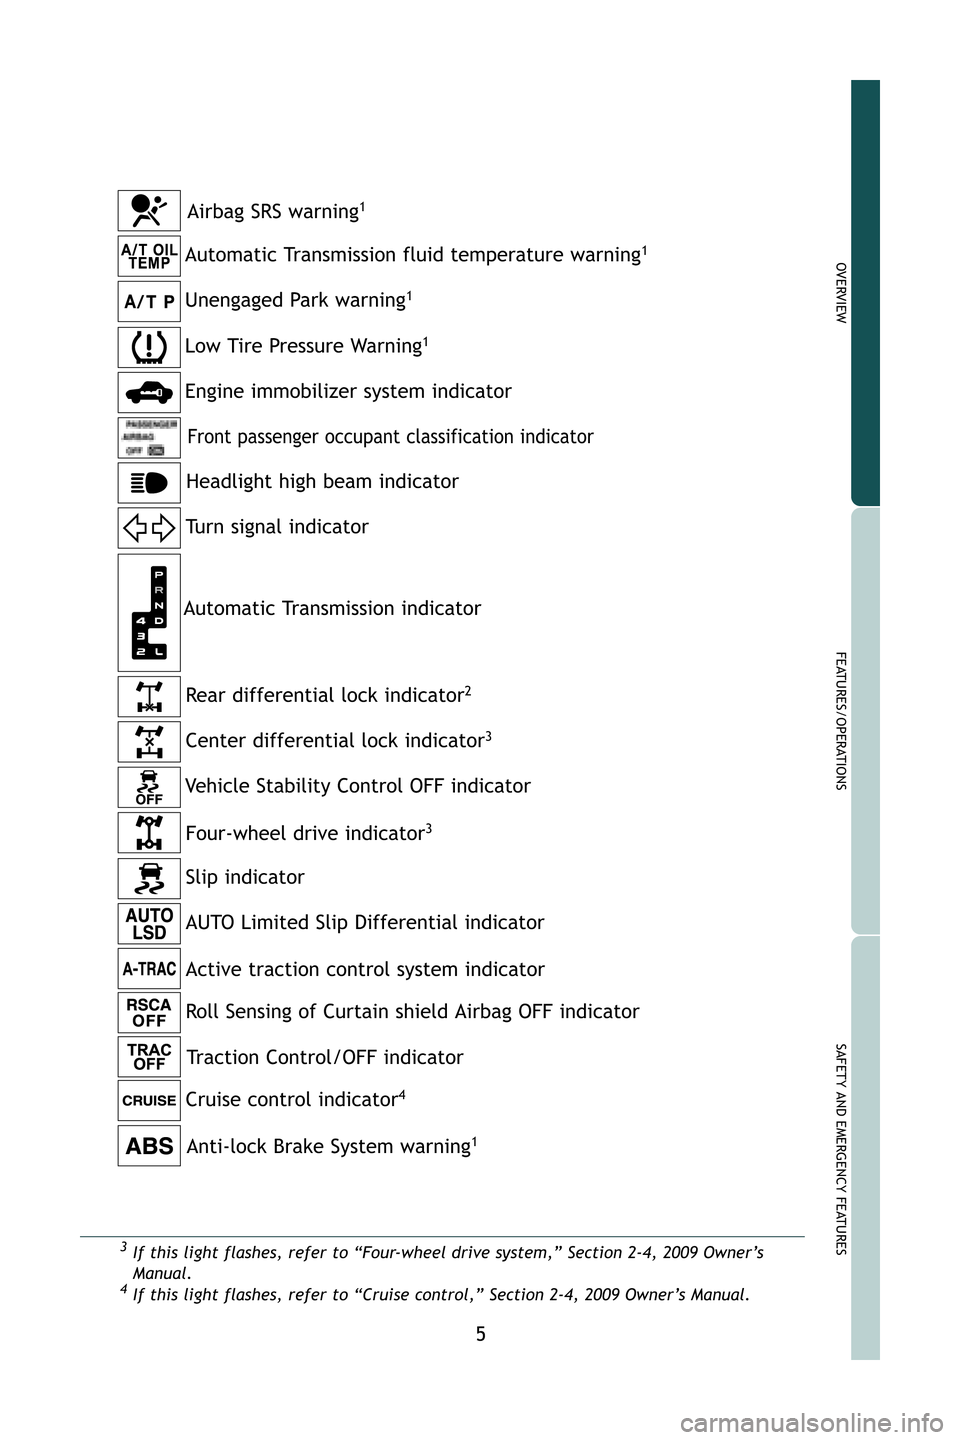
Automatic Transmission indicator
Front passenger occupant classification indicator
Turn signal indicator
Four-wheel drive indicator
3
Rear differential lock indicator2
Center differential lock indicator3
Slip indicator
Vehicle Stability Control OFF indicatorActive traction control system indicator AUTO Limited Slip Differential indicator
Cruise control indicator4
Automatic Transmission fluid temperature warning1
Unengaged Park warning1
Airbag SRS warning1
Headlight high beam indicator
Anti-lock Brake System warning
1
3If this light flashes, refer to “Four-wheel drive system,” Section 2-4, 2009 Owner’s
Manual.
4If this light flashes, refer to “Cruise control,” Section 2-4, 200\
9 Owner’s Manual.
Low Tire Pressure Warning1
Engine immobilizer system indicator
Roll Sensing of Curtain shield Airbag OFF indicator
Traction Control/OFF indicator
M2.qxd 7/28/08 3:06 PM Page 5
Page 10 of 24
FEATURES/OPERATIONS
8
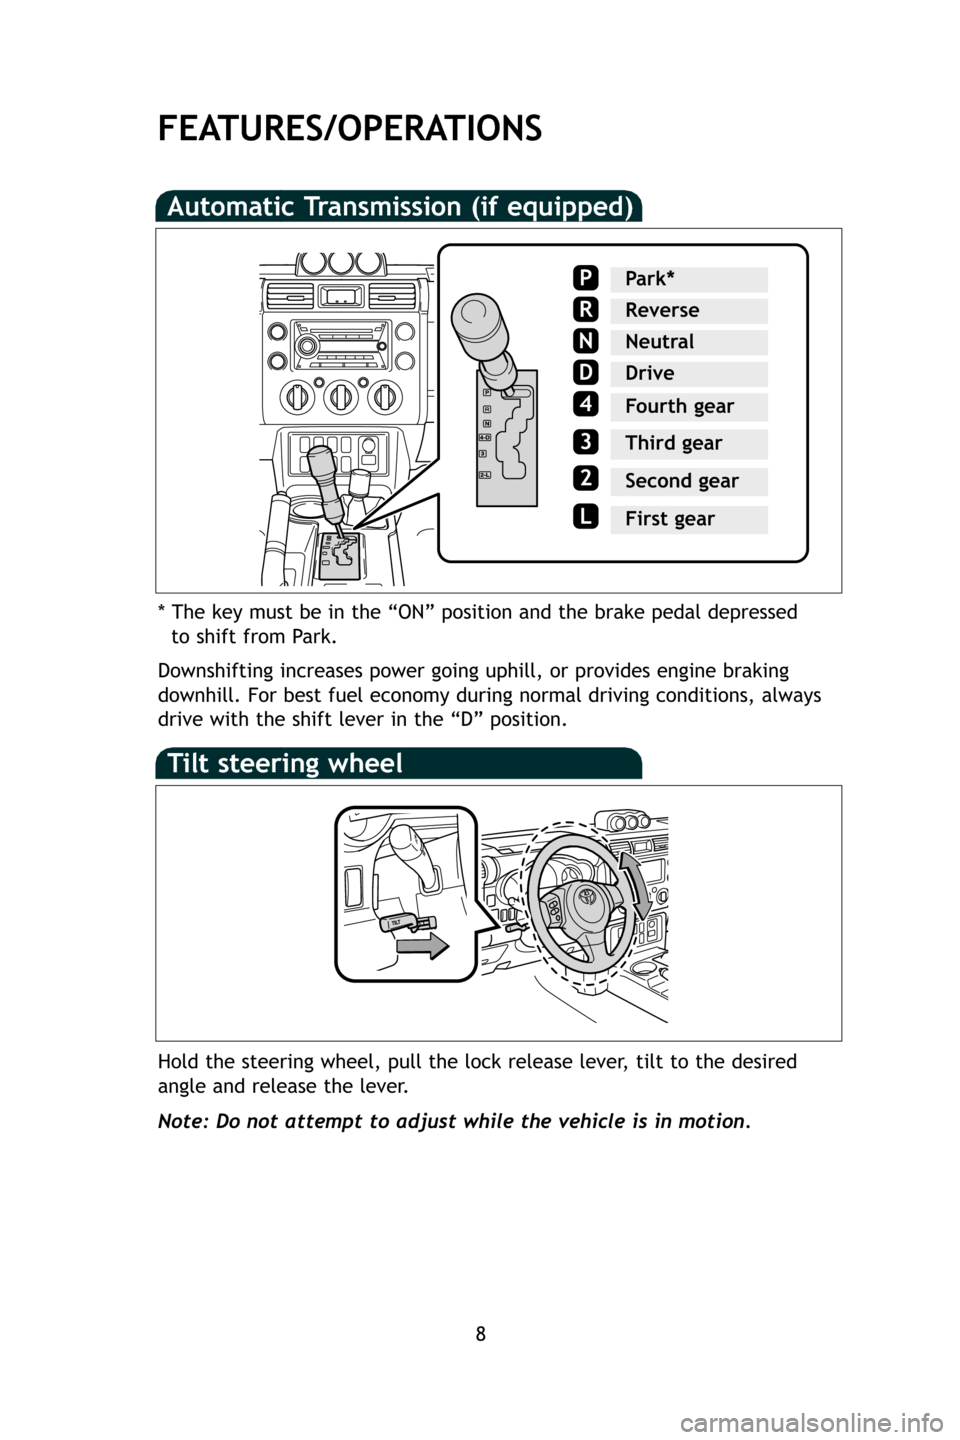
Automatic Transmission (if equipped)
Downshifting increases power going uphill, or provides engine braking
downhill. For best fuel economy during normal driving conditions, always\
drive with the shift lever in the “D” position.
Park*
Reverse
Neutral
Drive
Third gear
Second gear
First gear
P
R
N
D
4
3
2
L
Fourth gear
Tilt steering wheel
Hold the steering wheel, pull the lock release lever, tilt to the desired
angle and release the lever.
Note: Do not attempt to adjust while the vehicle is in motion. * The key must be in the “ON” position and the brake pedal depress\
edto shift from Park.
M2.qxd 7/28/08 3:06 PM Page 8
Page 11 of 24
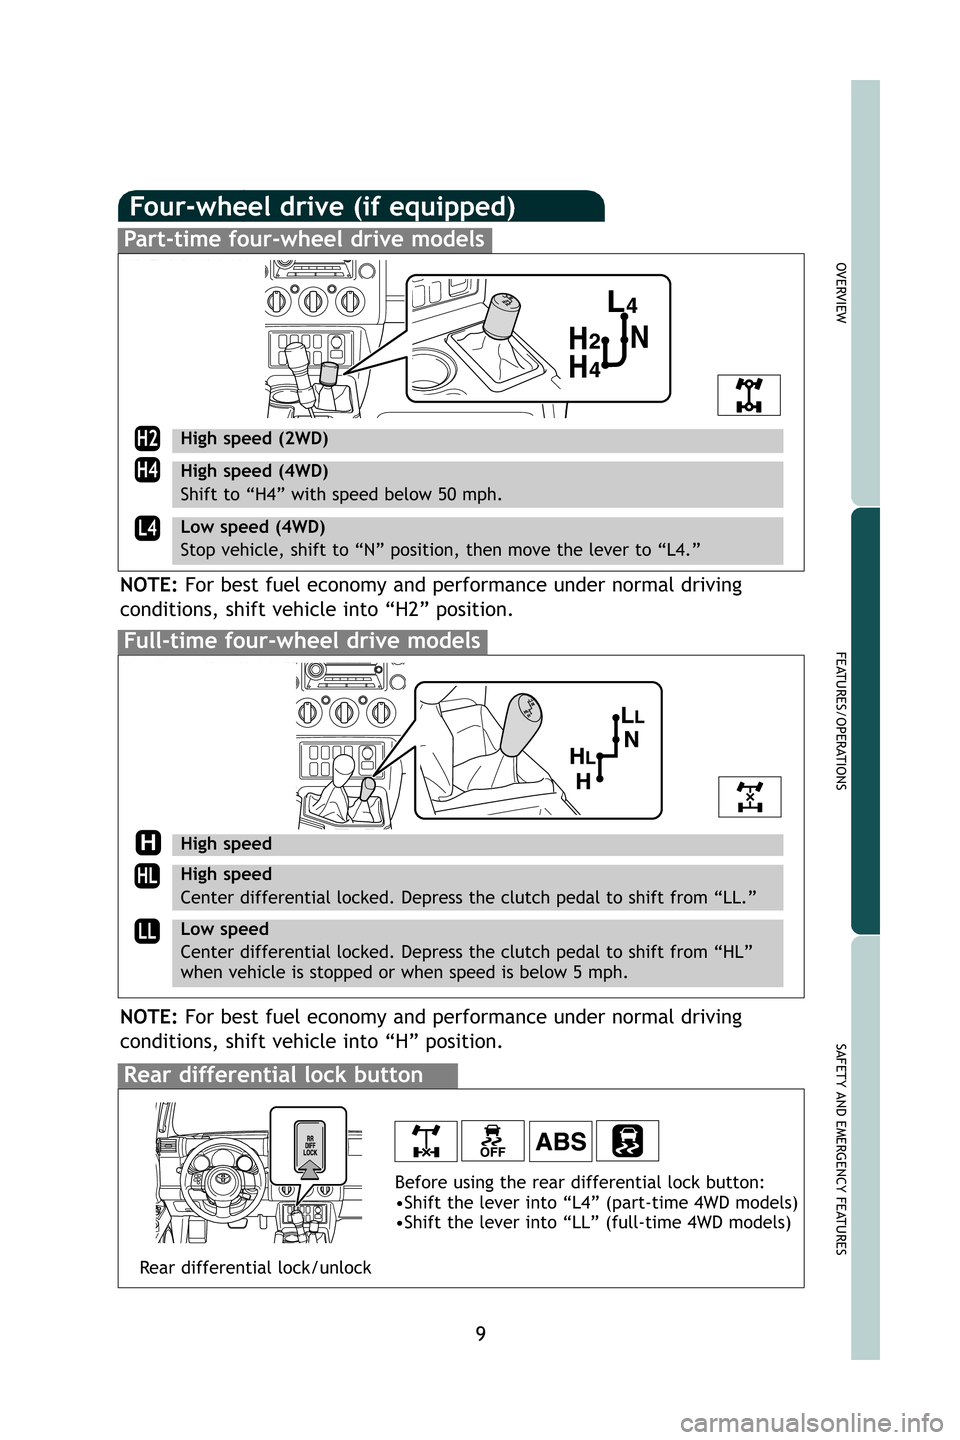
Four-wheel drive (if equipped)
9
OVERVIEW
FEATURES/OPERATIONS
SAFETY AND EMERGENCY FEATURES
H2
H4
L4
Full-time four-wheel drive models
Part-time four-wheel drive models
High speed (2WD)
High speed (4WD)
Shift to “H4” with speed below 50 mph.
Low speed (4WD)
Stop vehicle, shift to “N” position, then move the lever to “L4\
.”
Rear differential lock button
NOTE: For best fuel economy and performance under normal driving
conditions, shift vehicle into “H2” position.
Rear differential lock/unlock
Low speed
Center differential locked. Depress the clutch pedal to shift from “H\
L”
when vehicle is stopped or when speed is below 5 mph.
HL
LL
H
Before using the rear differential lock button:
•Shift the lever into “L4” (part-time 4WD models)
•Shift the lever into “LL” (full-time 4WD models)
NOTE: For best fuel economy and performance under normal driving
conditions, shift vehicle into “H” position.
High speed
High speed
Center differential locked. Depress the clutch pedal to shift from “L\
L.”
M2.qxd 7/28/08 3:06 PM Page 9
Page 17 of 24
15
OVERVIEW
FEATURES/OPERATIONS
SAFETY AND EMERGENCY FEATURES
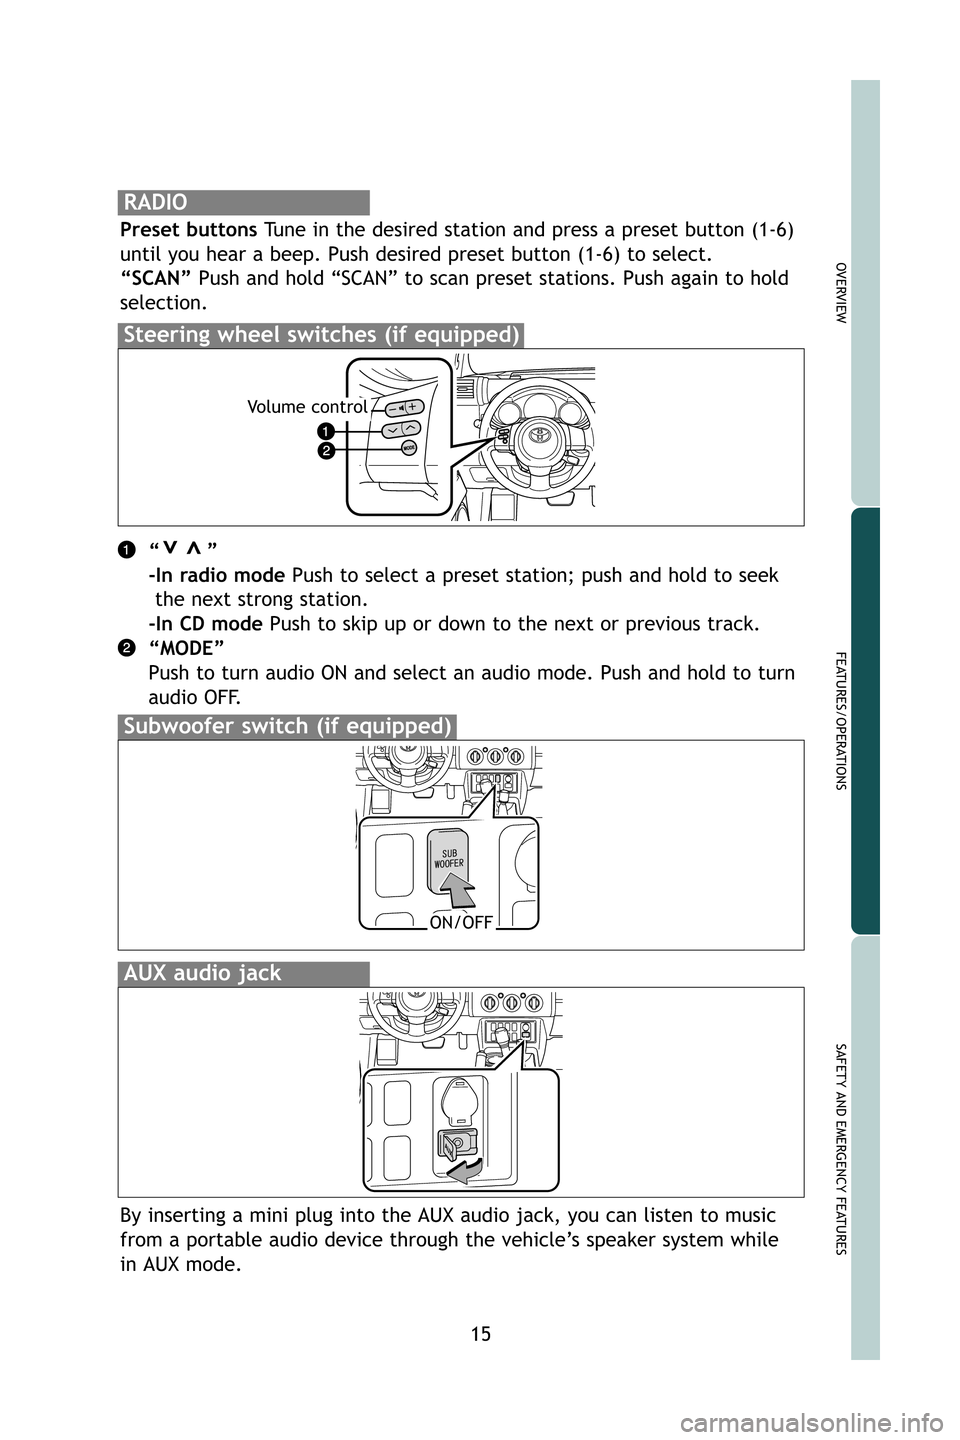
RADIO
Preset buttons Tune in the desired station and press a preset button (1-6)
until you hear a beep. Push desired preset button (1-6) to select.
“SCAN” Push and hold “SCAN” to scan preset stations. Push again to hold
selection.
“ ”
-In radio mode Push to select a preset station; push and hold to seek
the next strong station.
-In CD mode Push to skip up or down to the next or previous track.
“MODE”
Push to turn audio ON and select an audio mode. Push and hold to turn
audio OFF.
>>
Steering wheel switches (if equipped)
Subwoofer switch (if equipped)
ON/OFF
By inserting a mini plug into the AUX audio jack, you can listen to musi\
c
from a portable audio device through the vehicle’s speaker system while
in AUX mode.
AUX audio jack
Volume control
M2.qxd 7/28/08 3:06 PM Page 15
Page 23 of 24
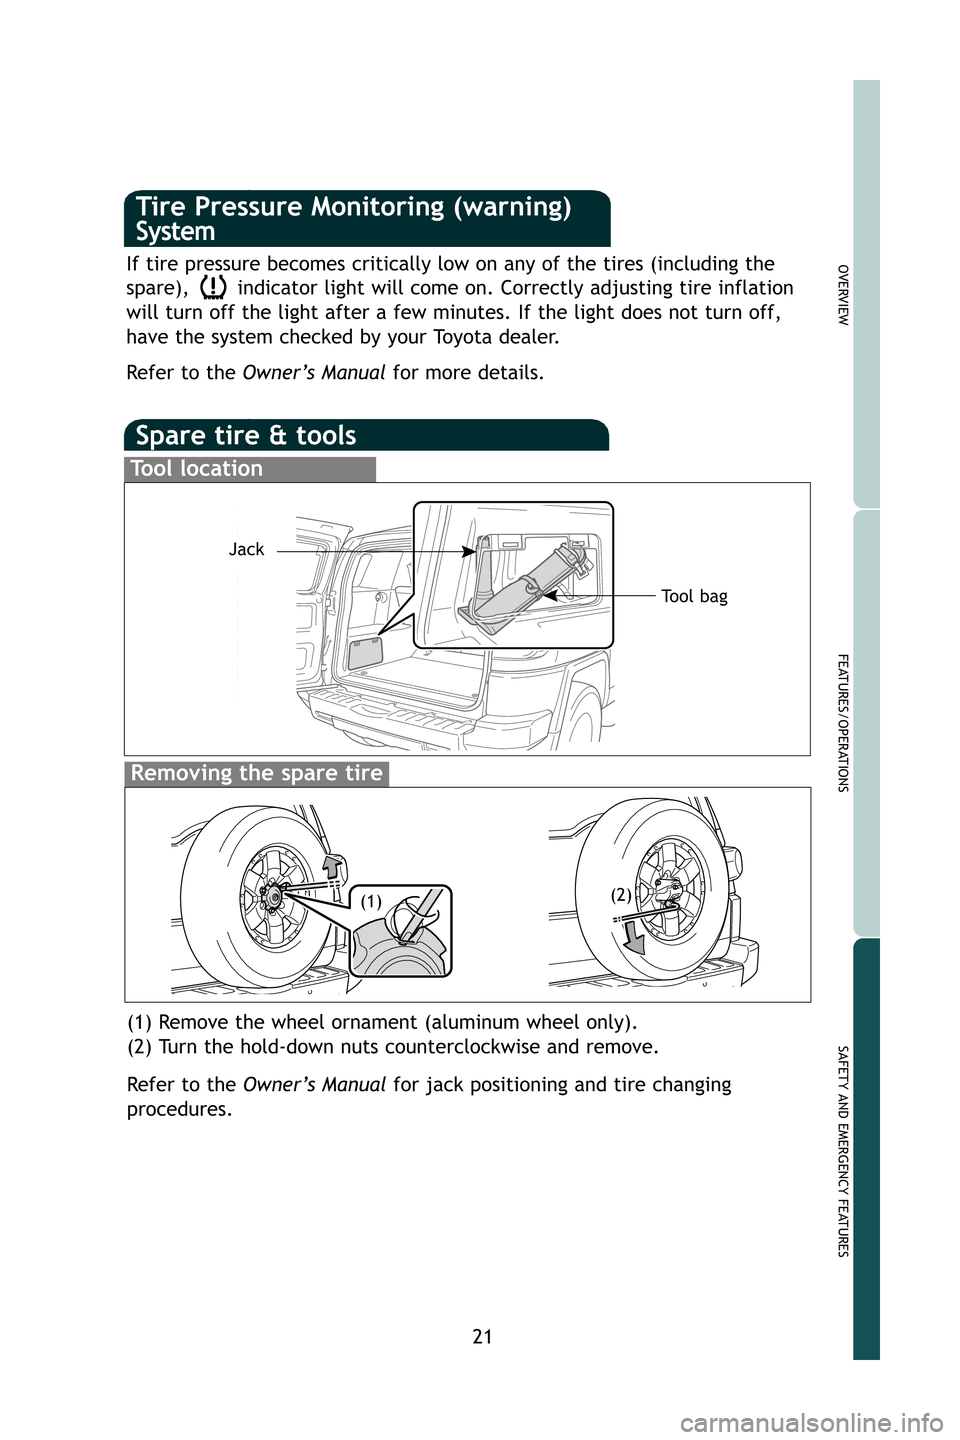
Spare tire & tools
Tool location
Removing the spare tire
(1) Remove the wheel ornament (aluminum wheel only).
(2) Turn the hold-down nuts counterclockwise and remove.
Refer to the Owner’s Manual for jack positioning and tire changing
procedures.
21
If tire pressure becomes critically low on any of the tires (including \
the
spare), indicator light will come on. Correctly adjusting tire inflation
will turn off the light after a few minutes. If the light does not turn \
off,
have the system checked by your Toyota dealer.
Refer to the
Owner’s Manual for more details.
Tool bag
Jack
OVERVIEW
FEATURES/OPERATIONS
SAFETY AND EMERGENCY FEATURES
(2)
(1)
Tire Pressure Monitoring (warning)
System
M1.qxd 7/28/08 3:04 PM Page 3