maintenance TOYOTA FJ CRUISER 2010 1.G Manual PDF
[x] Cancel search | Manufacturer: TOYOTA, Model Year: 2010, Model line: FJ CRUISER, Model: TOYOTA FJ CRUISER 2010 1.GPages: 439, PDF Size: 11.02 MB
Page 341 of 439
340 4-3. Do-it-yourself maintenance
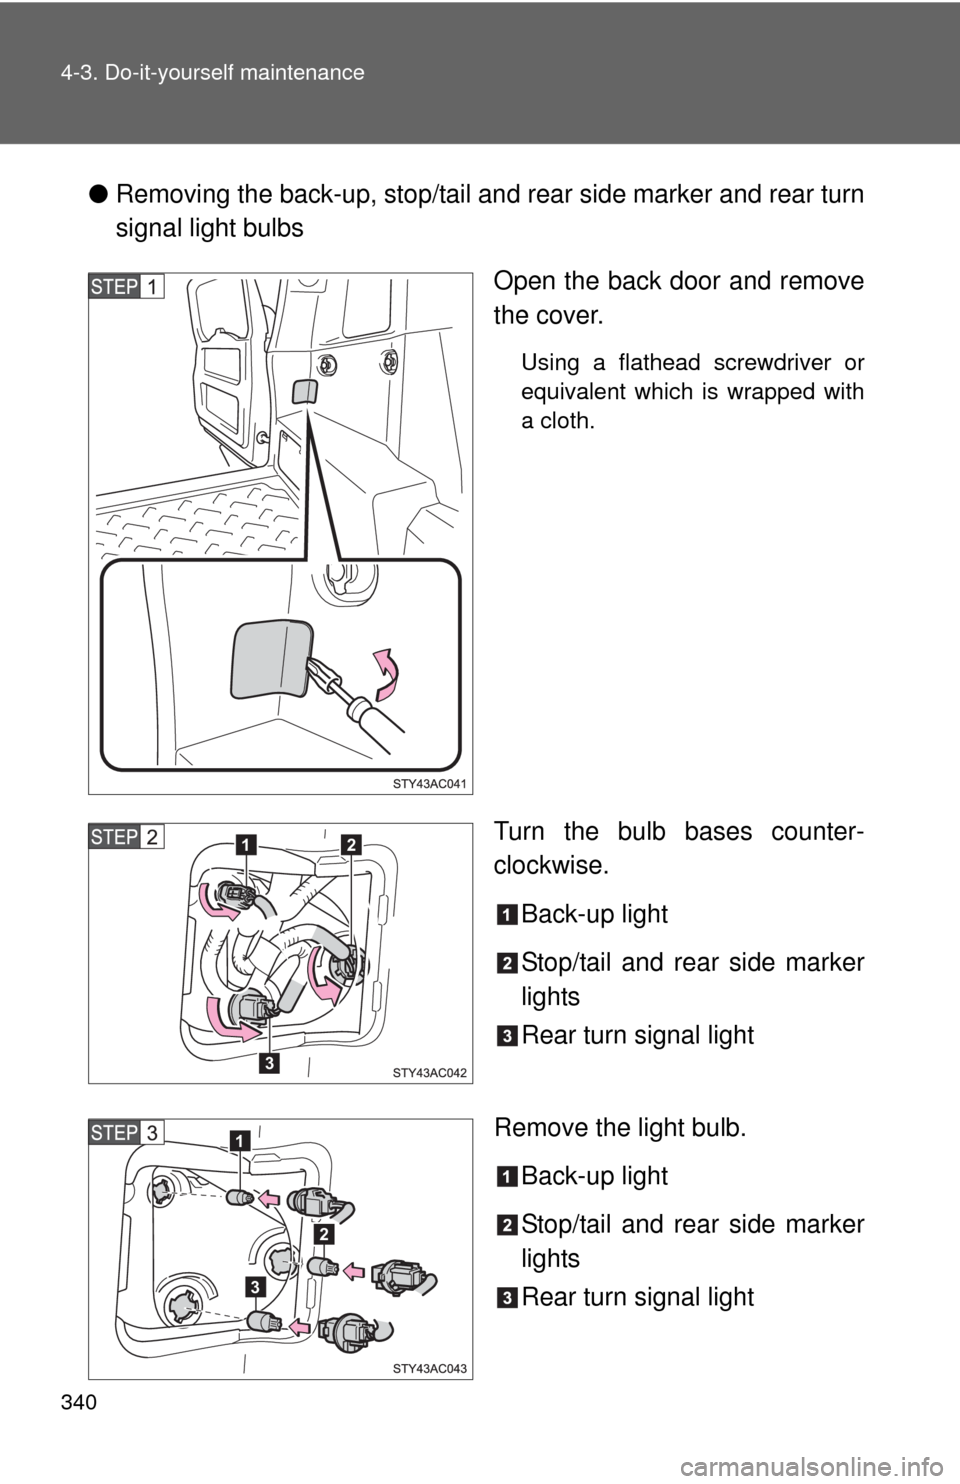
●Removing the back-up, stop/tail and rear side marker and rear turn
signal light bulbs
Open the back door and remove
the cover.
Using a flathead screwdriver or
equivalent which is wrapped with
a cloth.
Turn the bulb bases counter-
clockwise.
Back-up light
Stop/tail and rear side marker
lights
Rear turn signal light
Remove the light bulb.
Back-up light
Stop/tail and rear side marker
lights
Rear turn signal light12
3
1
3
2
Page 342 of 439
341 4-3. Do-it-yourself maintenance
4
Maintenance and care
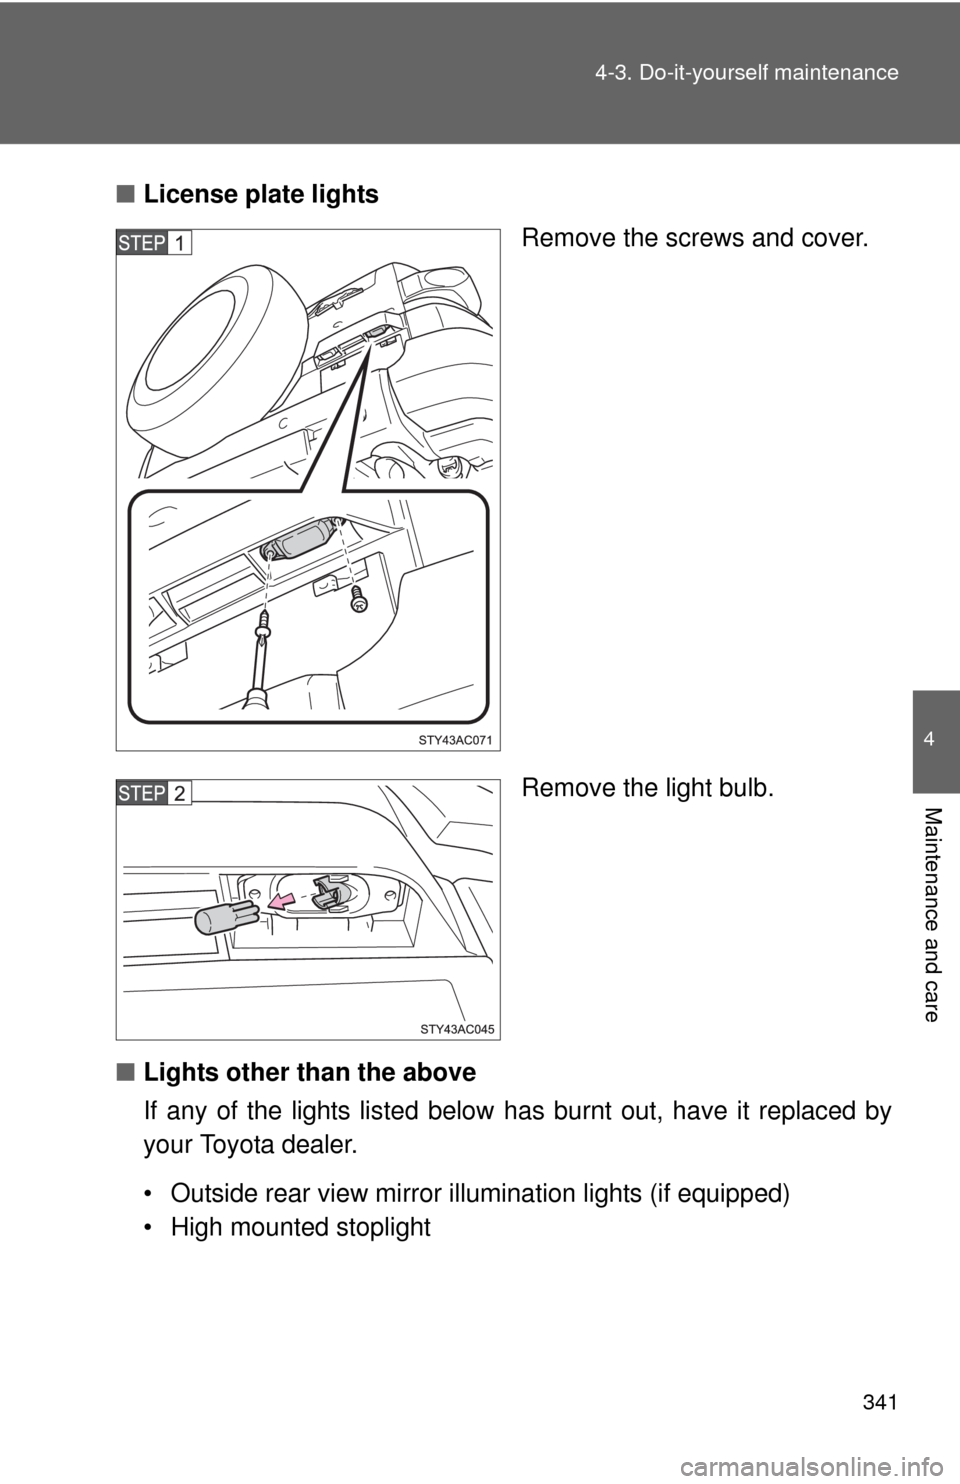
■License plate lights
Remove the screws and cover.
Remove the light bulb.
■Lights other than the above
If any of the lights listed below has burnt out, have it replaced by
your Toyota dealer.
• Outside rear view mirror illumination lights (if equipped)
• High mounted stoplight
Page 343 of 439
342 4-3. Do-it-yourself maintenance
■Condensation build-up on the inside of the lens
Contact your Toyota dealer for more information in the following situations.
Temporary condensation build-up on the inside of the headlight lens does
not indicate a malfunction.
●Large drops of water are built up on the inside of the lens.
●Water has built up inside the headlight.
■LED high mounted stoplight
The high mounted stoplight consists of a number of LEDs. If any of the LEDs
burn out, take your vehicle to your Toyota dealer to have the light replaced.
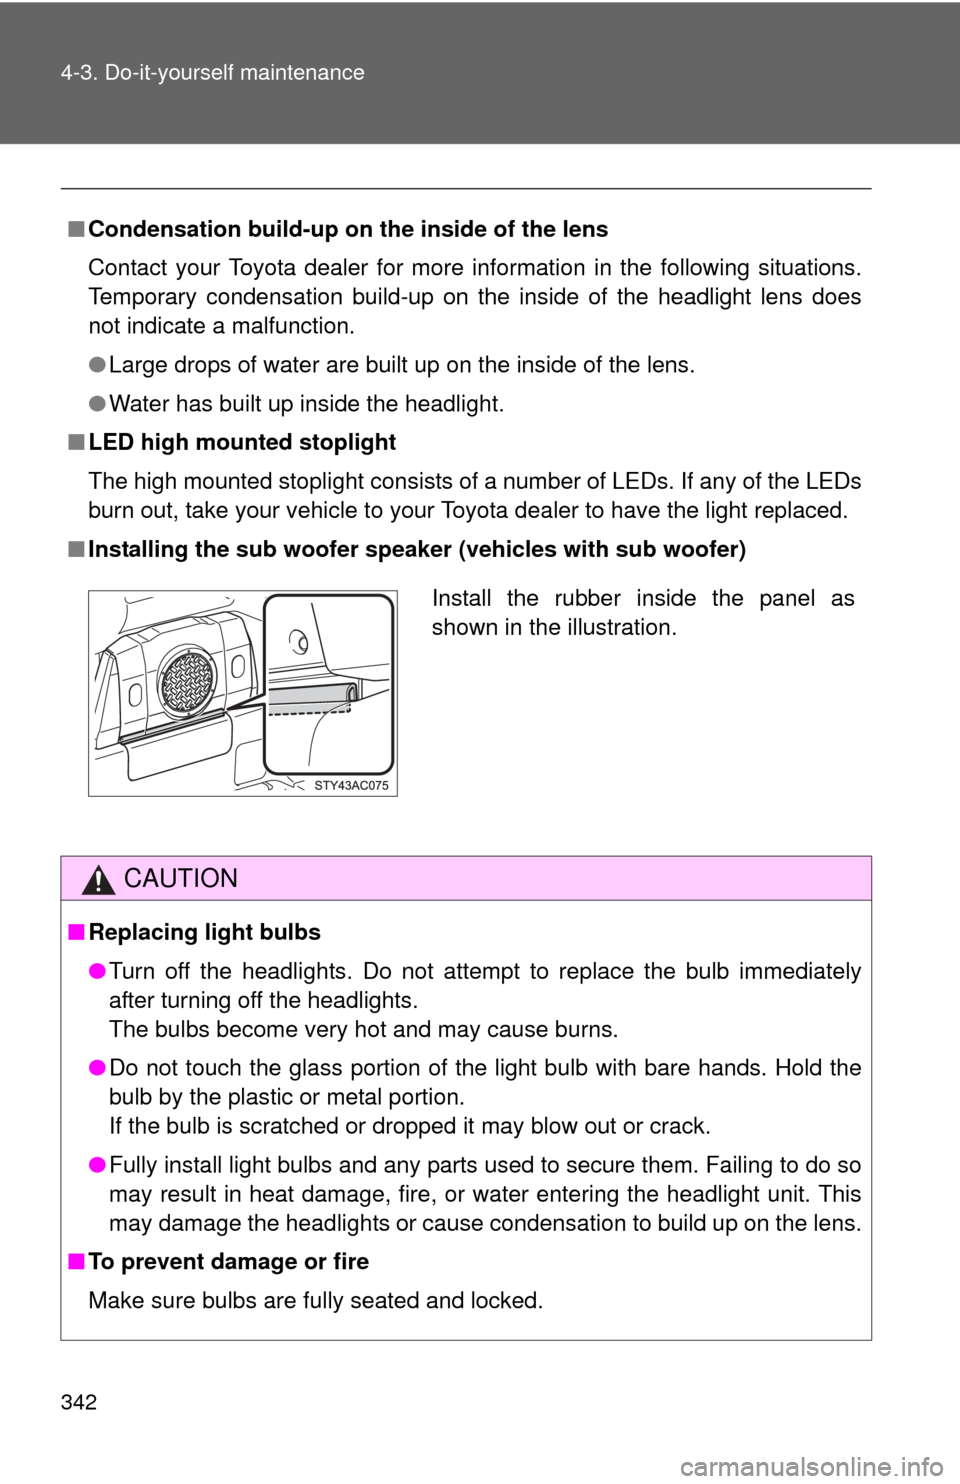
■Installing the sub woofer speaker (vehicles with sub woofer)
CAUTION
■Replacing light bulbs
●Turn off the headlights. Do not attempt to replace the bulb immediately
after turning off the headlights.
The bulbs become very hot and may cause burns.
●Do not touch the glass portion of the light bulb with bare hands. Hold the
bulb by the plastic or metal portion.
If the bulb is scratched or dropped it may blow out or crack.
●Fully install light bulbs and any parts used to secure them. Failing to do so
may result in heat damage, fire, or water entering the headlight unit. This
may damage the headlights or cause condensation to build up on the lens.
■To prevent damage or fire
Make sure bulbs are fully seated and locked.
Install the rubber inside the panel as
shown in the illustration.
Page 359 of 439
358 5-2. Steps to take in an emergency
*1: Driver's seat belt reminder:
The driver’s seat belt reminder sounds to alert the driver that his or her seat
belt is not fastened. Once the engine switch is turned to the ON or START
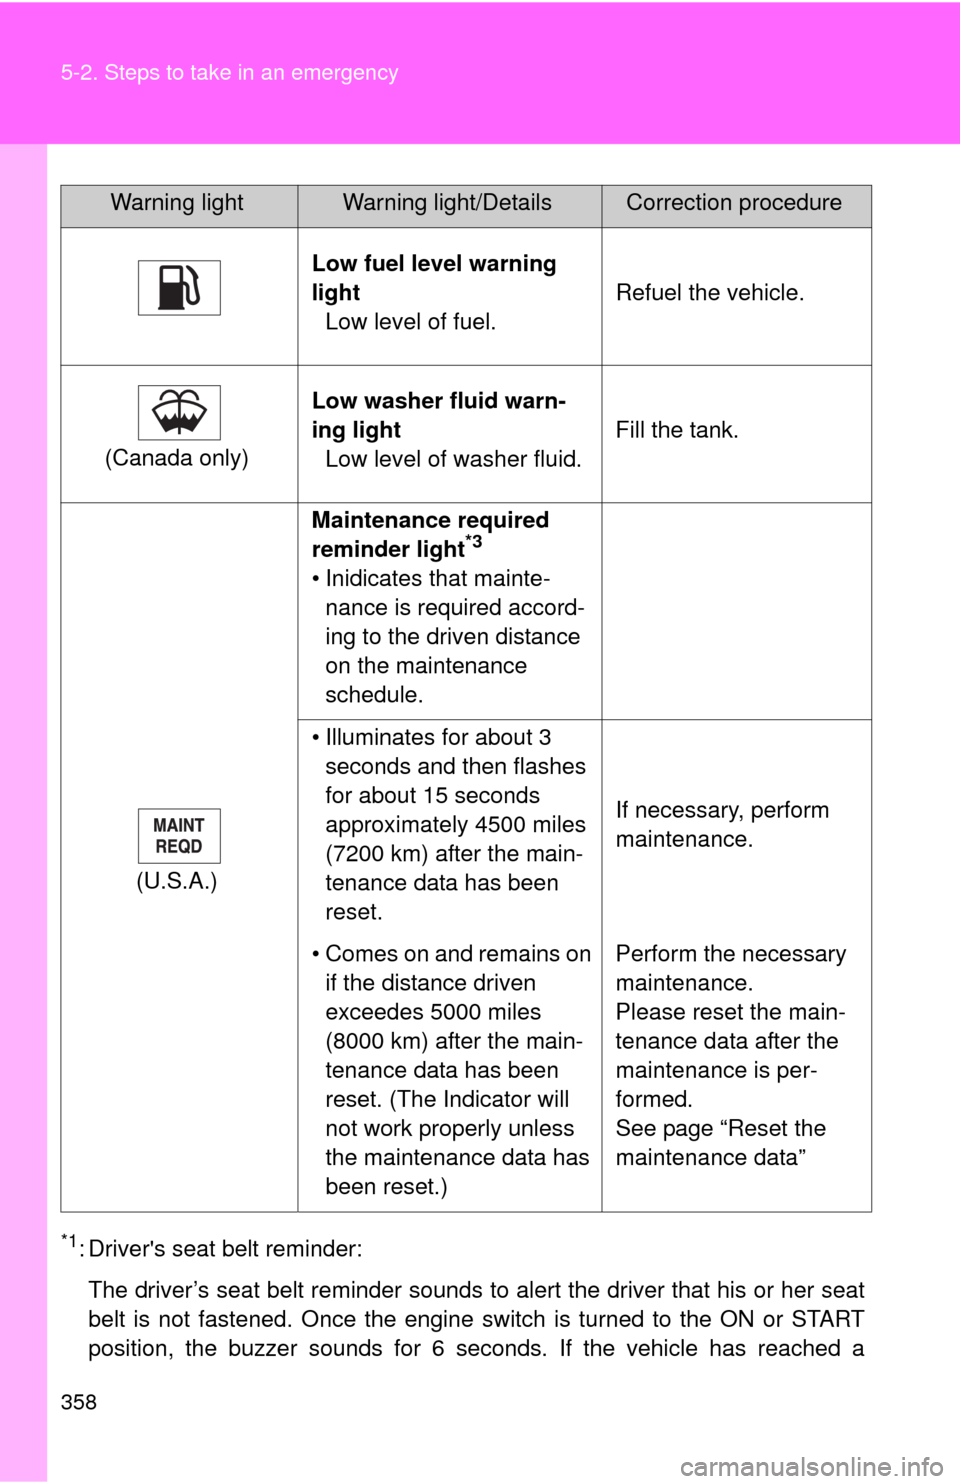
position, the buzzer sounds for 6 seconds. If the vehicle has reached aLow fuel level warning
light
Low level of fuel.Refuel the vehicle.
(Canada only)Low washer fluid warn-
ing light
Low level of washer fluid.Fill the tank.
(U.S.A.)Maintenance required
reminder light
*3
• Inidicates that mainte-
nance is required accord-
ing to the driven distance
on the maintenance
schedule.
• Illuminates for about 3
seconds and then flashes
for about 15 seconds
approximately 4500 miles
(7200 km) after the main-
tenance data has been
reset.If necessary, perform
maintenance.
• Comes on and remains on
if the distance driven
exceedes 5000 miles
(8000 km) after the main-
tenance data has been
reset. (The Indicator will
not work properly unless
the maintenance data has
been reset.)Perform the necessary
maintenance.
Please reset the main-
tenance data after the
maintenance is per-
formed.
See page “Reset the
maintenance data”
Warning lightWarning light/DetailsCorrection procedure
Page 360 of 439
5
When trouble arises
359 5-2. Steps to take in an emergency
speed of at least 12 mph (20 km/h), the buzzer sounds intermittently for 10
seconds. Then, if the seat belt is still unfastened, the buzzer will sound in a
different tone for 20 more seconds.
*2: Front passenger’s seat belt reminder:
The front passenger’s seat belt reminder sounds to alert the front passenger
that his or her seat belt is not fastened. The buzzer sounds intermittently for
10 seconds after the vehicle has reached a speed of at least 12 mph (20 km/
h). Then, if the seat belt is still unfastened, the buzzer will sound in a different
tone for 20 more seconds.
*3: Maintenance required reminder:
Refer to the seperate “Scheduled Maintenance Guide” or “Owner’s Manual
Supplement” for the maintenance interval applicable to your vehicle.
Page 363 of 439
362 5-2. Steps to take in an emergency
■Customization that can be configured at Toyota dealer
The vehicle speed linked seat belt reminder buzzer can be disabled.
(Customizable features P. 412)
CAUTION
■If the tire pressure warning light comes on
Be sure to observe the following precautions. Failure to do so could
cause loss of vehicle control and result in death or serious injury.
●Stop your vehicle in a safe place as soon as possible. Adjust the tire
inflation pressure immediately.
●If the tire pressure warning light comes on even after tire inflation pres-
sure adjustment, it is probable that you have a flat tire. Check the tires.
If the tire is flat, change to the spare tire and have the flat tire repaired
by the nearest Toyota dealer.
●Avoid abrupt maneuvering and braking. If the vehicle tires deteriorate,
you could lose control of the steering wheel or the brakes.
■If a blowout or sudden air leakage should occur
The tire pressure warning system may not activate immediately.
■Maintenance of the tire
Each tire, including the spare (if provided), should be checked monthly
when cold and inflated to the inflation pressure recommended by the
vehicle manufacturer on the vehicle placard or tire inflation pressure
label (tire and load information label). (If your vehicle has tires of a differ-
ent size than the size indicated on the vehicle placard or tire inflation
pressure label [tire and load information label], you should determine the
proper tire inflation pressure for those tires.)
Page 364 of 439
5
When trouble arises
363 5-2. Steps to take in an emergency
CAUTION
■Maintenance of the tire
As an added safety feature, your vehicle has been equipped with a tire
pressure monitoring system (TPMS-tire pressure warning system) that
illuminates a low tire pressure telltale (tire pressure warning light) when
one or more of your tires is significantly under-inflated. Accordingly,
when the low tire pressure telltale (tire pressure warning light) illumi-
nates, you should stop and check your tires as soon as possible, and
inflate them to the proper pressure. Driving on a significantly under-
inflated tire causes the tire to overheat and can lead to tire failure.
Under-inflation also reduces fuel efficiency and tire tread life, and may
affect the vehicle’s handling and stopping ability.
Please note that the TPMS (tire pressure warning system) is not a sub-
stitute for proper tire maintenance, and it is the driver’s responsibility to
maintain correct tire pressure, even if under-inflation has not reached the
level to trigger illumination of the TPMS low tire pressure telltale (tire
pressure warning light).
Your vehicle has also been equipped with a TPMS (tire pressure warning
system) malfunction indicator to indicate when the system is not operat-
ing properly. The TPMS (tire pressure warning system) malfunction indi-
cator is combined with the low tire pressure telltale (tire pressure
warning light). When the system detects a malfunction, the telltale will
flash for approximately one minute and then remain continuously illumi-
nated. This sequence will continue upon subsequent vehicle start-ups as
long as the malfunction exists. When the malfunction indicator is illumi-
nated, the system may not be able to detect or signal low tire pressure
as intended.
TPMS (tire pressure warning system) malfunctions may occur for a vari-
ety of reasons, including the installation of replacement or alternate tires
or wheels on the vehicle that prevent the TPMS (tire pressure warning
system) from functioning properly. Always check the TPMS (tire pres-
sure warning system) malfunction telltale after replacing one or more
tires or wheels on your vehicle to ensure that the replacement or alter-
nate tires and wheels allow the TPMS (tire pressure warning system) to
continue to function properly.
Page 390 of 439
Vehicle specifications6
387
6-1. Specifications
Maintenance data
(fuel, oil level, etc.) ......... 388
Fuel information ............... 398
Tire information ................ 401
6-2. Customization
Customizable features ..... 412
Items to initialize .............. 414
Page 391 of 439
388
6-1. Specifications
Maintenance data (fuel, oil level, etc.)
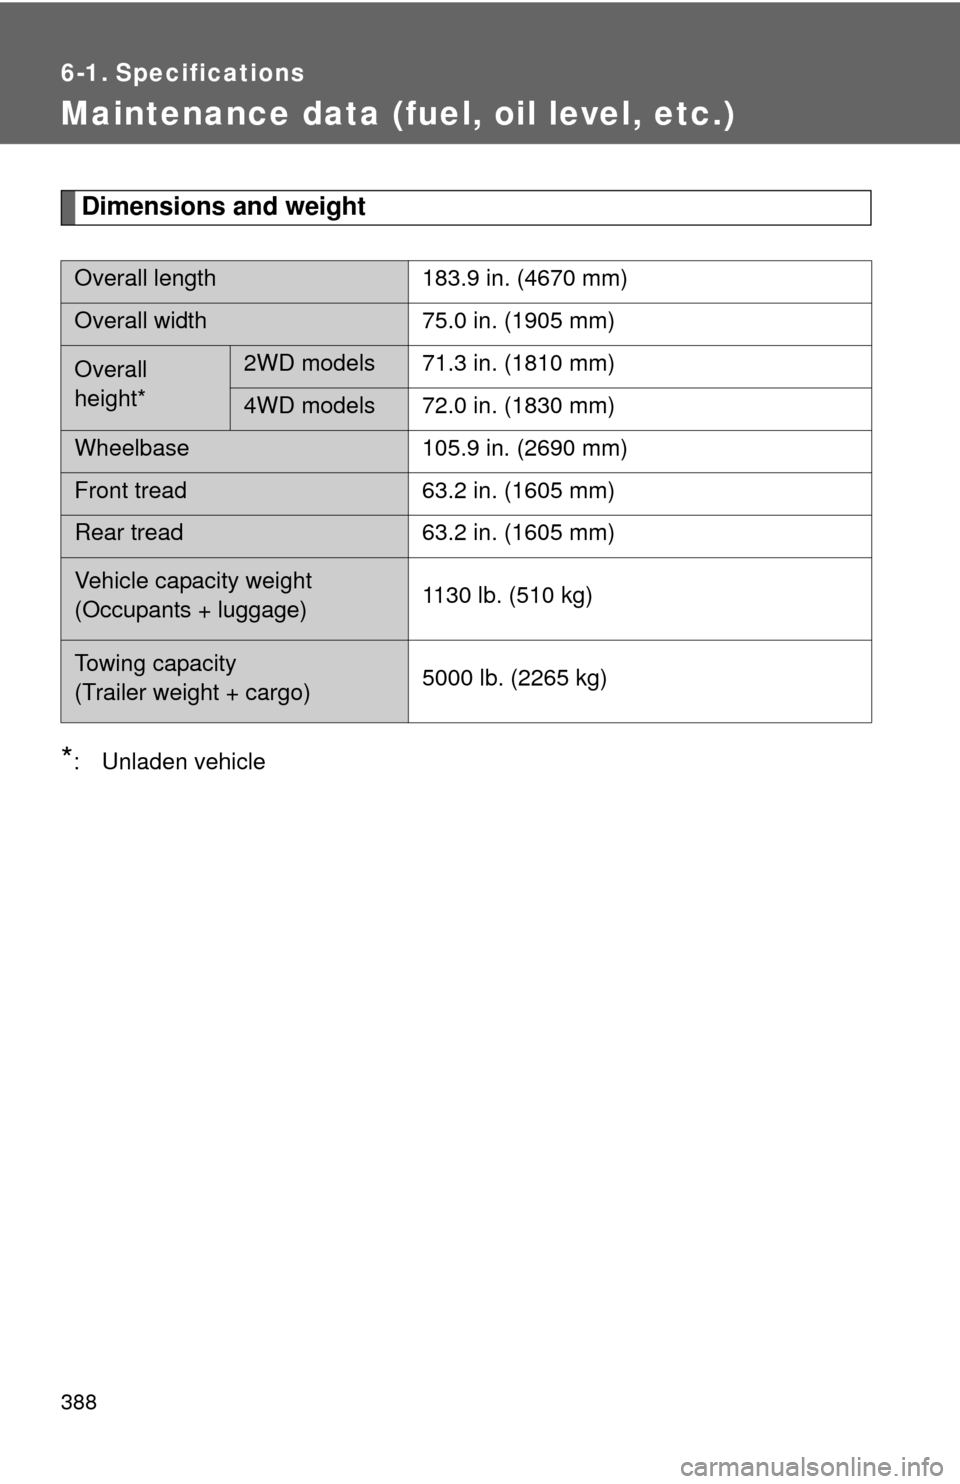
Dimensions and weight
*: Unladen vehicle
Overall length 183.9 in. (4670 mm)
Overall width 75.0 in. (1905 mm)
Overall
height*2WD models 71.3 in. (1810 mm)
4WD models 72.0 in. (1830 mm)
Wheelbase 105.9 in. (2690 mm)
Front tread 63.2 in. (1605 mm)
Rear tread 63.2 in. (1605 mm)
Vehicle capacity weight
(Occupants + luggage)1130 lb. (510 kg)
Towing capacity
(Trailer weight + cargo)5000 lb. (2265 kg)
Page 417 of 439
414
6-2. Customization
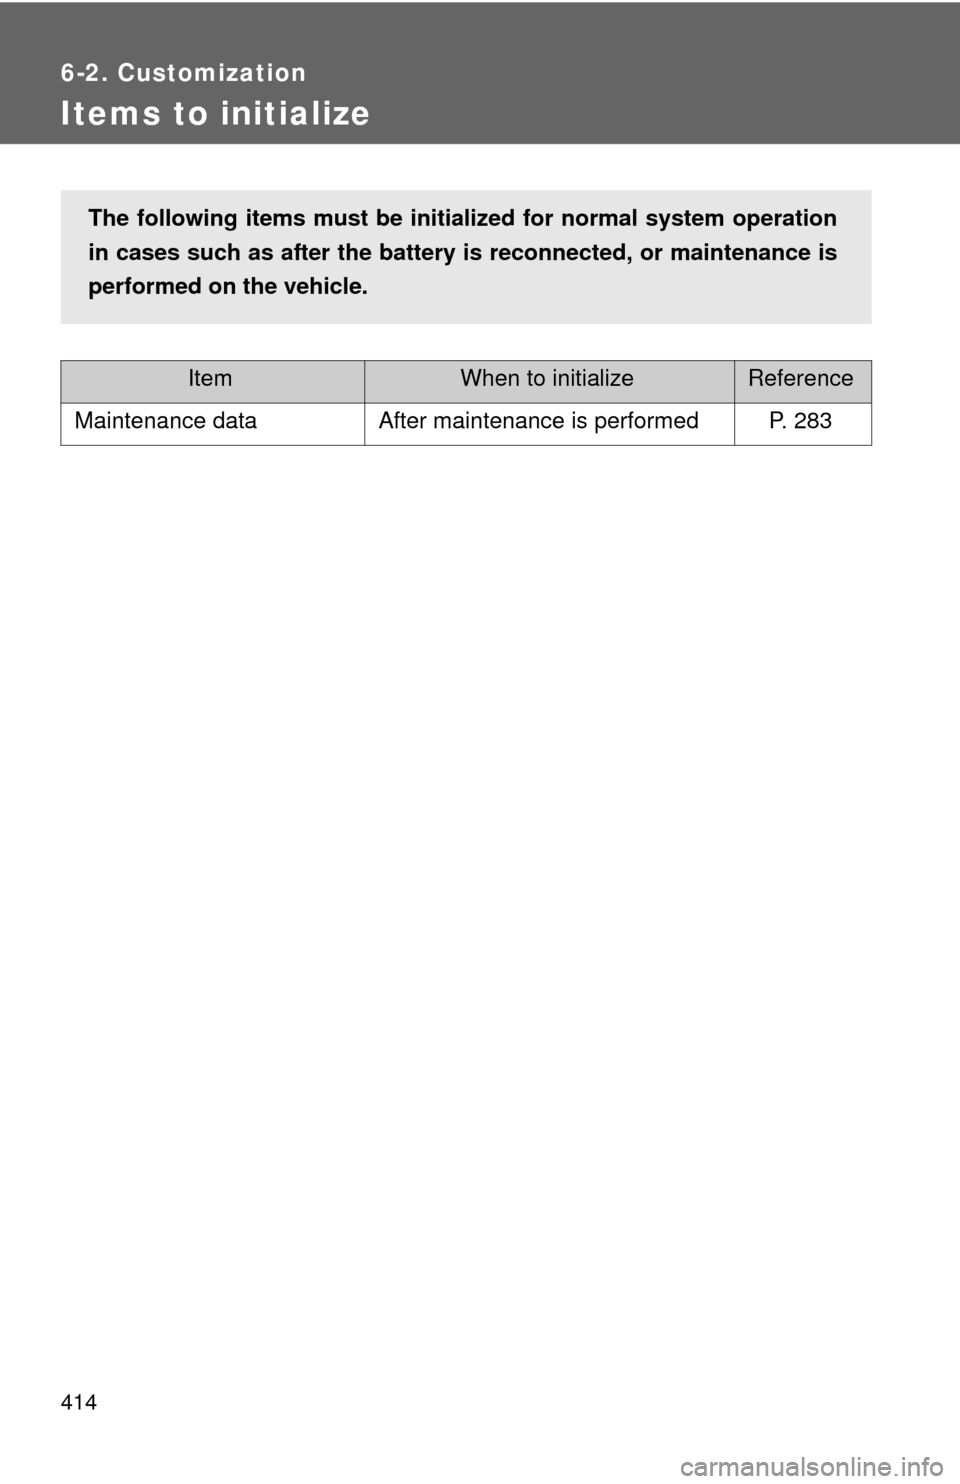
Items to initialize
ItemWhen to initializeReference
Maintenance dataAfter maintenance is performedP. 283
The following items must be initialized for normal system operation
in cases such as after the battery is reconnected, or maintenance is
performed on the vehicle.