transmission TOYOTA FJ CRUISER 2011 1.G Owner's Guide
[x] Cancel search | Manufacturer: TOYOTA, Model Year: 2011, Model line: FJ CRUISER, Model: TOYOTA FJ CRUISER 2011 1.GPages: 528, PDF Size: 10.93 MB
Page 201 of 528

201
2-5. Driving information
2
When driving
●
Always place wheel blocks under both the vehicle and the trailer
wheels when parking. Apply the parking brake firmly, and put the
transmission in P (automatic transmission) or in 1 or R (manual
transmission). Avoid parking on a slope, but if unavoidable, do so
only after performing the following:
Apply the brakes and keep them applied.
Have someone place wheel blocks under both the vehicle and
trailer wheels.
When the wheel blocks are in pl ace, release the brakes slowly
until the blocks absorb the load.
Apply the parking brake firmly.
Shift into 1 or R (manual transmission) or P (automatic trans-
mission) and turn off the engine.
● When restarting after parking on a slope:
With the transmission in P (automatic transmission) or the
clutch pedal (manual transmission) depressed, start the
engine. On vehicles with an au tomatic transmission, be sure
to keep the brake pedal pressed.
Shift into a forward gear. If reversing, shift into R.
Release the parking brake (also brake pedal on vehicles with
an automatic transmission), and slowly pull or back away from
the wheel blocks. Stop and apply the brakes.
Have someone retrieve the blocks.
Page 319 of 528
319
3-6. Using the
storage features
3
Interior features
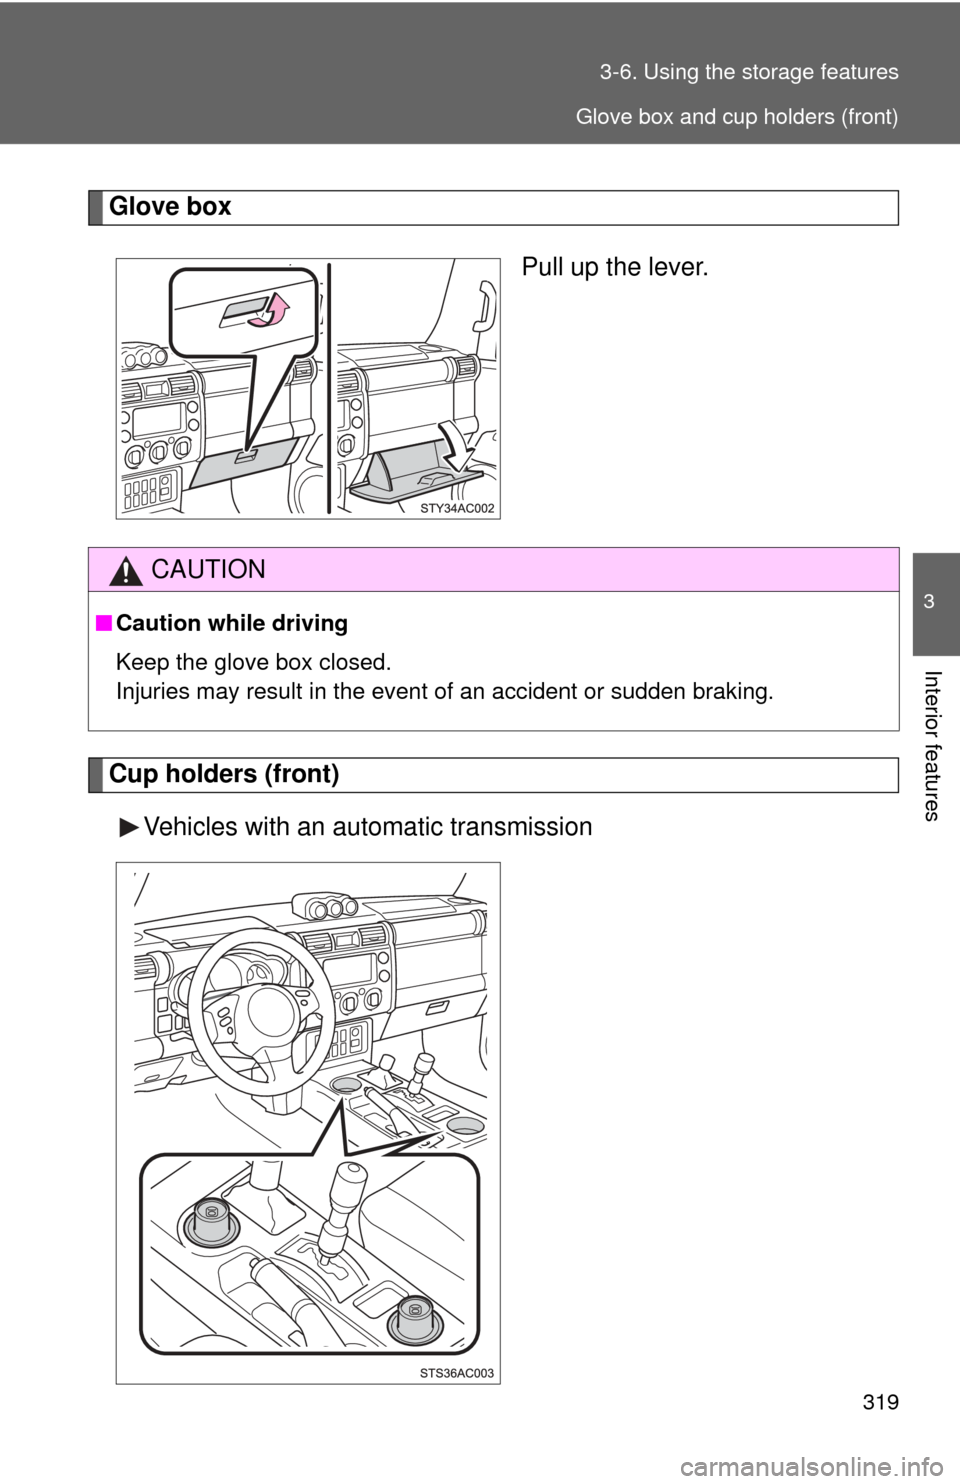
Glove box
Pull up the lever.
Cup holders (front)Vehicles with an automatic transmission
CAUTION
■Caution while driving
Keep the glove box closed.
Injuries may result in the event of an accident or sudden braking.
Glove box and cup holders (front)
Page 320 of 528
320 3-6. Using the storage features
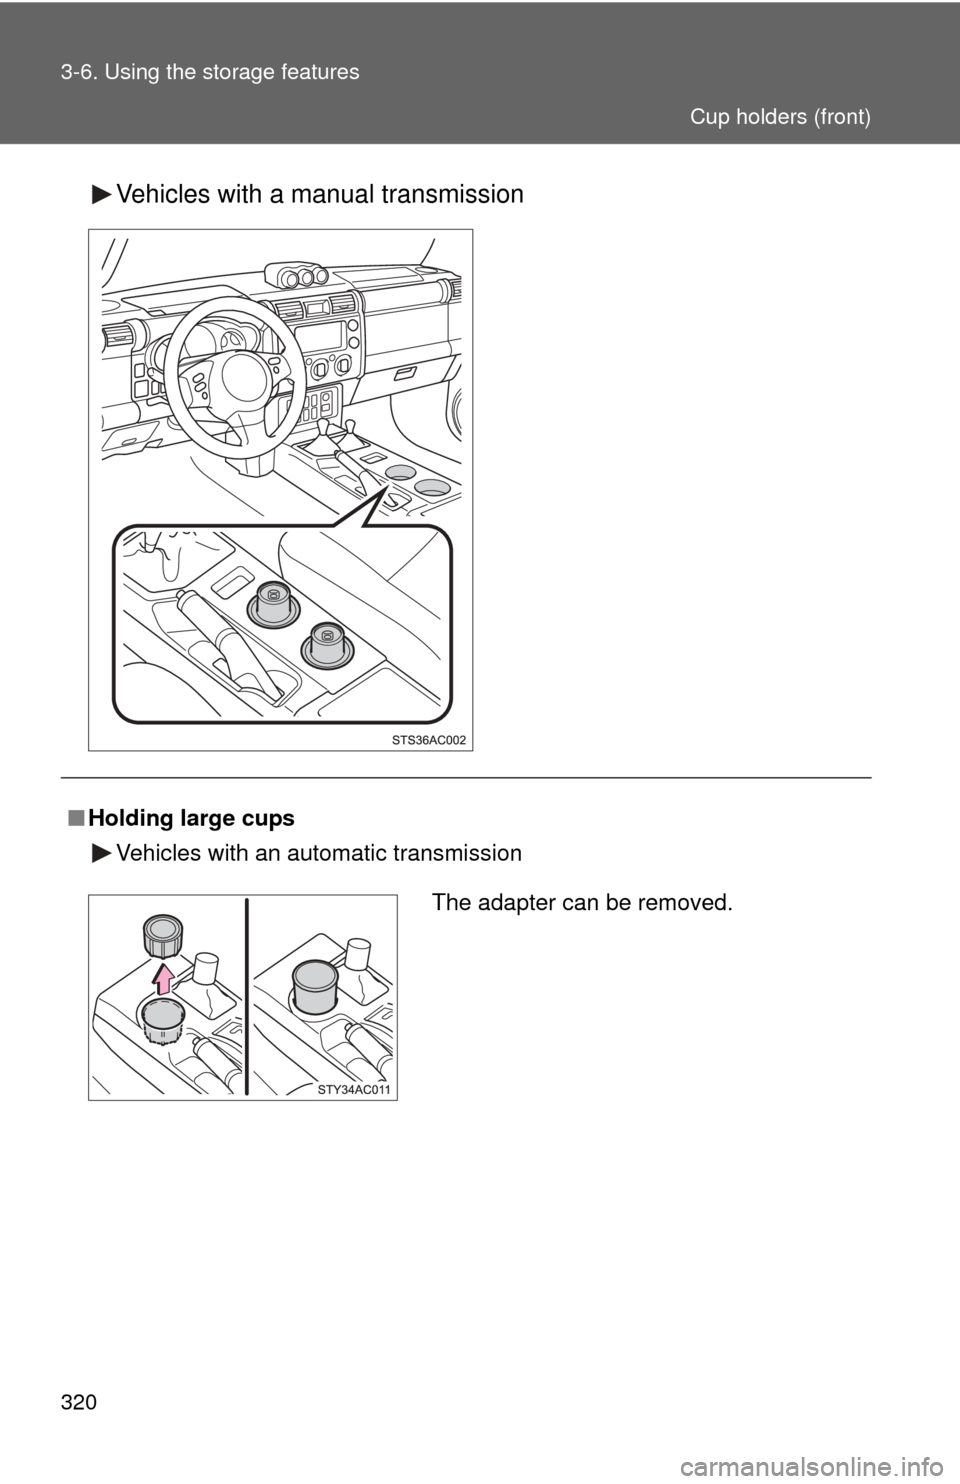
Vehicles with a manual transmission
■Holding large cups
Vehicles with an automatic transmission
The adapter can be removed.
Cup holders (front)
Page 321 of 528
321
3-6. Using the
storage features
3
Interior features
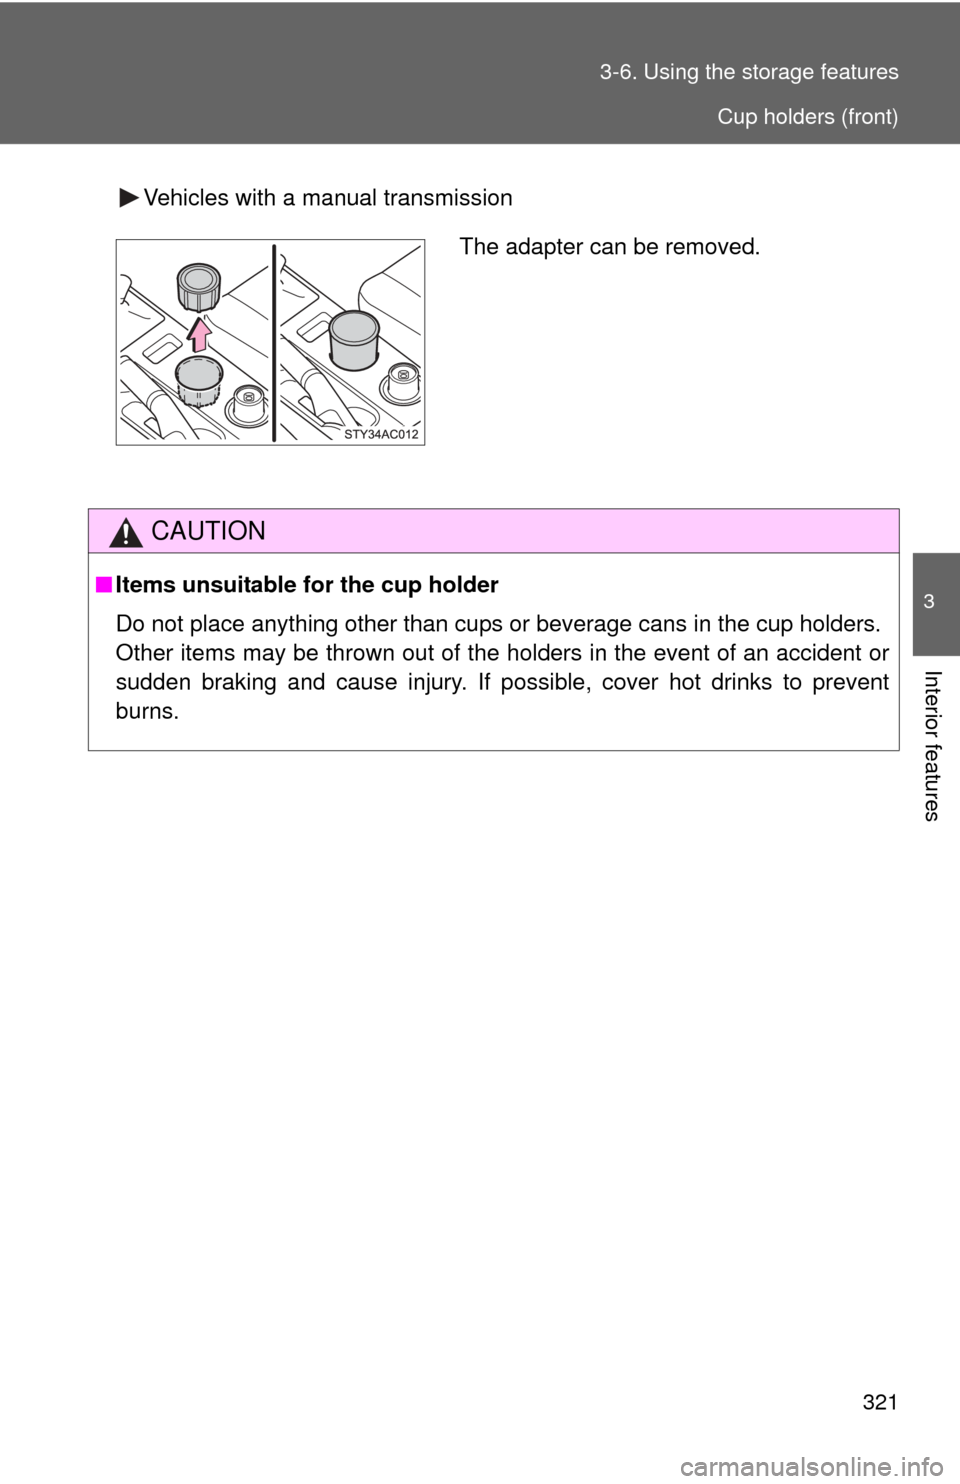
Vehicles with a manual transmission
CAUTION
■Items unsuitable for the cup holder
Do not place anything other than cups or beverage cans in the cup holders.
Other items may be thrown out of the holders in the event of an accident or
sudden braking and cause injury. If possible, cover hot drinks to prevent
burns.
The adapter can be removed.
Cup holders (front)
Page 331 of 528

331
3-7. Other interior features
3
Interior features
Maximum available capacity of the power outlet
■ While the vehicle is being driven
The maximum capacity of the po wer outlet is always 115V AC/
100W.
■ When the vehicle is stationary
The maximum capacity of the power outlet varies depending on
the following conditions.
●The maximum capacity is 115V AC/400W when the following
condition applies:
• The shift lever is in P or N. (automatic transmission)
• The shift lever is in N and the clutch pedal is not depressed.
(manual transmission)
A maximum capacity of 400W can only be restored by turning
the power outlet main switch off and then on again under condi-
tion described above.
● The maximum capacity is 115V AC/100W when the following
condition applies:
• The shift lever is moved to any positions other than P and N.
(automatic transmission)
• The clutch pedal is depressed. (manual transmission)
Page 333 of 528
333
3-7. Other interior features
3
Interior features
■
If the protection circuit is activated and the power supply is cut, con-
duct the following procedure:
Park the vehicle in a safe place, and then securely apply the park-
ing brake.
Check and ensure the following conditions
• The shift lever is in P or N. (automatic transmission)
• The shift lever is in N and the clutch pedal is not depressed.(manual transmission)
Make sure that the power consumption of the electric appliance is
within the maximum capacity of the power outlet and the appliance
is not broken.
Press the power outlet main switch again.
When the cabin temperature is high, open the windows to cool the tempera-
ture down. Once it reaches the normal temperature, turn the power outlet
main switch on again.
If the power supply is not resumed even after performing the above proce-
dure, have the vehicle inspected by a Toyota dealer.
CAUTION
■ Using a power outlet
Observe the following precautions to reduce the risk of injury.
●Use of the power outlet when it is wet with drinking water or snow may
result in electrical shocks and is extremely dangerous. The power outlet
must be thoroughly dried before use.
● Do not allow children to use or play with the power outlet.
● Be careful not to get any part of your body caught in the power outlet lid.
● When using electrical appliances, strictly follow any cautions and notices
written on their labels and in the manufacturers’ instruction manuals.
● Do not modify, disassemble or repair the power outlet or its inverter, in any
way. Doing so may result in unexpected malfunctions or accidents, which
could cause serious damage or injuries. Contact a Toyota dealer for any
necessary repairs.
Page 338 of 528
338 3-7. Other interior features
CAUTION
Observe the following precautions.
Failure to do so may cause the driver’s floor mat to slip, possibly interfering
with the pedals while driving. An unexpectedly high speed may result or it may
become difficult to stop the vehicle, leading to a serious accident.
■When installing the driver’s floor mat
●Do not use floor mats designed for other models or different model year
vehicles, even if they are Toyota Genuine floor mats.
● Only use floor mats designed for the driver’s seat.
● Always install the floor mat securely using the retaining hooks (clips) pro-
vided.
● Do not use two or more floor mats on top of each other.
● Do not place the floor mat bottom-side up or upside-down.
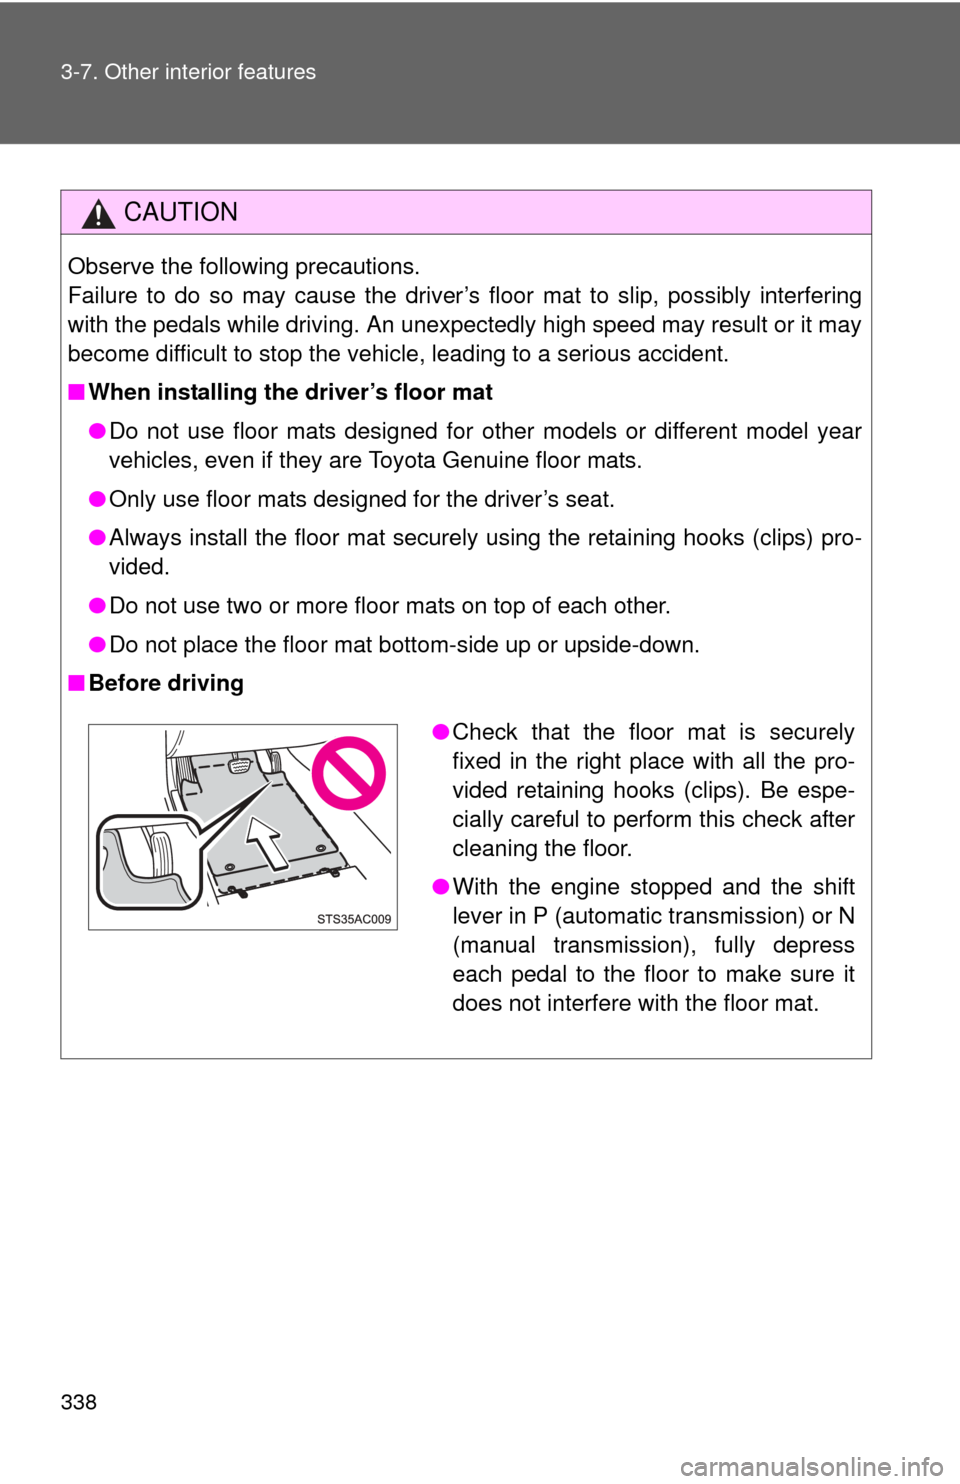
■ Before driving
●Check that the floor mat is securely
fixed in the right place with all the pro-
vided retaining hooks (clips). Be espe-
cially careful to perform this check after
cleaning the floor.
● With the engine stopped and the shift
lever in P (automatic transmission) or N
(manual transmission), fully depress
each pedal to the floor to make sure it
does not interfere with the floor mat.
Page 359 of 528

359
4-2. Maintenance
4
Maintenance and care
Vehicle interior
ItemsCheck points
Accelerator pedal • Moves smoothly (without uneven
pedal effort or catching)?
Automatic transmission “Park”
mechanism • Can the vehicle be hold securely
on an incline with the shift lever in
P?
Brake pedal • Moves smoothly?
• Does it have appropriate clear-
ance and correct amount of free
play?
Brakes • Not pull to one side when
applied?
• Loss of brake effectiveness?
• Spongy feeling brake pedal?
• Pedal almost touches floor?
Clutch pedal • Moves smoothly?
• Does it have correct amount of
free play?
Head restraints • Move smoothly and lock
securely?
Indicators/buzzers • Function properly?
Lights • Do all the lights come on?
• Headlights aimed correctly?
Parking brake • Moves smoothly?
• Can hold the vehicle securely on
an incline?
Seat belts • Does the seat belt system oper-
ate smoothly?
• Are the belts undamaged?
Seats • Do the seat controls operate
properly?
Page 363 of 528
363
4-3. Do-it-yourself maintenance
4
Maintenance and care
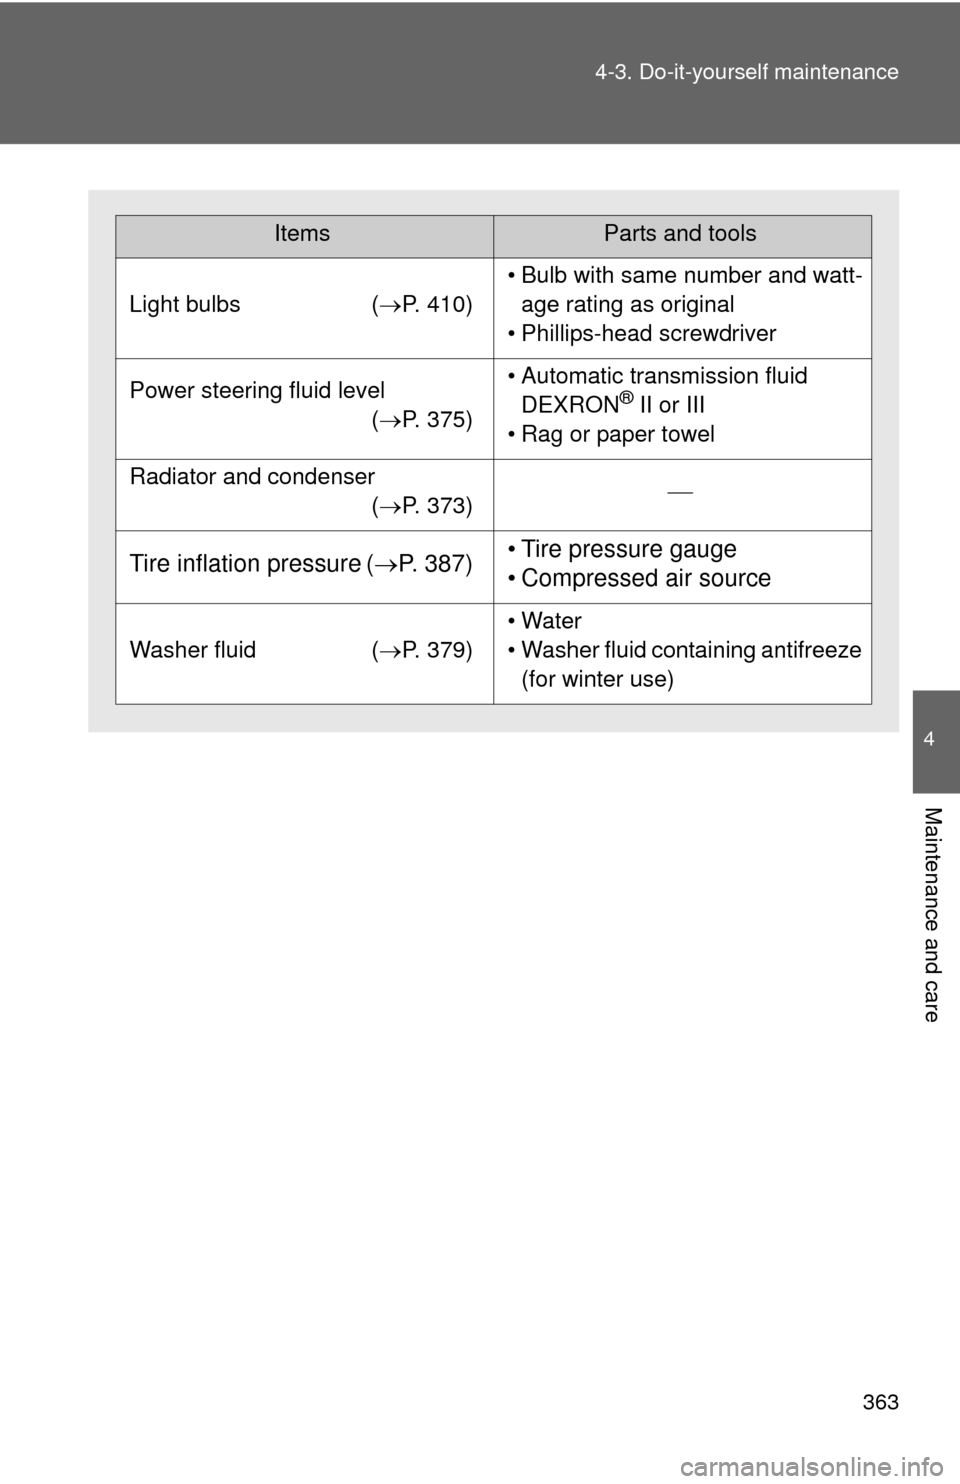
ItemsParts and tools
Light bulbs
(P. 410)
• Bulb with same number and watt-
age rating as original
• Phillips-head screwdriver
Power steering fluid level (P. 375)• Automatic transmission fluid
DEXRON® II or III
• Rag or paper towel
Radiator and condenser (P. 373)
Tire inflation pressure ( P. 387)• Tire pressure gauge
• Compressed air source
Washer fluid (P. 379)
• Water
• Washer fluid containing antifreeze
(for winter use)
Page 375 of 528
375
4-3. Do-it-yourself maintenance
4
Maintenance and care
Power steering fluid
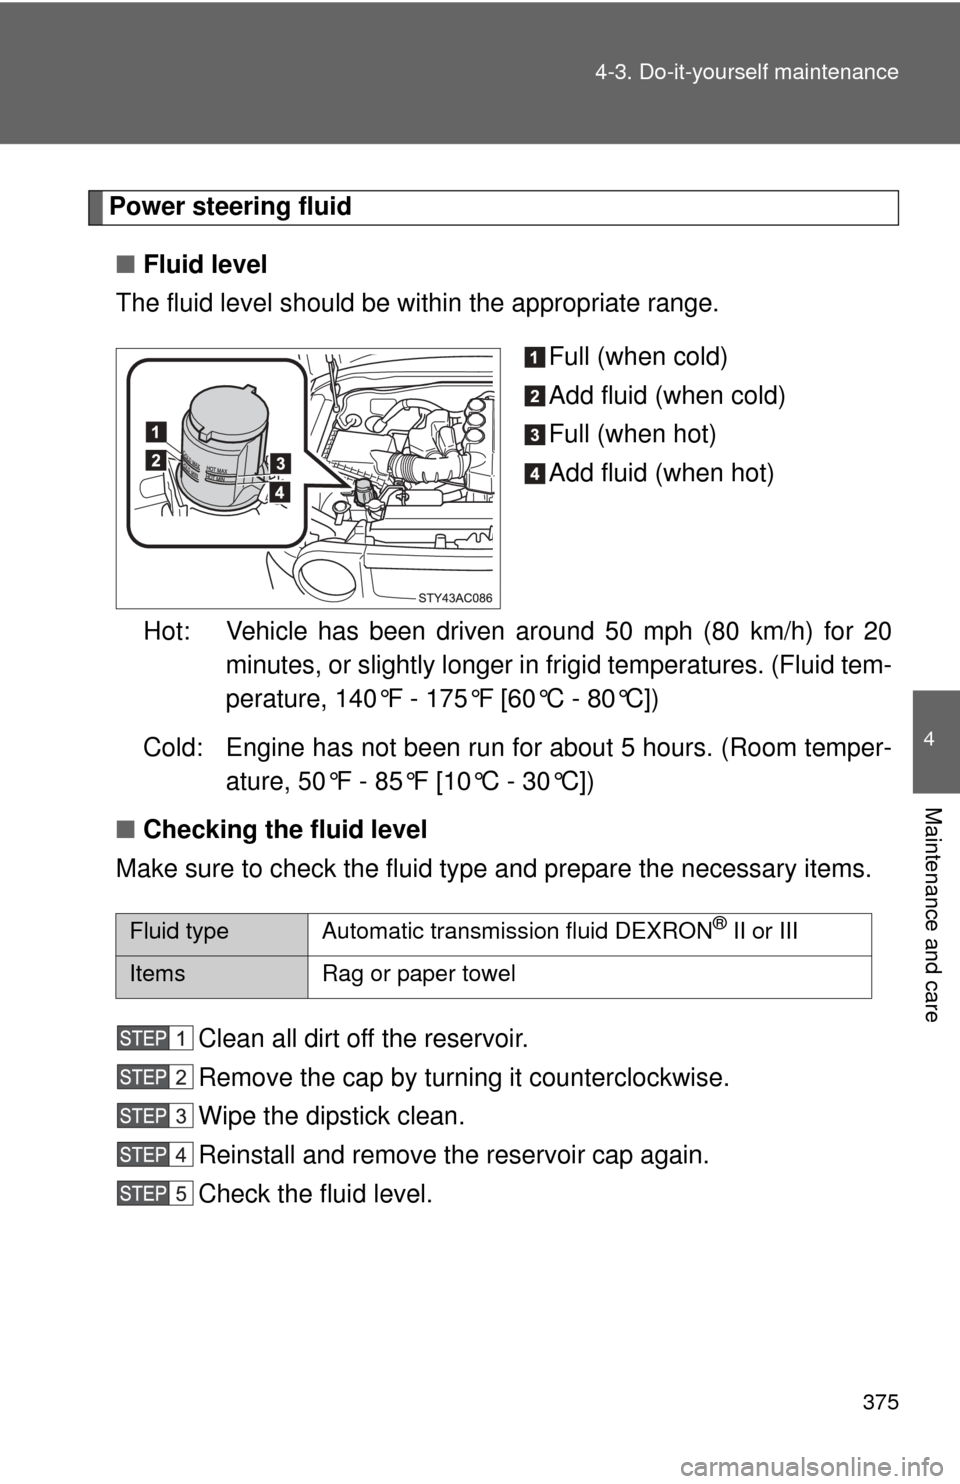
■ Fluid level
The fluid level should be within the appropriate range.
Full (when cold)
Add fluid (when cold)
Full (when hot)
Add fluid (when hot)
Hot: Vehicle has been driven around 50 mph (80 km/h) for 20 minutes, or slightly longer in frigid temperatures. (Fluid tem-
perature, 140°F - 175°F [60°C - 80°C])
Cold: Engine has not been run for about 5 hours. (Room temper- ature, 50°F - 85°F [10°C - 30°C])
■ Checking the fluid level
Make sure to check the fluid type and prepare the necessary items.
Clean all dirt off the reservoir.
Remove the cap by turning it counterclockwise.
Wipe the dipstick clean.
Reinstall and remove the reservoir cap again.
Check the fluid level.
Fluid type Automatic transmission fluid DEXRON® II or III
Items Rag or paper towel