power steering TOYOTA GR86 2022 Owners Manual (in English)
[x] Cancel search | Manufacturer: TOYOTA, Model Year: 2022, Model line: GR86, Model: TOYOTA GR86 2022Pages: 582, PDF Size: 86.38 MB
Page 4 of 582
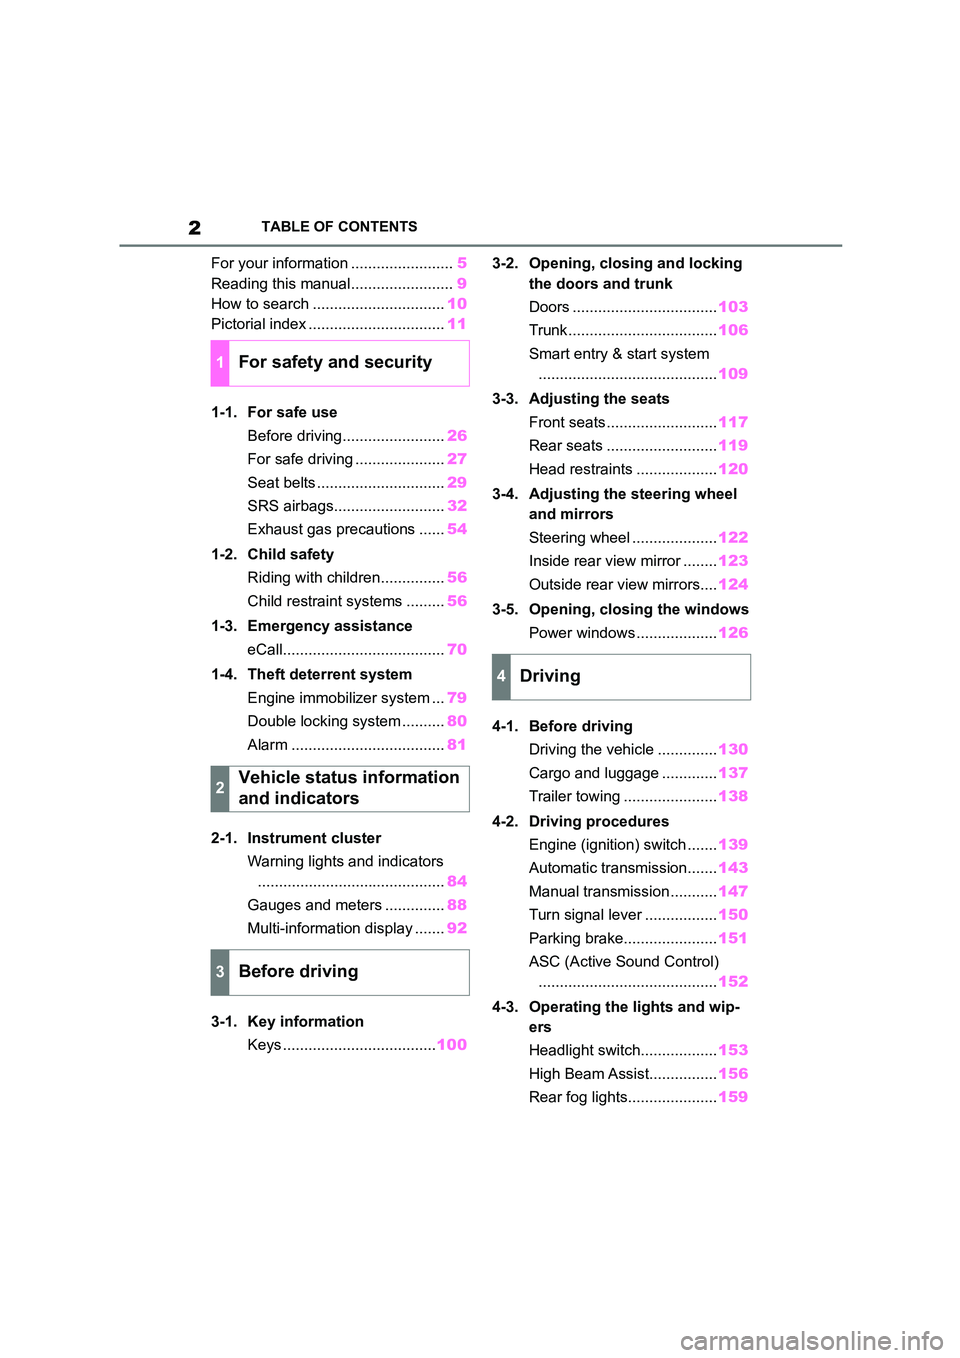
2TABLE OF CONTENTS
For your information ........................5
Reading this manual........................ 9
How to search ............................... 10
Pictorial index ................................ 11
1-1. For safe use
Before driving........................ 26
For safe driving ..................... 27
Seat belts .............................. 29
SRS airbags.......................... 32
Exhaust gas precautions ...... 54
1-2. Child safety
Riding with children............... 56
Child restraint systems ......... 56
1-3. Emergency assistance
eCall...................................... 70
1-4. Theft deterrent system
Engine immobilizer system ... 79
Double locking system .......... 80
Alarm .................................... 81
2-1. Instrument cluster
Warning lights and indicators
............................................ 84
Gauges and meters .............. 88
Multi-information display ....... 92
3-1. Key information
Keys .................................... 100
3-2. Opening, closing and locking
the doors and trunk
Doors .................................. 103
Trunk................................... 106
Smart entry & start system
.......................................... 109
3-3. Adjusting the seats
Front seats .......................... 117
Rear seats .......................... 119
Head restraints ................... 120
3-4. Adjusting the steering wheel
and mirrors
Steering wheel .................... 122
Inside rear view mirror ........ 123
Outside rear view mirrors.... 124
3-5. Opening, closing the windows
Power windows ................... 126
4-1. Before driving
Driving the vehicle .............. 130
Cargo and luggage ............. 137
Trailer towing ...................... 138
4-2. Driving procedures
Engine (ignition) switch ....... 139
Automatic transmission....... 143
Manual transmission ........... 147
Turn signal lever ................. 150
Parking brake...................... 151
ASC (Active Sound Control)
.......................................... 152
4-3. Operating the lights and wip-
ers
Headlight switch.................. 153
High Beam Assist................ 156
Rear fog lights..................... 159
1For safety and security
2Vehicle status information
and indicators
3Before driving
4Driving
Page 86 of 582
842-1. Instrument cluster
2-1.Instrument cluster
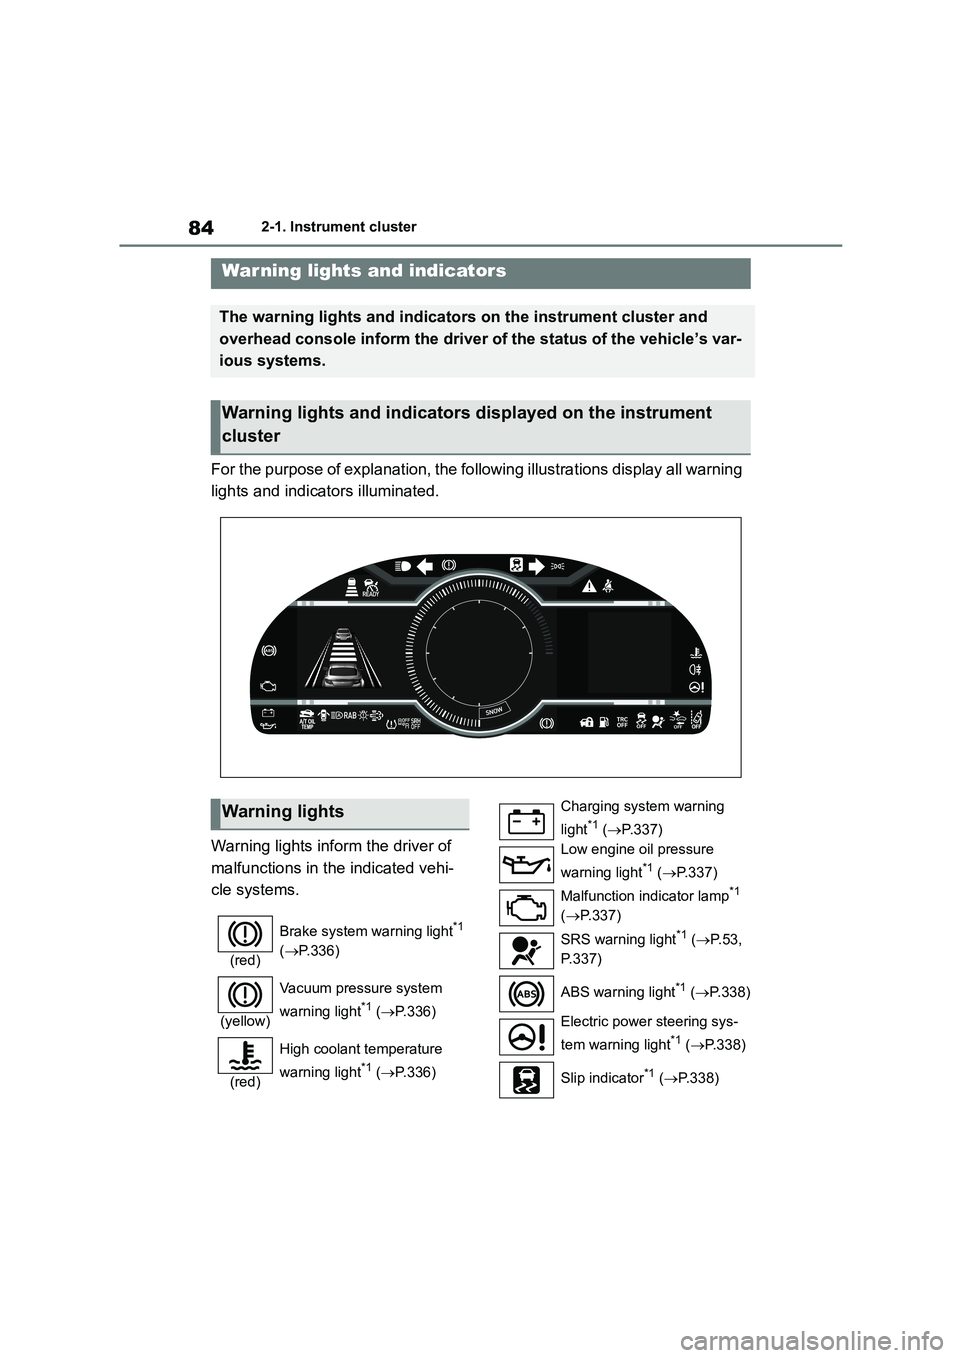
For the purpose of explanation, the following illustrations display all warning
lights and indicators illuminated.
Warning lights inform the driver of
malfunctions in the indicated vehi-
cle systems.
War ning lights and indicators
The warning lights and indicators on the instrument cluster and
overhead console inform the driver of the status of the vehicle’s var-
ious systems.
Warning lights and indicators displayed on the instrument
cluster
Warning lights
(red)
Brake system warning light*1
( P.336)
(yellow)
Vacuum pressure system
warning light*1 ( P.336)
(red)
High coolant temperature
warning light*1 ( P.336)
Charging system warning
light*1 ( P.337)
Low engine oil pressure
warning light*1 ( P.337)
Malfunction indicator lamp*1
( P.337)
SRS warning light*1 ( P. 5 3 ,
P.337)
ABS warning light*1 ( P.338)
Electric power steering sys-
tem warning light*1 ( P.338)
Slip indicator*1 ( P.338)
Page 97 of 582
95
2
2-1. Instrument cluster
Vehicle status information and indicators
your average fuel consumption. As a
result, the actual distance that can be
driven may differ from that displayed.
When only a small amount of fuel is
added to the tank, the display may not
be updated. When refueling, turn the
engine switch off. If the vehicle is
refueled without turning the engine
switch off, the display may not be
updated.
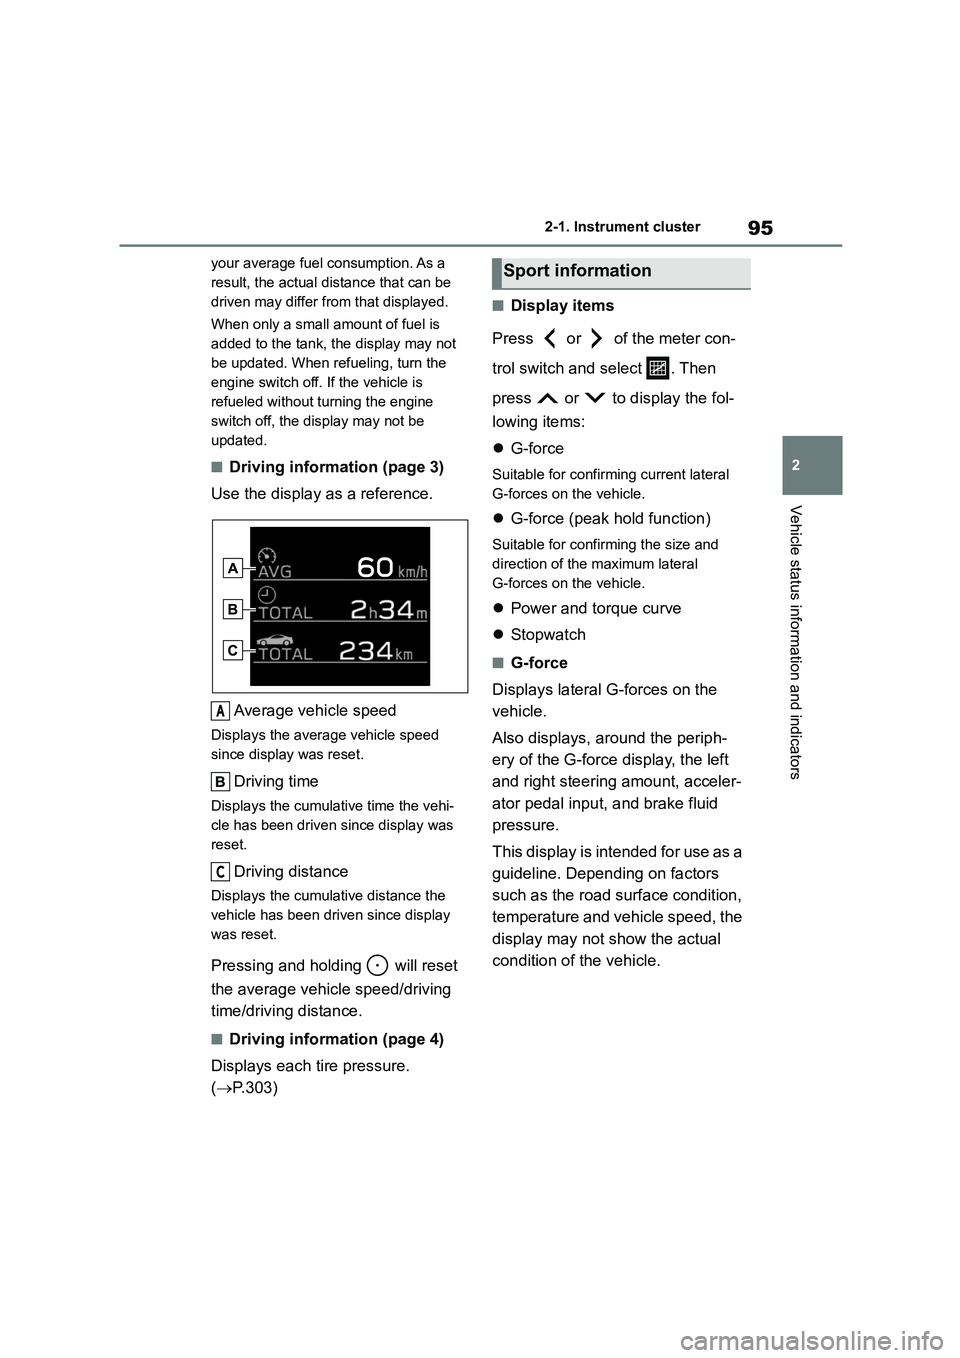
■Driving information (page 3)
Use the display as a reference.
Average vehicle speed
Displays the average vehicle speed
since display was reset.
Driving time
Displays the cumulative time the vehi-
cle has been driven since display was
reset.
Driving distance
Displays the cumulative distance the
vehicle has been driven since display
was reset.
Pressing and hold ing will reset
the average vehicle speed/driving
time/driving distance.
■Driving information (page 4)
Displays each tire pressure.
( P.303)
■Display items
Press or of the meter con-
trol switch and select . Then
press or to display the fol-
lowing items:
G-force
Suitable for confirming current lateral
G-forces on the vehicle.
G-force (peak hold function)
Suitable for confirming the size and
direction of the maximum lateral
G-forces on the vehicle.
Power and torque curve
Stopwatch
■G-force
Displays lateral G-forces on the
vehicle.
Also displays, around the periph-
ery of the G-force display, the left
and right steering amount, acceler-
ator pedal input, and brake fluid
pressure.
This display is intended for use as a
guideline. Depending on factors
such as the road surface condition,
temperature and vehicle speed, the
display may not show the actual
condition of the vehicle.
A
C
Sport information
Page 98 of 582
962-1. Instrument cluster
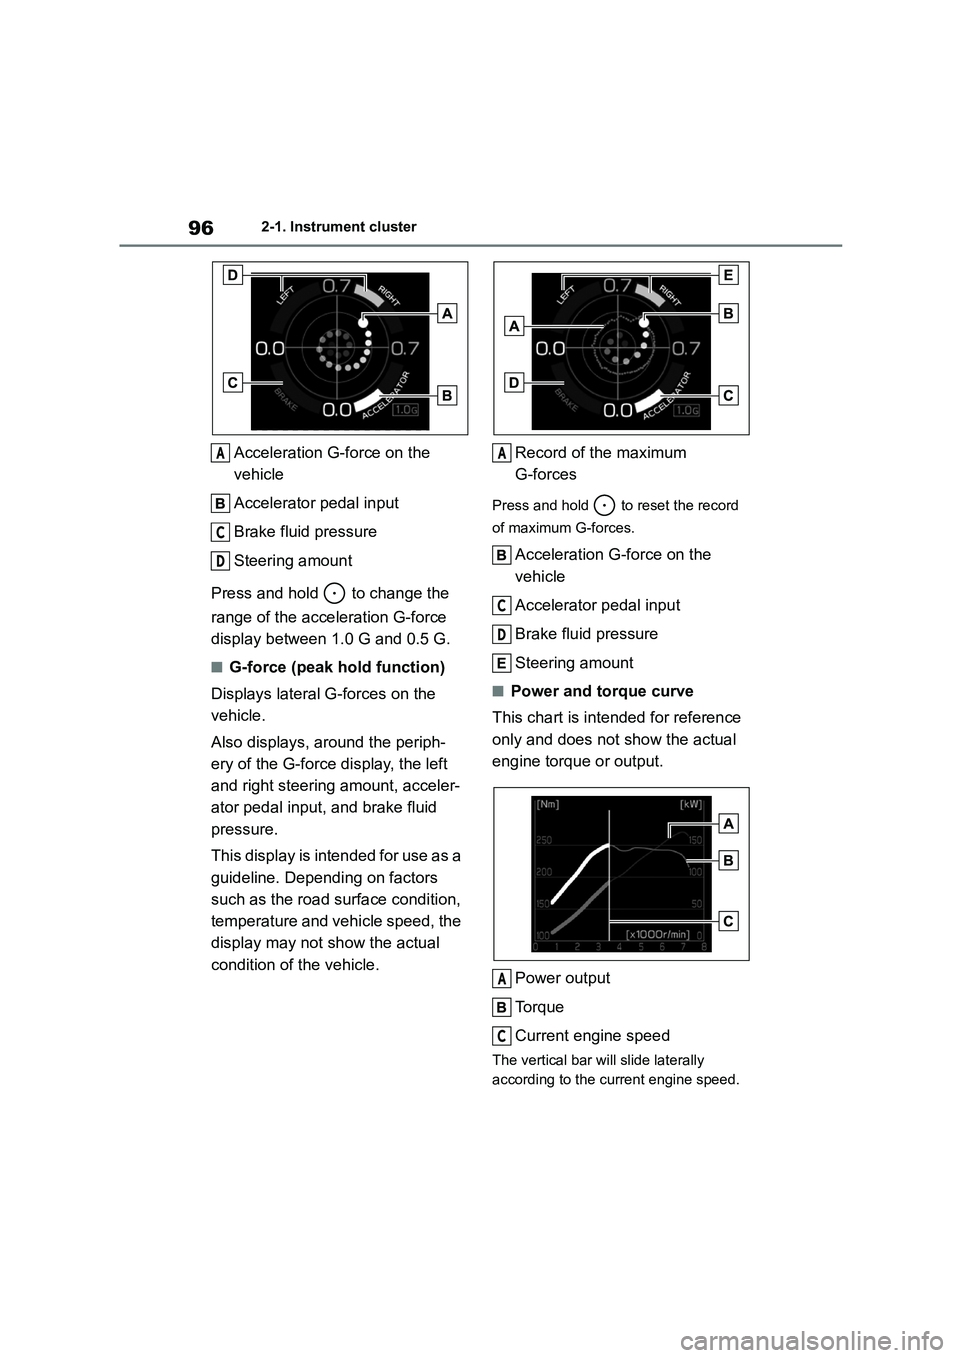
Acceleration G-force on the
vehicle
Accelerator pedal input
Brake fluid pressure
Steering amount
Press and hold to change the
range of the acceleration G-force
display between 1.0 G and 0.5 G.
■G-force (peak hold function)
Displays lateral G-forces on the
vehicle.
Also displays, around the periph-
ery of the G-force display, the left
and right steering amount, acceler-
ator pedal input, and brake fluid
pressure.
This display is intended for use as a
guideline. Depending on factors
such as the road surface condition,
temperature and vehicle speed, the
display may not show the actual
condition of the vehicle.
Record of the maximum
G-forces
Press and hold to reset the record
of maximum G-forces.
Acceleration G-force on the
vehicle
Accelerator pedal input
Brake fluid pressure
Steering amount
■Power and torque curve
This chart is intended for reference
only and does not show the actual
engine torque or output.
Power output
To r q u e
Current engine speed
The vertical bar will slide laterally
according to the current engine speed.
A
C
D
A
C
D
A
C
Page 101 of 582
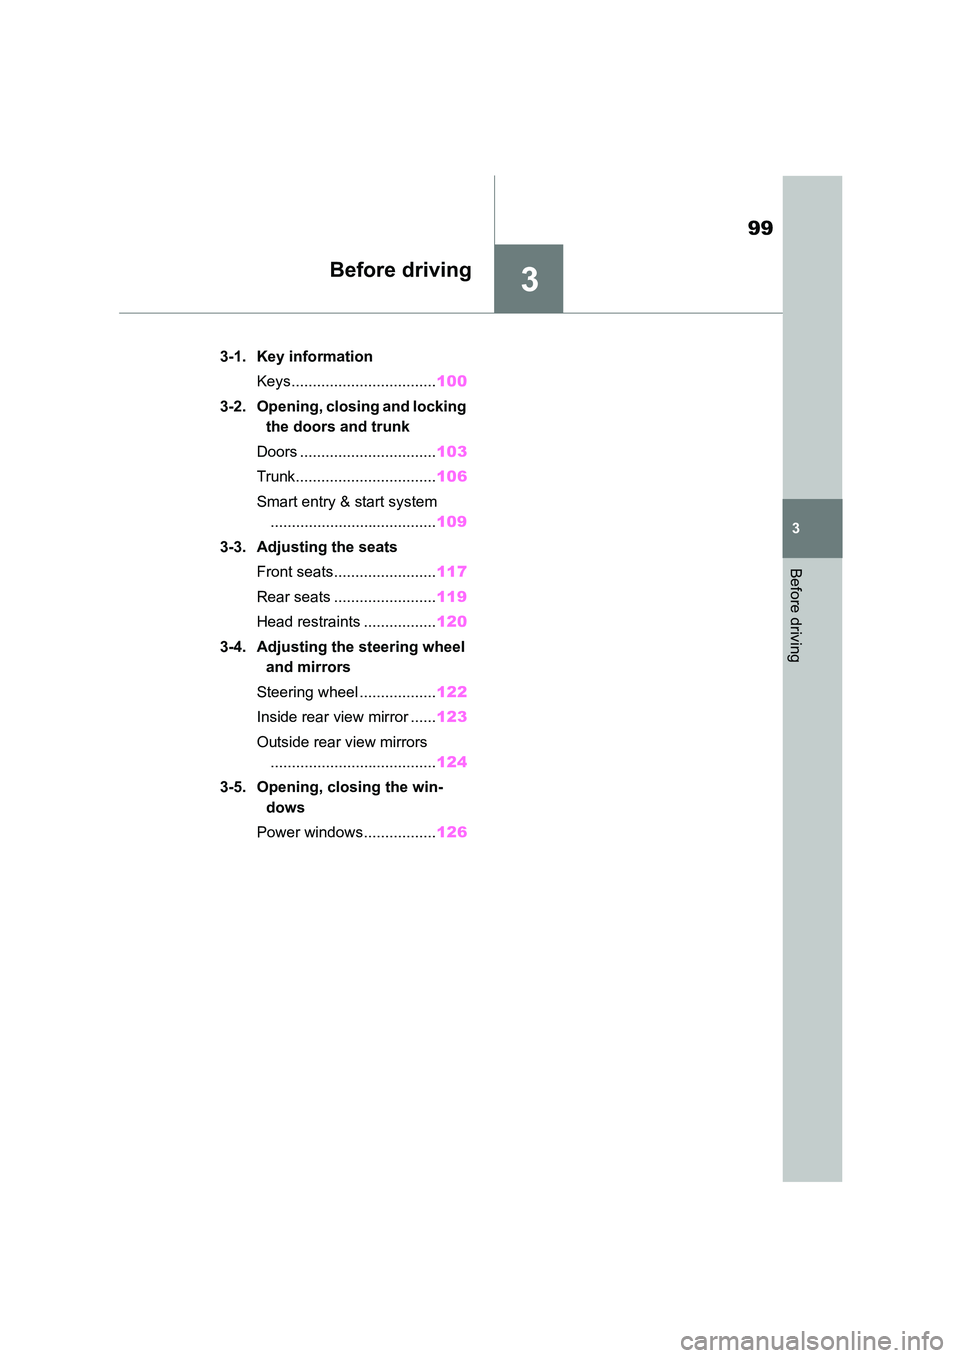
3
99
3
Before driving
Before driving
.3-1. Key information
Keys.................................. 100
3-2. Opening, closing and locking
the doors and trunk
Doors ................................ 103
Trunk................................. 106
Smart entry & start system
....................................... 109
3-3. Adjusting the seats
Front seats........................ 117
Rear seats ........................ 119
Head restraints ................. 120
3-4. Adjusting the steering wheel
and mirrors
Steering wheel .................. 122
Inside rear view mirror ...... 123
Outside rear view mirrors
....................................... 124
3-5. Opening, closing the win-
dows
Power windows................. 126
Page 135 of 582
133
4
4-1. Before driving
Driving
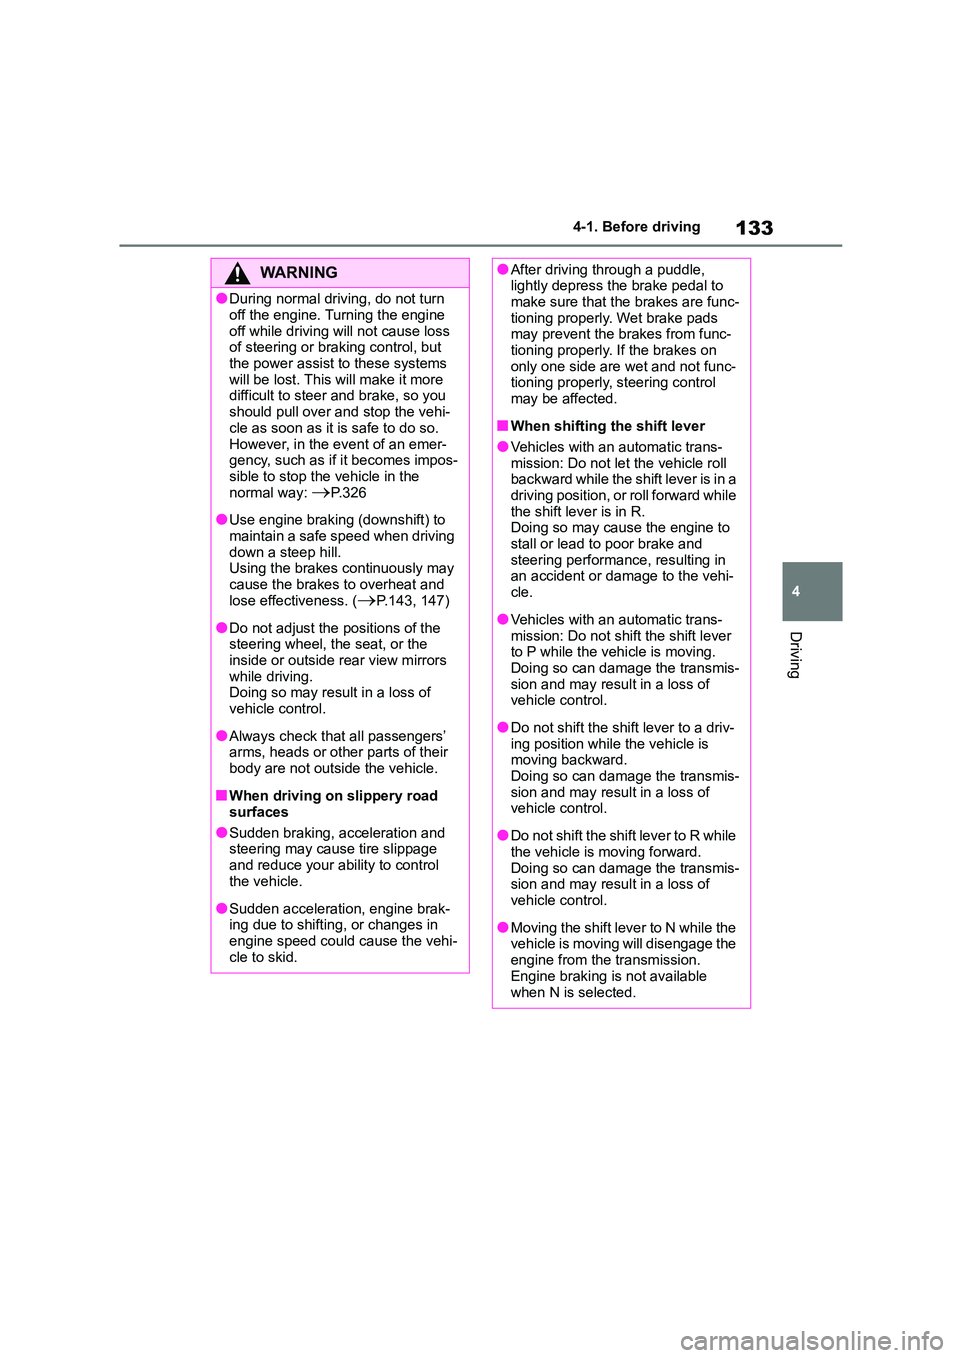
WA R N I N G
●During normal driving, do not turn
off the engine. Turning the engine
off while driving will not cause loss of steering or braking control, but
the power assist to these systems
will be lost. This will make it more difficult to steer and brake, so you
should pull over and stop the vehi-
cle as soon as it is safe to do so.
However, in the event of an emer- gency, such as if it becomes impos-
sible to stop the vehicle in the
normal way: P. 3 2 6
●Use engine braking (downshift) to
maintain a safe speed when driving down a steep hill.
Using the brakes continuously may
cause the brakes to overheat and lose effectiveness. (P.143, 147)
●Do not adjust the positions of the steering wheel, the seat, or the
inside or outside rear view mirrors
while driving. Doing so may result in a loss of
vehicle control.
●Always check that all passengers’
arms, heads or other parts of their
body are not outside the vehicle.
■When driving on slippery road
surfaces
●Sudden braking, acceleration and
steering may cause tire slippage
and reduce your ability to control the vehicle.
●Sudden acceleration, engine brak-ing due to shifting, or changes in
engine speed could cause the vehi-
cle to skid.
●After driving through a puddle, lightly depress the brake pedal to
make sure that the brakes are func-
tioning properly. Wet brake pads may prevent the brakes from func-
tioning properly. If the brakes on
only one side are wet and not func- tioning properly, steering control
may be affected.
■When shifting the shift lever
●Vehicles with an automatic trans-
mission: Do not let the vehicle roll backward while the sh ift lever is in a
driving position, or roll forward while
the shift lever is in R. Doing so may cause the engine to
stall or lead to poor brake and
steering performance, resulting in an accident or damage to the vehi-
cle.
●Vehicles with an automatic trans-
mission: Do not shi ft the shift lever
to P while the vehicle is moving. Doing so can damage the transmis-
sion and may result in a loss of
vehicle control.
●Do not shift the shift lever to a driv-
ing position while the vehicle is moving backward.
Doing so can damage the transmis-
sion and may result in a loss of vehicle control.
●Do not shift the shift lever to R while the vehicle is moving forward.
Doing so can damage the transmis-
sion and may result in a loss of vehicle control.
●Moving the shift lever to N while the vehicle is moving will disengage the
engine from the transmission.
Engine braking is not available
when N is selected.
Page 138 of 582
1364-1. Before driving
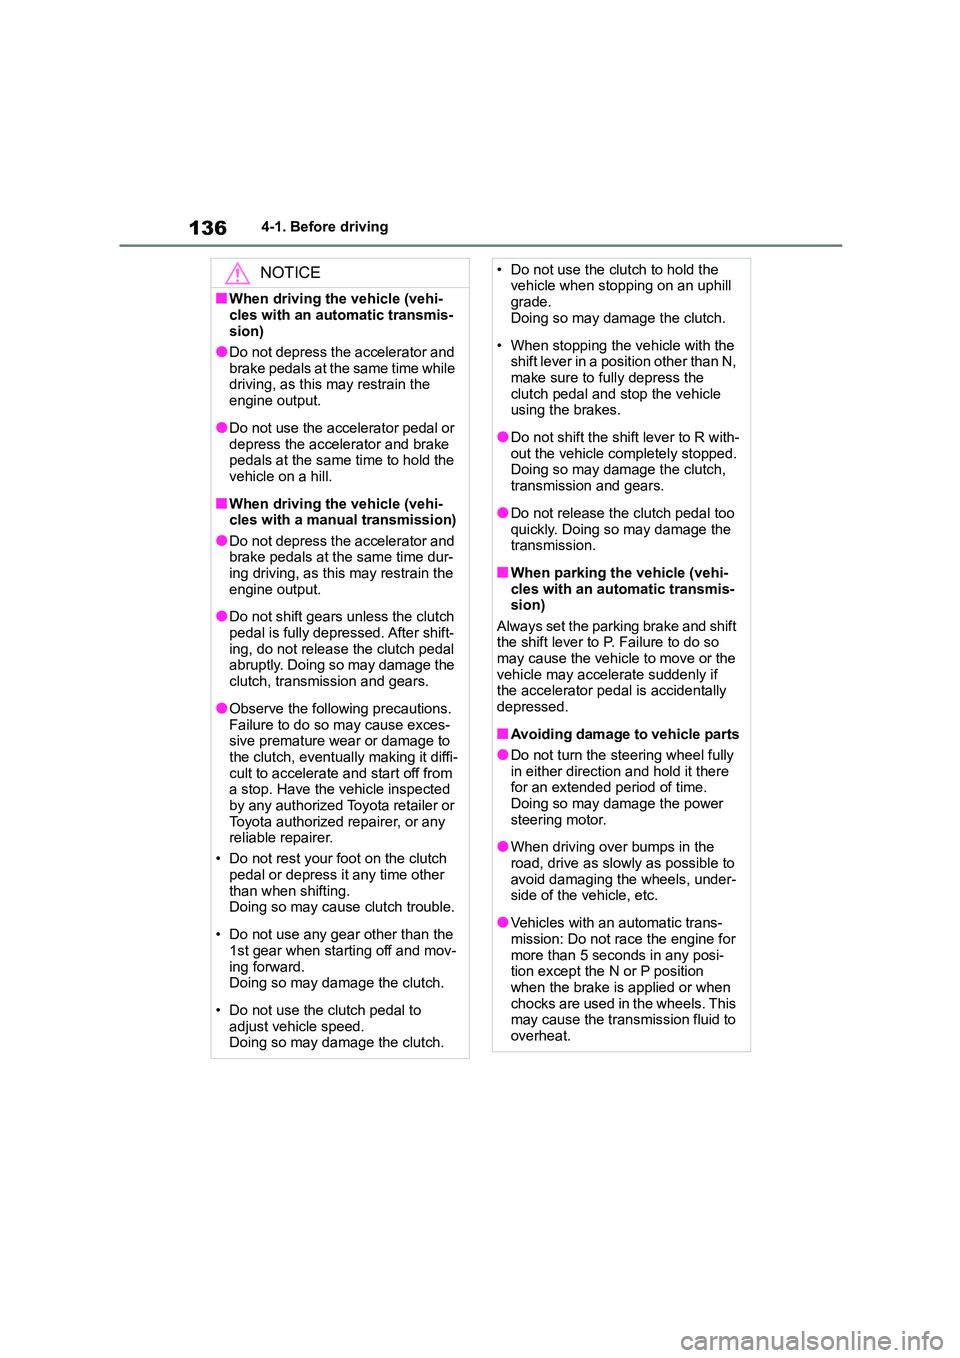
NOTICE
■When driving the vehicle (vehi-
cles with an automatic transmis-
sion)
●Do not depress the accelerator and
brake pedals at the same time while
driving, as this may restrain the engine output.
●Do not use the accelerator pedal or
depress the accelerator and brake pedals at the same time to hold the
vehicle on a hill.
■When driving the vehicle (vehi-
cles with a manual transmission)
●Do not depress the accelerator and brake pedals at the same time dur-
ing driving, as this may restrain the
engine output.
●Do not shift gears unless the clutch
pedal is fully depressed. After shift- ing, do not release the clutch pedal
abruptly. Doing so may damage the
clutch, transmission and gears.
●Observe the following precautions.
Failure to do so may cause exces- sive premature wear or damage to
the clutch, eventually making it diffi-
cult to accelerate and start off from a stop. Have the vehicle inspected
by any authorized Toyota retailer or
Toyota authorized repairer, or any reliable repairer.
• Do not rest your foot on the clutch
pedal or depress it any time other than when shifting.
Doing so may cause clutch trouble.
• Do not use any gear other than the
1st gear when starting off and mov-
ing forward. Doing so may damage the clutch.
• Do not use the clutch pedal to adjust vehicle speed.
Doing so may damage the clutch.
• Do not use the clutch to hold the vehicle when stopping on an uphill
grade.
Doing so may damage the clutch.
• When stopping the vehicle with the
shift lever in a position other than N, make sure to fully depress the
clutch pedal and stop the vehicle
using the brakes.
●Do not shift the shift lever to R with-
out the vehicle completely stopped. Doing so may damage the clutch,
transmission and gears.
●Do not release the clutch pedal too
quickly. Doing so may damage the
transmission.
■When parking the vehicle (vehi-
cles with an automatic transmis- sion)
Always set the parking brake and shift
the shift lever to P. Failure to do so may cause the vehicl e to move or the
vehicle may accelerate suddenly if
the accelerator pedal is accidentally depressed.
■Avoiding damage to vehicle parts
●Do not turn the steering wheel fully
in either direction and hold it there
for an extended period of time. Doing so may damage the power
steering motor.
●When driving over bumps in the
road, drive as slowly as possible to
avoid damaging the wheels, under- side of the vehicle, etc.
●Vehicles with an automatic trans-mission: Do not race the engine for
more than 5 seconds in any posi-
tion except the N or P position
when the brake is applied or when chocks are used in the wheels. This
may cause the transmission fluid to
overheat.
Page 143 of 582
141
4
4-2. Driving procedures
Driving
Automatic transmission
1 Stop the vehicle completely.
2 Set the parking brake (P.151),
and shift the shift lever to P.
Check the parking brake indicator is
illuminated.
3 Press the engine switch.
The engine will stop, and the meter dis-
play will be extinguished.
4 Release the brake pedal and
check that “ACCESSORY” or
“IGNITION ON” is not shown on
the meters.
Manual transmission
1 Stop the vehicle completely.
2 Set the parking brake. (P.151)
Check the parking brake indicator is illuminated.
3 Shift the shift lever to N.
( P.147)
4 Press the engine switch.
The engine will stop, and the meter dis-
play will be extinguished.
5 Release the brake pedal and
check that “ACCESSORY” or
“IGNITION ON” is not shown on
the meters.
Modes can be changed by pressing
the engine switch with brake pedal
(automatic transmission) or clutch
pedal (manual transmission)
released. (The mode changes each
NOTICE
■Symptoms indicating a malfunc-
tion with the engine switch
If the engine switch seems to be oper- ating somewhat differently than usual,
such as the switch sticking slightly,
there may be a malfunction. Contact any authorized Toyota retailer or
Toyota authorized repairer, or any reli-
able repairer immediately.
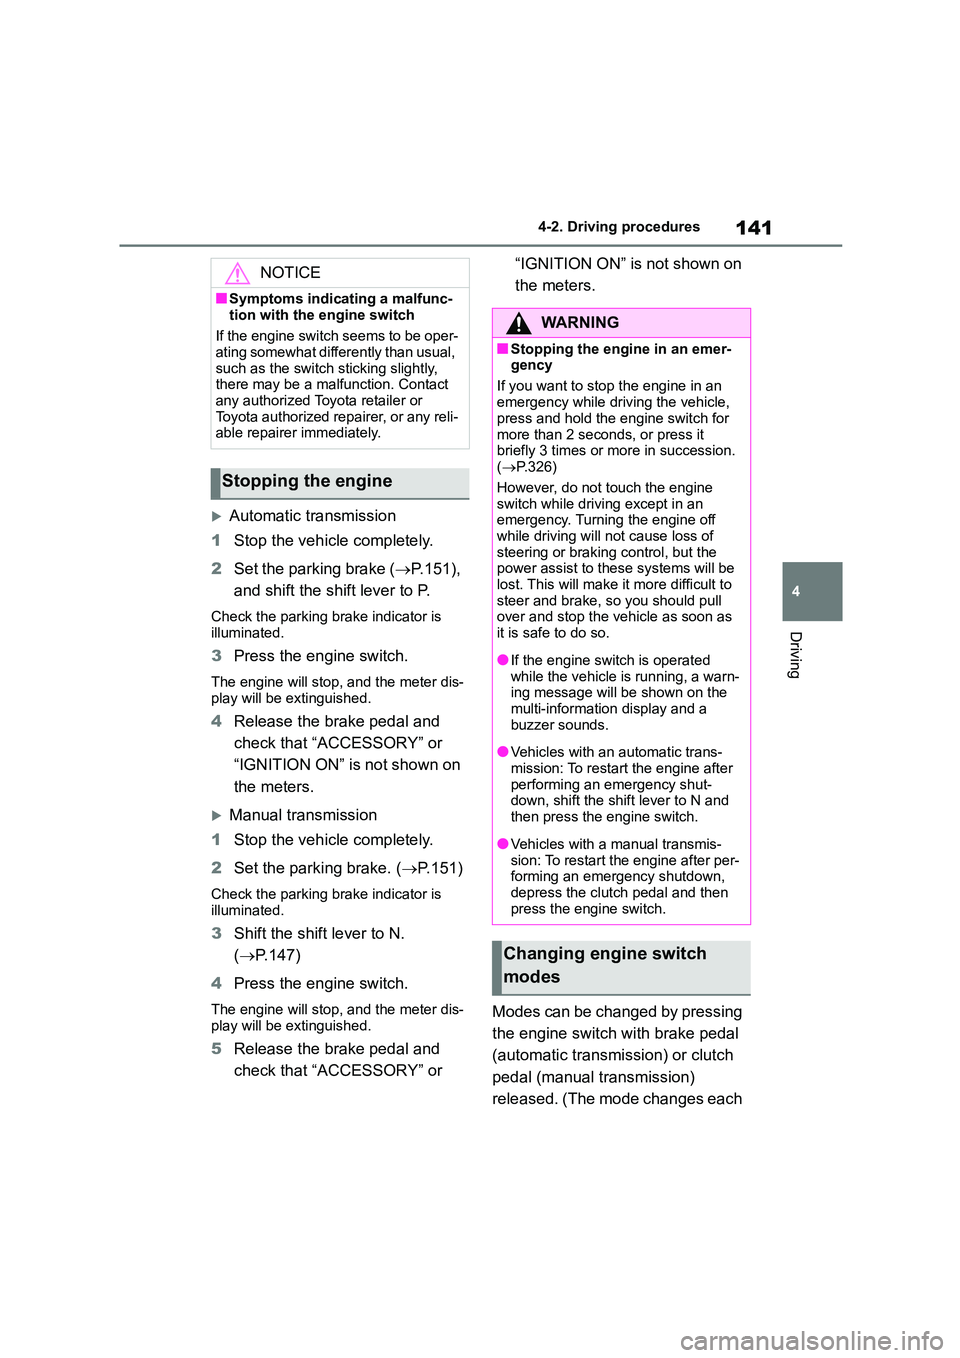
Stopping the engine
WA R N I N G
■Stopping the engine in an emer-
gency
If you want to stop the engine in an
emergency while driving the vehicle,
press and hold the engine switch for
more than 2 seconds, or press it briefly 3 times or more in succession.
( P.326)
However, do not touch the engine switch while driving except in an
emergency. Turning the engine off
while driving will not cause loss of steering or braking control, but the
power assist to these systems will be
lost. This will make it more difficult to steer and brake, so you should pull
over and stop the vehicle as soon as
it is safe to do so.
●If the engine switch is operated
while the vehicle is running, a warn- ing message will be shown on the
multi-information display and a
buzzer sounds.
●Vehicles with an automatic trans-
mission: To restart the engine after performing an emergency shut-
down, shift the shift lever to N and
then press the engine switch.
●Vehicles with a manual transmis-
sion: To restart the engine after per- forming an emergency shutdown,
depress the clutch pedal and then
press the engine switch.
Changing engine switch
modes
Page 258 of 582
2564-6. Using other driving systems
■ABS (Anti-lock Brake System)
Helps to prevent wheel lock when
the brakes are applied suddenly, or
if the brakes are applied while driv-
ing on a slippery road surface
■Brake assist
Generates an increased level of
braking force after the brake pedal
is depressed when the system
detects a panic stop situation
■VSC (Vehicle St ability Control)
Helps the driver to control skidding
when swerving suddenly or turning
on slippery road surfaces
■TRC (Traction Control)
Helps to maintain drive power and
prevent the drive wheels from spin-
ning when starting the vehicle or
accelerating on slippery roads
The TRC system is also equipped
with the brake LSD function.
■Hill-start assist control
P.253
■EPS (Electric Power Steering)
Employs an electric motor to
reduce the amount of effort needed
to turn the steering wheel
■Emergency brake signal
When the brakes are applied sud-
denly, the emergency flashers auto-
matically flash to alert the vehicle
behind.
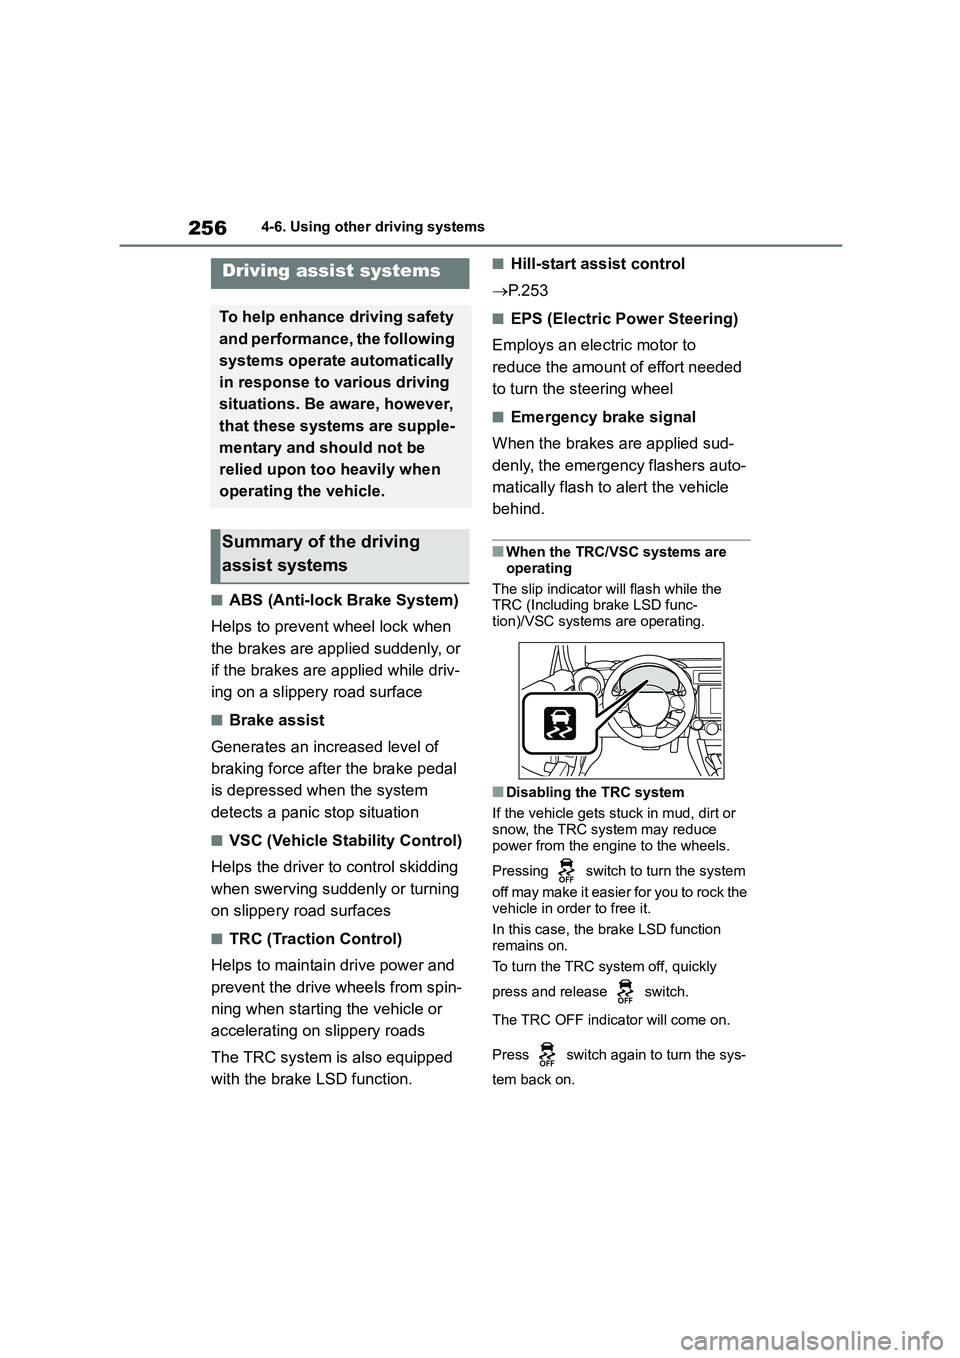
■When the TRC/VSC systems are
operating
The slip indicator will flash while the TRC (Including brake LSD func-
tion)/VSC systems are operating.
■Disabling the TRC system
If the vehicle gets stuck in mud, dirt or
snow, the TRC system may reduce
power from the engine to the wheels.
Pressing switch to turn the system
off may make it easier for you to rock the
vehicle in order to free it.
In this case, the brake LSD function
remains on.
To turn the TRC system off, quickly
press and release switch.
The TRC OFF indicator will come on.
Press switch again to turn the sys-
tem back on.
Driving assist systems
To help enhance driving safety
and performance, the following
systems operate automatically
in response to various driving
situations. Be aware, however,
that these systems are supple-
mentary and should not be
relied upon too heavily when
operating the vehicle.
Summary of the driving
assist systems
Page 329 of 582
327
7
7-1. Essential information
When trouble arises
press it briefly 3 times or more in
succession.
5 Stop the vehicle in a safe place
by the road.
If the door can be opened, open
the door and exit the vehicle.
If the door cannot be opened,
open the window using the
power window switch and ensure
an escape route.
If the window can be opened,
exit the vehicle through the win-
dow.
If the door and window cannot be
opened due to the rising water,
remain calm, wait until the water
level inside the vehicle rises to
the point that the water pressure
inside of the vehicle equals the
water pressure outside of the
vehicle and then open the door
after waiting for the rising water
to enter the vehicle, and exit the
vehicle. When the outside water
level exceeds half the height of
the door, the door cannot be
opened from the inside due to
WA R N I N G
■If the engine has to be turned off
while driving
Power assist for the brakes and steer-
ing wheel will be lost, making the
brake pedal harder to depress and the steering wheel heavier to turn.
Decelerate as much as possible
before turning off the engine.
If the vehicle is sub-
merged or water on the
road is rising
This vehicle is not designed to
be able to drive on roads that
are deeply flooded with water.
Do not drive on roads where
the roads may be submerged
or the water may be rising. It is
dangerous to remain in the
vehicle, if it anticipated that the
vehicle will be flooded or set a
drift. Remain calm and follow
the following.