clock TOYOTA GT86 2014 Owners Manual (in English)
[x] Cancel search | Manufacturer: TOYOTA, Model Year: 2014, Model line: GT86, Model: TOYOTA GT86 2014Pages: 452, PDF Size: 14.38 MB
Page 3 of 452
1
2
3
4
5
6
FT86_EE
3
2-2. Instrument cluster
Gauges and meters ............ 196
Indicators and warning
lights ................................. 201
Multi-information display ..... 206
2-3. Operating the lights and
windshield wipers
Headlight switch.................. 211
Fog light switch ................... 218
Windshield wipers and
washer .............................. 220
2-4. Using other driving
systems
Cruise control...................... 223
Driving assist systems ........ 228
2-5. Driving information
Cargo and luggage ............. 234
Winter driving tips ............... 236
Trailer towing ...................... 240
3-1. Using the air conditioning
system and defogger
Manual air conditioning
system .............................. 242
Automatic air conditioning
system .............................. 250
Rear window and
outside rear view
mirror defoggers ............... 2583-2. Using the audio system
Using the AUX/USB
port ................................... 260
3-3. Using the interior lights
Interior lights list ................. 261
• Interior light ...................... 262
3-4. Using the storage features
List of storage features....... 263
• Glove box ......................... 264
• Bottle holders ................... 265
• Cup holders/
console tray...................... 266
3-5. Other interior features
Sun visors .......................... 268
Vanity mirrors ..................... 269
Clock .................................. 270
Outside temperature
display .............................. 271
Ashtray ............................... 272
Power outlets ..................... 273
Seat heaters ....................... 275
Floor mat ............................ 277
Trunk features .................... 280
3Interior Features
Page 11 of 452
FT86_EE
11
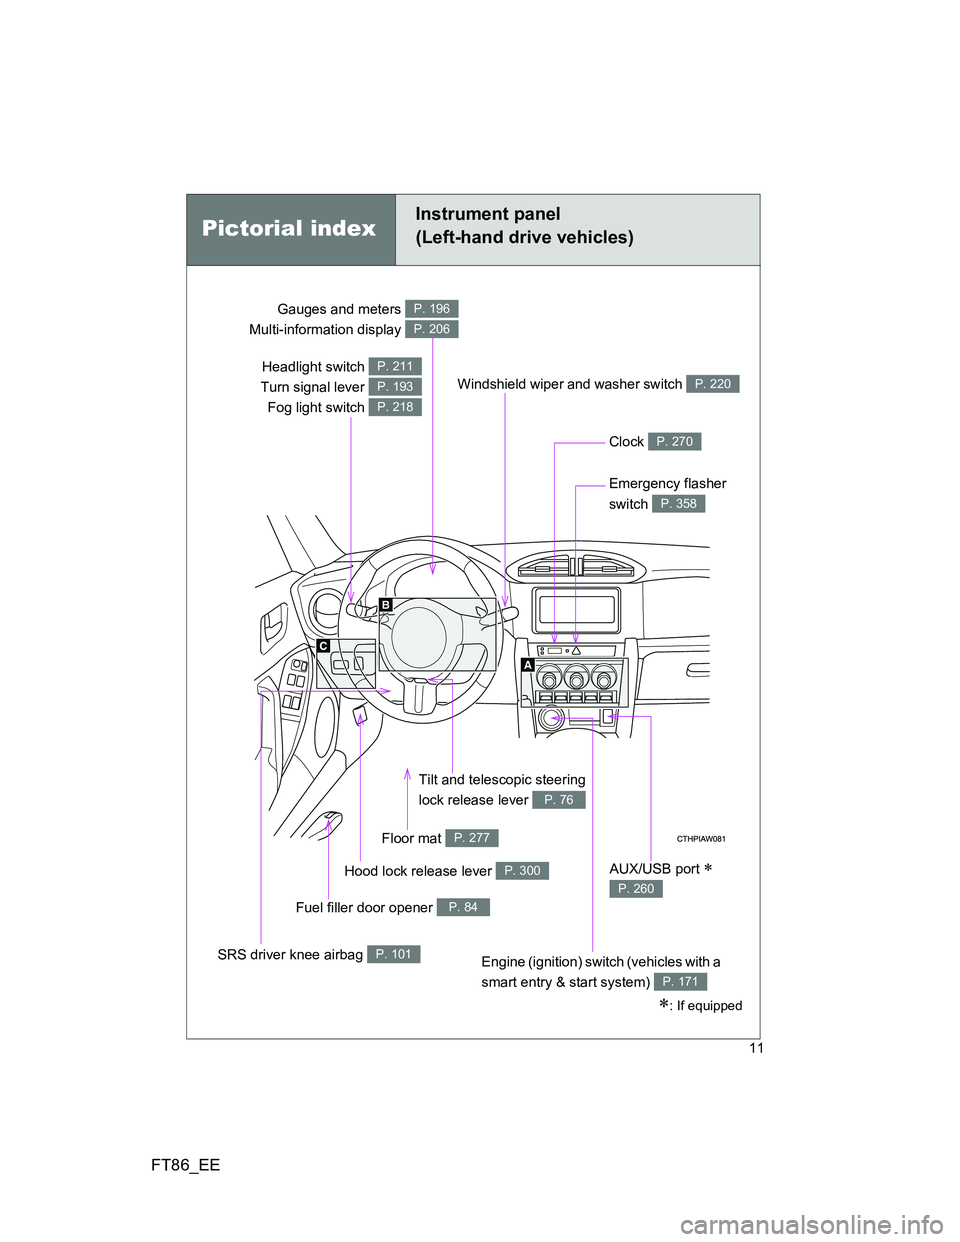
Headlight switch
Turn signal lever
Fog light switch P. 211
P. 193
P. 218
Gauges and meters
Multi-information display P. 196
P. 206
Clock P. 270
Windshield wiper and washer switch P. 220
Emergency flasher
switch
P. 358
Tilt and telescopic steering
lock release lever
P. 76
Floor mat P. 277
Hood lock release lever P. 300
Fuel filler door opener P. 84
SRS driver knee airbag P. 101Engine (ignition) switch (vehicles with a
smart entry & start system)
P. 171
AUX/USB port
P. 260
Pictorial index
Instrument panel
(Left-hand drive vehicles)
: If equipped
Page 17 of 452
FT86_EE
17
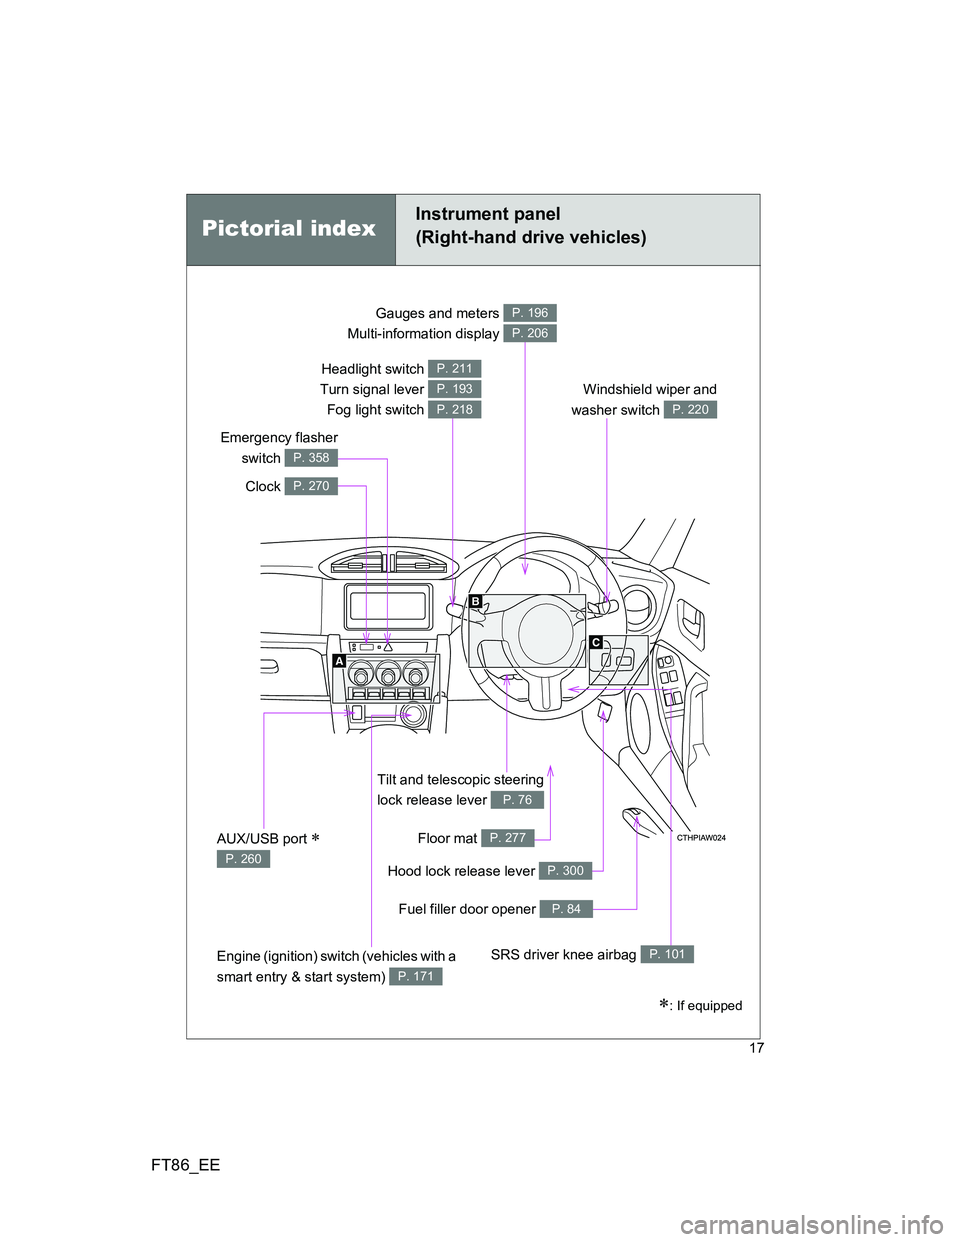
Tilt and telescopic steering
lock release lever
P. 76
Gauges and meters
Multi-information display P. 196
P. 206
Clock P. 270
Windshield wiper and
washer switch
P. 220
Emergency flasher
switch
P. 358
Floor mat P. 277
Hood lock release lever P. 300
Fuel filler door opener P. 84
Engine (ignition) switch (vehicles with a
smart entry & start system)
P. 171
SRS driver knee airbag P. 101
Headlight switch
Turn signal lever
Fog light switch P. 211
P. 193
P. 218
AUX/USB port
P. 260
: If equipped
Pictorial index
Instrument panel
(Right-hand drive vehicles)
Page 56 of 452
56
1-2. Opening, closing and locking the doors and trunk
FT86_EE
Trunk
The trunk can be opened using the key, trunk opener, entry function
or wireless remote control.
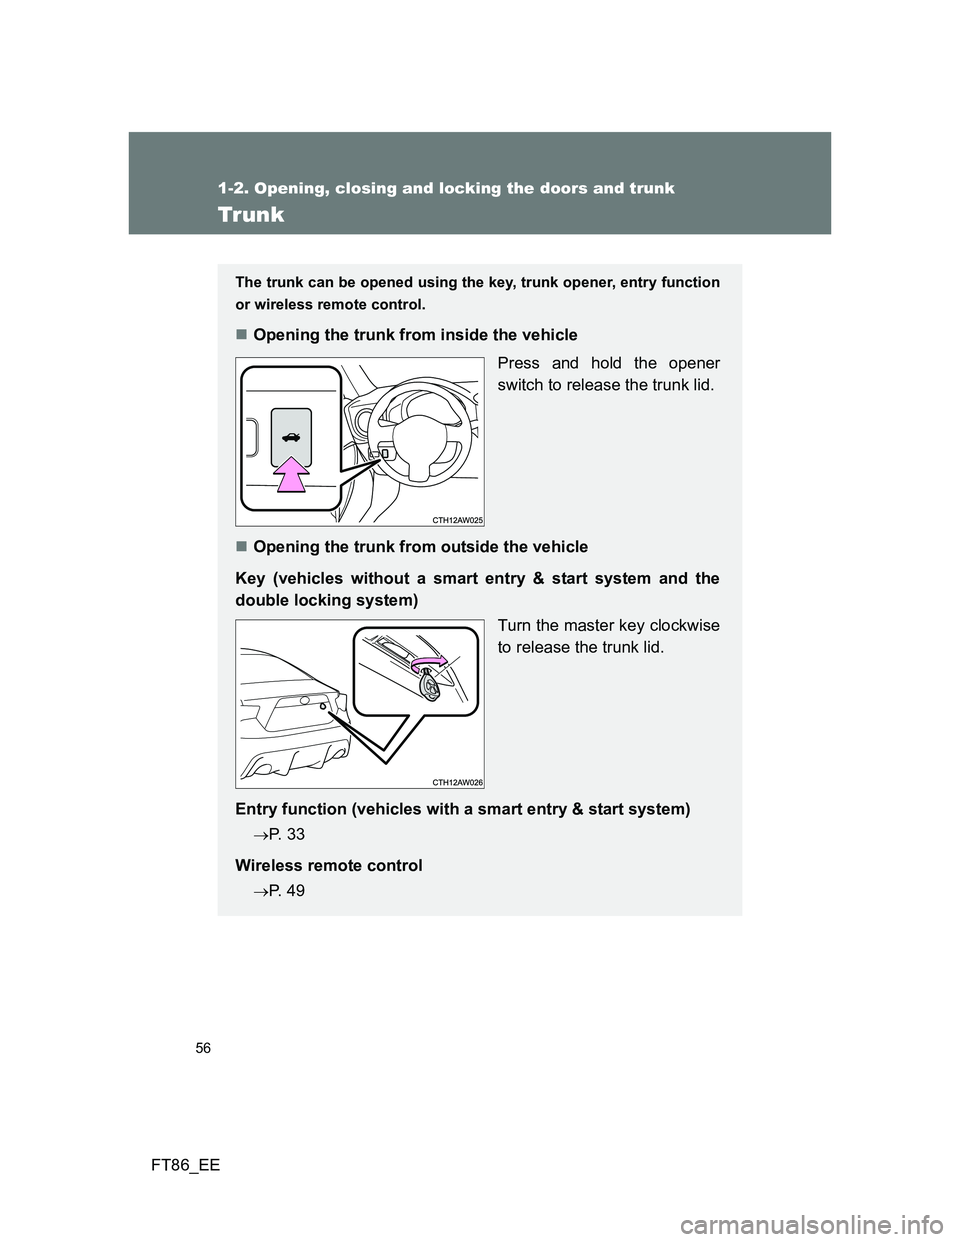
Opening the trunk from inside the vehicle
Press and hold the opener
switch to release the trunk lid.
Opening the trunk from outside the vehicle
Key (vehicles without a smart entry & start system and the
double locking system)
Turn the master key clockwise
to release the trunk lid.
Entry function (vehicles with a smart entry & start system)
P. 3 3
Wireless remote control
P. 4 9
Page 241 of 452
3Interior features
241
FT86_EE
3-1. Using the air conditioning
system and defogger
Manual air conditioning
system ............................ 242
Automatic air conditioning
system ............................ 250
Rear window and
outside rear view
mirror defoggers ............. 258
3-2. Using the audio system
Using the AUX/USB
port ................................. 260
3-3. Using the interior lights
Interior lights list................ 261
• Interior light ..................... 2623-4. Using the storage
features
List of storage features ..... 263
• Glove box ....................... 264
• Bottle holders.................. 265
• Cup holders/
console tray .................... 266
3-5. Other interior features
Sun visors ......................... 268
Vanity mirrors.................... 269
Clock ................................. 270
Outside temperature
display ............................ 271
Ashtray.............................. 272
Power outlets .................... 273
Seat heaters ..................... 275
Floor mat........................... 277
Trunk features................... 280
Page 242 of 452
242
FT86_EE
3-1. Using the air conditioning system and defogger
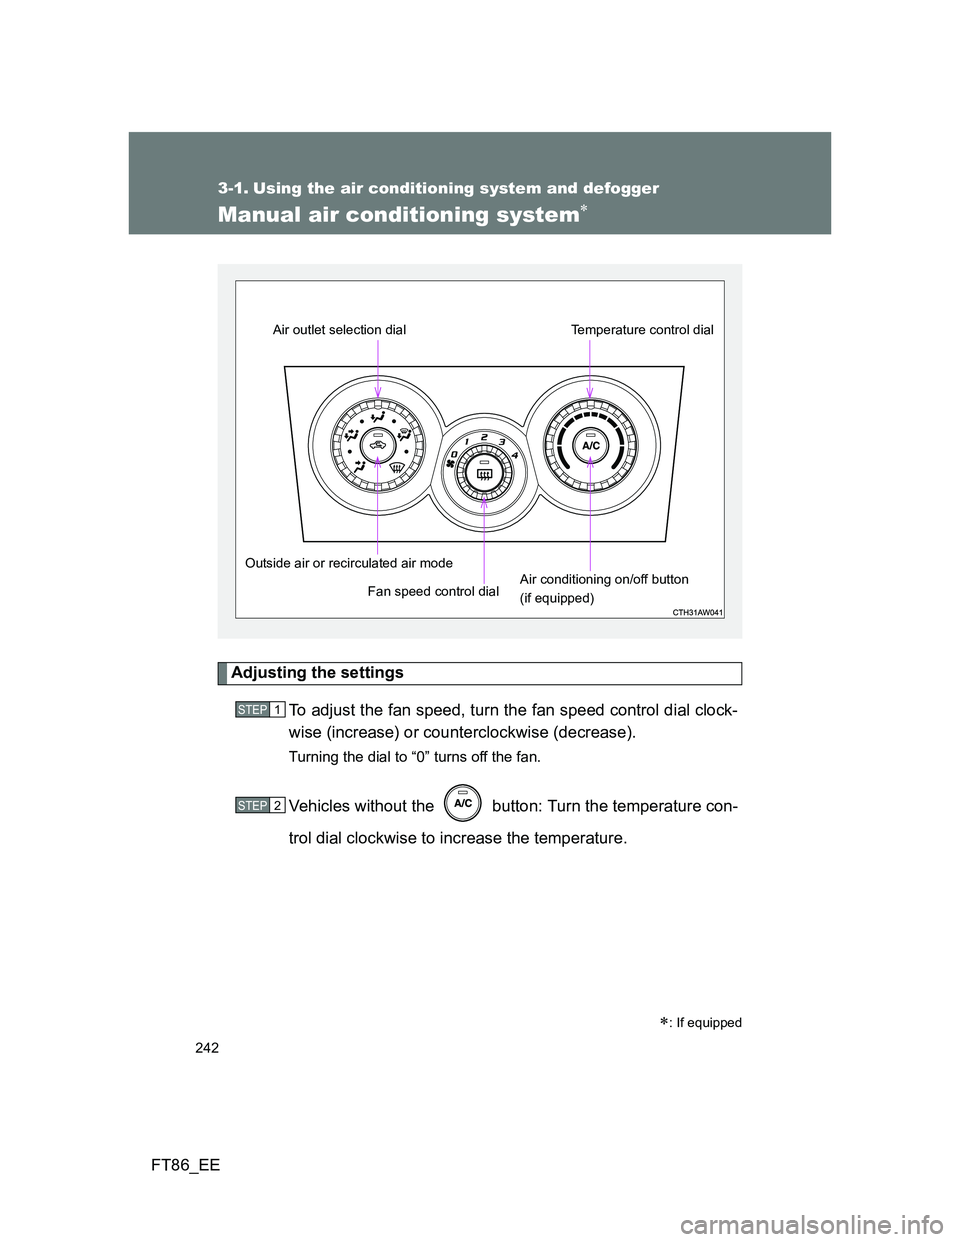
Manual air conditioning system
Adjusting the settings
To adjust the fan speed, turn the fan speed control dial clock-
wise (increase) or counterclockwise (decrease).
Turning the dial to “0” turns off the fan.
Vehicles without the button: Turn the temperature con-
trol dial clockwise to increase the temperature.
: If equipped
Fan speed control dial Air outlet selection dial
Air conditioning on/off button
(if equipped)Temperature control dial
Outside air or recirculated air mode
STEP 1
STEP 2
Page 243 of 452
243 3-1. Using the air conditioning system and defogger
3
Interior features
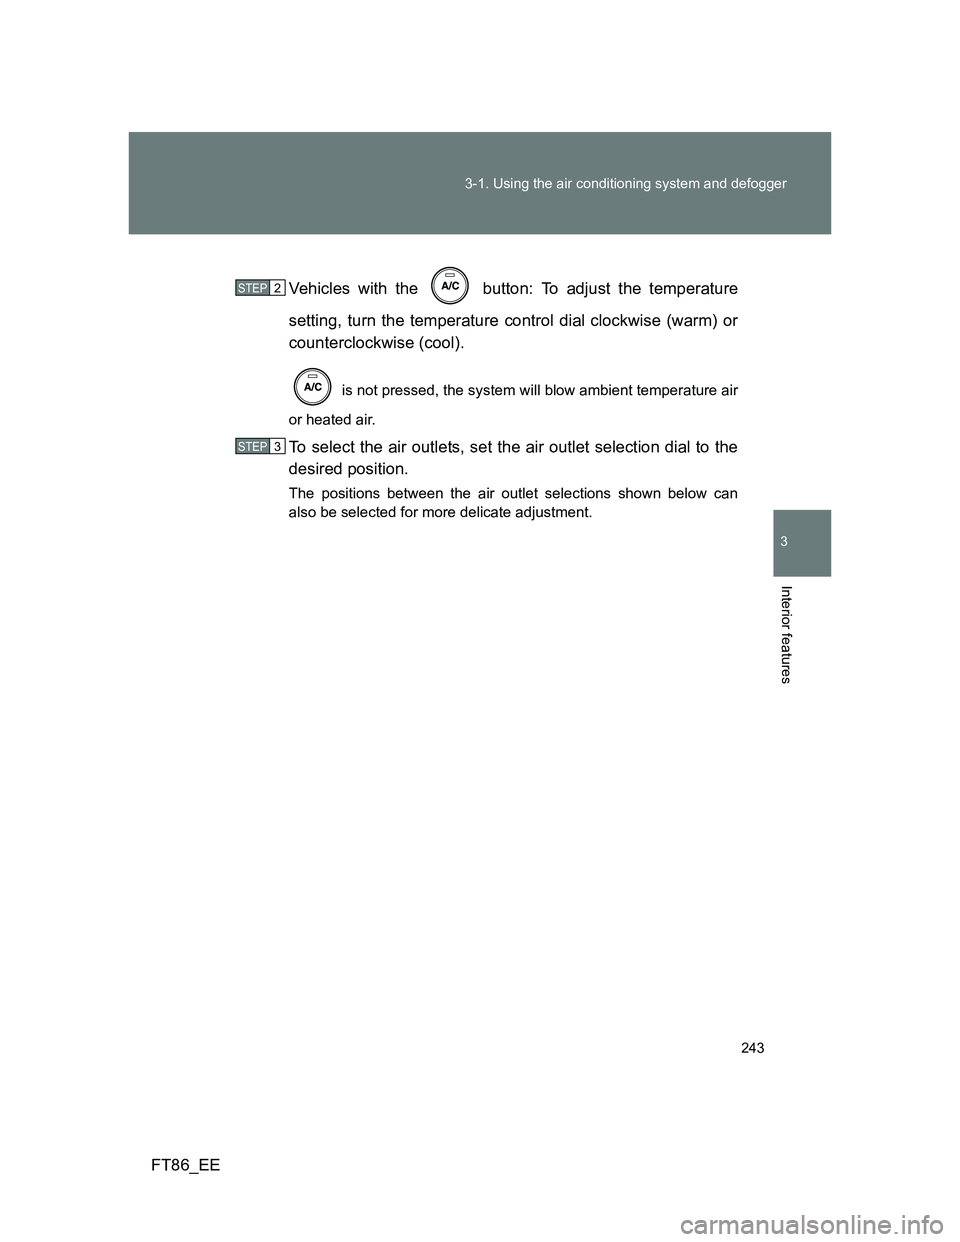
FT86_EEVehicles with the button: To adjust the temperature
setting, turn the temperature control dial clockwise (warm) or
counterclockwise (cool).
is not pressed, the system will blow ambient temperature air
or heated air.
To select the air outlets, set the air outlet selection dial to the
desired position.
The positions between the air outlet selections shown below can
also be selected for more delicate adjustment.
STEP 2
STEP 3
Page 251 of 452
251 3-1. Using the air conditioning system and defogger
3
Interior features
FT86_EE
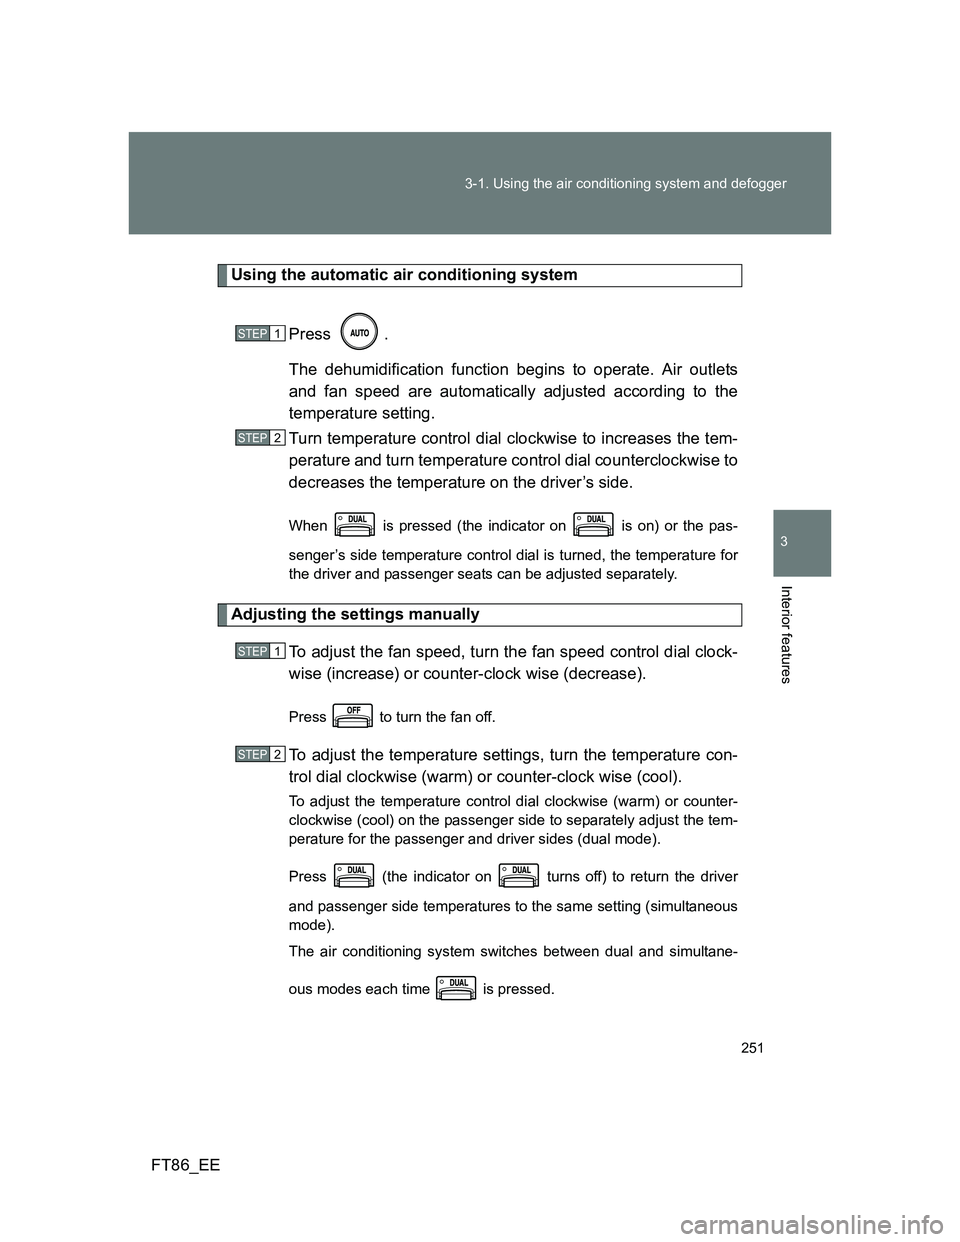
Using the automatic air conditioning system
Press .
The dehumidification function begins to operate. Air outlets
and fan speed are automatically adjusted according to the
temperature setting.
Turn temperature control dial clockwise to increases the tem-
perature and turn temperature control dial counterclockwise to
decreases the temperature on the driver’s side.
When is pressed (the indicator on is on) or the pas-
senger’s side temperature control dial is turned, the temperature for
the driver and passenger seats can be adjusted separately.
Adjusting the settings manually
To adjust the fan speed, turn the fan speed control dial clock-
wise (increase) or counter-clock wise (decrease).
Press to turn the fan off.
To adjust the temperature settings, turn the temperature con-
trol dial clockwise (warm) or counter-clock wise (cool).
To adjust the temperature control dial clockwise (warm) or counter-
clockwise (cool) on the passenger side to separately adjust the tem-
perature for the passenger and driver sides (dual mode).
Press (the indicator on turns off) to return the driver
and passenger side temperatures to the same setting (simultaneous
mode).
The air conditioning system switches between dual and simultane-
ous modes each time is pressed.
STEP 1
STEP 2
STEP 1
STEP 2
Page 270 of 452
270
3-5. Other interior features
FT86_EE
Clock
The clock is displayed when
Vehicles without a smart entry & start system
The engine switch is in the “ACC” or “ON” position.
Vehicles with a smart entry & start system
The “ENGINE START STOP” switch is in ACCESSORY or IGNITION ON
mode.
When disconnecting and reconnecting battery terminals
The clock data will be reset.
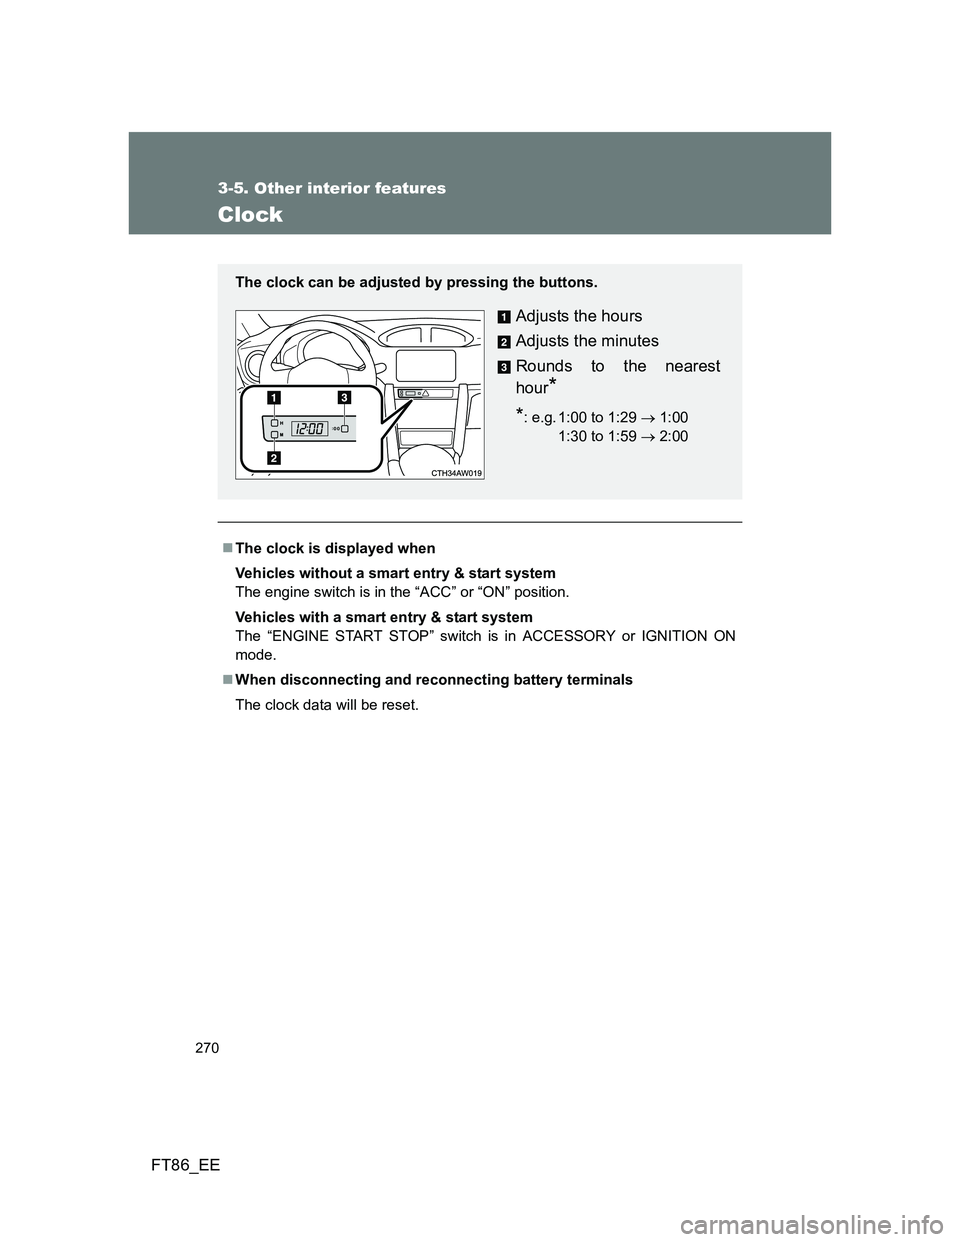
The clock can be adjusted by pressing the buttons.
Adjusts the hours
Adjusts the minutes
Rounds to the nearest
hour
*
*: e.g. 1:00 to 1:29 1:00
1:30 to 1:59 2:0000
Page 306 of 452
306 4-3. Do-it-yourself maintenance
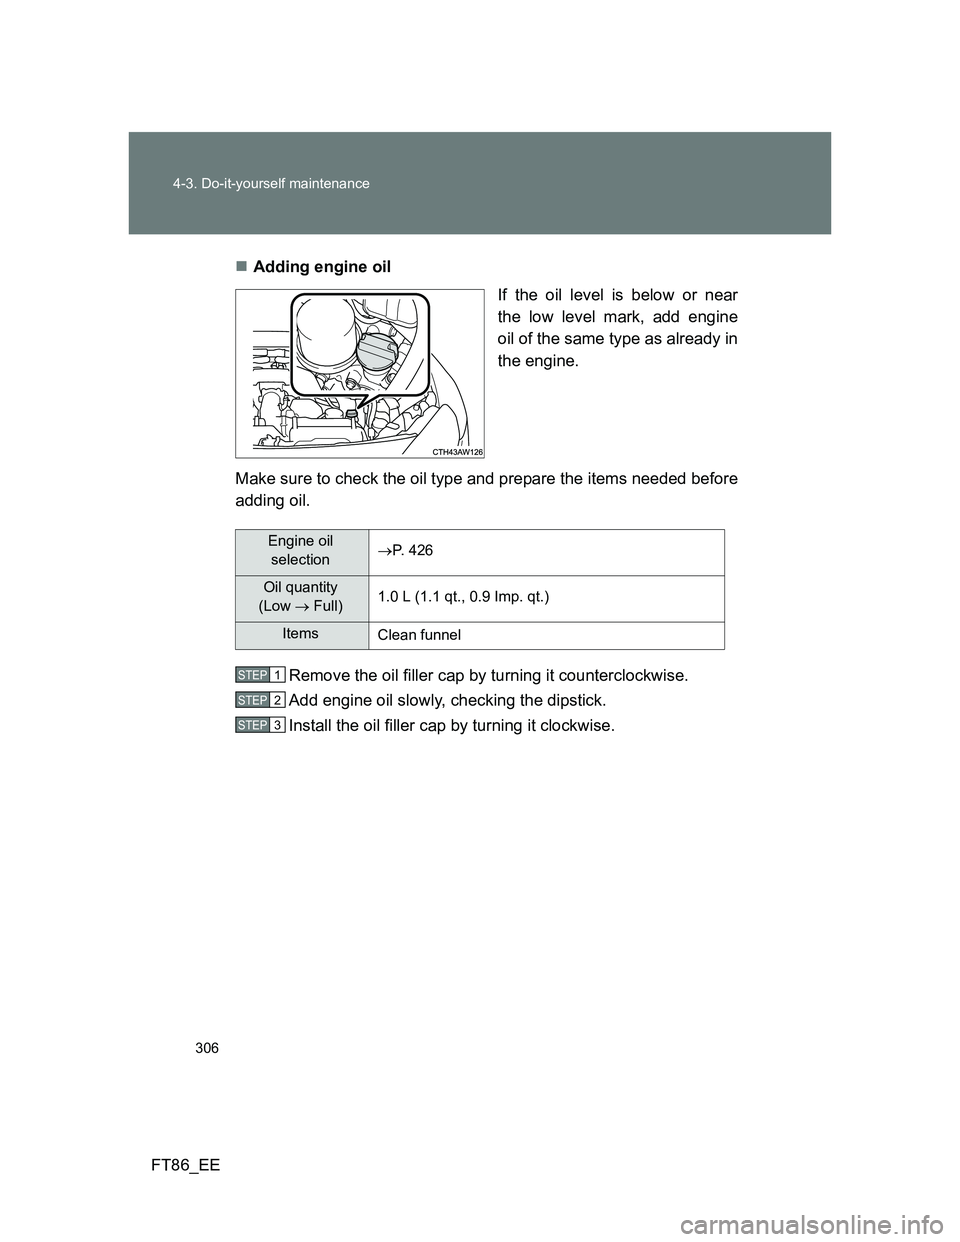
FT86_EEAdding engine oil
If the oil level is below or near
the low level mark, add engine
oil of the same type as already in
the engine.
Make sure to check the oil type and prepare the items needed before
adding oil.
Remove the oil filler cap by turning it counterclockwise.
Add engine oil slowly, checking the dipstick.
Install the oil filler cap by turning it clockwise.
Engine oil
selectionP. 426
Oil quantity
(Low Full)1.0 L (1.1 qt., 0.9 Imp. qt.)
Items
Clean funnel
STEP 1
STEP 2
STEP 3