reset TOYOTA HIGHLANDER 2008 XU40 / 2.G Owners Manual
[x] Cancel search | Manufacturer: TOYOTA, Model Year: 2008, Model line: HIGHLANDER, Model: TOYOTA HIGHLANDER 2008 XU40 / 2.GPages: 577, PDF Size: 11.46 MB
Page 16 of 577
16
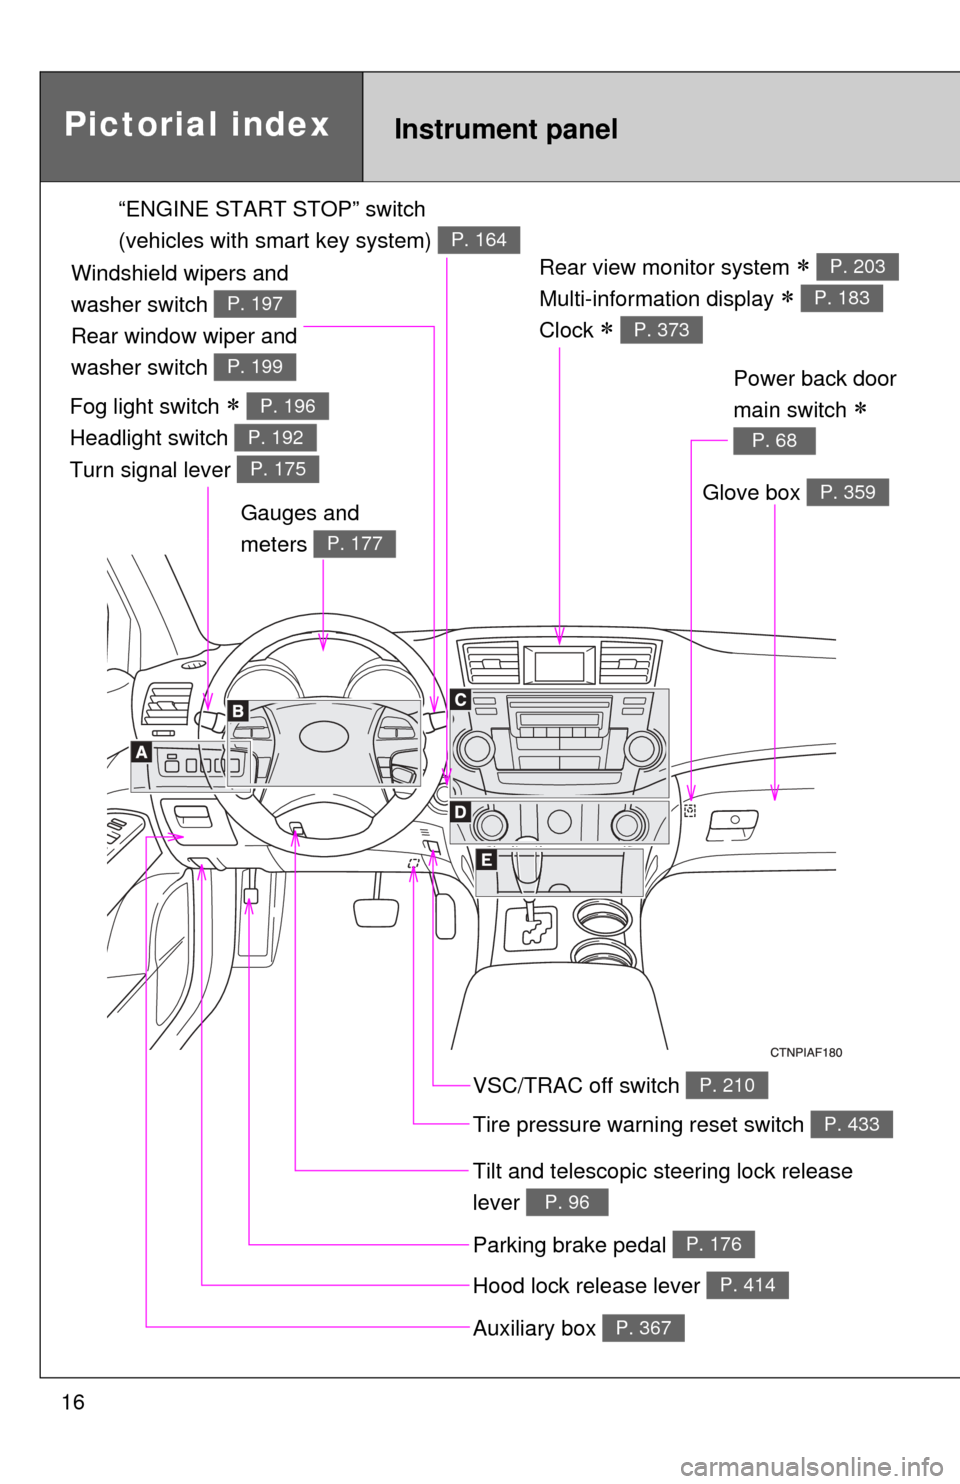
Rear view monitor system
Multi-information display
Clock
P. 203
P. 183
P. 373
Gauges and
meters
P. 177
Tilt and telescopic steering lock release
lever
P. 96
Glove box P. 359
Pictorial indexInstrument panel
Power back door
main switch
P. 68
VSC/TRAC off switch P. 210
Tire pressure warning reset switch P. 433
Parking brake pedal P. 176
Hood lock release lever P. 414
Auxiliary box P. 367
“ENGINE START STOP” switch
(vehicles with smart key system)
P. 164
Fog light switch
Headlight switch
Turn signal lever P. 196
P. 192
P. 175
Windshield wipers and
washer switch
Rear window wiper and
washer switch
P. 197
P. 199
Page 177 of 577
177
2
When driving
2-2. Instrument cluster
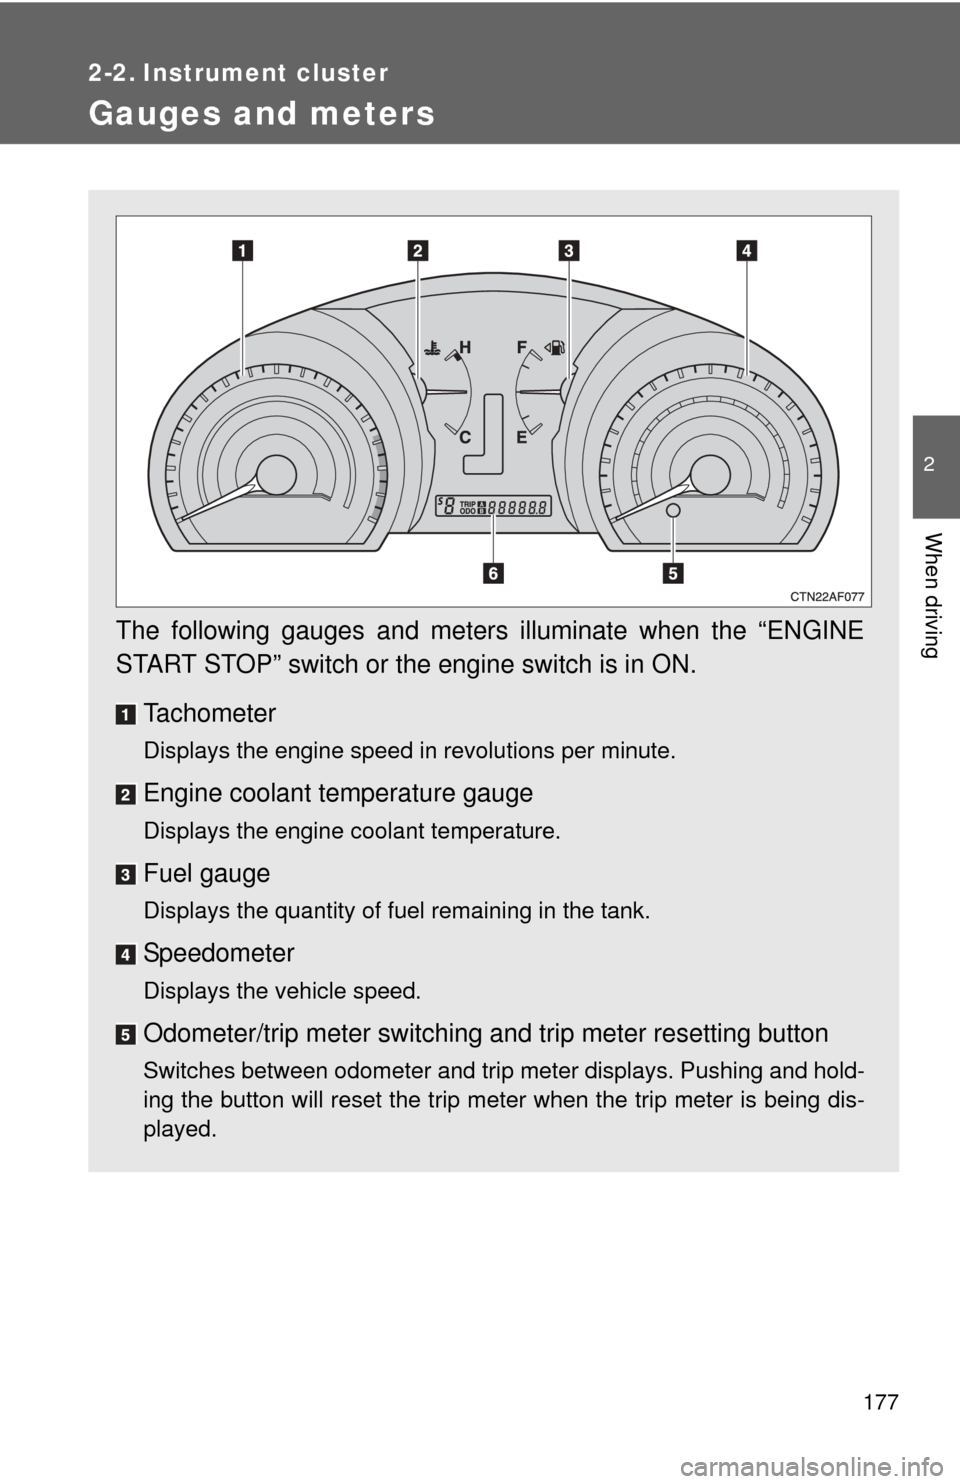
Gauges and meters
The following gauges and meters illuminate when the “ENGINE
START STOP” switch or the engine switch is in ON.Tachometer
Displays the engine speed in revolutions per minute.
Engine coolant temperature gauge
Displays the engine coolant temperature.
Fuel gauge
Displays the quantity of fuel remaining in the tank.
Speedometer
Displays the vehicle speed.
Odometer/trip meter switching and trip meter resetting button
Switches between odometer and trip meter displays. Pushing and hold-
ing the button will reset the trip meter when the trip meter is being dis-
played.
Page 178 of 577
178 2-2. Instrument cluster
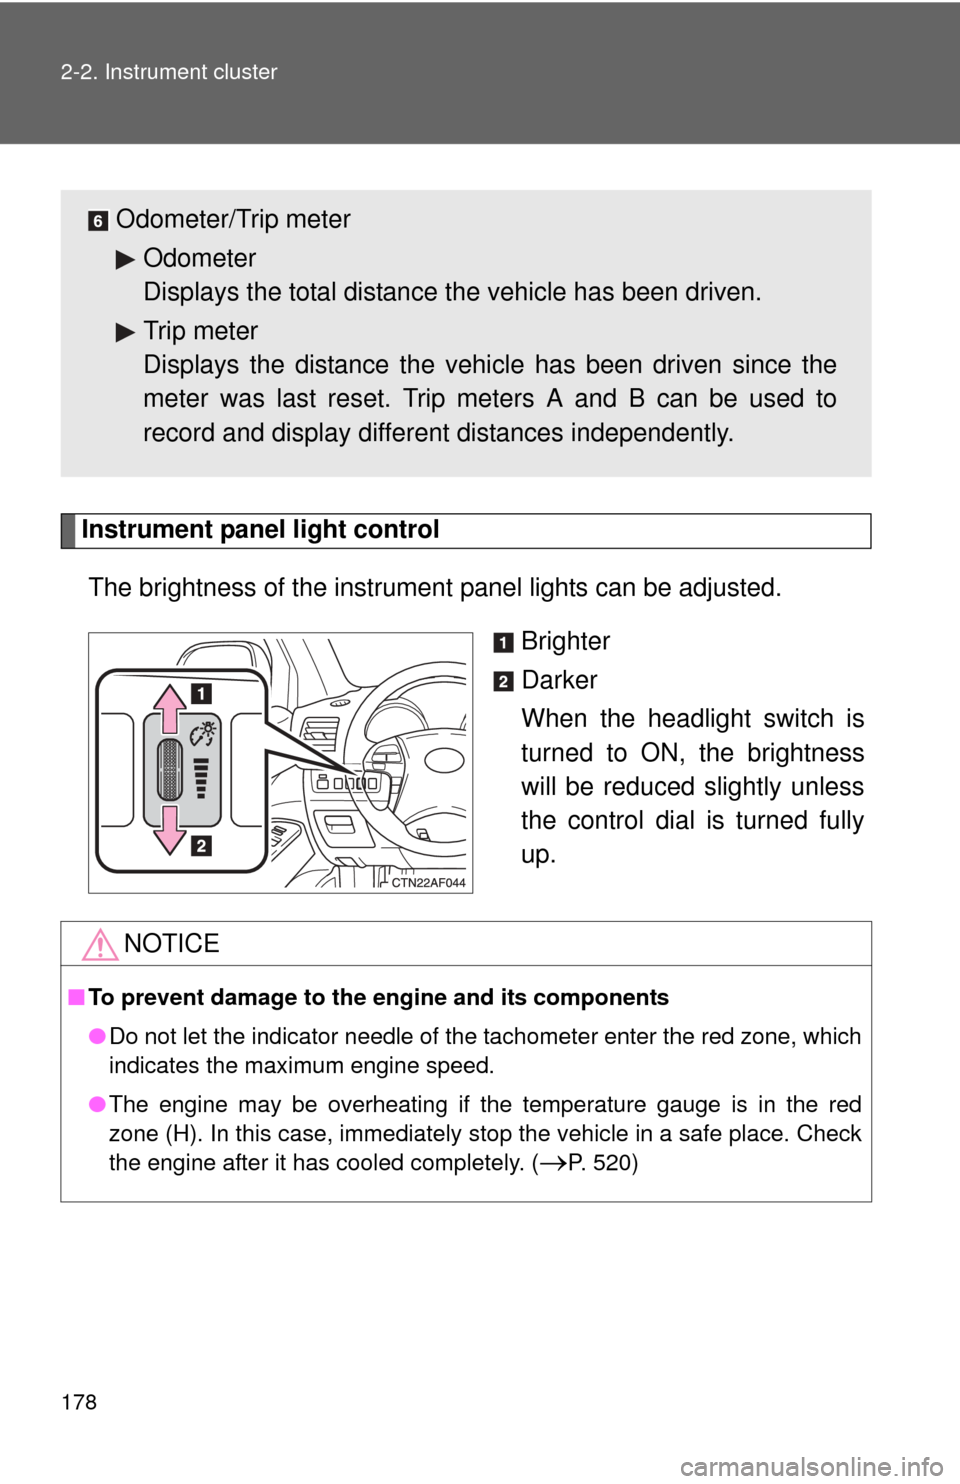
Instrument panel light controlThe brightness of the instrument panel lights can be adjusted.
Brighter
Darker
When the headlight switch is
turned to ON, the brightness
will be reduced slightly unless
the control dial is turned fully
up.
Odometer/Trip meterOdometer
Displays the total distance the vehicle has been driven.
Trip meter
Displays the distance the vehi cle has been driven since the
meter was last reset. Trip meters A and B can be used to
record and display different distances independently.
NOTICE
■ To prevent damage to the engine and its components
●Do not let the indicator needle of the tachometer enter the red zone, which
indicates the maximum engine speed.
● The engine may be overheating if the temperature gauge is in the red
zone (H). In this case, immediately stop the vehicle in a safe place. Check
the engine after it has cooled completely. (
P. 520)
Page 184 of 577
184 2-2. Instrument cluster
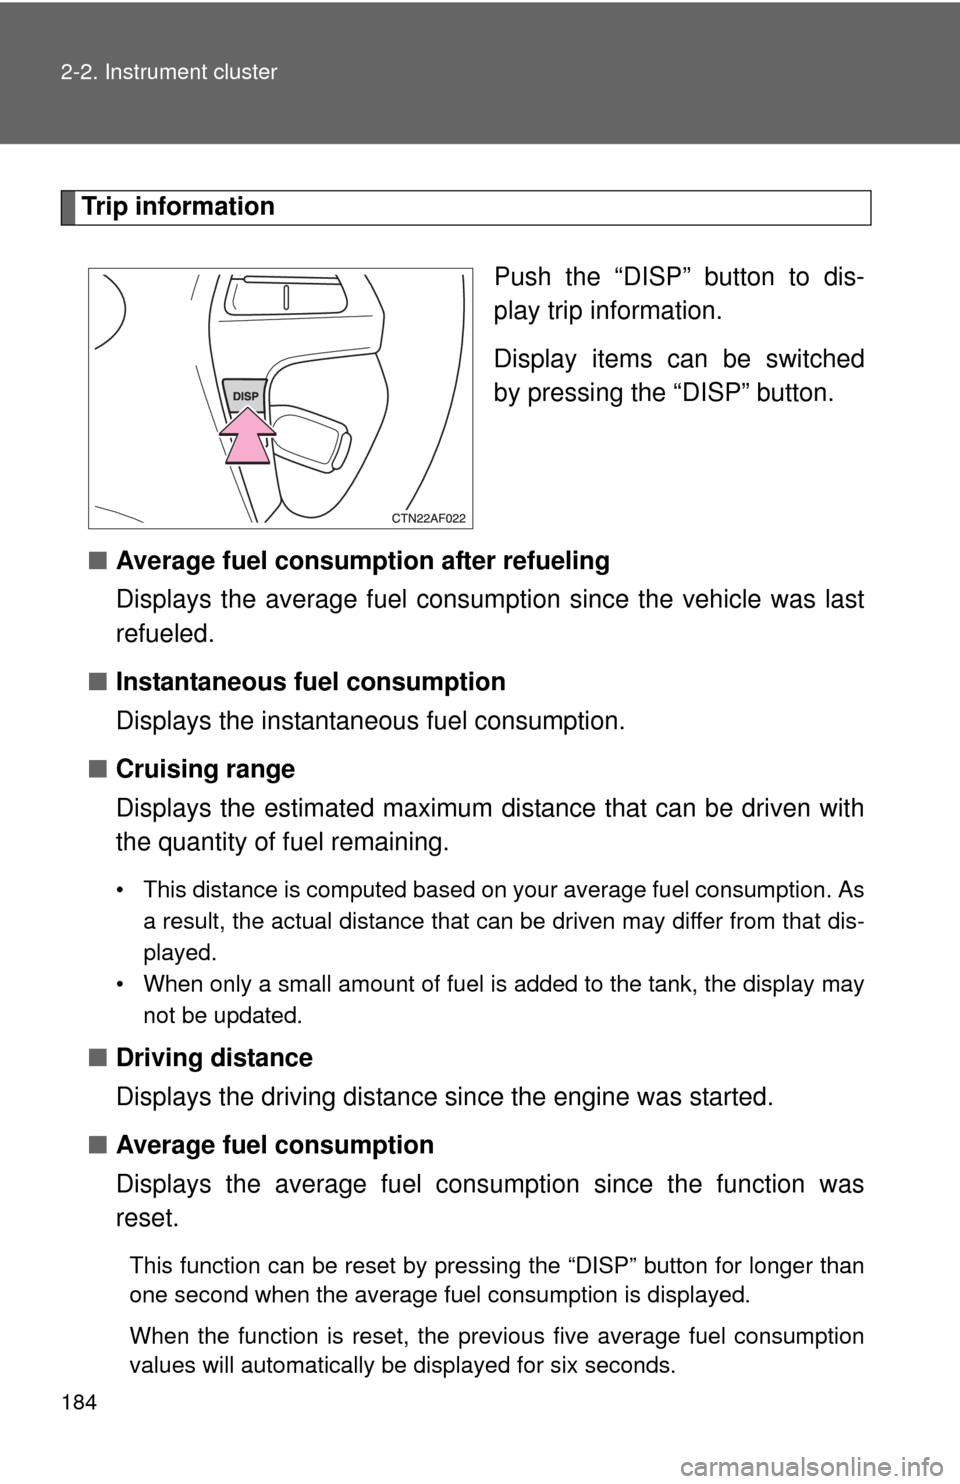
Trip informationPush the “DISP” button to dis-
play trip information.
Display items can be switched
by pressing the “DISP” button.
■ Average fuel consumption after refueling
Displays the average fuel consumption since the vehicle was last
refueled.
■ Instantaneous fuel consumption
Displays the instantan eous fuel consumption.
■ Cruising range
Displays the estimated maximum di stance that can be driven with
the quantity of fuel remaining.
• This distance is computed based on your average fuel consumption. As
a result, the actual distance that can be driven may differ from that dis-
played.
• When only a small amount of fuel is added to the tank, the display may
not be updated.
■Driving distance
Displays the driving distance since the engine was started.
■ Average fuel consumption
Displays the average fuel cons umption since the function was
reset.
This function can be reset by pressing the “DISP” button for longer than
one second when the average fuel consumption is displayed.
When the function is reset, the previous five average fuel consumption
values will automatically be displayed for six seconds.
Page 201 of 577
201
2-4. Using other
driving systems
2
When driving
■Cruise control can be set when
●The shift lever is in D, 4 or 5 range of S.
● Vehicle speed is above approximately 25 mph (40 km/h). Within the limits
of the engine’s capabilities, cruising speed can be maintained up or down
grades.
■ Accelerating
The vehicle can be accelerated normally.
■ Automatic cruise control cancellation
The set speed is automatically cancelled in any of the following situations.
●Actual vehicle speed falls more than 10 mph (16 km/h) below the preset
vehicle speed.
At this time, the memorized set speed is not retained.
● Actual vehicle speed is below 25 mph (40 km/h).
● VSC is activated.
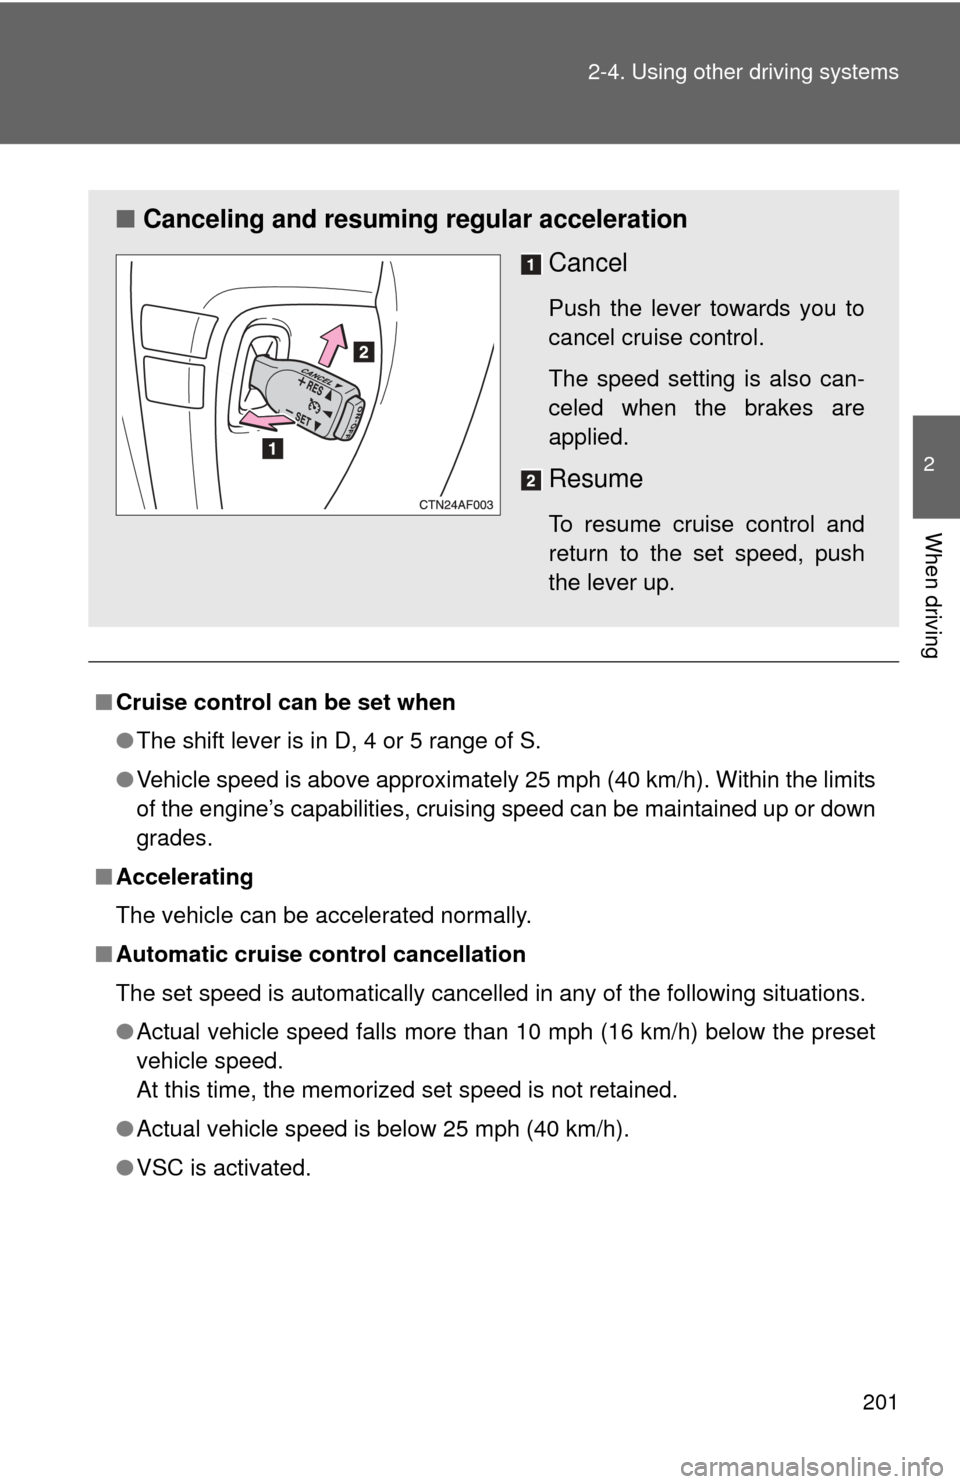
■ Canceling and resuming regular acceleration
Cancel
Push the lever towards you to
cancel cruise control.
The speed setting is also can-
celed when the brakes are
applied.
Resume
To resume cruise control and
return to the set speed, push
the lever up.
Page 269 of 577
268
3-2. Using the audio system
Using the radio
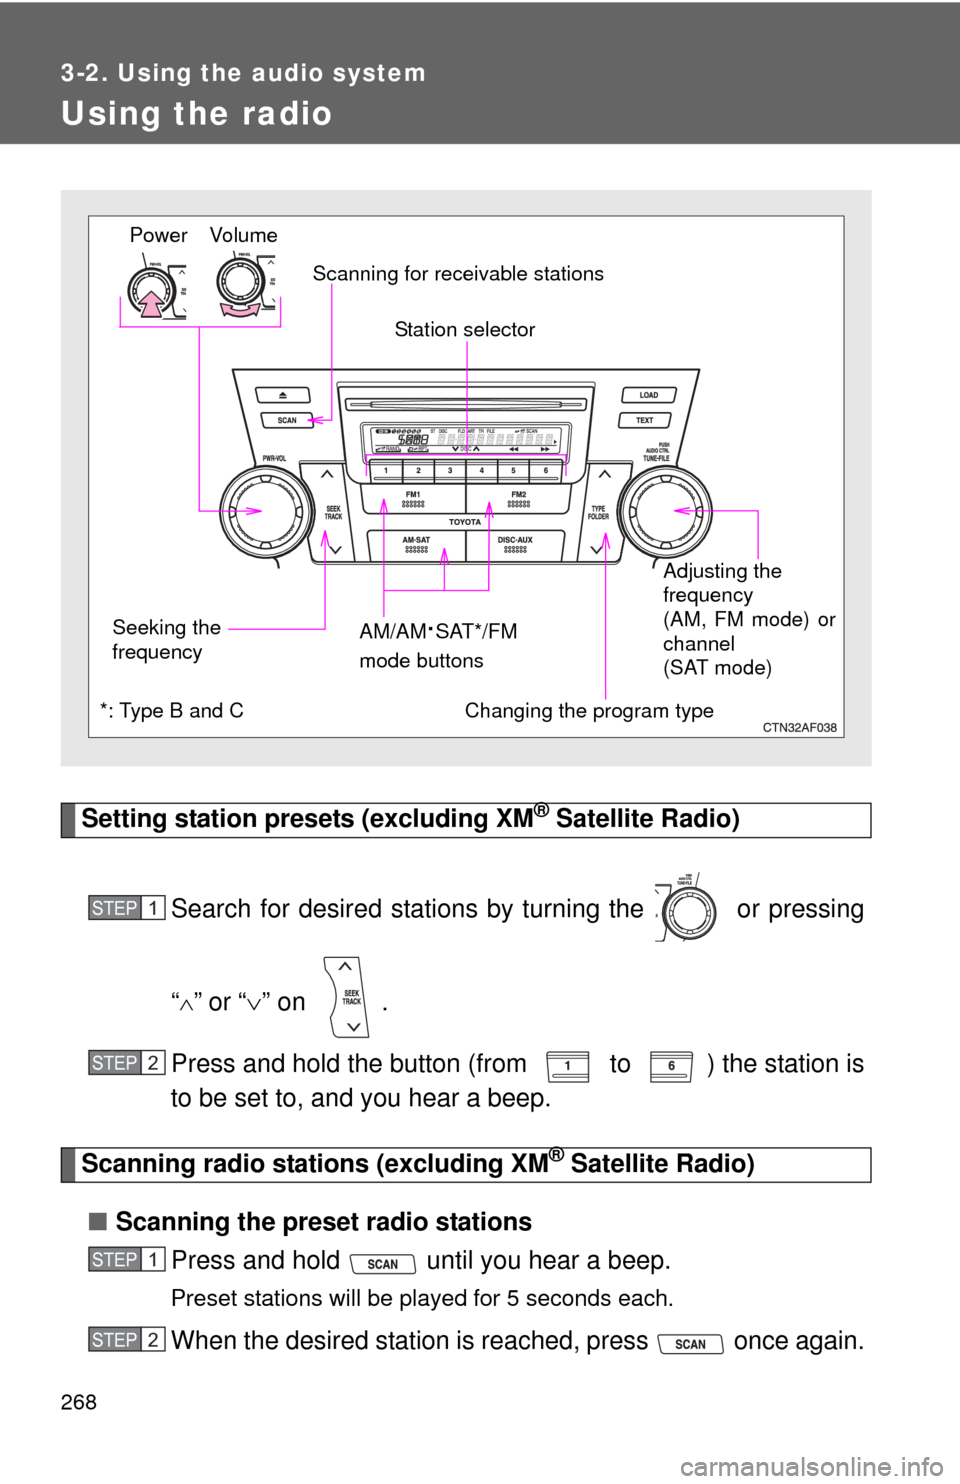
Setting station presets (excluding XM® Satellite Radio)
Search for desired stations by turning the or pressing
“
”or “ ” on .
Press and hold the button (from to ) the station is
to be set to, and you hear a beep.
Scanning radio stations (excluding XM® Satellite Radio)
■ Scanning the preset radio stations
Press and hold until you hear a beep.
Preset stations will be played for 5 seconds each.
When the desired station is reached, press once again.
Vo lu m e
Seeking the
frequency Station selector
AM/AM
·SAT*/FM
mode buttons Adjusting the
frequency
(AM, FM mode) or
channel
(SAT mode)
Power
Scanning for receivable stations
Changing the program type*: Type B and C
STEP1
STEP2
STEP1
STEP2
Page 270 of 577
269
3-2. Using the audio system
3
Interior features
■
Scanning all radio stations within range
Press
.
All stations with reception will be played for 5 seconds each.
When the desired station is reached, press once again.
XM® Satellite Radio (type B and C)
■ Receiving XM
® Satellite Radio
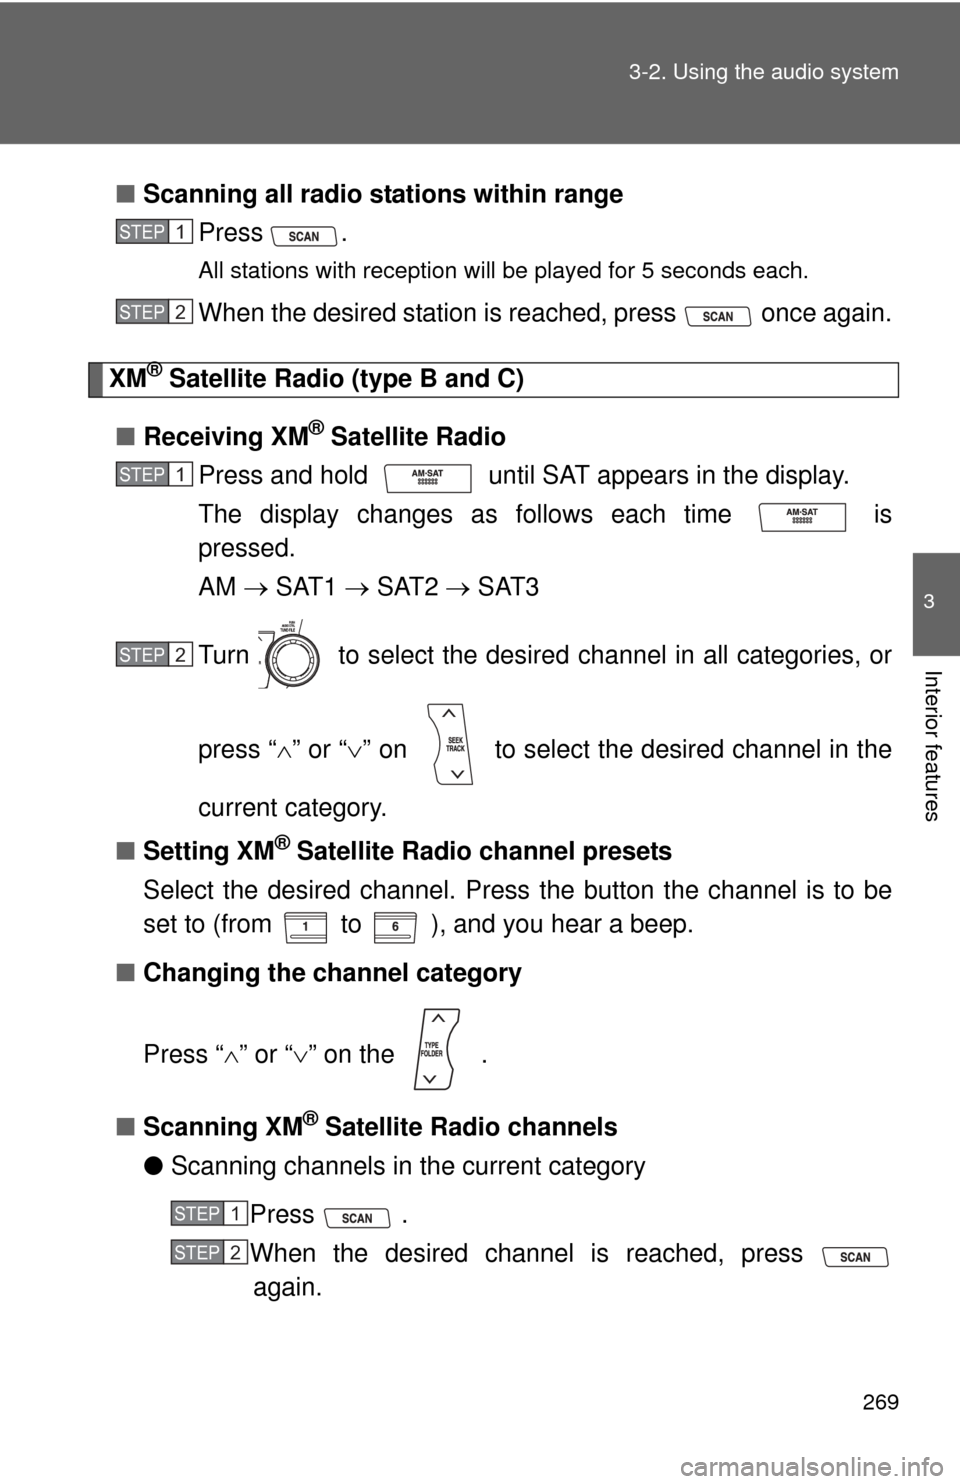
Press and hold until SAT appears in the display.
The display changes as follows each time is
pressed.
AM SAT1 SAT2 SAT3
Turn to select the desired channel in all categories, or
press “ ” or “ ” on to select the desired channel in the
current category.
■ Setting XM
® Satellite Radio channel presets
Select the desired channel. Press the button the channel is to be
set to (from to ), and you hear a beep.
■ Changing the channel category
Press “ ” or “ ” on the .
■ Scanning XM
® Satellite Radio channels
● Scanning channels in the current category
Press .
When the desired channel is reached, press again.
STEP1
STEP2
STEP1
STEP2
STEP1
STEP2
Page 271 of 577
270 3-2. Using the audio system
●Scanning preset channels
Press and hold until you hear a beep.
When the desired channel is reached, press again.
■ Displaying text information
Press .
The display will show up to 10 characters.
The display changes as follows each time the button is pressed.
●CH NAME
● TITLE (SONG/PROGRAM TITLE)
● NAME (ARTIST NAME/FEATURE)
● CH NUMBER
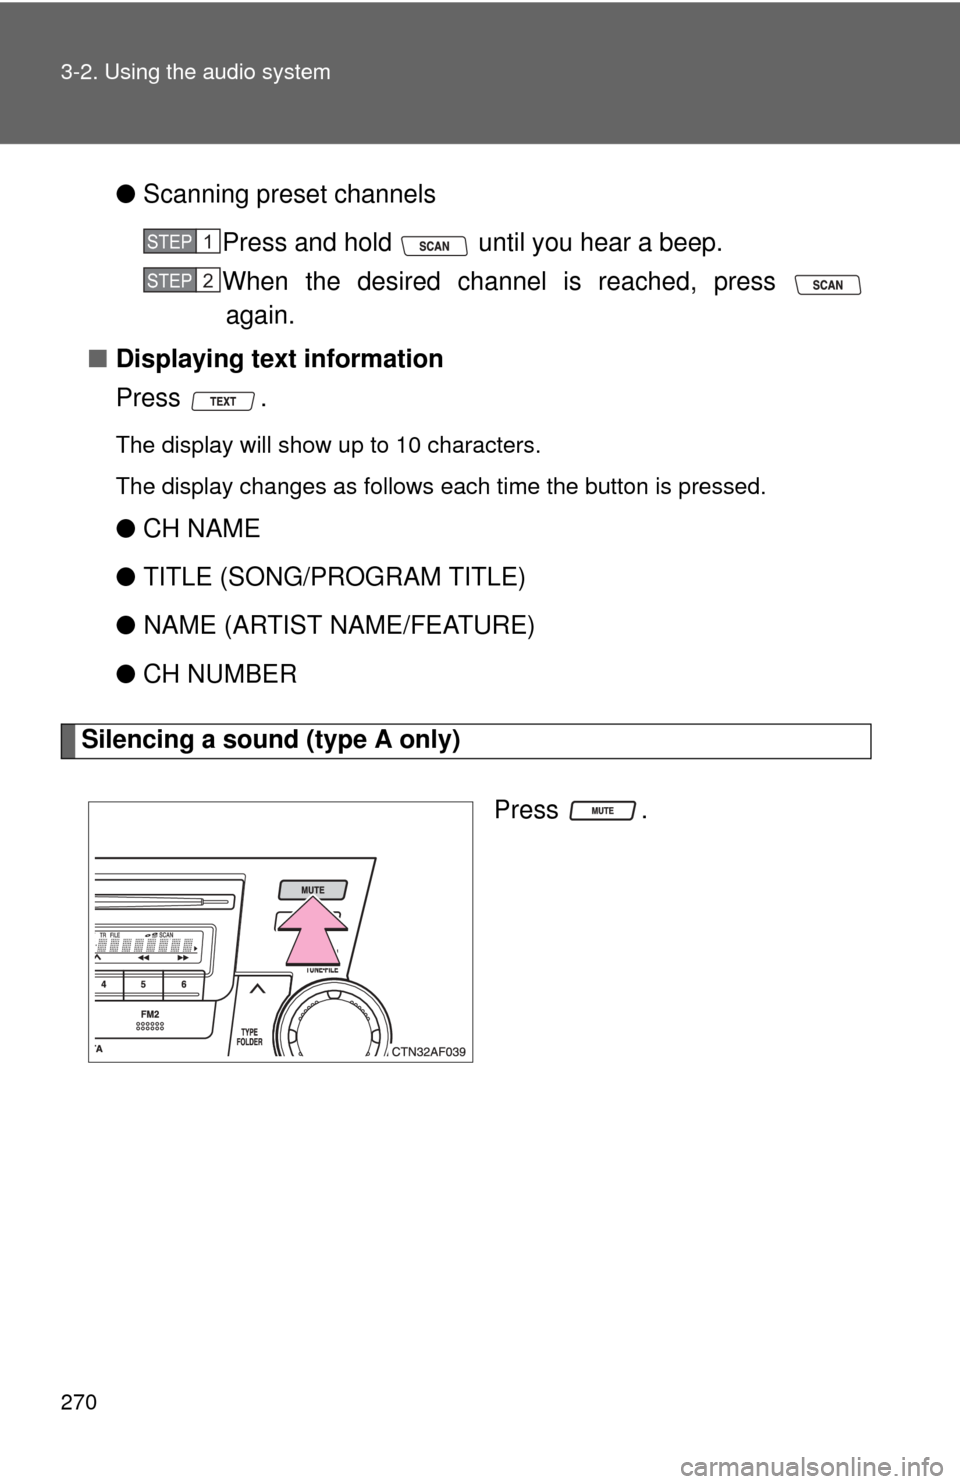
Silencing a sound (type A only)
Press .
STEP1
STEP2
Page 272 of 577
271
3-2. Using the audio system
3
Interior features
■
When the battery is disconnected
Stations presets are erased.
■ Reception sensitivity
●Maintaining perfect radio reception at all times is difficult due to the con-
tinually changing position of the antenna, differences in signal strength
and surrounding objects, such as trains, transmitters, etc.
● Mast type antenna The radio antenna is mounted on the right-side
front fender. The antenna can be removed from the base by turning it.
● Print type antenna The radio antenna is mounted inside the left-side
rear quarter window. To maintain clear radio reception, do not attach
metallic window tinting or other metallic objects to the antenna wire
mounted inside the left-side rear quarter window.
■ XM
® Satellite Radio (type B and C)
The optional Toyota genuine satellite radio tuner and antenna allows you to
receive and play XM
® Satellite Radio broadcasts. (Subscription is required.
Not available in Hawaii and Alaska.)
*
● XM® subscriptions
For detailed information about XM® Satellite Radio or to subscribe, visit
XM® on the web at www.xmradio.com or call 1-800-967-2346.
● Radio ID
You will need the radio ID when activating XM
® service or reporting a
problem. Select “CH000” using , and the receiver's 8-character ID
number will appear.
● Satellite tuner
The tuner supports only Audio Services (Music and Talk) and the accom-
panying Text Information of XM
® Satellite Radio.
*: Terms and services provided by XM® Satellite Radio are subject to change
without notice.
Page 295 of 577
294 3-2. Using the audio system
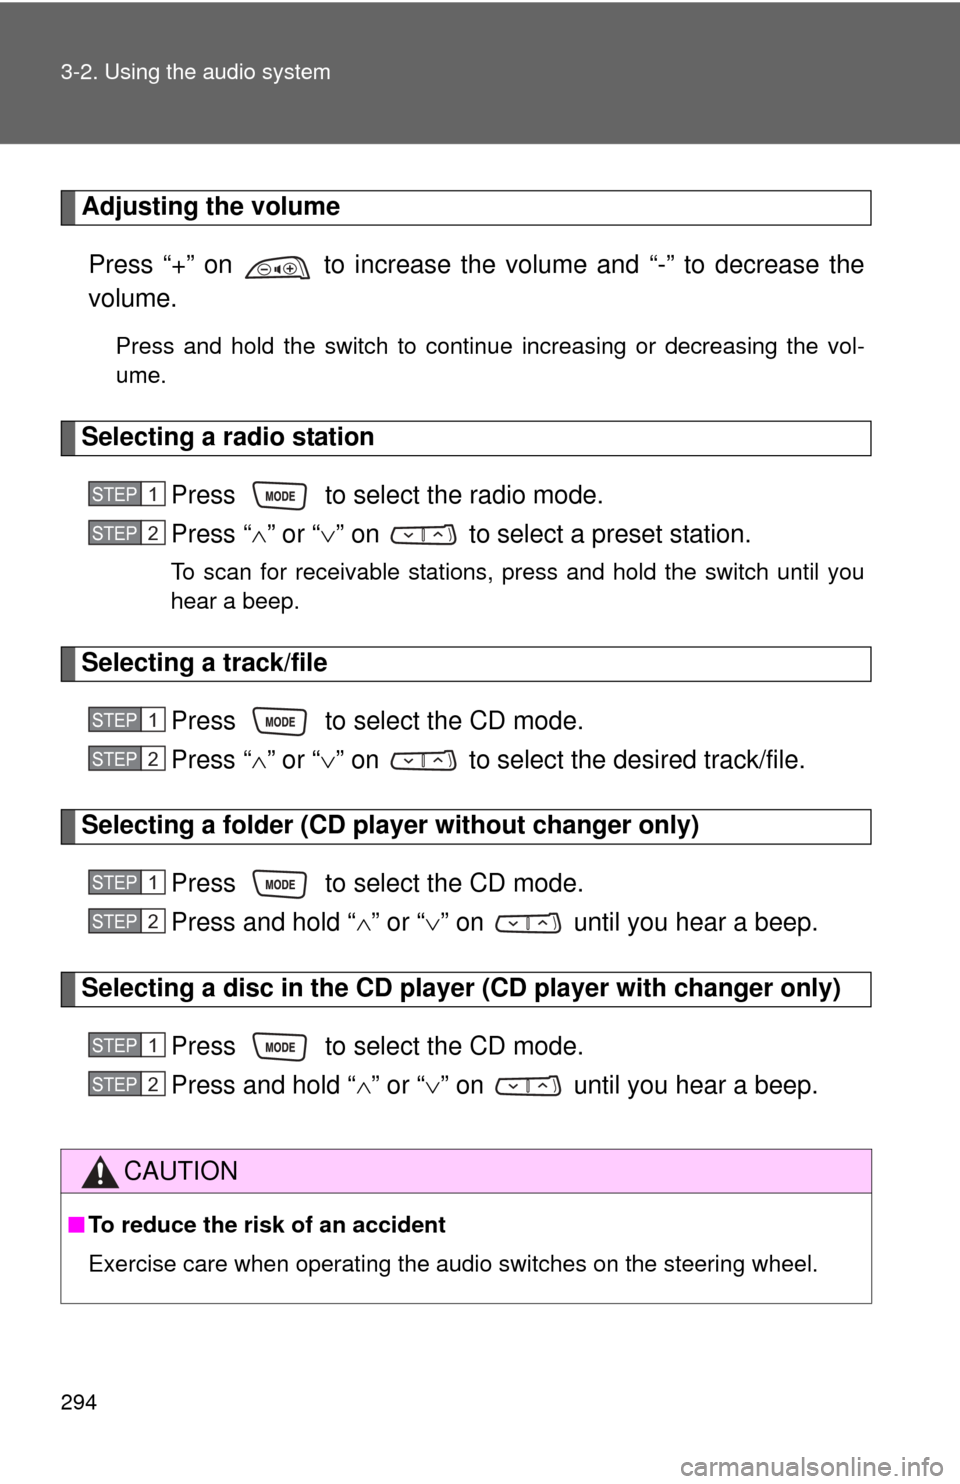
Adjusting the volumePress “+” on to increase the volume and “-” to decrease the
volume.
Press and hold the switch to continue increasing or decreasing the vol-
ume.
Selecting a radio station Press to select the radio mode.
Press “” or “ ” on to select a preset station.
To scan for receivable stations, press and hold the switch until you
hear a beep.
Selecting a track/file
Press to select the CD mode.
Press “” or “ ” on to select t he desired track/file.
Selecting a folder (CD player without changer only)
Press to select the CD mode.
Press and hold “ ” or “ ” on until you hear a beep.
Selecting a disc in the CD player (CD player with changer only)
Press to select the CD mode.
Press and hold “ ” or “ ” on until you hear a beep.
CAUTION
■ To reduce the risk of an accident
Exercise care when operating the audio switches on the steering wheel.
STEP1
STEP2
STEP1
STEP2
STEP1
STEP2
STEP1
STEP2