tow TOYOTA HIGHLANDER 2013 XU50 / 3.G Service Manual
[x] Cancel search | Manufacturer: TOYOTA, Model Year: 2013, Model line: HIGHLANDER, Model: TOYOTA HIGHLANDER 2013 XU50 / 3.GPages: 684, PDF Size: 15.42 MB
Page 447 of 684
447
3-7. Using the
storage features
3
Interior features
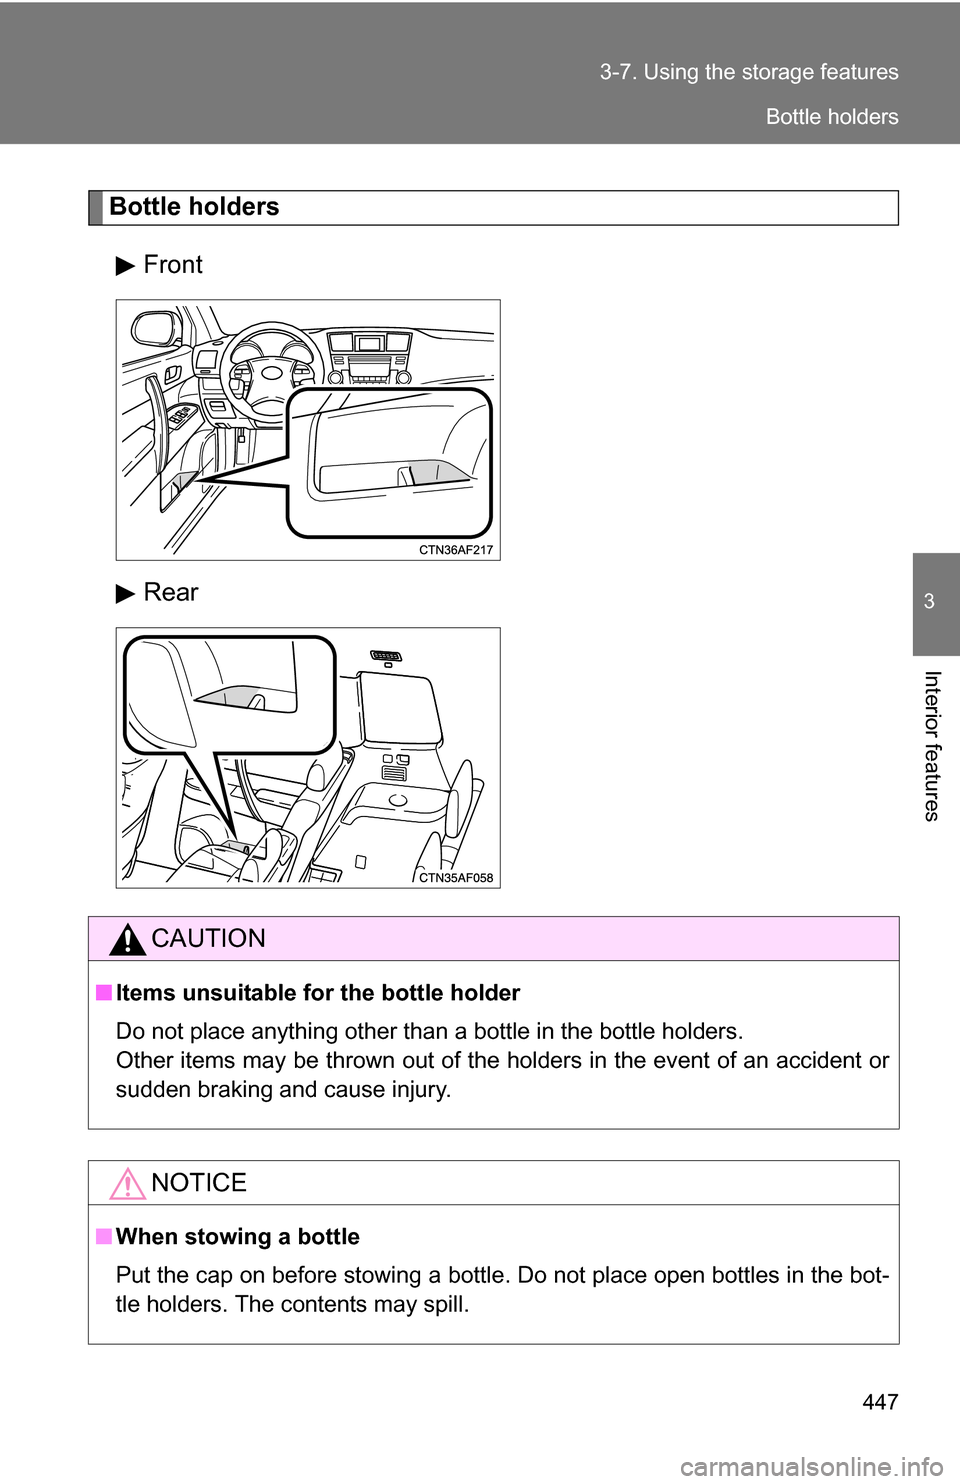
Bottle holders
Front
Rear
CAUTION
■Items unsuitable for the bottle holder
Do not place anything other than a bottle in the bottle holders.
Other items may be thrown out of the holders in the event of an accident or
sudden braking and cause injury.
NOTICE
■When stowing a bottle
Put the cap on before stowing a bottle. Do not place open bottles in the bot-
tle holders. The contents may spill.
Bottle holders
Page 451 of 684
451
3-7. Using the
storage features
3
Interior features
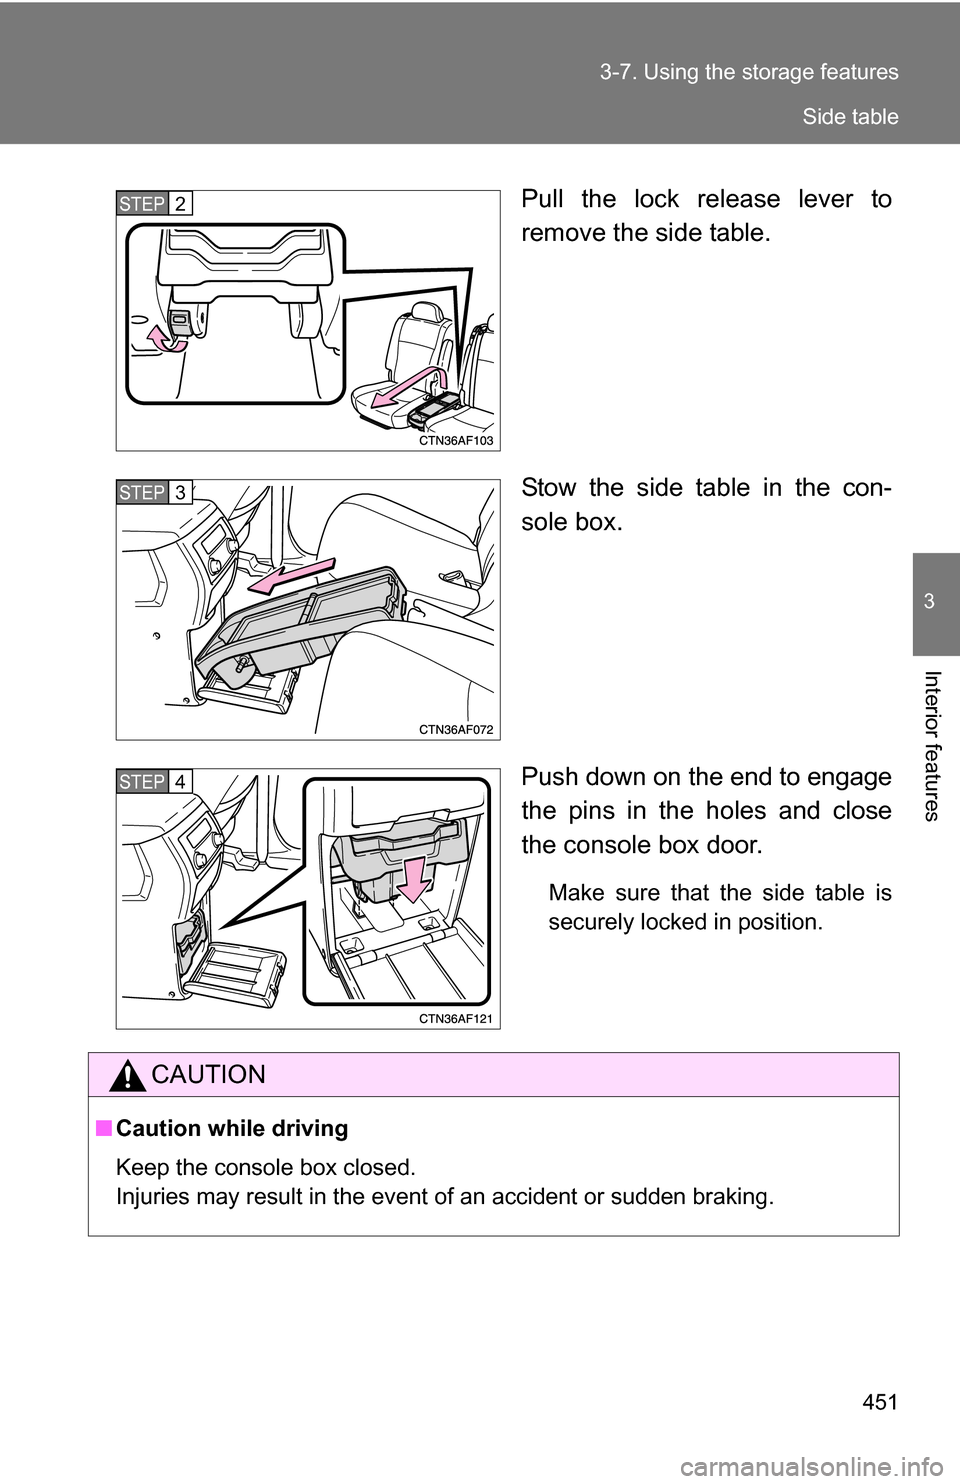
Pull the lock release lever to
remove the side table.
Stow the side table in the con-
sole box.
Push down on the end to engage
the pins in the holes and close
the console box door.
Make sure that the side table is
securely locked in position.
STEP2
STEP3
STEP4
CAUTION
■Caution while driving
Keep the console box closed.
Injuries may result in the event of an accident or sudden braking.
Side table
Page 466 of 684
466 3-8. Other interior features
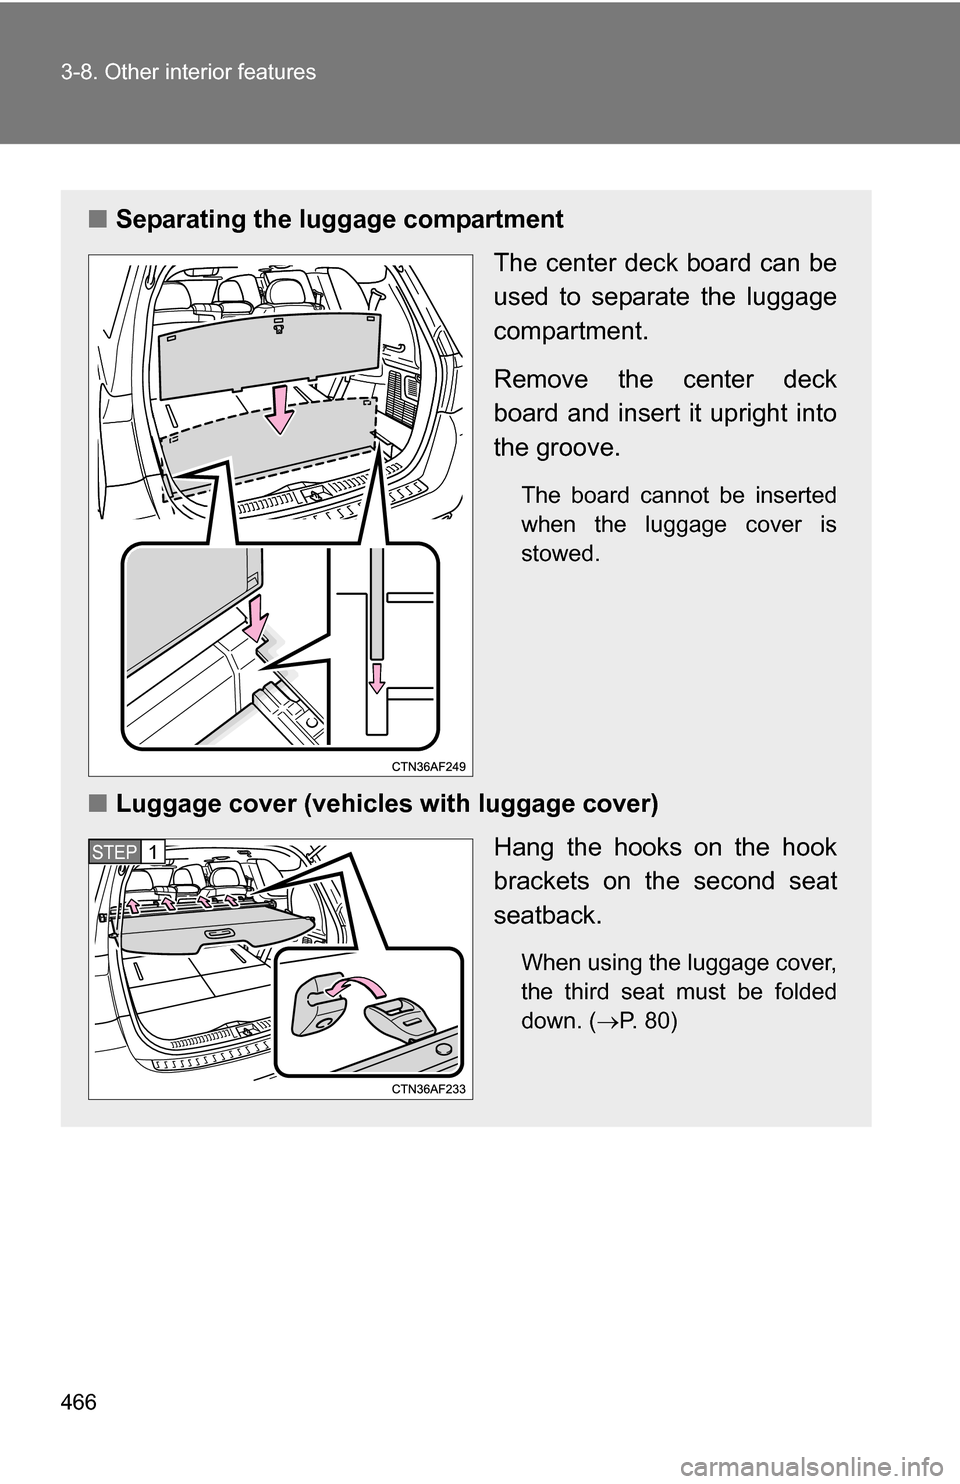
■Separating the luggage compartment
The center deck board can be
used to separate the luggage
compartment.
Remove the center deck
board and insert it upright into
the groove.
The board cannot be inserted
when the luggage cover is
stowed.
■Luggage cover (vehicles with luggage cover)
Hang the hooks on the hook
brackets on the second seat
seatback.
When using the luggage cover,
the third seat must be folded
down. (P. 80)
STEP1
Page 468 of 684
468 3-8. Other interior features
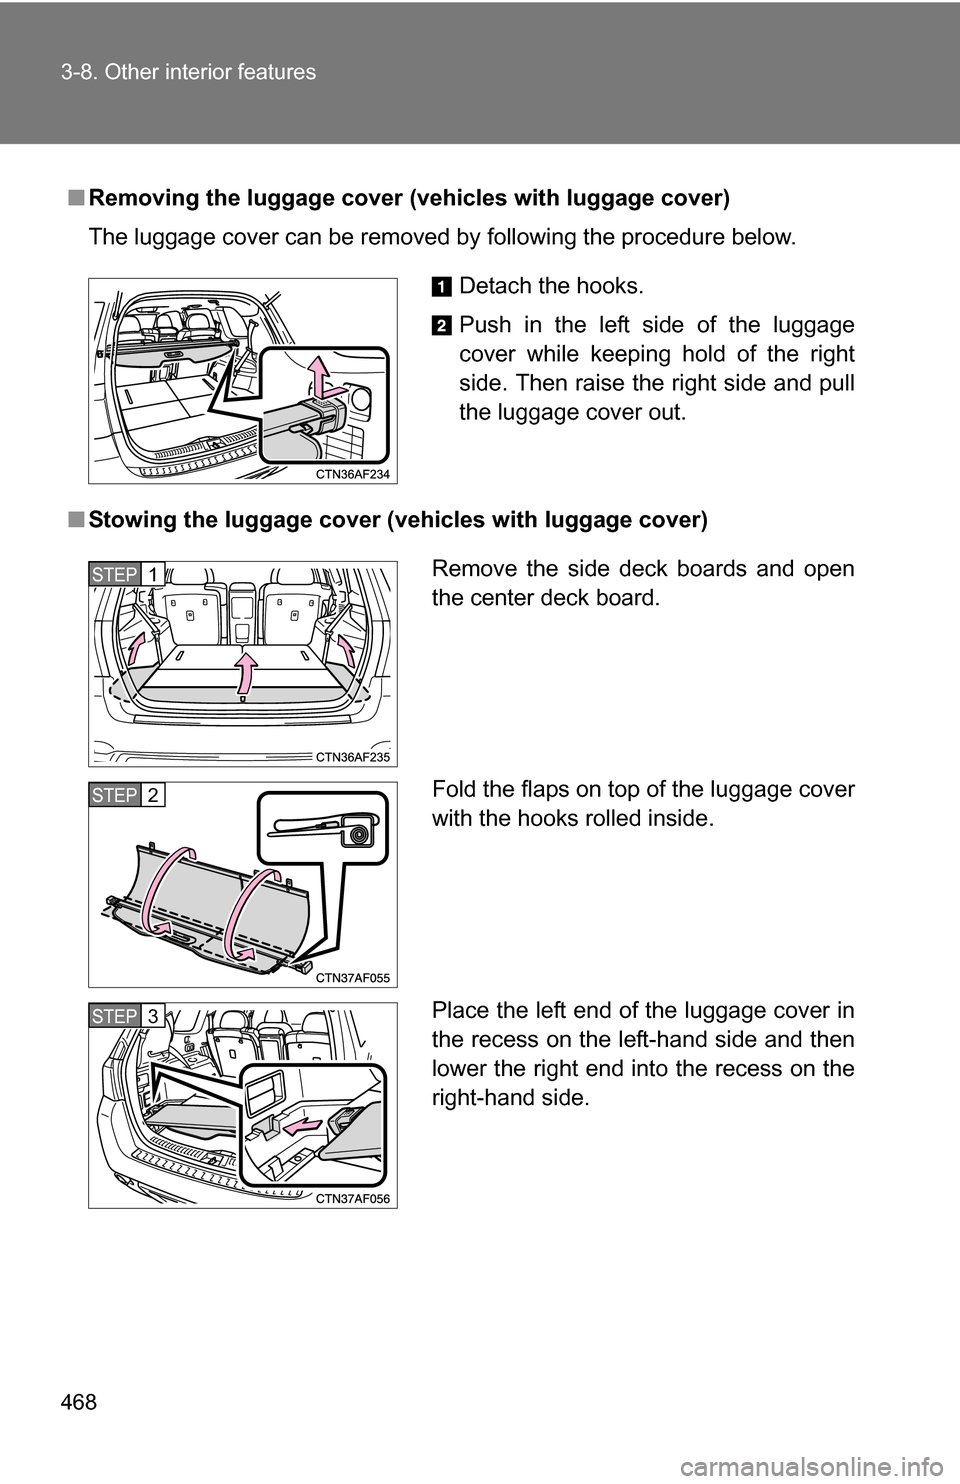
■Removing the luggage cover ( vehicles with luggage cover)
The luggage cover can be removed by following the procedure below.
■ Stowing the luggage cover ( vehicles with luggage cover)
Detach the hooks.
Push in the left side of the luggage
cover while keeping hold of the right
side. Then raise the right side and pull
the luggage cover out.
Remove the side deck boards and open
the center deck board.
Fold the flaps on top of the luggage cover
with the hooks rolled inside.
Place the left end of the luggage cover in
the recess on the left-hand side and then
lower the right end into the recess on the
right-hand side.STEP1
STEP2
STEP3
Page 469 of 684
469
3-8. Other interior features
3
Interior features
CAUTION
■
When the cargo hooks are not in use
To avoid injury, always return the cargo hooks to their positions when they
are not in use.
■ Caution while driving
Do not drive with any of the deck boards opened. Items may fall out and
cause injury.
NOTICE
■Grocery bag hook weight capacity
Do not hang any object heavier than 4 lb. (2 kg) on grocery bag hooks.
■ While driving
Do not drive with the luggage cover standing upright in the grooves as the
luggage cover may fall down.
■ Before inserting the center deck boa rd into the luggage compartment
Make sure the luggage cover is not stowed.
Page 478 of 684
478 3-8. Other interior features
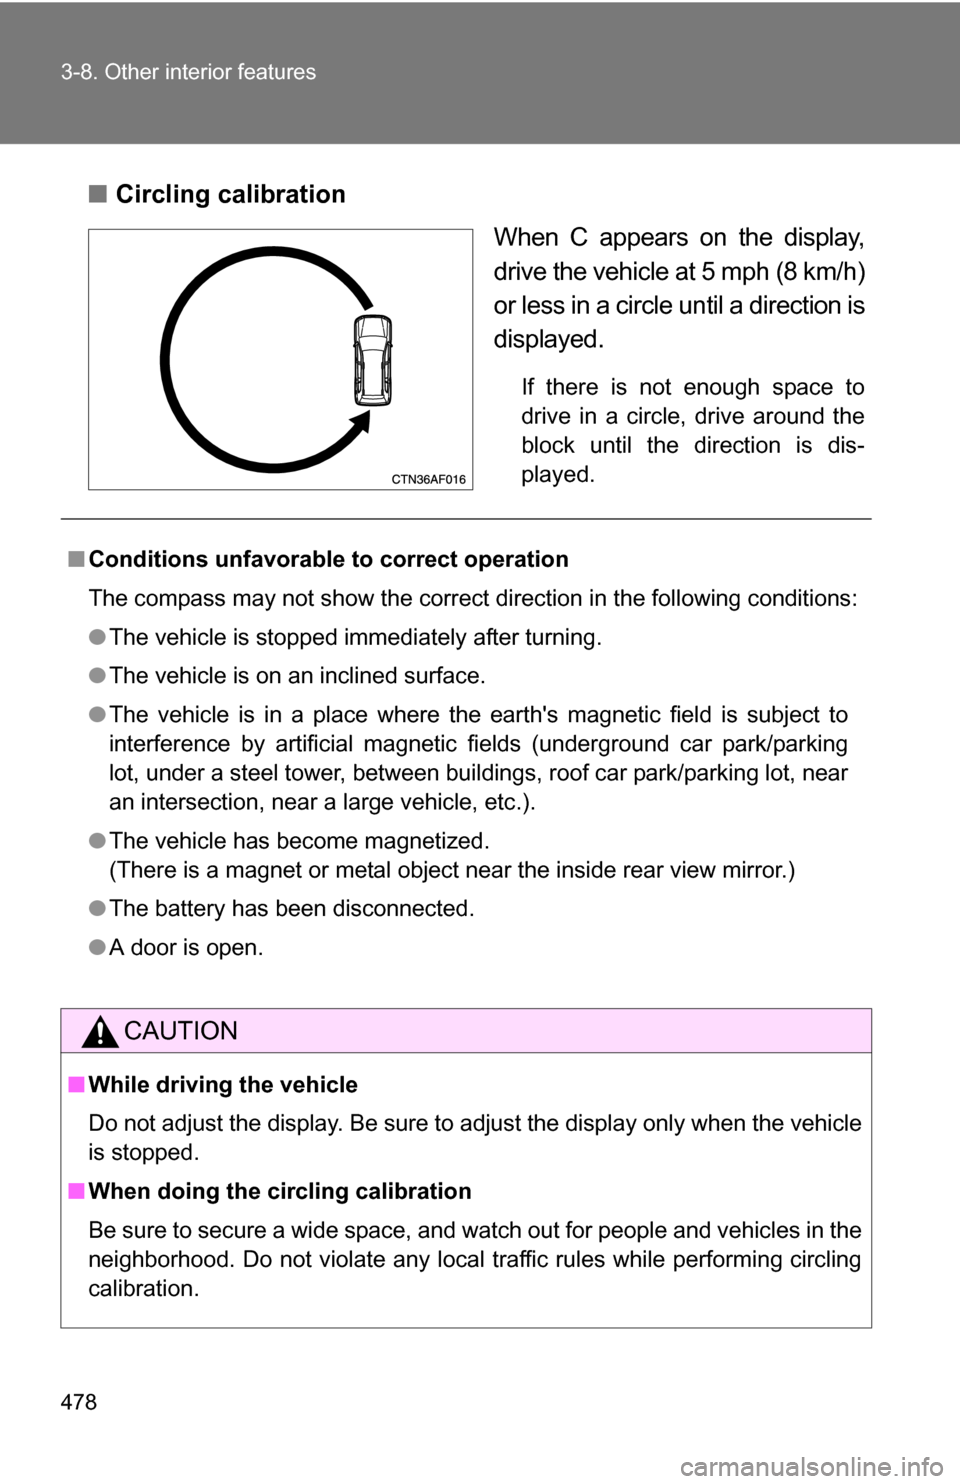
■Circling calibration
When C appears on the display,
drive the vehicle at 5 mph (8 km/h)
or less in a circle until a direction is
displayed.
If there is not enough space to
drive in a circle, drive around the
block until the direction is dis-
played.
■ Conditions unfavorable to correct operation
The compass may not show the correct direction in the following conditions:
●The vehicle is stopped immediately after turning.
● The vehicle is on an inclined surface.
● The vehicle is in a place where the earth's magnetic field is subject to
interference by artificial magnetic fields (underground car park/parking
lot, under a steel tower, between buildings, roof car park/parking lot, near
an intersection, near a large vehicle, etc.).
● The vehicle has become magnetized.
(There is a magnet or metal object near the inside rear view mirror.)
● The battery has been disconnected.
● A door is open.
CAUTION
■While driving the vehicle
Do not adjust the display. Be sure to adjust the display only when the vehicle
is stopped.
■ When doing the circling calibration
Be sure to secure a wide space, and watch out for people and vehicles in the
neighborhood. Do not violate any local traffic rules while performing circling
calibration.
Page 495 of 684
495
4
Maintenance and care
4-3. Do-it-yourself maintenance
Do-it-yourself ser vice precautions
If you perform maintenance yourself, be sure to follow the correct
procedures as given in these sections.
ItemsParts and tools
Battery condition ( P. 516)•Warm water
• Baking soda
• Grease
• Conventional wrench
(for terminal clamp bolts)
Brake fluid level ( P. 515)• FMVSS No.116 DOT 3 or SAE
J1703 brake fluid
• Rag or paper towel
• Funnel (used only for adding brake fluid)
Engine coolant level ( P. 512)• “Toyota Super Long Life Coolant”
or similar high quality ethylene
glycol based non-silicate, non-
amine, non-nitrite and non-borate
coolant with long-life hybrid
organic acid technology.
For the U.S.A.:
“Toyota Super Long Life
Coolant” is pre-mixed with 50%
coolant and 50% deionized
water.
For Canada:
“Toyota Super Long Life
Coolant” is pre-mixed with 55%
coolant and 45% deionized
water.
• Funnel (used only for adding engine coolant)
Engine oil level ( P. 508)• “Toyota Genuine Motor Oil” or
equivalent
• Rag or paper towel, funnel (used only for adding oil)
Page 510 of 684
510 4-3. Do-it-yourself maintenance
Make sure to check the oil type and prepare the items needed before
adding oil.Remove the oil filler cap.
Add engine oil slowly, checking the dipstick.
Install the filler cap, turning it clockwise.
Engine oil selection P. 622
Oil quantity
(Low Full)1.6 qt. (1.5 L, 1.3 Imp. qt.)
Items
Clean funnel
■ Engine oil consumption
A certain amount of engine oil will be consumed while driving. In the follow-
ing situations, oil consumption may increase, and engine oil may need to be
refilled in between oil maintenance intervals.
●When the engine is new, for example directly after purchasing the vehicle
or after replacing the engine
● If low quality oil or oil of an inappropriate viscosity is used
● When driving at high engine speeds or with a heavy load, when towing,
or when driving while accelerating or decelerating frequently
● When leaving the engine idling for a long time, or when driving frequently
through heavy traffic
STEP1
STEP2
STEP3
Page 523 of 684
523
4-3. Do-it-yourself maintenance
4
Maintenance and care
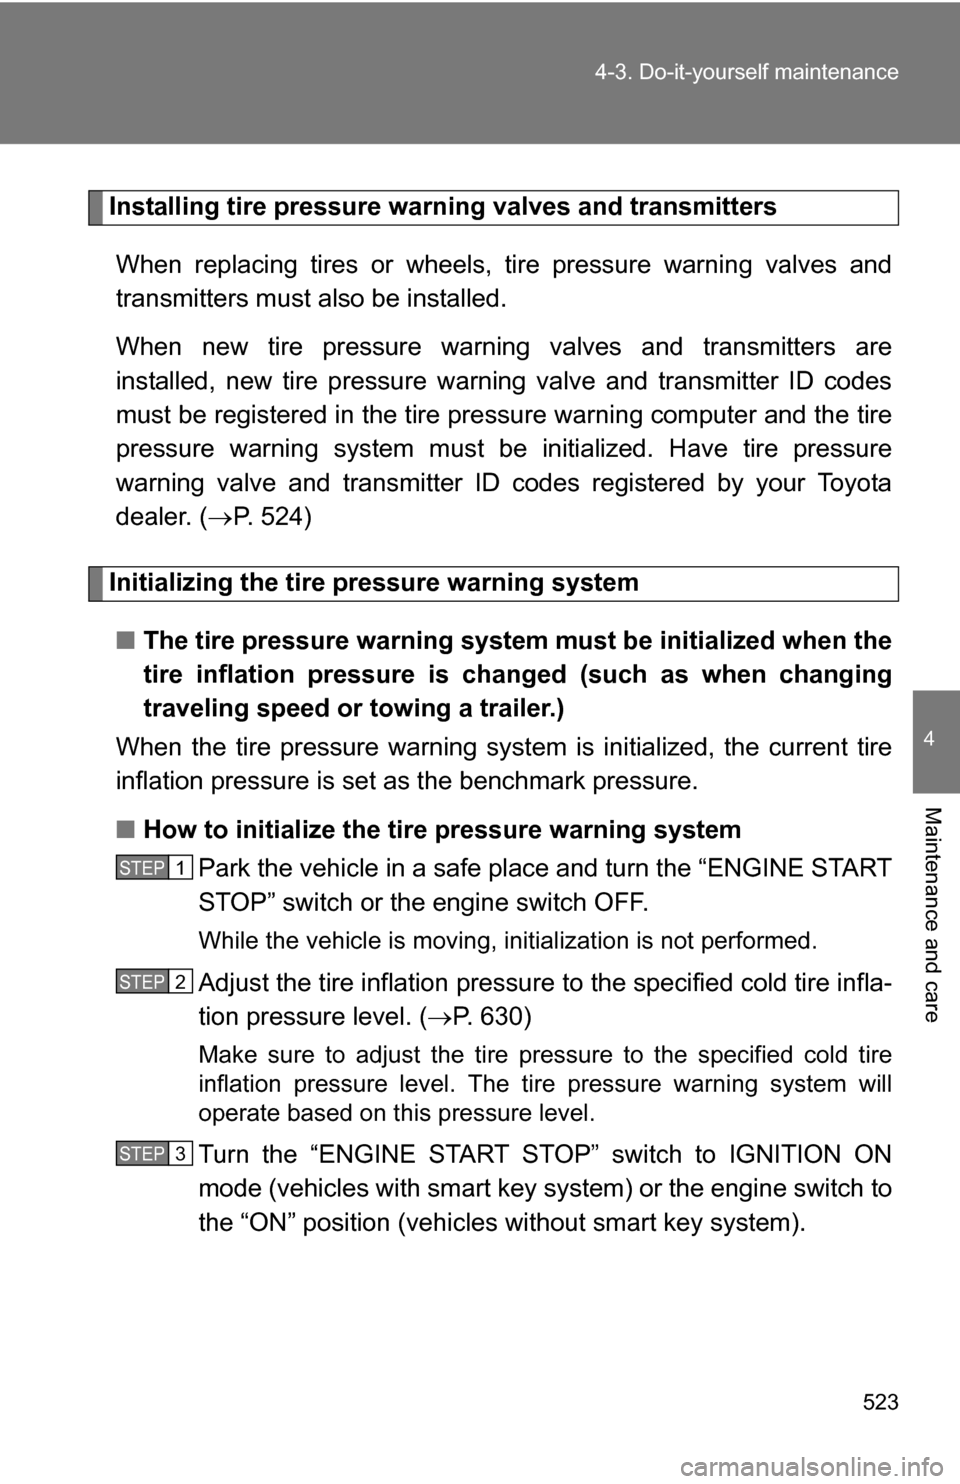
Installing tire pressure warning valves and transmitters
When replacing tires or wheels, tire pressure warning valves and
transmitters must also be installed.
When new tire pressure warning valves and transmitters are
installed, new tire pressure warning valve and transmitter ID codes
must be registered in the tire pre ssure warning computer and the tire
pressure warning system must be initialized. Have tire pressure
warning valve and transmitter ID codes registered by your Toyota
dealer. ( P. 524)
Initializing the tire pressure warning system
■ The tire pressure warning system must be initialized when the
tire inflation pressure is changed (such as when changing
traveling speed or towing a trailer.)
When the tire pressure warning syst em is initialized, the current tire
inflation pressure is set as the benchmark pressure.
■ How to initialize the tire pressure warning system
Park the vehicle in a safe place and turn the “ENGINE START
STOP” switch or the engine switch OFF.
While the vehicle is moving, in itialization is not performed.
Adjust the tire inflation pressure to the specified cold tire infla-
tion pressure level. ( P. 630)
Make sure to adjust the tire pressure to the specified cold tire
inflation pressure level. The ti re pressure warning system will
operate based on this pressure level.
Turn the “ENGINE START STOP” switch to IGNITION ON
mode (vehicles with smart key sy stem) or the engine switch to
the “ON” position (vehicles without smart key system).
STEP1
STEP2
STEP3
Page 528 of 684
528 4-3. Do-it-yourself maintenance
CAUTION
■When inspecting or replacing tires
Observe the following precautions to prevent accidents. Failure to do so
may cause damage to parts of the drive train, as well as dangerous han-
dling characteristics, which may lead to an accident resulting in death or
serious injury.
●Do not mix tires of different makes, models or tread patterns.
Also, do not mix tires of remarkably different treadwear.
●Do not use tire sizes other than those recommended by Toyota.
●Do not mix differently constructed ti res (radial, bias-belted or bias-ply
tires).
●Do not mix summer, all season and winter tires.
●Do not tow the vehicle with the spare tire installed.
■When initializing the tire pressure warning system
Do not push the tire pressure warnin g reset switch without first adjusting
the tire inflation pressure to the spec ified level. Otherwise, the tire pres-
sure warning light may not come on ev en if the tire inflation pressure is
low, or it may come on when the tire inflation pressure is actually normal.