TOYOTA HIGHLANDER 2015 XU50 / 3.G Owners Manual
Manufacturer: TOYOTA, Model Year: 2015, Model line: HIGHLANDER, Model: TOYOTA HIGHLANDER 2015 XU50 / 3.GPages: 712, PDF Size: 10.59 MB
Page 171 of 712
1713-3. Adjusting the seats
3
Operation of each component
HIGHLANDER_U (OM48E98U)■
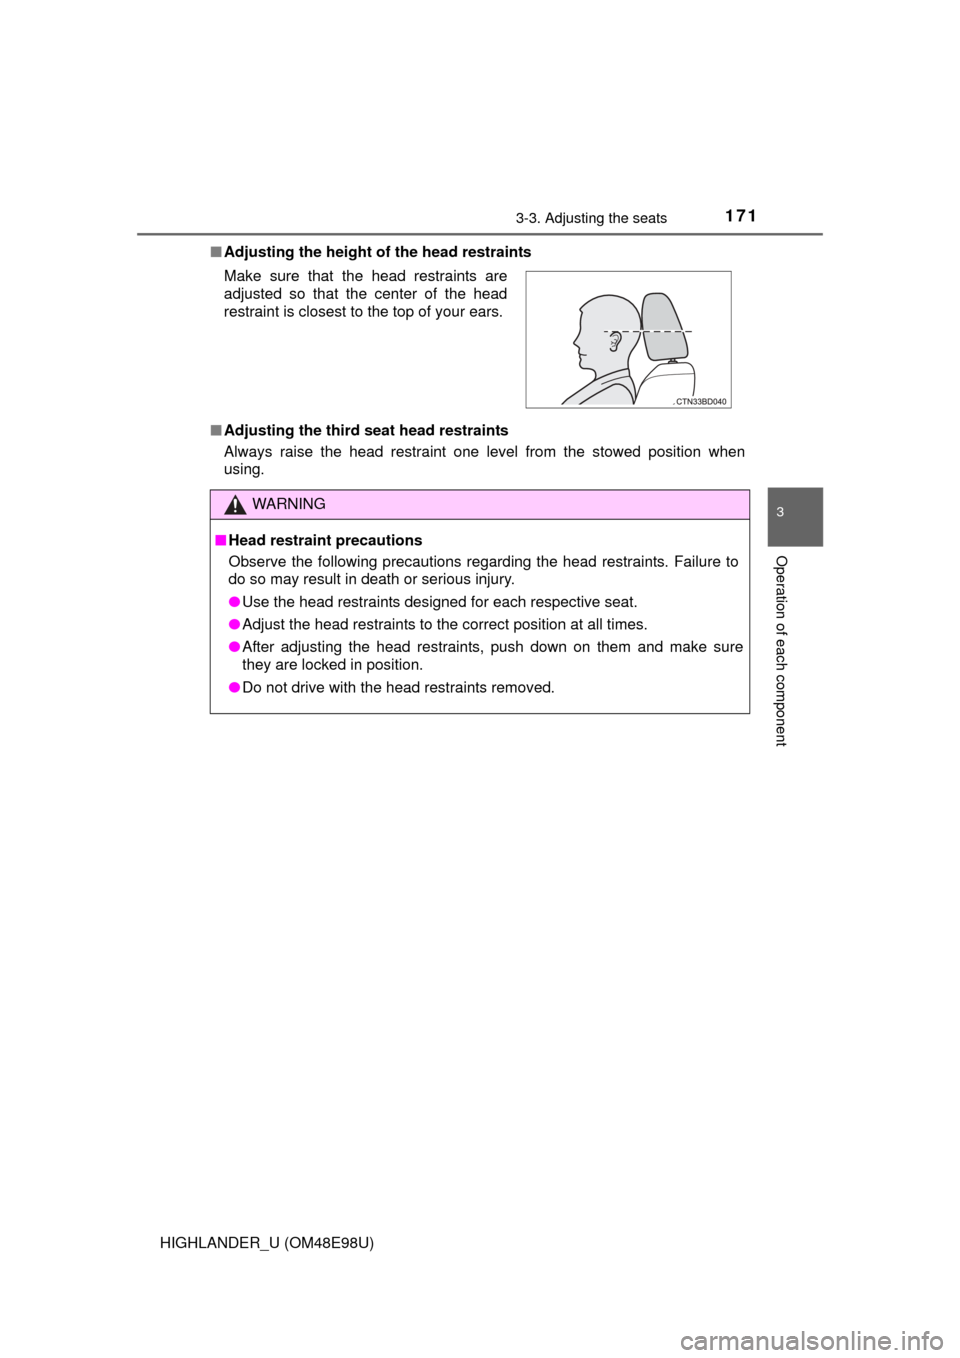
Adjusting the height of the head restraints
■ Adjusting the third seat head restraints
Always raise the head restraint one level from the stowed position when
using. Make sure that the head restraints are
adjusted so that the center of the head
restraint is closest to the top of your ears.
WARNING
■Head restraint precautions
Observe the following precautions regarding the head restraints. Failure to
do so may result in death or serious injury.
● Use the head restraints designed for each respective seat.
● Adjust the head restraints to the correct position at all times.
● After adjusting the head restraints, push down on them and make sure
they are locked in position.
● Do not drive with the head restraints removed.
Page 172 of 712
172
HIGHLANDER_U (OM48E98U)
3-4. Adjusting the steering wheel and mirrors
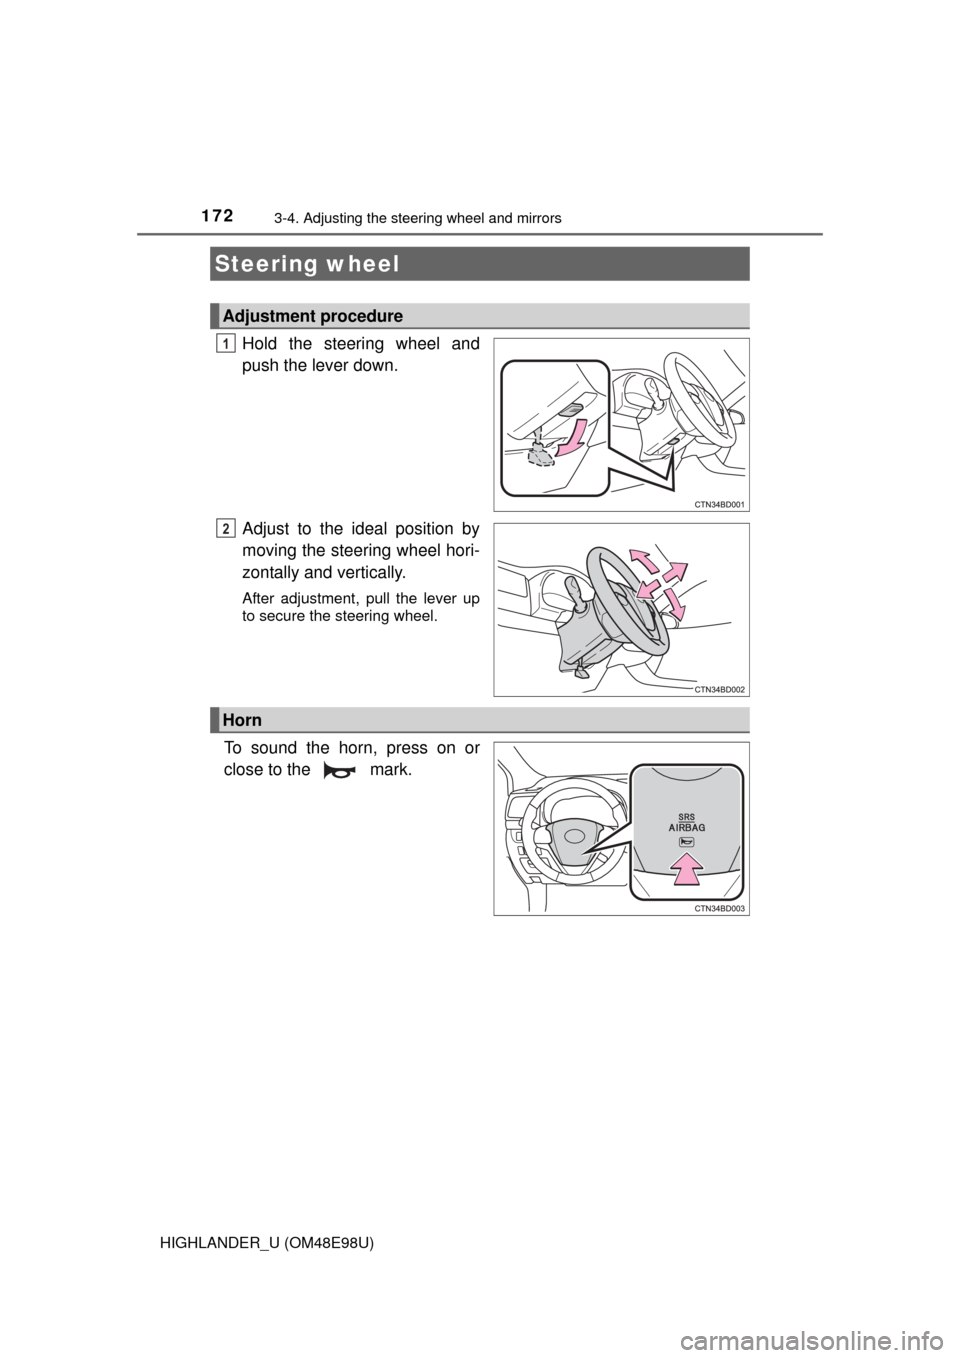
Hold the steering wheel and
push the lever down.
Adjust to the ideal position by
moving the steering wheel hori-
zontally and vertically.
After adjustment, pull the lever up
to secure the steering wheel.
To sound the horn, press on or
close to the mark.
Steering wheel
Adjustment procedure
1
2
Horn
Page 173 of 712

1733-4. Adjusting the steering wheel and mirrors
3
Operation of each component
HIGHLANDER_U (OM48E98U)
WARNING
■Caution while driving
Do not adjust the steering wheel while driving.
Doing so may cause the driver to mishandle the vehicle and cause an acci-
dent, resulting in death or serious injury.
■ After adjusting the steering wheel
Make sure that the steering wheel is securely locked.
Otherwise, the steering wheel may move suddenly, possibly causing an
accident, and resulting in death or serious injury. Also, the horn may not
sound if the steering wheel is not securely locked.
Page 174 of 712
1743-4. Adjusting the steering wheel and mirrors
HIGHLANDER_U (OM48E98U)
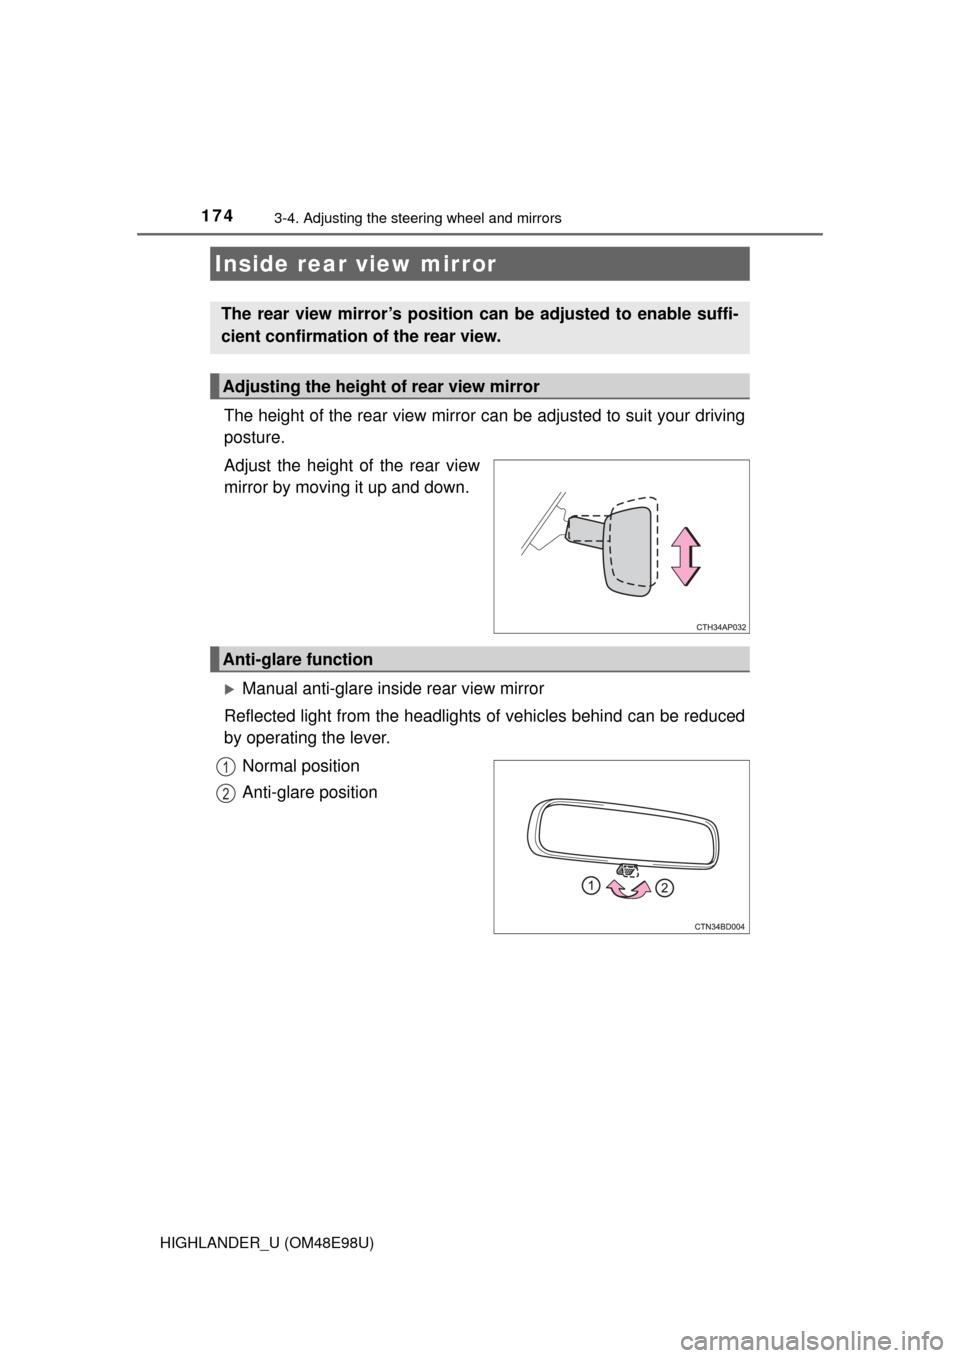
The height of the rear view mirror can be adjusted to suit your driving
posture.
Adjust the height of the rear view
mirror by moving it up and down.
Manual anti-glare inside rear view mirror
Reflected light from the headlights of vehicles behind can be reduced
by operating the lever.
Normal position
Anti-glare position
Inside rear view mirror
The rear view mirror’s position can be adjusted to enable suffi-
cient confirmation of the rear view.
Adjusting the height of rear view mirror
Anti-glare function
1
2
Page 175 of 712
1753-4. Adjusting the steering wheel and mirrors
3
Operation of each component
HIGHLANDER_U (OM48E98U)
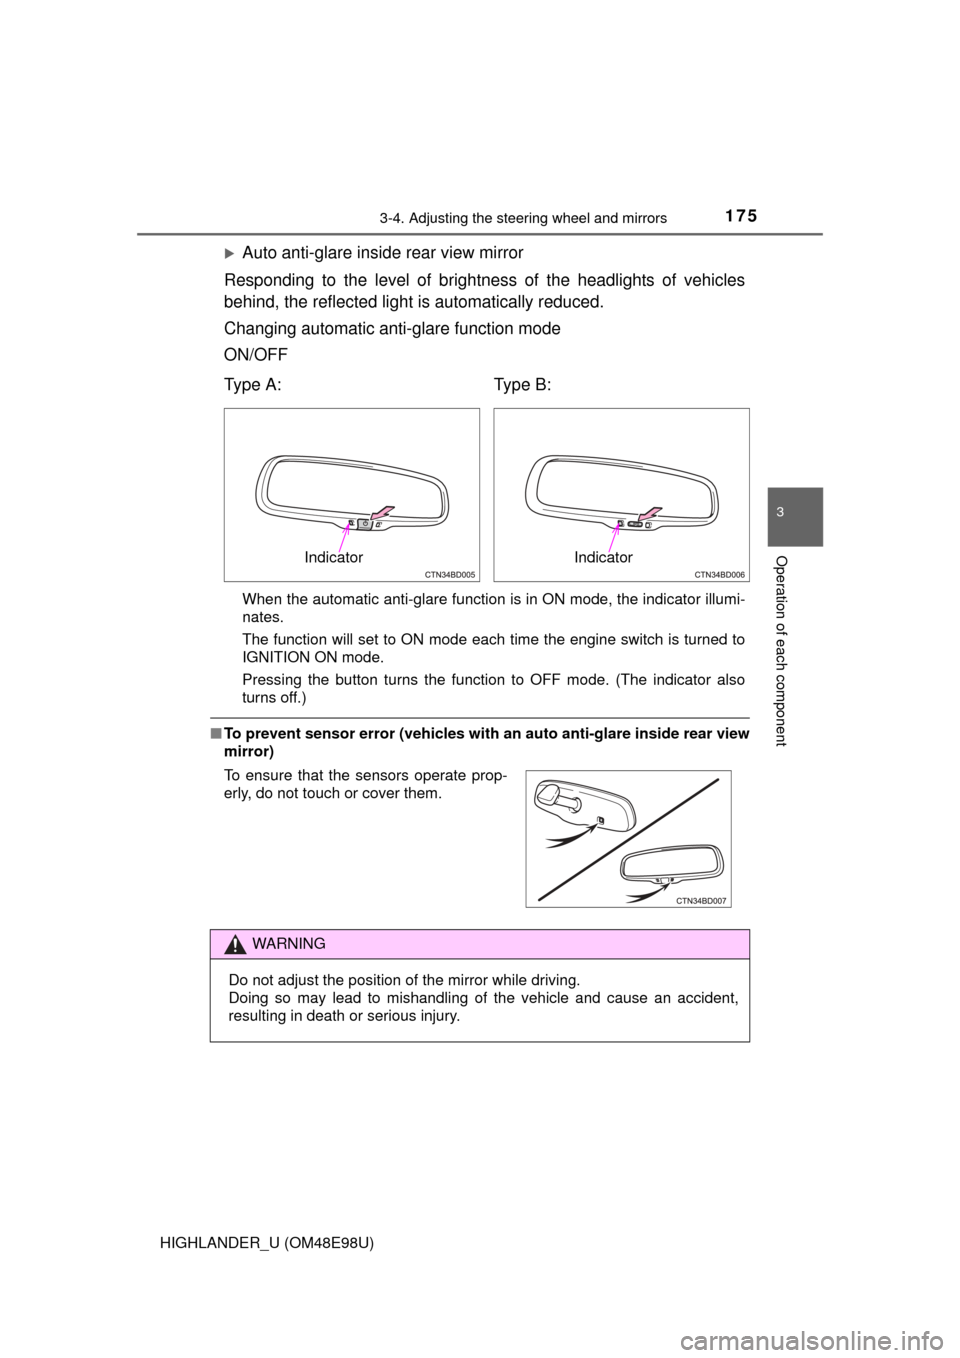
Auto anti-glare inside rear view mirror
Responding to the level of brightness of the headlights of vehicles
behind, the reflected light is automatically reduced.
Changing automatic anti- glare function mode
ON/OFF
■ To prevent sensor error (vehicles with an auto anti-glare inside rear view
mirror)
Ty p e A : Ty p e B :
When the automatic anti-glare function is in ON mode, the indicator illumi-
nates.
The function will set to ON mode each time the engine switch is turned to
IGNITION ON mode.
Pressing the button turns the function to OFF mode. (The indicator also
turns off.)
To ensure that the sensors operate prop-
erly, do not touch or cover them.
WARNING
Do not adjust the position of the mirror while driving.
Doing so may lead to mishandling of the vehicle and cause an accident,
resulting in death or serious injury.
IndicatorIndicator
Page 176 of 712
1763-4. Adjusting the steering wheel and mirrors
HIGHLANDER_U (OM48E98U)
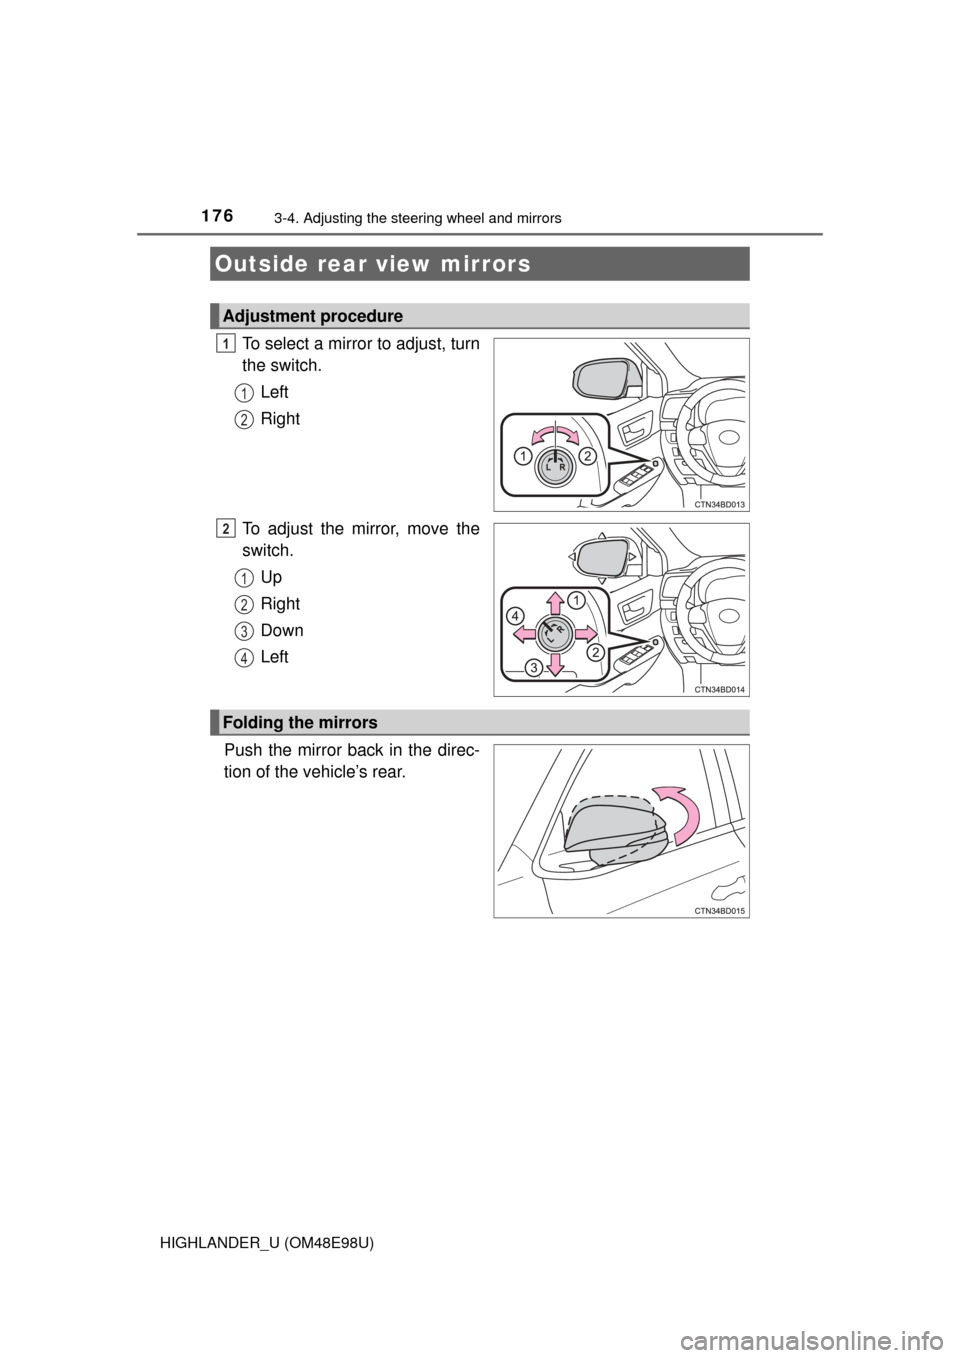
To select a mirror to adjust, turn
the switch.Left
Right
To adjust the mirror, move the
switch. Up
Right
Down
Left
Push the mirror back in the direc-
tion of the vehicle’s rear.
Outside rear view mirrors
Adjustment procedure
1
1
2
2
1
2
3
4
Folding the mirrors
Page 177 of 712

1773-4. Adjusting the steering wheel and mirrors
3
Operation of each component
HIGHLANDER_U (OM48E98U)
■Mirror angle can be adjusted when
Vehicles without a smart key system
The engine switch is in the “ACC” or “ON” position.
Vehicles with a smart key system
The engine switch is in ACCESSORY or IGNITION ON mode.
■ When the mirrors are fogged up (vehicles with outside rear view mirror
defoggers)
The outside rear view mirrors can be cleared using the mirror defoggers. Turn
on the rear window defogger to turn on the outside rear view mirror defog-
gers. ( P. 424 430)
■ Automatic adjustment of th e mirror angle (if equipped)
A desired mirror face angle can be entered to memory and recalled automa\
ti-
cally by the driving position memory. ( P. 164)
WARNING
■Important points while driving
Observe the following precautions while driving.
Failure to do so may result in loss of control of the vehicle and cause an
accident, resulting in death or serious injury.
● Do not adjust the mirrors while driving.
● Do not drive with the mirrors folded.
● Both the driver and passenger side mirrors must be extended and properly
adjusted before driving.
■ When the mirror defoggers are ope rating (vehicles with outside rear
view mirror defoggers)
Do not touch the rear view mirror surfaces, as they can become very hot
and burn you.
Page 178 of 712
178
HIGHLANDER_U (OM48E98U)
3-5. Opening and closing the windows
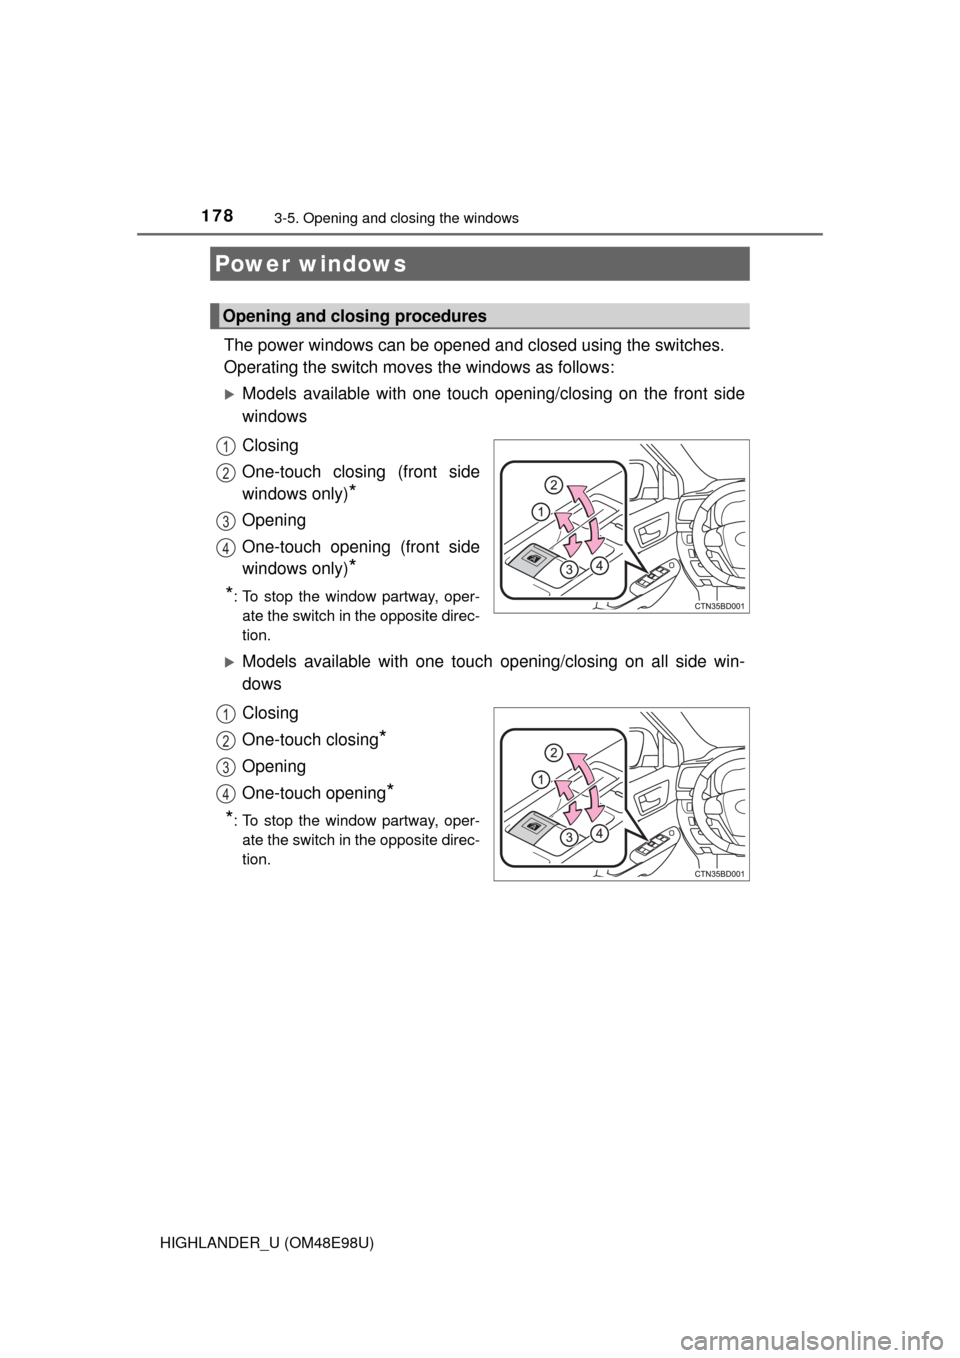
The power windows can be opened and closed using the switches.
Operating the switch moves the windows as follows:
Models available with one touch opening/closing on the front side
windows
Closing
One-touch closing (front side
windows only)
*
Opening
One-touch opening (front side
windows only)
*
*
: To stop the window partway, oper- ate the switch in the opposite direc-
tion.
Models available with one touc h opening/closing on all side win-
dows
Closing
One-touch closing
*
Opening
One-touch opening
*
*
: To stop the window partway, oper- ate the switch in the opposite direc-
tion.
Power windows
Opening and closing procedures
1
2
3
4
1
2
3
4
Page 179 of 712
1793-5. Opening and closing the windows
3
Operation of each component
HIGHLANDER_U (OM48E98U)
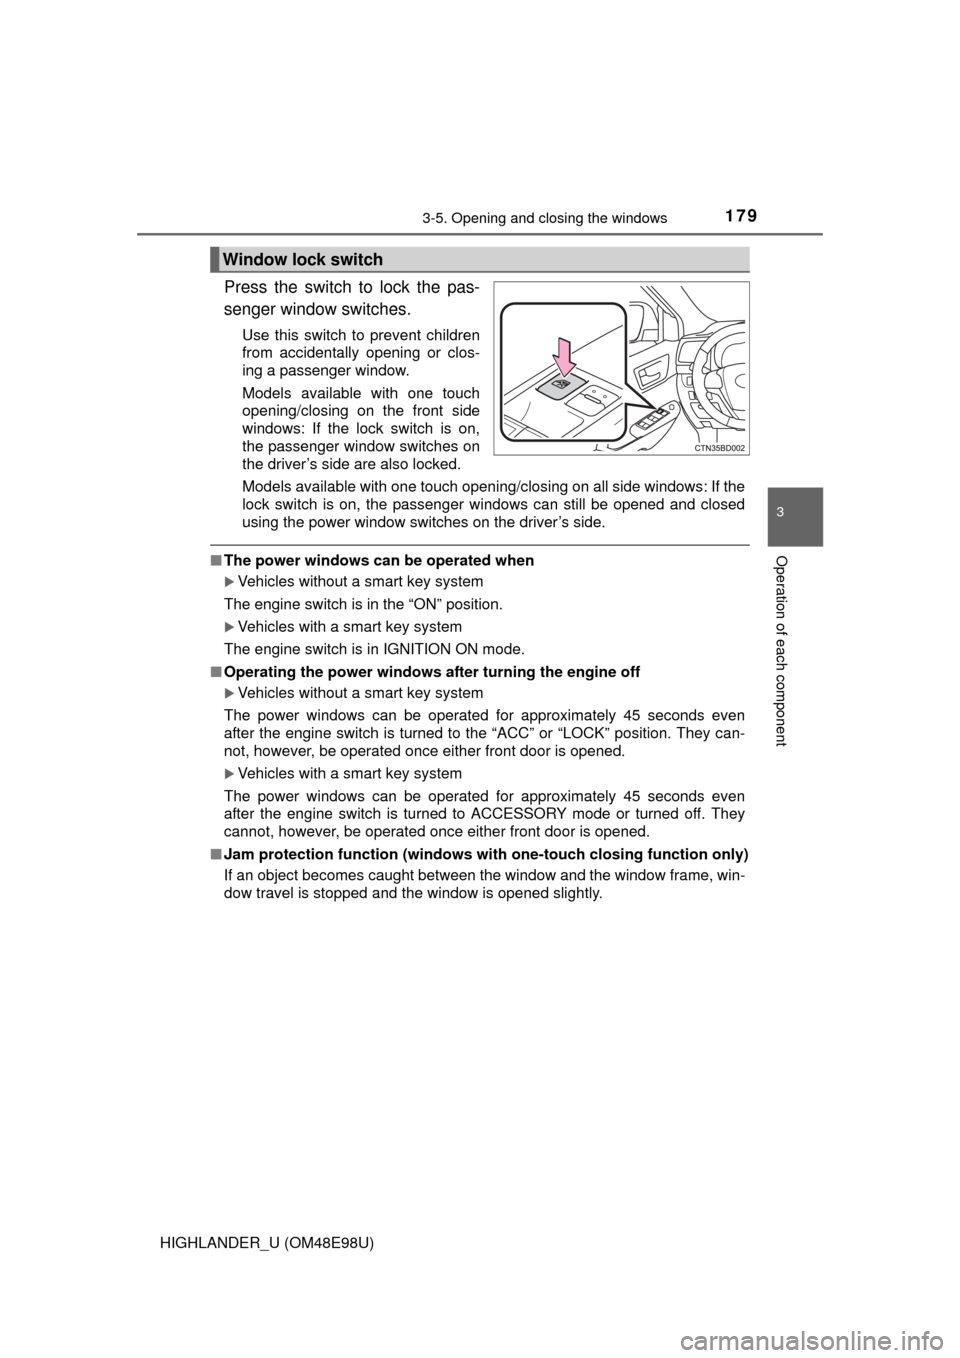
Press the switch to lock the pas-
senger window switches.
Use this switch to prevent children
from accidentally opening or clos-
ing a passenger window.
Models available with one touch
opening/closing on the front side
windows: If the lock switch is on,
the passenger window switches on
the driver’s side are also locked.
Models available with one touch opening/closing on all side windows: If the
lock switch is on, the passenger windows can still be opened and closed
using the power window switches on the driver’s side.
■The power windows can be operated when
Vehicles without a smart key system
The engine switch is in the “ON” position.
Vehicles with a smart key system
The engine switch is in IGNITION ON mode.
■ Operating the power windows after turning the engine off
Vehicles without a smart key system
The power windows can be operated for approximately 45 seconds even
after the engine switch is turned to the “ACC” or “LOCK” position. They can-
not, however, be operated once either front door is opened.
Vehicles with a smart key system
The power windows can be operated for approximately 45 seconds even
after the engine switch is turned to ACCESSORY mode or turned off. They
cannot, however, be operated once either front door is opened.
■ Jam protection function (windows with one-touch closing function only)
If an object becomes caught between the window and the window frame, win-
dow travel is stopped and the window is opened slightly.
Window lock switch
Page 180 of 712

1803-5. Opening and closing the windows
HIGHLANDER_U (OM48E98U)■
When the power window does not close normally (windows with one-
touch closing function only)
If the jam protection function is operating abnormally and a window cannot be
closed, perform the following operations using the power window switch on
the relevant door.
● Vehicles without a smart key system: After stopping the vehicle, the window
can be closed by holding the power window switch in the one-touch closing
position while the engine switch is turned to the “ON” position.
Vehicles with a smart key system: After stopping the vehicle, the window
can be closed by holding the power window switch in the one-touch closing
position while the engine switch is turned to IGNITION ON mode.
● If the window still cannot be closed even by carrying out the operation
explained above, initialize the function by performing the following proce-
dure.
Hold the power window switch in the one-touch closing position. Continue
holding the switch for a further 6 seconds after the window has closed.
Hold the power window switch in the one-touch opening position. Con-
tinue holding the switch for a further 2 seconds after the window has
opened completely.
Hold the power window switch in the one-touch closing position once
again. Continue holding the switch for a further 2 seconds after the win-
dow has closed.
If you release the switch while the window is moving, start again from the
beginning.
If the window continues to close but then re-open slightly even after perform-
ing the above procedure correctly, have the vehicle inspected by your Toyota
dealer.
■ Door lock linked window operation (windows with one-touch closing
function only)
●The power windows can be opened and closed using the key or mechanical
key.
* ( P. 123, 618)
● The power windows can be opened using the wireless remote control.
*
(P. 122)
*: These settings must be customized at your Toyota dealer.
■ Customization
Settings (e.g. linked door lock operation) can be changed.
(Customizable features: P. 662)
1
2
3