inflation pressure TOYOTA HIGHLANDER 2015 XU50 / 3.G Owners Manual
[x] Cancel search | Manufacturer: TOYOTA, Model Year: 2015, Model line: HIGHLANDER, Model: TOYOTA HIGHLANDER 2015 XU50 / 3.GPages: 712, PDF Size: 10.59 MB
Page 6 of 712

TABLE OF CONTENTS6
HIGHLANDER_U (OM48E98U)6-4. Using the other interior
features
Other interior features ....... 455
• Sun visors .................... 455
• Vanity mirrors............... 455
• Conversation mirror ..... 456
• Clock ............................ 457
• Outside temperature display.......................... 458
• Power outlets ............... 459
• Rear sunshades........... 462
• Armrest ........................ 463
• Coat hooks................... 464
• Assist grips .................. 464
• Side table ..................... 465
Garage door opener .......... 466
Safety Connect.................. 473
Compass ........................... 479 7-1. Maintenance and care
Cleaning and protecting the vehicle exterior .......... 484
Cleaning and protecting the vehicle interior ........... 487
7-2. Maintenance Maintenance requirements ................... 490
General maintenance ........ 493
Emission inspection and maintenance (I/M)
programs ......................... 497
7-3. Do-it-yourself maintenance Do-it-yourself service precautions ...................... 498
Hood .................................. 500
Positioning a floor jack....... 502
Engine compartment ......... 503
Tires................................... 515
Tire inflation pressure ........ 525
Wheels............................... 528
Air conditioning filter .......... 530
Wireless remote control/ electronic key battery ...... 532
Checking and replacing fuses ................................ 535
Light bulbs ......................... 539
7Maintenance and care
Page 15 of 712
15Pictorial index
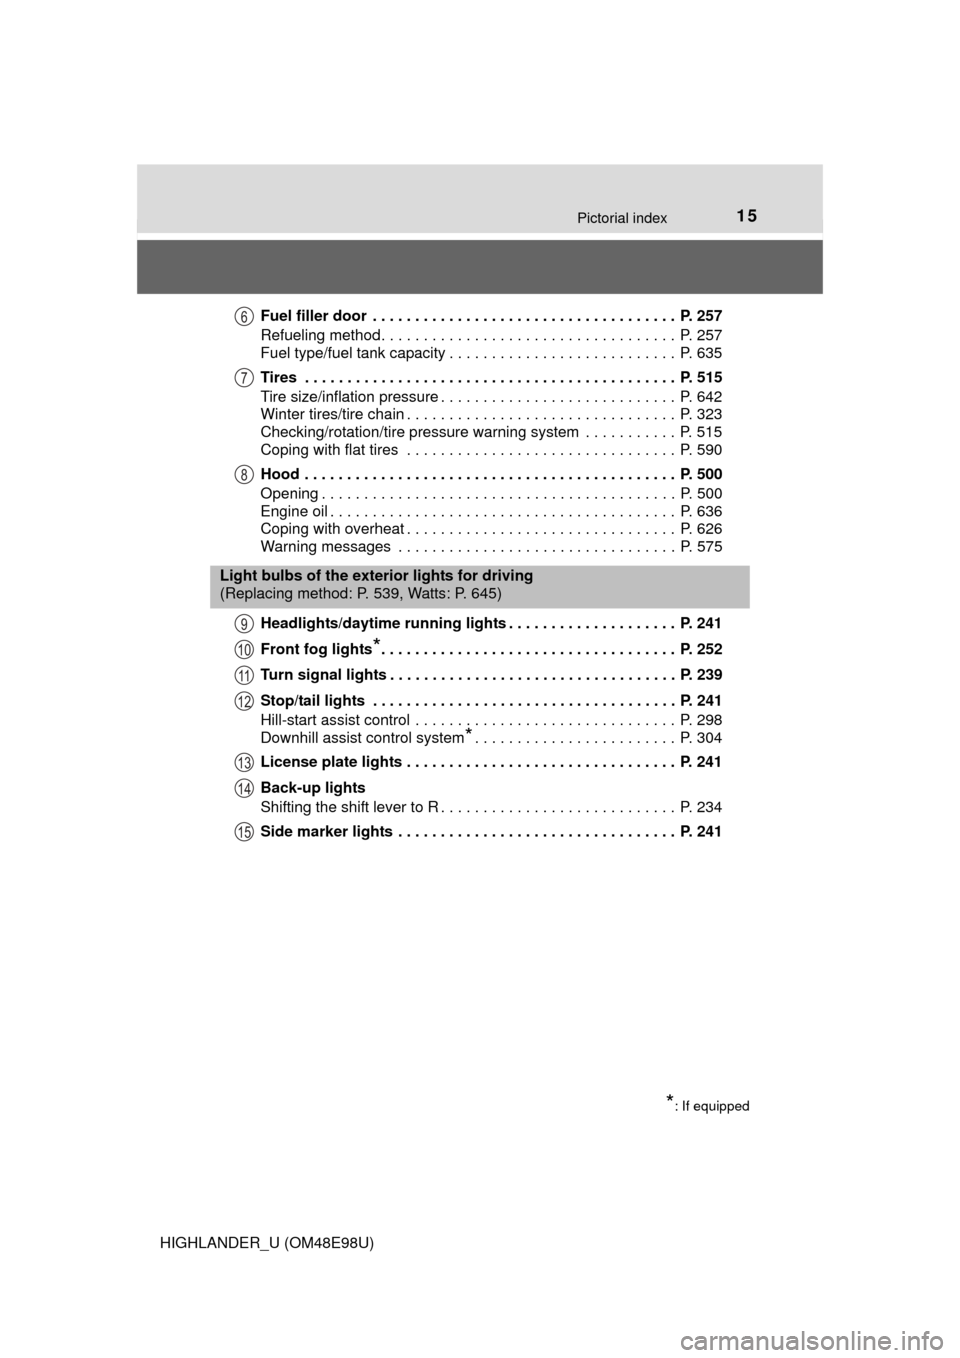
HIGHLANDER_U (OM48E98U)Fuel filler door . . . . . . . . . . . . . . . . . . . . . . . . . . . . . . . . . . . . P. 257
Refueling method . . . . . . . . . . . . . . . . . . . . . . . . . . . . . . . . . . . P. 257
Fuel type/fuel tank capacity . . . . . . . . . . . . . . . . . . . . . . . . . . . P. 635
Tires . . . . . . . . . . . . . . . . . . . . . . . . . . . . . . . . . . . . . . . . . . . . P. 515
Tire size/inflation pressure . . . . . . . . . . . . . . . . . . . . . . . . . . . . P. 642
Winter tires/tire chain . . . . . . . . . . . . . . . . . . . . . . . . . . . . . . . . P. 323
Checking/rotation/tire pressure warning system . . . . . . . . . . . P. 515
Coping with flat tires . . . . . . . . . . . . . . . . . . . . . . . . . . . . . . . . P. 590
Hood . . . . . . . . . . . . . . . . . . . . . . . . . . . . . . . . . . . . . . . . . . . . P. 500
Opening . . . . . . . . . . . . . . . . . . . . . . . . . . . . . . . . . . . . . . . . . . P. 500
Engine oil . . . . . . . . . . . . . . . . . . . . . . . . . . . . . . . . . . . . . . . . . P. 636
Coping with overheat . . . . . . . . . . . . . . . . . . . . . . . . . . . . . . . . P. 626
Warning messages . . . . . . . . . . . . . . . . . . . . . . . . . . . . . . . . . P. 575
Headlights/daytime running lights . . . . . . . . . . . . . . . . . . . . P. 241
Front fog lights
*. . . . . . . . . . . . . . . . . . . . . . . . . . . . . . . . . . . P. 252
Turn signal lights . . . . . . . . . . . . . . . . . . . . . . . . . . . . . . . . . . P. 239
Stop/tail lights . . . . . . . . . . . . . . . . . . . . . . . . . . . . . . . . . . . . P. 241
Hill-start assist control . . . . . . . . . . . . . . . . . . . . . . . . . . . . . . . P. 298
Downhill assist control system
*. . . . . . . . . . . . . . . . . . . . . . . . P. 304
License plate lights . . . . . . . . . . . . . . . . . . . . . . . . . . . . . . . . P. 241
Back-up lights
Shifting the shift lever to R . . . . . . . . . . . . . . . . . . . . . . . . . . . . P. 234
Side marker lights . . . . . . . . . . . . . . . . . . . . . . . . . . . . . . . . . P. 241
6
7
8
Light bulbs of the exterior lights for driving
(Replacing method: P. 539, Watts: P. 645)
*: If equipped
9
10
11
12
13
14
15
Page 285 of 712

2854-5. Using the driving support systems
4
Driving
HIGHLANDER_U (OM48E98U)■
Conditions in which the function may not operate correctly
In the following situations, the camera sensor may be unable to recognize
lane markers causing the lane departure warning function to operate incor-
rectly. However, this does not indicate a malfunction.
●When driving through an area with no lane markers, such as a tollbooth, a
crossing or before a ticket checkpoint
● When driving on a sharp curve
● When lane markers are extremely narrow or extremely wide
● When the vehicle leans to one side an unusual amount due to a heavy load
or improper tire inflation pressure
● When the following distance between your vehicle and the vehicle ahead is
extremely short
● When the lane markers are yellow (These may be more difficult for the sys-
tem to recognize compared to white markers.)
● When the lane markers are broken, Botts’ dots (raised pavement markers)
or stones
● When the lane markers are on a curb etc.
● When lane markers are obscured or partially obscured by sand, dirt, etc.
● When there are shadows on the road running parallel with lane markers, or
if a shadow covers the lane markers
● When driving on a particularly bright road surface, such as concrete
● When driving on a road surface that is bright due to reflected light
● When driving in a location where the light level changes rapidly, such as the
entrance to or exit from a tunnel
● When sunlight or the headlights of oncoming vehicles are shining directly
into the camera lens
● When driving on roads that are branching or merging
● When driving on a road surface that is wet due to rain, previous rainfall,
standing water, etc.
● When the vehicle experiences strong up-and-down motion such as when
driving on an extremely rough road or on a seam in the pavement
● When headlight brightness at nighttime is reduced due to dirt on the lenses,
or when the headlights are misaligned
● When driving on winding roads or roads that are uneven
● When driving on rough or unpaved roads
■ When changing the tires
Depending on the tires used, sufficient performance may not be maintainable.
■ Warning messages for the LDA system
Warning messages are used to indicate a system malfunction or to inform t\
he
driver of the need for caution while driving. ( P. 578)
Page 303 of 712

3034-5. Using the driving support systems
4
Driving
HIGHLANDER_U (OM48E98U)
WARNING
■TRAC may not operat e effectively when
Directional control and power may not be achievable while driving on slip-
pery road surfaces, even if the TRAC system is operating.
Drive the vehicle carefully in conditions where stability and power may be
lost.
■ Hill- start assist control
● Do not overly rely on hill-start assist control. Hill-start assist control may
not operate effectively on steep inclines and roads covered with ice.
● Unlike the parking brake, hill-start assist control is not intended to hold the
vehicle stationary for an extended period of time. Do not attempt to use
hill-start assist control to hold the vehicle on an incline, as doing so may
lead to an accident.
■ When the VSC is activated
The slip indicator light flashes. Always drive carefully. Reckless driving may
cause an accident. Exercise particular care when the indicator light flashes.
■ When the TRAC/VSC syst ems are turned off
Be especially careful and drive at a speed appropriate to the road condi-
tions. As these are the systems to help ensure vehicle stability and driving
force, do not turn the TRAC/VSC systems off unless necessary.
■ Replacing tires
Make sure that all tires are of the specified size, brand, tread pattern and
total load capacity. In addition, make sure that the tires are inflated to the
recommended tire inflation pressure level.
The ABS, TRAC and VSC systems will not function correctly if different tires
are installed on the vehicle.
Contact your Toyota dealer for further information when replacing tires or
wheels.
■ Handling of tires and the suspension
Using tires with any kind of problem or modifying the suspension will affect
the driving assist systems, and may cause a system to malfunction.
Page 483 of 712

483
7Maintenance and care
HIGHLANDER_U (OM48E98U)7-1. Maintenance and care
Cleaning and protecting the vehicle exterior .......... 484
Cleaning and protecting the vehicle interior ........... 487
7-2. Maintenance Maintenance requirements ................... 490
General maintenance........ 493
Emission inspection and maintenance (I/M)
programs......................... 497
7-3. Do-it-yourself maintenance Do-it-yourself service precautions ..................... 498
Hood ................................. 500
Positioning a floor jack ...... 502
Engine compartment ......... 503
Tires .................................. 515
Tire inflation pressure ....... 525
Wheels .............................. 528
Air conditioning filter.......... 530
Wireless remote control/ electronic key battery ...... 532
Checking and replacing fuses ............................... 535
Light bulbs......................... 539
Page 496 of 712
4967-2. Maintenance
HIGHLANDER_U (OM48E98U)
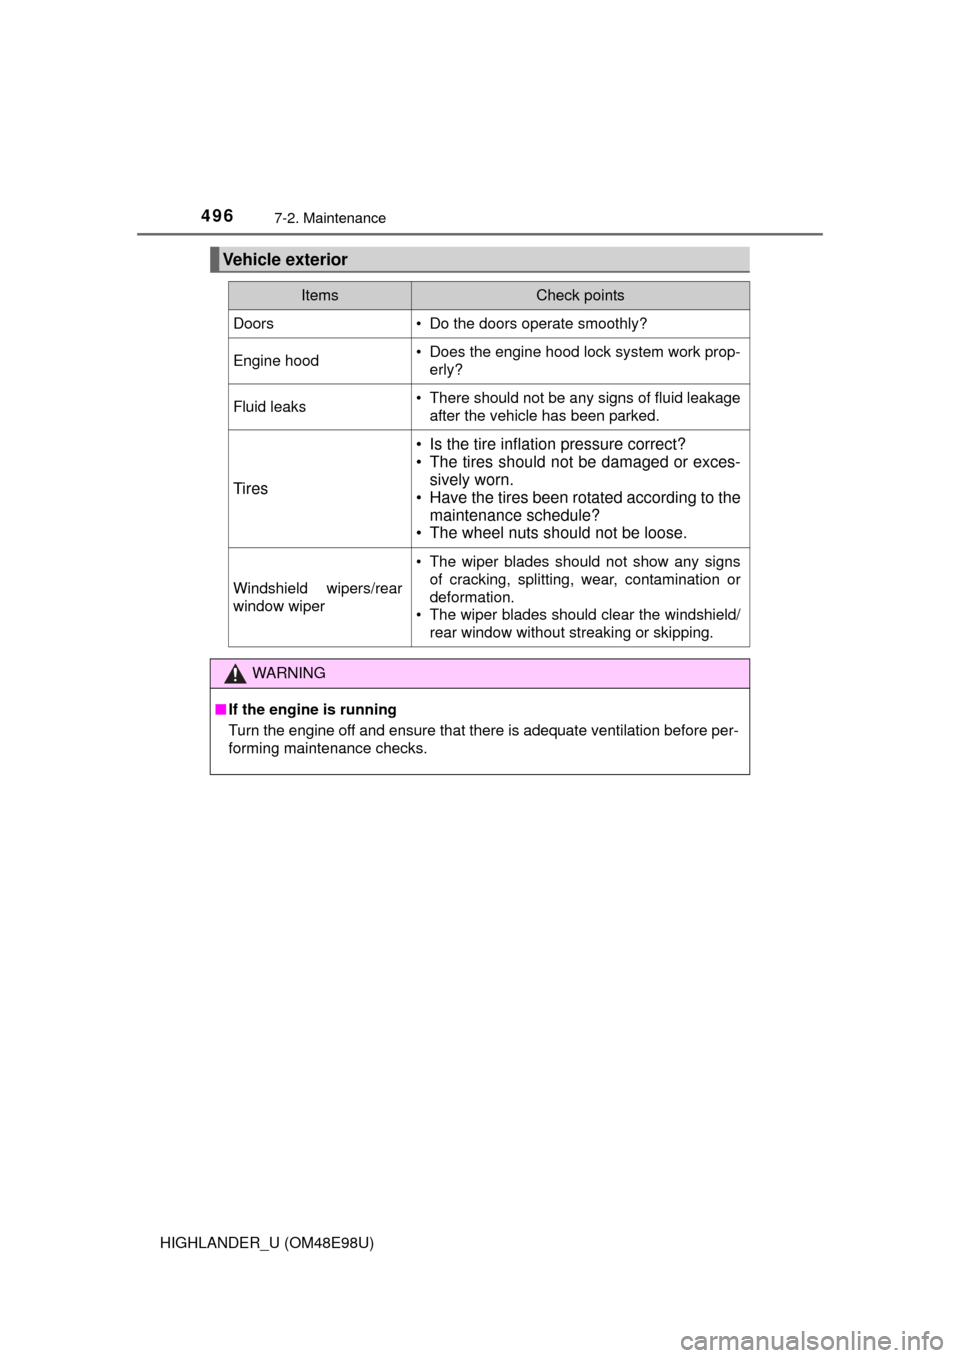
Vehicle exterior
ItemsCheck points
Doors• Do the doors operate smoothly?
Engine hood• Does the engine hood lock system work prop-erly?
Fluid leaks• There should not be any signs of fluid leakageafter the vehicle has been parked.
Tires
• Is the tire inflation pressure correct?
• The tires should not be damaged or exces-sively worn.
• Have the tires been rotated according to the
maintenance schedule?
• The wheel nuts should not be loose.
Windshield wipers/rear
window wiper
• The wiper blades should not show any signs
of cracking, splitting, wear, contamination or
deformation.
• The wiper blades should clear the windshield/
rear window without streaking or skipping.
WARNING
■If the engine is running
Turn the engine off and ensure that there is adequate ventilation before per-
forming maintenance checks.
Page 498 of 712
498
HIGHLANDER_U (OM48E98U)
7-3. Do-it-yourself maintenance
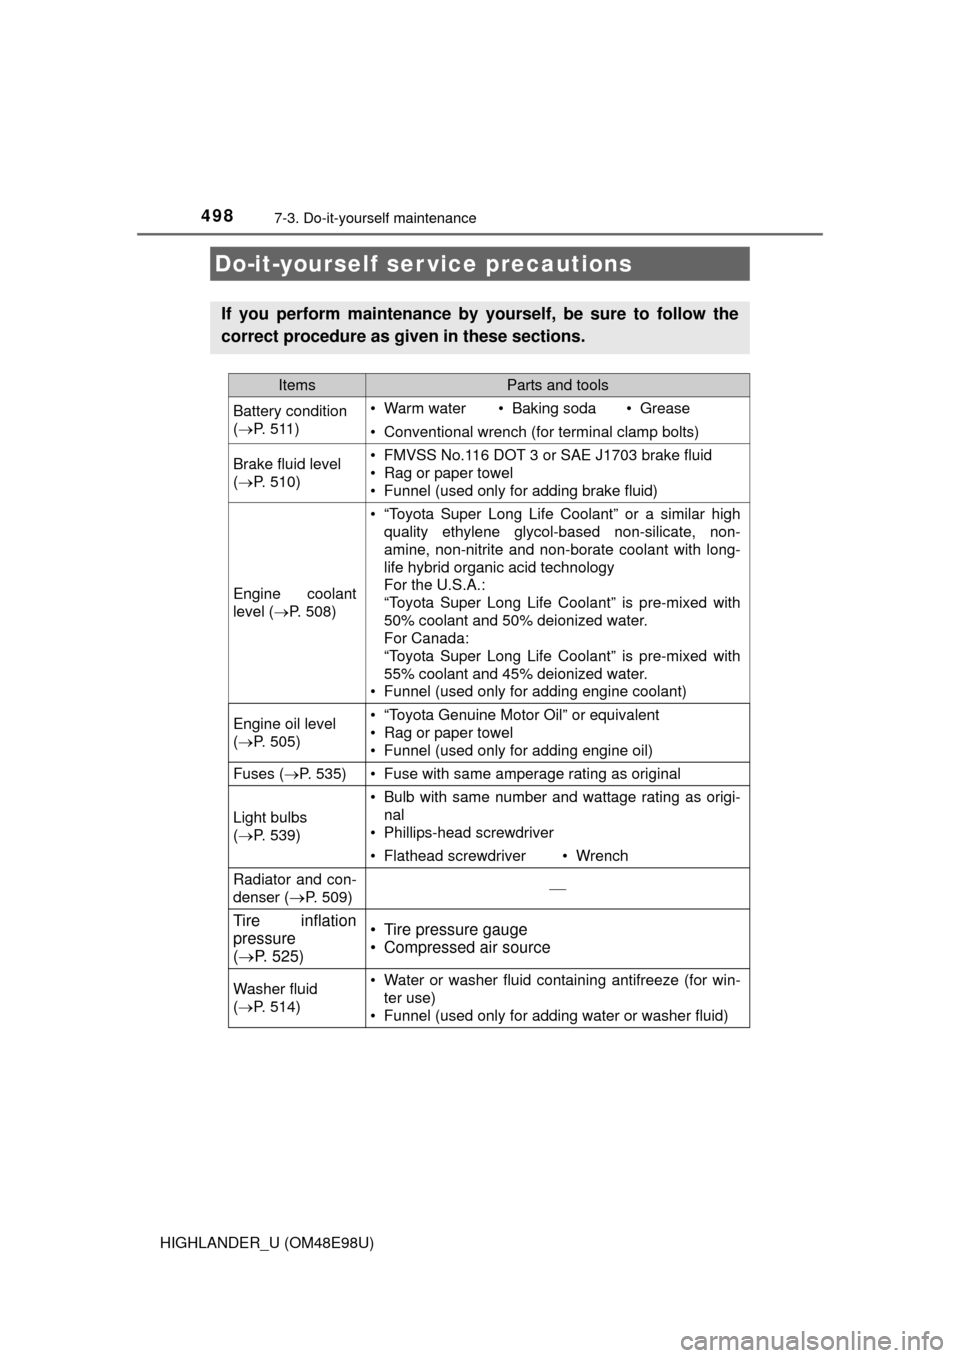
Do-it-yourself ser vice precautions
If you perform maintenance by yourself, be sure to follow the
correct procedure as given in these sections.
ItemsParts and tools
Battery condition
( P. 511)• Warm water• Baking soda• Grease
• Conventional wrench (for terminal clamp bolts)
Brake fluid level
( P. 510)• FMVSS No.116 DOT 3 or SAE J1703 brake fluid
• Rag or paper towel
• Funnel (used only for adding brake fluid)
Engine coolant
level ( P. 508)
• “Toyota Super Long Life Coolant” or a similar high
quality ethylene glycol-based non-silicate, non-
amine, non-nitrite and non-borate coolant with long-
life hybrid organic acid technology
For the U.S.A.:
“Toyota Super Long Life Coolant” is pre-mixed with
50% coolant and 50% deionized water.
For Canada:
“Toyota Super Long Life Coolant” is pre-mixed with
55% coolant and 45% deionized water.
• Funnel (used only for adding engine coolant)
Engine oil level
( P. 505)• “Toyota Genuine Motor Oil” or equivalent
• Rag or paper towel
• Funnel (used only for adding engine oil)
Fuses ( P. 535)• Fuse with same amperage rating as original
Light bulbs
( P. 539)
• Bulb with same number and wattage rating as origi-
nal
• Phillips-head screwdriver
• Flathead screwdriver• Wrench
Radiator and con-
denser (
P. 509)
Tire inflation
pressure
( P. 525)• Tire pressure gauge
• Compressed air source
Washer fluid
( P. 514)• Water or washer fluid containing antifreeze (for win-
ter use)
• Funnel (used only for adding water or washer fluid)
Page 516 of 712

5167-3. Do-it-yourself maintenance
HIGHLANDER_U (OM48E98U)
Your vehicle is equipped with a tire pressure warning system that uses
tire pressure warning valves and tr ansmitters to detect low tire infla-
tion pressure before serious problems arise.
If the tire pressure drops below a predetermined level, the driver is
warned by a warning light. ( P. 565)
◆Installing tire pressure warning valves and transmitters
When replacing tires or wheels, tire pressure warning valves and
transmitters must also be installed.
When new tire pressure warning valves and transmitters are
installed, new ID codes must be registered in the tire pressure
warning computer and the tire pr essure warning system must be
initialized. Have tire pressure warning valve and transmitter ID
codes registered by your Toyota dealer. ( P. 518)
◆Initializing the tire pressure warning system
■The tire pressure warning system must be initialized in the fol-
lowing circumstances:
● When the tire inflation pressure is changed such as when chang-
ing traveling speed or load weight.
When the tire pressure warning system is initialized, the current tire
inflation pressure is set as the benchmark pressure.
Tire pressure warning system
Page 517 of 712
5177-3. Do-it-yourself maintenance
7
Maintenance and care
HIGHLANDER_U (OM48E98U)■
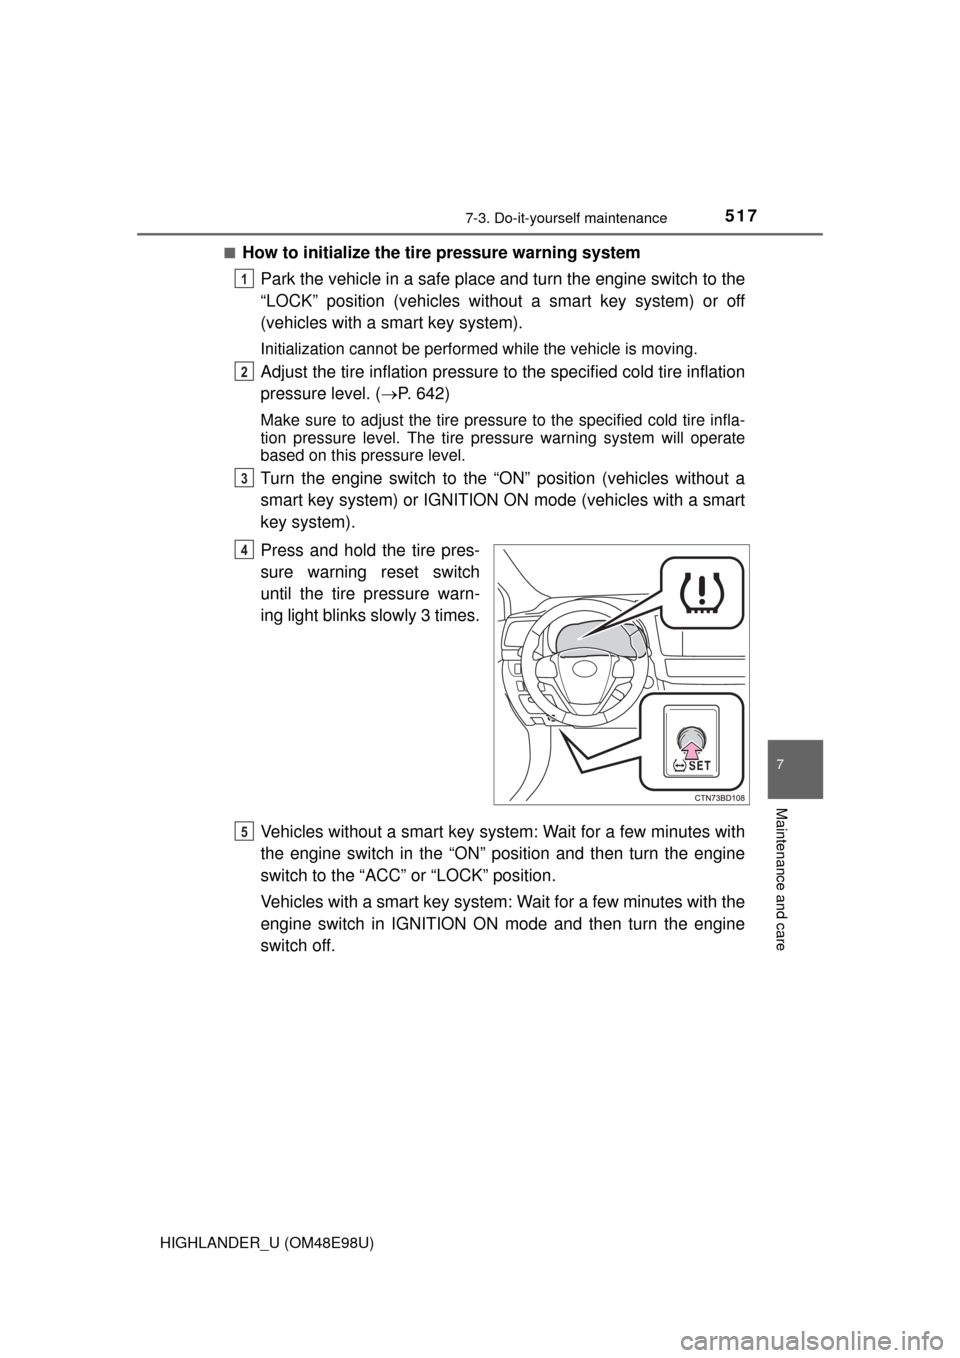
How to initialize the tire pressure warning system
Park the vehicle in a safe place and turn the engine switch to the
“LOCK” position (vehicles without a smart key system) or off
(vehicles with a smart key system).
Initialization cannot be performed while the vehicle is moving.
Adjust the tire inflation pressure to the specified cold tire inflation
pressure level. ( P. 642)
Make sure to adjust the tire pressu re to the specified cold tire infla-
tion pressure level. The tire pressure warning system will operate
based on this pressure level.
Turn the engine switch to the “ON” position (vehicles without a
smart key system) or IGNITION ON mode (vehicles with a smart
key system).
Press and hold the tire pres-
sure warning reset switch
until the tire pressure warn-
ing light blinks slowly 3 times.
Vehicles without a smart key syst em: Wait for a few minutes with
the engine switch in the “ON” position and then turn the engine
switch to the “ACC” or “LOCK” position.
Vehicles with a smart key system: Wait for a few minutes with the
engine switch in IGNITION ON mode and then turn the engine
switch off.
1
2
3
4
5
Page 519 of 712
5197-3. Do-it-yourself maintenance
7
Maintenance and care
HIGHLANDER_U (OM48E98U)■
Routine tire inflation pressure checks
The tire pressure warning system does not replace routine tire inflation
pressure checks. Make sure to check tire inflation pressure as part of
your routine of daily vehicle checks.
■Maximum load of tire
Check that the number given by dividing the maximum load by 1.10 of the
replacement tire is greater than 1/
2 of the Gross Axle Weight Ratings
(GAWR) of either the front axle or the rear axle, whichever is greater.
■Tire types
●Summer tires
Summer tires are high-speed performance tires best suited to highway
driving under dry conditions. Since summer tires do not have the same
traction performance as snow tires, summer tires are inadequate for
driving on snow-covered or icy ro ads. For driving on snow-covered
roads or icy roads, the use of snow tires is recommended. When install-
ing snow tires, be sure to replace all four tires.
●All season tires
All season tires are designed to provide better traction in snow and to
be adequate for driving in most winter conditions as well as for use
year-round. All season tires, however, do not have adequate traction
performance compared with snow tires in heavy or loose snow. Also, all
season tires fall short in acceleration and handling performance com-
pared with summer tires in highway driving.
●Snow tires
For driving on snow-covered roads or icy roads, we recommend using
snow tires. If you need snow tires, select tires of the same size, con-
struction and load capacity as the or iginally installed tires. Since your
vehicle has radial tires as original equipment, make sure your snow
tires also have radial construction. Do not install studded tires without
first checking local regulations fo r possible restrictions. Snow tires
should be installed on all wheels. ( P. 323)
■If the tread on snow tires wears down below 0.16 in. (4 mm)
The effectiveness of the tire s as snow tires is lost.
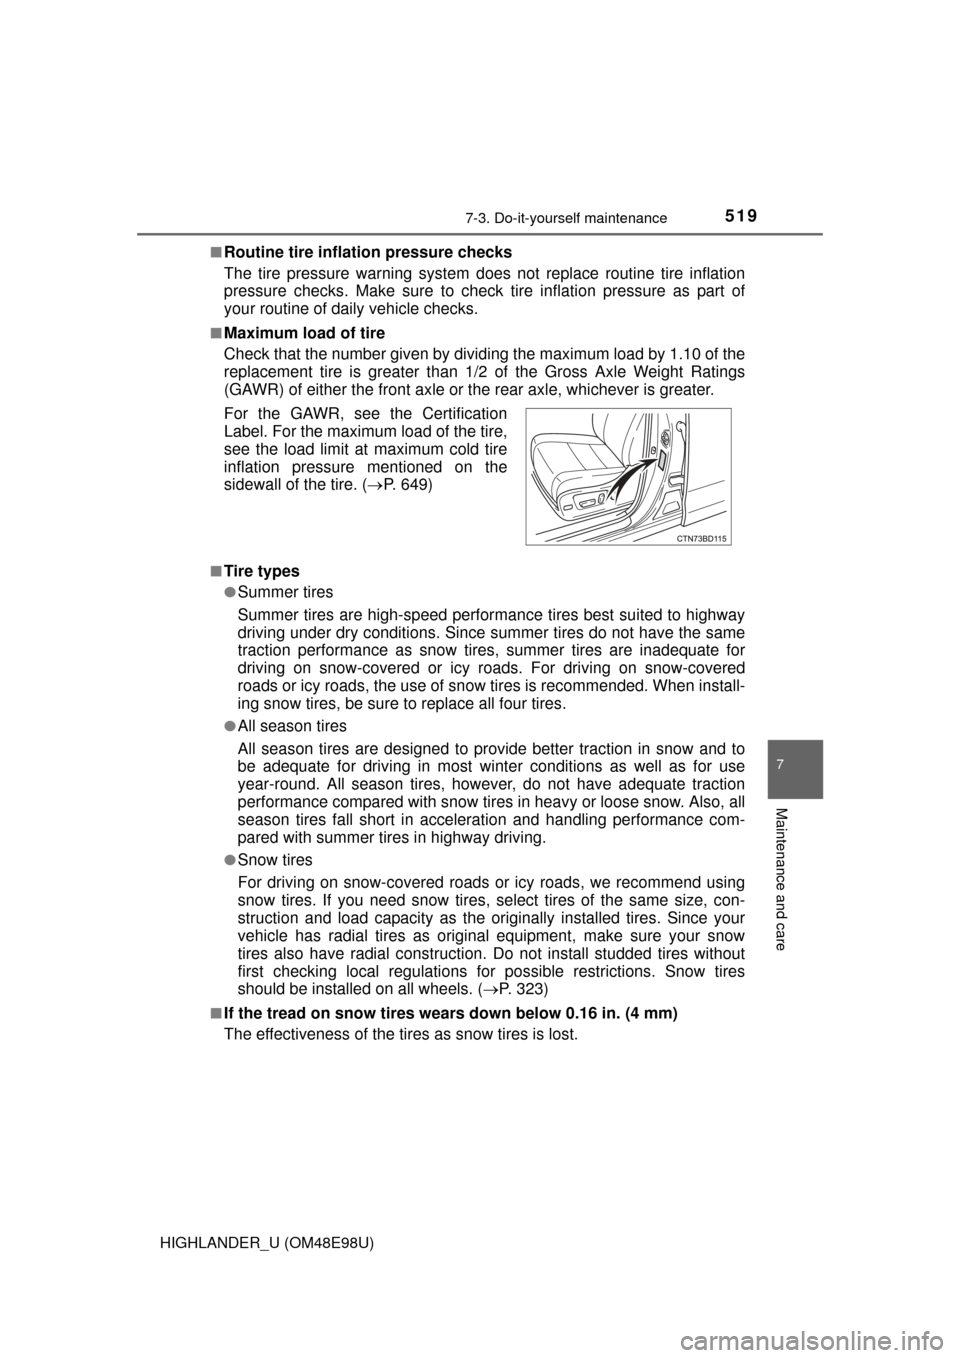
For the GAWR, see the Certification
Label. For the maximum load of the tire,
see the load limit at maximum cold tire
inflation pressure mentioned on the
sidewall of the tire. (
P. 649)